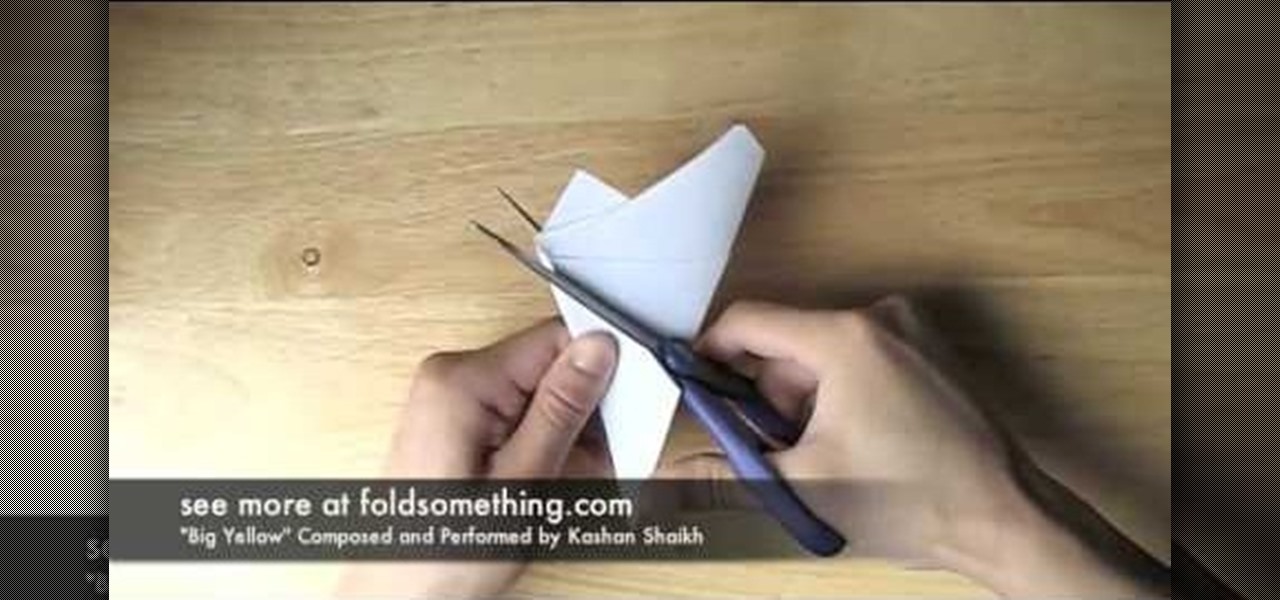
In this Arts & Crafts video tutorial you will learn how to make an 8-petal flower from folded paper with origami. Take a square sheet of paper and fold it diagonally in both directions and open it up. Then fold it in half horizontally and vertically n the opposite side. Open it up and collapse the sheet in to a waterbomb base. Fold the flaps down along the center crease on both sides. Valley fold the four tips up. Open up the sheet and fold the four corners inwards. Then fold the direction of...
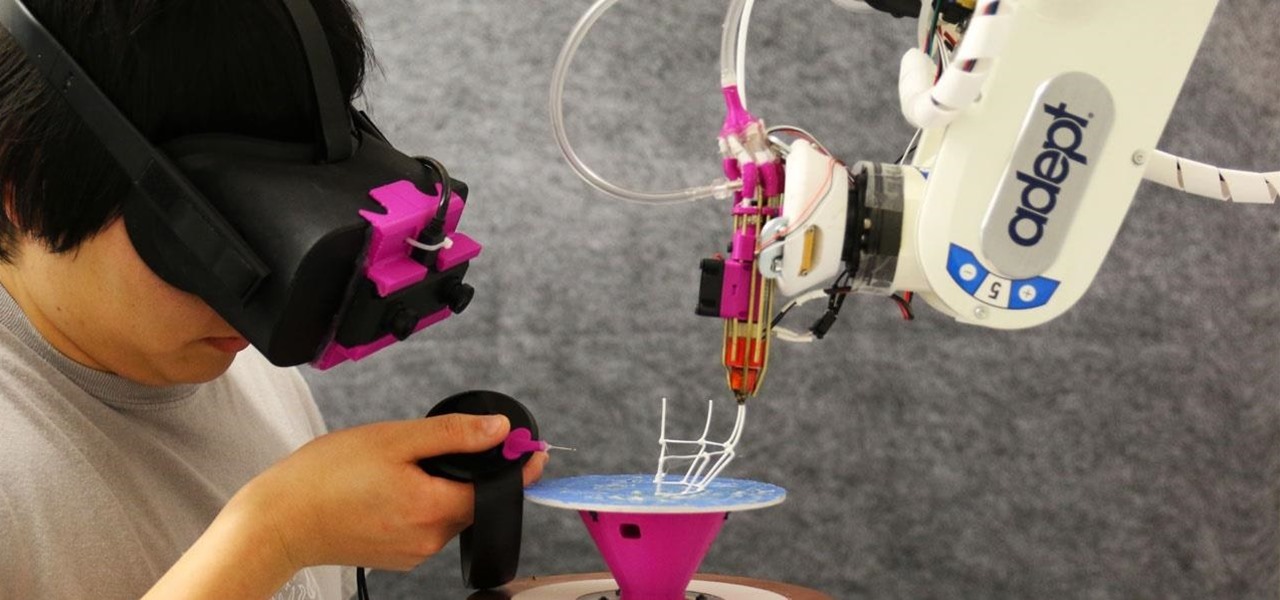
We've seen a number of unique mashups of augmented reality with other bleeding edge technologies, but somehow it took until 2018 for someone to come up with a now obvious complement to AR: 3D printing.
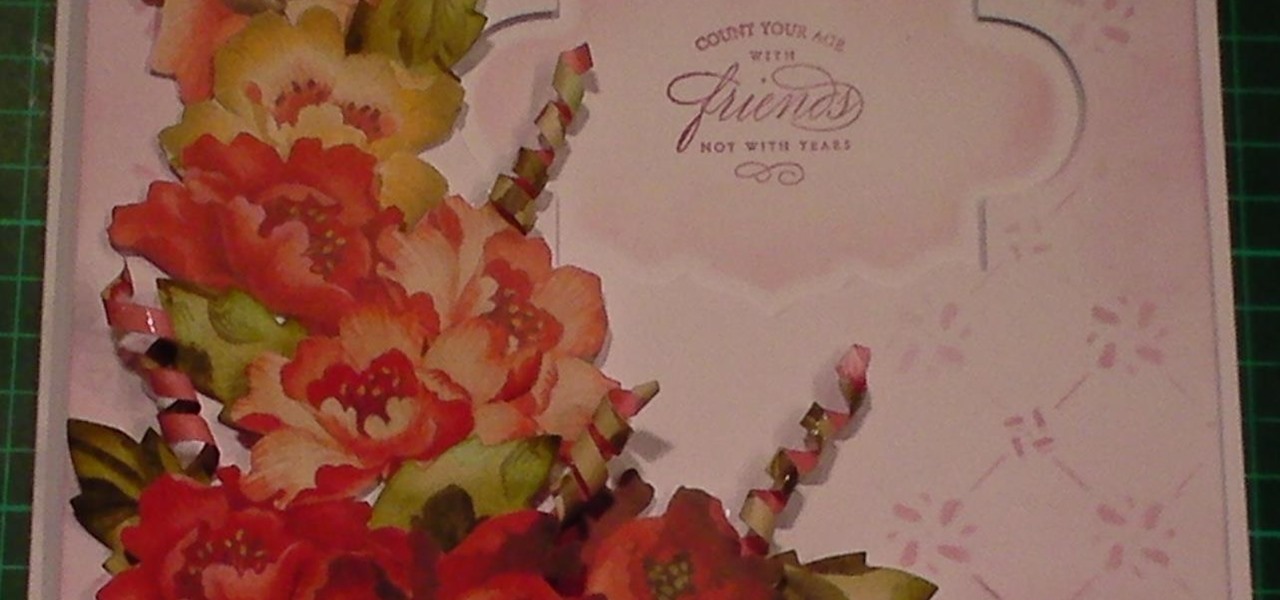
In this cardmaking tutorial I make a gorgeous card using cut out decoupage from a sheet of 12x12inch paper from Anna Griffins range of fabulous papers. I finish off the card with the matching leaves and paper curls. This looks like a time consuming card but apart from the cutting out of the flowers, it is quite quick & easy and all from 1 sheet of paper. Step 1: Items Used

In python, or any scripting language for that matter, there are certain things that you will carry with you throughout your entire scripting career. Some of the most basic things that you will keep with you are output, variables, and their value types. We'll start by going over output, then cover variables and their types. So, let's get started!
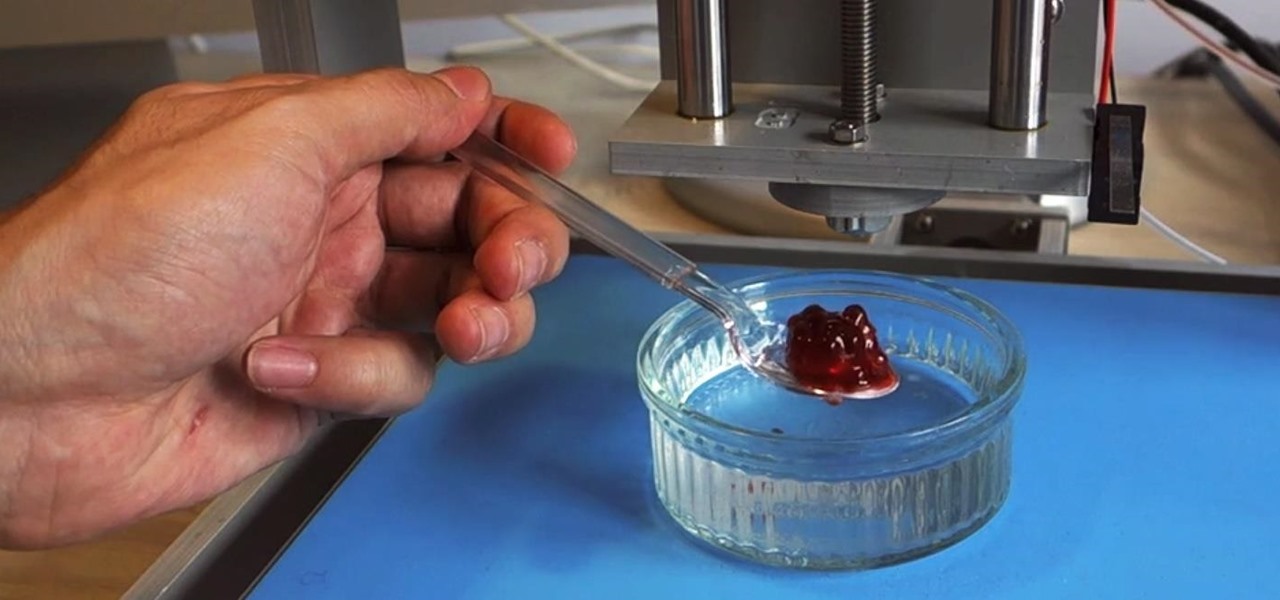
You already know that 3D-printing technology is swiftly evolving—it's been used to print balloon animals, bikinis, and house keys, and there's even an affordable home version of the printer, as well as one you can 3D print.
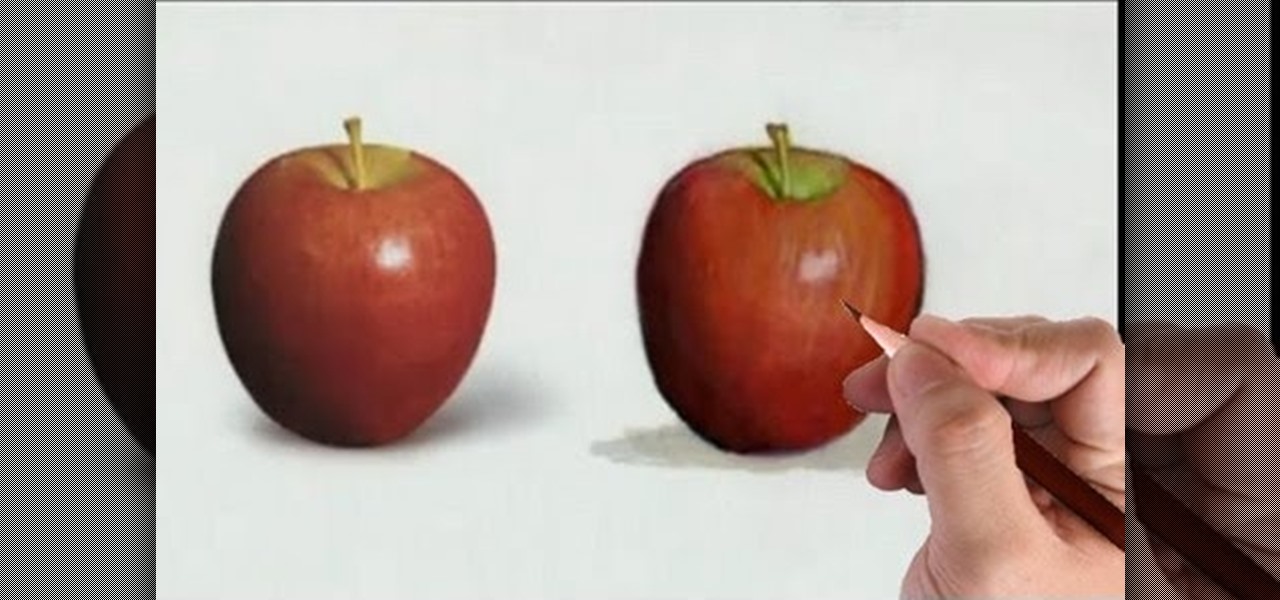
Watch this fine art video tutorial to learn how to illustrate with markers and colored pencils. "This video shows my process for making an illustration (non tradigital). I use illustration markers (usually prismacolor) and color pencils (usually prisma once again) and a wax blending stick. I make my illustrations in two steps:

Watch this video to see how woodblock printmaking is done.
This video is a tutorial on how to remove scroll bars, sheet tabs and objects in Excel. To remove scroll bars and sheet tabs, go to the Office button, then Excel Options. On the screen that comes up go to the Advanced tab and scroll down to “Display options for this workbook”, where you will see some check boxes. Uncheck the boxes for horizontal scroll bar, vertical scroll bar and sheet tabs. This will remove them from the current workbook. This feature only works with the current workbook.
Anyone can go to the store and buy a bag, but how many people are going to have a handmade duct tape bag? Show your creativity and style by choosing a wacky color and show up with this whimsical tote bag.
Spread several sheets of wax paper on cookie trays, side-by-side. Using a butter knife, spread a teaspoon of peanut butter on each Ritz cracker. Set aside.
What's a national holiday without a sheet cake featuring Old Glory? Luckily, it's simple to make….And delicious too!
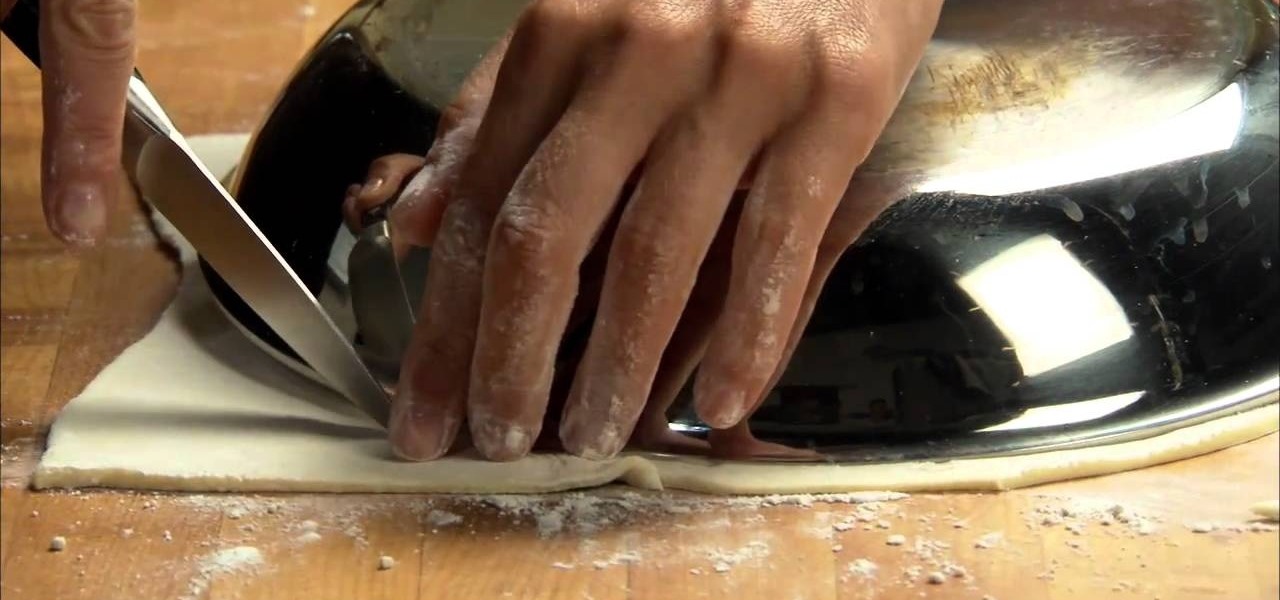
Enjoy the sweet and satisfying taste of pears mixed with walnuts in a dessert designed (unintentionally) by Stéphanie Tatin. Her accidental classic, Tarte Tatin is revitalized with this Holiday Kitchen upside-down cake recipe, where pears take the place of apples, and puff pastry makes all of the kitchen work easier! You can't pass this dessert up!
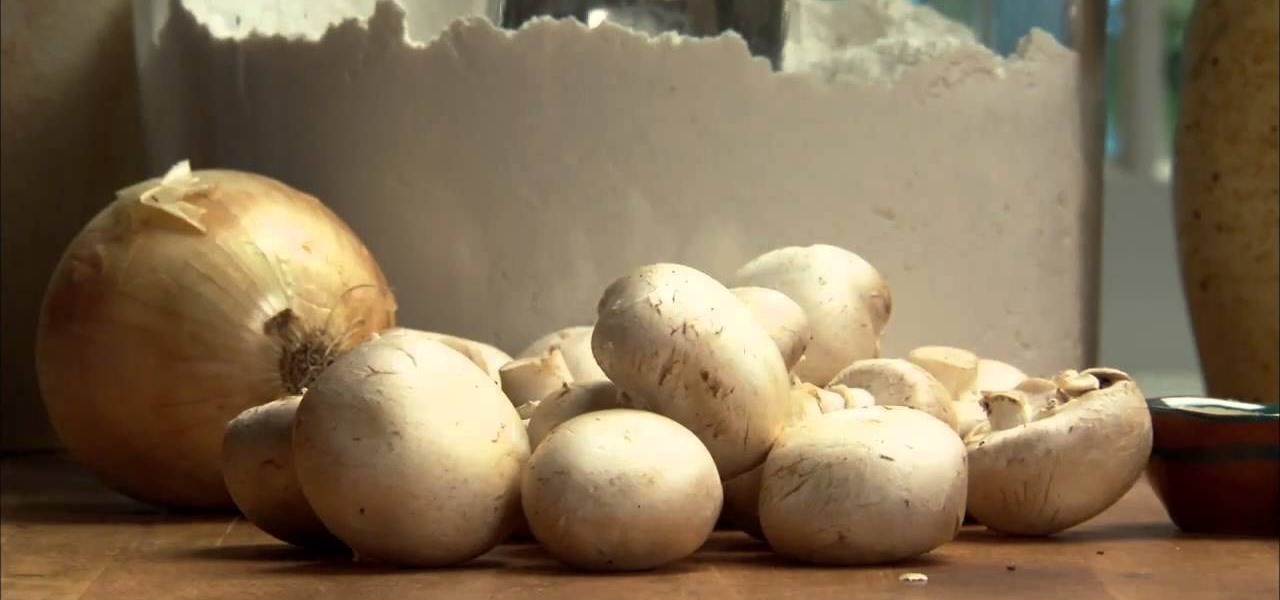
This recipe from Holiday Kitchen shows you their impressive, celebratory dish that satisfies the most discriminating crowd. Beef Wellington will leave your party guests grinning and wide-eyed as you present and carve this spectacular meal at the table. This masterpiece of meat is worth the effort! But don't worry— there's no foie gras here.
Modern life is almost completely digital ... almost. While you can get by in many cases with just your iPhone, sometimes a situation requires a hard copy. In the past, there was really no convenient way for you to get a Reminders list from your iPhone onto paper, but iOS 14.5 changes that.
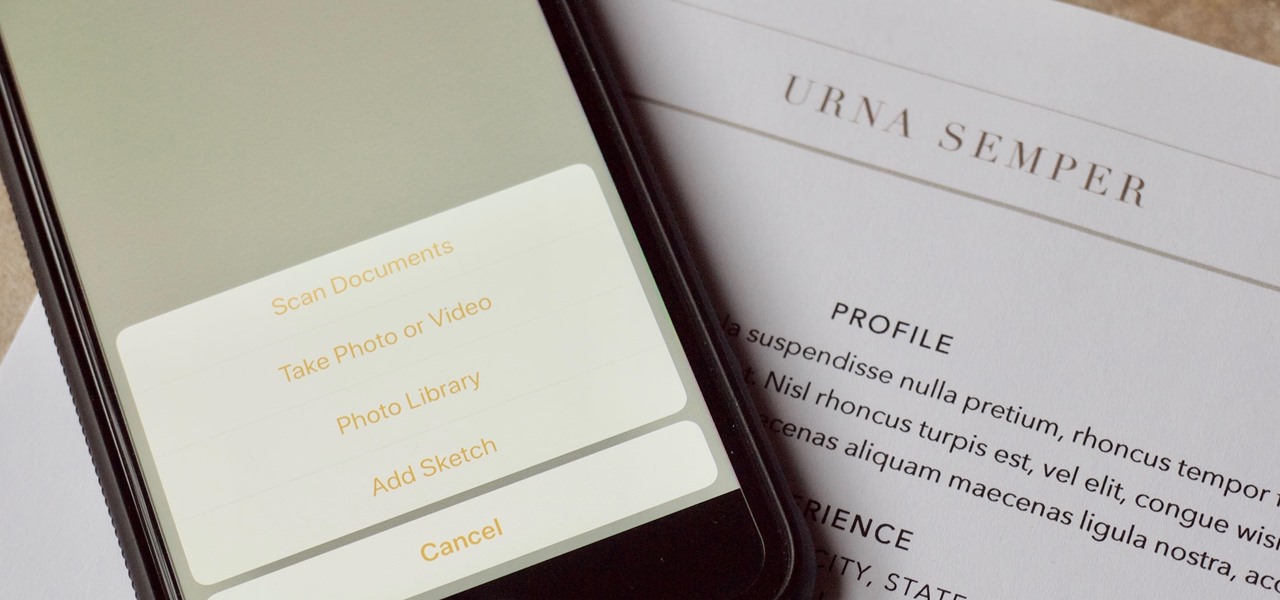
There are plenty of third-party apps for scanning documents on your iPhone, but they can all be tossed out the door since iOS 11 includes one by default now. Instead of a dedicated app, it's included as part of the Notes app, and it's fairly easy to use. After scanning, you can save it, print it, turn it into a PDF, add markup, and more.
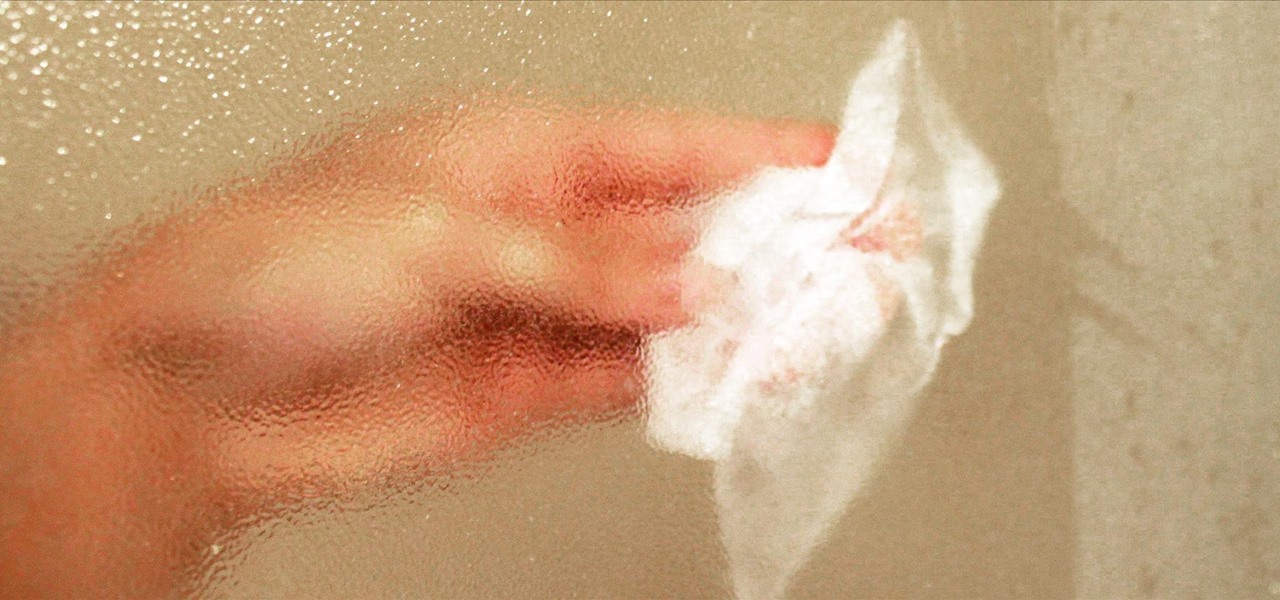
How often do you fight with your shower doors? Maybe not literally (although my elbow has smacked the hard glass many times), but when it's time to clean the bathroom, getting a few weeks' worth of soap scum and grime off the shiny, clear surface becomes an insurmountable task. Whether you use a special cleaner and squeegee or a carefully selected wipe, chances are you still battle the streaks and grit left behind. Although it might not make sense to steal cleaning supplies from the laundry r...
When programming an Excel-file with links between sheets and assorted macros for whatever is needed you may want the file to behave as a program so that users can not access the ribbon even by double-clicking on the top bar. Protect the code from being accessed by pressing alt-F8 or alt-F11. Make sure you can run the macro show_sheets_and_ribbon () from the opening sheet before continuing to step 3
It is possible to convert your Excel spreadsheets into a PDF file by using your PC's Print Manager and Save As functions. This video shows you a step by step to create a password-protected PDF version of your Excel file.
Sandra Lee shows viewers how to make a No-Bake Love Cake in this video. You will need the following ingredients:
Make a fun marshmallow treat for Valentines Day! You will need:
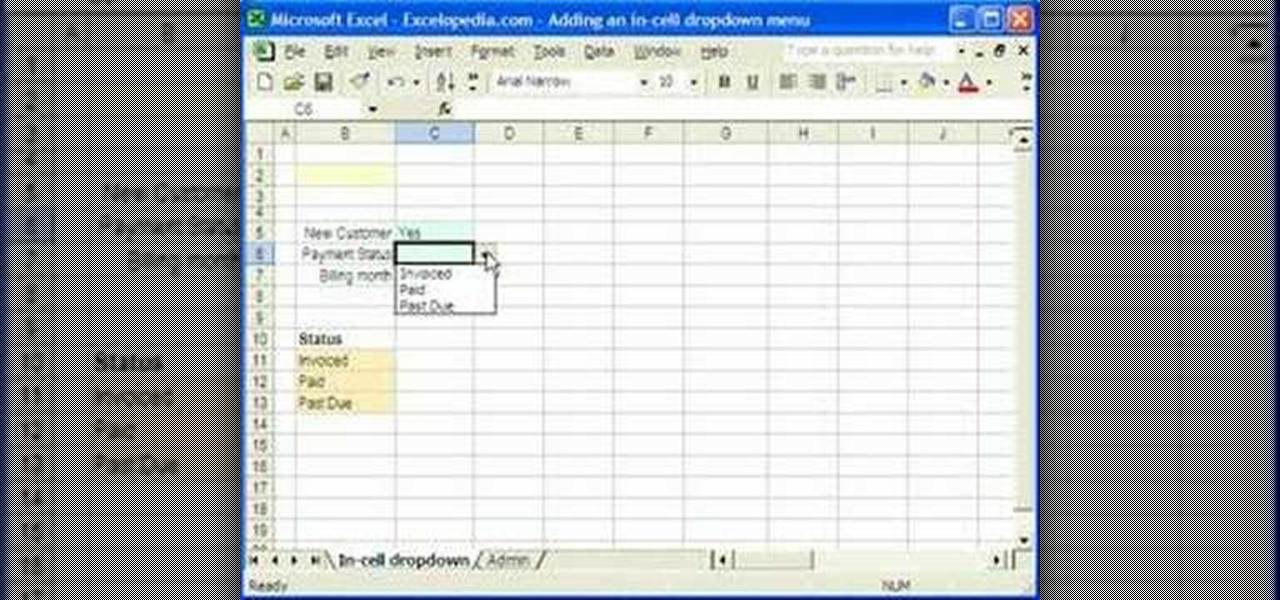
1. Select the cell for which the dropdown menu is to be applied. 2. once the cell is selected goto DATA menu select VALIDATION.Data validation dialog box will be displayed.
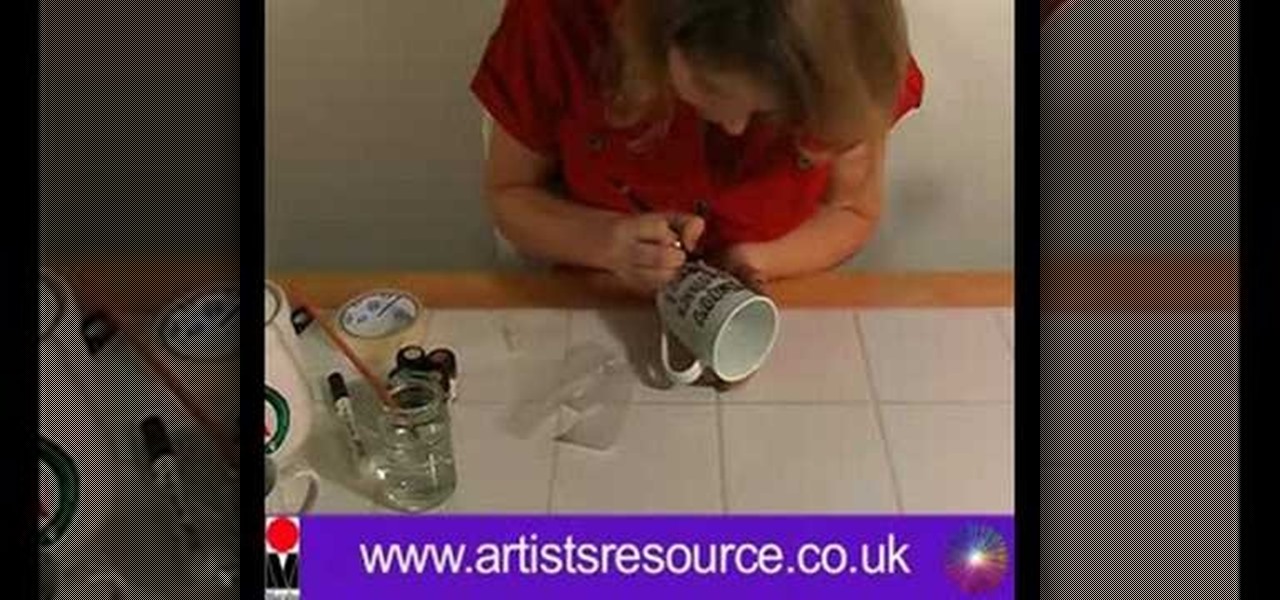
This video demonstrates how to paint Mother’s and Father’s Day mugs. This is a ceramic painting project. For this project, you will need the following supplies: 2 mugs, a Marabu ceramic kit, a paintbrush, a soft pencil, tissue, masking tape, a marabu porcelain paint pen, a jar of water, paper, scissors, tracing paper, and a sheet of paper with the lettering that you want to use on the cup. On your PC, use any decorative font that you like.
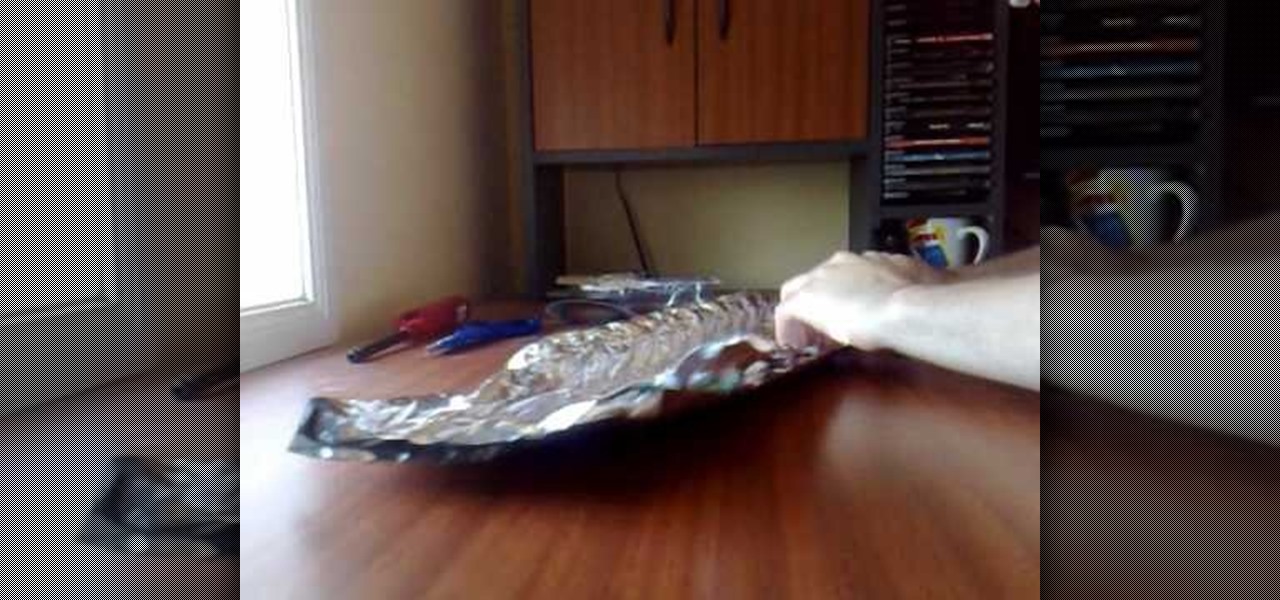
The video shows how to make an extra long ping pong smoke bomb. For this we need a long sheet of aluminum foil (length of the foil depends on the number of ping pong balls we use), 12 ping pong balls is used in the video (any number of balls can be used), a pair of scissors and a lighter.
First of all go to Google and then type in 'candy bar wrapper image' and then enter and go to image results. Select the 'crunch' image and right click and then 'copy' and then go to word document and paste it there. But if the image is big then right click and select 'hyperlink' and select 'remove hyperlink' to remove it. Now select the image again by clicking on to it and you can change the size of the image. Pick out the corner of the box that appears on the image and drag it inside to make...
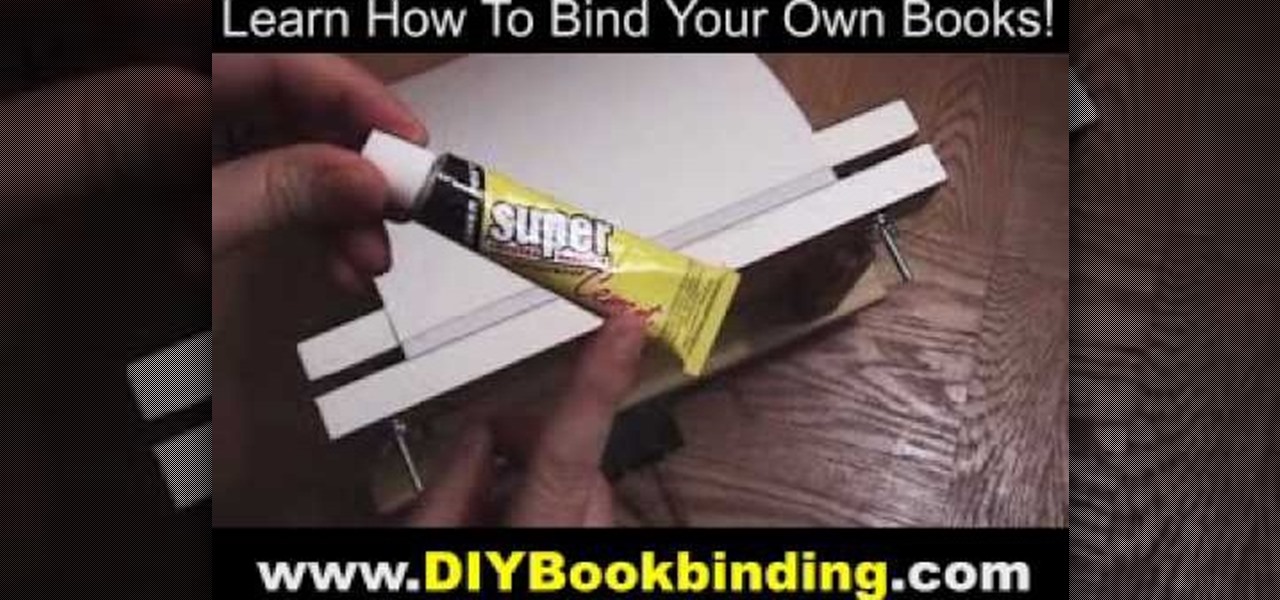
You Tube user go to guy enterprises teach you how to make glue bound paperback book. You will print you book on a4 paper, 2 pages per side, on each side. That means you'll have 4 pages in total on a sheet of a4 paper. Fold the paper in the middle and make stacks of the pages. You will also need an adjustable wood placement for the pages. Make sure you also have a piece of card stock for the black cover. Then align everything up, clamp it down to make the pages staying tight. On the spine of t...
gotoguyenterprises teaches you how to make a glue bound paperback book. You will print you book on a4 paper, two pages per side, on each side. That means you will have the four pages in total on a sheet of a4 paper. Fold the paper in the middle and make stacks of the pages. You will also need an adjustable wood placement for the pages. Make sure you also have a piece of card stock for the black cover. Then align everything up, clamp it down to make the pages staying tight. On the spine of the...
If you've ever wanted to know how to write checks in Intuit QuickBooks program, this instructional is for you. To write a check in the QuickBooks program: Select banking from the menu bar, and then the write checks command. Select the checking account for which the checks will be drawn from the checking accounts drop down menu. Assign the check a number if you will be printing the check. If you are printing the check, make sure that the "to be printed" box is checked. Enter the correct date f...
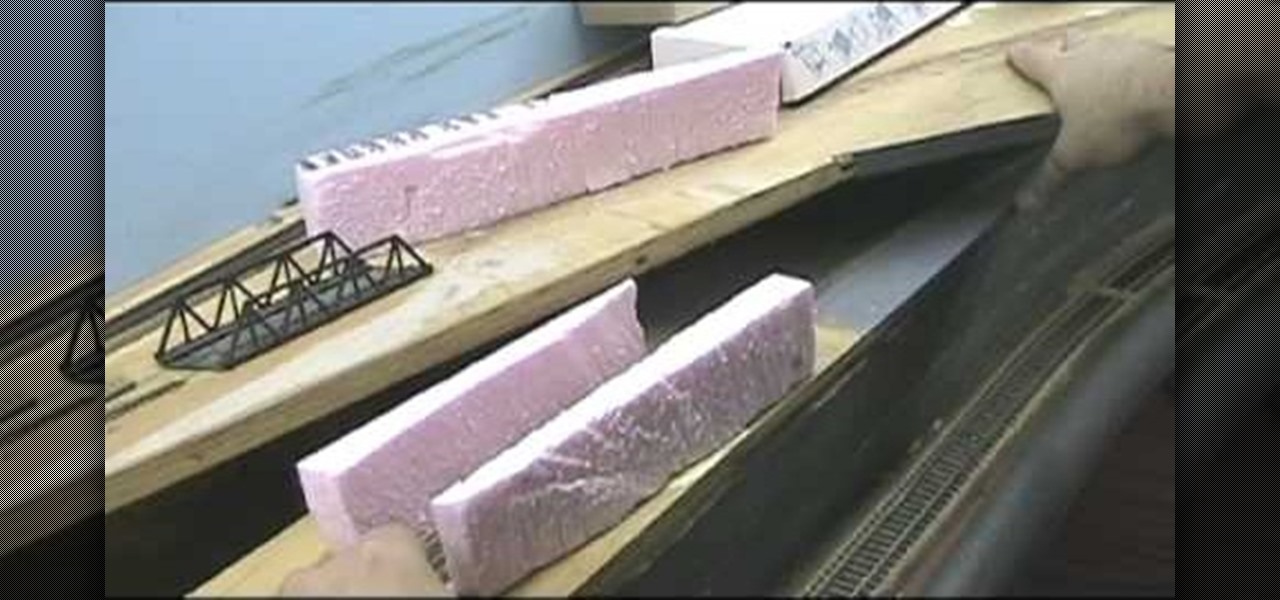
Tunnels can help make your model railroad set-up come alive. But professionally made tunnels can be expensive, and they lack character. In this tutorial you'll learn how to make your own, customized tunnels.
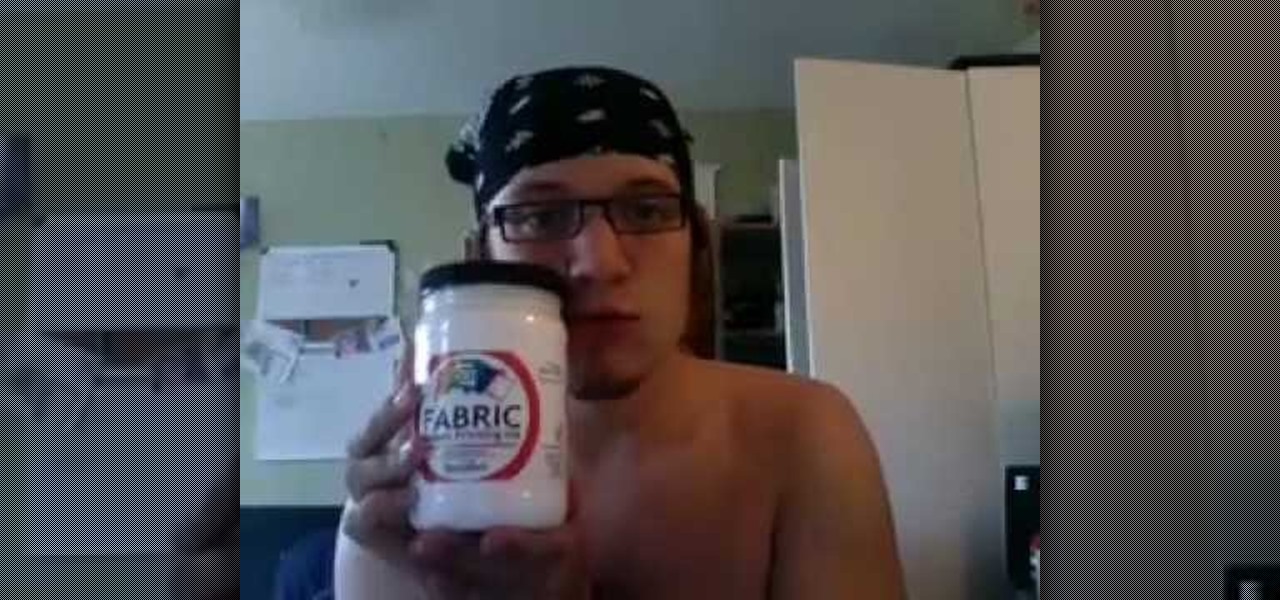
Stephen Loidolt demonstrates block printing techniques in this how-to video. These methods can be adapted for use on either cloth or paper. Follow along with the steps in this video printmaking tutorial and learn how to make your own custom crafts.
Drypoint is a printmaking technique of the intaglio family, in which an image is incised into a plate with a hard pointed needle. Then the print is made with ink and paper. Watch this video printmaking tutorial and learn how to make drypoint prints.
Making a PCB is very simple; it does not consume a lot of time and the results look professional. After watching this step-by-step how-to video, you will be able to make your own PCB in your workshop using just a few inexpensive materials.
Screen printing only takes a few simple tools: a squeegee, the screen frame, ink, and the t-shirt. Make a silkscreen out of anything you like. Watch this video screenprinting tutorial and learn how to silkscreen a t-shirt at home.
Silkscreening customized t-shirts can be really easy with self weeding or self cutting transfer paper. No need for a sticky mess, just heat press and peel. Learn how to print a t-shirt using self weeding or self cutting transfer paper by watching this video silkscreening tutorial.
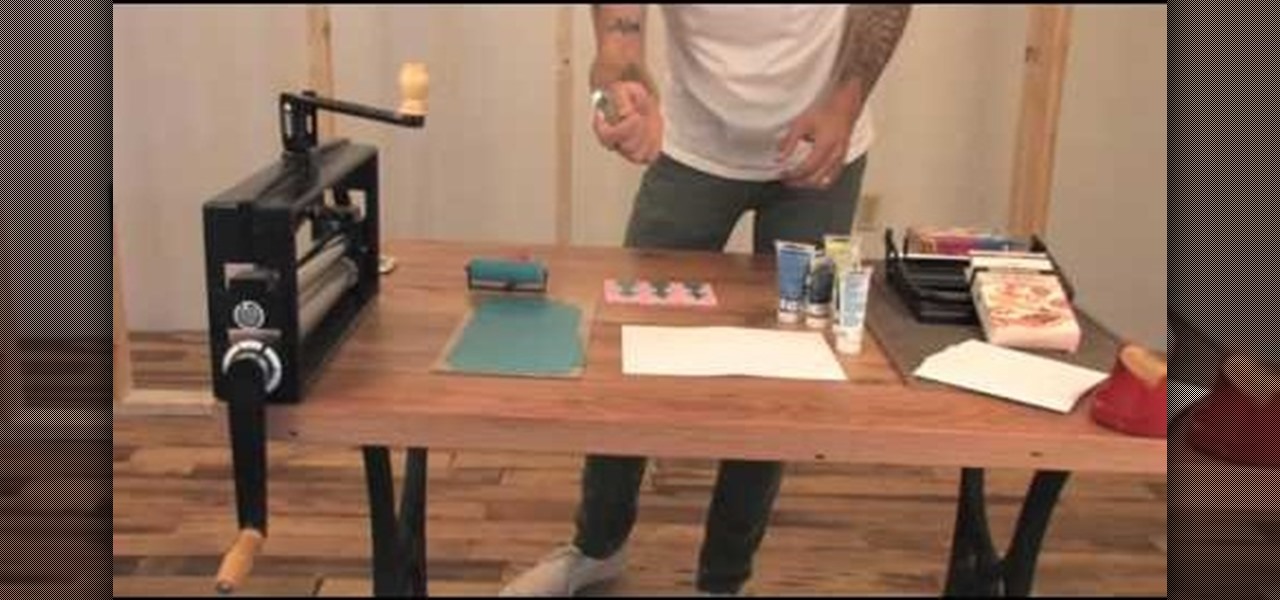
The folks at Spudnik Press show how to make a simple piece of art with a printing press. First, you paint your picture on a hard plastic surface, keeping in mind that in the print everything will be backwards. Second, you take a wet piece of paper and place it on top of your picture. Then you lay blankets over them and turn the wheel of the press. Roll the blankets back and a-da! You have a print copy of your drawing! This video was created by Fresh Cut Media for www.getfreshcut.com.
This is a video tutorial in the Arts & Crafts category where you are going to learn how to fold a five-point paper barn star. You will need a square sheet of paper. Fold it in half to make a rectangle. Take the right folded corner and fold it up to the left edge of the rectangle. Place the corner about 1/3 from the top edge and fold the sheet. Next take the left corner and fold it over the edge you just folded. Finally take the flap on the right and fold it over to the opposite side. Now cut ...
Connie Brad teaches us how to make a pop-up box card in this tutorial. First, you need to take a scoring board and draw 1 cm increments down the center of it. Now, take a sheet of card stock and score the sheet 2 cm from one end, then continue down until you reach the bottom 3/4's of the paper. Now, fold your card along all of the score lines up until the last line. Next, line this up on a cutting mat and cut 3 cm on each side until the end of each score line. Now when you set this up, it wil...
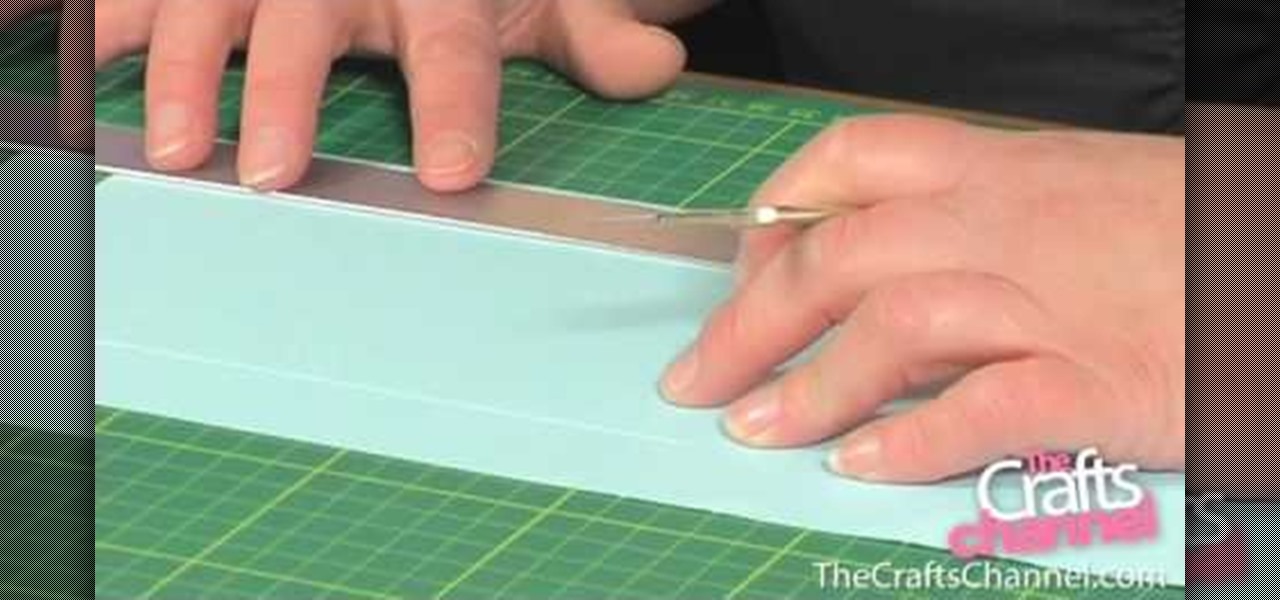
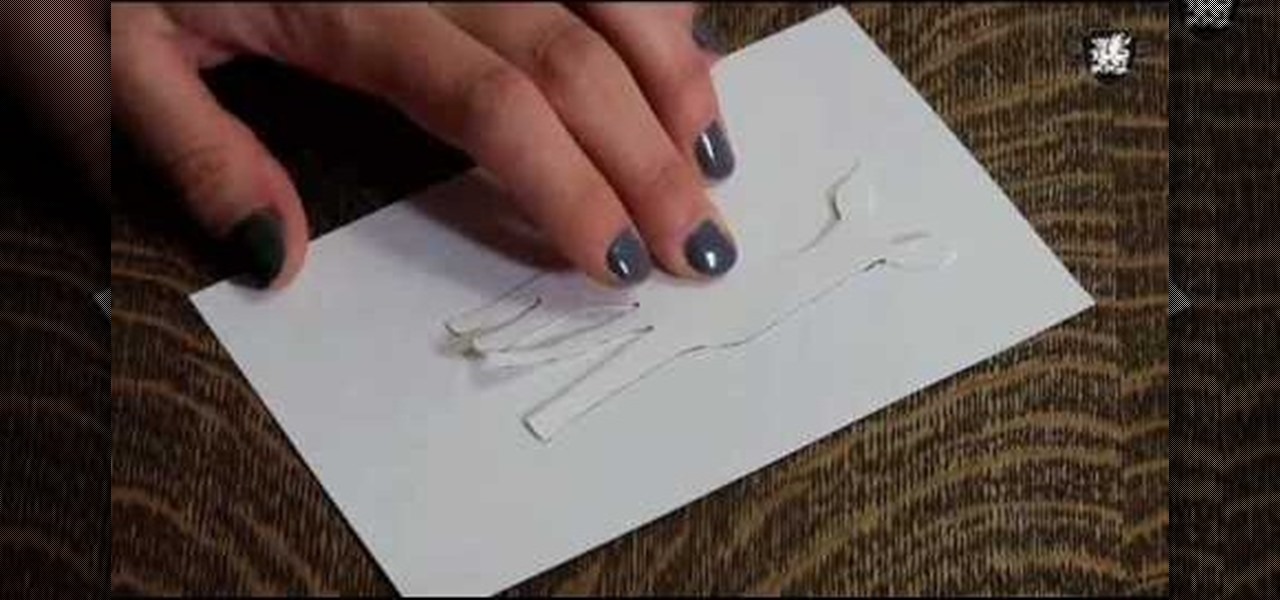
In order to make paper cutting art for your home, you will need: paper, pencils, X-acto knife, card stock, scissors, self-healing cutting mat, poster board, adhesive, and a scanner.
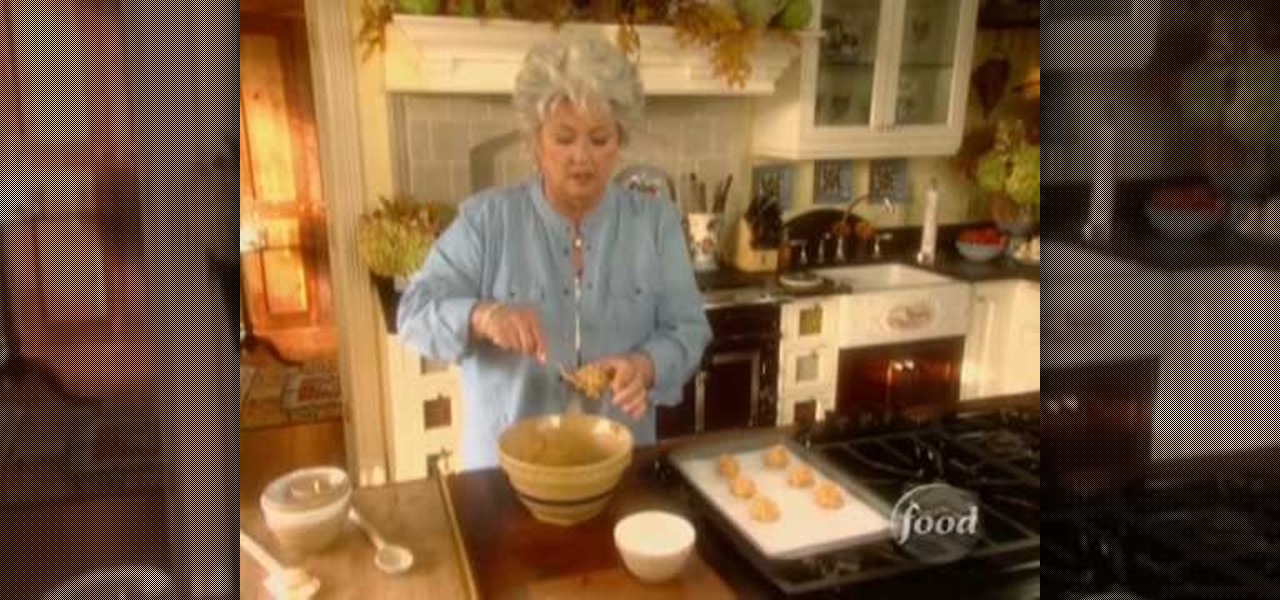
This holiday cookies are a favorite for many dessert lovers… or more accurately… rum lovers. They're basically a butter cookie, but with a delicious and fluffy rum filling in the middle. These delicious desserts are called "rum-filled thumb prints" and will not disappoint. The key is to encrust the cookie dough in walnuts, then bake! And the nutmeg goes perfectly with the rum.
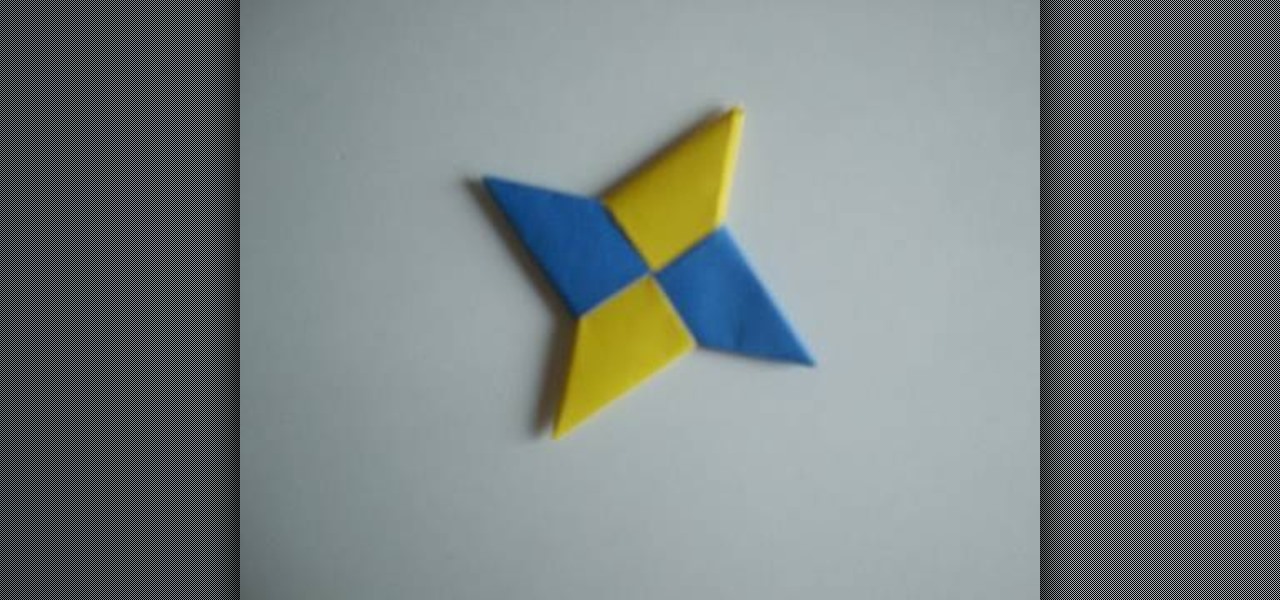
Everybody knows what a ninja star is, but what about a shuriken? A shuriken is the exact same thing as a ninja star: a weapon in the form of a star with blades or points. It's a missile in martial arts. It's a ninja's best friend. But for some of you, shurikens might be too dangerous, so that's were origami comes in. This video will show you the process of folding modular paper shurikens, and you only need two sheets of paper to do it.
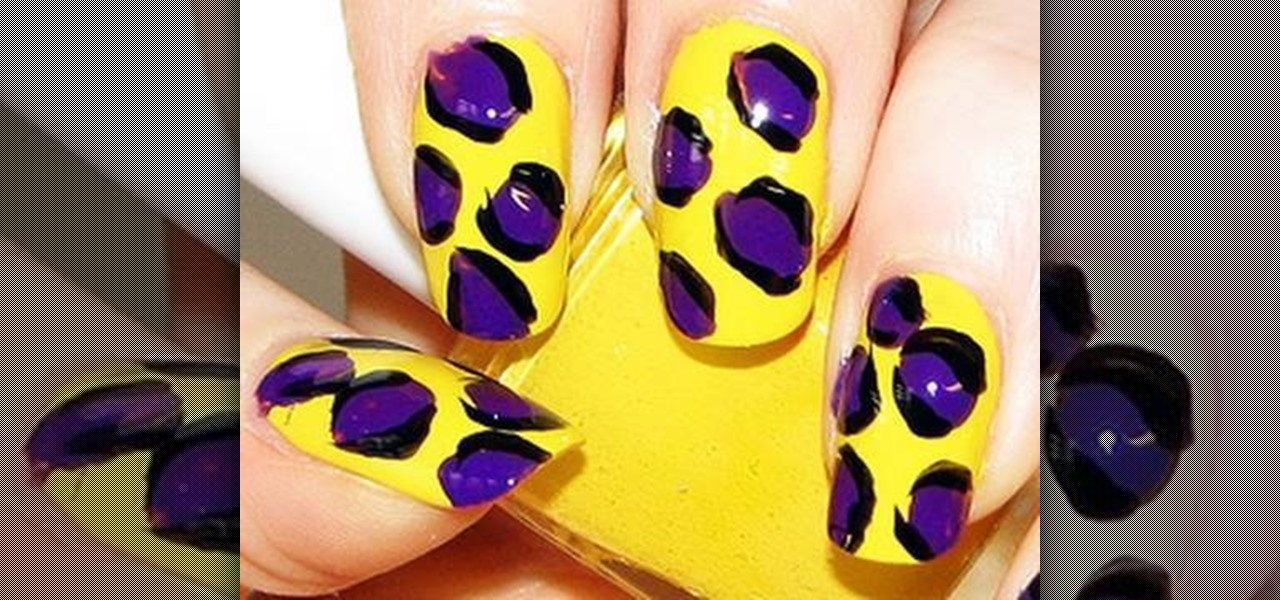
This video is about how to create colorful leopard print nails. So the first thing that you will have to do is to choose any colors of the nail polish that you want. After deciding for the first color of the nail polish, apply it to your nails and let it dry. The next step is to get a plastic plate and place a bit of a small amount of the second color that you chose. With the use of the nail art brush, carefully start forming small random spots on the nail. Apply these to the rest of your nai...