
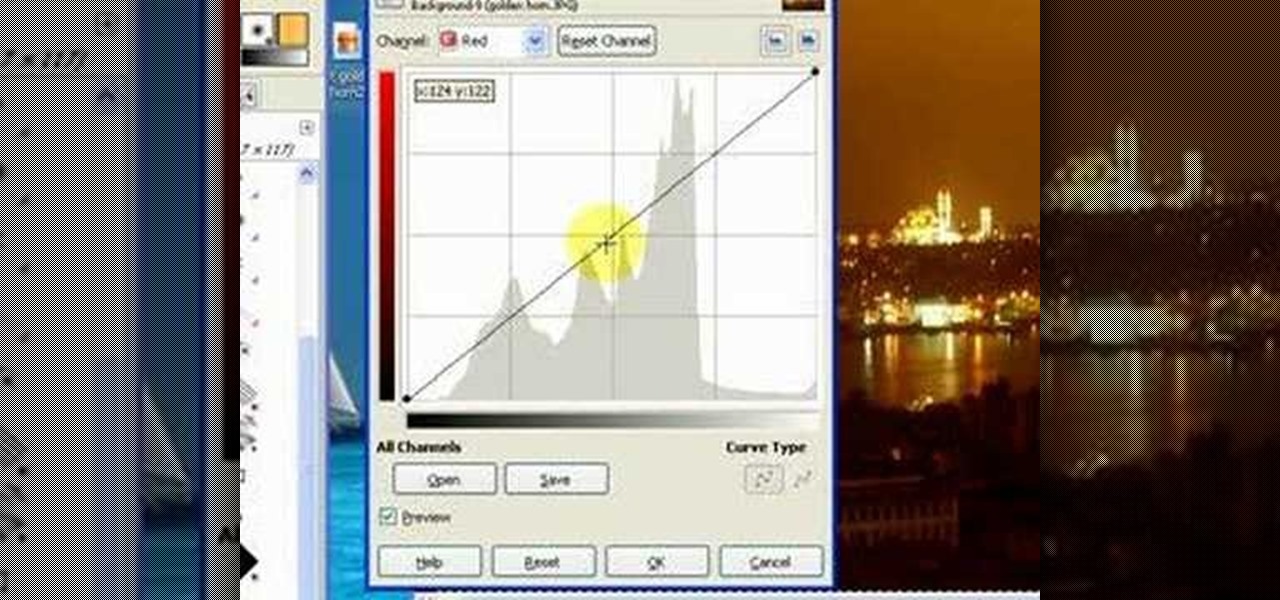
How To: Improve night shots using curves in GIMP
This GIMP curves tutorial should help you remove unwanted color casts from your photos and make you favorite pictures actually evoke the memories of your favorite scenes!

This GIMP curves tutorial should help you remove unwanted color casts from your photos and make you favorite pictures actually evoke the memories of your favorite scenes!
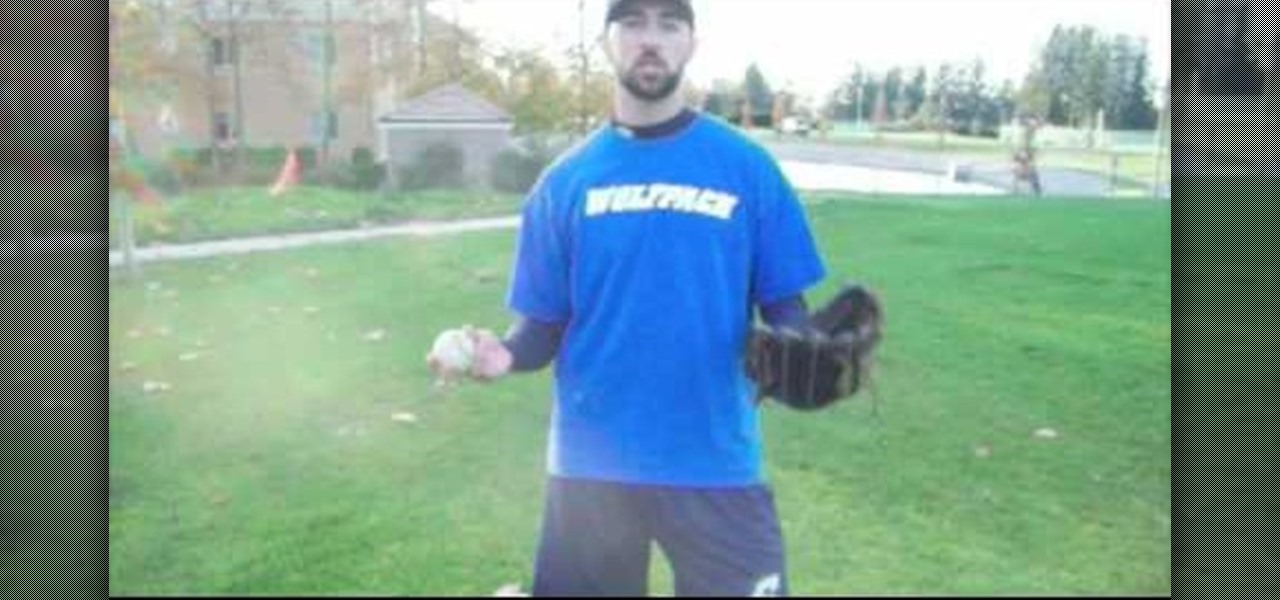
The video shows us how to throw a curve ball like a college pitcher. There are actually keys to throw a curve ball. Number one is the grip, number two, your arm speed and number three is the position of your hand when you throw the ball. First step is to focus on the grip and here it is going to be on a two seam and your index finger and your middle finger is placed on the right side for right hand throw and on the left side of the ball for left hand throw for the exact gripping. Number two i...
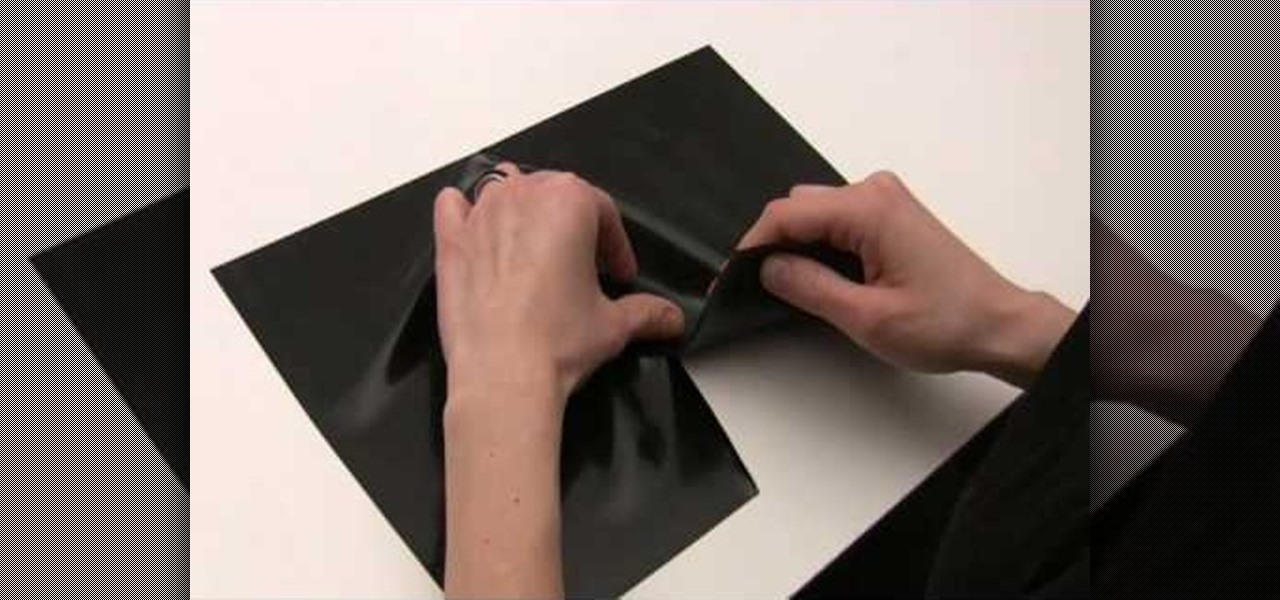
In this tutorial, we learn how to glue straight and curved latex seams. First, press each piece of latex down so it's just touching in the middle. After this, use your finger to press down on the middle, then take a roller and roll over the middle until it's perfectly straight. Now, stretch out the latex to make sure that both sides are stuck together. To glue curved latex seams, place the pieces together slowly, pushing your finger down in the center as you go to make a curved effect. Once y...
In this video tutorial, viewers learn how to draw curves like an architect. The first way is to use circle and oval shaped templates. When using the template, push down on it firmly and carefully picking the template back up to not smear the pencil marks. If the template does not come with a raised backing, use some built-up tape for leverage. Never use permanent markers with the template, work with dirty hands or cut with the template. Users can also use French curve templates and compasses....

First, make the chin of the skull by drawing out a slight sharp curve facing downwards. Then, make the forehead and the upper part of the skull by drawing huge slight curves. Draw a circle on the spot where the eye socket should be. Draw a curve at the side of the circle to give it an illusion of popping out. Draw the cheekbone lines as well as the jaw lines to give the skull more definition. Draw several rectangles standing vertically to create the skull's teeth. Finish the head with a sligh...
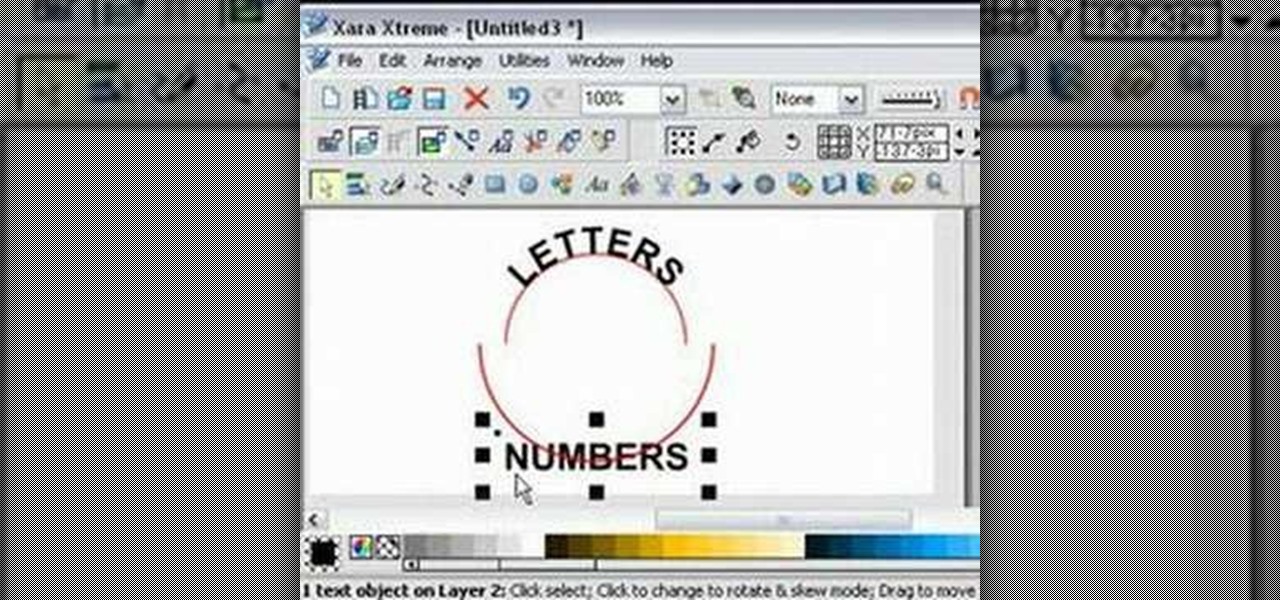
For anyone experimenting with graphic arts and interested in learning how to wrap text to a curve in Xara Xtreme, this tutorial shows how to create this effect. The tutorial uses the example of a circle and shows step-by-step how to wrap words around the curvature of the circle. Learn how to convert the text to a curved shape to bend the letters. In a matter of minutes, you can learn how to fit text to a curve by in Xara Xtreme by following the steps in this video.
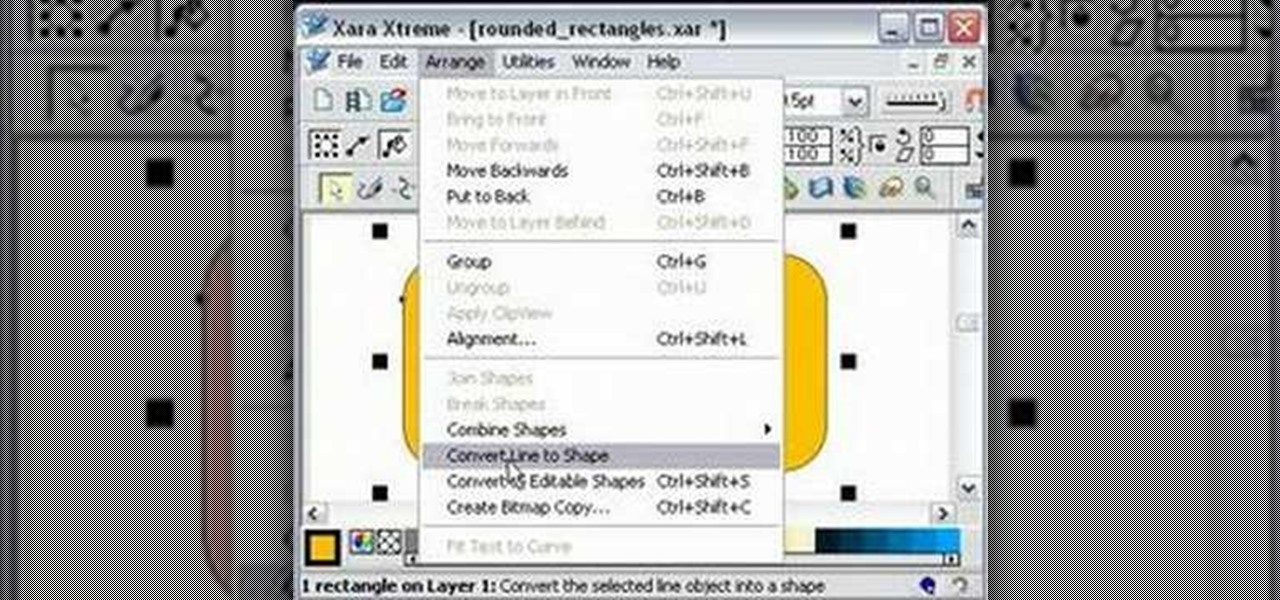
One must have often wondered how to create rectangles with smooth rounded corners. Open Xara Xtreme and create a rectangle on the stage. To change it to rounded corners, click on 'curved corners'. Then one can edit how much curve is required on the rectangle. If we scale the rectangle, then it will lose the curve path. So it should be converted to 'editable shapes'. This will maintain the curves, even if scaled from one angle. This will be helpful to create those party fliers.
Sanding molding can be pretty challenging with all the curves and details. First for sanding curves try wrapping your sandpaper around a piece of dowel rod. Choose the proper sized dowel for the size of the curve that you have to sand. The larger the curve the larger the piece of dowel that you will need. To get into hard to reach crevices try folding the sandpaper several times and then use the edge of the sandpaper to sand down in the tight crevices.

In this Photoshop tutorial the instructor shows how to fix colors. It looks bad to have dull colors in your images. Now open the image in the Photoshop and go to image adjustments. Go to curves and start playing around with the curves in the RGB mode. When you change the curve you can see the change in the original images. Now adjusting the colors in the curves tool play around with the colors and this will get the colors brightened up. There are no stead fast rules but you need to play aroun...

Want to switch your Blackberry Curve's service? Here might be your chance. In this tutorial, learn how to unlock (or jailbreak) your Blackberry Curve in just a few steps, listed below (from Killer Number X):
This tutorial shows you how to use curve snapping in Maya. It allows you to snap to snap to nurbs curves, isoparms or polygonal edges or anything that's a curve!
Mobile wallet Curve just released a new feature that lets you correct past mistakes. Sounds incredible, right? Unfortunately, the mistakes you can erase aren't things like forgetting to do an assignment in school, screwing up a job interview, or, well, your ex. However, you can switch the card you want to use to pay even after you've paid with Curve, and that's still pretty cool.
It's not impossible! This tutorial is a super easy technique you can use to sew a curved seam (such as cap sleeves) without having to use pins, which can create difficult bunching. All you need really is a Curve Master presser foot attachment!
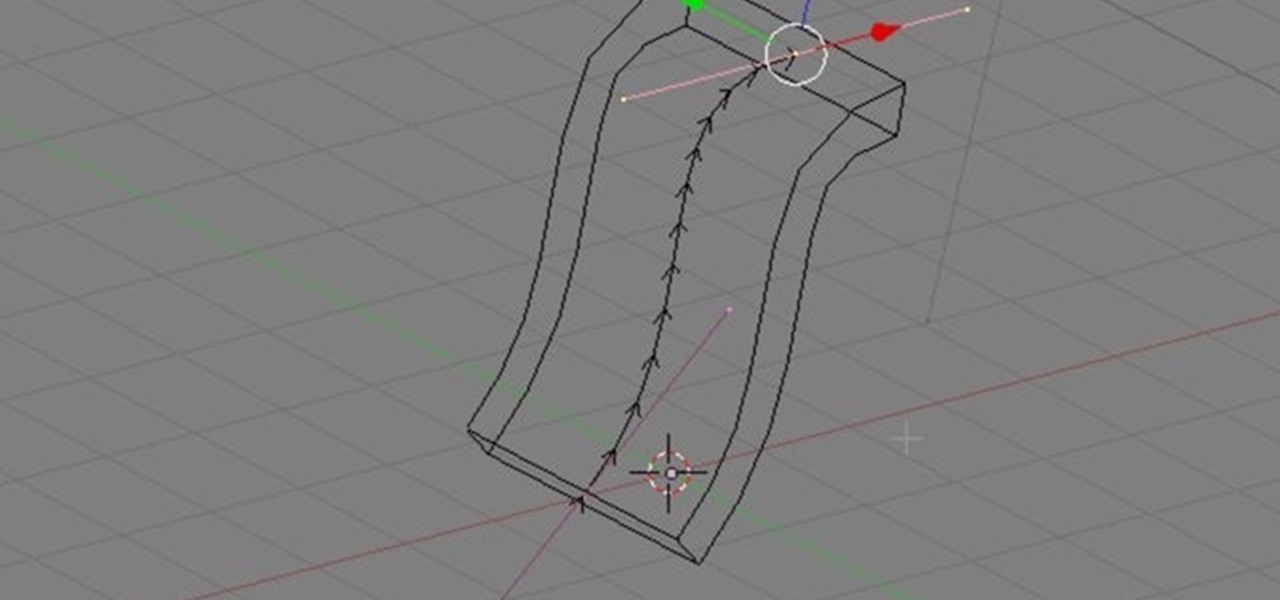
Here are a few quick tips and tricks on how to take advantage of the Curve Modifier feature in Blender 2.49b and 2.5. Whether you're new to the Blender Foundation's popular 3D modeling program or a seasoned graphic artist just interested in better acquainting yourself with the application, you're sure to be well served by this free video tutorial. For more information, including detailed instructions, take a look.
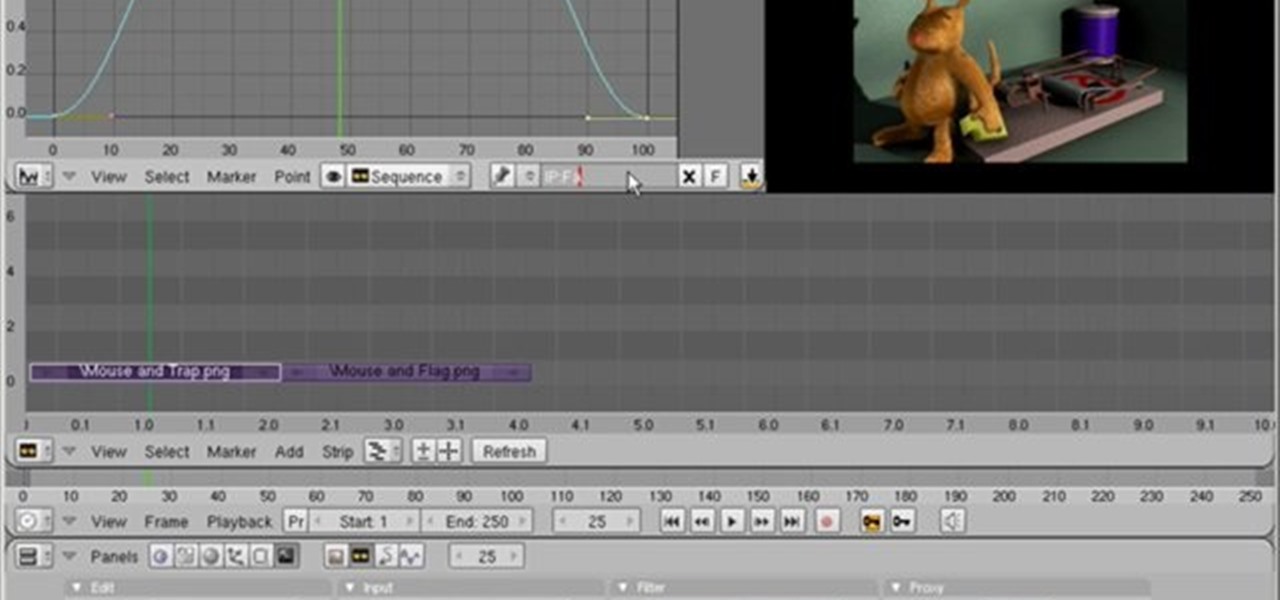
Here's a quick tip on using the IPO Curve Editor in the Sequencer in Blender 2.49b or 2.5. Whether you're new to the Blender Foundation's popular 3D modeling program or a seasoned graphic artist just interested in better acquainting yourself with the application, you're sure to be well served by this free video tutorial. For more information, including detailed instructions, take a look.

Blender’s curves tools are quite a powerful and convenient way to model all kind of things. Tubes, lathe-objects, logos, tentacles and much more. This tutorial shows you how to use the different types of curves, control-points and handles and how to use them. You will learn how to trace a logo and to give it some depth, and how to create lathe-objects within Blender and add some variations to them by using the lattice- and the cast-modifier. Whether you're new to the Blender Foundation's popu...

Want to know how to create Bézier parametric curves when working in Maya 2011? This clip will show you how it's done. Whether you're new to Autodesk's popular modeling software or a seasoned 3D artist just looking to better acquaint yourself with the Maya 2011 workflow, you're sure to be well served by this video tutorial. For specifics, watch this free video guide.
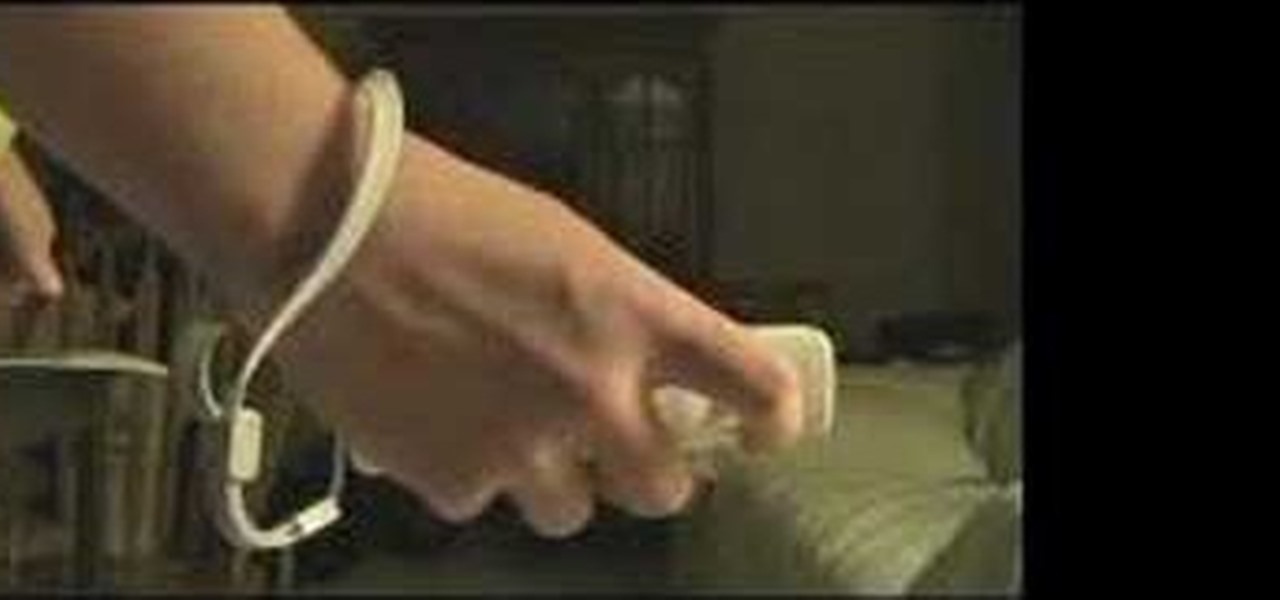
Wii Bowling is probably one of the most played video games in the Wii Sports package bundled with the Nintendo Wii. But not everybody can play it well. There's always that one person that throws that humungous curve ball that barrels down the lane and destroys all ten pins with the bowling ball. Well, that could be you, after watching this brief video tutorial on how to bowl a super power curve in Wii Bowling. Try to master this, and if you succeed, you can master the game.
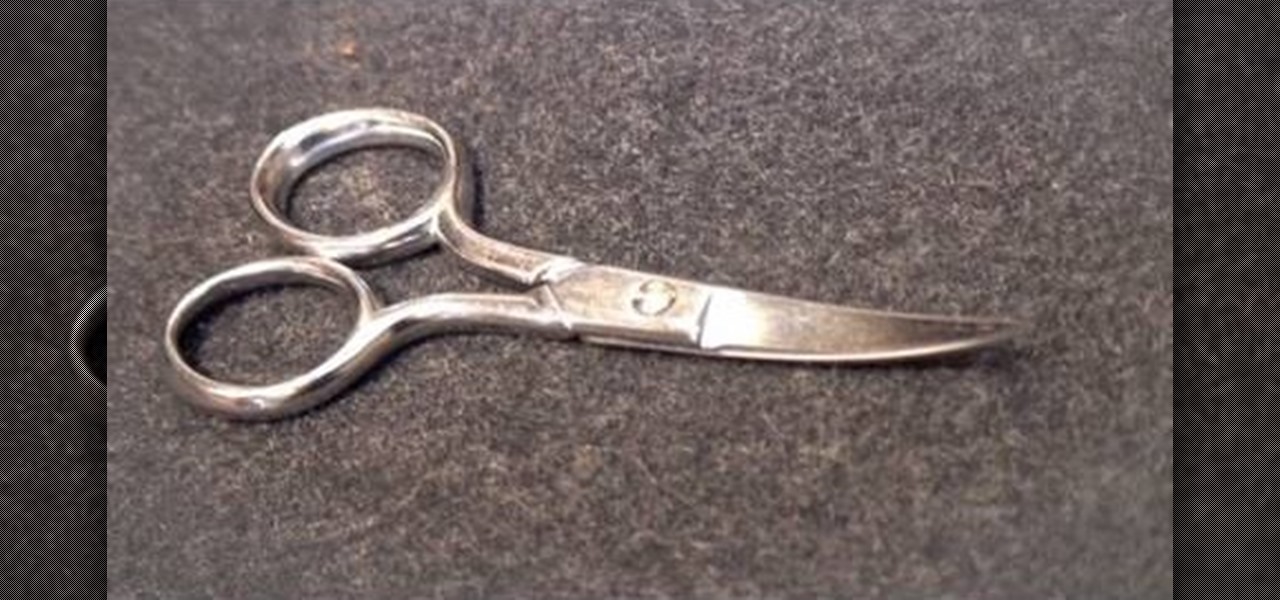
Kenneth D. King of ThreadBanger demonstrates one way to use a scissor known as an embroidery scissor, which is a very tiny scissor with a slightly curved blade. The curved blade prevents the points of the scissors from poking through the fabric, which is very important when you need to trim something close to the fabric. This comes in handy for uses other than embroidery.
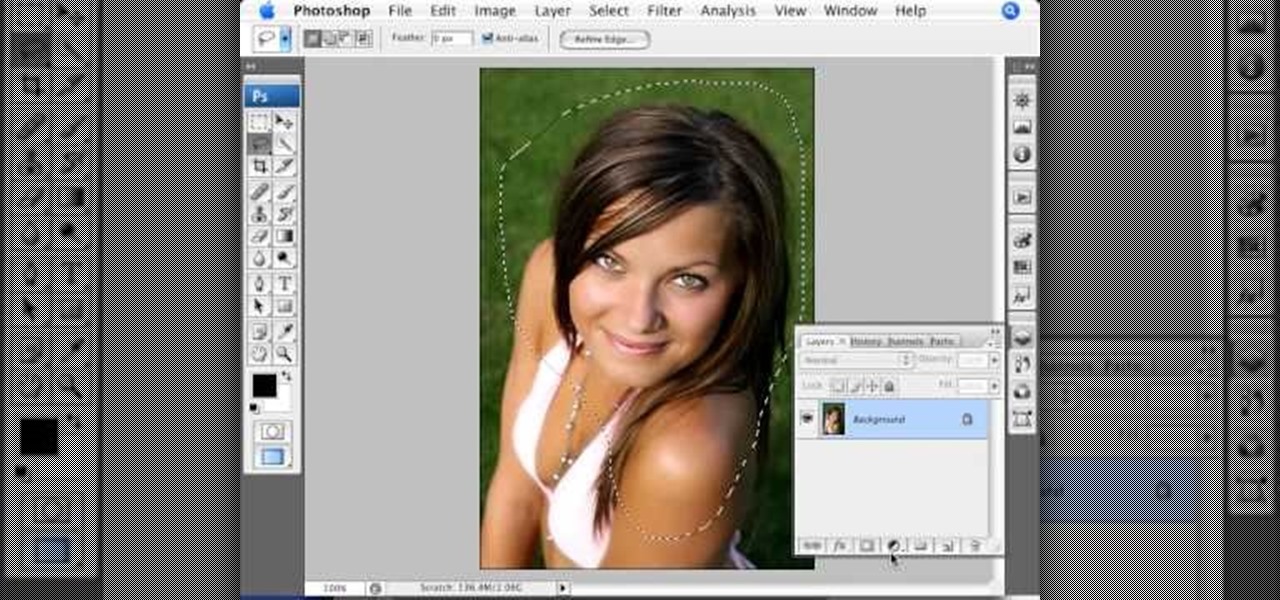
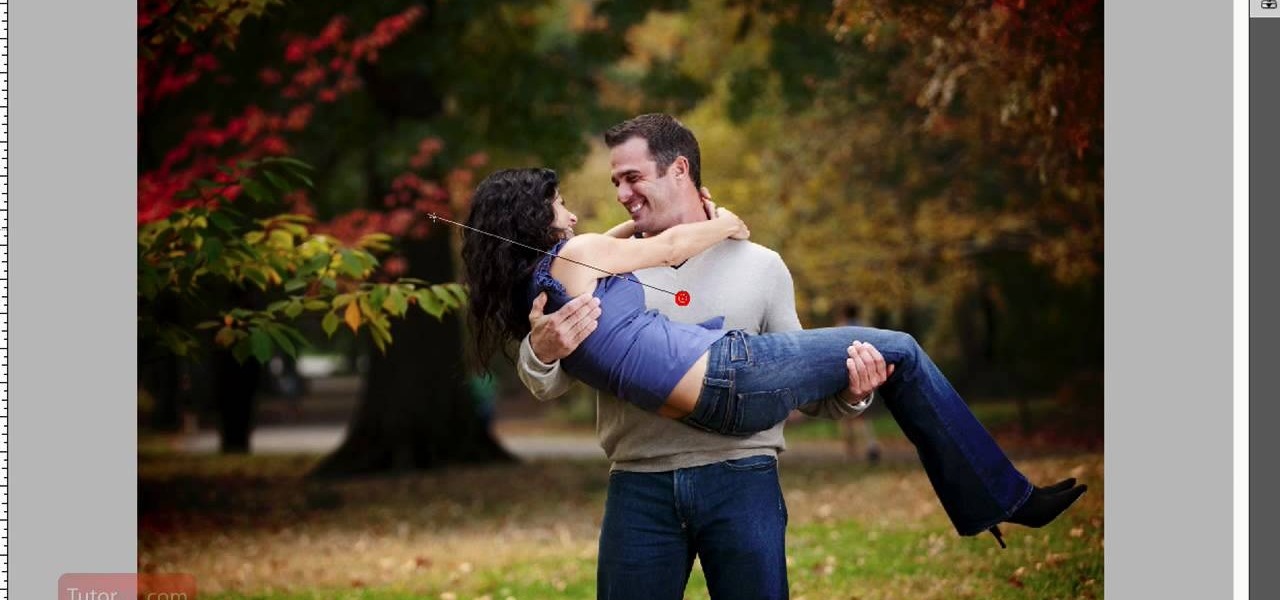
The video is basically about how to modify the focal point of the image. When the image has some stuff on the background and when you want the viewers to focus more on one particular area and making the rest of the image darker, you need to modify the light values of the image, which will be taught in this video. This can be done by just selecting the area, which you need to highlight on the image by giving some border and then add curves. In the curves the area is made darker than the rest b...

In this video the author takes us through how to simulate a curved photo in Photoshop. One can learn how to make it seem like your photo is slightly curved and popping up from the screen. The audio quality for this video is good and the explanation was very clear that even a beginner could understand the steps shown in the video. If you follow these steps in Photoshop, you can add a great look to your photo portraits with ease.
In this video, we learn how to write the letter H in calligraphy copperplate. To make the upper-case letter, start off drawing into a thick line, with a curve at the end of the letter. Make the curve end touching the line, then draw it out to the right side of the letter, bringing it back down to a line to make the "h" shape. Next, draw a line across the two lines with a curve at both ends. To make the lower-case letter, start by drawing a thin line to make a loop at the top, then bring it do...

In this video, we learn how to write the letter "S" in calligraphy copperplate. First, dab your calligraphy into ink, then start to writ on a your paper. Make a large half bowl shaped curved line, then make a loop and go down, creating a curved line with a dot at the end. To make the lowercase letter, make a thin line, followed by a thick outer line that curves into the large line making a lower case s. When you are finished with both of these, you will have beautiful letters that look great ...

Need to calculate the area between two curves? This free video lesson will show you how. From Ramanujan to calculus co-creator Gottfried Leibniz, many of the world's best and brightest mathematical minds have belonged to autodidacts. And, thanks to the Internet, it's easier than ever to follow in their footsteps (or just finish your homework or study for that next big test). With this installment from Internet pedagogical superstar Salman Khan's series of free math tutorials, you'll learn how...
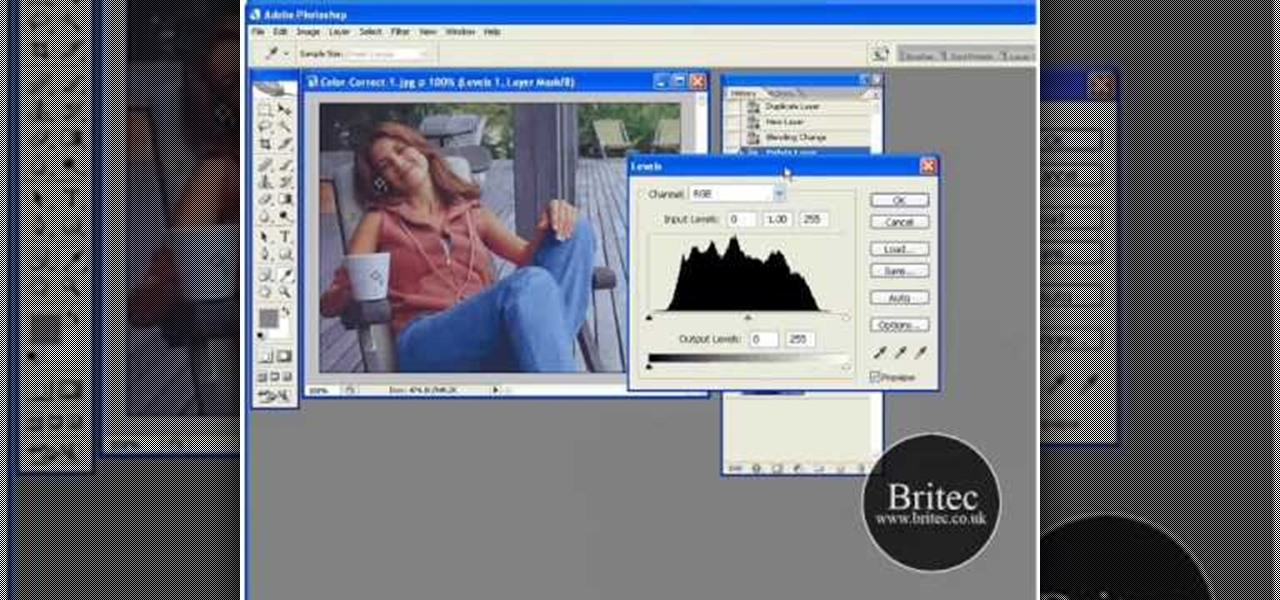
Want to color correct a digital image within Adobe Photoshop? Whether you're new to Adobe's popular image editing software or simply looking to pick up a few new tips and tricks, you're sure to benefit from this free video tutorial from the folks at Britec Computer Systems. This video offers a step-by-step guide on how to color correct images using Photoshop's curve adjustment tool.

If you use Microsoft Excel on a regular basis, odds are you work with numbers. Put those numbers to work. Statistical analysis allows you to find patterns, trends and probabilities within your data. In this MS Excel tutorial from everyone's favorite Excel guru, YouTube's ExcelsFun, the 47th installment in his "Excel Statistics" series of free video lessons, you'll learn about the basics of the empirical rule (the bell curve) and how to apply it in various ways.
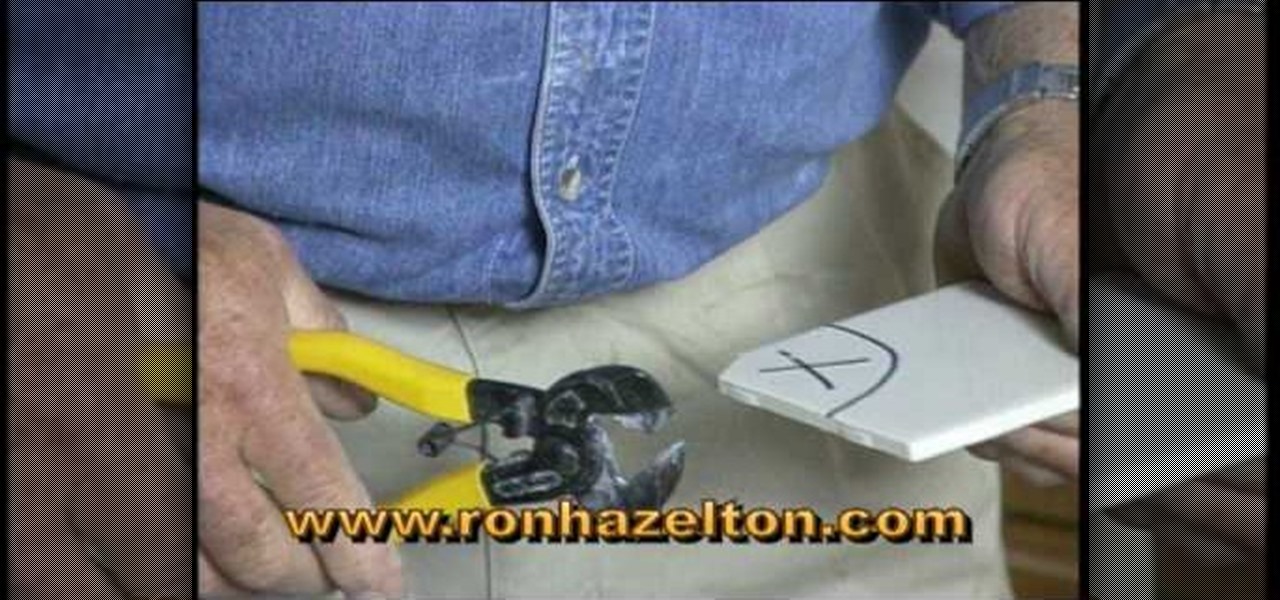
If you lay tile it is rare to do a job and not have to cut a curved piece of tile. If you do have to cut a curved piece there are two ways to do it. First, you have to draw outline of the cut that you need to make on the tile itself and mark the part you are going to remove with an X. The low tech method involves using a pair of tile nippers. You nip away pieces of the tile until you have nipped away the whole area until you have a circular cut out. For a more polished cut you can use a spira...

This is kind of a hard trick to pull off, but if you're playing a soccer match in Fifa 12 and want to try something risky, go for a curved in corner kick goal. With any luck, the goalie won't be able to block it and you'll score!

In this tutorial, we learn how to pick up stitches along a curved edge. You can see the slope on your fabric that you can work with. If you slip the first stitch you can avoid this. First, slip the first stitch and then bind off the next stitch as usual. This will create a nice curve. To pick up stitches, you will use a circular needle and then poke it through the area in the last row. Find a 'v' shape and then push the needle through this. Pull through just like you are normally knitting and...
In this free video software tutorial, you'll learn how to use the Saturation Curve editor when color correcting or grading footage in Color. Whether you're new to Apple's popular non-linear editor or a seasoned digital video professional merely looking to pick up a few new tips and tricks, you're certain to be well served by this video guide. Take a look.
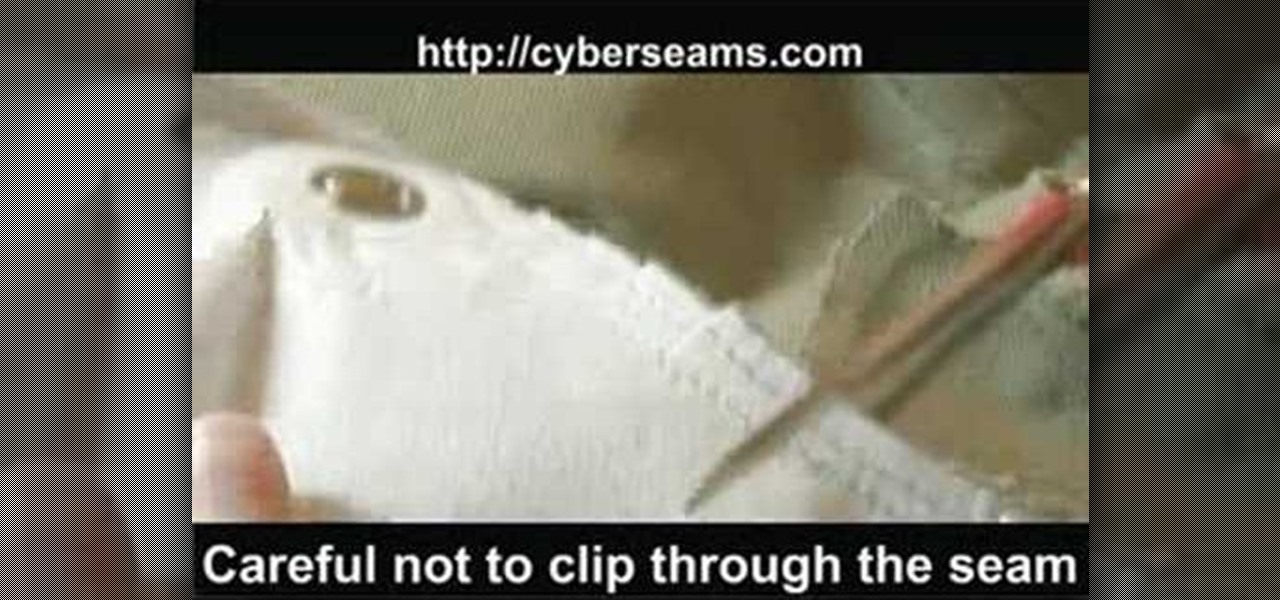
In this tutorial, we learn how to clip curves when sewing with rounded seams or edges. First, you will take your piece of clothing, then grab your scissors. Put the edge of the clothing (with the seam) and lay it flat. Then, put the scissors onto the seams with the very back of the scissors over the fabric. Clip close to the seam, but do not clip through the seam as you are cutting. Once you are finished, you will be able to sew in curves and will be able to easily get around the seams withou...

In this tutorial, we learn how to find abc, curve direction & y-intercept (quadratic eq). First, you need to find the a,b, and c of the equation. A will equal what the coefficient is in the equation, B will equal the second, and C will equal the third term. This tells us if the numbers are positive or negative, so so know if the parabola opens up or down. To graph C, you will know what the y-intercept is going to be, then find the matching units. After this, you will use B to shape the parabo...

Even though your Blackberry Curve comes with MMS capabilities, the factory settings do not have this turned on. To turn on MMS, you'll have to go within several settings on your phone and adjust them in order to be able to receive MMS messages.

In this tutorial, we learn how to create a Lomo effect in Photoshop. This is a contrast that gives the photo a "cool" vibe and change up the effect that you see. First, load up your picture into Photoshop and then go to adjustments, then curve. From here, add a slight s-curve and then add a green channel with the same s-curve that you just created. Go to the blue channel and create the opposite s-channel from the others, then click "ok". Now, go to layer, new adjustment layer, then gradient m...
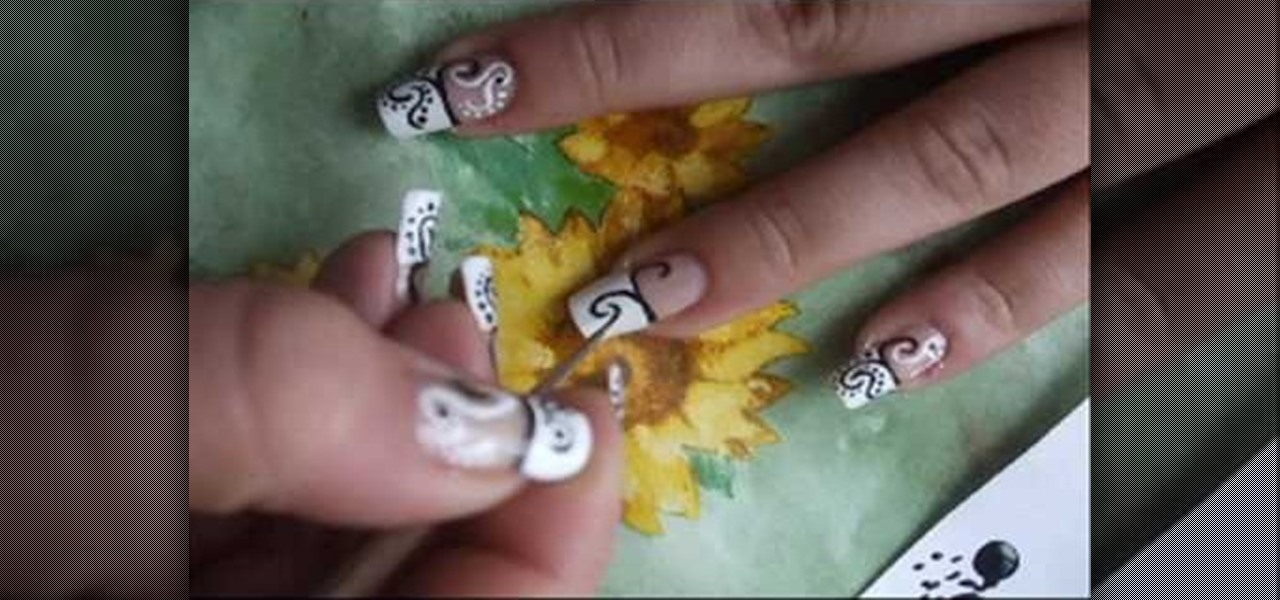
Create swirly black & white nail art Use base and top coat, black and white nail polish and paint brush nr 2/0.

This video tutorial is in the Fine Art category which will show you how to draw a deer from a triangle. First you draw an inverted triangle which will make up the face of the deer. Then you draw two small curves starting at the two top corners of the triangle to make the horns of the deer. You can also draw more short curves or straight lines starting from these curves to make up the complete horns. Then you draw the ears starting just below the horns. Draw the eyes and color in the ears and ...
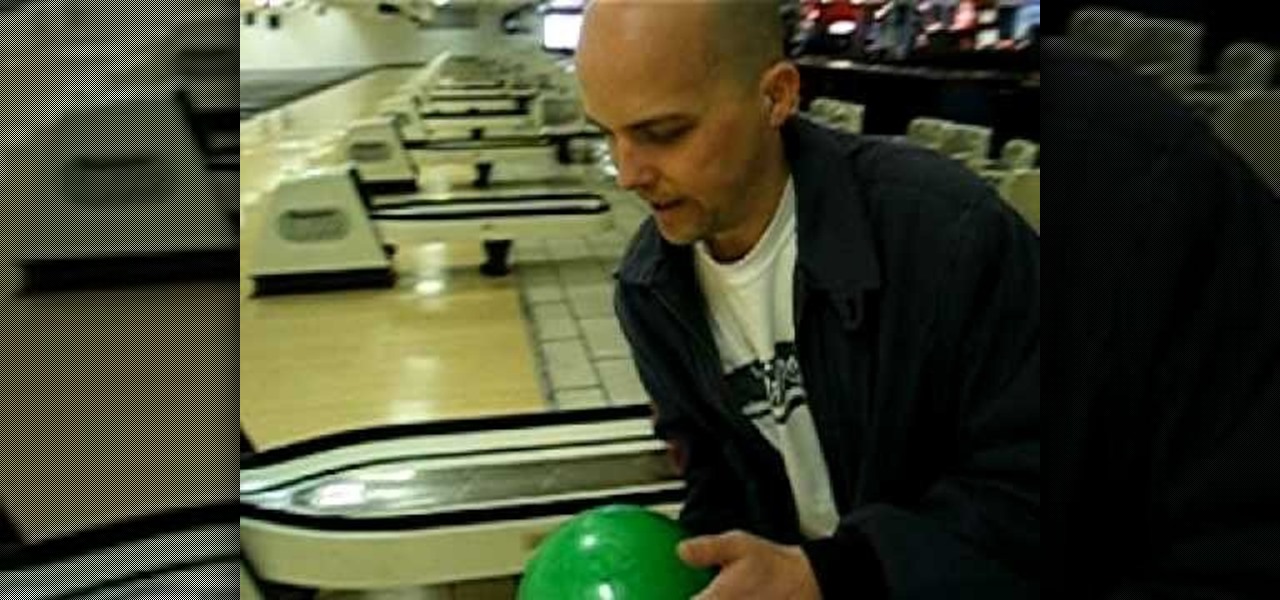
In this video tutorial, viewers learn how to curve a bowling ball. When holding the ball, users will only be using 2 fingers: the middle and index finger. Place the middle finger in the left hole and index finger in the right hole. Make sure that the bowling ball is not too heavy. Do not use your thumb to hold the third hole. When you let go of the ball, spin the ball really hard with just one finger. This video will benefit those viewers who enjoy bowling, and would like to learn how to curv...
This tutorial is for those looking to get an understanding of Photoshop CS4. It's a beginner video and shows you the best way to create a vignette with curves easily. It's a great way to add a little something to your photos without making it look fake. So sit back and enjoy!

If you use Microsoft Excel on a regular basis, odds are you work with numbers. Put those numbers to work. Statistical analysis allows you to find patterns, trends and probabilities within your data. In this MS Excel tutorial from everyone's favorite Excel guru, YouTube's ExcelsFun, the 48th installment in his "Excel Statistics" series of free video lessons, you'll see comparison of Chebyshev's Theorem and the Empirical Rule (bell curve) and learn when to apply which.

First of all select the 'pen' tool from the side bar. Now select the 'paths' box from the top screen. Now make two different points to make a curve and then make a third point to make another curve as shown. Now select the 'text' button. Now change the 'color' of the text to ‘black’. Now run your cursor over the path till it ‘changes’. Then click. Now you can actually ‘type’ on this path. Type in "text goes in a curve". This shall be written on the curved path that you have just m...