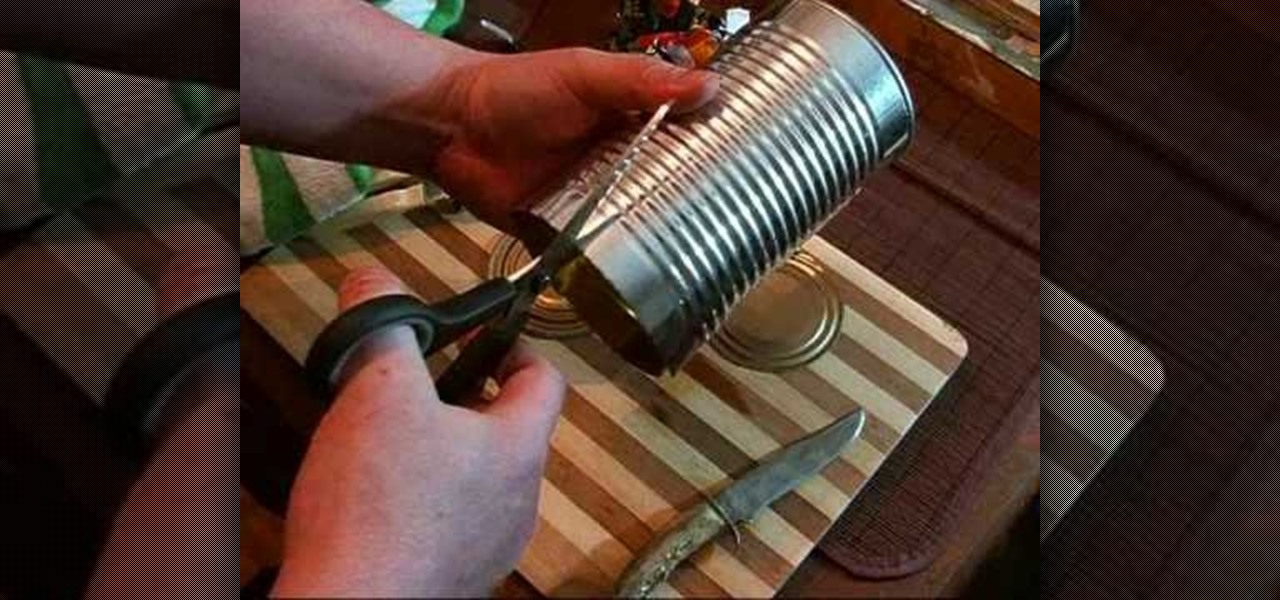
This is a how-to on how to make a survival cook stove instead of spending $25 to buy one online. It is a simple projecting that requires an old can, a pair of scissors, and a knife. Be careful and pay attention to his excellent instructions! Watch this video survival training tutorial and learn how to build a cook stove out of a tin can.

If you love origami you'll love this project. Watch this video and see how simple and quick it is to make a 3D paper star.
Check out this video for creating a one piece mold using a repro laminating system. This is a professional video not for beginners. The repro laminating system is ideal for working on medium-sized projects, this process is easier, faster, and more economical than the epoxy laminating system. This process can be used in automotive, mechanical, fine art and film special effects uses.
Check out this video to learn how to make a professional epoxy fiberglass layup and epoxy laminating systems. This process is ideal for working on larger projects, a typical 'fiberglass layup' is a popular process for those who need a large, strong, and lightweight tool.This process can be used in automotive, mechanical, fine art and film special effects uses.
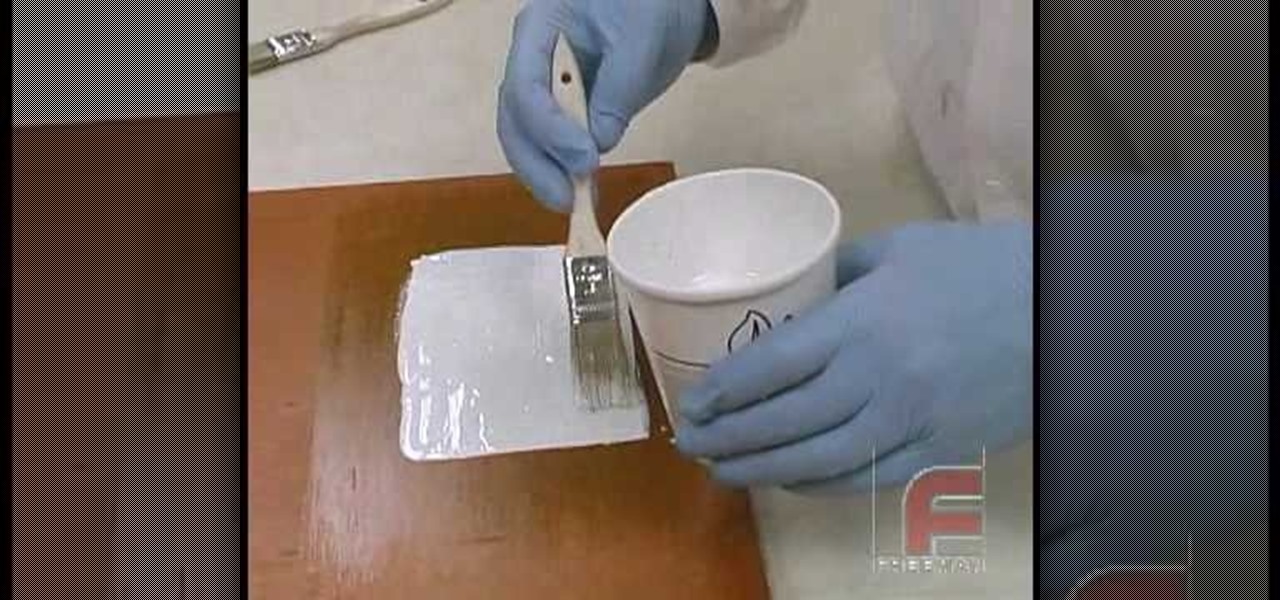
Check out this video for how to create simple one piece silicone rubber molds. This technique is ideal for smaller projects (less than 12" x 12"), this is the easiest process for creating parts, patterns, tools, & molds. We demonstrate creating a silicone rubber mold and then the casting of parts with Repro, epoxy casting resins and polyurethane elastomers. This process can be used in automotive, mechanical, fine art and film special effects uses.
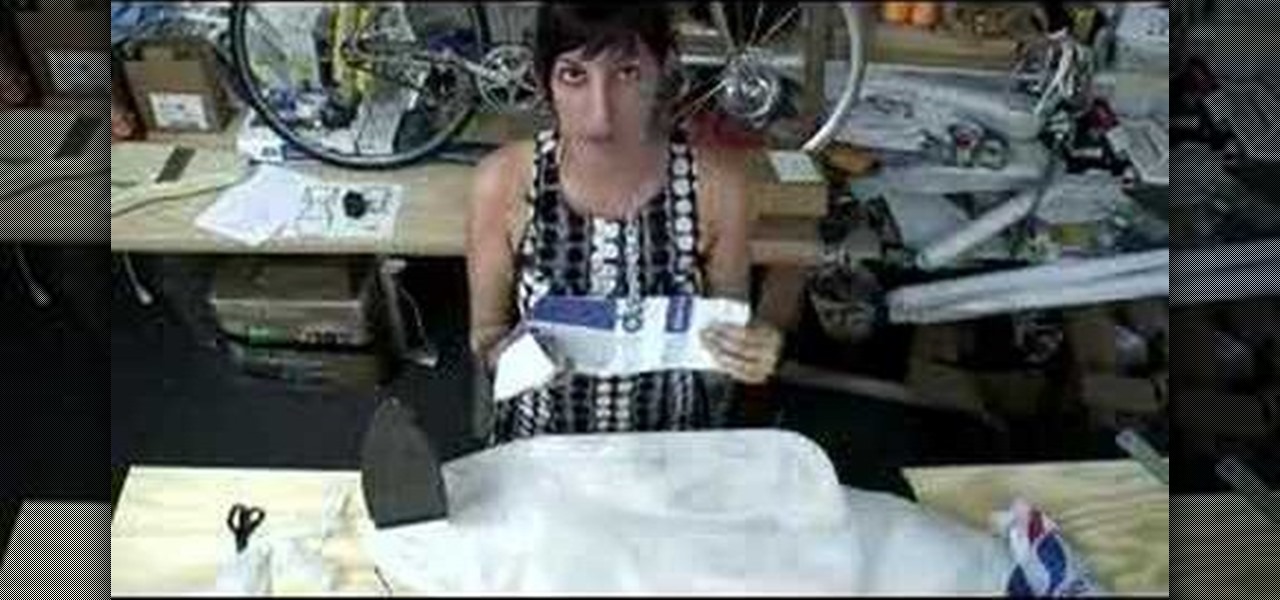
Watch this instructional video to learn how to make a messenger bag out of trash bags. All you need to do is melt some trash bags together with an iron and wax paper, stitch them up, and then add some necessary buckles and pack accessories. Join Bre Pettis and Make Magazine for this great craft project.

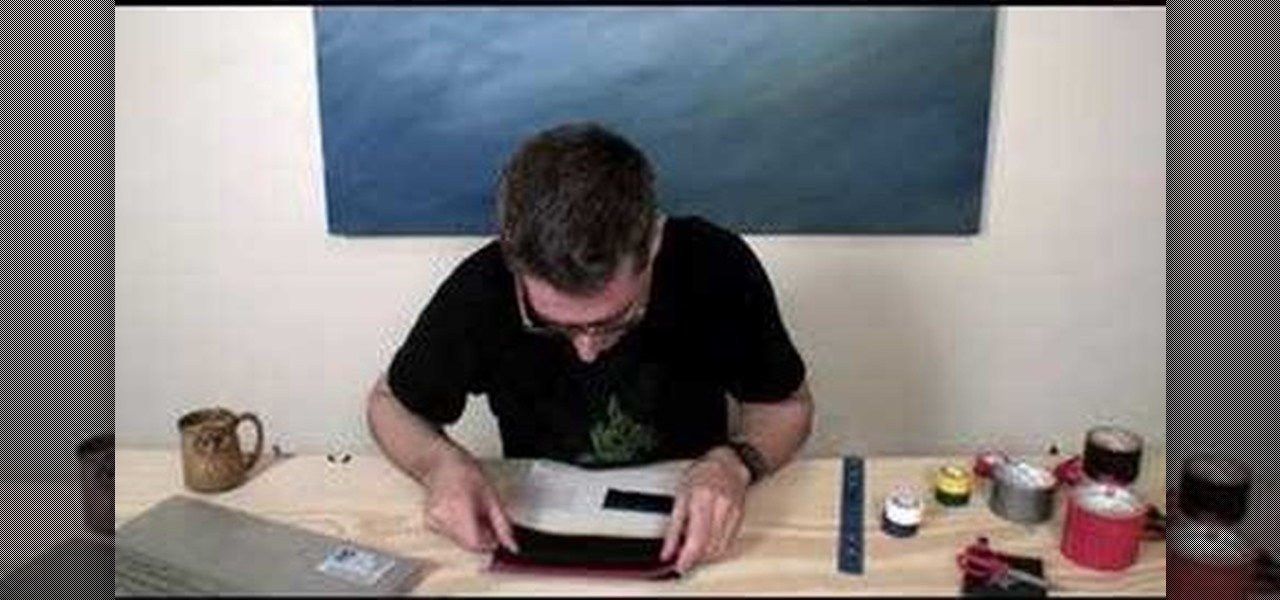
Even kids can follow along with this Weekend Project. Make Magazine and Bre Pettis put together this wallet using scissors and duct tape. You can also use a hobby knife, book binding tape and gaffers' tape if want a fancy wallet.
This video looks at some of the issues around constructing sundials. Included are step by step instructions for building a horizontal sundial and instructions for setting it up. This activity supports both science and math curriculums. A good project providing an opportunity to use protractors and rulers. The sundial example in this video is designed for use at latitudes close to 45 degrees north.
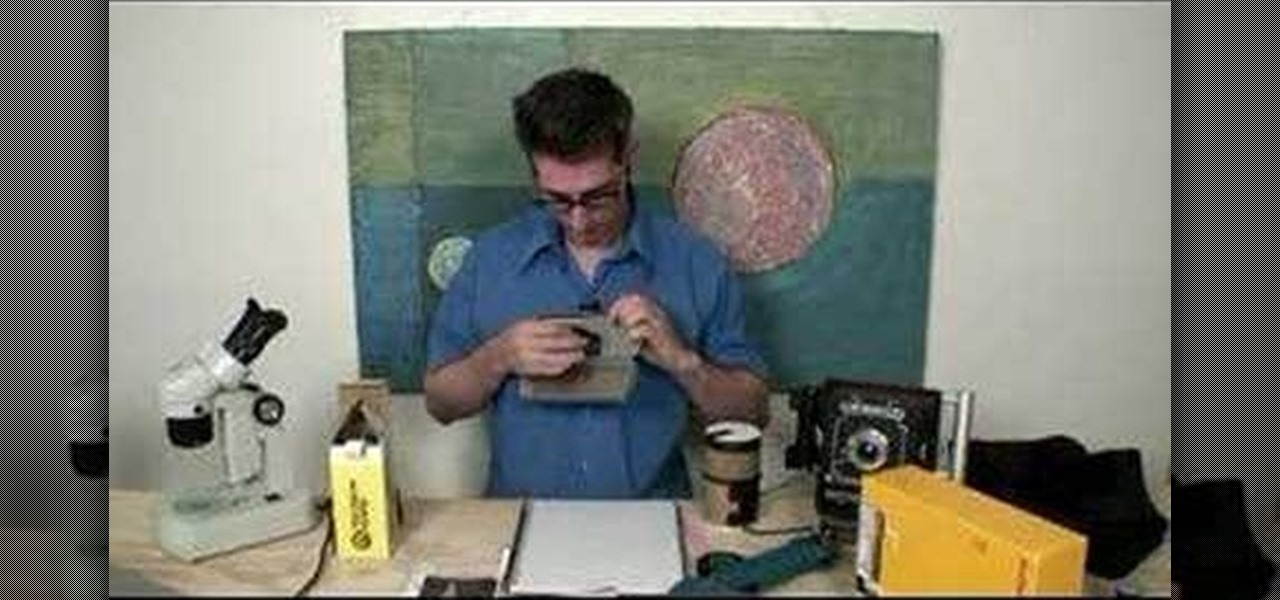
Learn how to take photographs without a lens and develop film in your bathroom. Taken from the masters of the "weekend project", Bre Pettis and Make Magazine, you are sure to get some entertainment out of creating a camera and darkroom. Make sure to download the PDF to get all the details.
With its 3D engine being responsible for approximately 60% of augmented and virtual reality experiences, Unity is continuing to place a premium on tools that not only keep developers working in its development environment but also make their workflows easier.
Much of the excitement around the HoloLens 2 has moved on to many wondering when we'll finally be able to get our hands on what is now the best augmented reality device on the market.
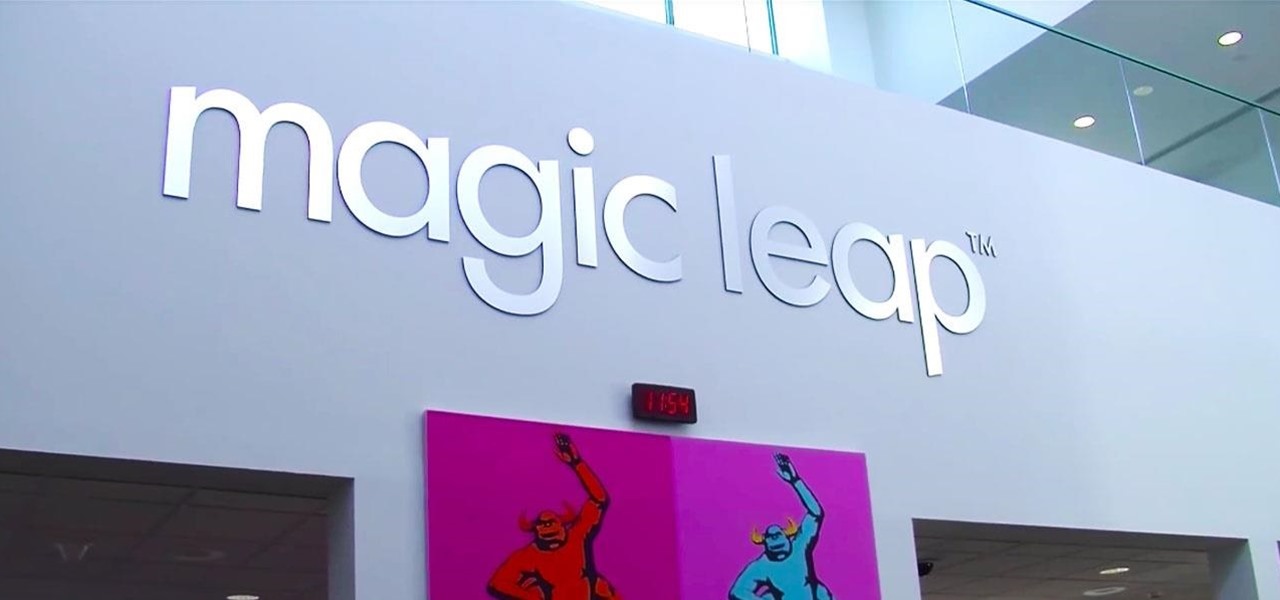
The long guarded veil of mystery surrounding Magic Leap for years was finally lifted last year when the company revealed its Magic Leap One device.
At its annual MAX event kicking off on Monday in Los Angeles, Adobe gave the audience a new preview of its forthcoming Project Aero augmented reality authoring tool during the keynote presentation.
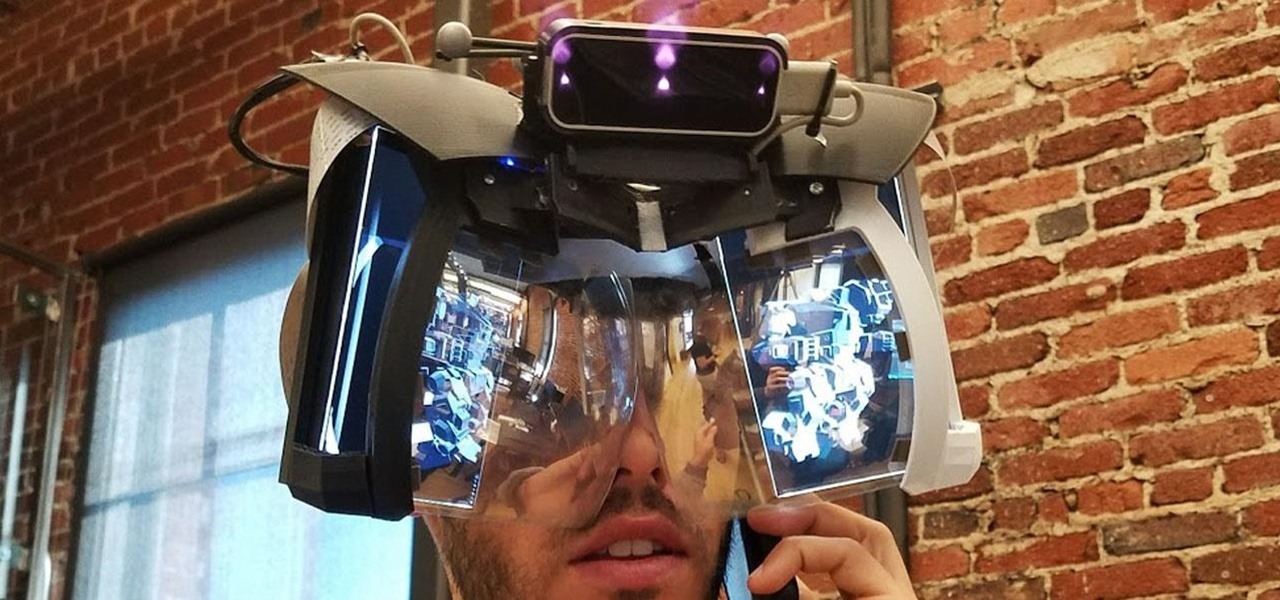
If it had come out just a week earlier, around April 1, no one would have believed it. But it's true, Leap Motion has developed its own prototype augmented reality headset, and it looks pretty wild.
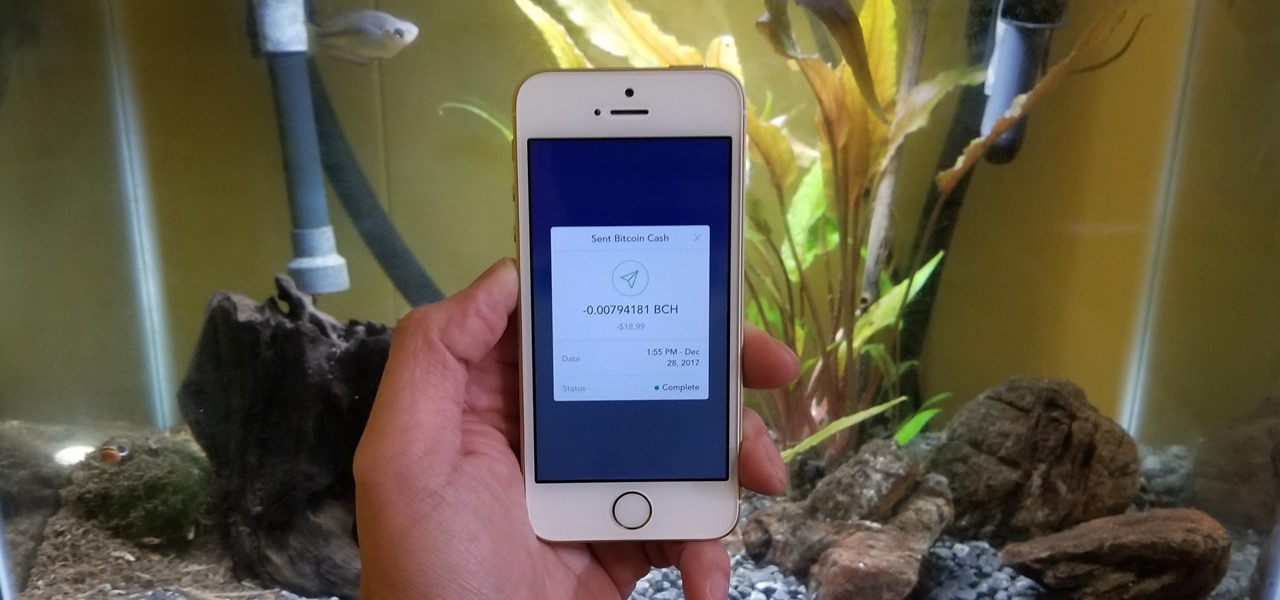
With all the hype surrounding meteoric rise of Bitcoin (BTC), Litecoin (LTC), Ethereum (ETH), and Bitcoin Cash (BCH), it's easy to overlook the fact that you can send and receive cryptocurrencies as a form of payment. And thanks to Coinbase, sending and receiving digital coins couldn't be any easier.
While the iMovie application for Mac has a few more bells and whistles, Apple's mobile version of its video-editing program is jam-packed full of features and more intuitive than its big brother. Still, before you dive right in to become a movie editor on your iPhone, it's good to know the basics first.
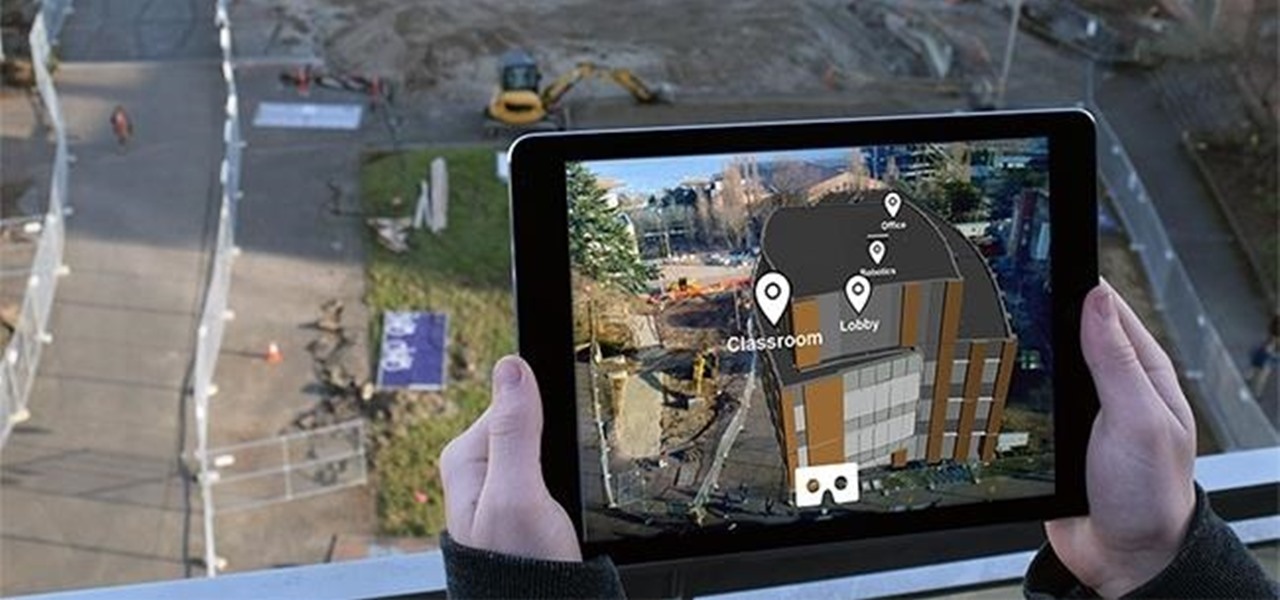
It's fitting that students at the University of Washington can catch a glimpse of the new, 135,000 square-foot computer science building in augmented reality before construction is completed.
With significant advancements in the treatment and prevention of HIV, you'd think the stigma surrounding the deadly virus and AIDS, the syndrome the infection causes in the body, would have lessened. Unfortunately, a new project looking at conversations on Grindr — a social networking app for gay, bi, curious, and queer men — has shown that this stigma is very much present.
Microsoft has the HoloLens and Google has their money on Magic Leap (as well as their own Tango and Cardboard, among others), but we've heard next to nothing about how Apple plans to enter the virtual/augmented/mixed reality space. A new patent offers some clues.
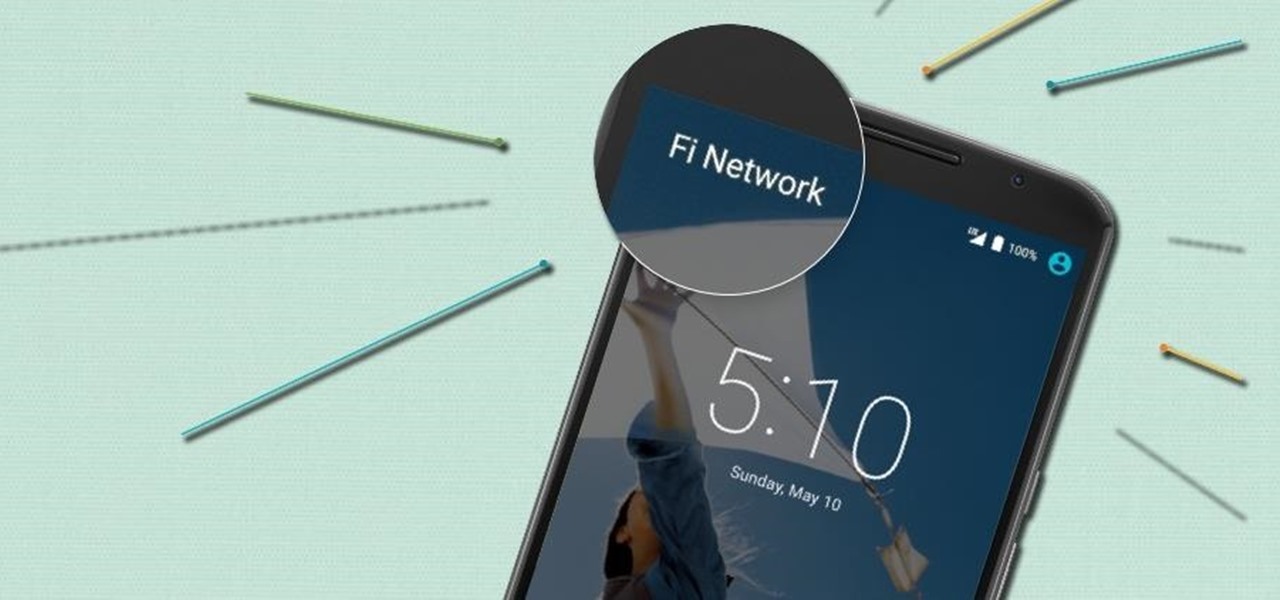
Rumors have had Google making a foray into the mobile carrier world for quite some time, but today, the Mountain View tech giant finally made things official. The new service, dubbed Project Fi, will be a Mobile Virtual Network Operator, or MVNO, that uses existing Sprint and T-Mobile cell towers.
"Millions of us have smartphones with the power to speed up research that will benefit billions of people around the world." - Professor Francois Grey
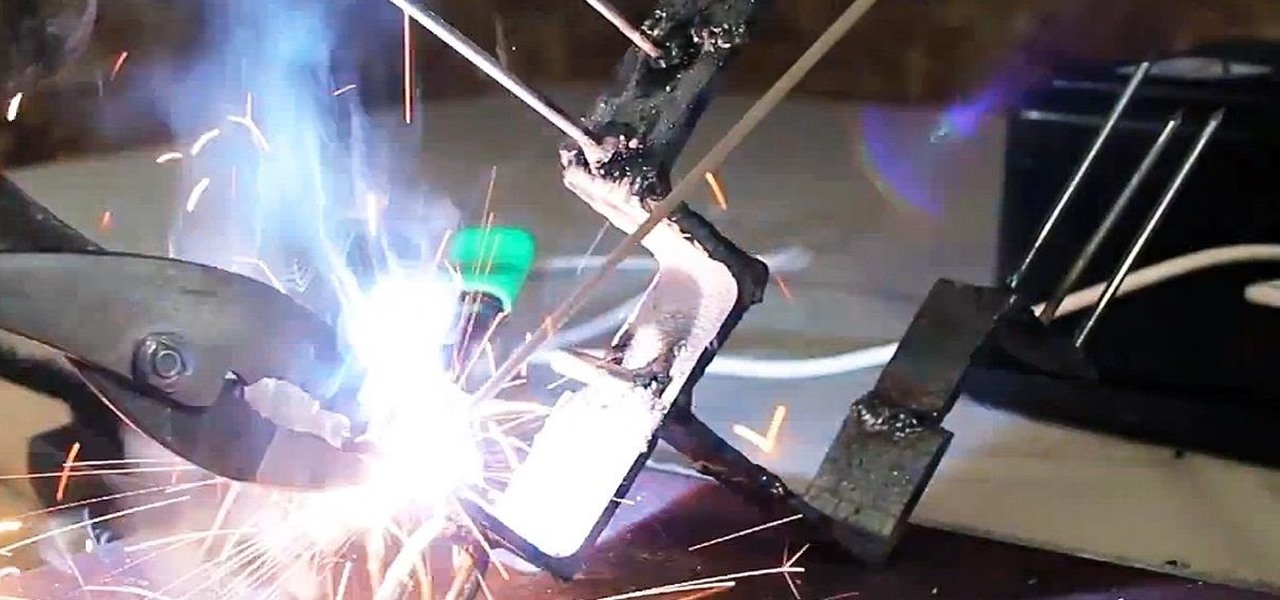
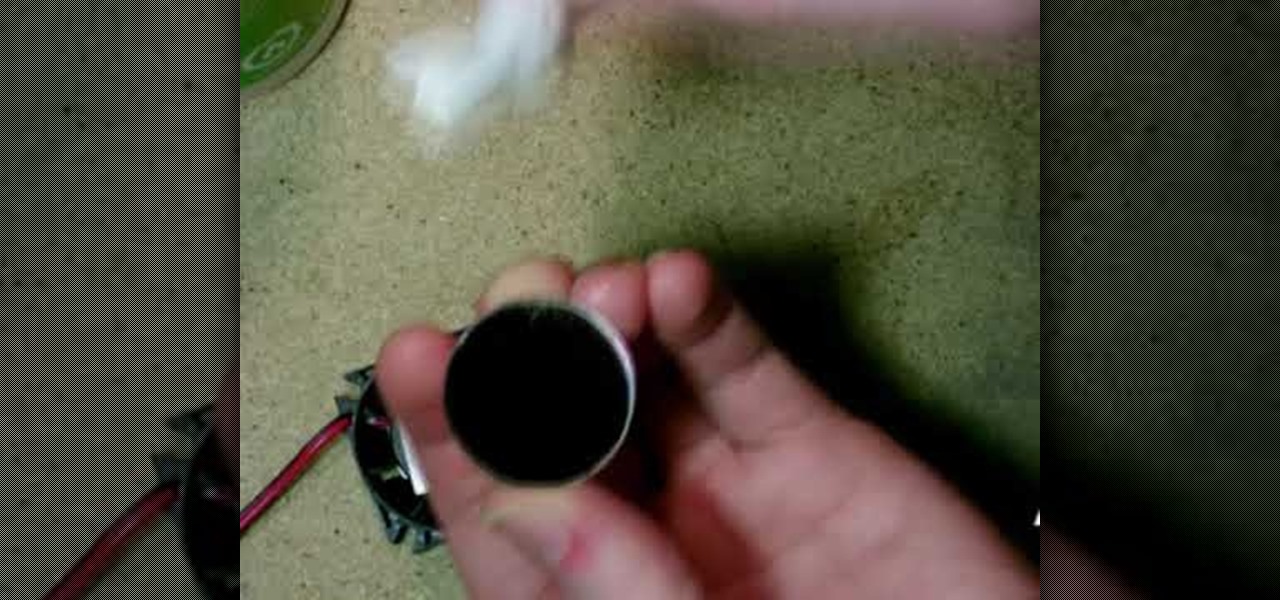
Lurking inside your old junk microwave is an abundance of useful parts that can let you melt metal, spot weld, and make electrifying Jacob's ladders. You can even make a powerful AC arc welder, perfect for making hard-to-solve puzzles and even makeshift weapons for the zombie apocalypse.
Remember those old vinyl records? Remember jumping on the 8-track bandwagon? Switching over to cassette tapes? How much money you spent converting your music collection to compact discs? To MP3s?
Science investigatory projects suck, or at least seem to at first. But you shouldn't let school drag you down. Instead, use your homework assignment as an opportunity to solve a problem you've always been interested in. And it doesn't hurt if the end result is eco-friendly, either.
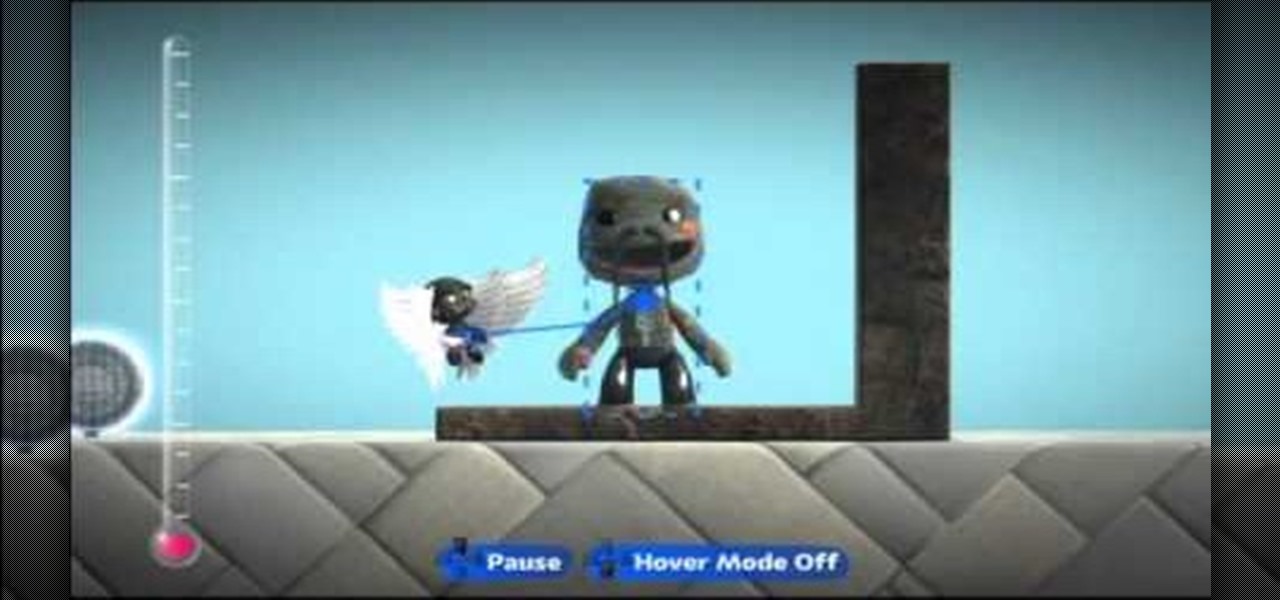
Unlocking all the cool costume bits for your Sackbot is one of the most fun parts of LittleBigPlanet 2, but unlocking the same pieces for multiple Sackbots or seeing someone online with clothes you like and not being able to get them sucks. This video will show you how to share costumes between Sackbots, keeping you in style for good.
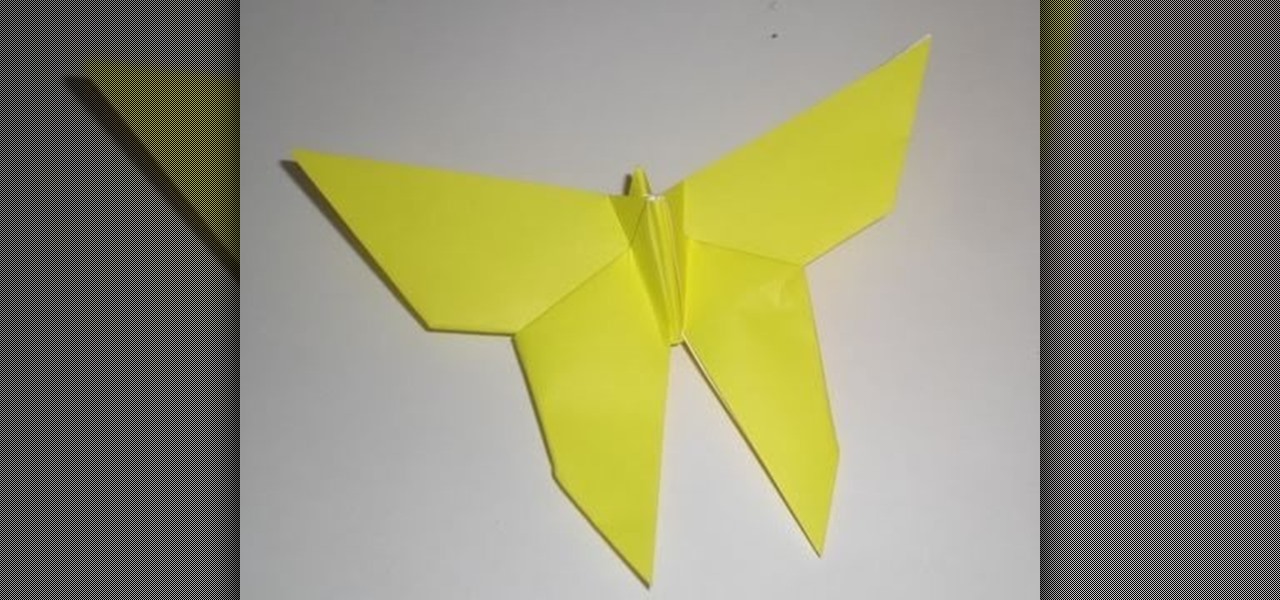
You don't need to be able to create crazy 100-side modular spheres to make beautiful origami projects. In fact, a great portion of the more popular origami projects are on the easier side (good news for sausagefingers like us).
So we have to admit something. We're not entirely sure what this project is. It looks like one of those Sweedish straw ornaments you hang on the tree during Christmas, but then again it could also just be an abstract representation of the sun.
To spray paint graffiti, you will need the following: 2 cans of spray paint and a mask. You will need to have an idea of the design you want to paint, before you begin this project, because you will need to work quickly. Put on your safety/protective gear. Paint an outline of your design, first, with one can of spray paint. Then, you will want to strategically fill in the design. One can is primarily for filling it in and achieving light and shadow. Therefore, you will need a dark shade and a...
If you are interested in taking up woodworking, this next video tutorial is very helpful. In it, you find out how to use and tune up a hand plane. This tool is a very common one in woodworking and is used for all sorts of different reasons. If you try using one that is dull, you have a good chance of messing up your wood project. USing incorrectly will also damage your project as well as yourself. So check out this video tutorial, pay attention, and good luck!
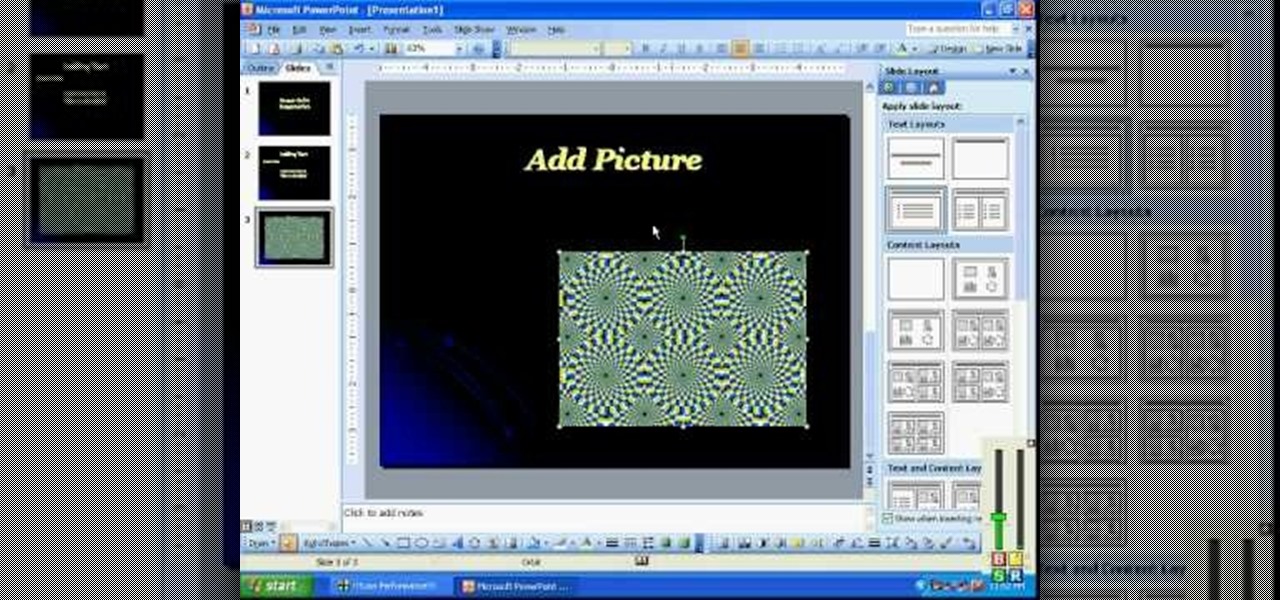
In this video, we learn how to create a PowerPoint presentation. Start off by adding in the title and subtitle of the project. After you do this, you can start to change the fonts and colors, as well as add pictures to the background and add transitions to the next page. When you're done with this, go onto your next page and start to add in all the information you need to on the following pages. When you are finished, you will be able to save your project and then use it for a presentation. T...
If you like homemade light shows, this is one hell of a way to do it. AP Digital light shows you how you can hack a small fan into a special mirror used to create a poor man's PIC-based laser show. It's an experimental method of balancing a fan-mounted acrylic mirror for spirograph project.
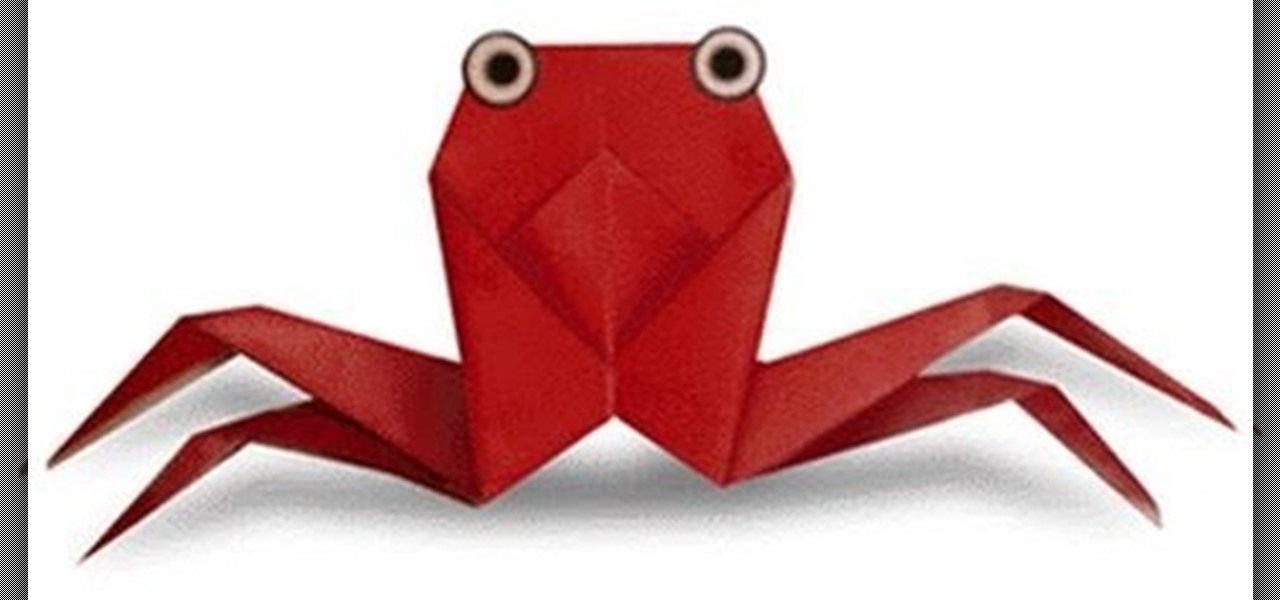
Feeling crabby doesn't always have to be a bad thing. In fact, if you're an origami artist sometimes feeling crabby simply means you're in the mood for folding some teeny crabs! Crabs are a great project for summer and also take minimal effort and expertise to fold.
Our little sister nearly burst our eardrum when she squeled in glee at seeing cute as a button baby penguins tap dance and jive in the movie "Happy Feet." Baby penguins, being rather spherical in shape and super fuzzy, often become a little girl's favorite animal, and it's easy to see why.
In this tutorial, we learn how to use task types in MS Project 2007. First, open up the form view of all the different tasks you have. Now, look at the unit task type and see if it's effort driven or fixed units. Now, change what you want the task type to be and then click on the next button. Assign a second resource if you need to, then change the duration if you need to as well. Continue to change the task types depending on what durations you have then make sure to save this. Double check ...
In this tutorial, we learn how to set up work resources in MS Project 2007. First, go into your chart and click on the resource sheet from the file menu. Now, you will be able to change the different sections that show up on this sheet. Go through the different columns to change the information and type in additional information, the more you insert the better. When you click on the tabs, you will have more options where you can enter in notes and make custom fields. Go through the entire she...
In this tutorial, we learn how to set up the calendar in MS Project 2007. First, open up your calendar and then click on the "work week" tab. Now, set your working times into the slots for each different day. Make sure you set your start and end times correctly. Now, go to options and change the default start and end times so they match your working calendar. When finished, save this and then start to enter your task information to each different slot. When you enter this, the start and finis...
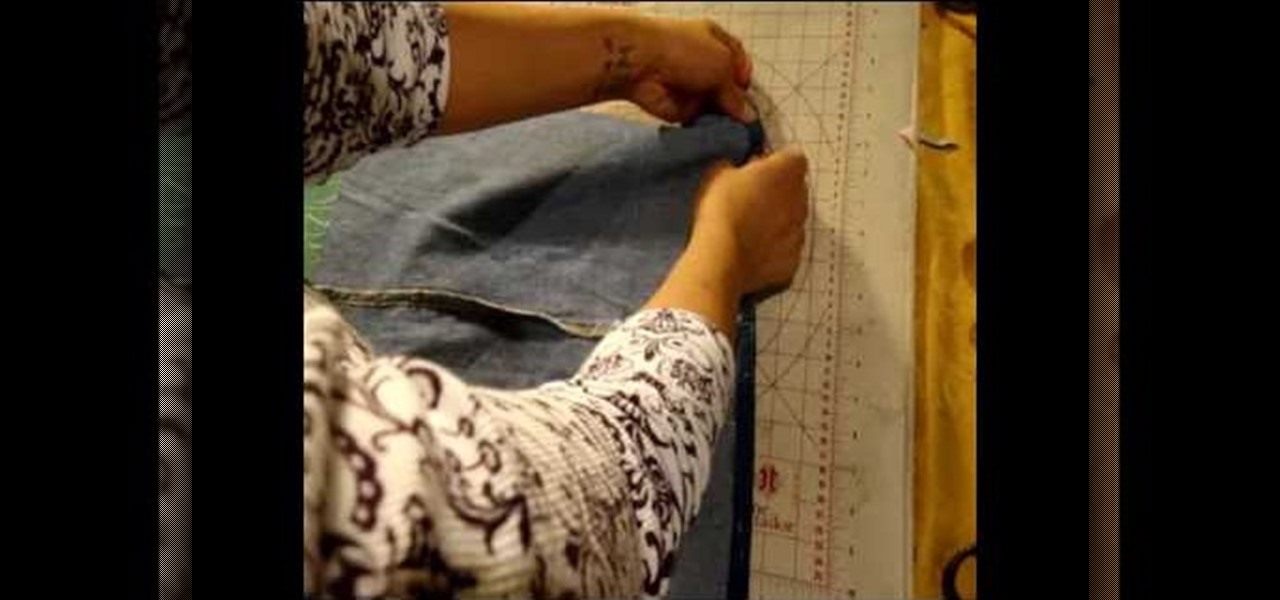
Don't want to throw away that raggedy pair of old Levi's with small paint stains and random tears all over because it's stuck with you longer than your trusty 12-year-old jack russell terrier? We totally understand. Continue to use your favorite pair of blue jeans by watching this video.
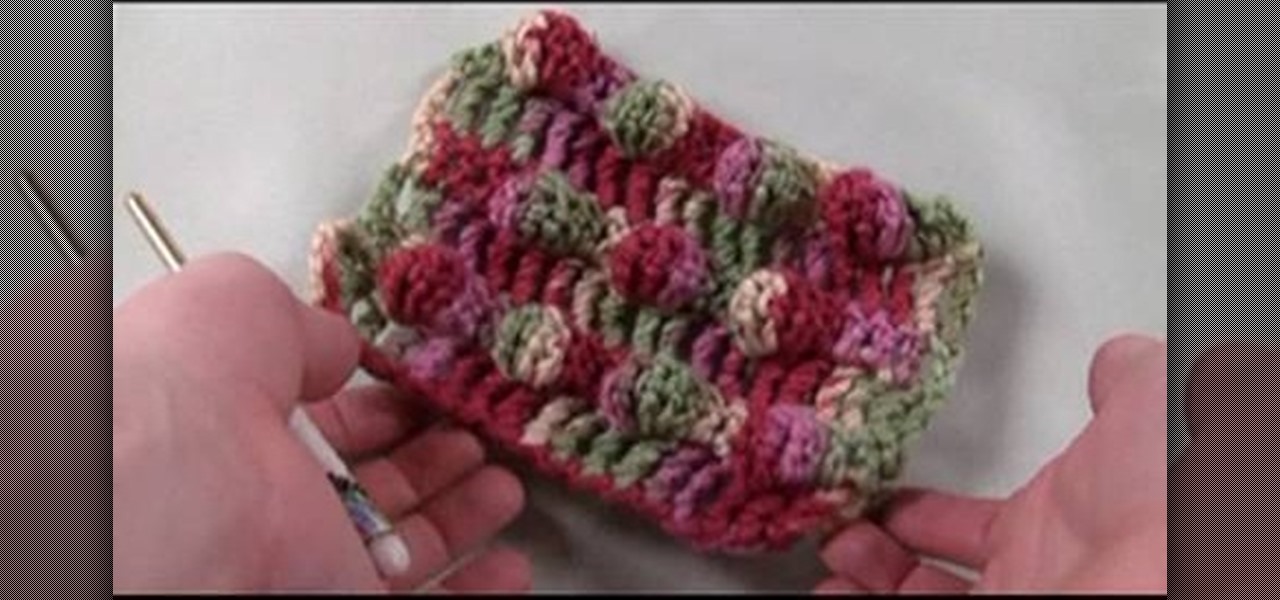
Okay, so just to be clear, this is not a crochet tutorial for crocheting a stitch that resembles your new Blackberry Pearl (though, admittedly, that would be pretty damn awesome).
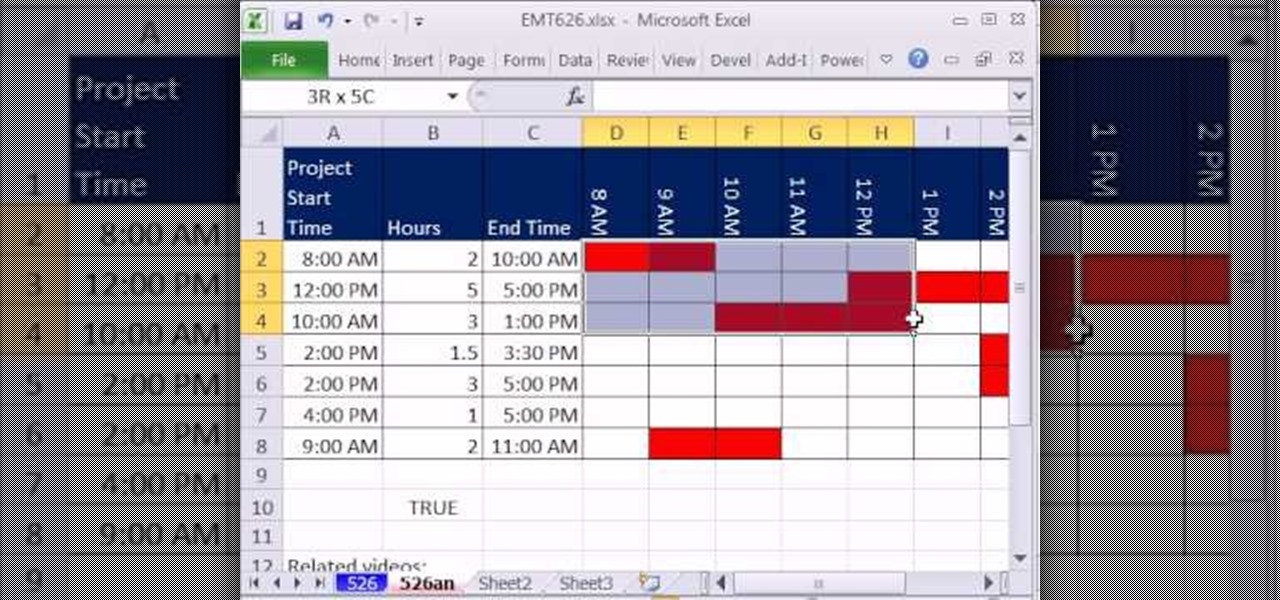
New to Microsoft Excel? Looking for a tip? How about a tip so mind-blowingly useful as to qualify as a magic trick? You're in luck. In this MS Excel tutorial from ExcelIsFun, the 626th installment in their series of digital spreadsheet magic tricks, you'll learn how to create a Gantt Chart to show the amount of time a project takes during a day.
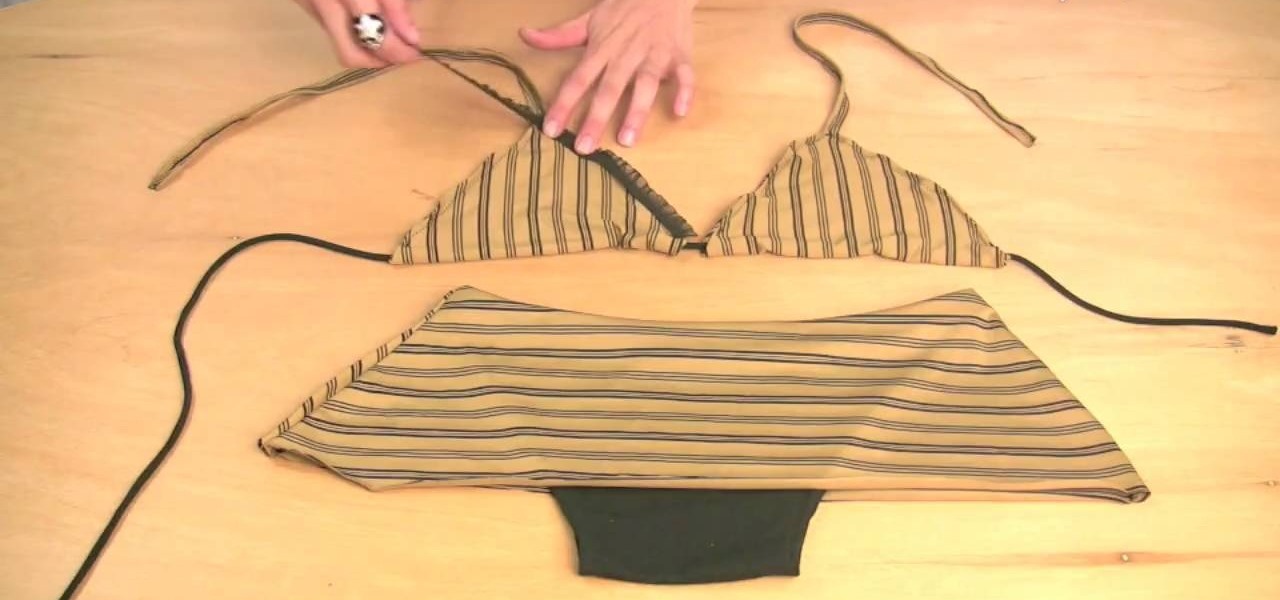
Why would you blow upwards of $200 or $300 on a bikini when you can craft a perfect good one yourself? Don't believe us? Then watch this video by fashion DIY expert Gianny L to prove yourself wrong.