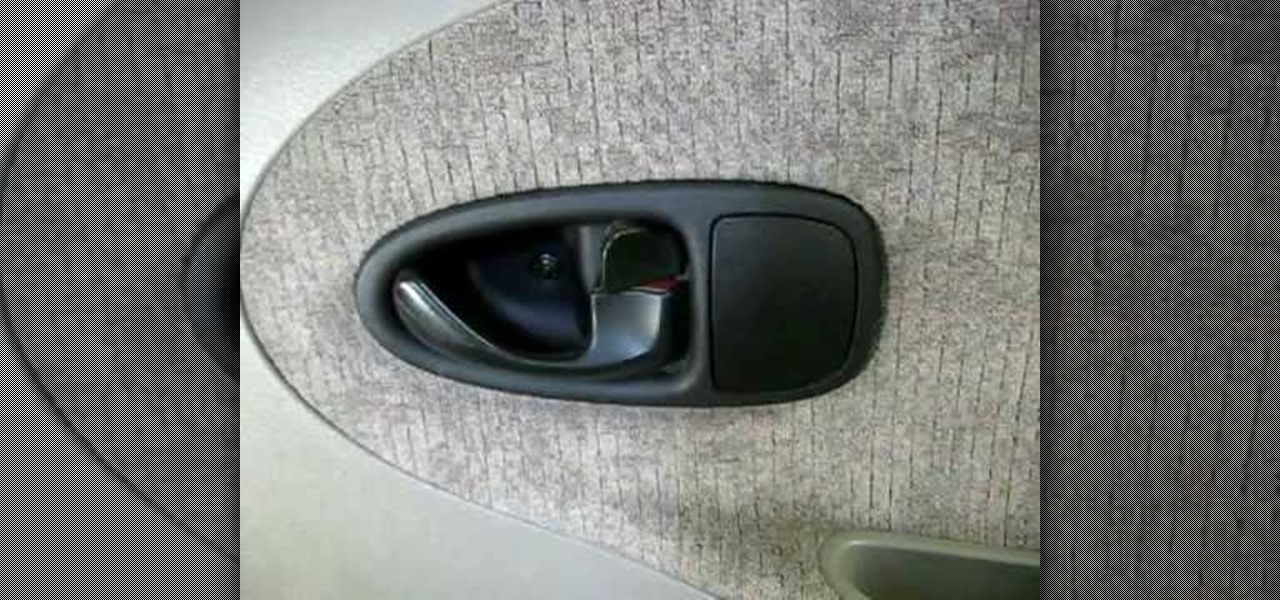
In this tutorial, we learn how to remove a rear inside door panel from a Saturn S series. First, open the door and take off the handle to the door, then remove the screw inside of that. After this, unlatch the side of the door and unscrew the bolts from this. Now, go inside the side pocket of the door and remove the screws from that, then set aside. Remove the foam padding against the inside of the door, then loosen up the wires on the inside of it. Now you will be able to remove the door and...
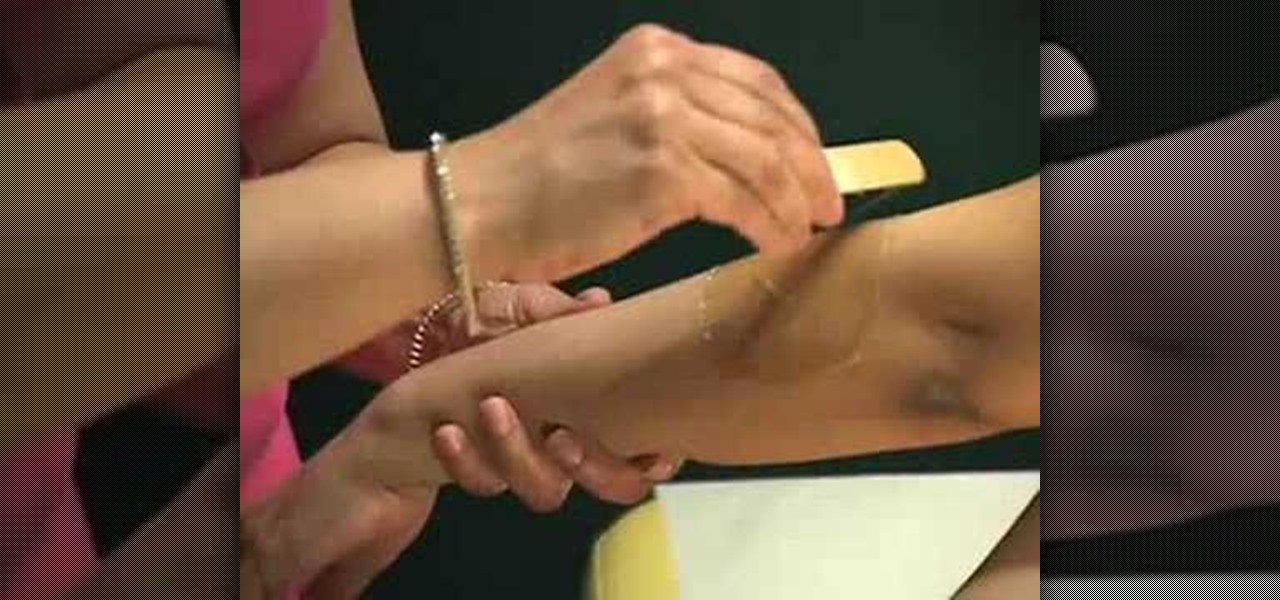
In this video, sugaring specialist Anjali teaches us how to use sugar wax, which is a natural and slightly more gentle alternative to normal wax, to remove unsightly arm hair. Composed only of three ingredients, sugar, water, and lemon juice, sugar wax removes hair without drying skin out like normal waxes.

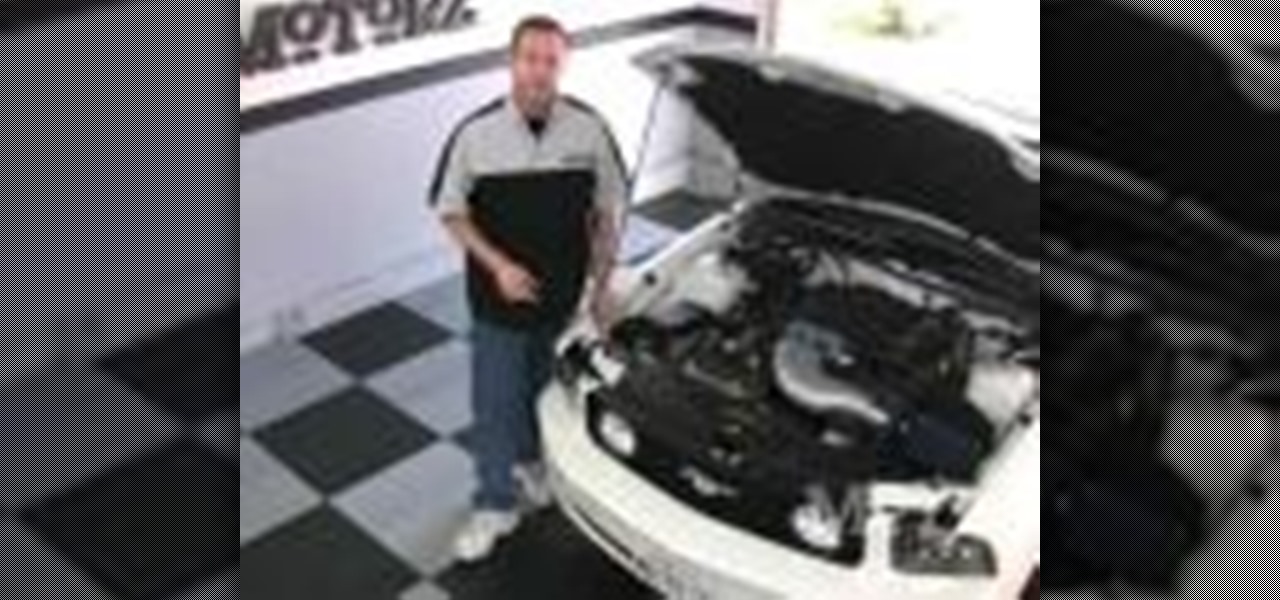
In this tutorial, we learn how to perform a brake upgrade on a Ford Mustang. To begin, remove your lug nuts and jack up the rear of the vehicle. Next, remove the brake caliper and all bolts around it. Remove your brake pads and remove more bolts from the back as well. Now, take off the metal ring around the rotor, then slide the rotor off as well. Put on your new rotor after this, then reinstall your bracket and remove the brake fluid from the car. Put all the bolts and parts back into the ca...
In this tutorial, we learn how to install a headlight upgrade on a Ford Mustang GT. To start, remove the radiator cover and the clips around it. Now, take a 10 mm socket and remove the bolt next to the headlight. Now, turn your wheel to remove the screws around the headlight. Next, there will be 2 (10mm) bolts you will have to remove, as well as a fender lining. Disconnect your marker lights by pressing on the tabs on both sides of the car. Lay out a blanket to lay your bumper on. Now, remove...

It can be very difficult when trying to remove ink stains from pieces of clothing. There are many different ways to help remove the stain, but each one works differently. So in this helpful tutorial, you'll find out one way to helping remove ink stain on your clothing. So check it out and good luck!
In order to change a flat tire on a motor scooter, you will need the following: the wrench that came with your scooter, a tire tube, a socket wrench, an allen wrench, a standard wrench, and a Phillips head screwdriver.

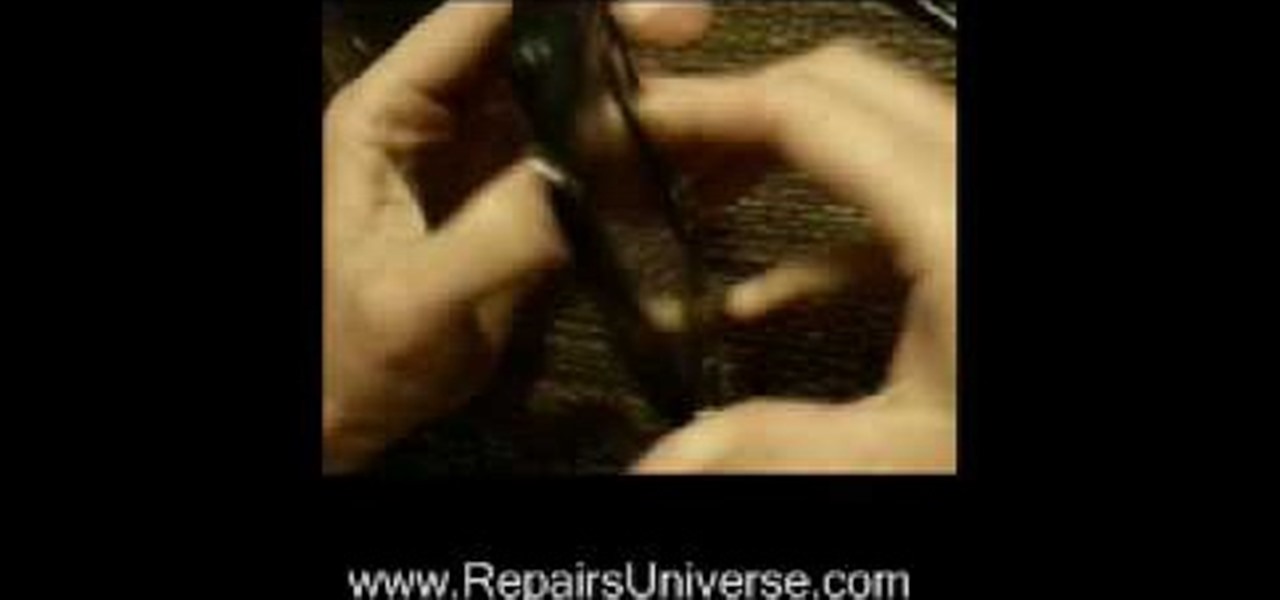
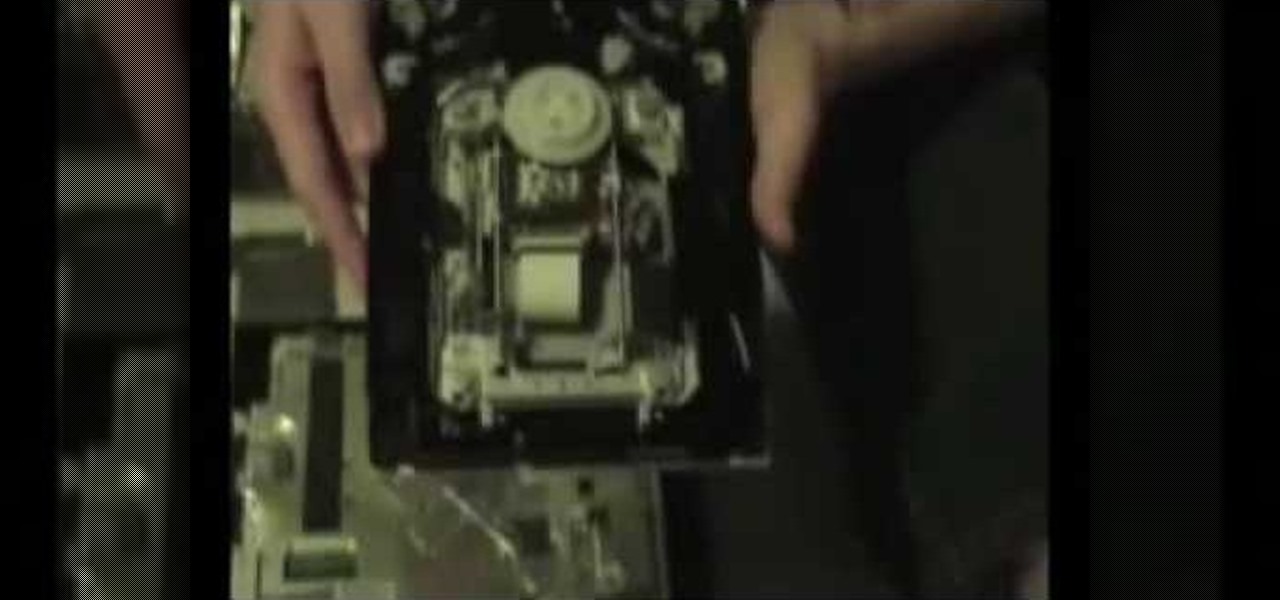
Repairs Universe demonstrates how to remove a Sony Ericsson LCD screen. First, remove the battery from the device. Use a safe pry tool and run it along the side of the phone to unclip the clips and release the top cover. Then, slide the phone forward and release the top cover. Next, remove the keypad from the device. Then, remove the LCD screen by prying the clips oven with the safe pry tool. Use the pry tool to pop the pop clip to fully remove the LCD screen. The new LCD screen is now ready ...
In this Electronics video tutorial you will learn how to repair the LCD screen on the HTC Tilt. Remove the stylus pen, back cover and the battery. With a T6 torque screwdriver, remove the three screws. Using a safe pry tool, pry off the top part of the cover. Take out the small piece of rubber as shown in the video and remove the screw below it with a Phillips screwdriver. Then remove one screw on top left corner with the T6. Using the safe pry tool, release the clips and lift off the next la...
How to fix and repair the LCD screen on the HTC Touch
In this video tutorial, viewers learn how to remove the fan assembly from a G5 i-Mac computer. This process is very fast, simple and easy to do. Begin by laying the i-Mac screen face down and remove the screws on the back cover. Then remove the back cover of the screen. There are 3 fans inside the i-Mac. These fans are not supported by any screws. Just simply lift up each fan to remove it. This video will benefit those viewers who have an i-Mac computer and would like to learn how to remove t...
To take apart a PS3, you will need the following tools: Phillips-head screwdriverPliersTiny Phillips-head screwdriversTiny flat-head screwdrivers
Bob Harris of decorative concrete institute explains how you can remove your tiled or carpeted flooring for a concrete substitute. He suggests when your removing carpeting that it can be very heavy and advises you to hire someone who can lift and carry it out, or rent a dumpster for easy take away. He states that after the carpet is removed you'll need to remove the adhesive from the floor. You can do this by stripping or grinding, and at other times the use of harsh chemicals may be needed. ...
How to remove acrylic nails with a soak
This video shows how to take apart a Play Station 3 (PS3) in order to clean the disc reading lens. First locate the sticker that says "void if removed" and remove the plastic cover from this point with a screw driver. Once this cover is removed there is a second cover which is removed by unscrewing the nine screws which hold it into place and rotating the cover towards the front of the device. Disconnect the disc housing on the right by pulling out the smaller cable then remove the five screw...
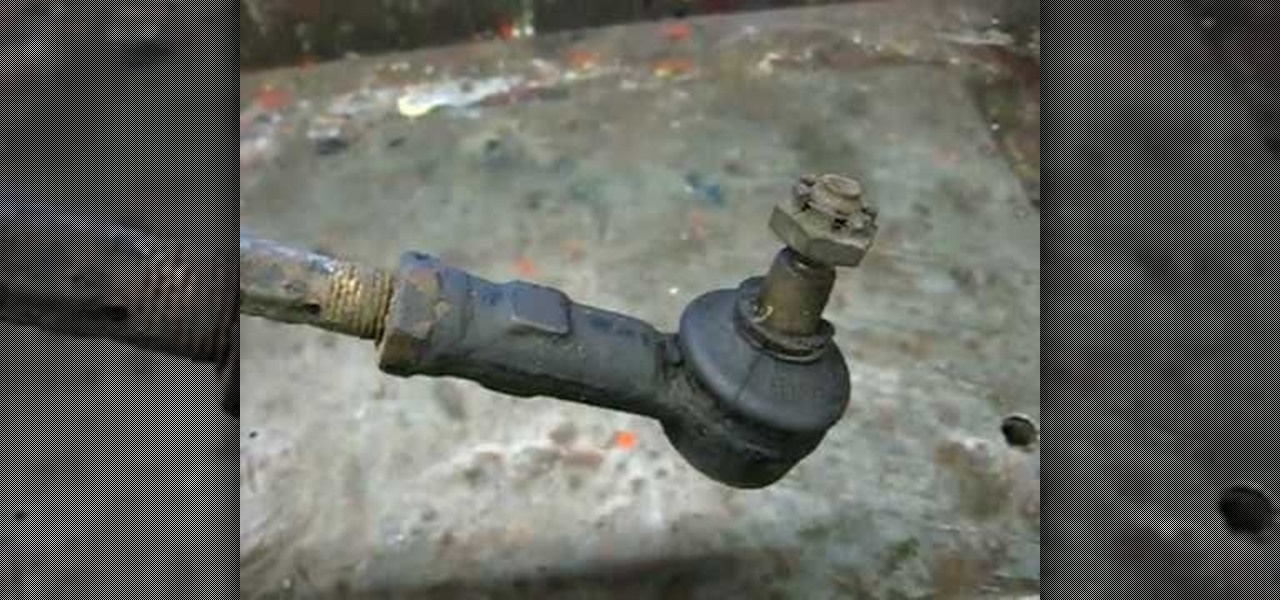
Richpin demonstrates how to remove the inner tie rod end on an automobile. First, get the car up in the air and support it by jack stands. Remove the wheel assembly.
Richpin demonstrates how to clean the throttle body on a Saturn S-series car. First, remove the accelerator cables using a tool like a pen. Next, remove the top hose. Remove the wires from the throttle position sensor. In the back are wires for the idle control valve. Remove them. Remove the 10 millimeter nuts and bolts and brackets by the EGR. Once the hardware is removed, tap the top with a screwdriver and the throttle body will come off. From the throttle body, remove the throttle position...
In this video from solvingtime we learn how to remove objects from photos using Paint. To get this program go to to install it. He uses the clone stamp tool to remove things. First he zooms in on the object he wants to remove using the magnifying glass. Then click the stamp which will switch to the clone stamp tool. Use the bracket keys near the letter P on the keyboard to adjust brush size. Then while holding the control key click once on an area near the object you wa...
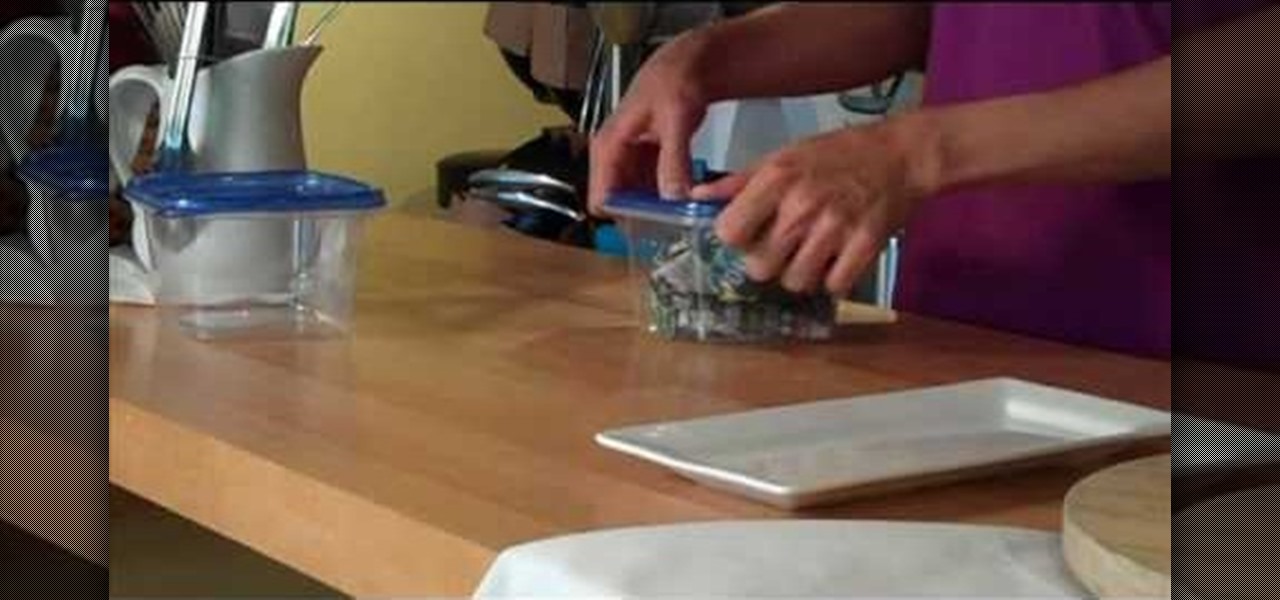
This video describes how to remove unwanted odor from plastic storage containers. The video shows three easy steps to remove odor. Firstly, thoroughly wash the plastic container as you usually would. After it dries, place a few pieces of crumpled up newsprint inside of the container and close the lid. Leave the newsprint in the container for a couple of days before removing the paper. After you remove the paper, simply wash the container again and the odor should be gone. A viewer would benef...
Check out this instructional electronics video that illustrates the simple process of removing the foam padding of an iPod Photo. In order to get the case to close when installing the battery you may need to remove some of the blue foam padding from the underside of the hard drive. This video from iPodJuice demonstrates how to safely remove the light-blue foam from the bottom of the hard drive on an iPod Photo.
Stock are very easy to make and even easier to remove the fat from. In this how to video Chef Paul talks about removing the fat from your cooking stock. Watch and learn how to make your broths just a little healthier by removing the fat that gathers at the top.
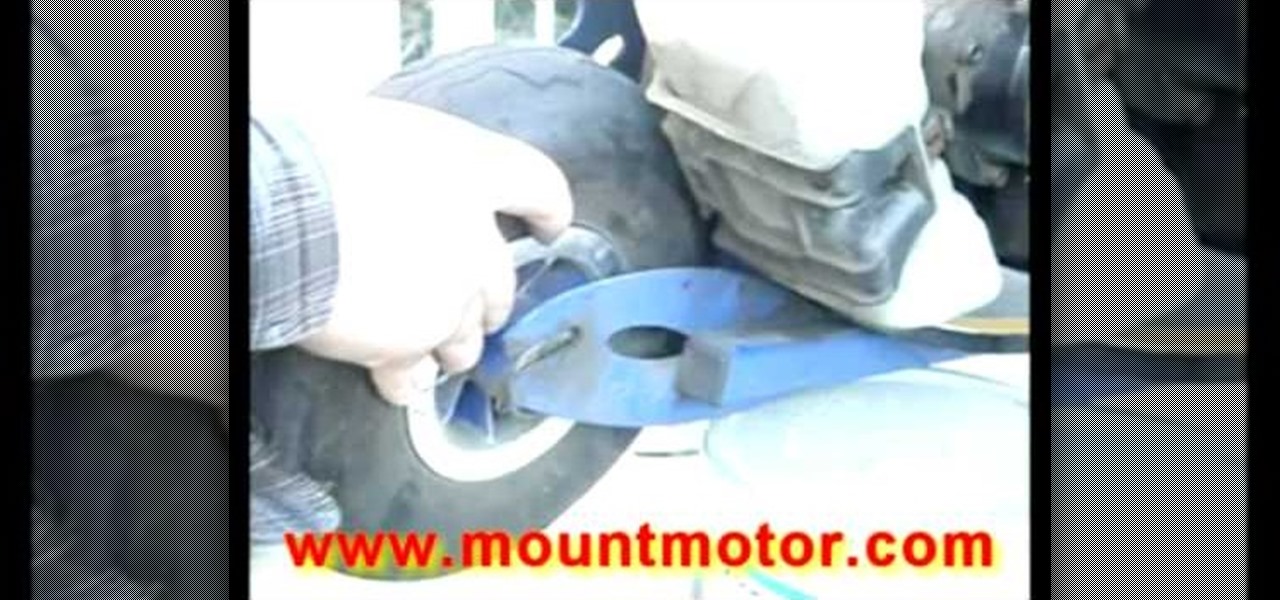
This video is on how to install and remove a clutch bell assembly for a nitro radio controlled engine, and some simple troubleshooting tips. It will show you the proper way of removing the flywheel, installing and removing clutch shoes, and how to ensure that the clutch bell (CB) spins freely. You can use this on any RC kit, and will also help racers in the pit and bashers alike.
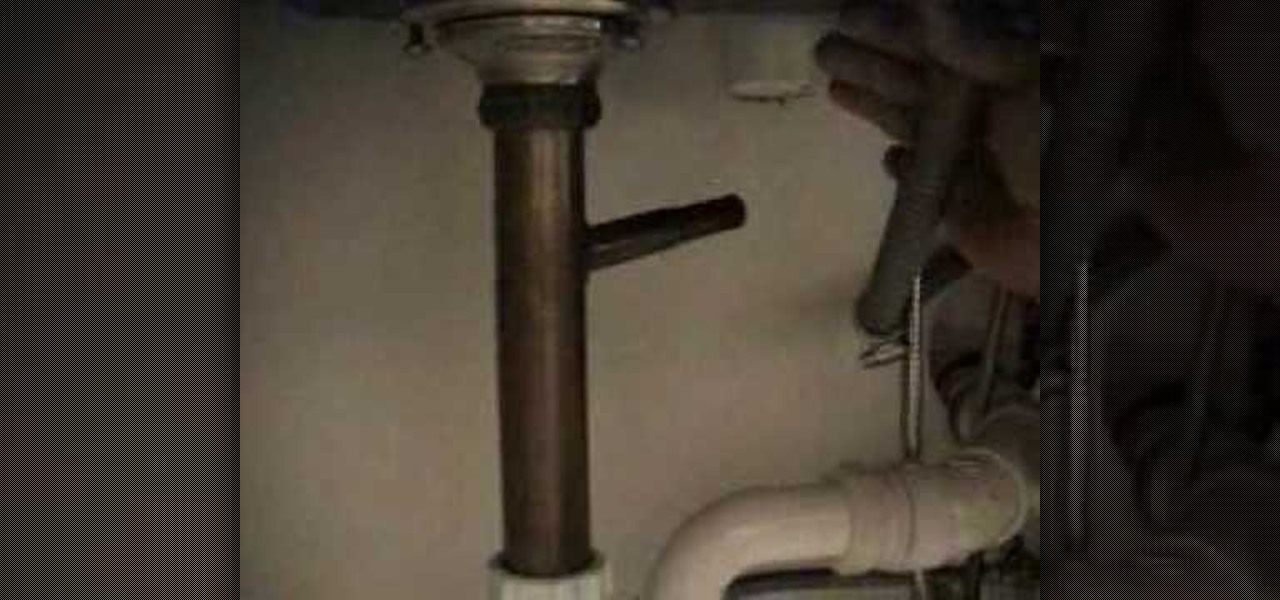
Big Tony the plumber shows you how to remove a dishwasher. Use an electrical tester you can buy from any home center. Watch and learn how to make sure when it is safe to remove the dishwasher.
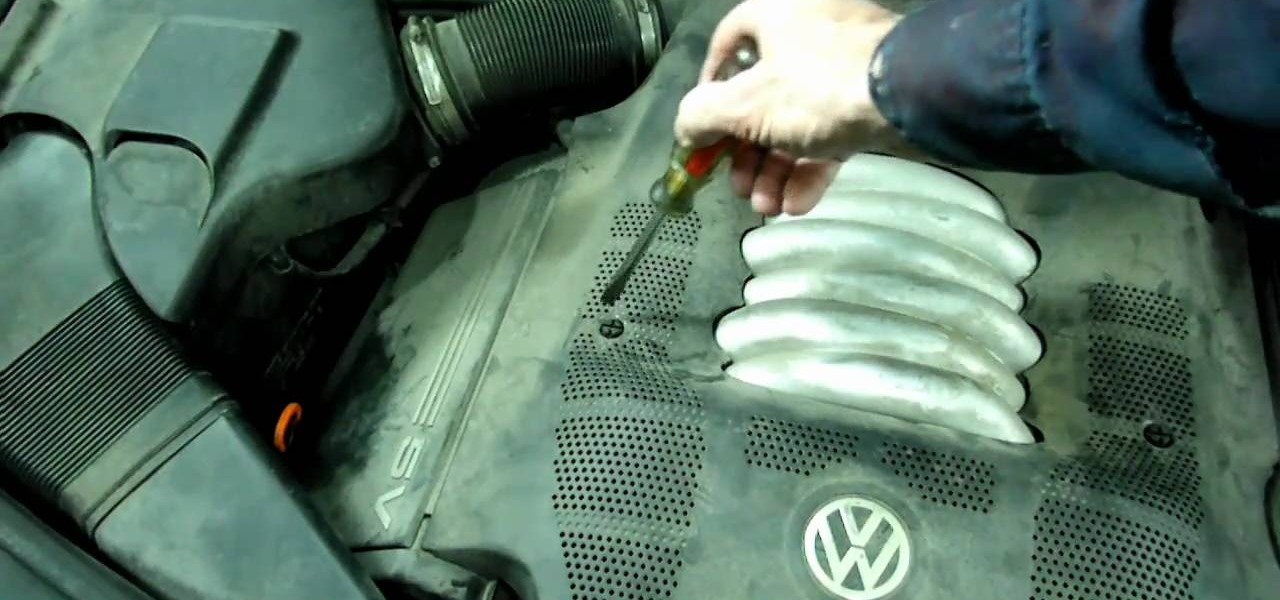
This guide walks you through the replacing of a coolant temp sensor on a Volkswagon by showing you step-by-step instructions using a 2.8L Volkswagon Passat with a 6 cylinder engine. Start by removing the plastic engine cover, disconnecting the electrical connection, and removing a large hose so that you can gain access to the air duct.
This guide will help you remove the heater from a Chevrolet truck - though the featured automobile is a 1979 pickup truck. If there's a bad smell coming from the heater, the guide will also help you learn how to safely clean the vehicle's heater with disinfectant, gloves, and goggles.
MS Removal Tool is the latest in the long line of malware programs that pose as official antivirus software and actually put virus and other tracking software on your computer. This video will show you how to remove MS Removal Tool from your computer and get it working good again.
Palladium Pro is one of the newest rogues making it's way around the internet, posing as antivirus software and then infecting your computer with all sorts of nasty malware. This video will teach you three different ways of removing Palladium Pro from your PC completely and getting your precious machine back.
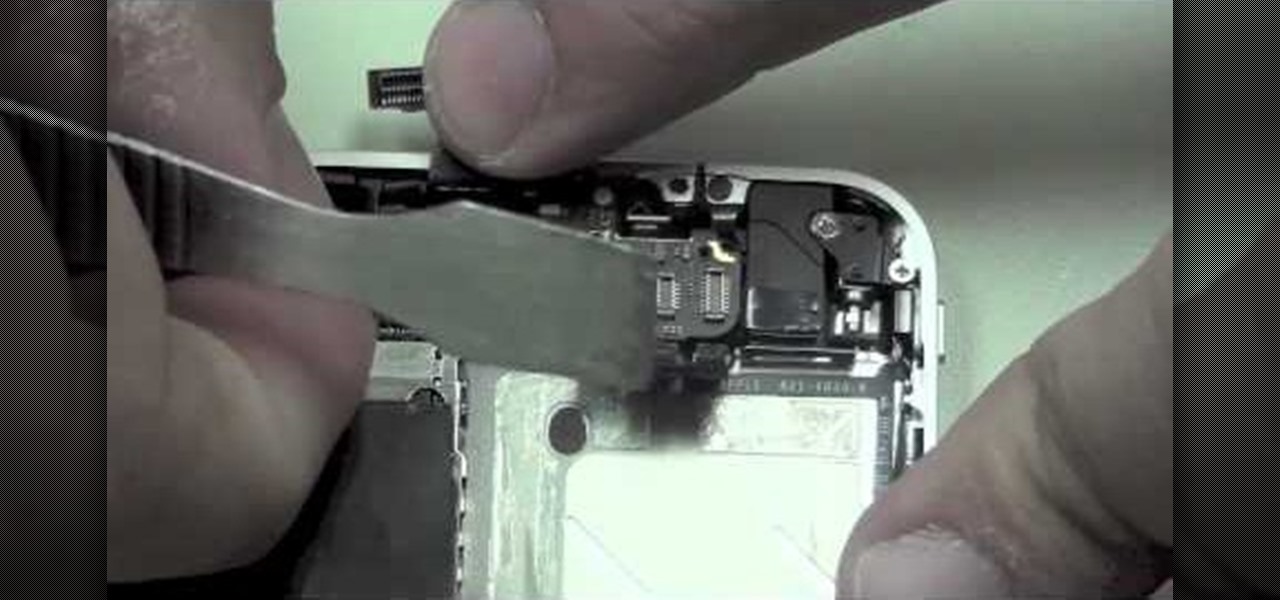
Well, you've opened up your iPhone 4 and taken the battery out. Now, you want to remove the LCD display and the logic board and the phone's proximity sensor. Apple doesn't like you doing it, but this great, step-by-step guide shows you clearly just how to do it.
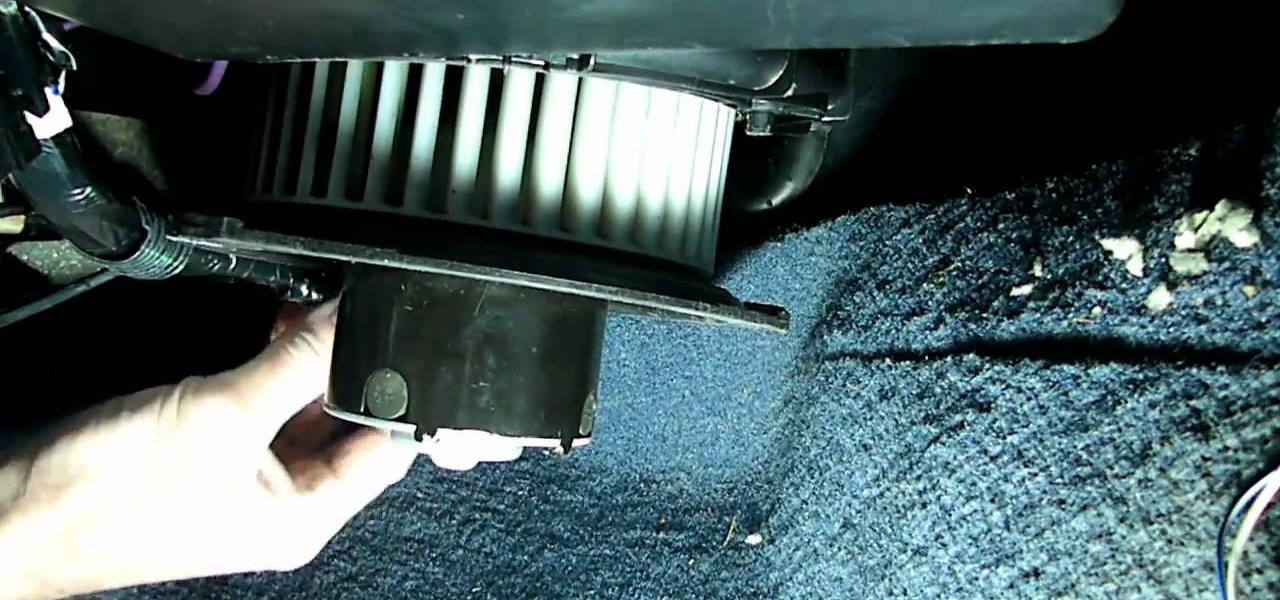
The blower motor on older American cars were not always very well-made, and most of them are bad now. This video will show you how to check out your blower motor and remove it if need be, which is harder than it should be really.
The CV axles (halfshafts) on your front-wheel drive car can develop a rip or leak pretty easily, leading to noisy driving and eventually axle unreliability. Watch this video for step-by-step instructions on how to remove and install a CV halfshaft.
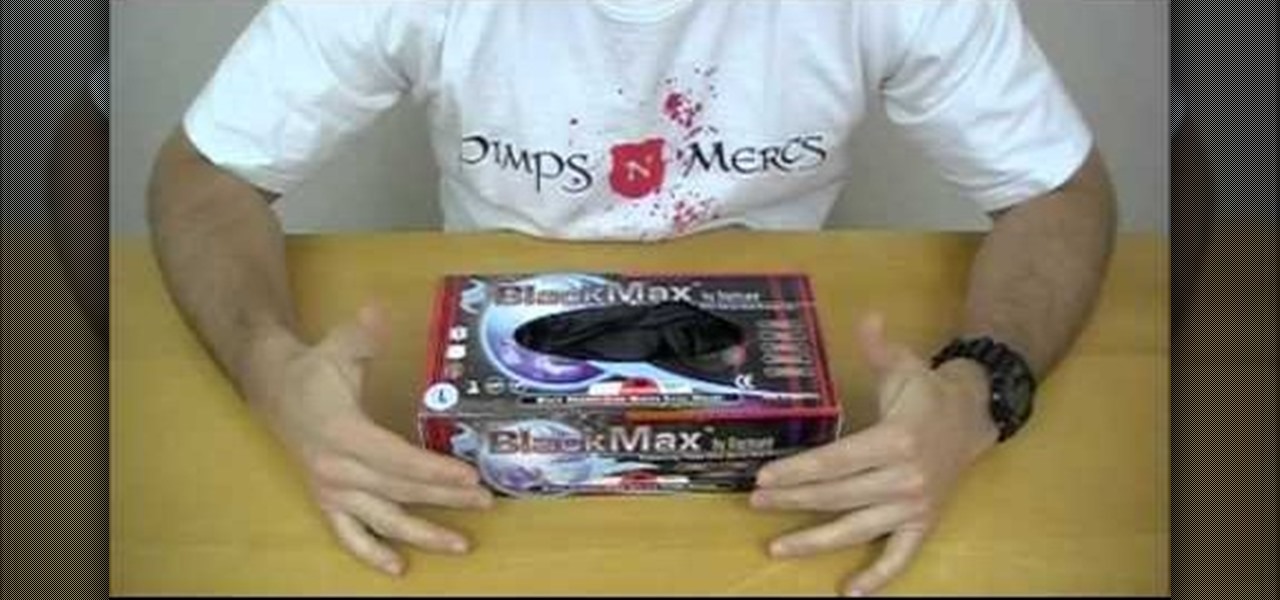
Nitrile exam gloves are the latest in disposable medical glove technology. They withstand stress well and won't trigger latex allergies, making them a great choice for first aid work. Watch this video to learn how to remove them properly, ensuring that your skin is not contaminated by whatever you were trying to keep off them with the gloves.
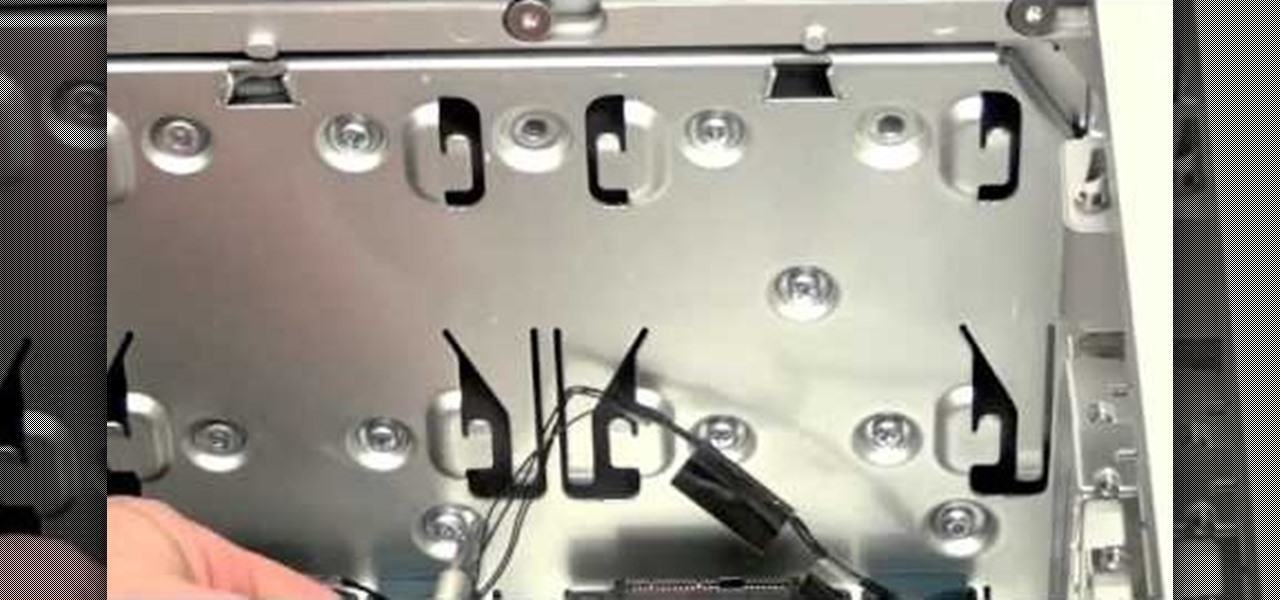
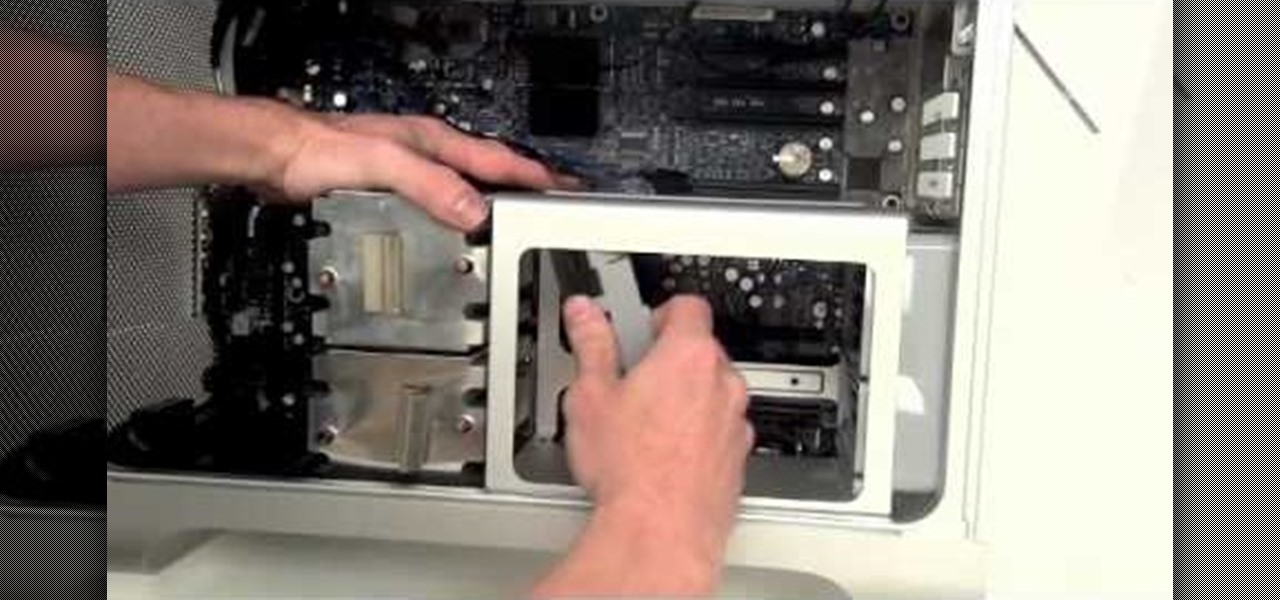
Looking for a primer on how to remove the superdrive and power supply from your Mac Pro? This brief how-to will guide you through the process, the first necessary step of any upgrade or repair to either of the aforementioned parts. This tutorial will also be of use to those who wish to learn more about the guts of their Mac Pros without actually disassembling their units.
Fixing to remove the logic board from your Mac Pro? This brief how-to will guide you through the process, the first necessary step of any upgrade or repair. This tutorial will also be of use to those who wish to learn more about the guts of their Mac Pros without actually disassembling their units.
Want to know how to remove the fans, heat sink and processor from your Mac Pro? This brief how-to will guide you through the process, the first necessary step of any upgrade or repair to either of the aforementioned parts. This tutorial will also be of use to those who wish to learn more about the guts of their Mac Pros without actually disassembling their units.
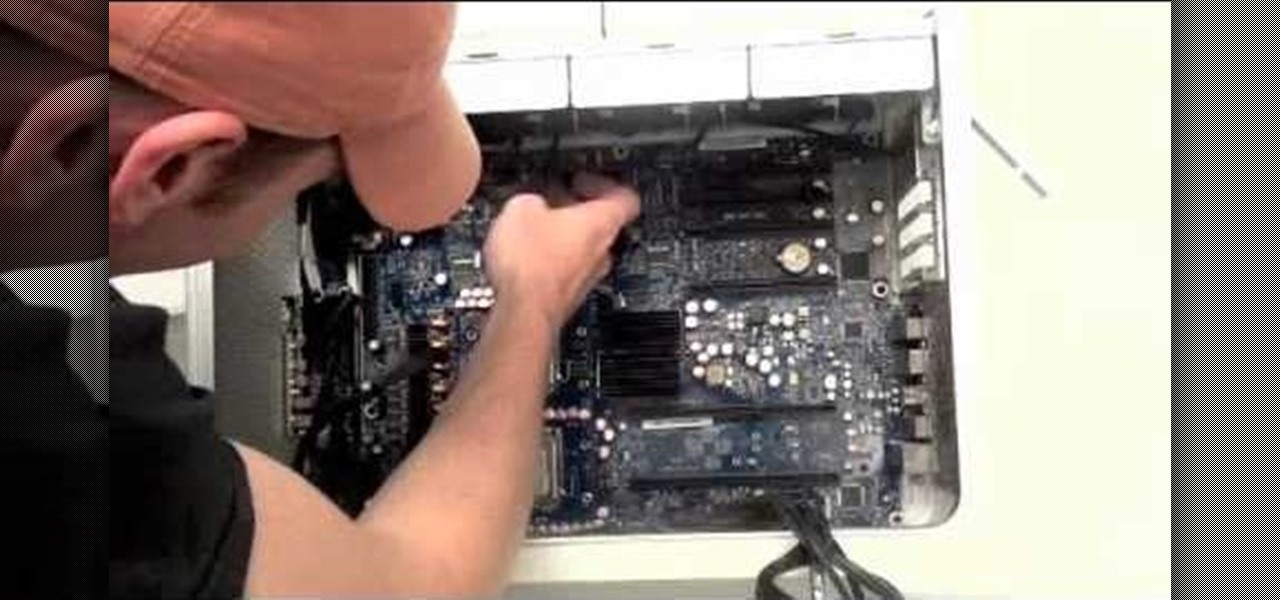
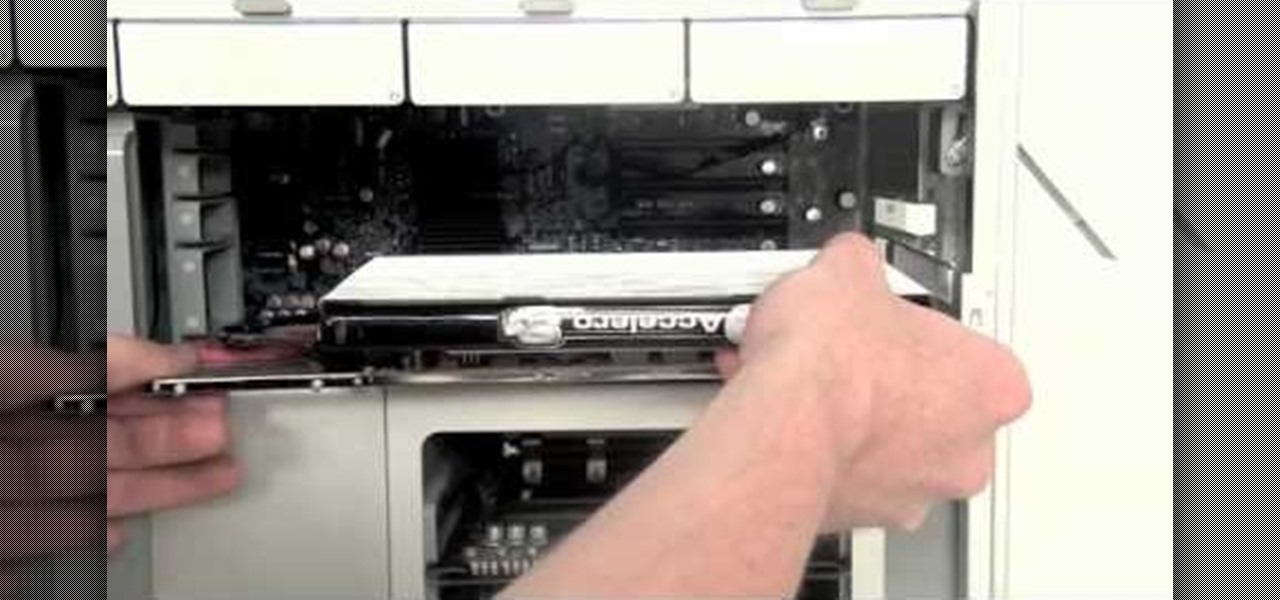
Interested to know how to remove the video card and RAM riser boards from your Apple Mac Pro? This brief how-to will guide you through the process, the first necessary step of any upgrade or repair to either of the aforementioned parts. This tutorial will also be of use to those who wish to learn more about the guts of their Mac Pros without actually disassembling their units.
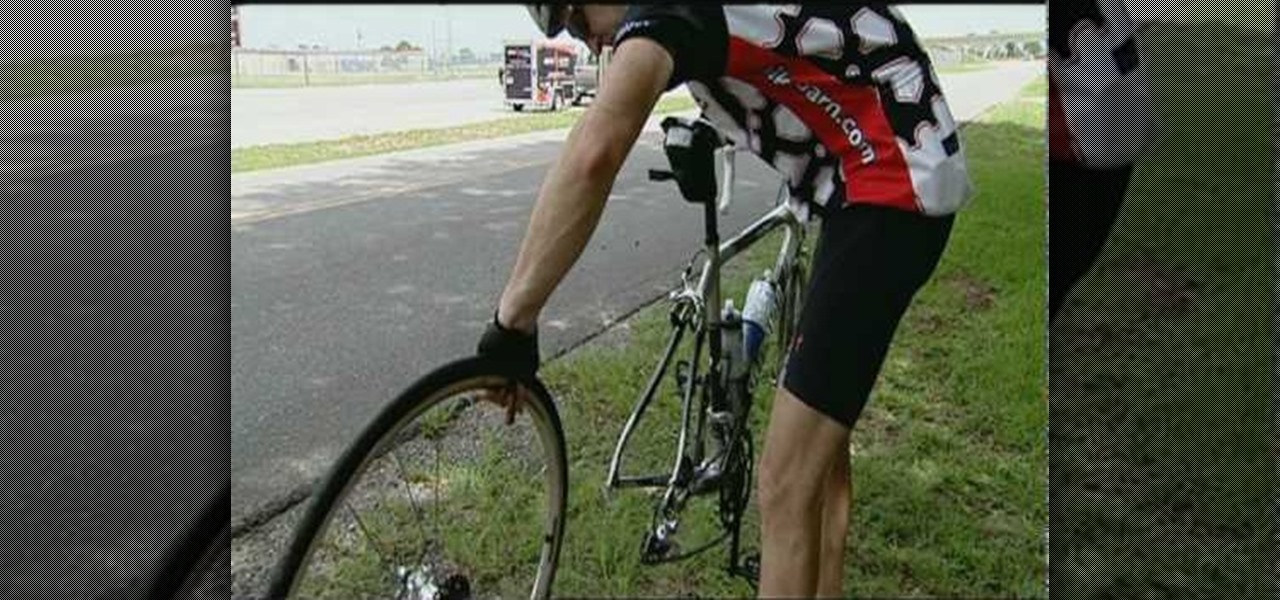
The rear wheel of a bicycle is the more complicated to work with of the two because of it's position in the frame. If you have quick releases, it's still pretty easy to remove and reinstall. This video will show you how to do it step-by-step, and should have you back on the trail again in no time.
In this video tutorial, viewers learn how to remove/change the arrow on the shortcut icons in Windows. These arrows allows the user to know that the icon is only a shortcut. Users will need to download the program, Vista Shortcut Overlay Remover. The program allows users to display an arrow, light arrow, custom arrow or no arrow. This program also provides an option to disable the " - Shortcut" extension on any shortcut icon. This video will benefit those viewers who use a Windows Vista compu...
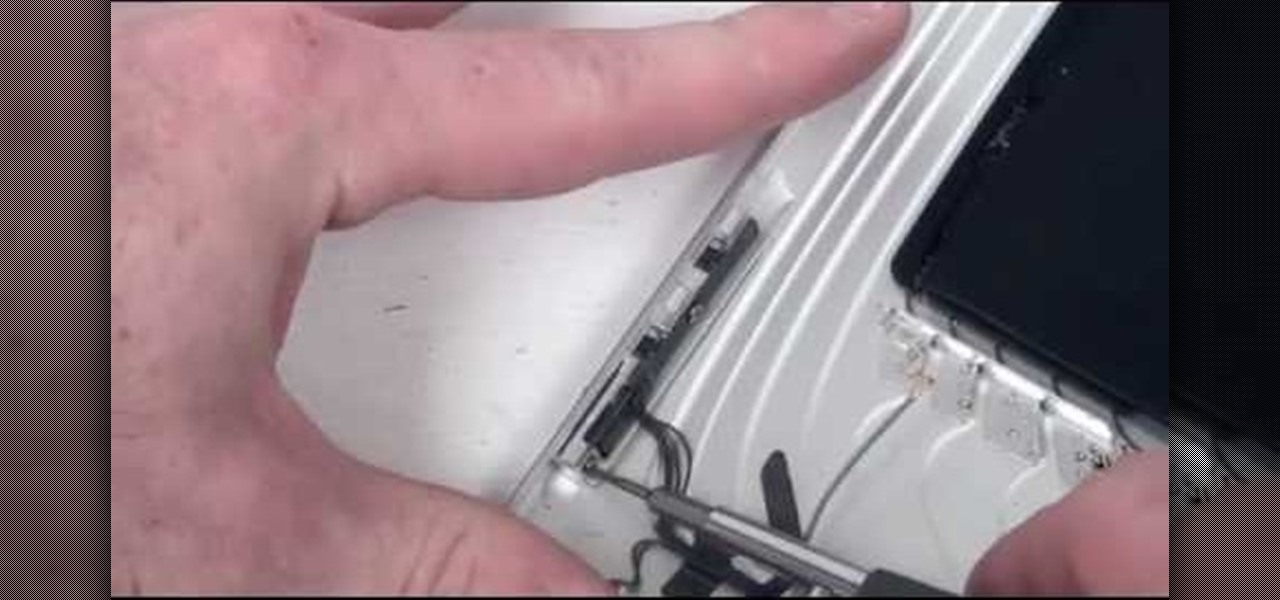
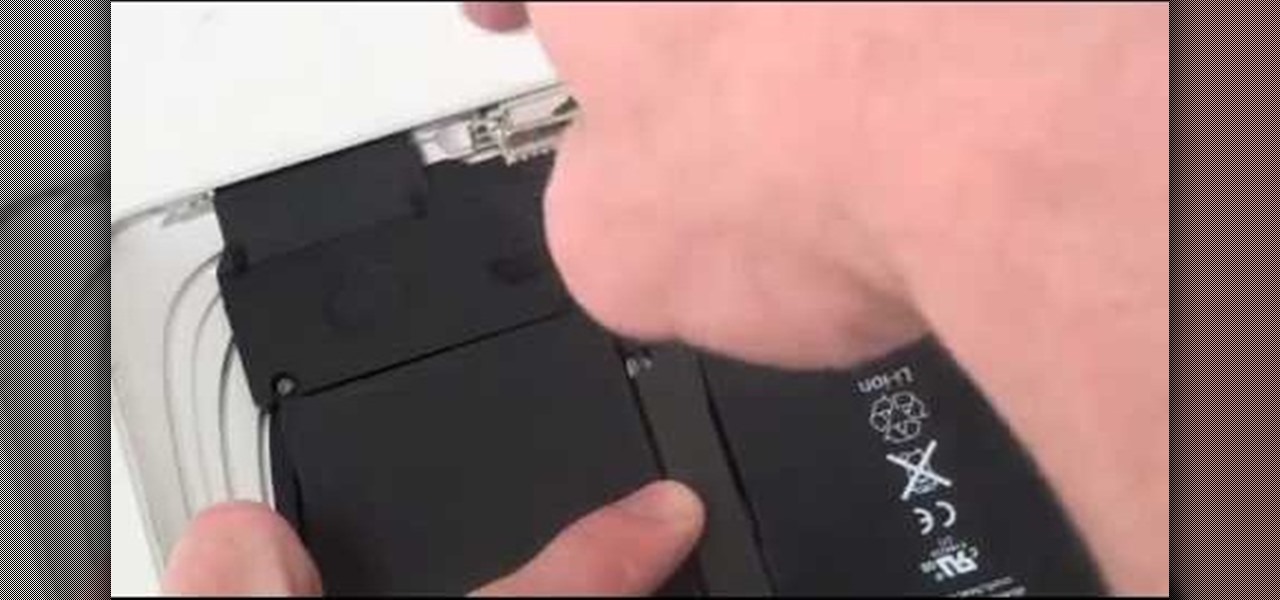
Accidents will happen. This brief how-to will guide you through the process of removing the speaker assembly from an Apple iPad 3G tablet computer quickly and efficiently without damaging any of the components, the first necessary step of any successful repair. This tutorial will also be of use to those who wish to learn more about the guts of their iPads without actually disassembling their units.
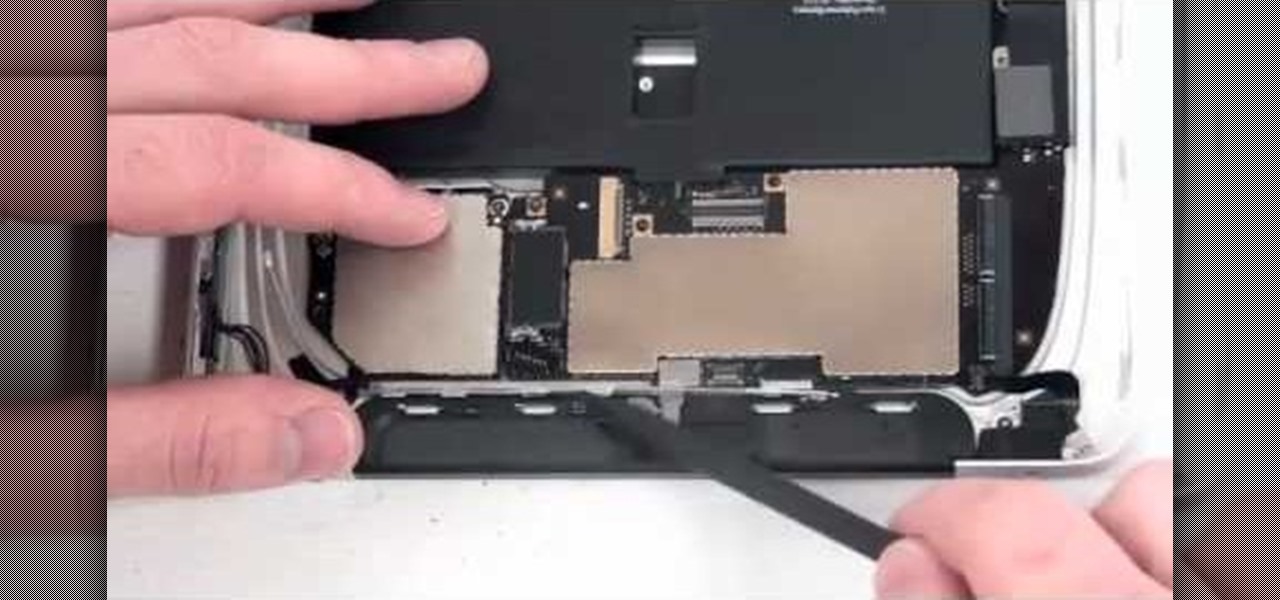
Accidents will happen. This brief how-to will guide you through the process of removing the logic board and micro SIM card from an Apple iPad 3G tablet computer quickly and efficiently without damaging any of the components, the first necessary step of any successful repair. This tutorial will also be of use to those who wish to learn more about the guts of their iPads without actually disassembling their units.
Accidents will happen. This brief how-to will guide you through the process of removing the I/O (or IO) cable from an Apple iPad 3G tablet computer quickly and efficiently without damaging any of the components, the first necessary step of any successful repair. This tutorial will also be of use to those who wish to learn more about the guts of their iPads without actually disassembling their units.
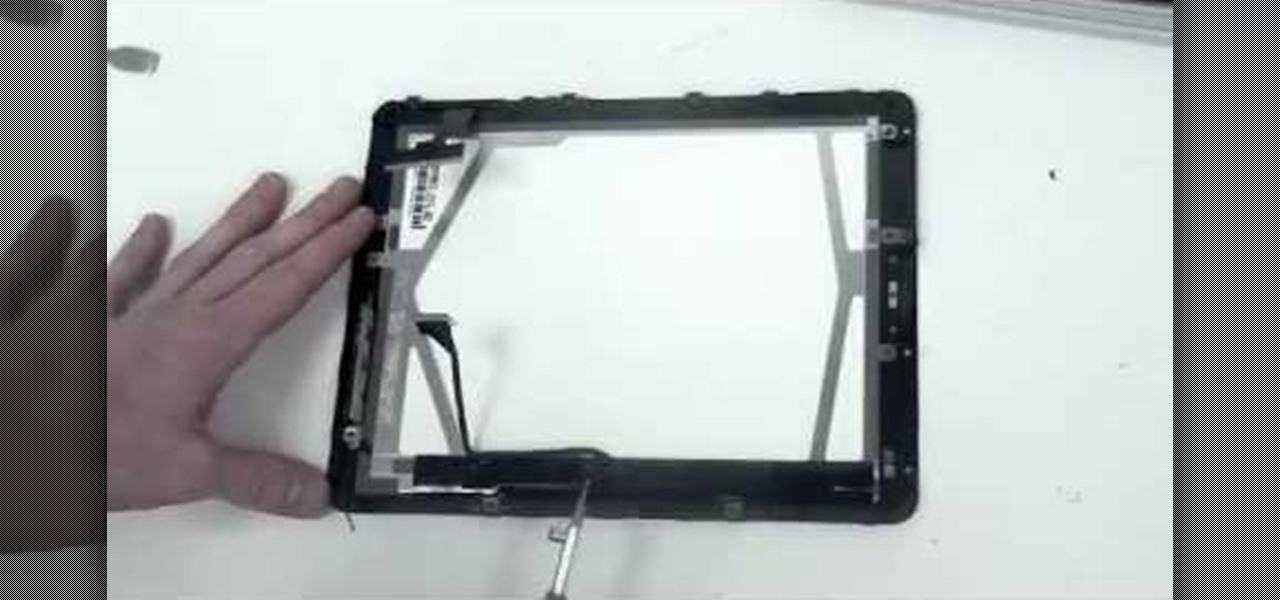
Accidents will happen. This brief how-to will guide you through the process of removing the LCD display and glass assembly from an Apple iPad 3g tablet computer quickly and efficiently without damaging any of the components, the first necessary step of any successful repair. This tutorial will also be of use to those who wish to learn more about the guts of their iPads without actually disassembling their units.