Pixel Perfect is the "perfect" show to help you with your Photoshop skills. Be amazed and learn as master digital artist Bert Monroy takes a stylus and a digital pad and treats it as Monet and Picasso do with oil and canvas. Learn the tips and tricks you need to whip those digital pictures into shape with Adobe Photoshop and Illustrator. In this episode, Ben shows you how to create flooring in Photoshop.

Pixel Perfect is the "perfect" show to help you with your Photoshop skills. Be amazed and learn as master digital artist Bert Monroy takes a stylus and a digital pad and treats it as Monet and Picasso do with oil and canvas. Learn the tips and tricks you need to whip those digital pictures into shape with Adobe Photoshop and Illustrator. In this episode, Ben shows you how to create a soothing pastoral scene in Photoshop.

Pixel Perfect is the "perfect" show to help you with your Photoshop skills. Be amazed and learn as master digital artist Bert Monroy takes a stylus and a digital pad and treats it as Monet and Picasso do with oil and canvas. Learn the tips and tricks you need to whip those digital pictures into shape with Adobe Photoshop and Illustrator. In this episode, Ben shows you how to turn build a 3D rocket in Photoshop and Illustrator.
This 7 part Houdini 9 tutorial series is about how to transfer color using dynamics is a great place to start to understand Houdini's dynamics in a significant way. Part one covers painting setup, two establishing a paint source, three creating paint, four defining paint colors with a solver, five painting with dynamics, six reviews how it works, seven setting up for render output. Learn to paint and transfer color with dynamics in Houdini 9 and get more control over your work in this tutorial.
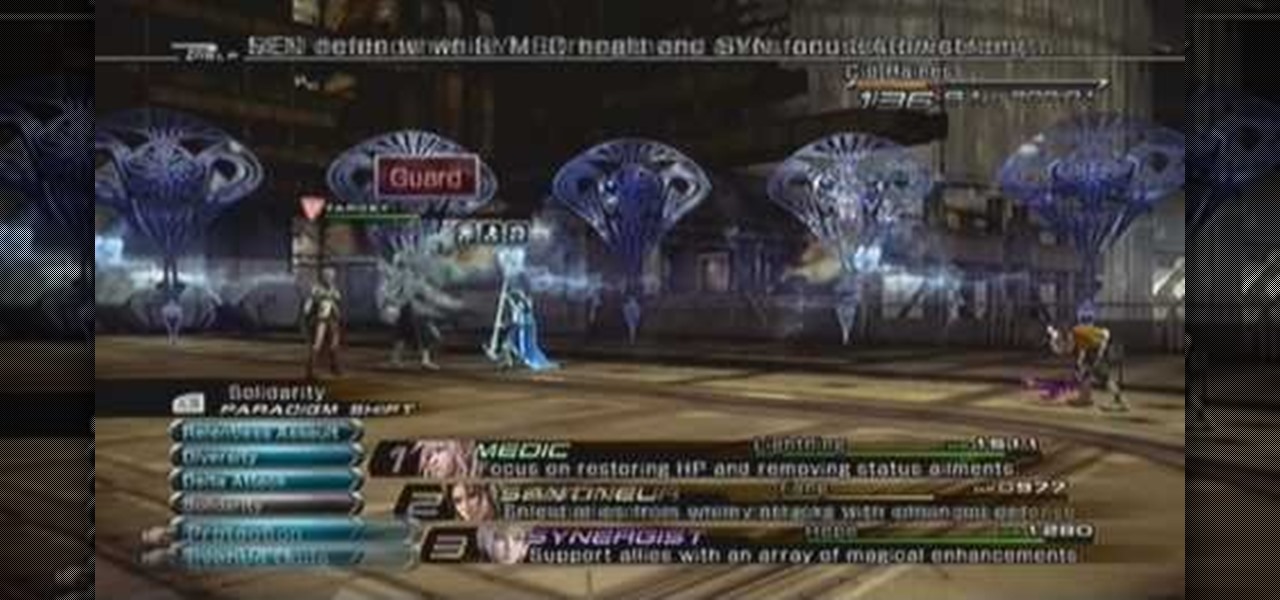
Cid Raines has always been a formidable foe in the FInal Fantasy series. This video will show you exactly how to beat him in FInal Fantasy XIII.
First of all open an image which shows many different lights in a night background. Now make a new layer now set the color of background to black by first and the foreground color set to white. Click the background for the bottom of the left bar and then pressing 'd'’. Next select the 'gradient' tool. Make sure to select the style from the foreground to background. Select the 'mode' to 'normal' and ‘opacity’ to '100%'. Now drag the top right hand corner to the bottom of the left hand corner. ...

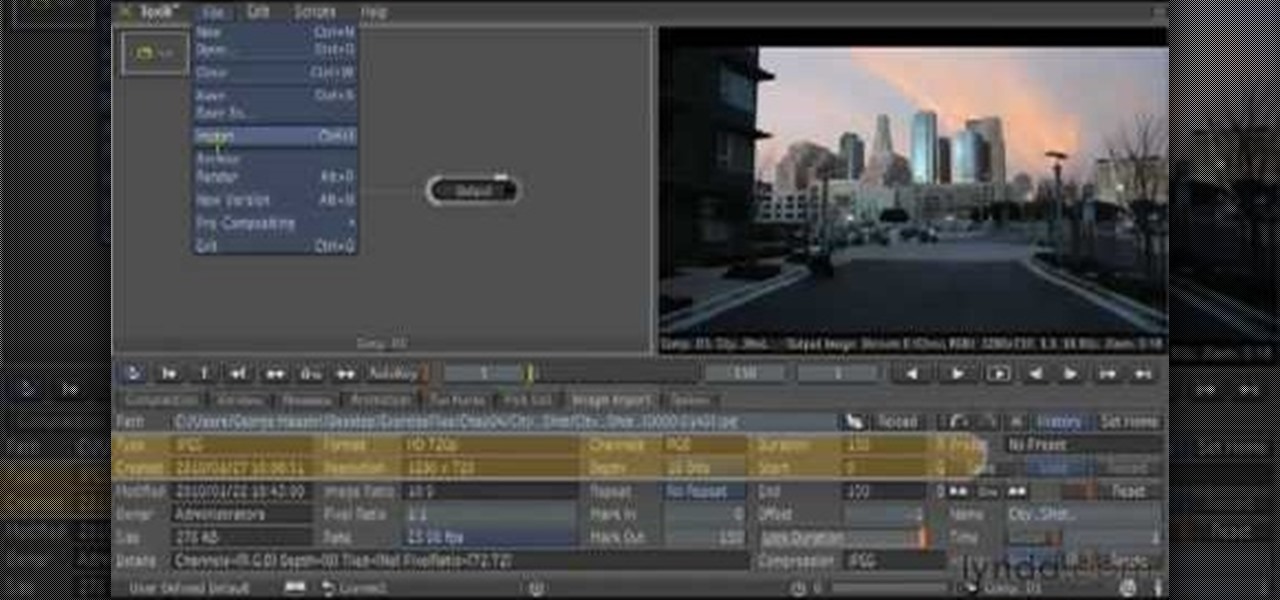
The Lynda Podcast teaches viewers how to composite a video using Autodesk Toxik program. First, you need to import your footage so go to file and import. Import the files that you would like to composite together. Now that you have your files, you should arrange them in the order that you want to composite them. What you want to be first, should be on top. To composite, add in a rendering not by right clicking and click add to pick list. You can pick 'Blend and comp' to composite the files to...
Team Member Trevor at Bunnings.com shows the average Joe how to render an effective paving job. On this particular day, Trevor guides viewers through simple instructions for laying a nice brick walk. He recommends starting with a foundation of coarse-grade sand, as the coarser grades pack better.
pbj746 is here to teach you on how to create a glossy rainbow effect using Adobe Photoshop CS4. This can be easily done in a matter of minutes and you can try experimenting with other colors and effects to get variant number of sassy backgrounds.
New to Windows? No problem... here's a beginner's video tutorial that will teach you how to prevent cut, paste, copy, and delete on Windows files.
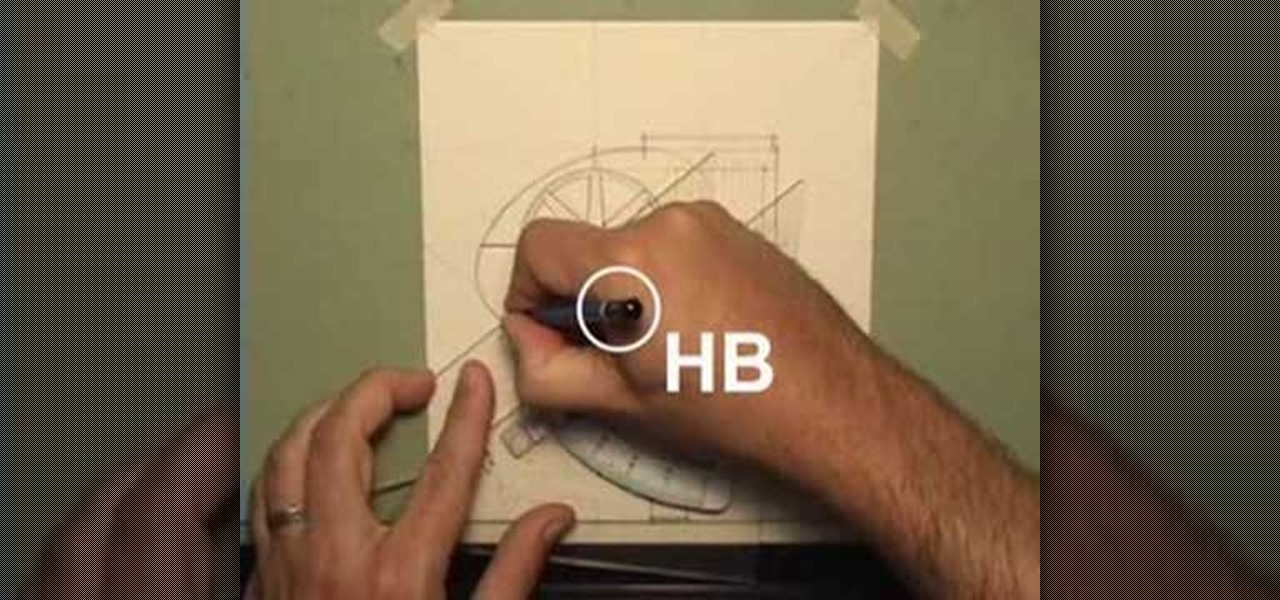
Take a lesson in architecture from renowned architect Doug Patt by watching this video tutorial. If you want to learn about drawing and designing, without going to school, Doug's just the teacher. Watch to see how to design and draw with lead like an architect.
Update February 25: The new Sony Xperia flagship has been announced, and it has a new name: The Sony Xperia 1. You can read all of the official specs and details at our full article on Sony's new model.
A core concept that has resonated through societies of the world over the course the last few hundred years is "knowledge is power." And understanding that concept gives us the drive to push further forward and learn as much as we can on a subject. At the moment, that subject for us at Next Reality is the recently released information about Magic Leap's upcoming Magic Leap One: Creator Edition.
At the end of 2017, Mozilla introduced the world to Quantum. While desktop Firefox received all the improvements, Android users were stuck waiting for one of the biggest components to hit, which brought speed that surpassed Google Chrome. Well the wait is over, the new and improved Firefox Mobile is finally here.
It finally happened! In a world of "go big or go home," Magic Leap has finally done something other than tease us with vague promises and rendered video concepts. Although, other than actually showing us what the developer's kit will look like, it seems little more than a slightly different kind of a tease. To demystify this new product, we here at Next Reality decided to put together what we know about the hardware.
The Pixel 2 has finally arrived. Google unveiled their newest flagship phones on October 4th, and there's quite a few changes in store. For one thing, most of Google's official renders have already showed us something new: The Pixel 2 and Pixel 2 XL will have a Google Search bar at the bottom of their home screens.
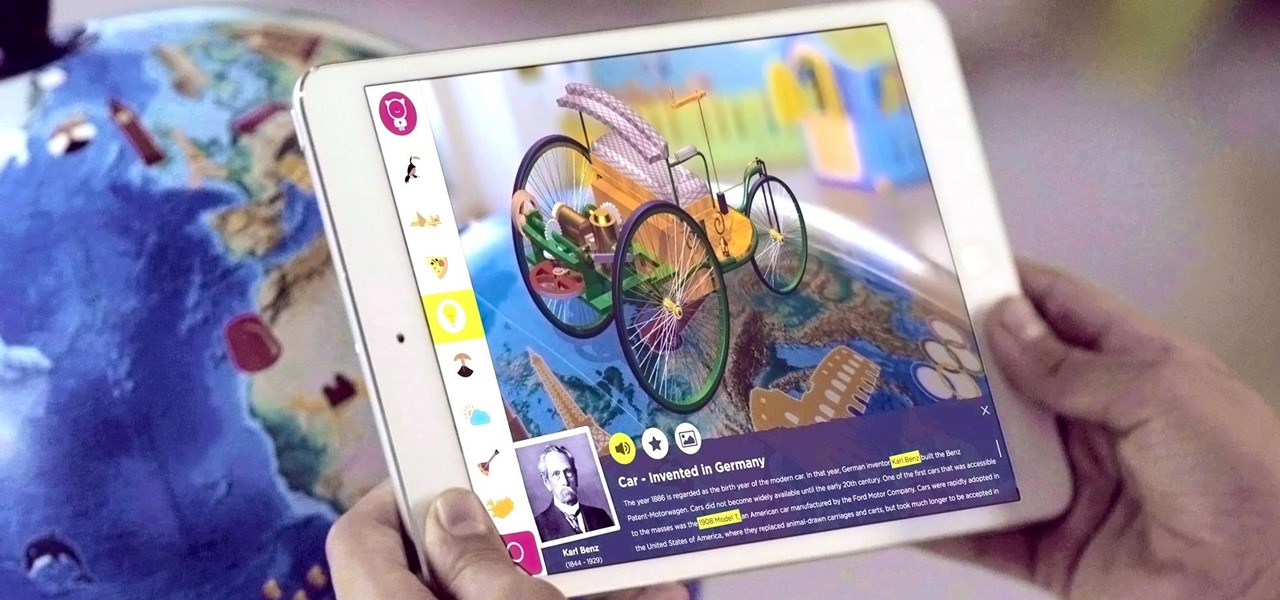
Globes used to be standard in households, usurped in many ways by modern mobile and desktop applications. But one company believes they can upgrade the globe for the 21st century.
At the moment, it would be safe to say that demand for devices running Tango, Google's augmented reality smartphone platform, is relatively low among consumers. Kaon Interactive, a B2B software company who has built more than 5,000 interactive applications for use at trade shows, remote sales demonstrations, and other customer engagements, is betting that there is a market for the devices in sales and marketing.
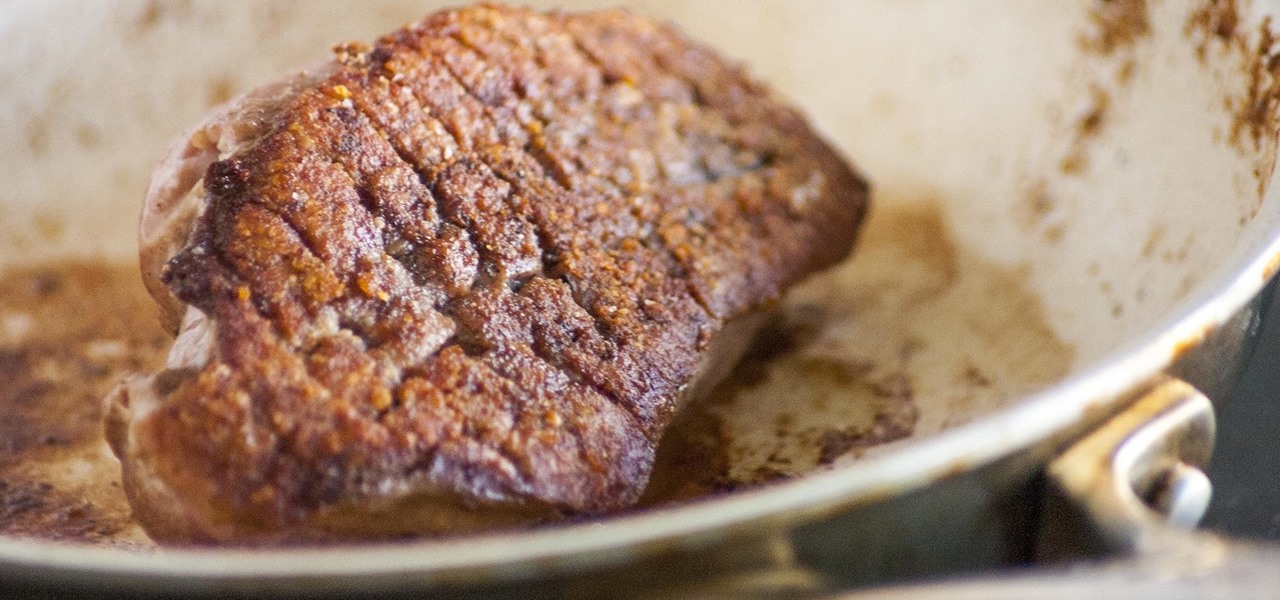
Many home cooks struggle to cook duck breast because they cook it as they would chicken. But not all poultry is created equal, and duck is definitely unlike chicken.
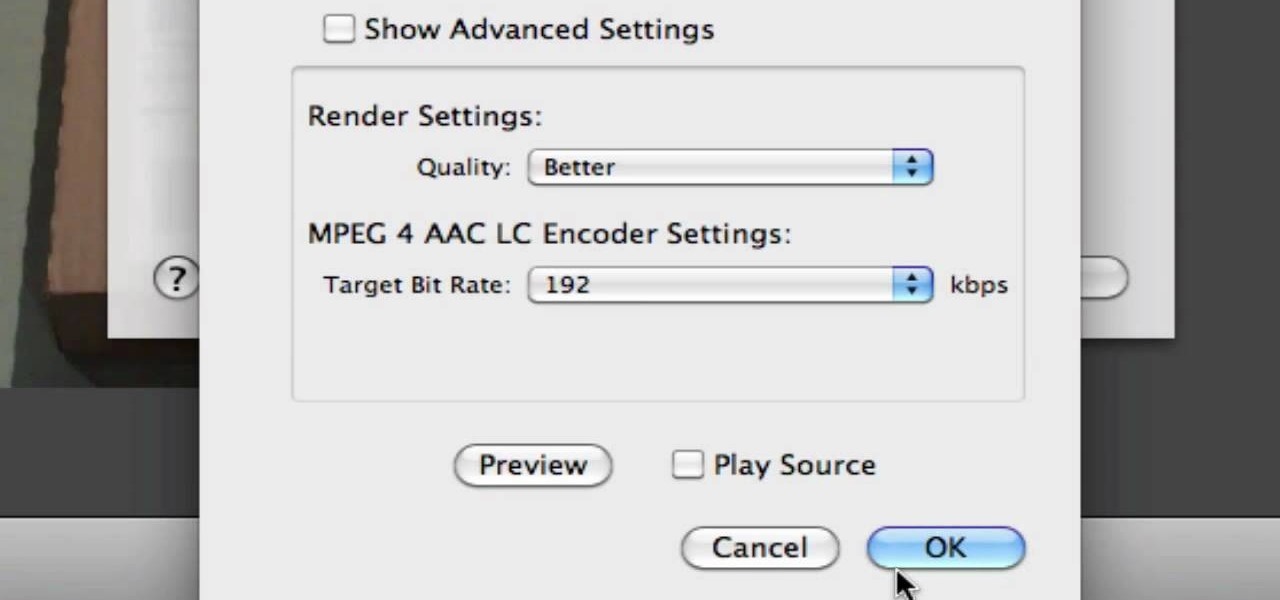
In this video from AppleGenius0921 we learn how to export videos using Screenflow in HD. Launch Screenflow, make sure you're editing is complete and go to File, then Export. A window will come up asking the name you want to save it as and where you want to save it. Make a good title that is relevant to your video. Now click customize. Then click settings. Now go to compression type and double click H.264. Set the quality on Best. Click OK and use no filter. Now go to size and click 1280x720 H...
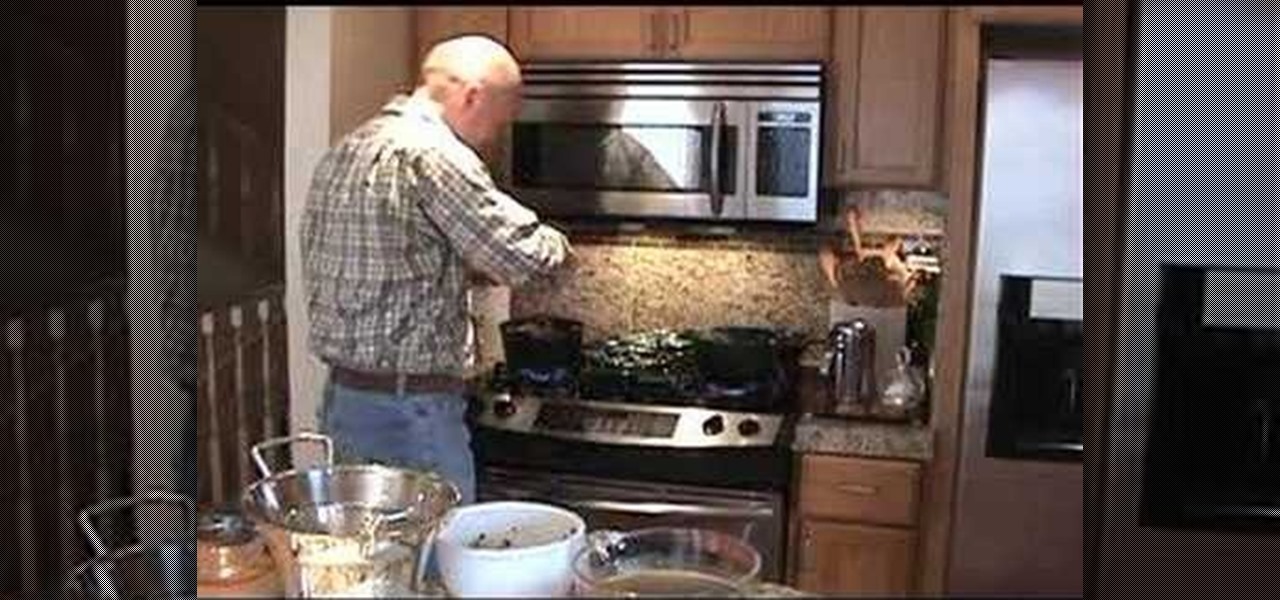
Scott demonstrates how to make southern-style black-eyed peas and turnip greens. Use one pound of frozen chopped turnip greens and used two cups of dried black-eyed peas. Soak the peas overnight in six cups of water with two teaspoons of salt. In the morning drain the peans. Use two cups of chicken stock per recipe. Use three ounces of smoked bacon strips per recipe. Heat cast iron pots over medium heat and add the bacon. Cook until the fat is rendered. In one pot, add the greens and stir to ...
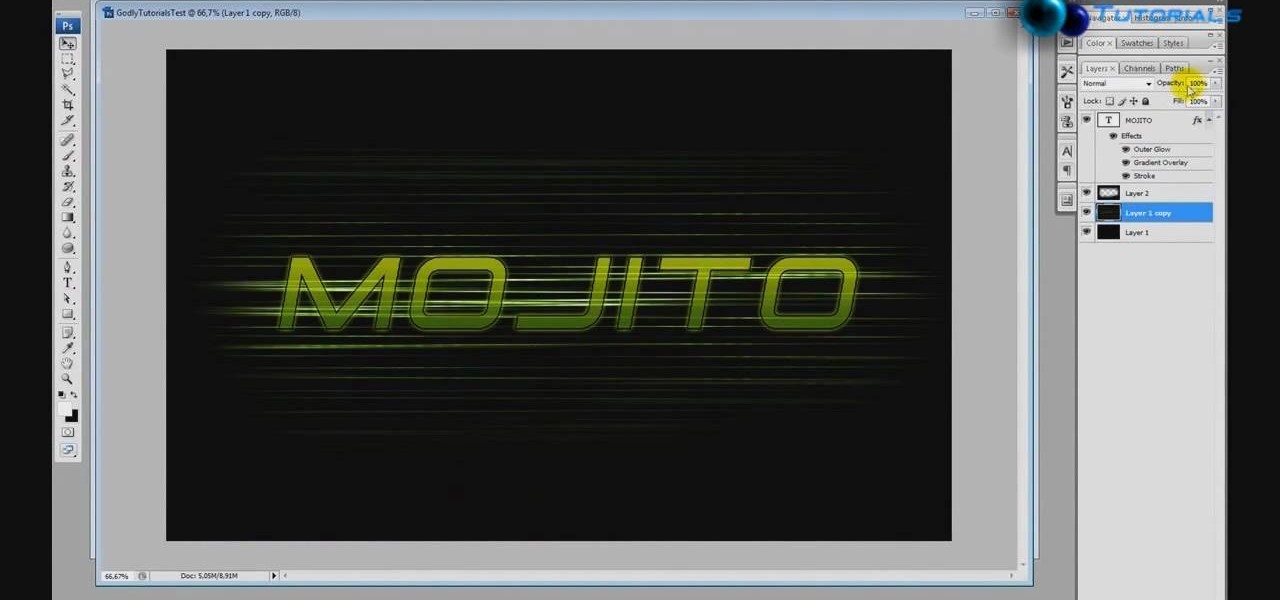
This how to video shows you how to create wallpaper for your computer desktop. Open Photoshop and create a new file. Change the dimensions to the size of your desktop. Click okay and go to edit and fill. Choose color and select black. Click okay to fill the screen with black. Duplicate the layer. Once this is done, go to filter, render, and lens flare. Make sure the lens flare is in the center. Edit the settings to your liking. Click okay to add the effect on to the image. Go to filter, disto...
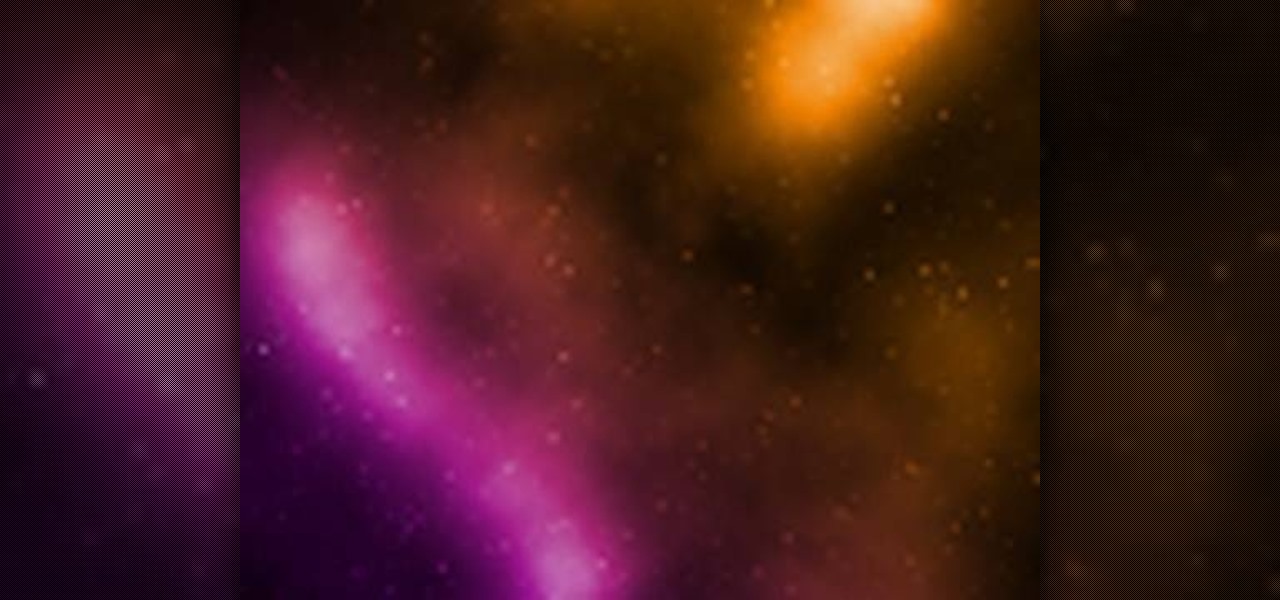
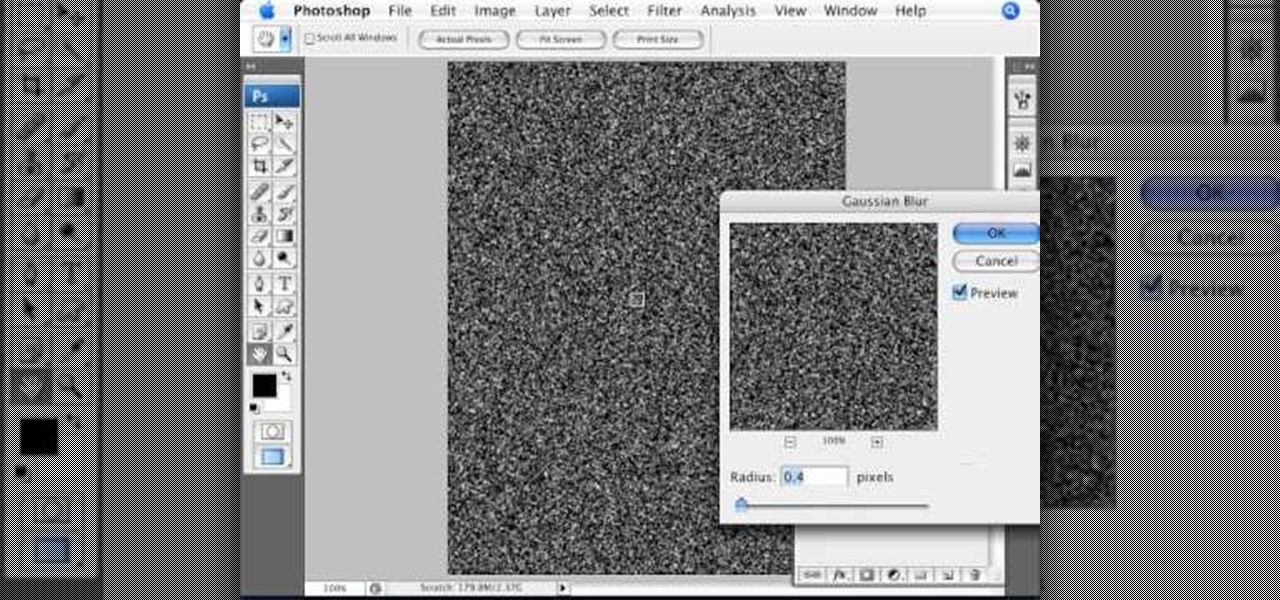
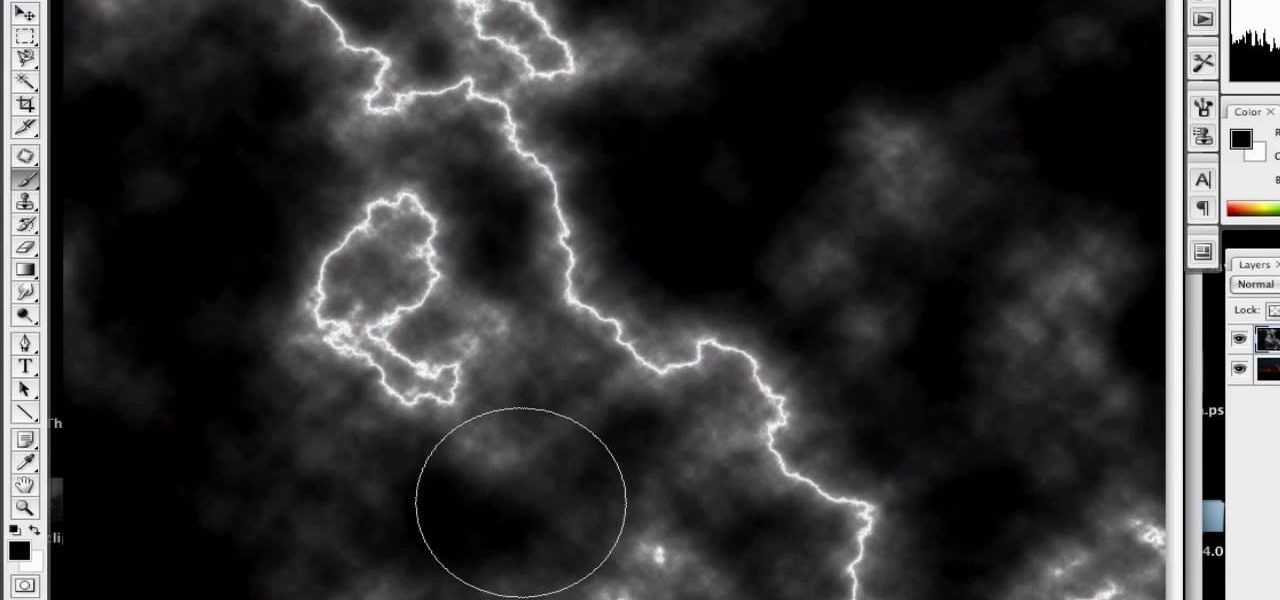
This how to video shows you how to create a nebula star scene in Photoshop. First, create a new image in Photoshop. Fill the background with black. Next, create a new layer and call it stars. Go to filter and select noise. Choose Gaussian and click monochromatic. Click okay to add the noise. Once that is done, go to adjustments and levels. Change the settings so that you have less clutter. Next, make a selection in the middle. Copy and paste it as a new layer. Go to edit and select free trans...
This video tutorial from Magix presents how to burn (S)VCDs and DVDs using Magix Movie Edit Pro 15 application.First you need to group videos you want to burn.If you want to play movies using remote control you have to place chapter markers. You can set markers manually or choose automatic? marker setting which places markers before each new scene.Once all chapter markers are placed, click Burn button.Here you can choose Start Menu Templates. To change movie titles and chapter headings double...
Make light saber glow effects in lsmakerThe author found freeware that helps create light sabers. The freeware is not as good as adobe after effects, but it will serve the purpose. Download the software from the website http://www.lsmaker.uw.hulpage.php?main=lsmaker.html. Extract the folder. Open lsmaker.exe. Save the extracted file to the desktop. Select import. Add either picture or video file. Change the saber color to red. Click ok. The blade needs to be white. In the dialog box change pi...
How to use quotation marks in British EnglishIn this video we are about to see how to use quotation marks in British English. This is a very useful video because most of us confuse the usage of quotations and the meaning it renders. There are two forms of quotations single and double. A single quote contains only one inverted comma and the double contains two inverted commas. A double quote is used for direct speech or actual quotations. Whenever a person says something a comma is given and t...
This tutorial explains how to create a multi colored eye effect. First open the image in Photoshop and unlock the layer. Make a selection of the eye with either the lasso, magnetic lasso or pen tool. If you are using the pen tool, like in the tutorial, right click and choose mark selection, feather radius of three pixels. Now copy and paste the eye. Go to File and select New. Create an image of 1000 by 1000 pixels. Unlock the layer and make sure tea background and foreground colors are black ...
Open an image and on the layers panel add a new layer by clicking on the fifth icon below the layers panel. A new layer is created with the name 'layer 1' and your previous layer would have the name 'background'. These names can be changed by you. For now we'll leave them as they are.
Dart and his friends are almost done. They just need to defeat Faust and return to the Law City Zenebatos in this part of The Legend of Dragoon for PlayStation. This video walkthrough takes you from where Dart and company fight and defeat Magician Faust in Flanvel Tower, they leave Flanvel and Kashua Glacier and back to the Law City Zenebatos to where they are exploring the city and rewriting laws so they can move about easier.
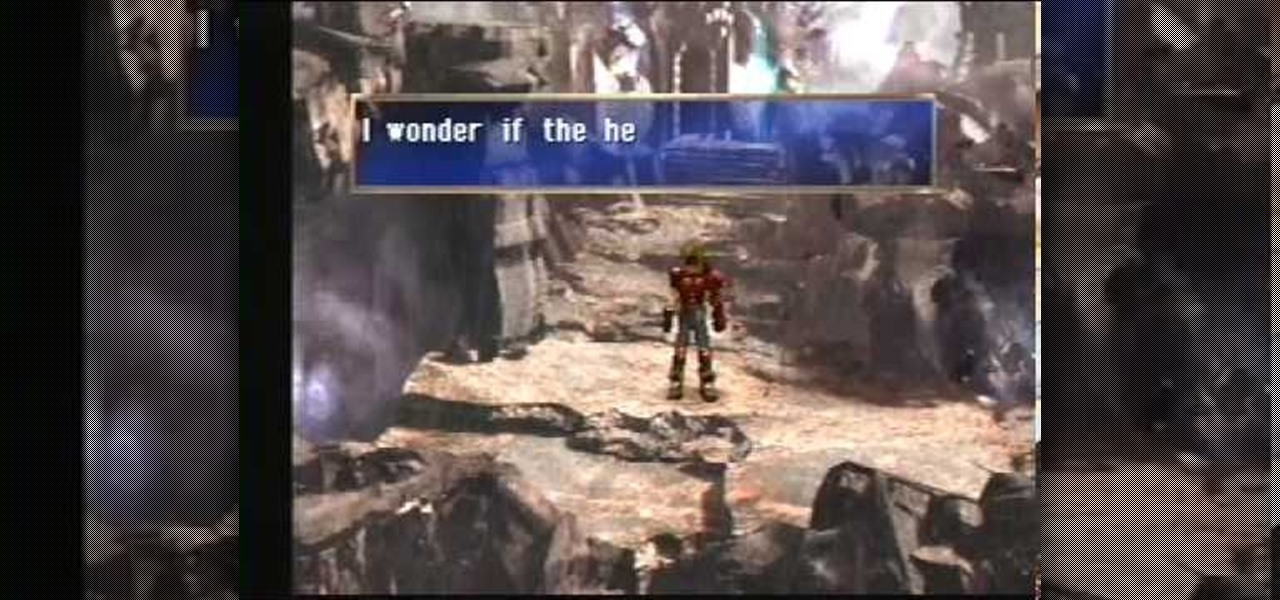
Start your battle with the Magician Faust in this section of The Legend of Dragoon for PlayStation. This video walkthrough takes you from where Dart and company fight and defeat Belzac and Kanzas, they head to Deningrad to buy/sell some stuff, through the Kashua Glacier to the Flanvel Tower, and they explore the Tower to where they are fighting Magician Faust.
You'll find yourself in Kadessa and Deningrad in this installment of The Legend of Dragoon for PlayStation. This video walkthrough takes you from where Dart and company are exploring Kadessa, they fight and defeat the Grand Jewel for possession over the Dragon Block Staff, the party leaves Kadessa just as the Divine Dragon is launching an attack upon Deningrad, the Winglies try to teleport the party to Deningrad but they are too late to stop the attack, the party rush to the castle and make s...
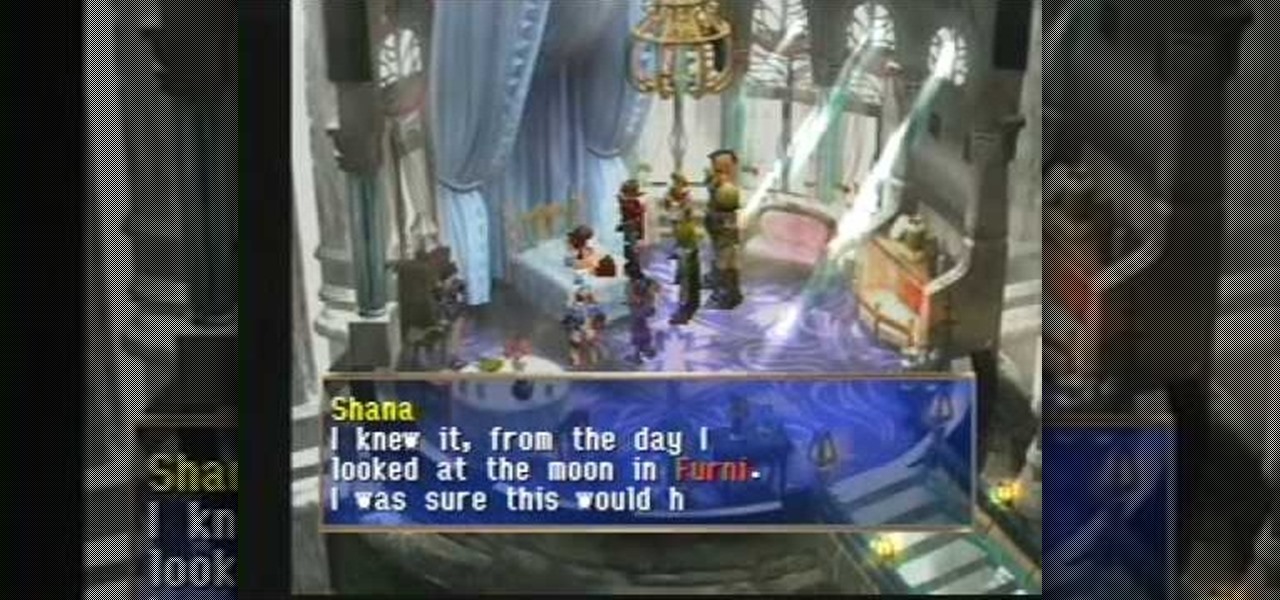
There's a lot going on here. In this level of The Legend of Dragoon for PlayStation, you'll see Queen Theresa, Sister Miranda, Shana, Winglies, and Neet. This video walkthrough takes you from where Dart and company make a visit to the Crystal Palace, Queen Theresa gets the party to agree to stop the Divine Dragon, Shana's Dragoon Spirit leaves her for First Sacred Sister Miranda, Shana collapses and is forced to stay behind, the party leaves and goes through the Evergreen Forest, they make a ...
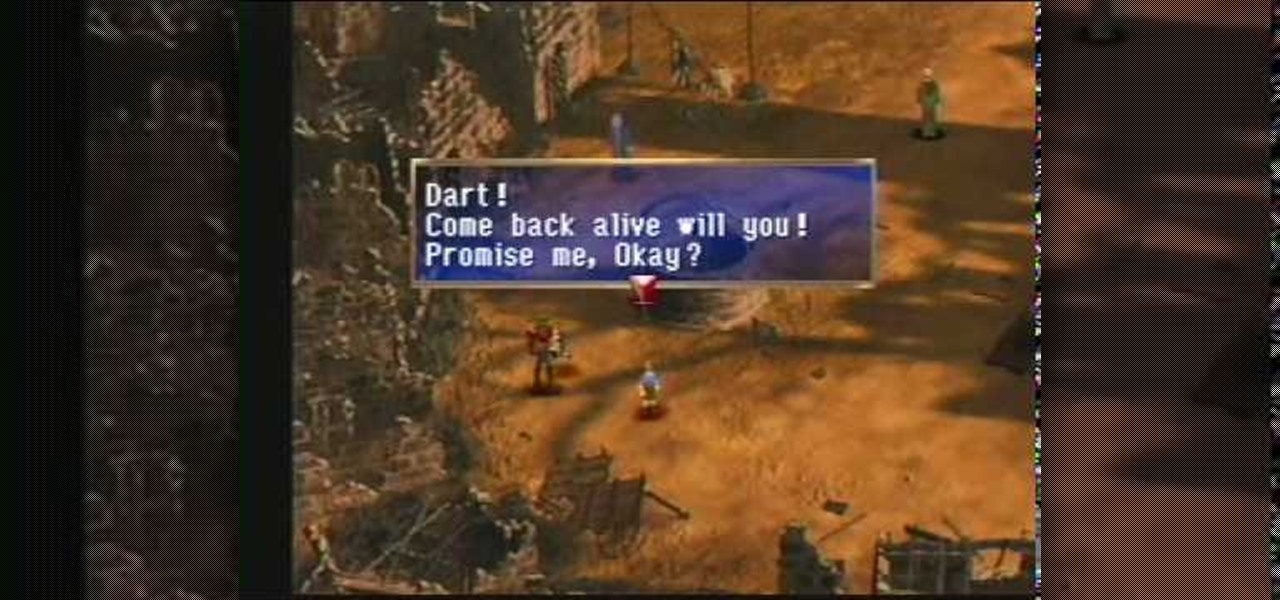
In Hellena Prison, save the King from his execution… save the day in this level of The Legend of Dragoon for PlayStation. This video walkthrough takes you from where Dart and company are racing to the top of Hellena Prison to save King Albert from execution, they fight and defeat Fruegel, Lloyd steals the Moon Gem from Albert, Lavitz turns Dragoon in an attempt to help King Albert and gets slain, King Albert joins the party, they all go talk in Seles to where they travel to and explore the Bl...
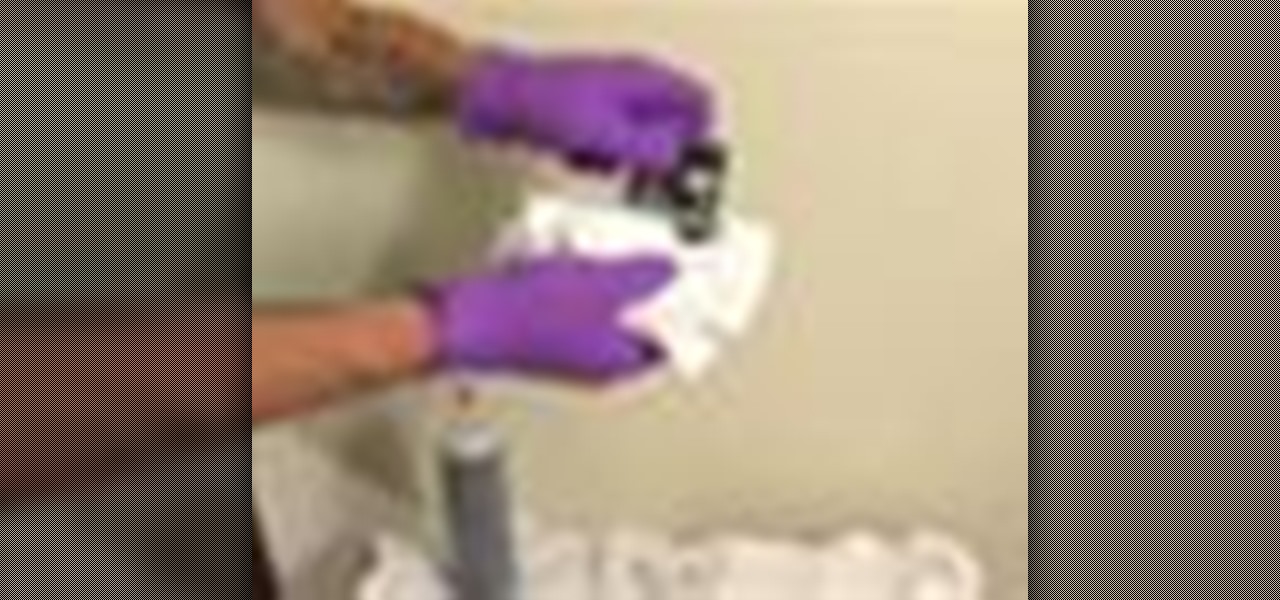
If you use your inkjet printer regularly, you’ve probably discovered that the cost of replacing the cartridges can quickly exceed that the printer itself. Refill the cartridges yourself to save some money.
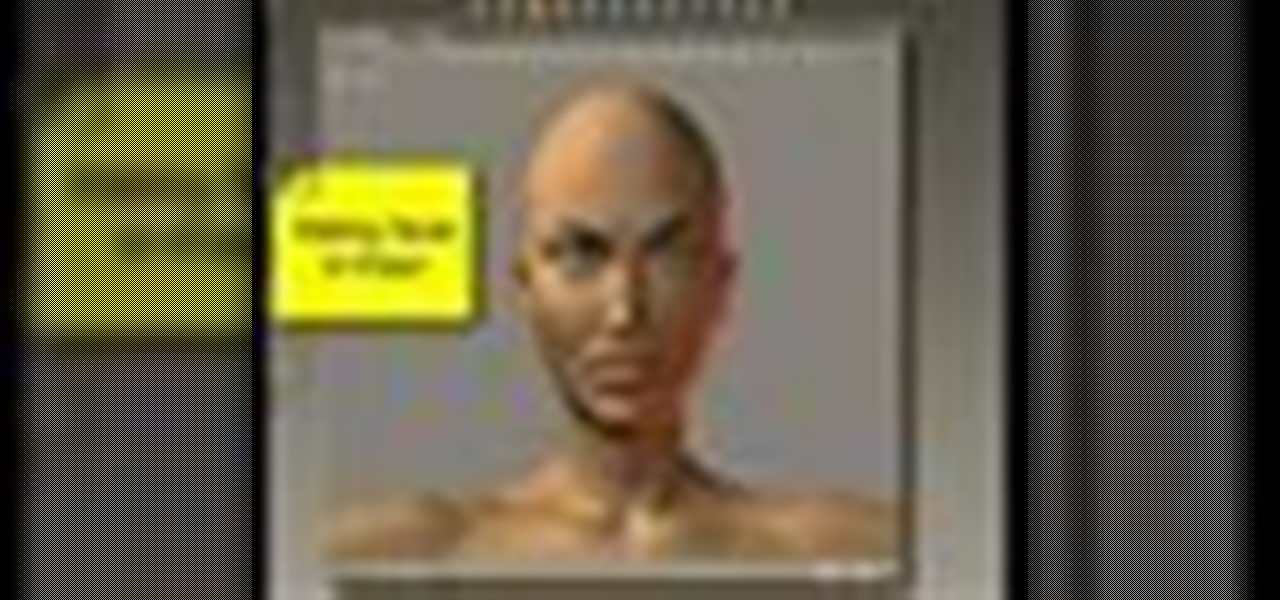
Learn how to use face room to create facial expressions in computer program Poser with expert 3D animation and rendering tips in this free software tutorial video series.
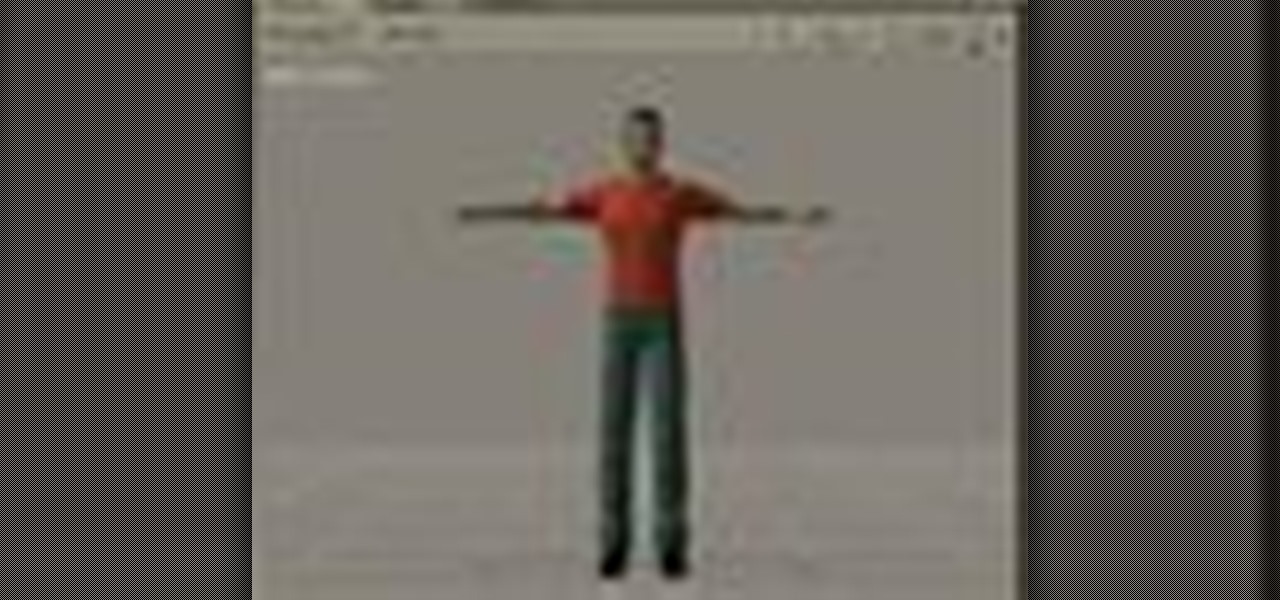
Learn how to make characters walk and move using the computer program Poser with expert 3D animation and rendering tips in this free software tutorial video series.
Learn how to create realistic hair and clothing using the dynamic features of the computer program Poser with expert 3D animation and rendering tips in this free software tutorial video series.
This six-part 3ds Max video tutorial will guide you step by step through the process of exporting from 3D Studio Max into the award-winning, science-fiction, first-person shooter, computer game Crysis.
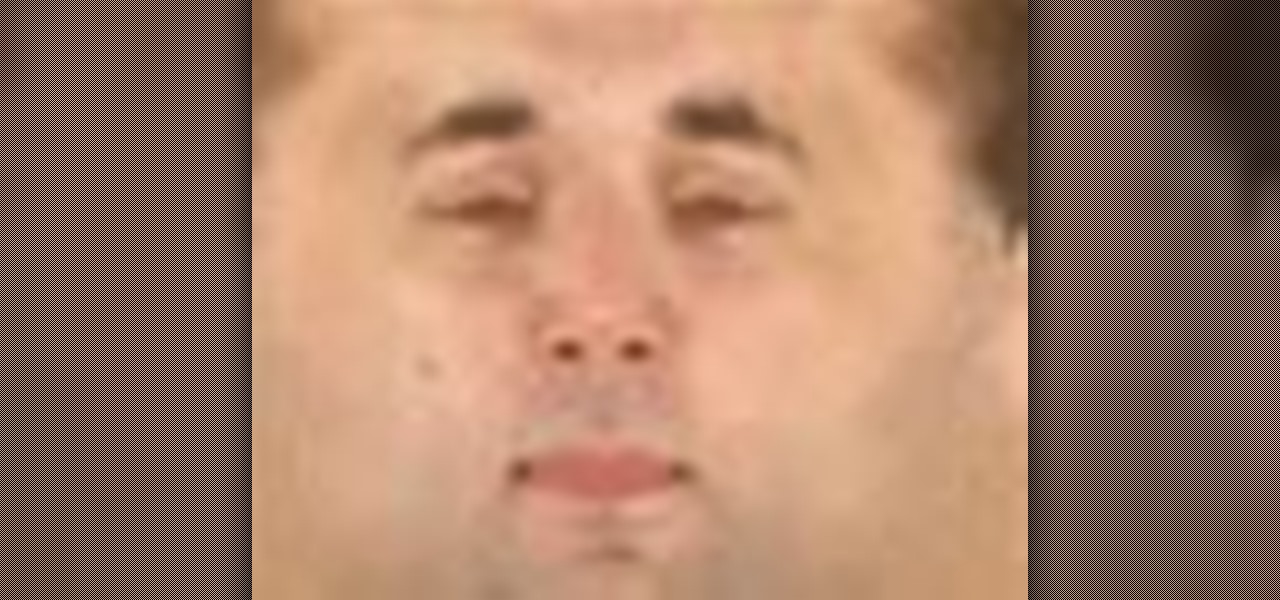
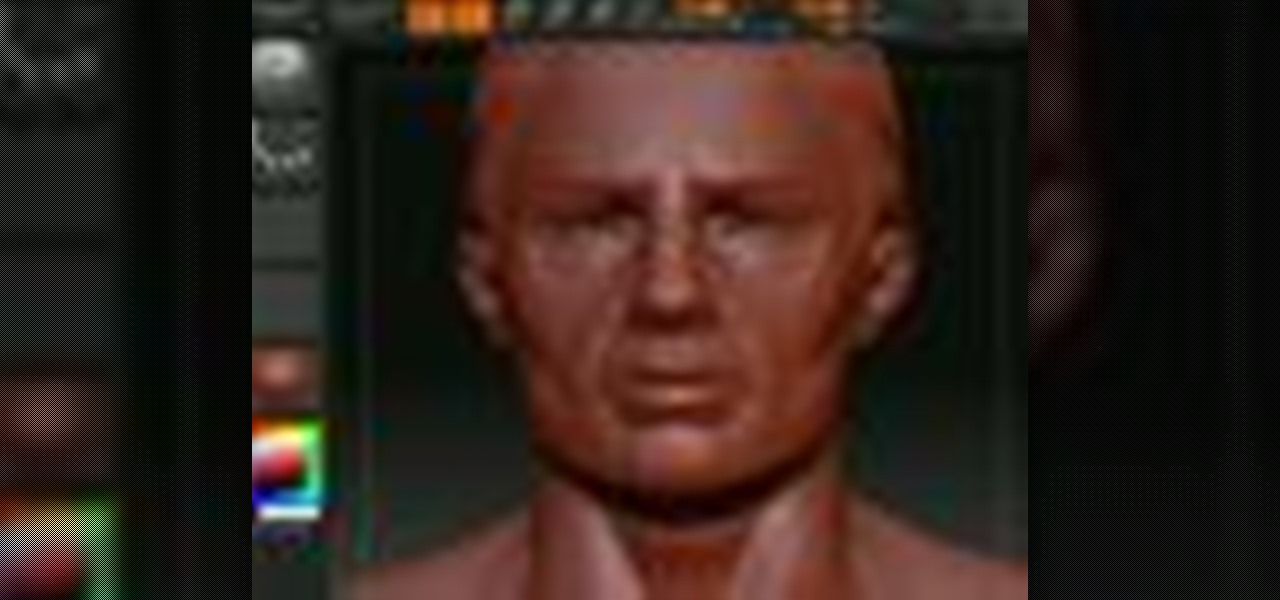
This is a three-part 3ds max video tutorial that takes a look at using reference photos for creating a head texture. If you have photographs that can work, there really isn't any reason not to use them since they can often provide plenty of subtle details that would be very time consuming to add otherwise.
This tutorial shows you how to subscatter particles (SSS) across the surface of a mesh using Zbrush and Maya then rendering with Mental Ray. In part one uvs are added to the Zbrush head to support the textures on the sss node. Part two shows you the basic node setup in Maya. Part 3 covers painting and applying diffuse maps in Zbrush to Maya, part 4 covers painting and applying the the front sss color map, part 5 covers the mid sss color map, part 6 applies the bump map to the sss node and par...