Screenshots taken from a compromised computer can provide hackers with access to private emails, photographs, and information found in sensitive documents. This data can be used by the attackers to build profiles of a target for social engineering attacks and blackmail or even just to release the information out in the wild.
You may know the traditional way to take a screenshot on your iPhone, but it may not be the best action for your needs. There are faster ways to capture an image of your iPhone's screen, methods for capturing overlays and other elements that won't show in regular screenshots, and even options for blocking screenshot thumbnail previews from appearing.
While it's easy enough to take a screenshot of an end-to-end encrypted Telegram chat thread using an iPhone, it's an entirely different story on Android phones. Telegram disables screenshots for Secret Chats by default on Android, and not everyone can turn it on.
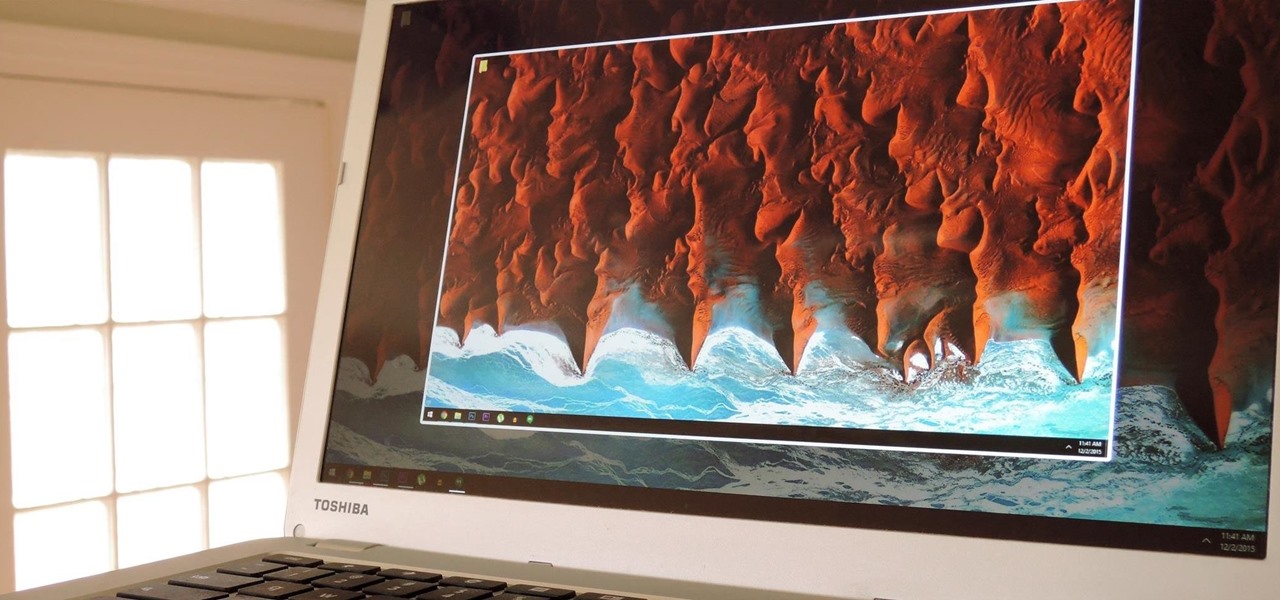
While my desktop is usually neat and organized, it quickly fills up with screenshots each and every day. Usually, I end up putting them in a folder or just trash them, but why not make the entire process of taking and organizing screenshots easier by changing their default save location? With the help of Terminal, I'm going to show you how to change the default save location of screenshots to anywhere you want in Mac OS X.
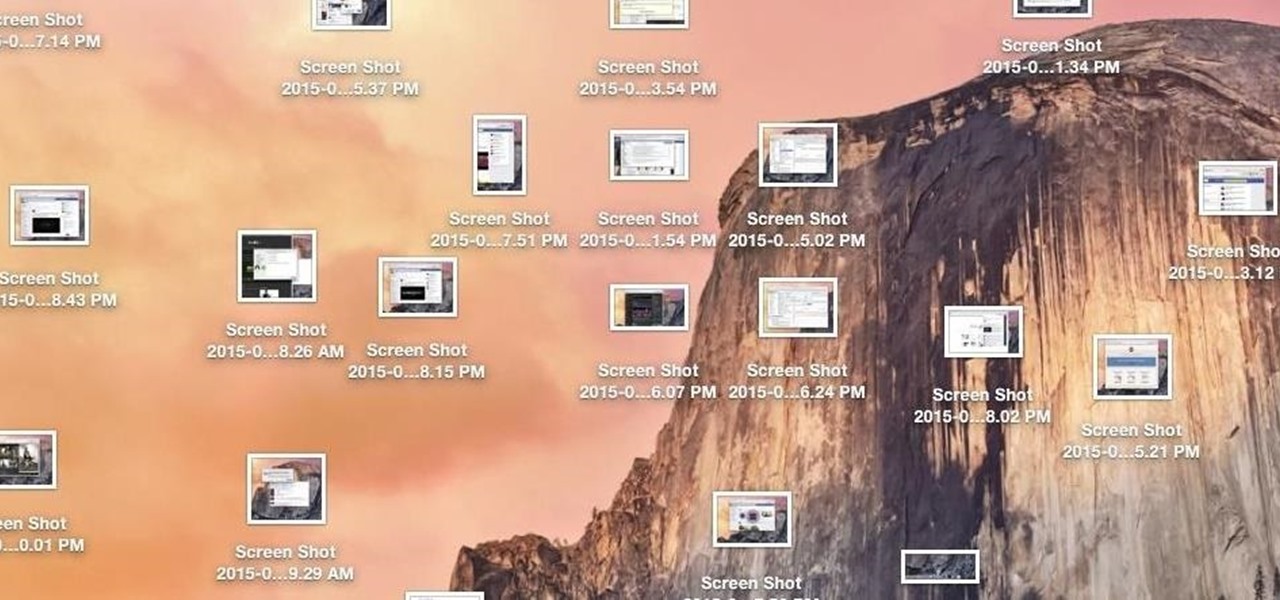
If you're like me, you take more than just a few screenshots throughout the day, and they add up fast on your iPhone. When you snap that many images of the screen, your Photos app's "Screenshots" folder can swell beyond triple digits if you don't manage it, and your "Recents" folder will become a cluttered mess. But there is a trick to keeping screenshots in check, and you can have total control over it.
Have you ever seen an image on social media, somebody's blog, or a news website that shows an iPhone or iPad screenshot with an actual iPhone or iPad model framed around it? You can do that too, and it's really easy to accomplish with a third-party app — but you can do the same thing with a shortcut that won't bug you to pay or subscribe.

Screenshots are an indispensable tool when it comes to relaying information about what's currently showing on your monitor. Whether you need help troubleshooting an issue or you just want to save and share a protected image, screenshots are often your best bet.
With just a swipe and tap of a finger, we can access enormous libraries of information on our smartphones like never before. Whether we want more info about gluten sensitivity or just want to brush up on 18th century philosophers, there's an article somewhere in the vast ocean of the internet that can lend us a hand.
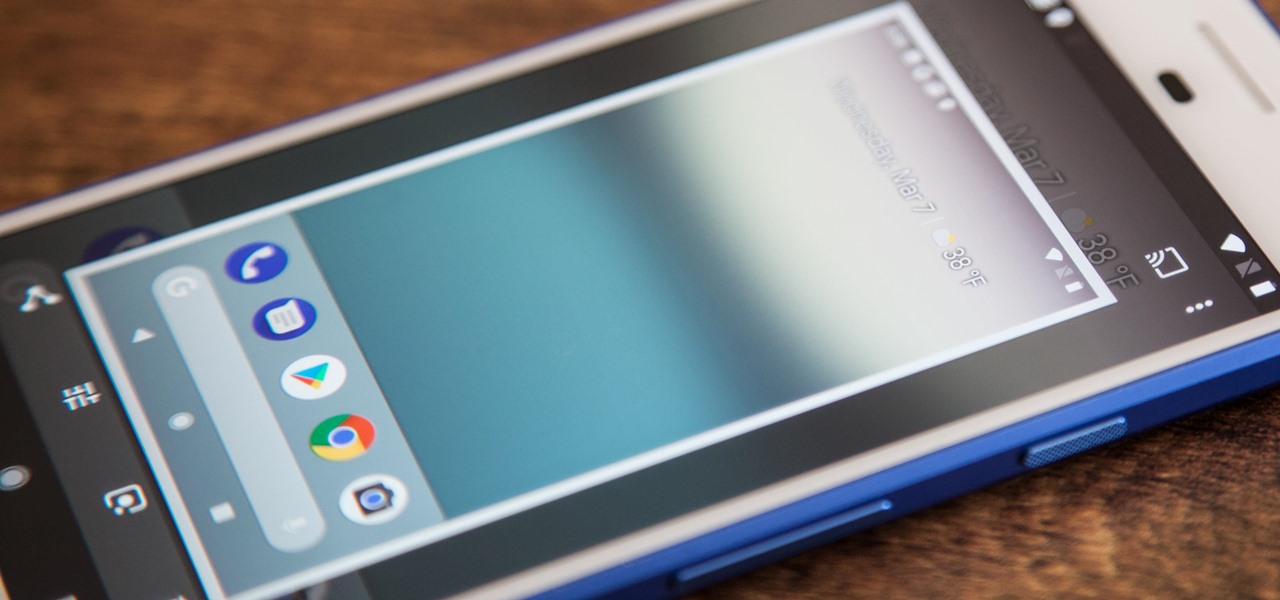
To take a screenshot on most phones, you'd use the power + volume down button combo. For a brief moment, you could even use Google Now on Tap to take screenshots without those hardware buttons, but Google Assistant eventually removed the functionality. Now, easier screenshots are back with Android 9.0 Pie.
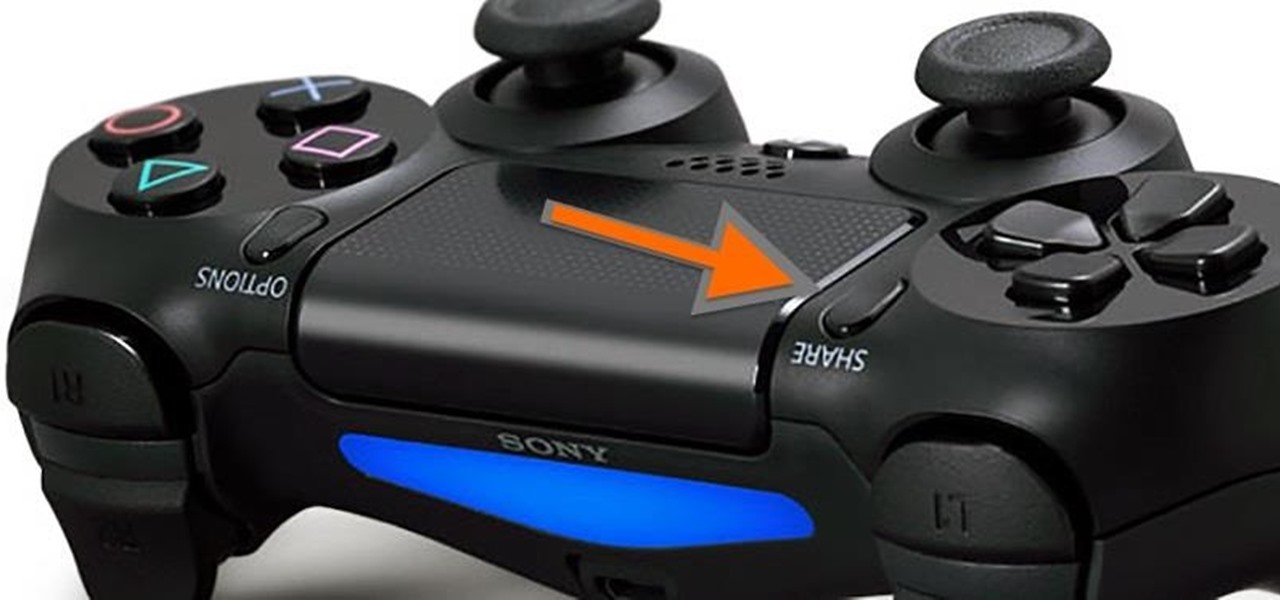
It has been 7 long years since the PlayStation 3 was released, which makes it no surprise that over 1 million gamers purchased the new PlayStation 4 this weekend.
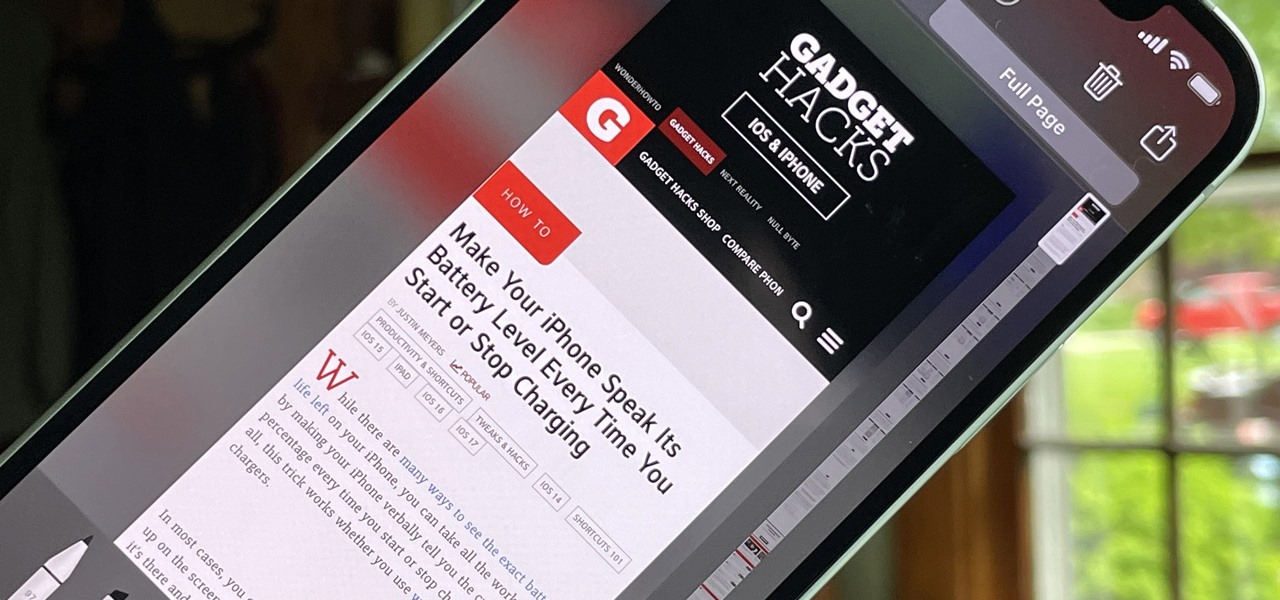
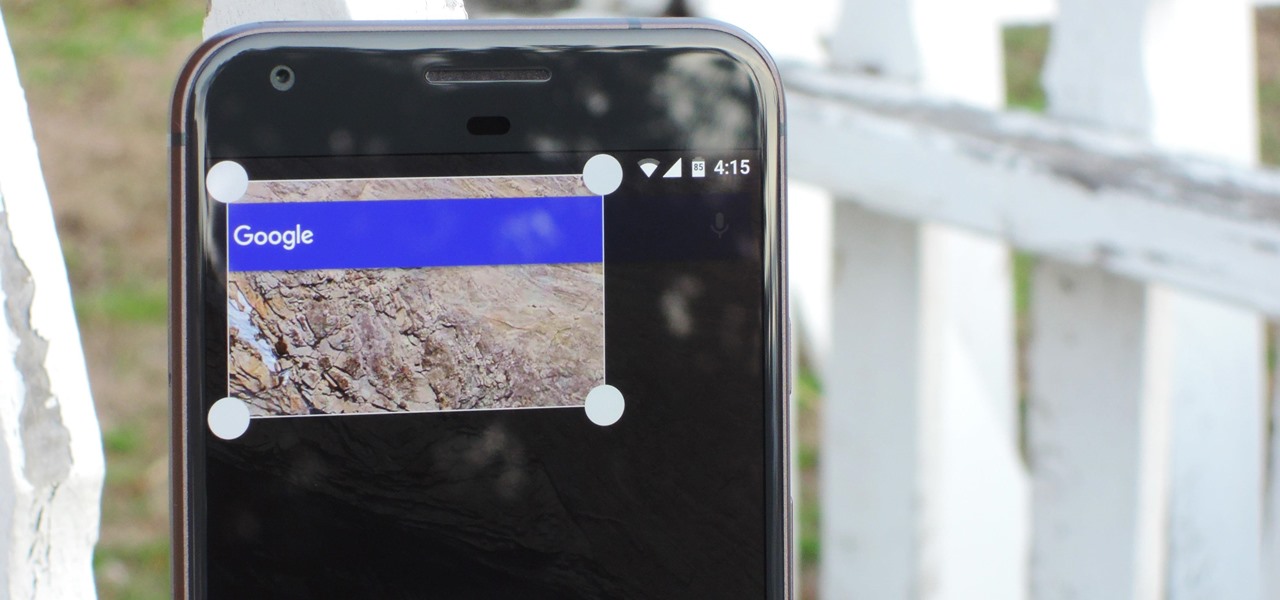
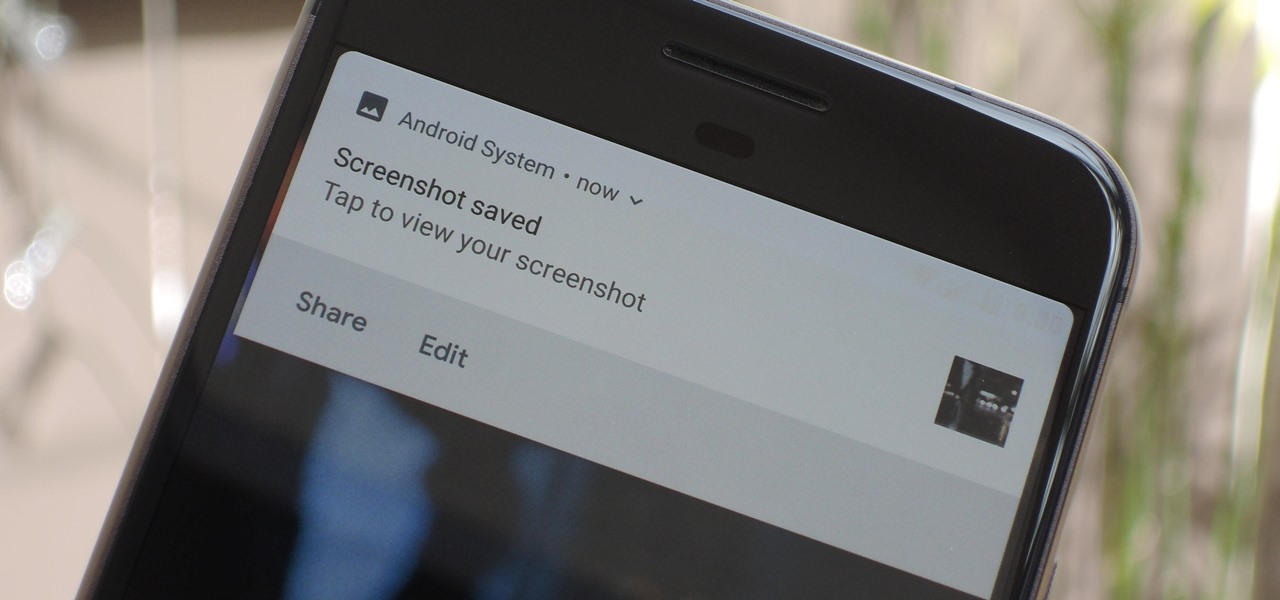
When you take a screenshot on your iPhone, it's automatically saved to your Photos app. You can ignore the screenshot thumbnail or swipe it away, but you shouldn't. If you open the screenshot editor instead, you'll gain access to your iPhone's most useful screen capture tool: full-page screenshots.
Apple's screenshot feature is a near-perfect tool for saving images of your iPhone's screen to keep for yourself or share with others. But iOS is missing one thing that would make it almost flawless: a way to rename your screenshots from their original IMG_1234.PNG file name.
It was a long time coming, but Android finally has built-in scrolling screenshots, and they come courtesy of Android 12.
If you just got an iPhone 12, 12 Pro, 12 Pro Max, or 12 mini, and you've never owned an iPhone before, some of the most basic tasks can be baffling. Shutting it down, force-restarting it, quitting apps, and even viewing the percentage of battery remaining sound simple but aren't very intuitive for new iPhone owners. Another big question mark is screenshots, and there are several ways to take them.
Over the last few years, Apple has significantly improved and scaled up your iPhone's ability to edit photos. Using the Markup feature, which was introduced back in iOS 10, you can add doodles, highlights, important text, your signature, and arrows and other objects onto pictures and screenshots. One of the lesser-known tools in Markup lets you zoom into essential details without cropping.
Being able to take screenshots on Android isn't something we were always able to do. It was added to stock Android in Ice Cream Sandwich 4.0 (Gingerbread 2.3, if you were a Samsung TouchWiz user) as a simple full screen screenshot, and that's the way it's remained ever since—until now.
For the most part, when you take a screenshot, it's because you intend on sharing it with someone. And, of course, we all take pride in our smartphones, so we want to show them off as much as possible. But the downside here is that regular screenshots are pretty boring, so they don't do a great job of showing anything off, really.
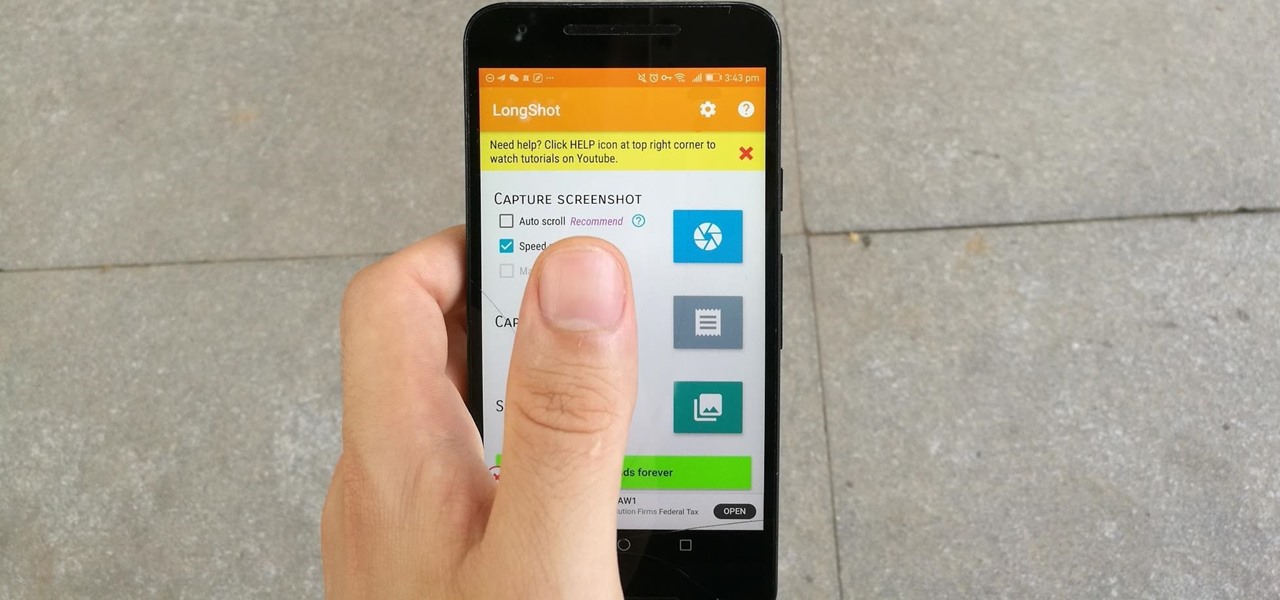
Some Android phones have had scrolling screenshots for years, but now that Apple added the feature to iOS 13 for iPhones, it should be standard on all phones. Thankfully, if your Android didn't come with the ability to take long, vertical screenshots, you can download an app that brings this feature to the masses.
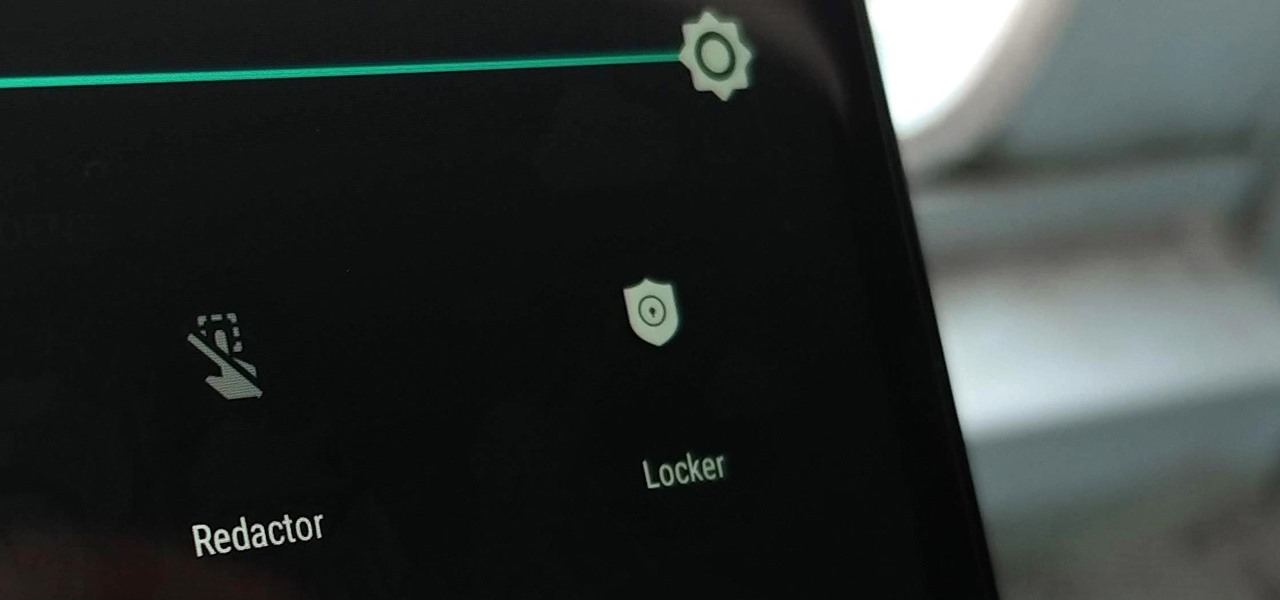
Sometimes we need to share screenshots, but don't want to reveal the entire screen. This usually requires some editing that isn't typically easy to do on a smartphone. BlackBerry recognized this issue and created a tool called Redactor that makes it easy to hide your data before sharing.
Samsung has had a rich screenshot editor in TouchWiz for years, and Apple even added a similar feature to iOS 11. Until now, stock Android has lagged behind in this area, but that's finally fixed in Android 9.0 Pie.
There are many ways to take a screenshot in macOS (previously Mac OS X), but all of the well-known options give you a drop shadow in the picture when snapping application windows.
There are plenty of useful shortcuts in Mac OS X, but not all of them are necessarily simple. You can use one of built-in shortcuts to take many different kinds of screenshots, but the shortcuts can be rather annoying to use because they require at least three different keys, which can be a little awkward to perform.
Samsung removed the Bixby key on the Galaxy Note 10 and Note 10+ and gave the power button dual functionality. In the process, they changed the way you power off the phone and made taking screenshots a bit tricky. Fortunately, it's not too hard once you get used to things.
Android 12 comes with new features and upgrades that any mobile gamer can appreciate, including Instant Play, which lets you play games instantly without downloading them first. Even better, there's Game Dashboard, which adds shortcuts for screenshots, screen recordings, and more in whatever game you play. The only problems are that it's not enabled by default, and it's a little hard to find.
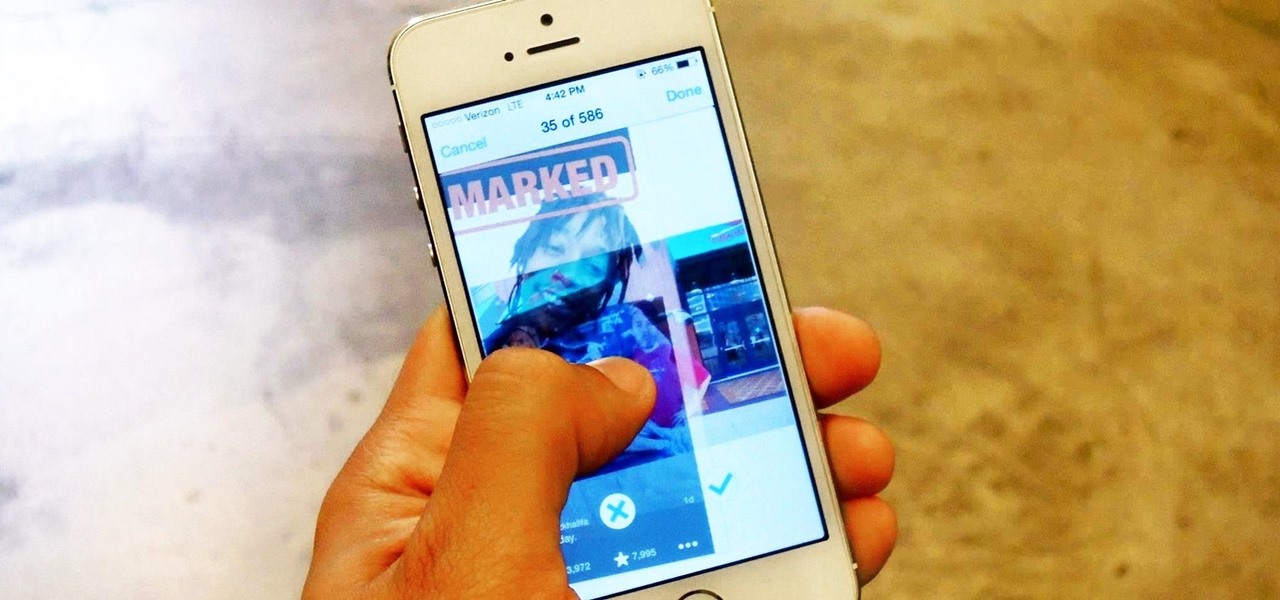
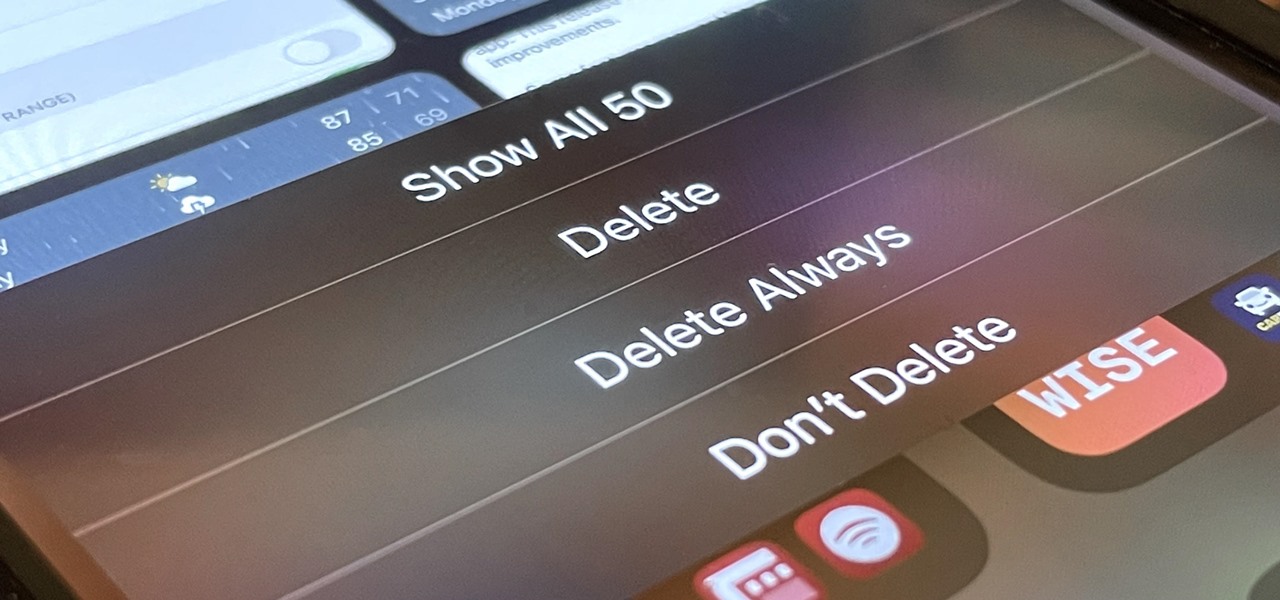
Apple doesn't make it very easy to delete things quickly from your Photos library, mainly for two reasons. First of all, if you delete multiple pictures at once, it's difficult to know the full details of each individual one you're selecting because the tiny thumbnails don't show very much detail. Secondly, if you delete the pictures one-by-one, you'll be able to view them in full screen, but it will take forever. And dealing with a delete confirmation each time is enough to drive anyone crazy.
A new leak from GSM Israel on March 6th shows some telling screenshots of the U.S. variant of the upcoming Samsung Galaxy S4, some of which confirm features seen in the leaked 4.2.1 ROM for the Galaxy S3.
If you're a frequent Snapchatter like myself, you're probably well aware that Snapchat can't stop you or anyone else from taking a screenshot of a photo received. Instead, they notify the sender that a screenshot was taken—a greatly appreciated fair warning when impetuous photographs are involved. However, there is a loophole to this.
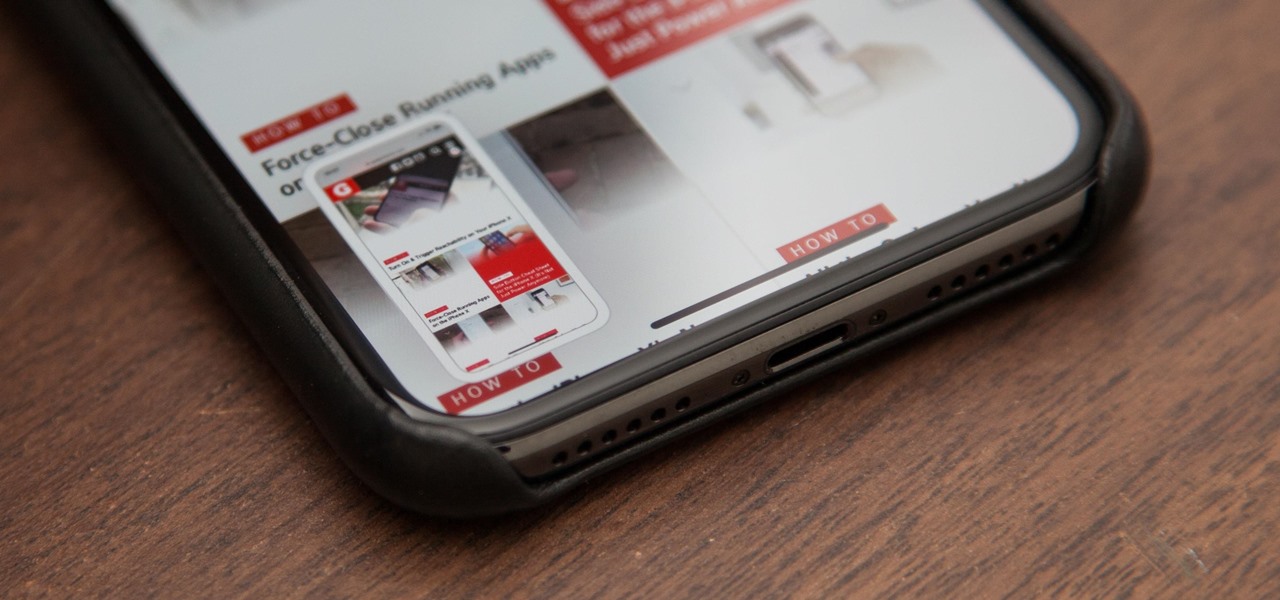
The fact that the iPhone X, XS, XS Max, and XR don't have Home buttons means that you'll need to learn a few new gestures. There's the home gesture, the multitasking gesture, and even a new way to access Apple Pay, among others. But one less-common action that has issues due to the lack of a Home button is taking a screenshot.
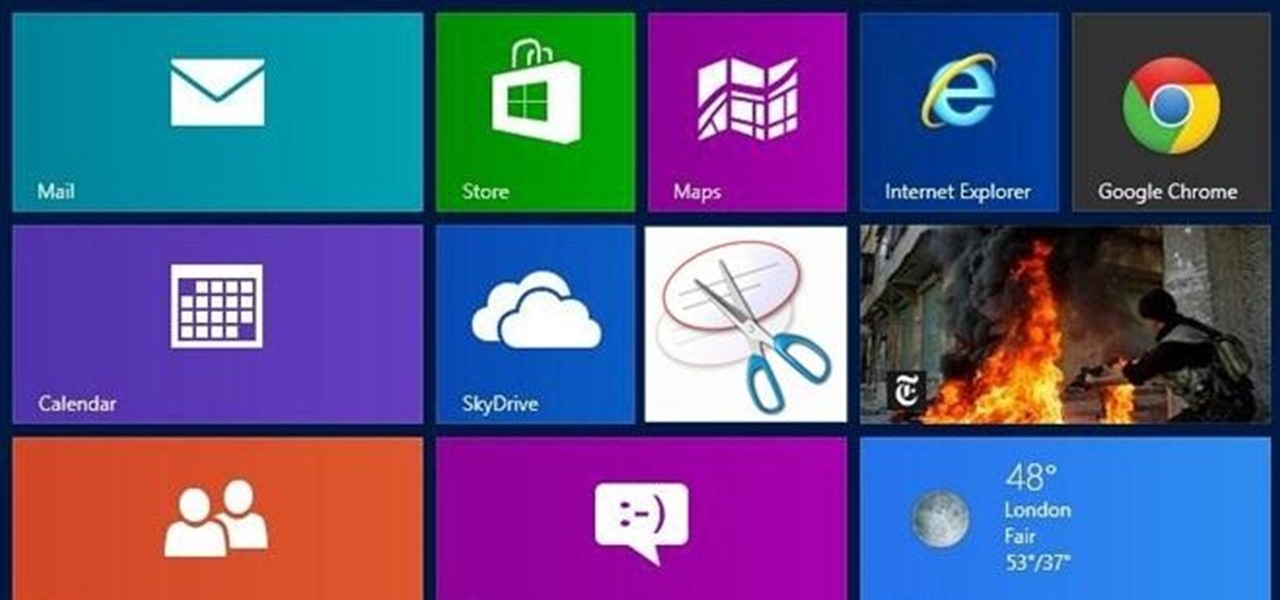
I know what you're thinking—taking a screenshot is super simple. While that is partly true, taking of a screenshot of the Start Screen in Windows 8 is little bit tricky, unless you're on your Surface.
Whether it's to flaunt your new digital face on Instagram or to show off a unique app to your friends, you'll ultimately need to know how to take a quick screenshot with your shiny new Apple Watch. Turns out, it's not that much different than taking one on your iPhone.
Some of my Facebook status updates are absolutely hilarious, and sometimes (though rarely) even my friends updates can get me on the floor laughing. And like most of you, I'm sure, when you come across something funny—you have to share it.
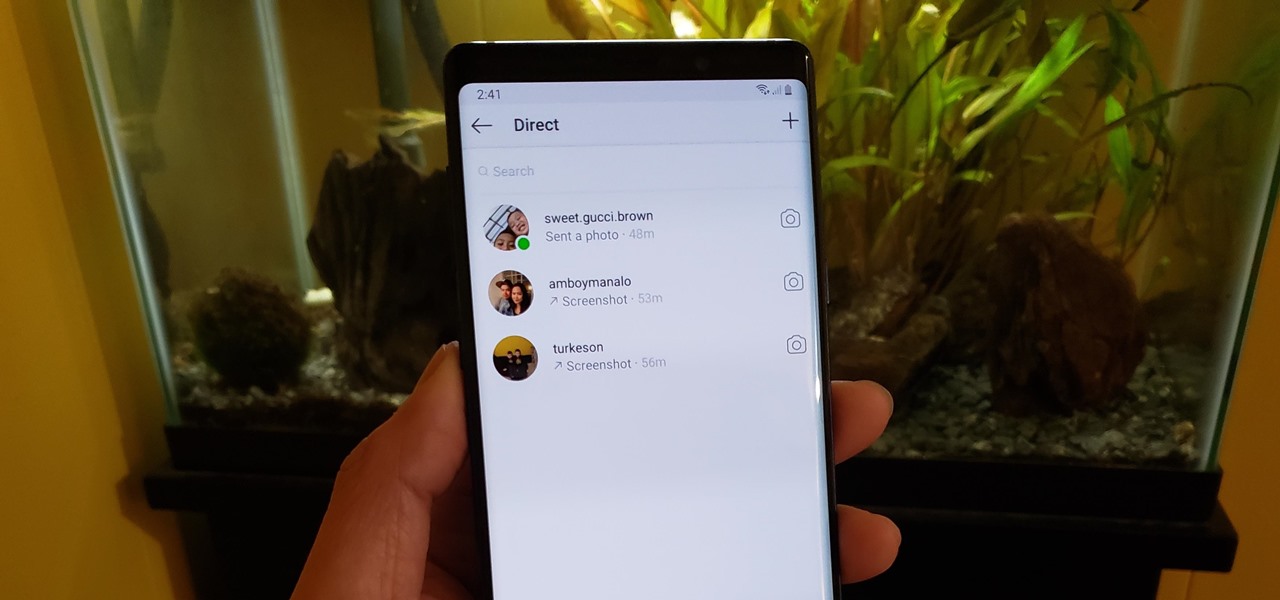
If imitation truly is the sincerest form of flattery, then Snapchat must be blushing profusely as Instagram continues to shamelessly copy its features and dig into its wallet. Instagram has also managed to copy some of the security aspects — or lack thereof — of one of Snapchat's hottest characteristics.
Taking screenshots in Windows isn't as easy as taking screengrabs in Mac OS X, but Microsoft sure is trying to resolve this issue. Their idea -- Snipping Tool. The Snipping Tool is available for both Windows Vista and Windows 7 operating systems.
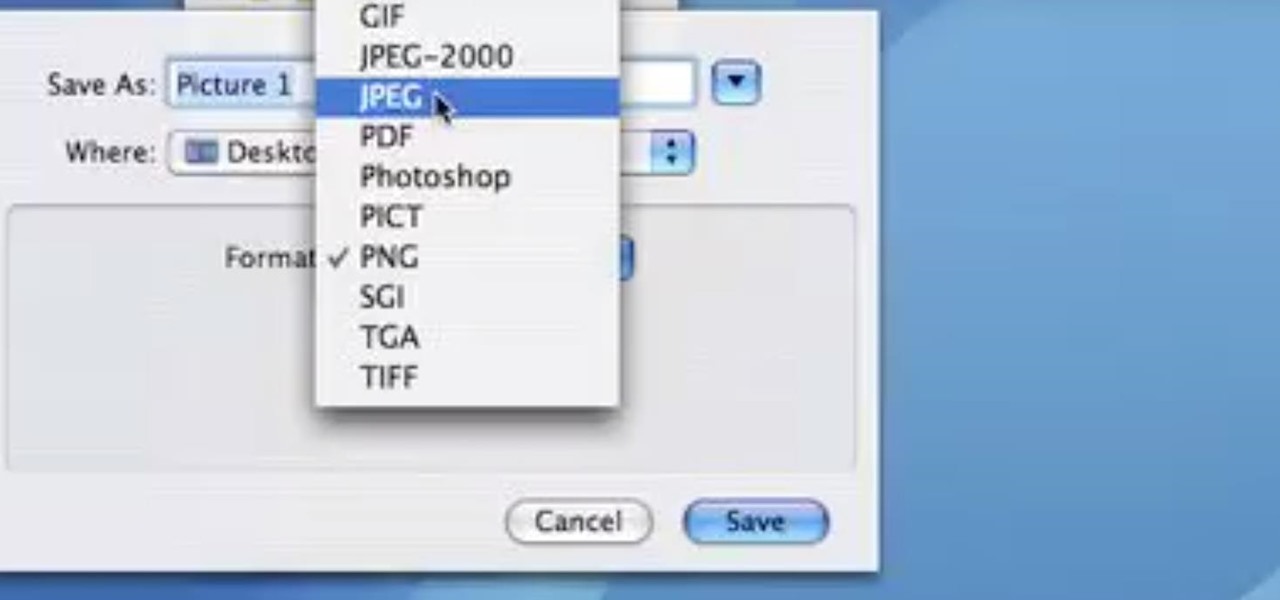
This video demonstrates how easy it is to take a screenshot with shortcuts in Mac OS X. Pressing Command-Shift-3 will take a screenshot of the entire screen, while Command-Shift-4 will let you take a screenshot of just a selected area of the screen instead. For the latter, once you use the shortcut, your mouse pointer will turn into crosshairs, and you would click on one point of the screen, then drag and release your mouse to take a capture of the selected area.
It's so convenient to take a screengrab of one of your most favorite moments from your favorite movie or show, but sometimes you just can't. But you can actually take a snapshot of it. Check out this video tutorial on how to create screenshots from videos on Ubuntu Linux.
Need a little help figuring out how to capture screenshots in Microsoft Windows 7? It's easy! So easy, in fact, that this free home computing how-to can present a complete (and somewhat talky) overview of the process in just over a minute's time. For specifics, and to get started taking your own screengrabs in Win 7, watch this PC user's guide.
Have you ever wanted to take a screenshot of your desktop to use in a presentation or to send to a coworker? In this video tutorial, Mac Genius Joy will show you how to take a picture of all, or part, of your screen with the Mac OS X key commands. For more, and to learn how to take your own screenshots in Mac OS X, watch this video tutorial.
In previous versions of Windows, trying to get a picture of your screen was a frightening experience, but now, in Windows Vista, they've designed a great feature called Snipping Tool which allows you to take screenshots with just a few clicks. If you're looking to take screen grabs and snippets of your desktop's screen, then watch this video to see how it's done!
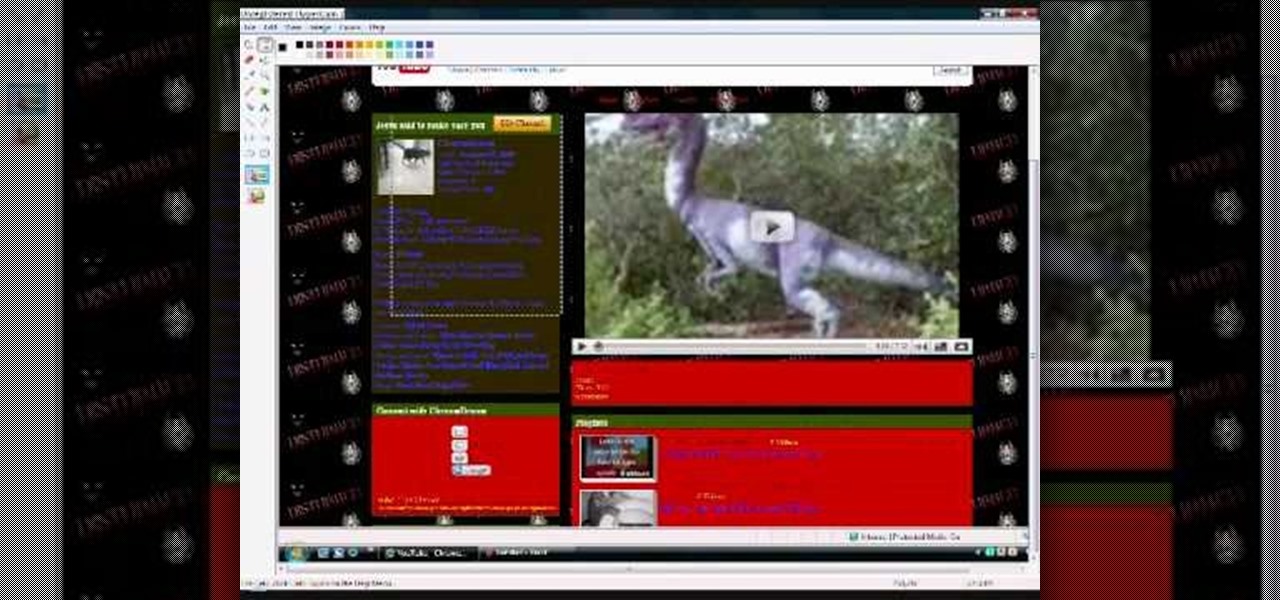
This is a video about how to use the printscreen button. You can take screenshots with the printscreen button on the keyboard. First you have to a pick an image whatever you want to save in your PC. In this video he is explaining about how to save the a picture about the animal description. Next press the printscreen button when you get the image. Next go to start button and next Accessories and next paint and open the new page on paint. Then go for paste in the edit. Then you will see the pi...
For this tutorial to work, you will need to be running iMovie on a Mac. Take any frame from your footage and turn it into a still shot that will function like a photograph. Use it as a screenshot or promotional tool for your movie!