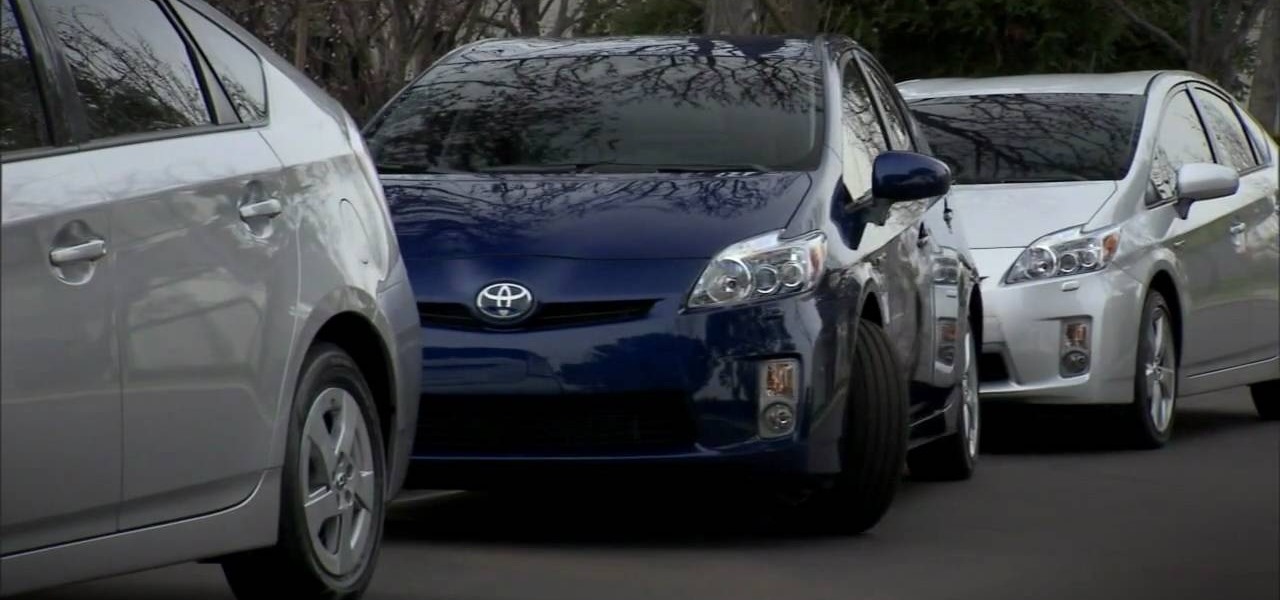
Learn how to use the parking assist mode in the new 2010 Toyota Prius in simple steps. Press the Intelligent parking assist button located under the power button when you park you car. Now select the type of parking you want to park your car which is either parallel parking or back in mode. For the parallel parking stay 3 feet away from the vehicle to your right and stop when you hear a beep. Press OK when ready, release the steering and gently control the speed as the system will steer for y...
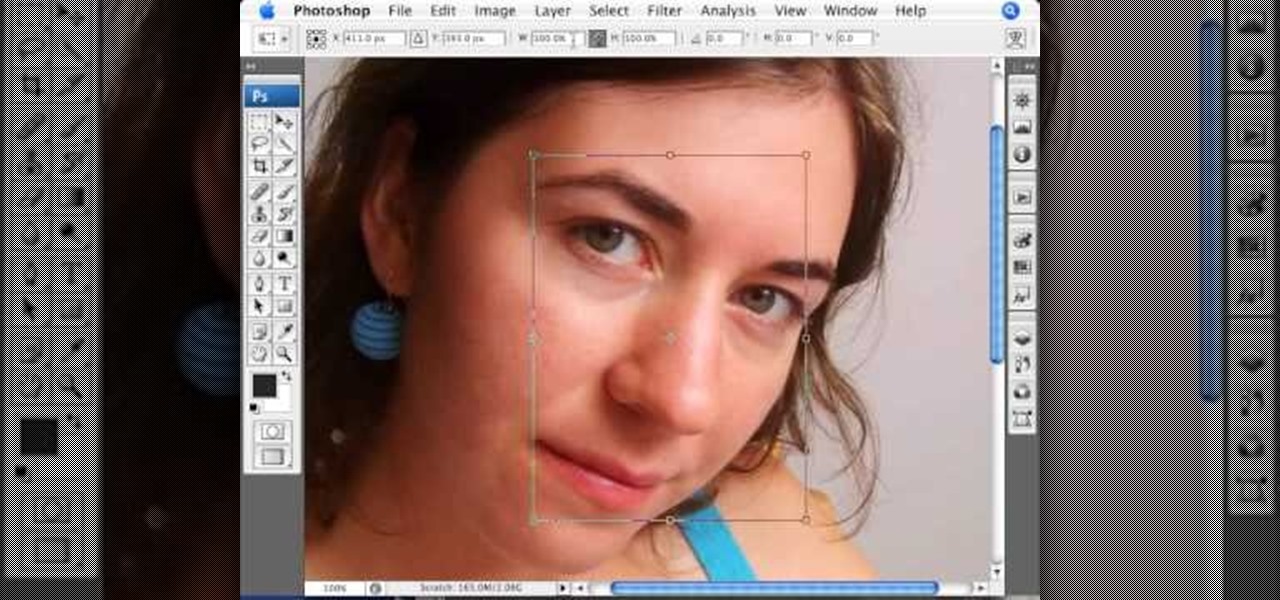
This Photoshop tutorial on performing a nose job using Photoshop contains detailed instructions on the use of Photoshop tools to, depending on taste, enhance the appearance of an individual. The person narrating the tutorial specifies the necessity of subtlety with the modification of the picture in order to remove any appearance of modification. The way described is essentially to select the general nose area, feather the selection by an optional amount, and set it in a separate layer. Then ...

This video tutorial by photoshopuniverse shows you how to create a postage stamp in Photoshop. First take a suitable image and decide the shape of the stamp. Corp the image to suit the shape of the stamp by selecting the area and choosing corp and increase the canvas size as shown in order to create the perforated cutout. Transform the image into a regular layer and once again increase the canvas size to create a back ground with an appropriate color as shown. Add a layer mask, chose the brus...
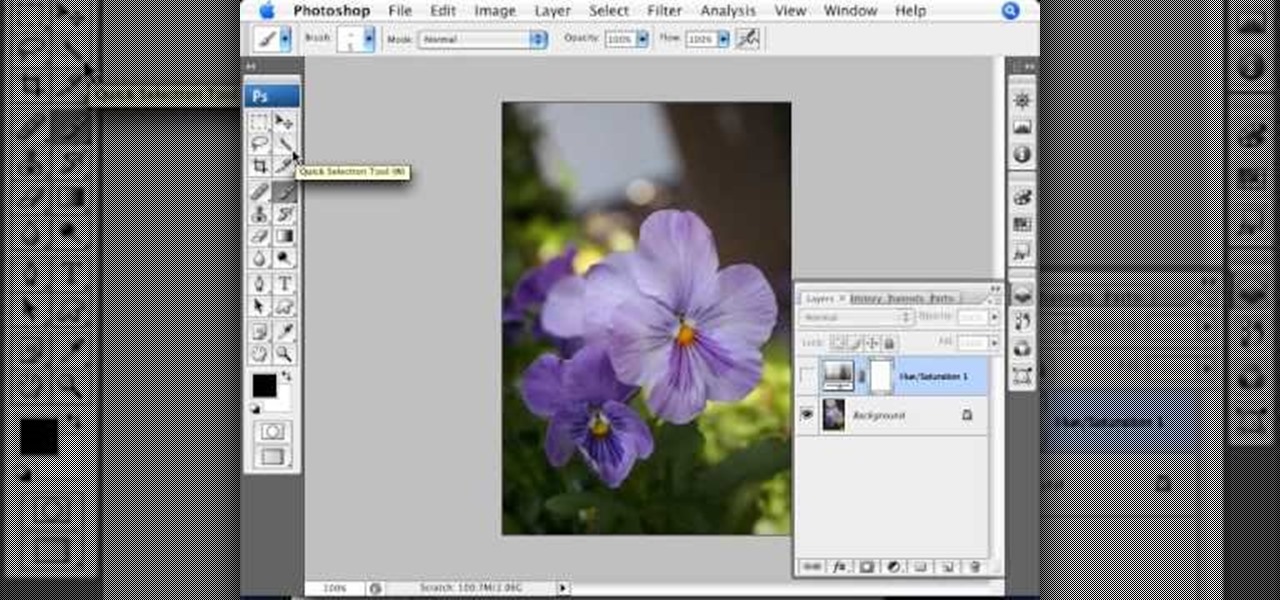
This video shows you how to simulate hand coloring in Photoshop. The first step in the process of simulating hand coloring is to turn the image you have chosen into black and white. Following turning the pictures coloring to black and white you must bring up the hue color control panel. The final task includes selecting the object to color within your image as well as picking the color in hue that you wish to use. The coloring must be done manually by the users control of the mouse.
This how-to video produced by Photoshop Universe gives step-by-step instructions on how to batch automate a process in Adobe Photoshop. With this tutorial you'll be able to learn to correct white balance, enhance colors, resize, and save for the web whole folders' worth of images in one go. The first step to doing this is to open up one of the images in your folder and correct the white balance, enhance the colors, resize the photo and save. The next thing you want to do is to record all of t...
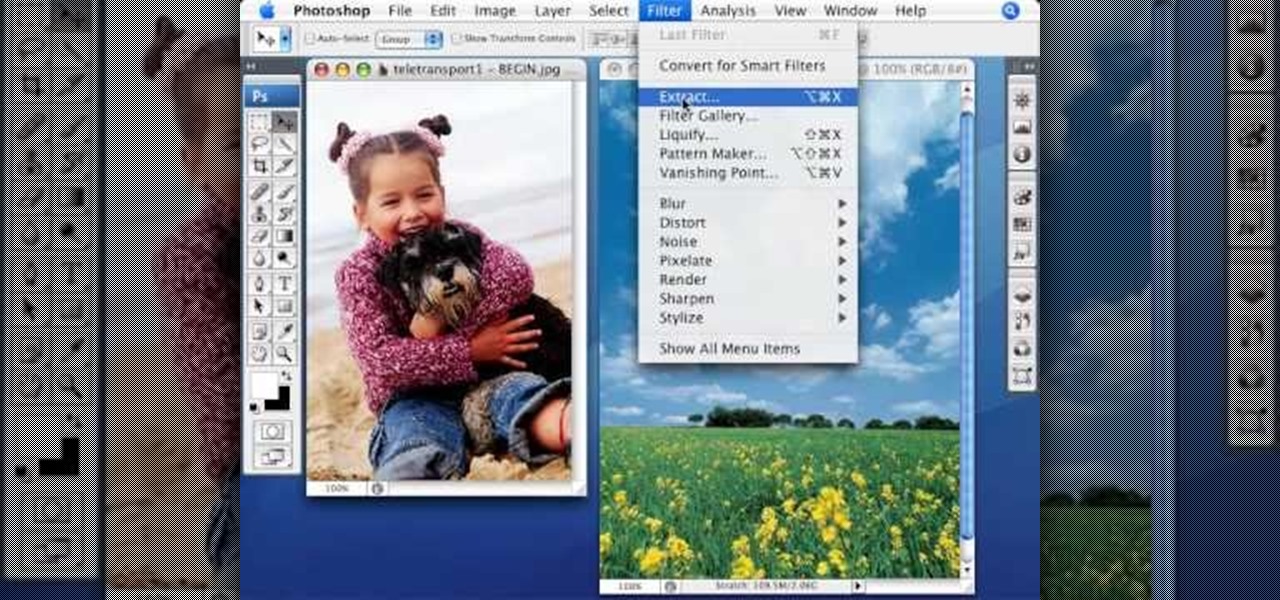
This video tutorial by photoshopuniverse, is to tele-transport people in photos using Photoshop. For this you will need two photos, one with a person and another of a suitable scene. Select the image with the person and extract the person using the extract tool by marking the edges. Make sure to change the brush size so that you can mark the edges with a bit of the border to be included and a bit of the outside to be excluded. Fill in the retaining area and extract the image. Using the move t...

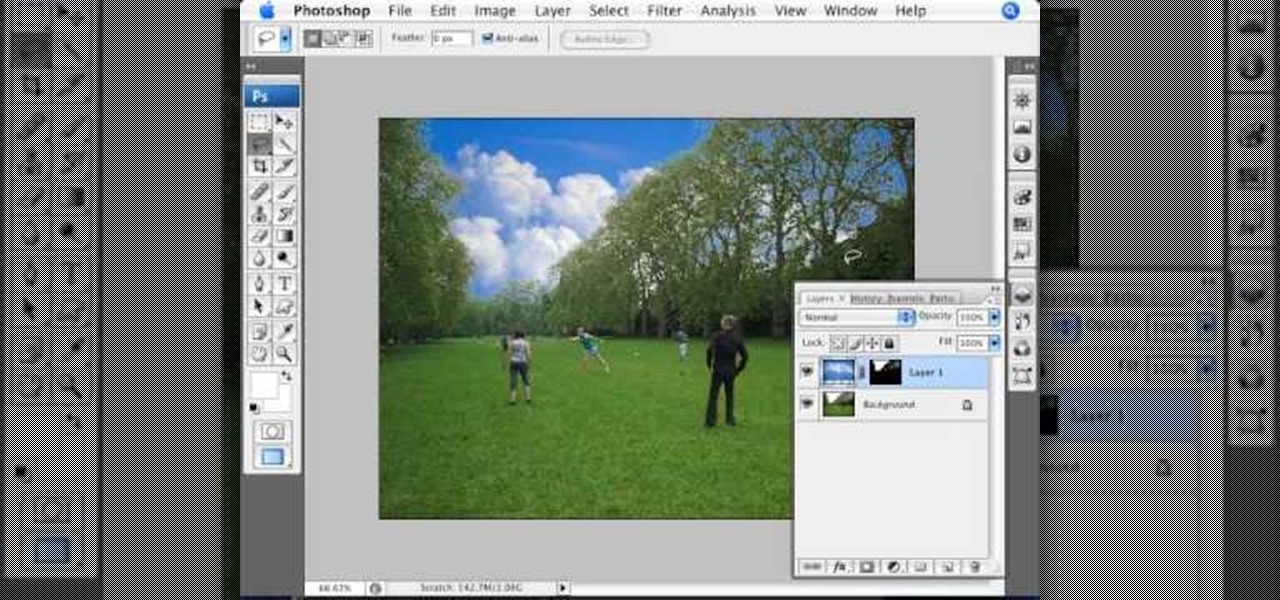
In this Photoshop tutorial the instructor teaches you to replace the sky in a photograph. If you have a photograph which has a very dull and blown out sky you can change it to make it look better as shown in this video tutorial. Some times when the sky is cloudy or due to improper white balance you end up with photos having a over bright or dull sky. Now you can find another image where the sky looks bright and attractive and replace the sky in this image with that one. Open the photo that yo...
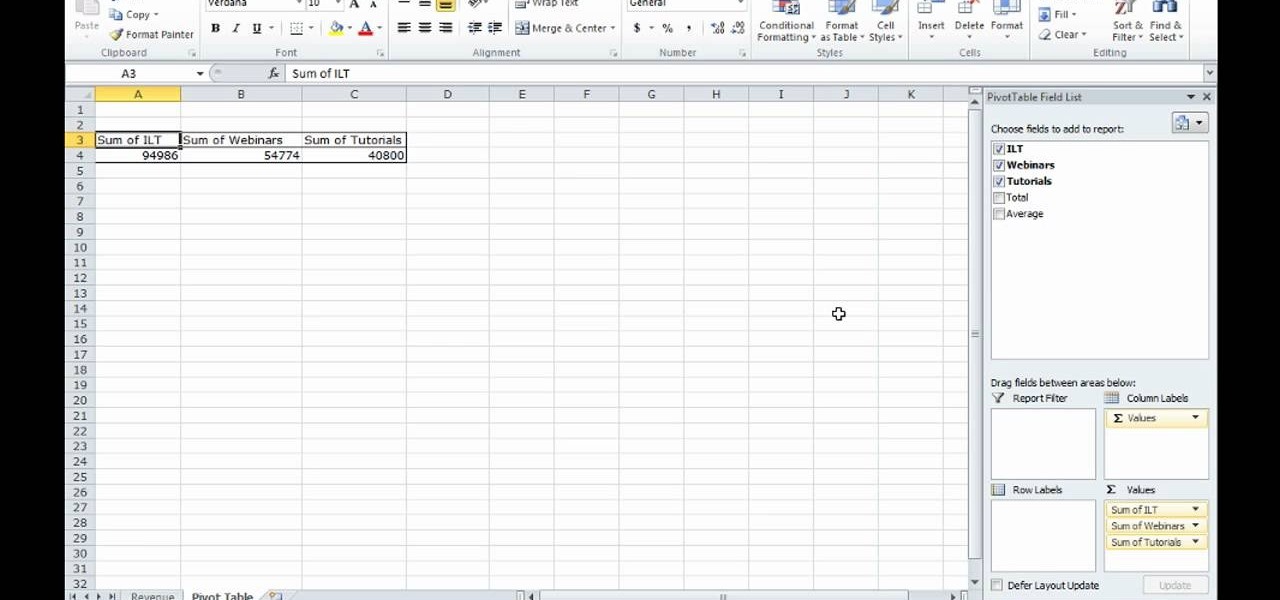
This video shows how to make a quick pivot table data filtering by using Excel 2010's ‘Slicer’ functionality. ‘Slicer’ delivers enhanced visual filtering method to allow you to get the data you need more quickly. When selecting a cell in the pivot table you will find ‘Slicer’ in the filter group of the ‘Insert’ tab. Click on ‘Slicer’ and an 'Insert Slicer' dialogue shows up where you can pick particular data fields from the slider list. Once you click on ‘OK’, the ‘Slicer’ objects with filter...
Radford Education teaches you how to create a website using Google Sites. You need to have a Gmail account for this. Go to Google and click More - Sites. After the login, click Create new site in the upper left corner. Complete all the fields, starting with the name of your site. You can also select your site theme below. Hit the Create Site button at the bottom, when you're done. You will then be taken to your brand new site.
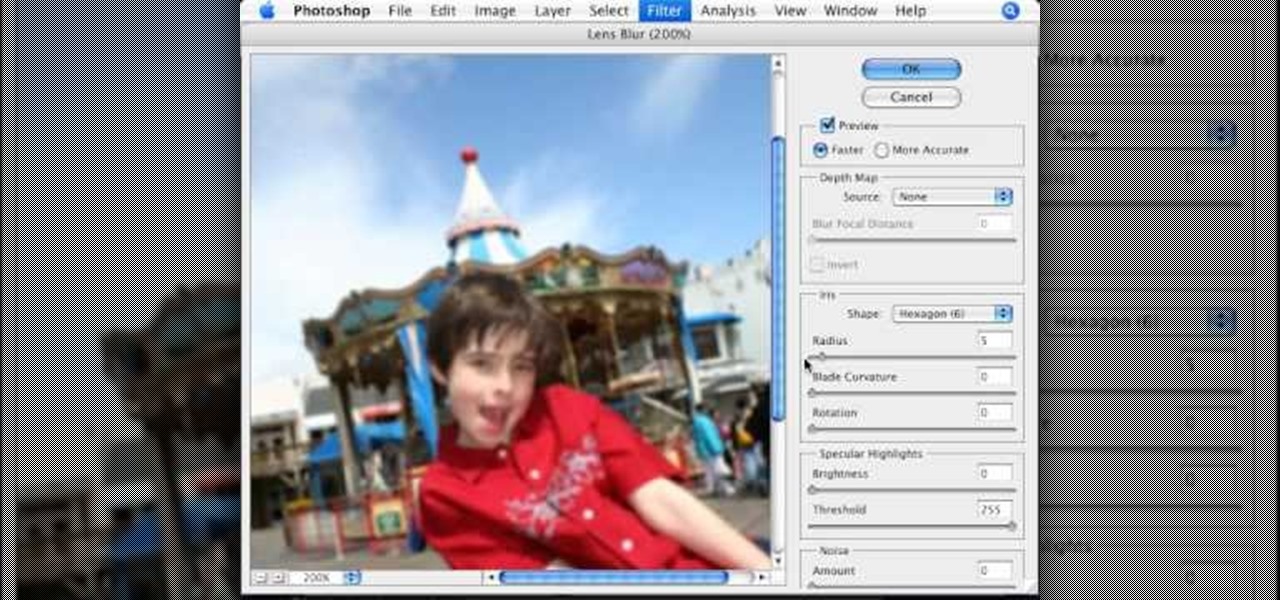
This video tutorial, by photoshopuniverse, shows you how to reduce the depth of field after a photo is taken using Photoshop. This enables you to ensure that your main subject is clearly in focus while the background is out of focus or blurry. First duplicate the layer using the short cut that was mentioned and apply the filter lens blur to the new layer and adjust the radius so that an adequate amount of blurring is achieved. Add a layer mask and bring the subject to focus by selecting the b...
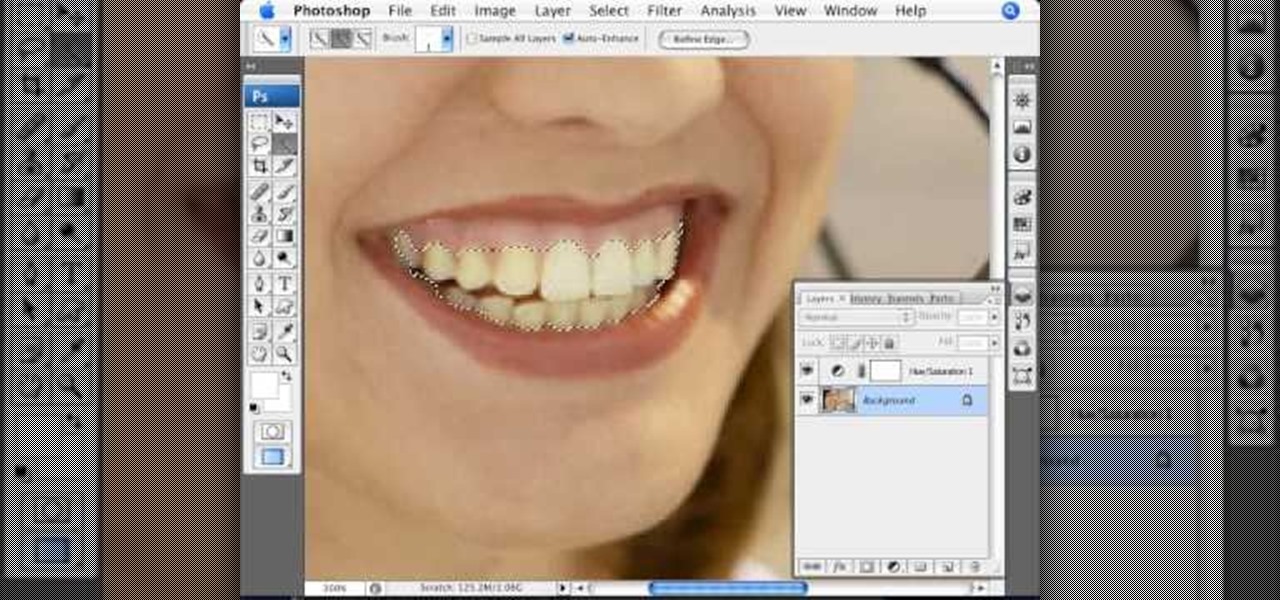
This is a terrific video on how to whiten yellow teeth in Photoshop, taught by Link. First, he zooms in on the teeth and uses the quick selection tool or magic wand. This is a pretty easy task. You just have to click and drag. If you put too much of the gums, you can hold down alt, then drag the areas you don't want. Make sure you use a small brush when using these modifications. All you have to do then, is go into the heat saturation and select shift-control-I, which inverts the selection. T...
This video, produced by Photoshop Universe, teaches how to reduce beard stubble or 5 o'clock shadows from male pictures. We are shown how to use the dust and scratches filter, layer mask, as well as the advanced layer style command "blend if" on the underlying layer helps us to make this possible. The first step is to duplicate the layer and then select filter, noise, and dust and scratches. The second step is to apply some dust and scratches to the beard selection. Finally we blur the layer ...
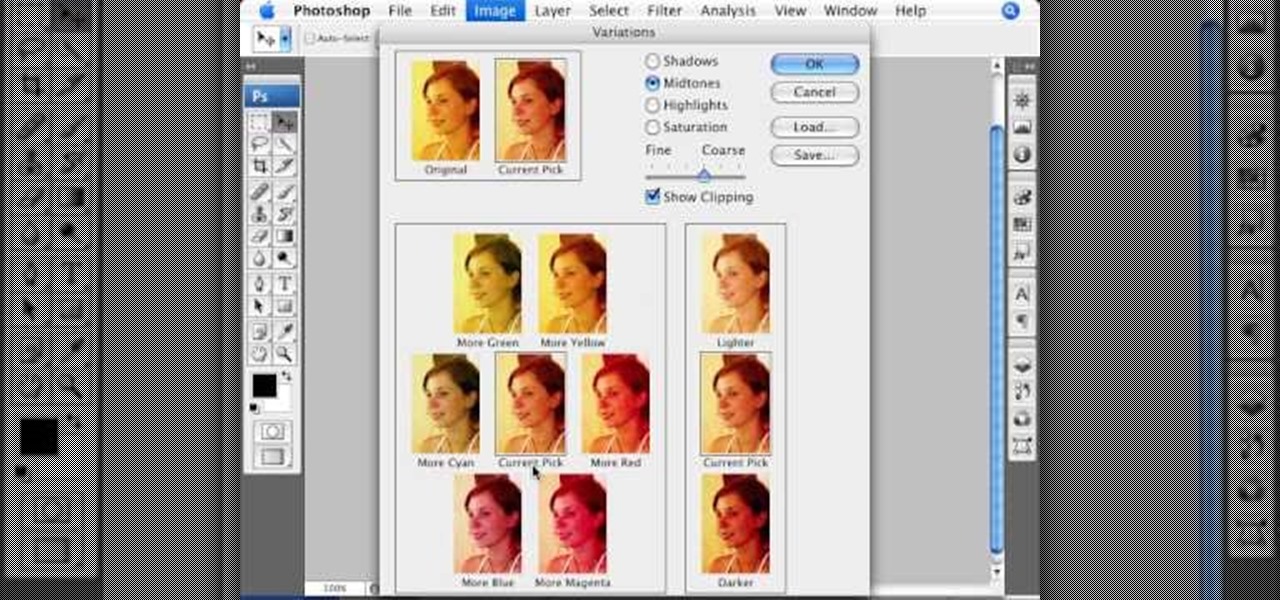
This informative video tells you how to use the variations panel in Adobe Photoshop to correct color issues in your photo. Too much yellow in your picture? Learn how to use the variations setting to instantly fix this with the corresponding opposite color. With simple clicks and easy preview-able pictures, you can correct color over-exposures with a click of the mouse. First go to the Images drop down and select the variations option. The original photo on the top can be clicked to revert you...
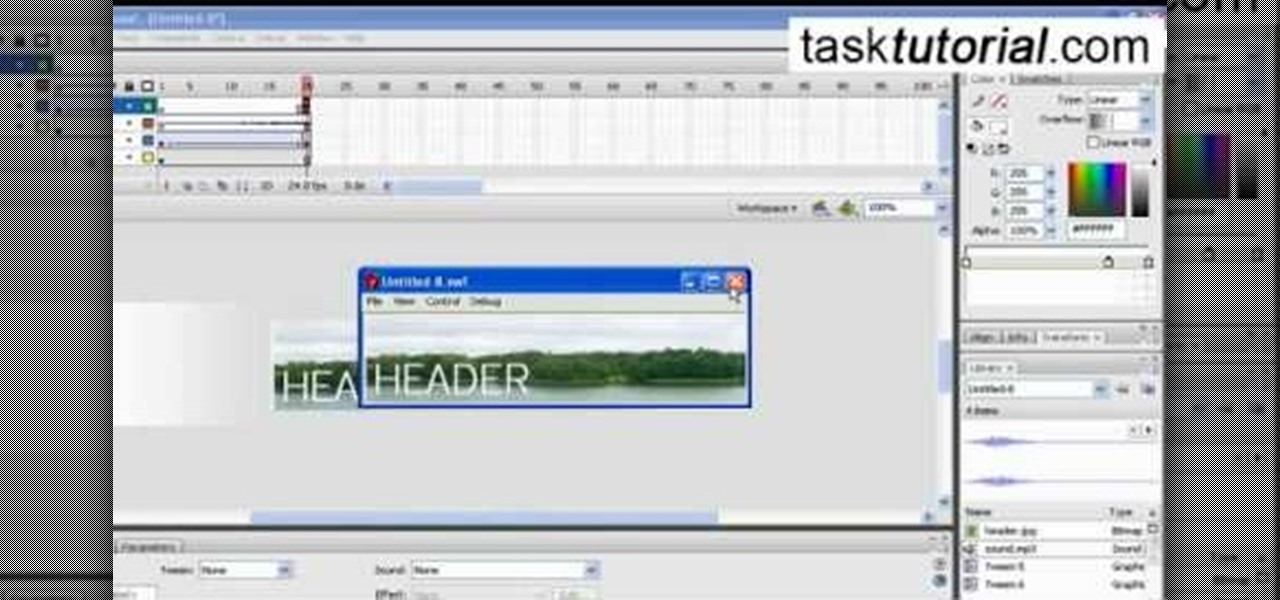
Today we learn about creating a header appearance in animation w/sound in Flash. First your import image. Create a new layer and then create our new shape. Then delete the stroke. Next select the shape and change its size to frame 20 and then press F6. Move your image as shown in the video. You will be asked to create a new layer three times. Just repeat the process of layer until you have a total of 35 layers. Now onto getting you animation to move. Mass layer is also acceptable in creating ...
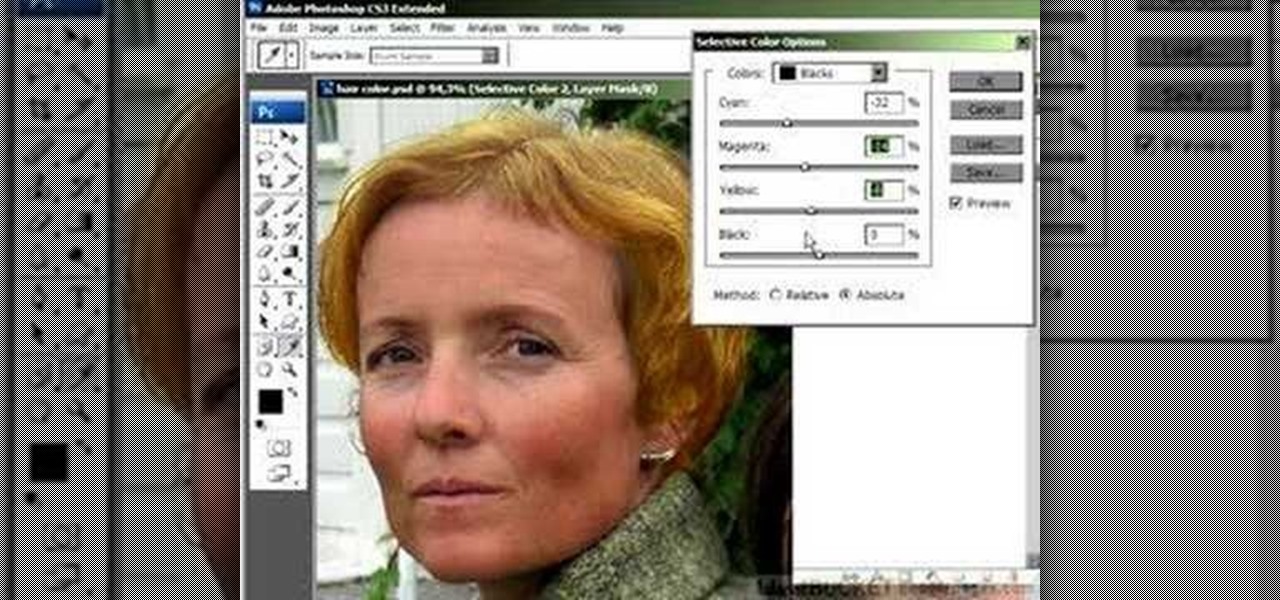
In this Photoshop tutorial the instructor shows how to change the dark hair color to blond. To get this accomplished you need to use a couple of very special techniques. First use the selective adjustment layer and select the outline of the hair. Now use the selective color option and change cyan and magenta settings to about minus forty. Now changing the other yellow color to achieve saturation and black colors to achieve the effect with shadows. Now next change the colors of black so that t...
This video shows you how easy it is to use system restore on Windows XP and Vista to bring your computer back to life. System restore takes your computer back in time to a point before it had errors or problems. Go to the start menu, all programs, accessories folder, system tools, and system restore.
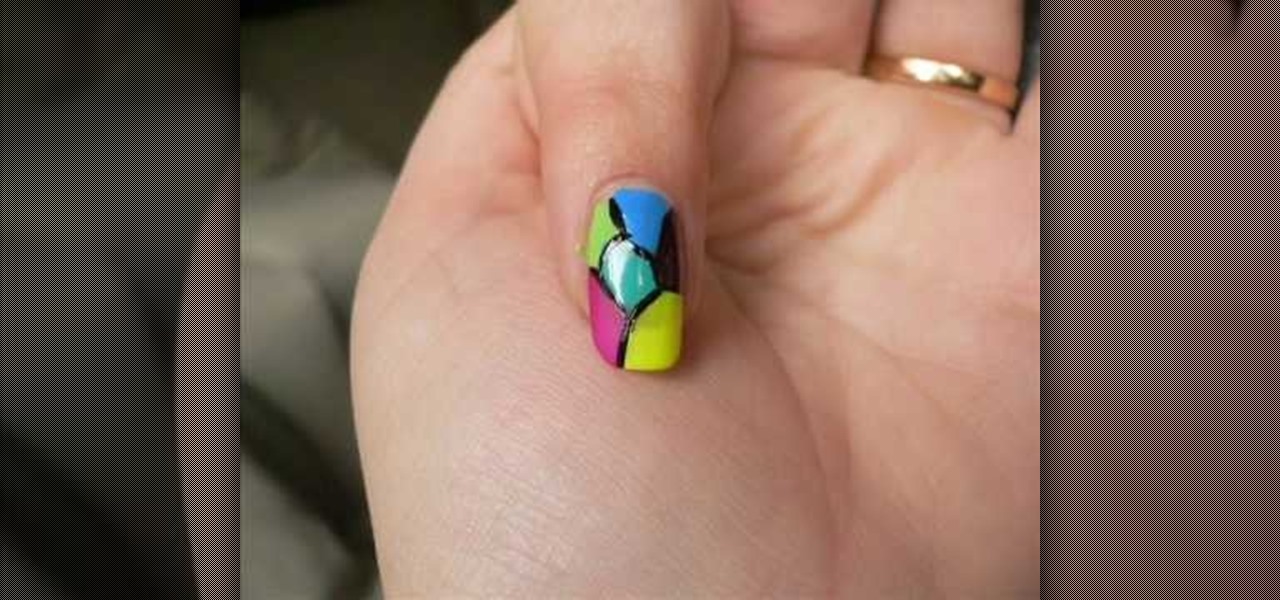
This video relates to Neon Mosaic Nail Tutorial. This video teaches how to make the nails good looking and also pleasing. In this video she teaches how to select the colors of nail polish and also she teaches the steps to be followed regarding which color nail polish to be applied first and also to create a mosaic by using multiple colors. She also add some border line to create and pleasing look. She also narrates to change the colors in applying to each nail. She also teaches how to create ...
You can use starburst to make stars in photos stand out or you can use that feature to make reflections and glares on cars, mirrors and other shiny things. You use different layers in Photoshop to create the starbursts then add it to the photograph that you select. You can choose the pixel, size and color. The tutorial also teaches you other buttons to use in conjunction with the starburst feature, which teaches you other things so you can work on other pictures.
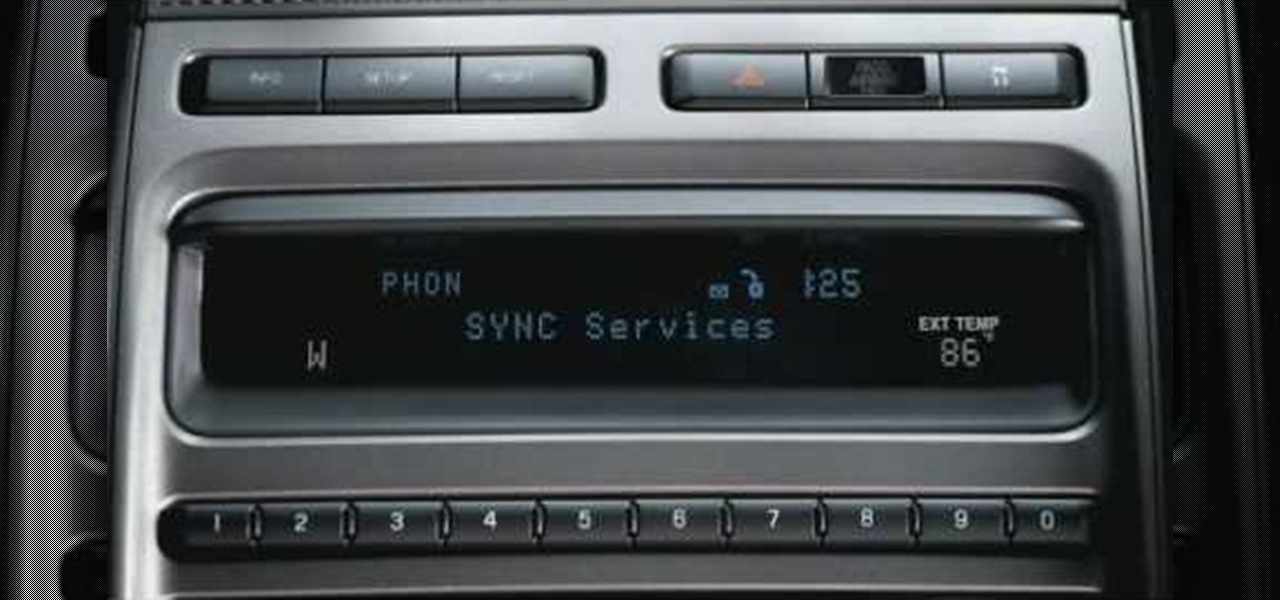
Ford's new SYNC system makes it easy to receive personalized alerts, including weather, news, and sports alerts… hands free! You only have to go to your owner's account online and set your favorite alerts for your SYNC system. Then just press the Voice button and select your service.
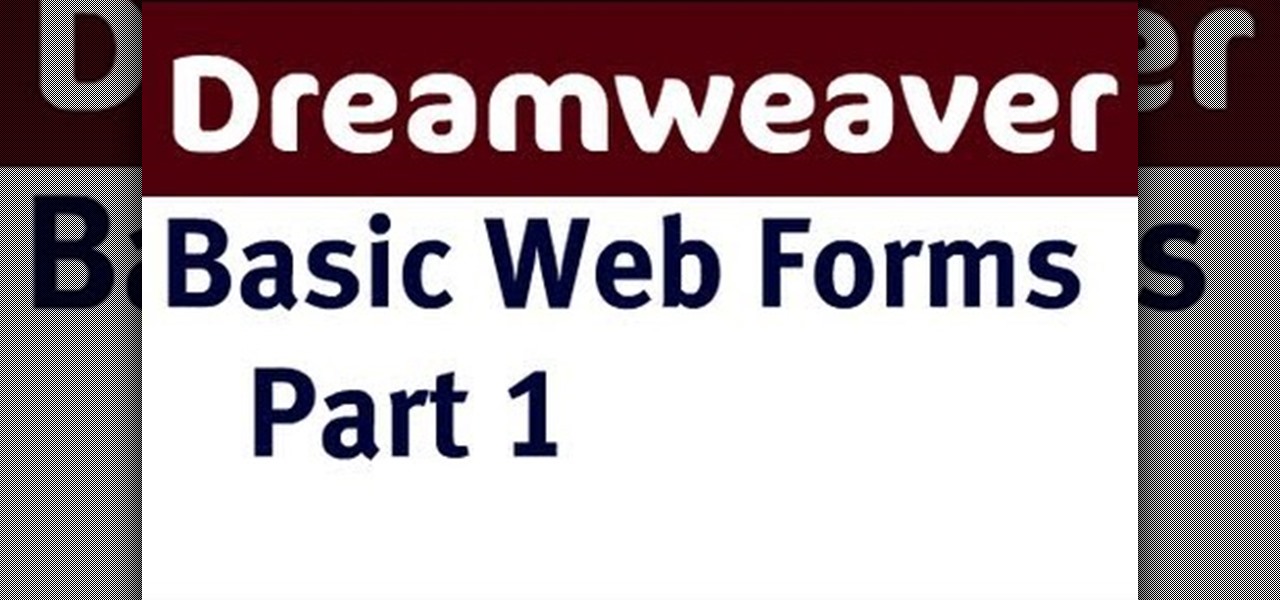
In this three-part Dreamweaver tutorial, learn how to create basic web forms using Dreamweaver. The three parts cover the following:
One of the cool things in Windows 7 is the new start menu. It is now possible to add an internet search area to your Start Menu. Instead of searching your computer, you can select a separate option called Search the Internet.
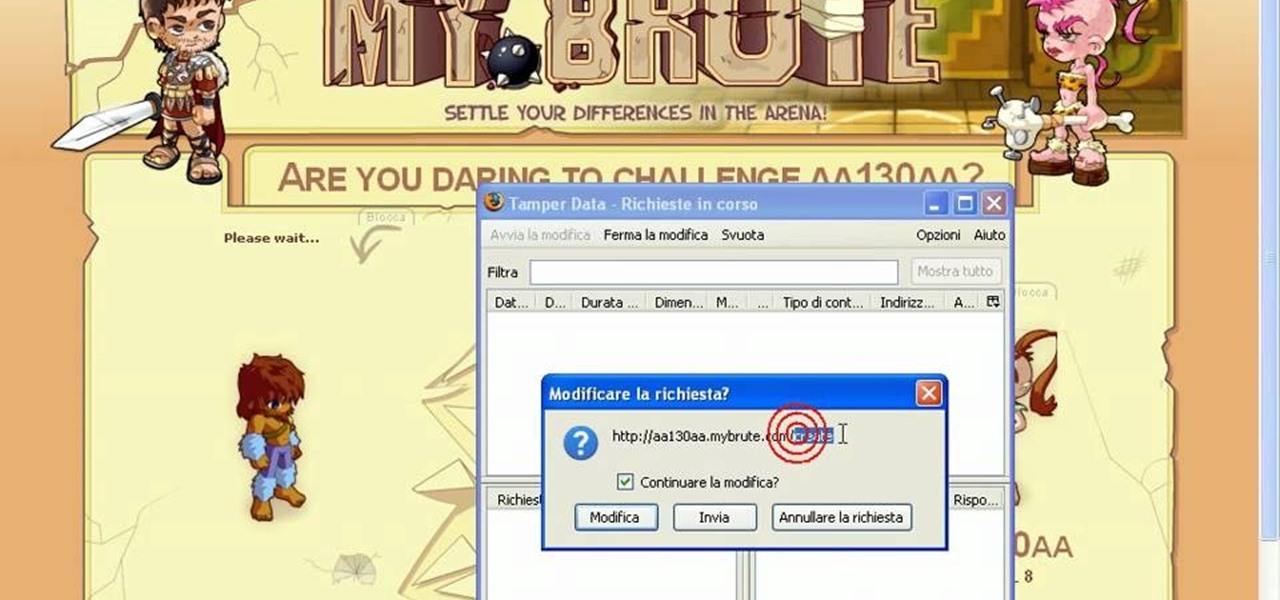
Hack mybrute with this mybrute cheat. MyBrute hacks, cheats, tricks. Watch this video tutorial to learn how to cheat MyBrute for a bear (05/08/09). This is the easiest way to get a bear!
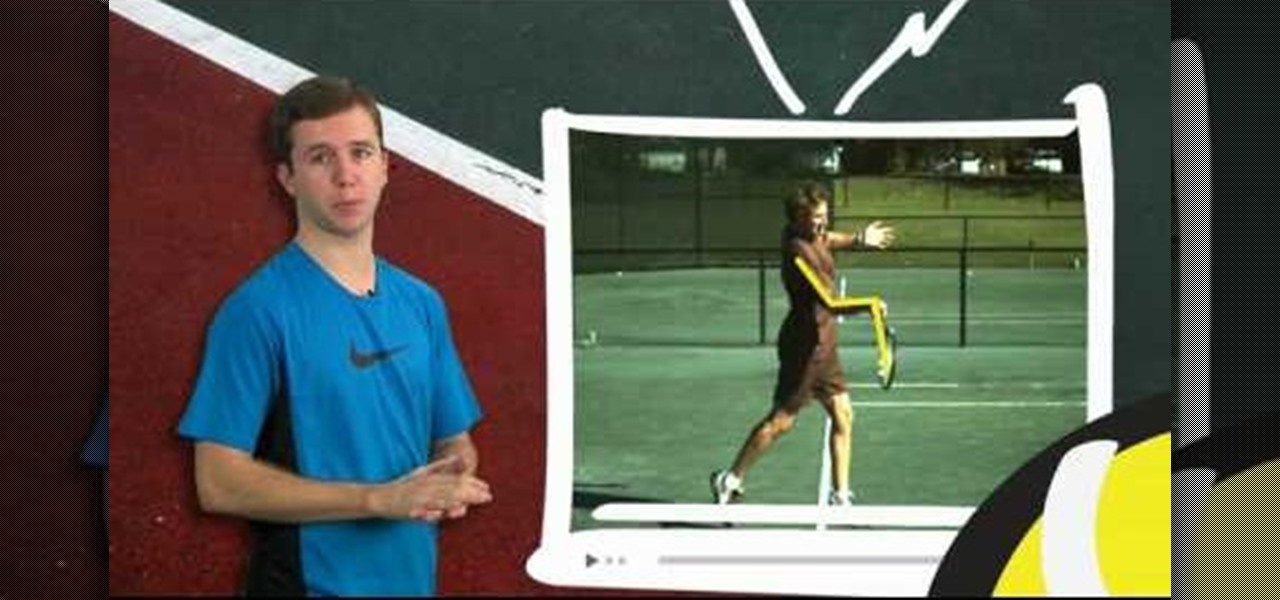
Welcome to a tennis lesson from FuzzyYellowBalls, the the best place to learn how to play tennis online. Our free video tennis lessons teach you how to play the game in a new way that combines technical analysis, visual learning, and step-by-step progressions.
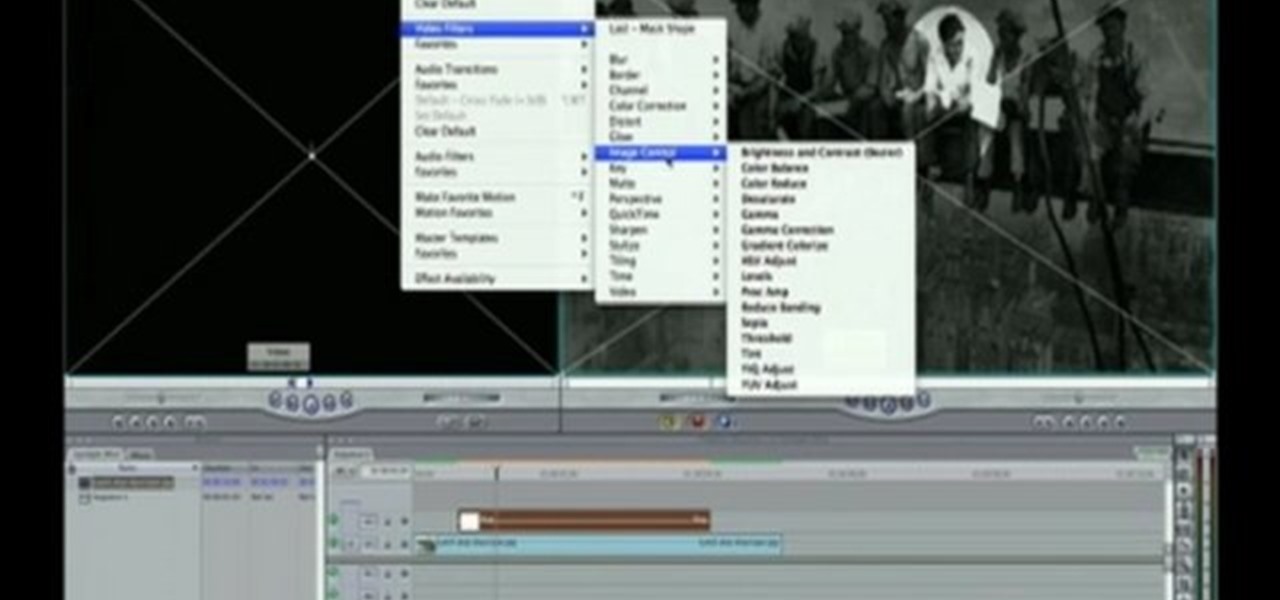
For this Final Cut Studio video tutorial, Zach King will teach you how to create a spotlight effect in Final Cut Pro. To create a spotlight effect, just drag your photo of choice into the timeline, set and in and out point, go to video generators, and use the slug. Then press the red overwrite button. Next, select the clip, go to the Effects tab, go to Video Filters, Matte, and then Mask Shape. Check out the rest of the process in Final Cut. Let the Final Cut King show you how!
Instead of using Photoshop, why not give Apple's Aperture a try? Aperture is designed more for post-production work for professional photographers, letting you cull through shoots, enhance images, manage massive libraries, and deliver stunning photos.
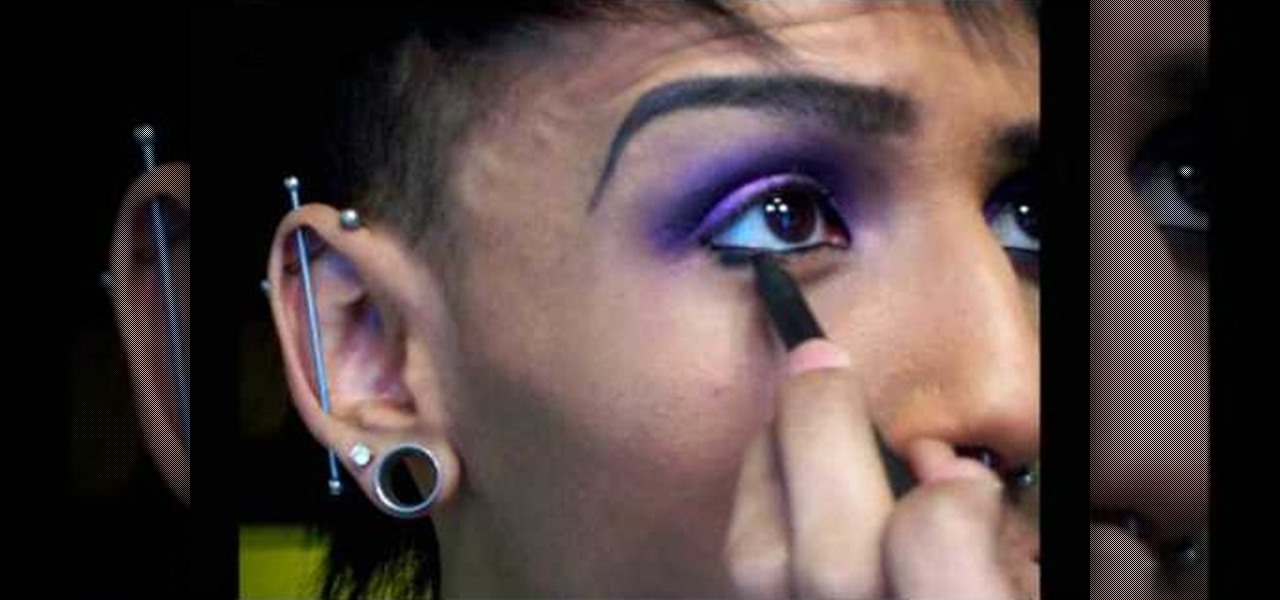
Watch this makeup video tutorial from Petrilude on how to create a carbon copy "smoky purple eyes" makeup look. What does carbon copy mean? Well, Xsparkage was inspired by Petrilude's "Jeweltone UV Neon" look and did her own version (which was beyond amazing), now Petrilude is copying and bettering one of her styles, the "smoky purple eyes" look. See how to do this new version of the smokey purple eyes.
If you work with MobileMe Calendar, you can create individual calendars to help you keep track of what's going on in your life. Let's say you've just started a new book club and you want to create a new calendar for it: just click on the plus sign in the lower-left corner, then click "New Calendar"; next, give it a new title such as "Book Club." Now, with your new calendar selected, when you enter the kickoff meeting for Sunday afternoon, that event will be added to the book club calendar. To...
In this ASP.Net video tutorial, Chris Pels will show how to use nested master pages to create individual master pages that represent different standard content layouts for a web site. First, see how several major commercial web sites use a standard set of content layouts. Next, see how to nest a master page within another master page, and use the design time support in Visual Studio 2008. Then, learn the considerations for establishing a “page architecture” which represents the major types of...
Topiaries are no longer just speciality plants. They have become very popular and are showing up in garden centers and nurseries across the country. Topiaries have been used for thousands of years, in places like Babylon and England. Today we take the mystery out of topiaries and discuss pruning trees and shrubs to look like geometric forms. As well we talk about designing topiaries, selecting the trees and shrubs and maintaining them to look their best and show you how to create small topiar...
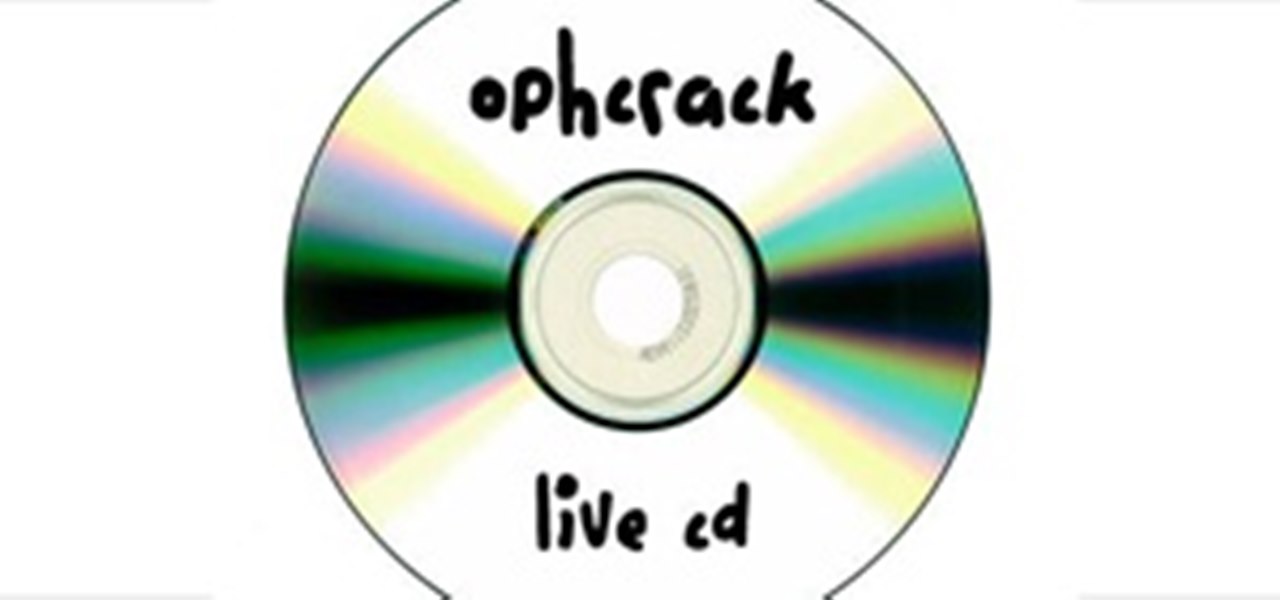
There are loads of reasons for somebody to want to recover a Windows password, and there are lots of different ways of doing it. My favorite of all of these ways is to use a piece of software called Ophcrack because:
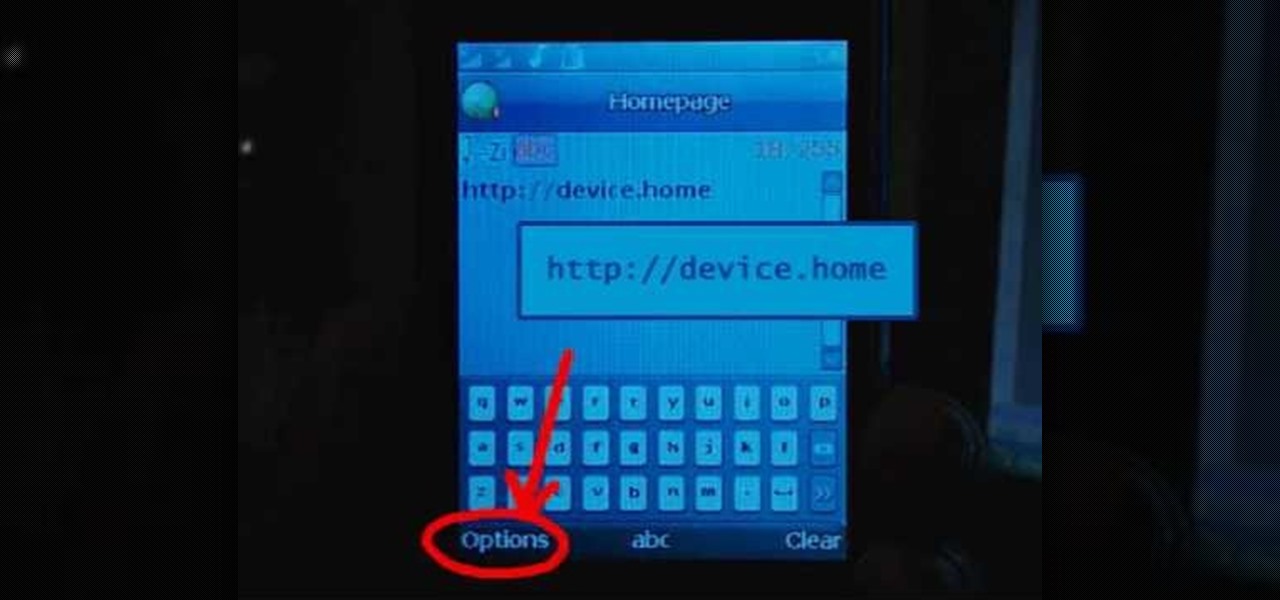
Learn how to set up Internet on iPhone clones with this video. *First thing you need to do is to make an AT&T GPRS data account.
Chris Beardshaw demonstrates how to plant a rambling rose, offering tips on how to select the perfect rose, pruning and training.
See how to use FocalPoint 1.0, a plug-in for Photoshop, to enhance a studio portrait image. The FocalPoint plugin makes it even easier to focus the viewer's eye and eliminate distractions from portraits when retouching photos in Photoshop. All you need to do is select the area to be the focal point, adjust, and you are done. Enhance a portrait with FocalPoint Photoshop plugin.
Everyone's been in the following situation. You're sitting there at a nice bar, chatting up a smoking hot member of the opposite sex when all of a sudden they drop this bomb: "Can you engrave on wood in Photoshop?" The next thing you know, the night spirals into blackness and you wake up in a puddle of your own tears with some half-eaten beef jerky hanging out of your mouth.
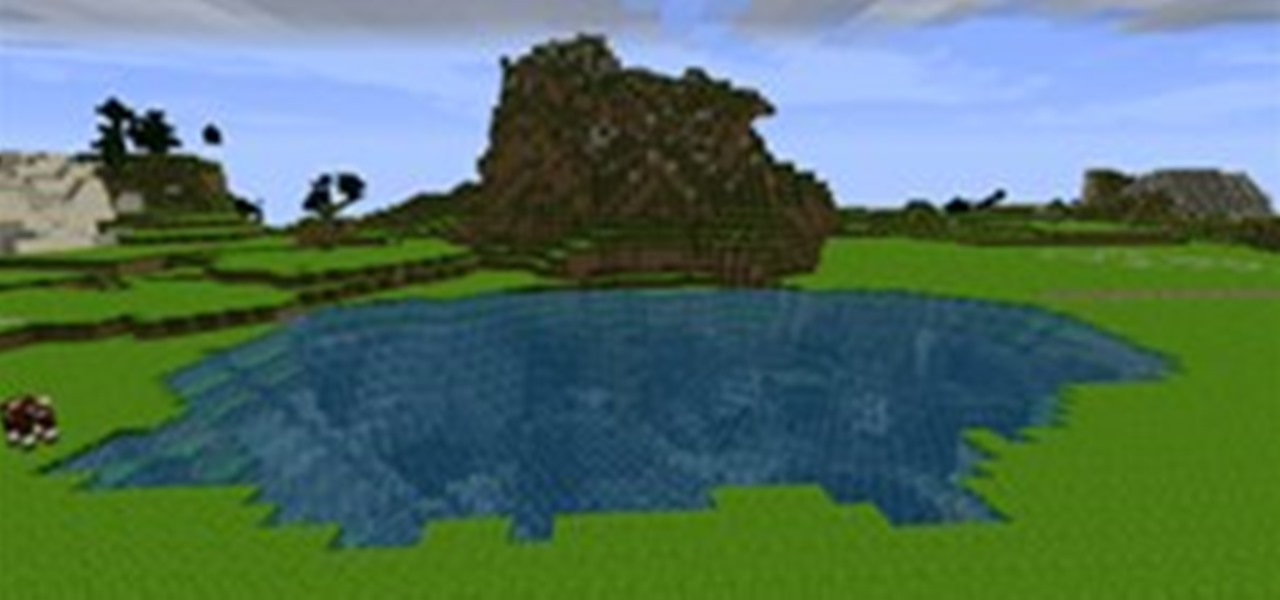
Welcome to Minecraft World! Check out our advanced tutorials and come play on our free server.
Notch- "I challenge Bethesda to a game of Quake 3. Three of our best warriors against three of your best warriors. We select one level, you select the other, we randomize the order. 20 minute matches, highest total frag count per team across both levels wins."
This is a guide showing you how to get Java games onto your Samsung Tocco F480 phone via USB—for free!
In this article, we're going to create an additional button in our Word toolbar which creates a PDF file of our loaded file with one simple click. We are going to use the function to create Macros, which are little 'programs' in
So you want to export the individual instruments played in Superior Drummer as audio files? Easy! Here’s a step by step way to do it. For this tutorial, I’ll be using Cubase 5.
This post copied from FrontierVillePost.com Please bookmark frontierville post for faster updates and make sure you like the facebook page!