
How To: Make Garlic Parmesan Croutons
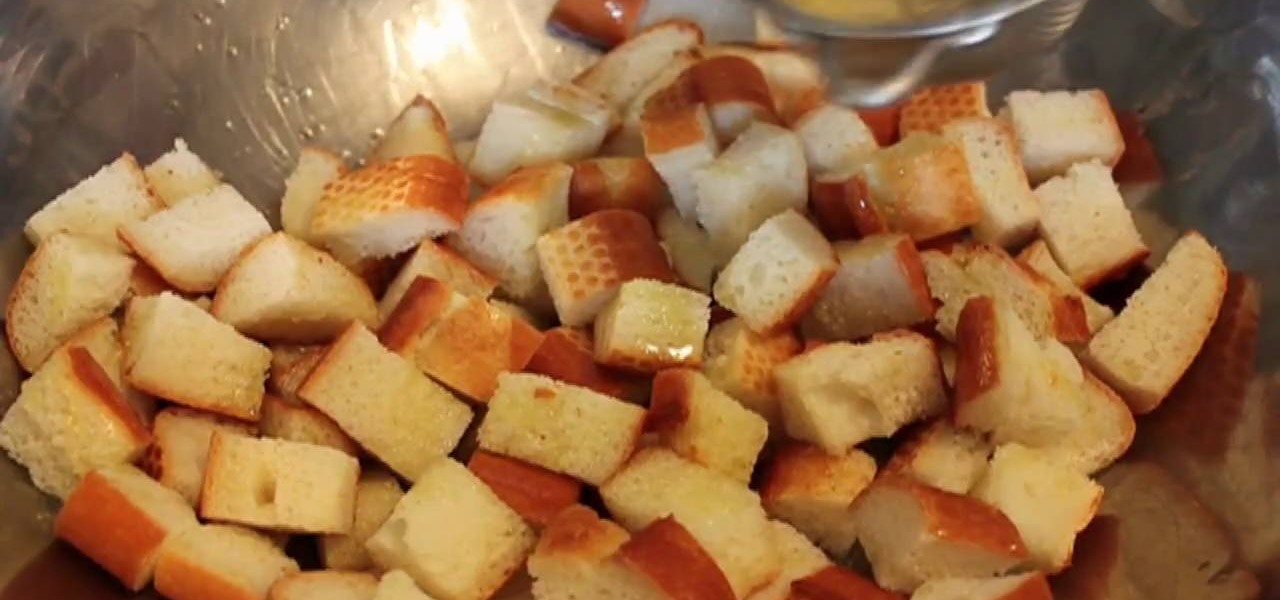
This video from FoodWishes.com demonstrates how to make garlic Parmesan croutons. This is a great recipe for homemade croutons which will be much better than the ones you can buy at a store.

This video from FoodWishes.com demonstrates how to make garlic Parmesan croutons. This is a great recipe for homemade croutons which will be much better than the ones you can buy at a store.

Betty's always serving up something original, yet traditionally Southern. In this video, she shows you how to make her unique Peanut Butter and Banana Pudding.
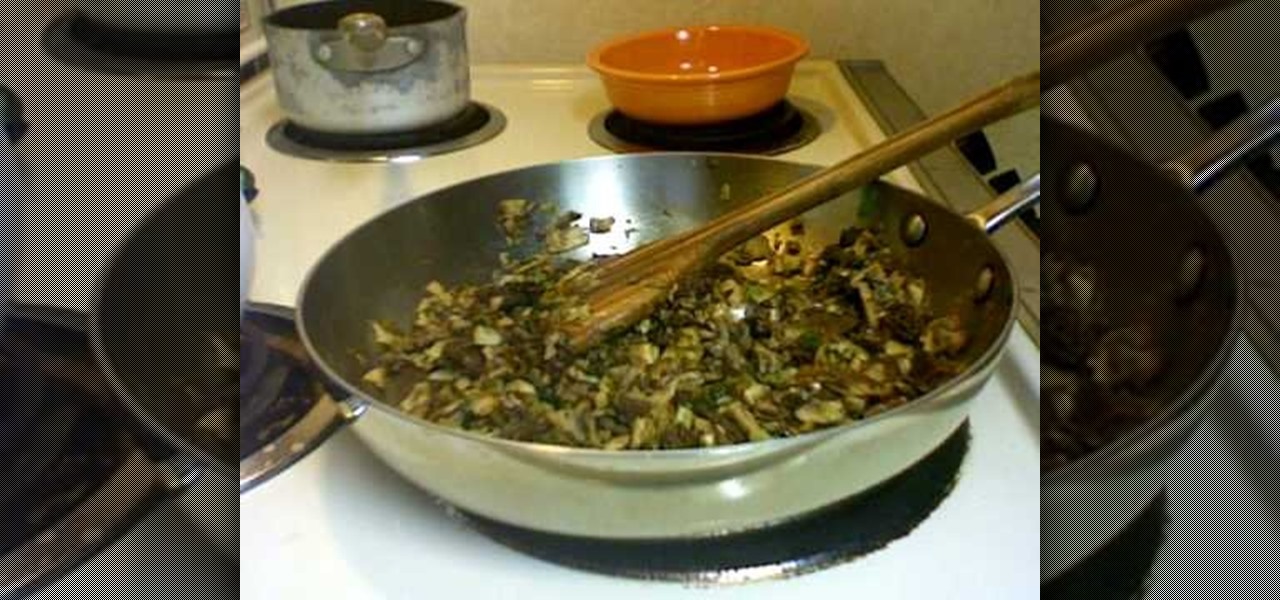
This dish is perfect for dinner for two. You need two beef tenderloin fillets with the silver skin cut off, ½ package of phyllo dough, 8 oz of mushrooms, 1½ cup green onions, 2 tbsps of olive oil, 1 tbsp of butter, ¼ cup of parsley, and 2-3 tsps of lemon juice, salt and pepper, Hollandaise sauce. Pan fry the beef for a minute or two on each side if you like it more well done. For the mushroom filling, use fresh mushrooms. Chop up the mushrooms finely. Chop up green onions. Use a little bit of...
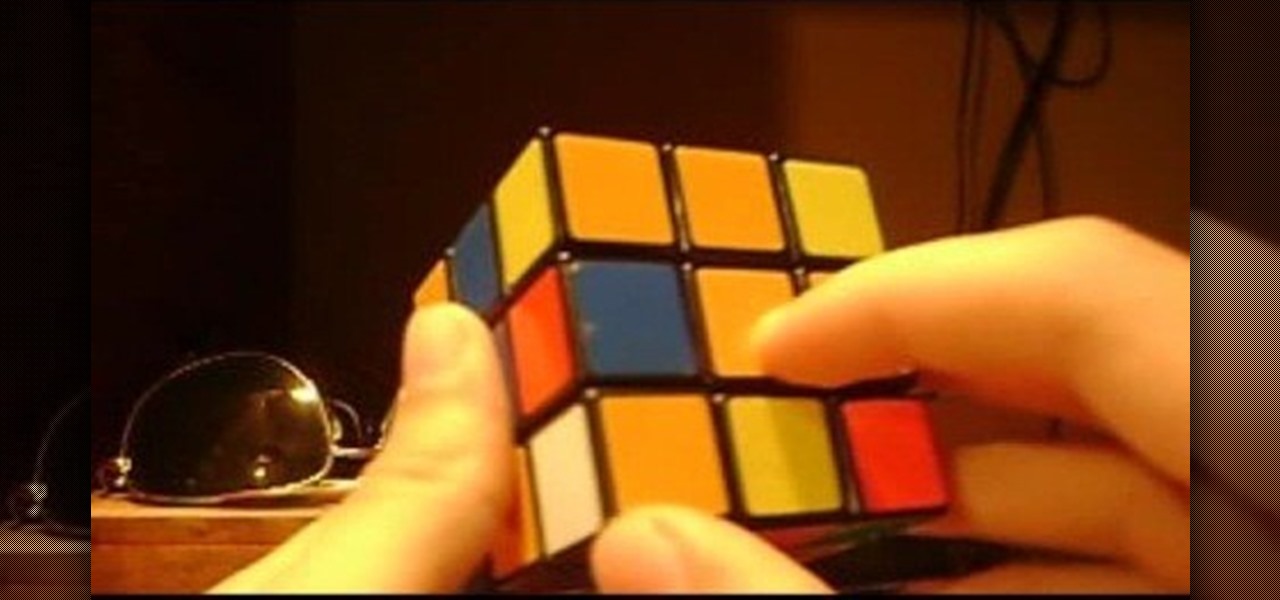
If you know nothing about solving a Rubik's Cube, don't you think it's about time you learned? Don't you want to be able to walk into a party store, find that Rubik's Cube display on the shelf, and solve the puzzle in front of your friends like it's nothing? Of course you do, who doesn't want to impress people?

Pixel Perfect is the "perfect" show to help you with your Photoshop skills. Be amazed and learn as master digital artist Bert Monroy takes a stylus and a digital pad and treats it as Monet and Picasso do with oil and canvas. Learn the tips and tricks you need to whip those digital pictures into shape with Adobe Photoshop and Illustrator. In this episode, Ben shows you how to create a Times Square billboard in Photoshop.
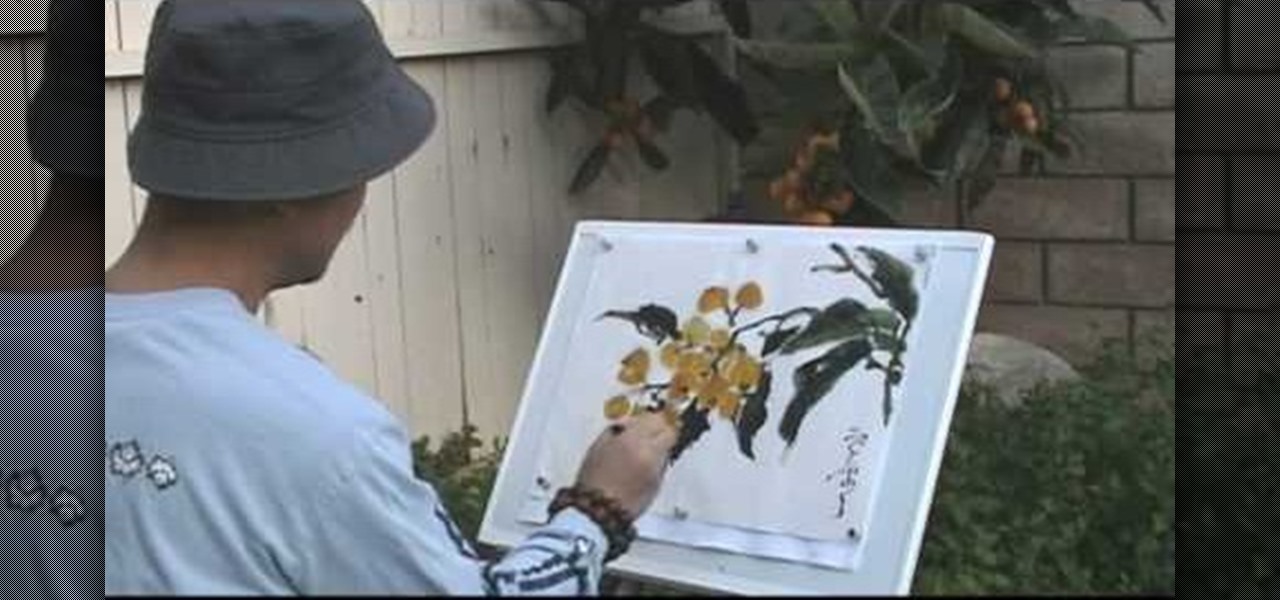
In Chinese watercolor paiting, static subjects like cherry blossoms and peach trees never go out of fashion because they represent the teeming life and beauty of nature that most Chinese watercolor artists enjoy representing.
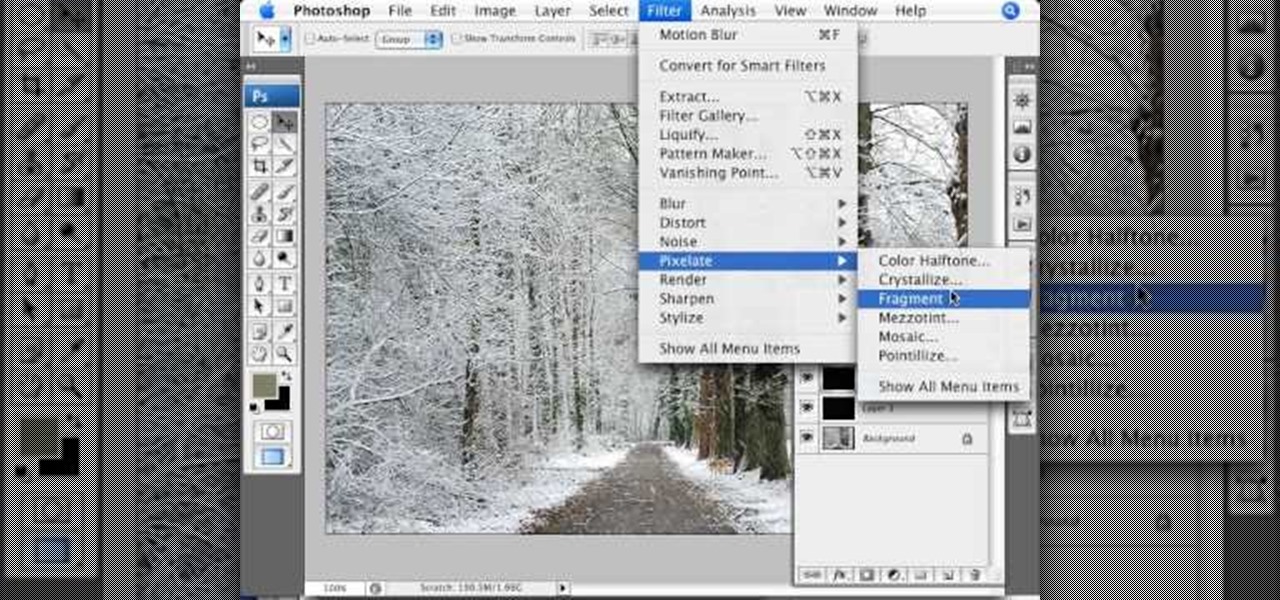
Learn how to simulate snow in your photograph in this video tutorial by photoshopuniverse. For this you'll need a photo depicting winter scenery. Add a new layer, fill it in with black, go to filer noise and add noise as shown using the given amounts. Go to filter effects and add blur to the layer. Go to images and adjust the levels to reduce the snow-flakes as shown. And add some motion blur to it. Change the blend mode to screen, duplicate the layer, rotate the new layer, apply the filter c...

In order to cook a lot of bacon at once, you will need the following: bacon, a broiler pan, and aluminum foil.
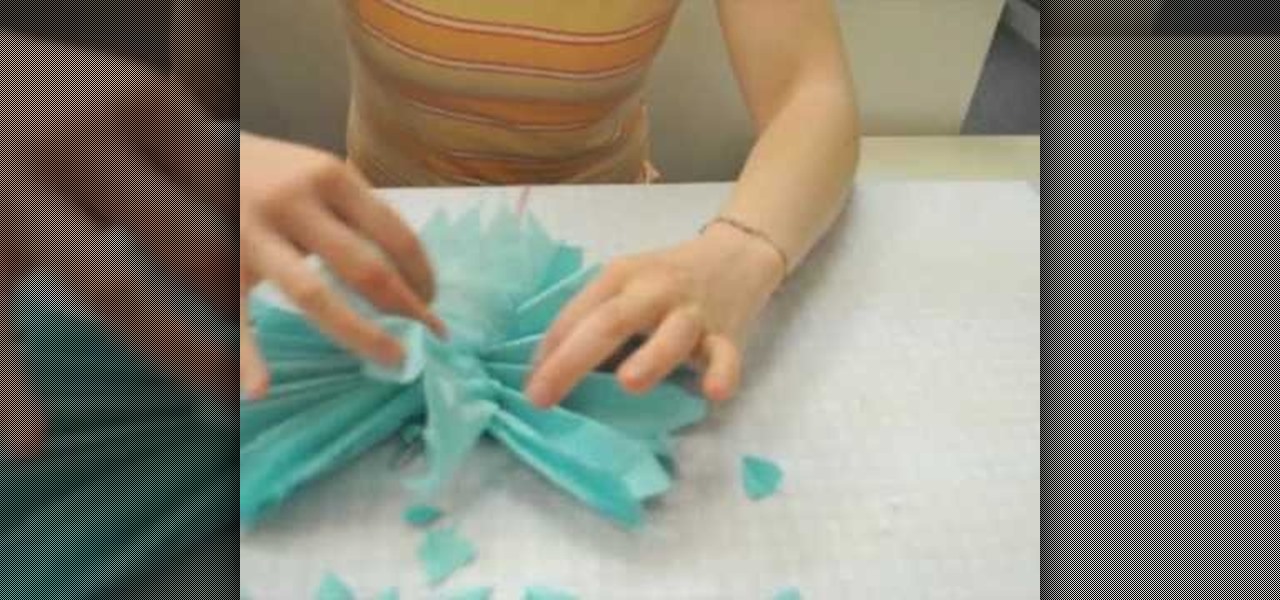
This video shows you how to make a puff flower ball using tissue paper.Spread out a tissue paper,of any colour,on a table.Keep one of the short ends of the paper,facing you and away from you.Then fold it back and forth,from one short to the other side until the whole of the tissue paper is used up.Fold this into half and release.Take a piece of ribbon and tie it on the center.Give the edges a pointed, partyish look by cutting them using a pair of scissors.Now take a single piece of tissue pap...
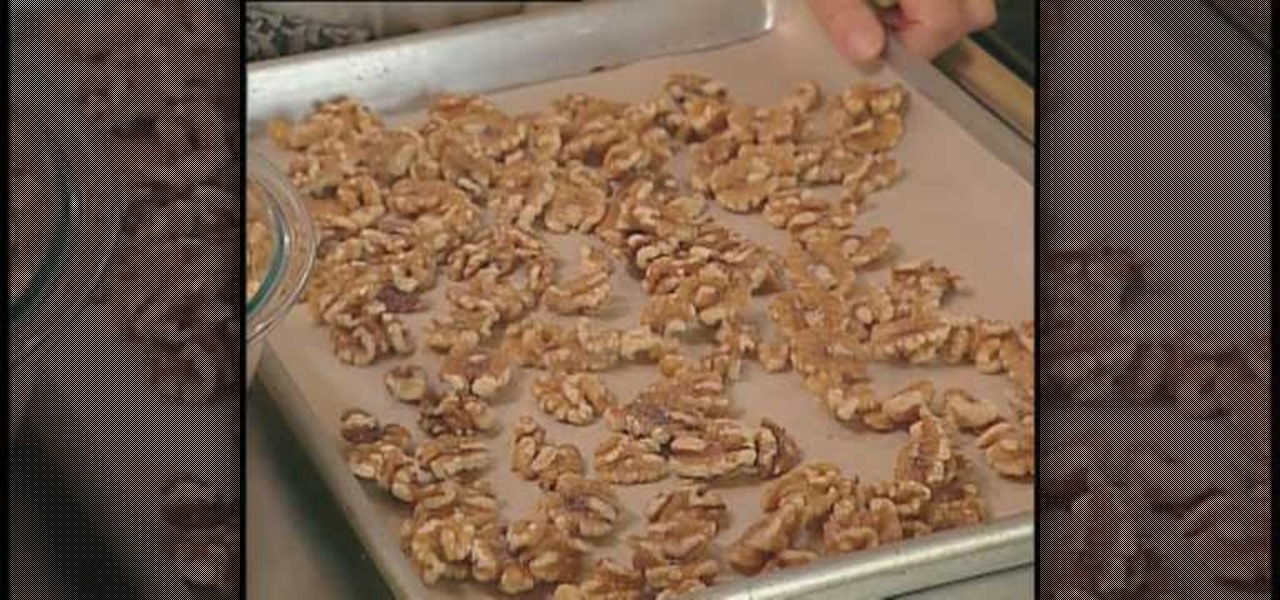
In this video, we learn how to toast walnuts to place into your favorite recipes. First, you want to put the walnuts on a single layer of a baking sheet so they bake nice and evenly. Now, place the walnuts in a preheated 350 degree oven for about 7-10 minutes until they are golden brown. When finished, remove from the oven and let these cool. You can now place these walnuts into any recipe you like! This will bring out the most flavor that is in your walnuts and taste much better than using u...

Layers are very important component of Photoshop. Without knowing how to use the layers correctly, one can not utilize the maximum what Photoshop offers to designers and digital artists. For a beginner, this video provides a good basic knowledge about Photoshop layers. Layers enable you to arrange different parts of a picture and manipulate them without effecting the content of other layers. Layers are added by using layers panel. Each layer is named accordingly. We can change the order of la...
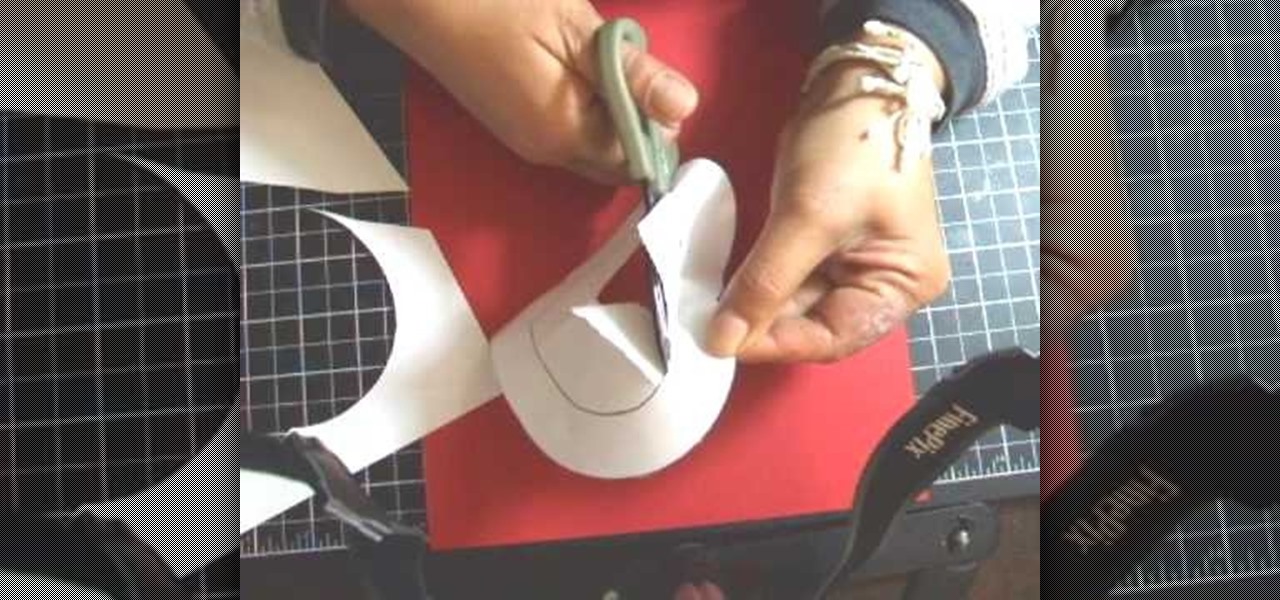
The template for this heart-shaped window card can be found at [www.stampininspirations.blogspot.com stampininspirations.blogspot.com]. You will need the template and cardstock and the other usual materials needed to make a card. You can re-size the template to about 5 1/2 inches across by about 5 1/2 inches high. Cut out the heart and remove the center heart as well. Take an 8 1/2 by 11 inch piece of red card stock and fold it in half, then trace the inside and outside of the heart-shaped te...
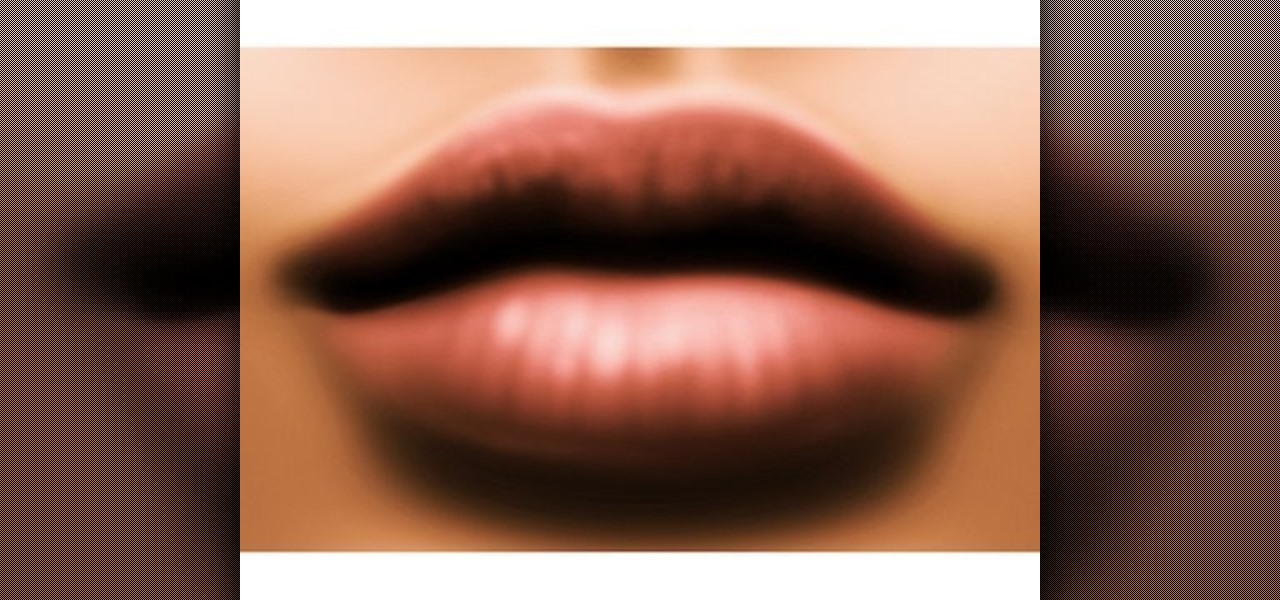
Are you interested painting in 3D mode? Let's try the human mouth first. First, get the basic shade of the lips with a single color. Then, fade out the top side of the upper lip part and give it a less sharp edge. Then paint the depth area above the lips. Edge out the top lip and add more shades on the bottom one. Then add those small vertical lines with low opacity. Add a gradient map over it and another pink layer(color burn).The lips are ready and it will help you in your painting skills.
This how-to video is about how to create a simple text effect in Photoshop.
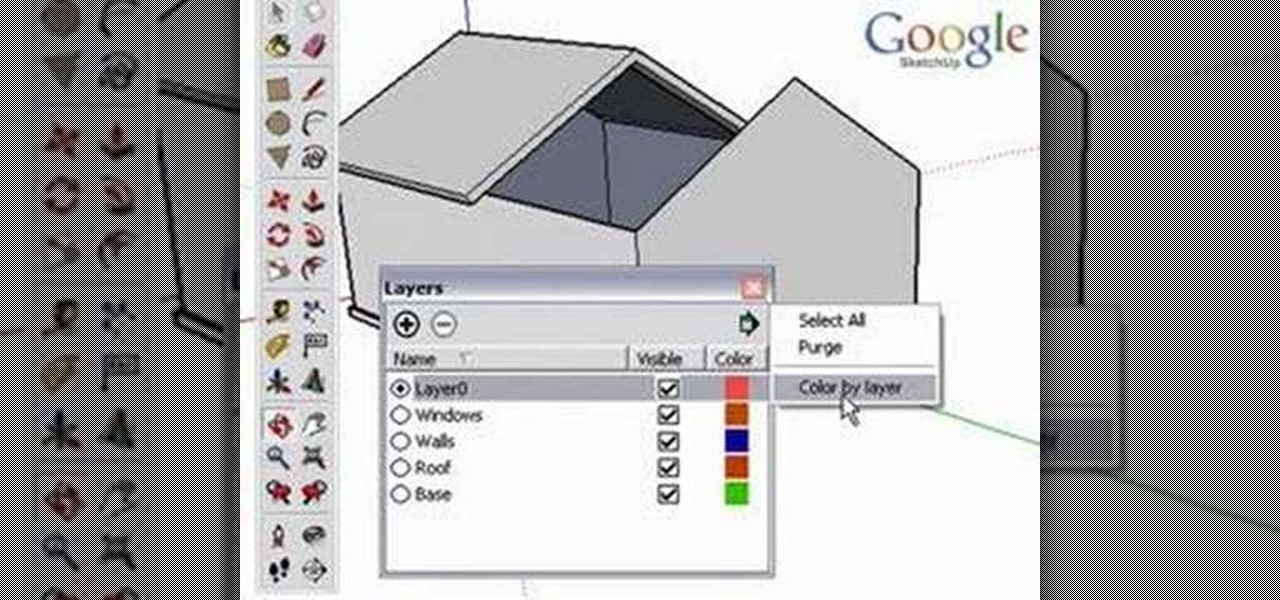
Using layers in SketchUp is different than many other applications. This instructional video to learn how to use layers, the layer dialog box, as well as some layer tips. In other applications, layers control actual geometry. This is especially true in CAD software. SketchUp's layering system only controls the visibility of the geometry, not the actual geometry itself.

The Skrags/Gorgers are formidable opponents on the battle field in Warhammer, if you use them correctly. But half of having a good army is making sure they look good. In this video you will learn some techniques including glazes, layers, blends and more to pain a GREAT looking Gorger figure!
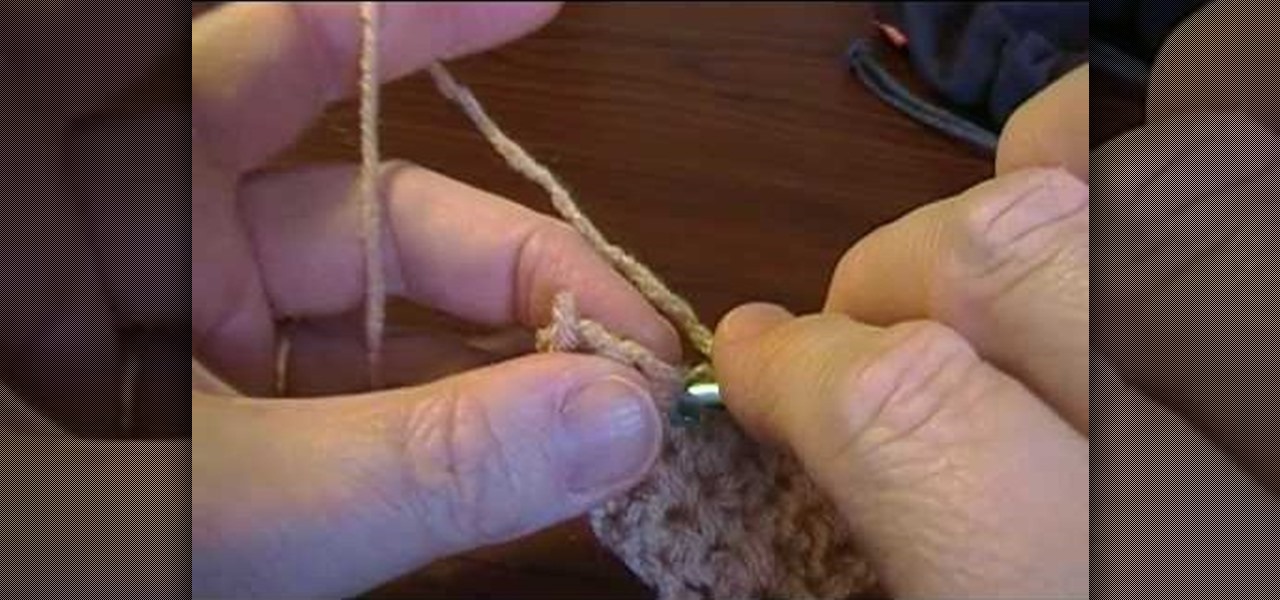
In this tutorial, we learn how to increase and decrease a single crochet. To do this, you will start off with five single crochets, then single crochet in the single crochet from the hook. After this, do an h chain across. After this, increase by doing a chain one and turn and go back into the stitches. If you want to make it wider on both sides, chain one and turn, then put two single crochets in the first stitch. Then, go in each stitch across and go by what the pattern says to go by. Usual...

Whether you're new to Adobe InDesign or a seasoned graphic arts professional after a general overview of CS5's most vital new features, you're sure to be well served by this official video tutorial from the folks at Adobe TV. In it, you'll see how the all-new Layers panel lets you manage objects in complex documents with more control in InDesign CS5.
Bob Doyle shows how to make a layered latte at home. You need an espresso machine, any brand, and milk. Skim milk foams better but whole milk tastes better, so choose which you prefer. First, steam about 3 ounces of milk until your glass is about full. Set it aside. Start the espresso. Plan for about 6 ounces of espresso. Use a container with a lip to control how you pour because the key to a layered espresso is how fast you pour your espresso into your milk. Pour slowly, alternating with a f...
This video by photoshopuniverse shows you how to make any photo seem as it was taken in a studio. Take the working photo and add a new layer over it and fill it in black as shown. Add a newer layer over that and add the filter> render> clouds effect. Increase the opacity of the cloud layer and merge it with the black layer as shown. Add the splatter effect and the sprayed stoke effect as shown onto the merged layer and add a hue and saturation adjustment layer and colorize it as desired. Go t...
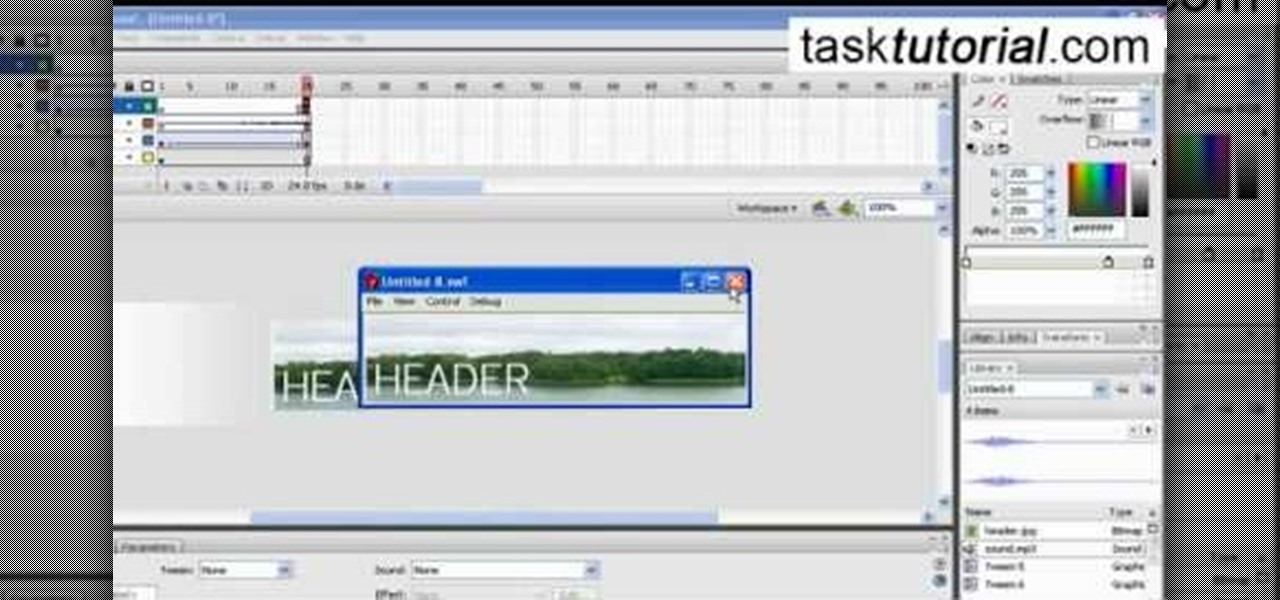
Today we learn about creating a header appearance in animation w/sound in Flash. First your import image. Create a new layer and then create our new shape. Then delete the stroke. Next select the shape and change its size to frame 20 and then press F6. Move your image as shown in the video. You will be asked to create a new layer three times. Just repeat the process of layer until you have a total of 35 layers. Now onto getting you animation to move. Mass layer is also acceptable in creating ...
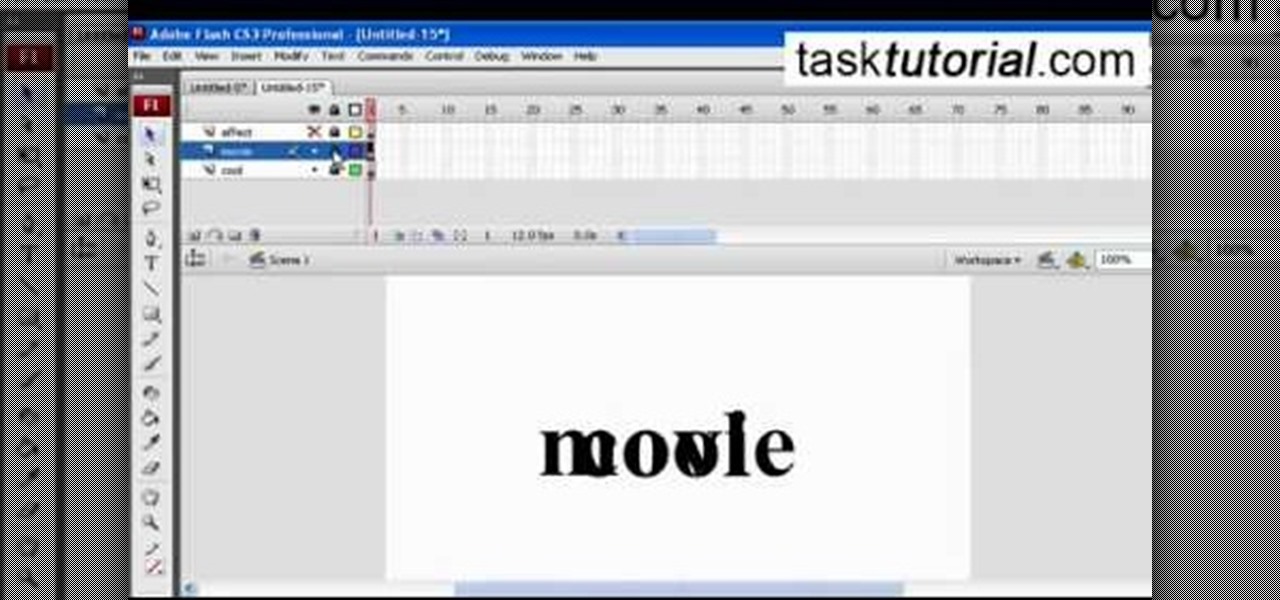
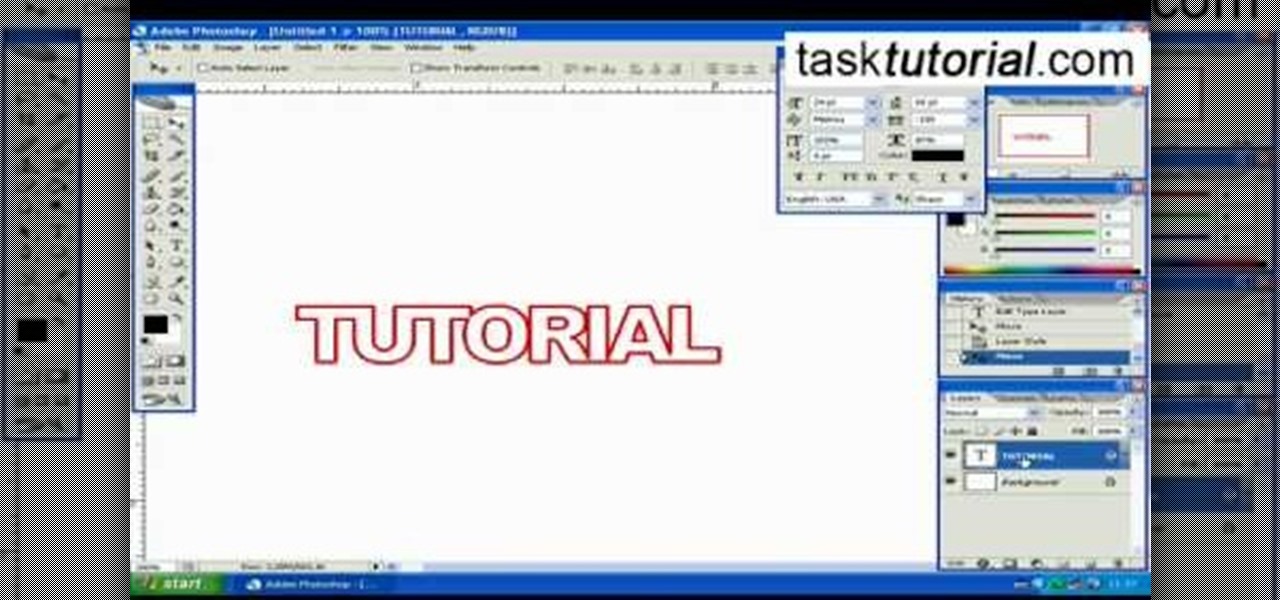
A great free video training from tasktutorial on how to create a cool movie text effect in Flash. Start by creating the text; type in "cool", rename the layer and lock it. Now type "movie" and rename the layer. Type in "effect" and rename this layer as well. Now focus on the first layer. Convert it to movie clip. Now convert the other two layers to movie clips as well. Stack the three layers on top of each other. Next add a key frame starting from frame 10. Select the "cool" layer. Re-size it...
Pixel Perfect is the "perfect" show to help you with your Photoshop skills. Be amazed and learn as master digital artist Bert Monroy takes a stylus and a digital pad and treats it as Monet and Picasso do with oil and canvas. Learn the tips and tricks you need to whip those digital pictures into shape with Adobe Photoshop and Illustrator. In this episode, Ben shows you how to create fabrics in Photoshop.
Pixel Perfect is the "perfect" show to help you with your Photoshop skills. Be amazed and learn as master digital artist Bert Monroy takes a stylus and a digital pad and treats it as Monet and Picasso do with oil and canvas. Learn the tips and tricks you need to whip those digital pictures into shape with Adobe Photoshop and Illustrator. In this episode, Ben shows you how to transform a photo into a flashy poster in Photoshop.
If you have been learning how to work with smart objects in Photoshop CS3, you may have noticed that some funny things start to happen when you try to use layer masks with smart objects. Most often, you layer mask doesn't move with the smart object. This Photoshop tutorial will show you a workaround for layer masks not linking with smart objects.
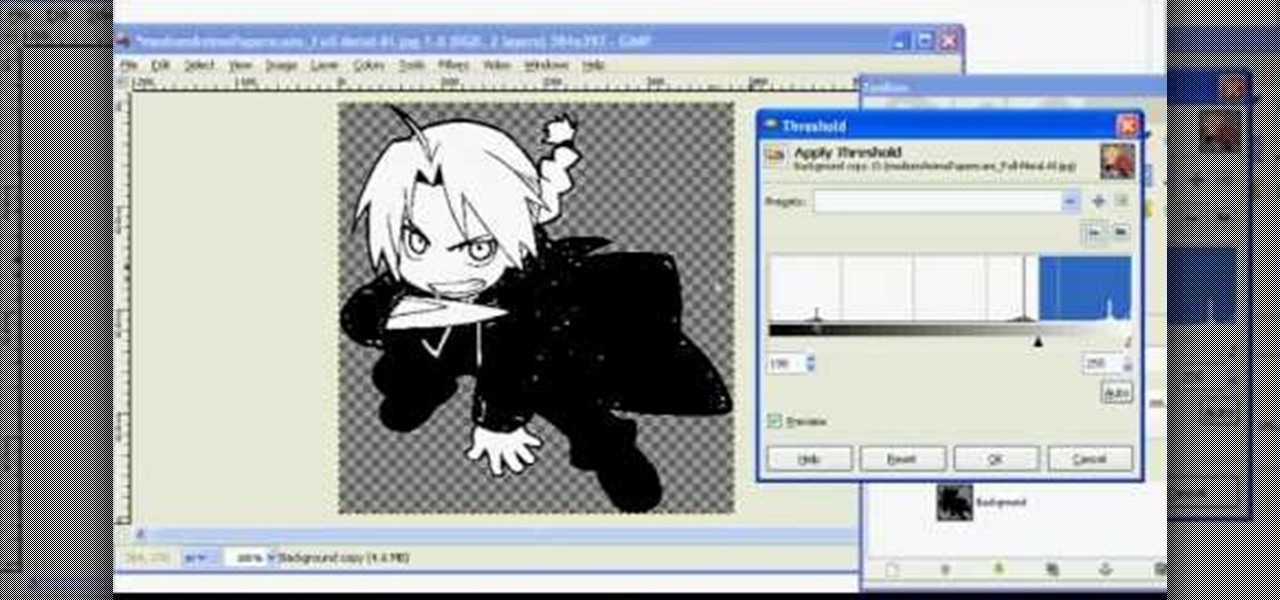
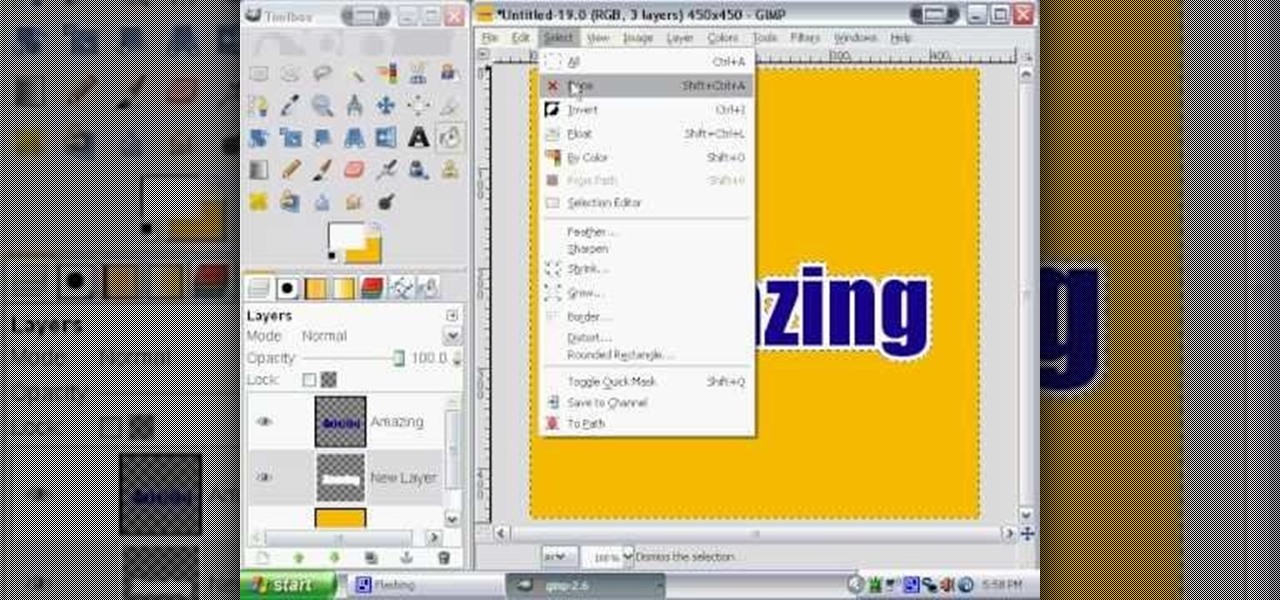
In this tutorial, we learn how to make 2-layer stencils in GIMP. First, cut out the background before you begin. Now, right click on your main layer and then select "add alpha layer". After this, select the magic wand tool and delete all the white areas on the outside of the picture. Now duplicate the layer, then hide the top layer and select the bottom layer. Now, go back to threshold and move it all the way to the right to get an outline of the image. From here, go back up to the top layer ...
This video demonstrates how to make a broken mirror effect using Photoshop.
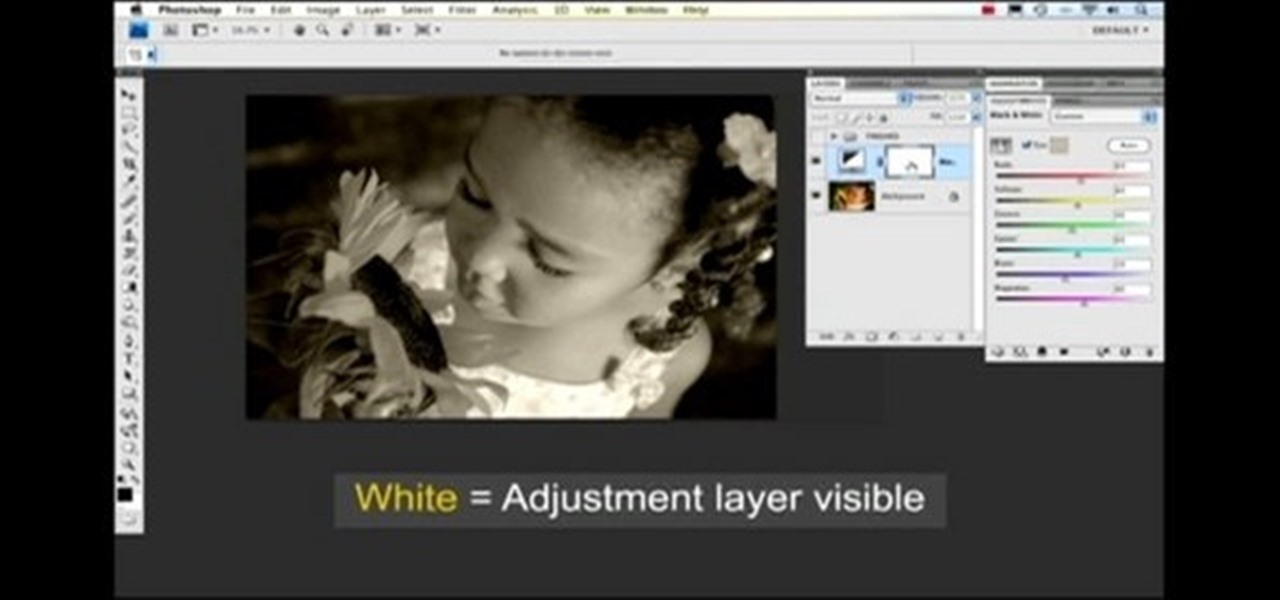
Learn how to toggle layer visibility in Photoshop in this video tutorial. Nocole Young will show you how to do this easily. When you are working on any image in Photoshop, you usually create a number of layers. You would like to see what the image will look like before you start editing the image. You can always toggle the visibility between the layers by clicking the ‘eye-ball’ toggle on the right hand side of the page on the layer panel. Click the ‘eye-ball’ toggle next to a layer and you w...
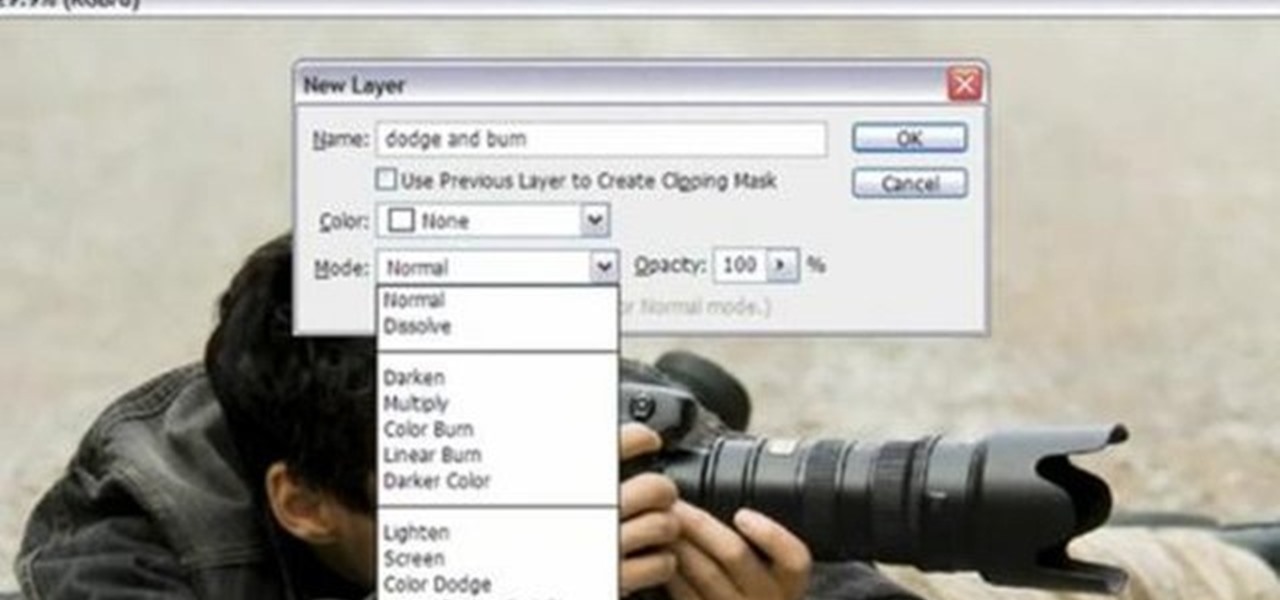
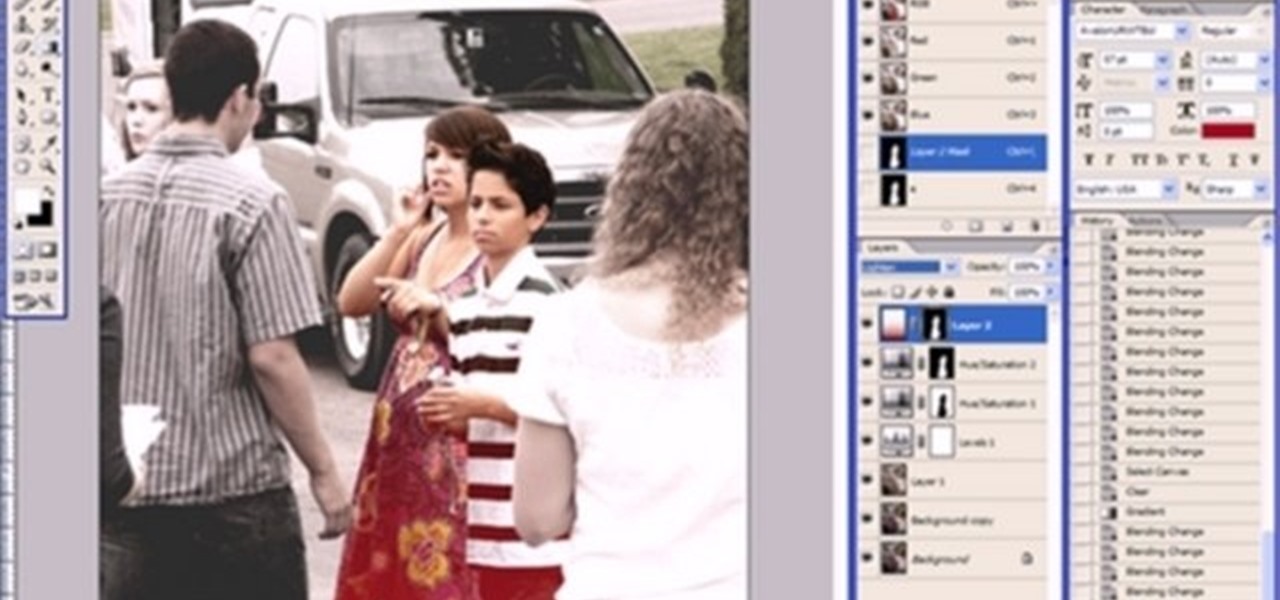
Yanik Chauvin demonstrates how to do Non Destructive Dodging (lighten) and burning (darken) of images using the tools in Photoshop. He shows the image of a man lying on earth with his camera. To start the work he wants to make a new layer which can be done in two ways either by clicking on the ‘layer’ button on top of menu or by pressing down the alt key and clicking on the new layer at button of the layer palette. It will bring up the dialogue box. He named it “dodge and burn” and from the l...
Click in File and New to create a new document, press OK and select the text tool and click once on your file and write something, then close the window. Click in move the active layer to make easier to move the text. Go again to the text tool and click on the Color to change the text color. Press Crtl+O, select the background layer and change the color to the one you want, now select the bucket tool and click on the background to paint it with the color you have selected. Go back to the text...
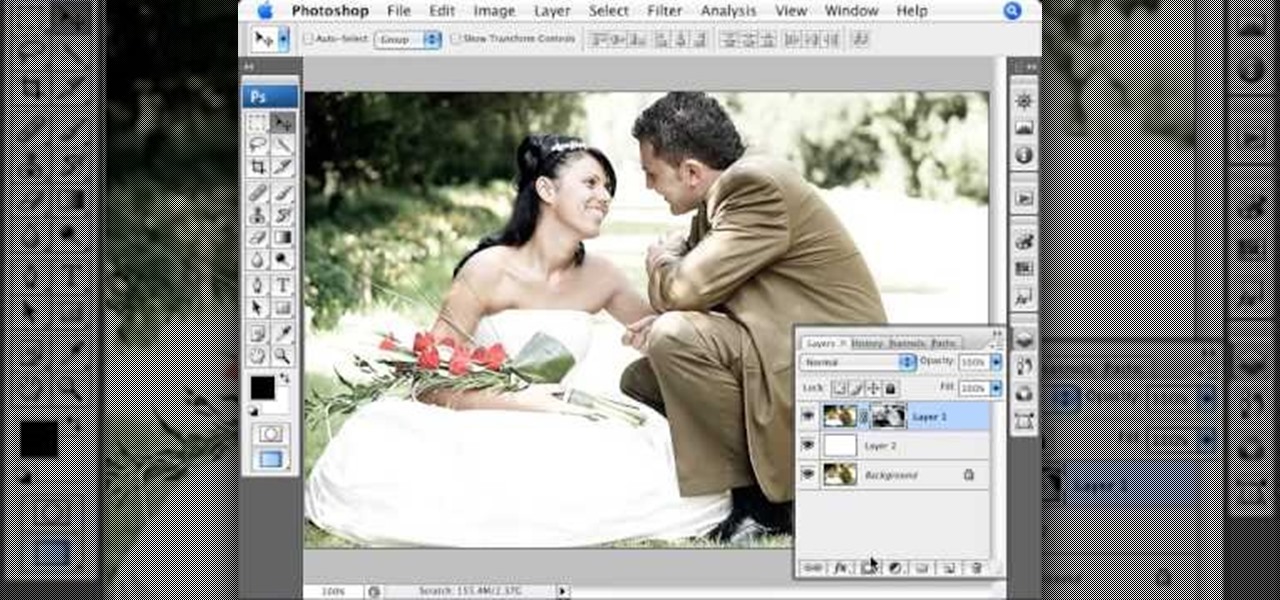
In this Photoshop tutorial the instructor shows how to mask a photo to itself and produce a glowing effect. First open the image in the Photoshop tool and duplicate a layer and add another layer in between filling it with white. Now select and copy the whole layer. Add layer mask to it and alt click it. Now paste the copied layer on the masked layer. Now do the control+I to invert the masking. Now the images gets a glowing effect on which you can apply the glossy effect on it. Now merge all t...
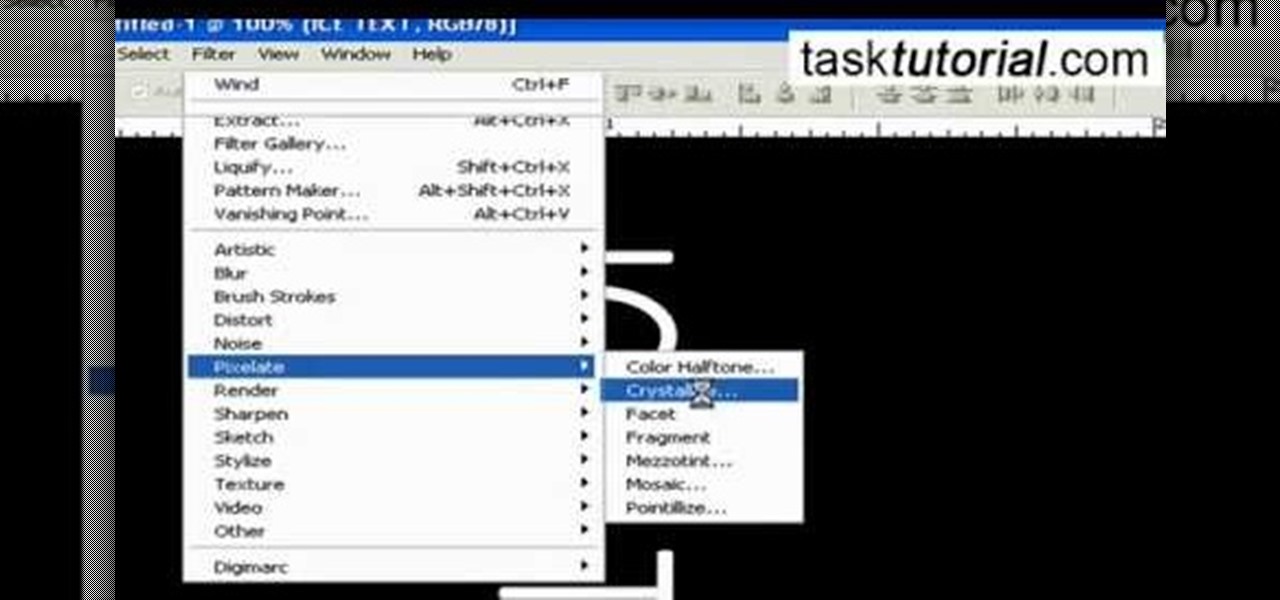
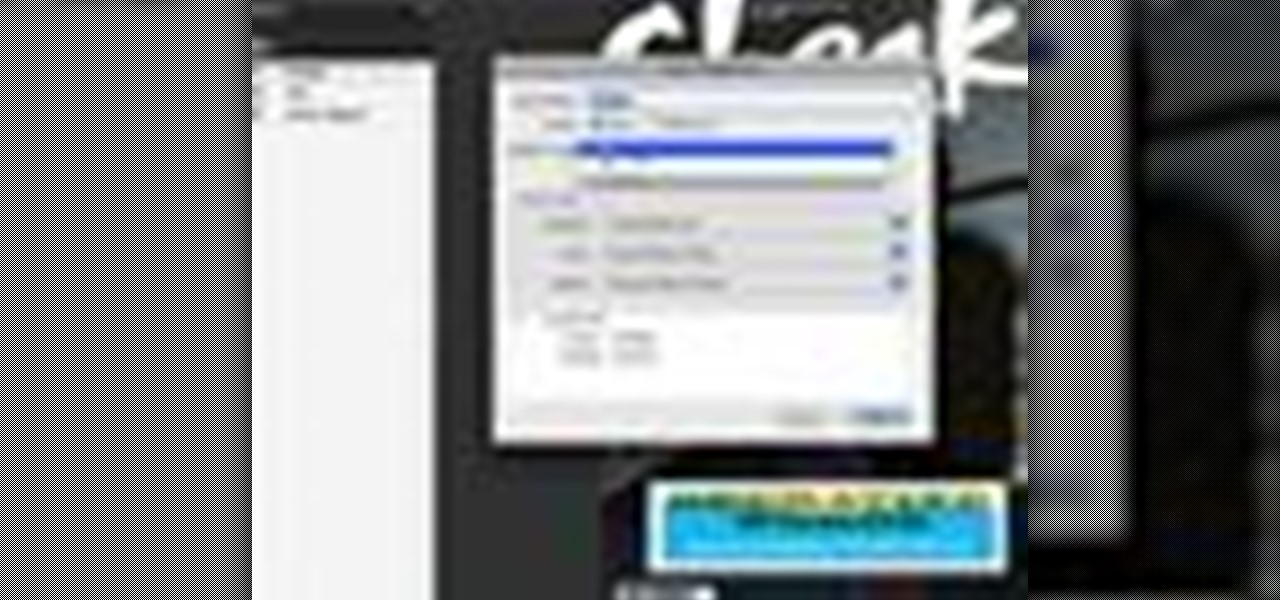
It is a tutorial that how to make an ice text effect on Photoshop. First create a new layer select paint bucket tool switch black color and paint the layer now create an other layer, choose type tool then switch the white color and create a text "ice text" after go to layer pallet merge the layers after that again create another layer select paint bucket tool and select black color now select ice text layer then go to image menu rotate canvas click clock wise then go to filter choose crystall...
This Adobe Acrobat 9 Pro tutorial shows you how to work with layers. Learn how to view, navigate and control layers in Acrobat 9. Also learn how to add a PDF page as a layer, and use Adobe 9 Pro Preflight tools to assign objects to different layers. Great tutorial for anyone new to using Acrobat Pro, or needing to view the newer tools in Acrobat 9 Pro.
In order to make Clarified Butter, you will need the following: butter, a saucepan, knife, measuring cups, and a spoon.
In this tutorial, we learn how to crochet a left handed large size beanie cap for a man. For the first round, you will work 10 single crochets through the loop, not joining. Then the cap will be worked into a spiral or round shape. Next, you will work in two single crochets in each single crochet. Then, you will do 20 single crochets total. For round three, you will work one single crochet for 20 more total. For round four, you will do the same for fourty more single crochets. For round five ...
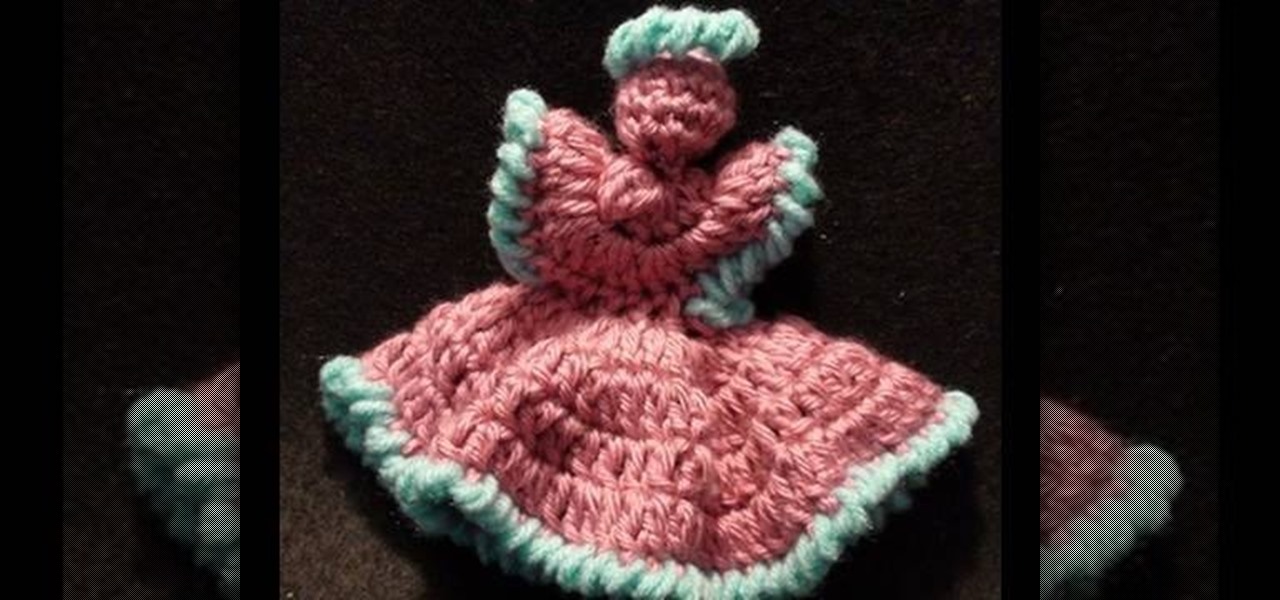
In this tutorial, we learn how to crochet a dainty angel. Start out with the first round where you will work 6 single crochets through the chain. Then, work the first single crochet at the top of the next stitch. For round 2, work 2 single crochets in each single crochet until you have 12 single crochets. For rounds 3 and 4, you will work one single crochet in each single crochet for 12 times total. In round five, you will work six single crochets at a decrease, then add filling to the head. ...
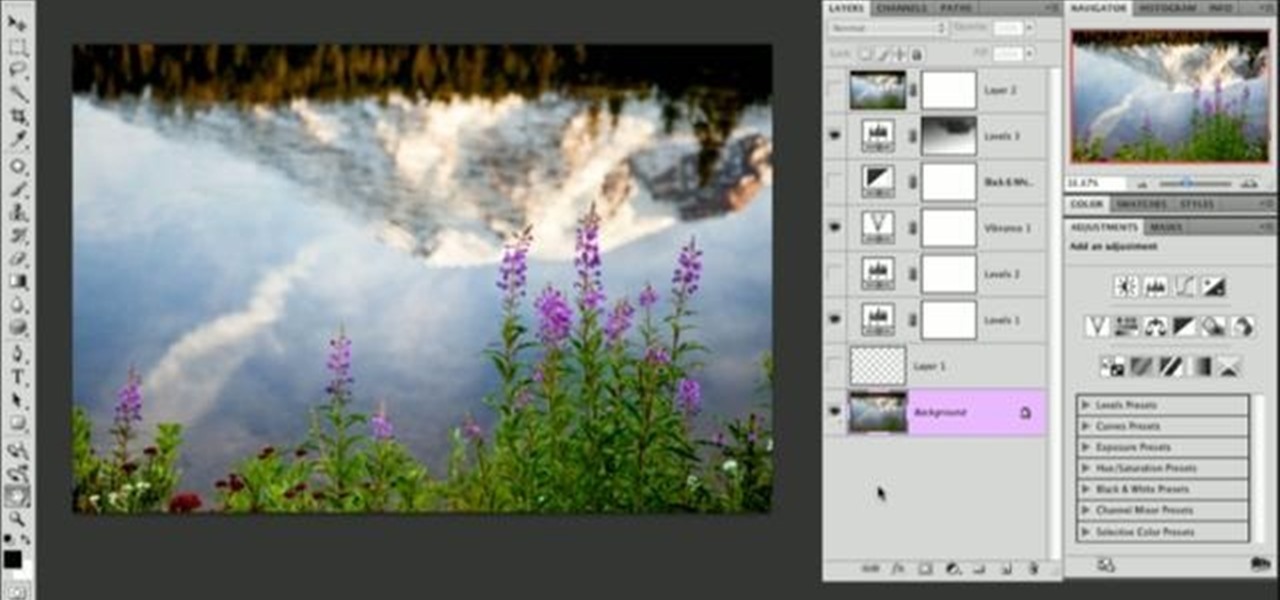
Nichole Young demonstrates how to hand color using layer masks in Photoshop CS4, which also works in Photoshop CS3. The procedure can be summarized in two stages: turning the picture you would like to edit black and white and then bringing color back into it to give it a hand-colored look. The black-and-white effect is achieved by creating a new layer over the background layer. The next step is to give the picture a warm look by adjusting the layer’s respective color balance. Then bring the c...
In this video tutorial the instructor shows how to create a text on a rotating sphere in Flash. To do this first create a gray background in the flash tool. Now make a new layer, select the oval tool and set the color gradient to green color and select the oval shape on the gray background. Similarly create an another sphere which will act as a mask for the text. Now create a new layer and add text to layer in white. Now move to frame 20 and make a key frame with all layers. Now drag the text...
This image editing software tutorial shows you how to separate layer styles in Photoshop CS3. Learn how to separate your layer styles from it's parenting layer in Photoshop!
This is a tutorial in Adobe Photoshop CS2 demonstrating primarily the use of the quickmask tool to make precise selections of organic shapes. Other topics covered include adjustment layers and layer masks. So watch and learn how to enhance photos using quickmasks, layer masks and adjustment layers in Photoshop CS2.