
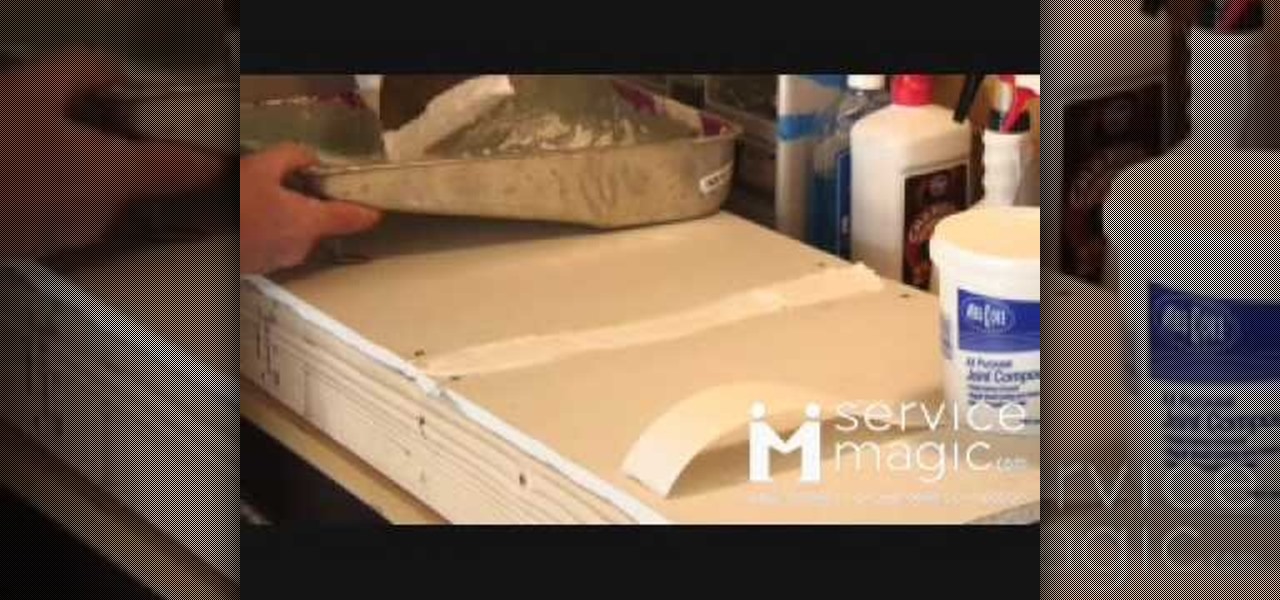
How To: Tape and finish drywall
How to tape and finish drywall

How to tape and finish drywall
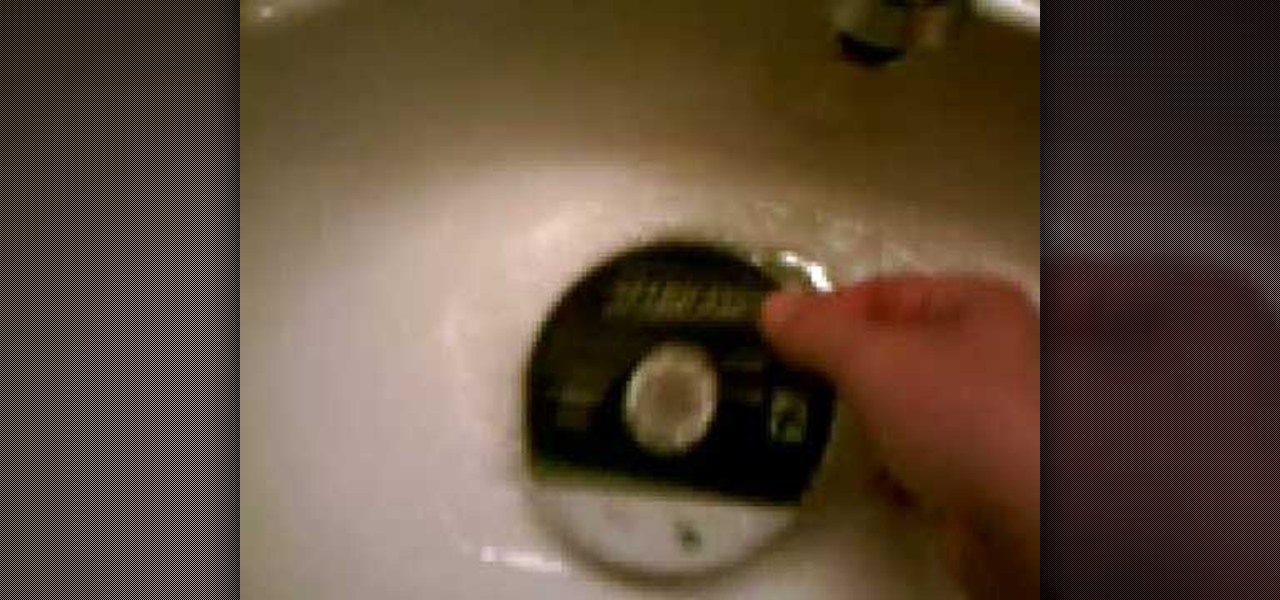
This video shows you how to clean a compact disk using peroxide and toothpaste as the cleaning agents.First of all, put the disk in a mixture of water and a bit of peroxide and let it stay there for about 5 minutes. Then, you must take out the disk and apply a thin layer of toothpaste on the whole disk's surface. Let it sit like that for another 3-5 minutes. After that, clean the disk with water. Use it only when it is dry. If this method does not work, then you should either take the disk to...
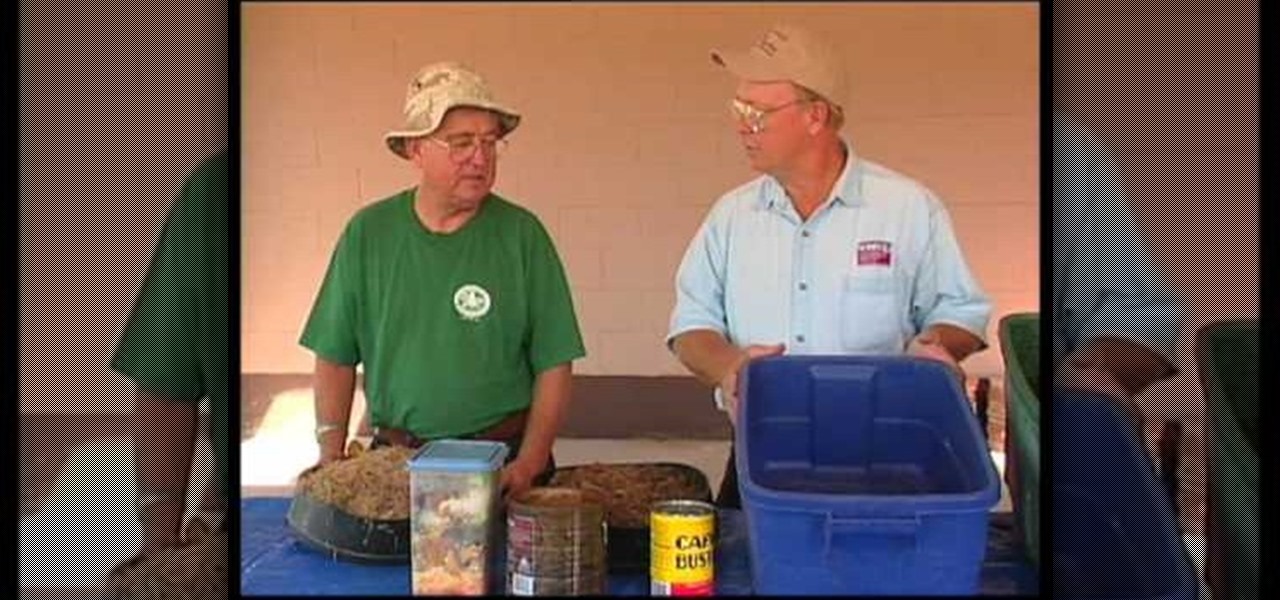
How to Make Vermicompost.
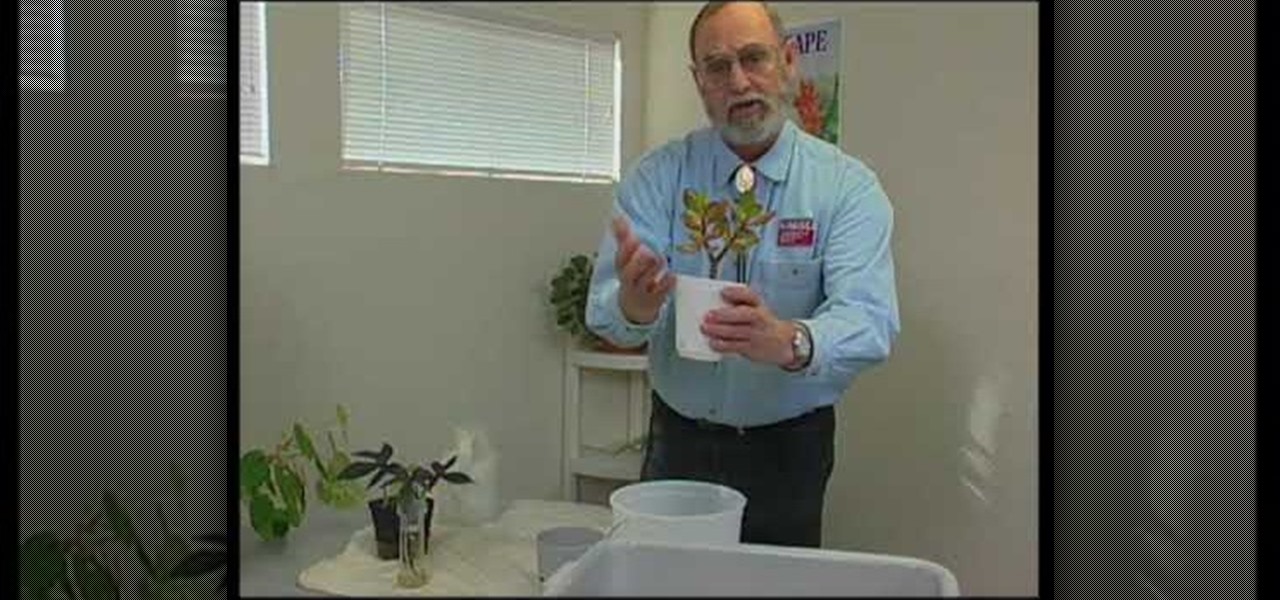
Growing plants in the Southwest is different then other climates. We learn how to grow plants in water. Salt is a factor that we need to be cautious of. Salt is in soil and in water. Water, once absorbed leaves a layer of salt. It can be avoided by watering in a certain way. Changing the water frequently, a dish underneath a potted plant to drain the water and flushing out the salt and re-potting periodically. Sometimes extremes measures must be taken to hydrate a plant. In this case putting ...
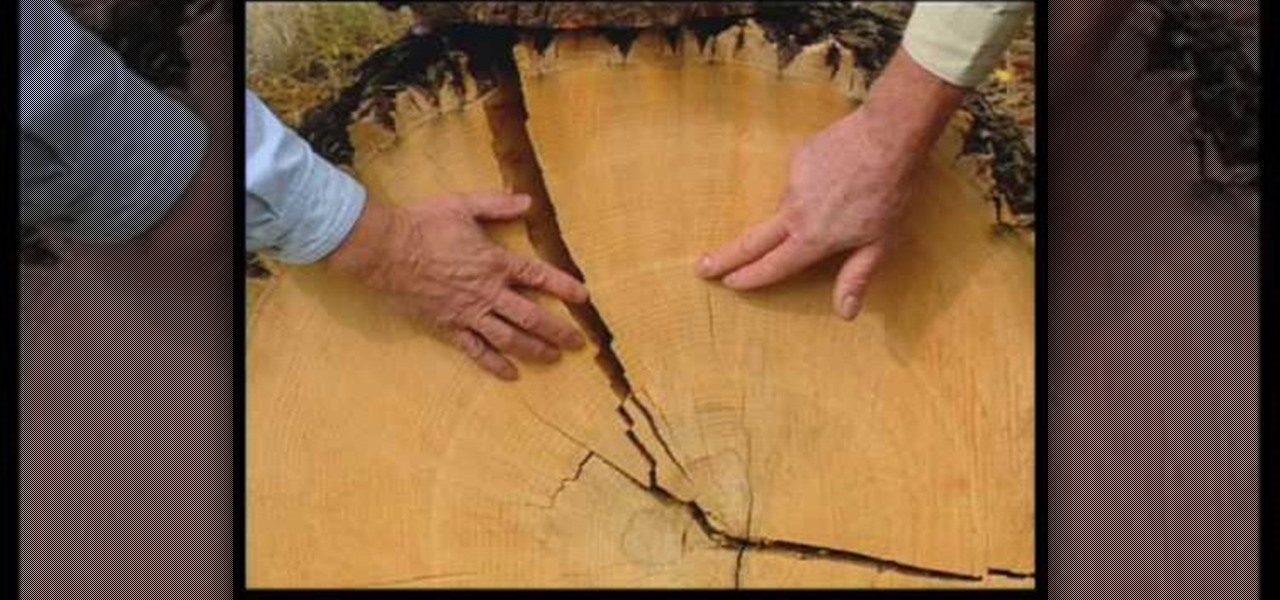
This video explains how tree growth rings function and what they can tell us.The growth rings are formed in 2 (sometimes 3) layers of wood that are the spring growth and the summer growth. Ring width can vary depending on the specie of the tree, the environment in which it has grown and the amount of water it has used. By counting the rings you can tell the age of the tree.By analyzing the growth rings, you can see the years in which there was a drought where the tree once stood, because the ...
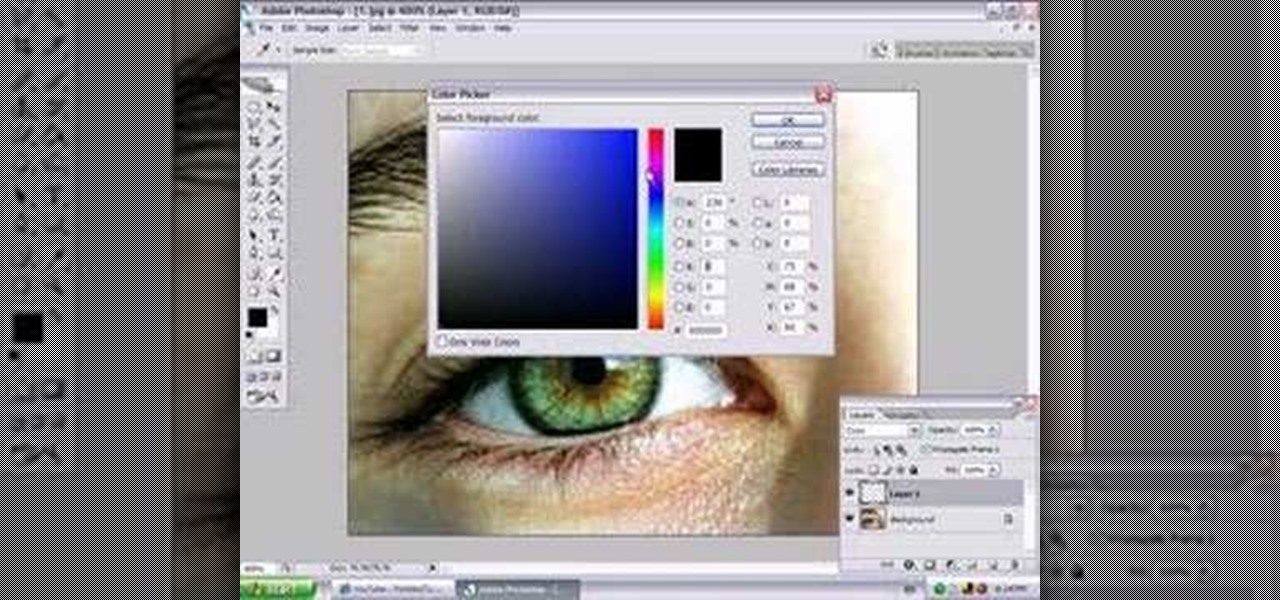
In this video, Jessica shows us how to change eye color using Photoshop. First, open up Photoshop on your computer. Open up your picture and zoom in on the eyes so you have a great view of it. Then add a new layer or "control +j". Where it says "normal" change that to color. Then select your paintbrush tool and make it a reasonable size for your eye. Click the color palette square and change the color to whichever one you choose. Now, paint over the eye and it will completely change the look!...
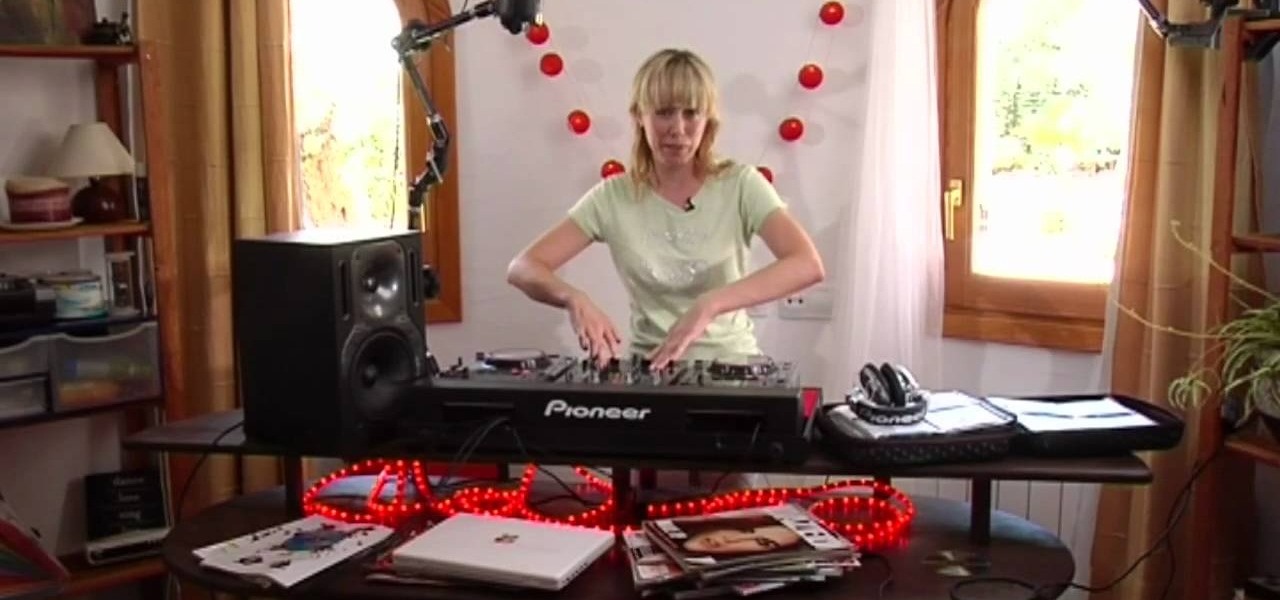
In this video tutorial series, DJ Sarah Main explains how to become a working professional DJ. She offers tips on how to set up your digital DJ rig, cueing up tracks in the mix, and cataloging your music library. In the second half of the series Sarah shows how to mix tracks with the cross fader, and progressively layer audio elements.
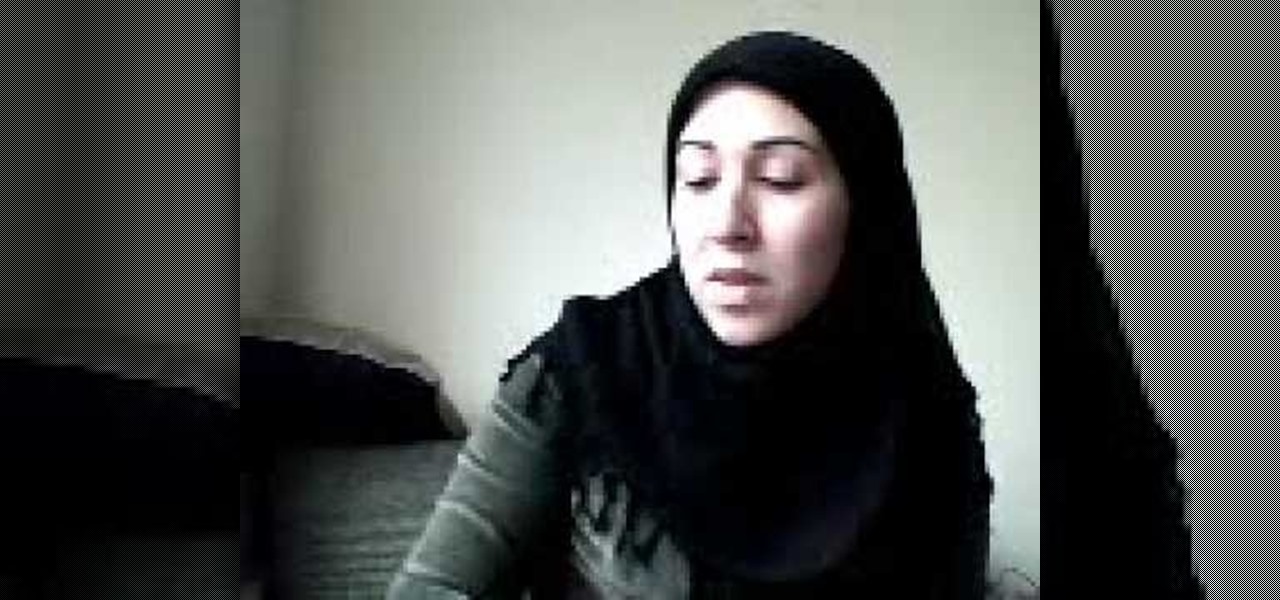
This video walks you through every step on how to wear a hijab. In shows you three different styles on how to rock your hijab. You'll learn how to wear hijab in the layered hijab look using 3 underscarfs, one oblong hijab, two hijab pins, and one safety pin.
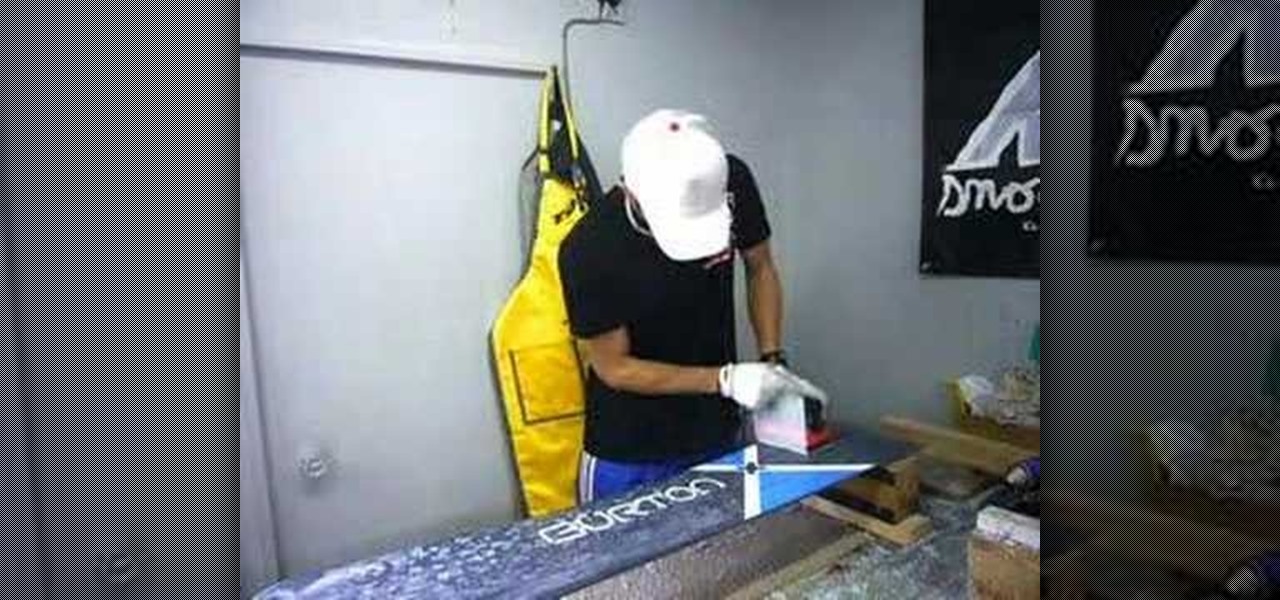
In this video tutorial, viewers learn how to wax a snowboard. The materials required for waxing are: wax (cold, medium or warm temperature), scraper, brush, iron, wax paper, cloth and gloves. Begin by wiping the board with the cloth. Now rub the wax on the board. Then hold the wax against the iron to melt it, and then rub it on the board. The press the iron on some wax paper and spread it across the board. Leave it too cool for about 20-30 minutes. Then use the scrape to remove the wax layer....

Sfehmi shares a recipe for Bombay Biryani. This is an Indian dish made with chicken, tomato, rice, onion, and masala. She combines spices that make up a masala to flavor the chicken and tomato, which is heated for 30 minutes on the stove. After boiling the rice al dente, it is layered with the chicken into an oven-safe pan, and topped off with onions and saffron. The dish is then covered with foil and cooked for 40 minutes at 320 degrees.
Artist Stephanie Valentin takes us through the steps of how to draw the X-Men character Wolverine in Photoshop. She outlines the necessary tools to be able to make the drawing and provides detailed information on width, shading, and opacity to make sure the colors are all accurate. After creating a series of layers, gradients and various sketches, she shows us how to create the character. In just five hours with this tutorial, you can learn how to create Wolverine using Photoshop.
This video shows you how to create a realistic shadow of window blinds over the picture of a boy in a photograph that had no window blind shadows using Photoshop. Creating a separate layer, he creates shadows first by using the rectangular marquee, then filling in with black and copying the black stripes across the photograph. The opacity is set to 40%. The shadows look like a casting of the shadows of window blinds over the boy, but is not as realistic as he wants them to be. He then makes a...
This step-by-step instructional video shows how Photoshop can be used to purposely over-process a photo and give it a more gritty effect. First, a High Pass filter is applied to give the photo a gray buzz. Next, hard light blend layers are applied to give the photo more contrast. A few approaches for applying noise filters are described next. Finally, de-saturation is applied to produce an amazing finished product. A must-see video for anybody looking to add a fantastic grunge effect to a photo!
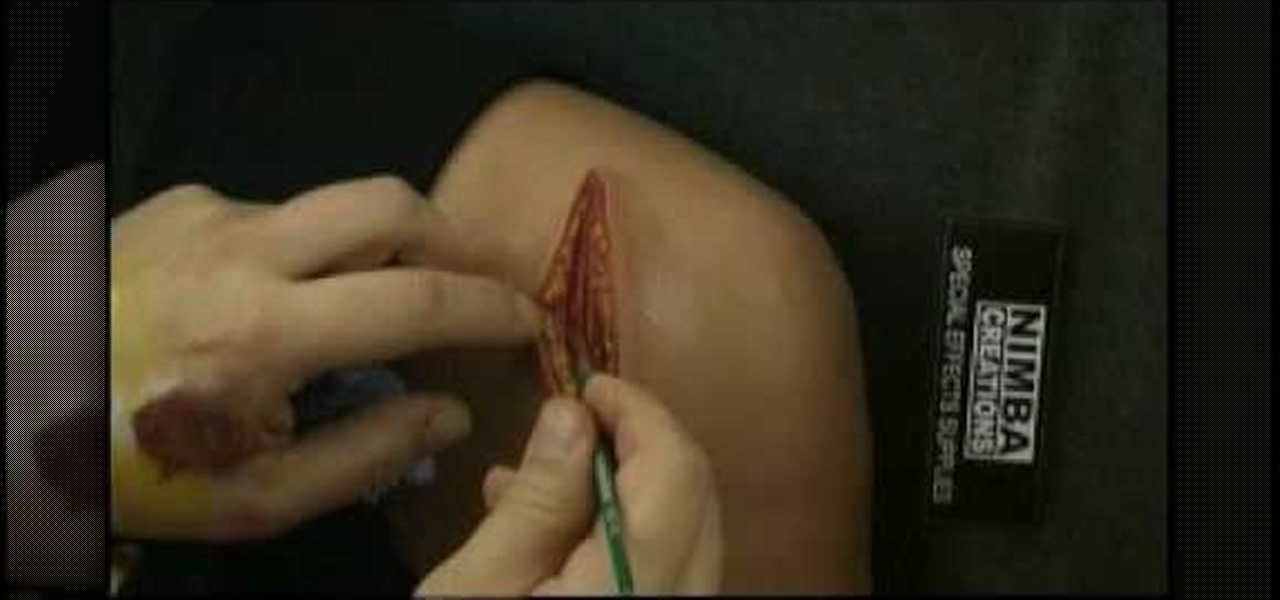
This video describes the coloring techniques to make a realistic gelatine prosthetic wound. The presenter chooses to use grease paint as it applies easily to the rubber gelatine wound mold. First, apply a base color to mimic that flesh tone around the wound and blend it until it matches the skin tone. Next the presenter applies red and pink tones to the wound, the idea is to mimic the color of raw meat. Highlights are then applied inside the wound to simulate fat underneath the top layer of s...

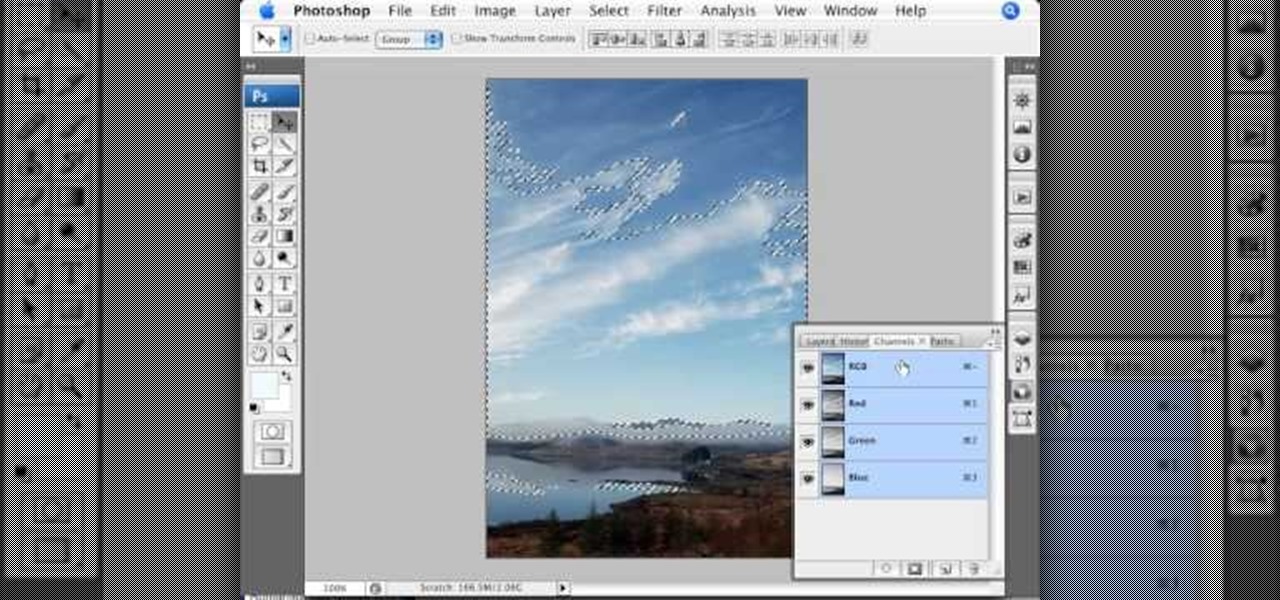
This video shows you how to enhance the sky in pictures using a program called Adobe Photoshop. With this program you can use a gradient tool to layer different areas and change the color to enhance the picture of the sky. You can also invert colors and do a lot of different things using this tool. It is a very helpful tool to have because it drastically changes how bold the sky looks and could help a photographer out a lot to learn this skill.

Photoshopuniverse shows you how to quickly add rounded corners to photos using Photoshop. He talks about vector masks which he is going to use to give the photo in the video a rounded corner. He uses layers inside of Photoshop to complete this task and also use the Crop tool. He also adds a border around the image then makes it green. IF you watch this video, you will learn how to add rounded corners to photos and how to add boarders and color them.
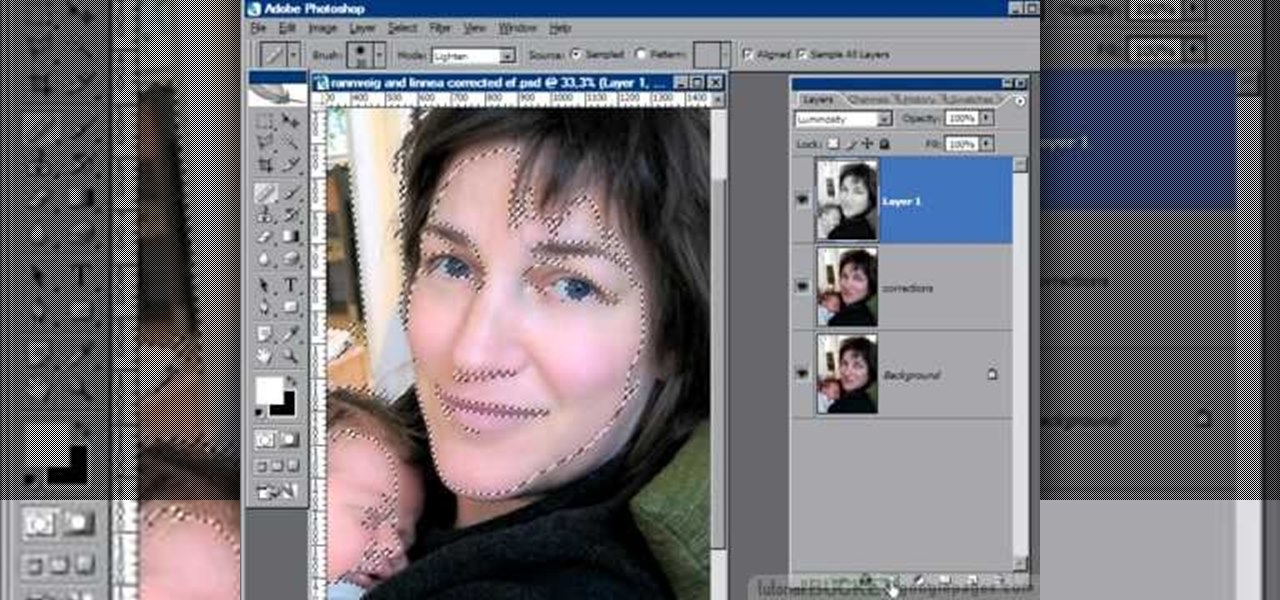
This video is about using a luminosity mask in Photoshop. The luminosity mask is used to enhance the color and contrast in photos that lack each of these. The color is enhanced or punched up. Choose the manipulation tool: channel and RGB. To choose RGB, touch control and then select RGB. Select the 100 % white or light parts of the photo, it will not select the darker or black images. Copy the light parts of the image by using control J. Choose to copy the lightest parts by selecting overlay ...
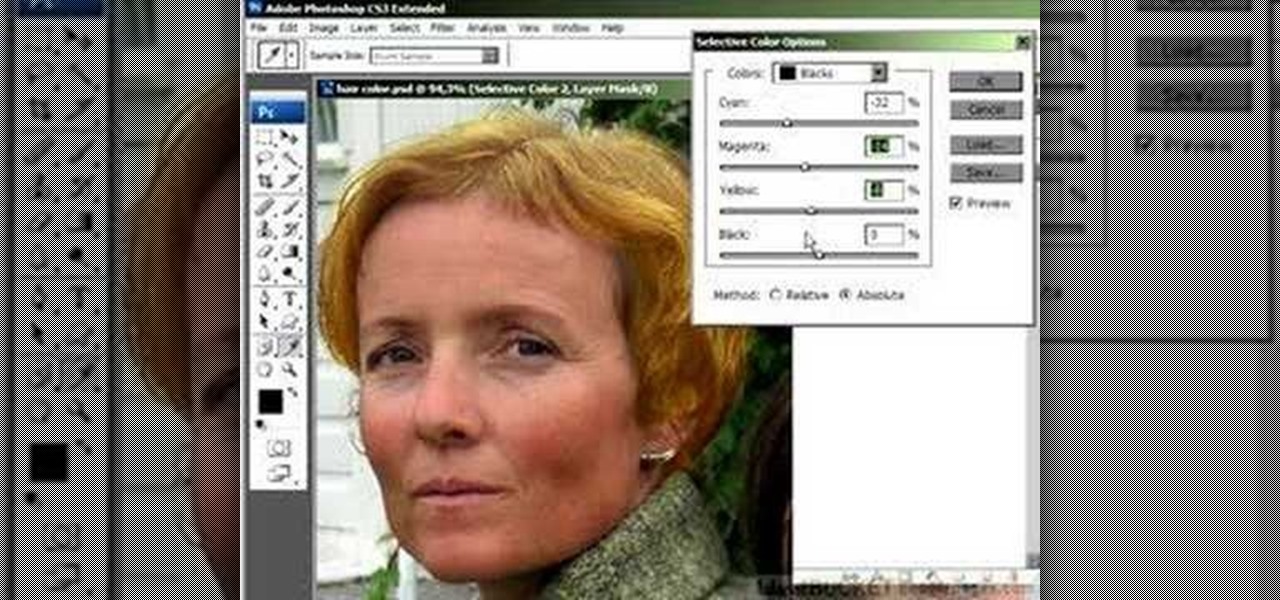
In this Photoshop tutorial the instructor shows how to change the dark hair color to blond. To get this accomplished you need to use a couple of very special techniques. First use the selective adjustment layer and select the outline of the hair. Now use the selective color option and change cyan and magenta settings to about minus forty. Now changing the other yellow color to achieve saturation and black colors to achieve the effect with shadows. Now next change the colors of black so that t...
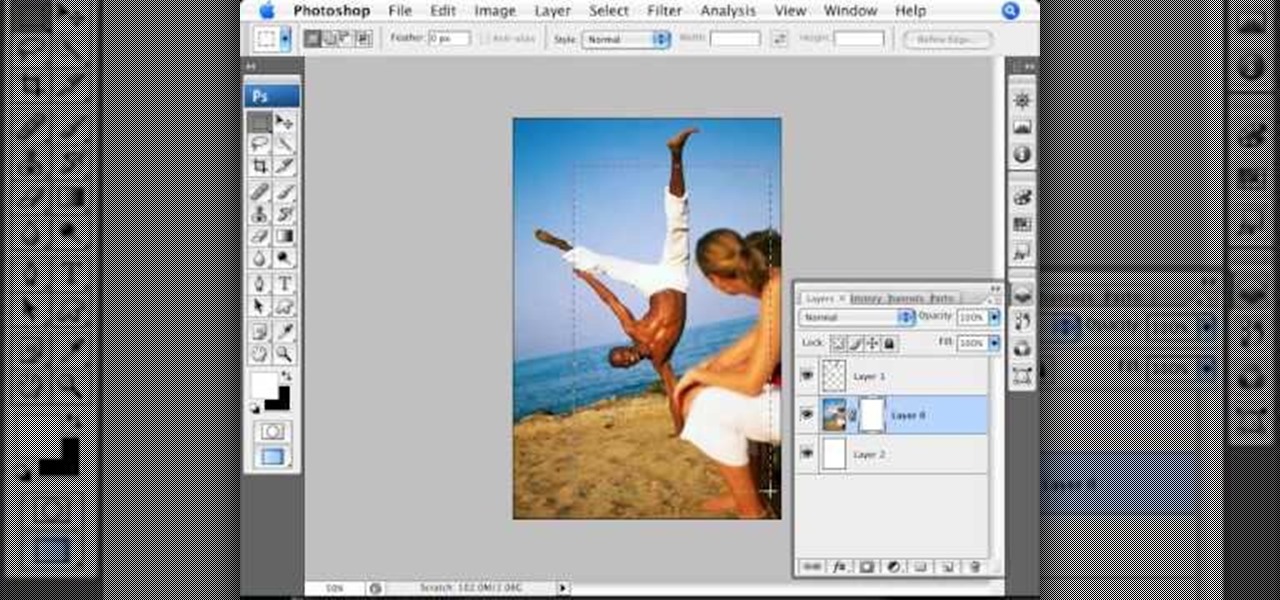
To add drama to a photo and create some additional pop, this video tutorial shows how to create a photo cutout using Photoshop software. What you need to do is determine what subject in a photo you would like to cut out. Using a cutout and multiple layers, the final impact is an effect that makes the cutout appear as though it is extending beyond the photo's boundaries and into white space. By following these steps, you can create additional interest or emphasize a certain part of a photo usi...
Oftentimes a subject in a photo will want to remove certain blemishes or correct his or her skin tone, and it is simple thing to do in Photoshop. This video takes us through the process of what is known as "facial scrubbing" using Photoshop software that can automatically give a person a flawless appearance like that in magazines. Retouching can be done by editing certain layers of a photo's subject. By following the steps in this video you can touch up the complexion of anyone in Photoshop.

You can use starburst to make stars in photos stand out or you can use that feature to make reflections and glares on cars, mirrors and other shiny things. You use different layers in Photoshop to create the starbursts then add it to the photograph that you select. You can choose the pixel, size and color. The tutorial also teaches you other buttons to use in conjunction with the starburst feature, which teaches you other things so you can work on other pictures.

Heat the pot and put in the cooking oil. sauté the onion until the layers separate. Add the pork belly and cook until the outer part turns light brown. Put in the fish sauce and mix it with the ingredients. Pour in the water and bring it to a boil. Add the taro and tomatoes, then simmer for 40 minutes or until pork is tender. Put in the sinigang mix and chili. Add the string beans (and other vegetables if there are any) and simmer for 5 to 8 minutes. Put in the spinach, turn off the heat, and...
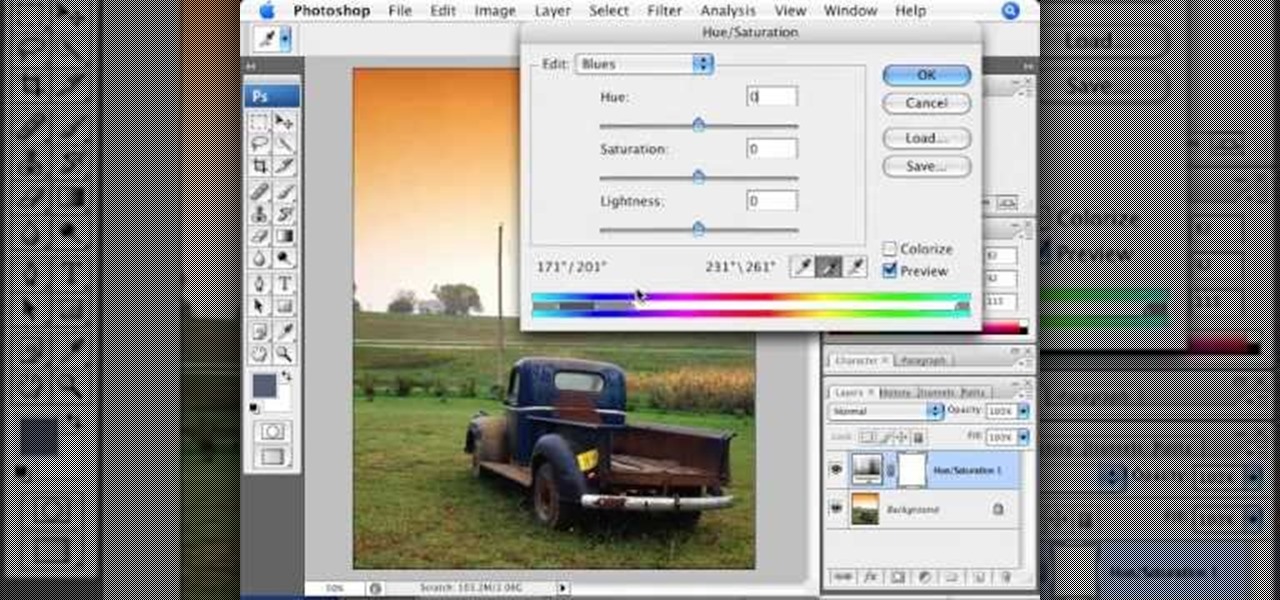
Adjusting the color of specific objects within your images in Photoshop is crucial. Sometimes fine tuning the color of just one component in an image is required. While an image may be adjusted globally at once, this approach lacks flexibility. This tutorial will show you the proper steps from the creation of an adjustment layer to the appropriate and functional calibration of the hue and saturation options. Get the most out of these tools and maximize your productivity in Photoshop.
A lot of people know how to make homemade popsicles, but Karen Solomon, author of "Jam It, Pickle It, Cure It," provides us with an ingenious way of making these cool, delicious treats.
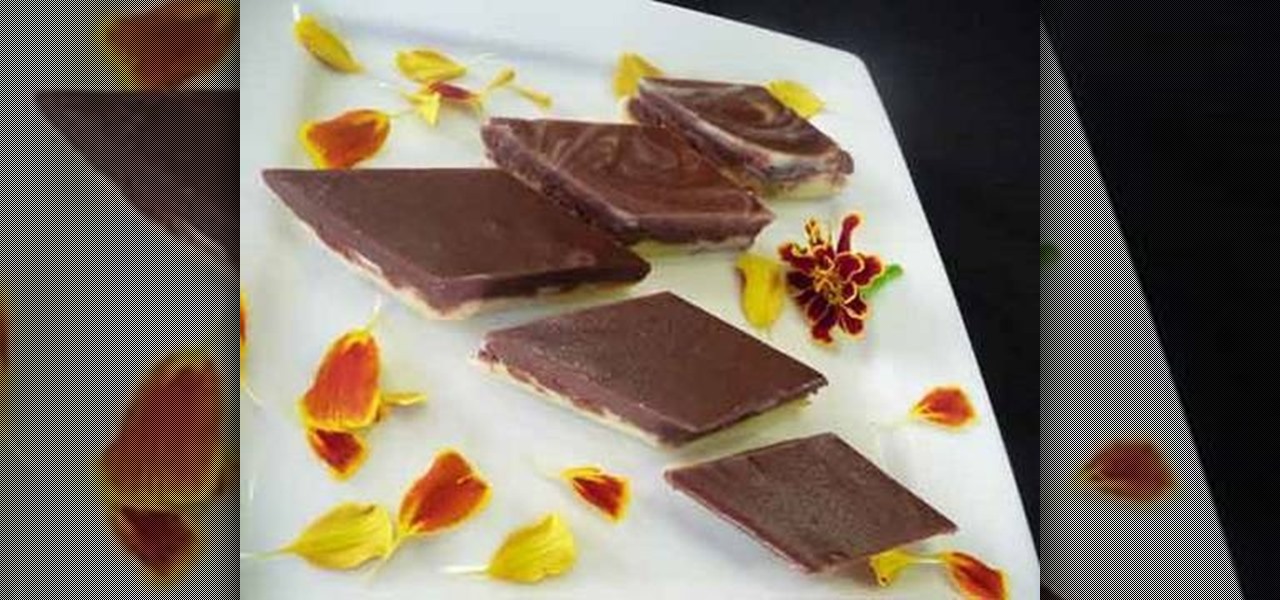
This is an easy and simple way to prepare Chocolate Burfi for chocolate lovers! At first you will need instant dry milk, heavy whipping cream, chocolate chunk, powder sugar.
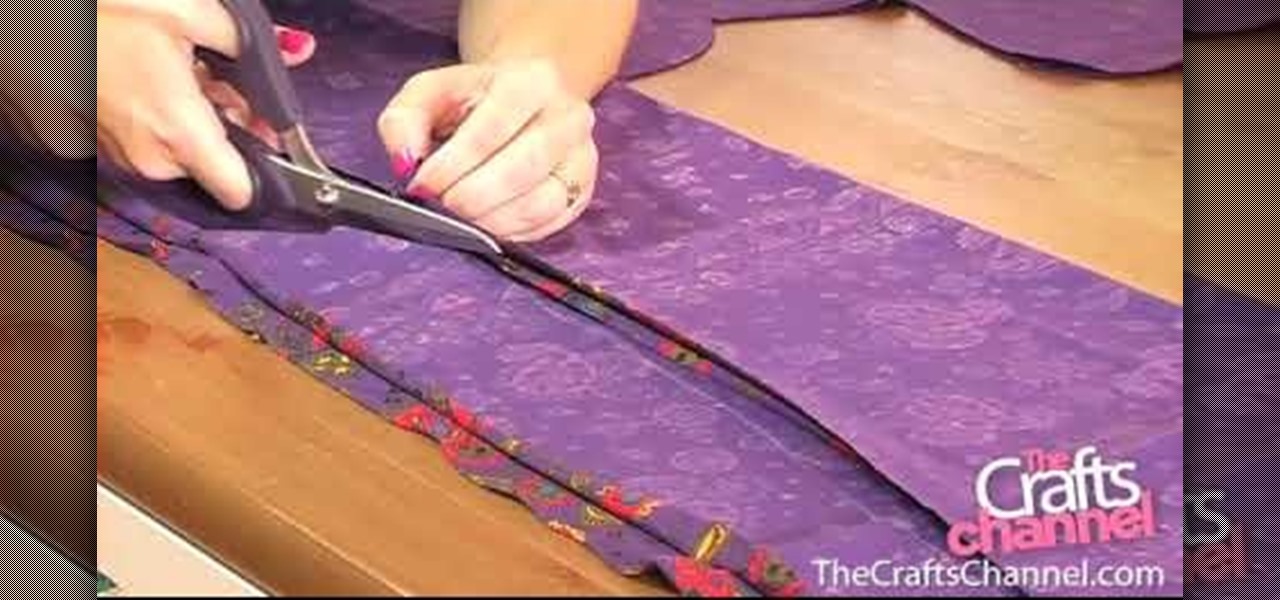
1: Chose a stretchy fabric & fold in half, so that the right side of the patterns are together. 2: Lay dress on top of fabric & trace the dress with dressmakers chalk, allowing for a 1.5 cm seam allowance (except for the bottom. allow 5 cm).

Have some fun while gaining pro Adobe Photoshop skills by embarking on the project featured in this video. You'll learn how to produce a fancy license plate that's snazzy and shiny. To make the plate, you'll be using the text tool, layer effects, and paths.
Get started using Adobe After Effects with the help of The New Boston! This beginner's tutorial is bound to answer the many questions you have about the popular digital motion graphics and compositing software. The main purpose of After Effects is for film and video post-production.

Get started using Adobe After Effects with the help of The New Boston! This beginner's tutorial is bound to answer the many questions you have about the popular digital motion graphics and compositing software. The main purpose of After Effects is for film and video post-production.

Do you even know what a Leyden jar is? Well... it's an early form of capacitor made from a glass jar with layers of metal foil on the outside and inside. This video tutorial will show you how to make a Leyden jar to store static electricity. This Leyden jar will give you a powerful shock!

Need a little help solving the last part of the Rubik's Cube puzzle? Permutating the last layer could be tricky, and could get you back to square one if you don't know what you are doing, but don't worry, you'll be able to solve that Cube in every possible PLL situation.

The Professor of Silliness returns with some paper. Watch this instructional video to make a tall tree out of newspaper. You need an old newspaper, masking tape, and scissors. Simply lay out the newspaper pages from end to end and tape them together. Then roll it up at a diagonal, starting from one corner, and pack i it into a compact tube. Use tape to keep the tub intact Use the scissors to cut vertical lines half way down the newspaper tube. Pull out the inner most layer and turn your recyc...

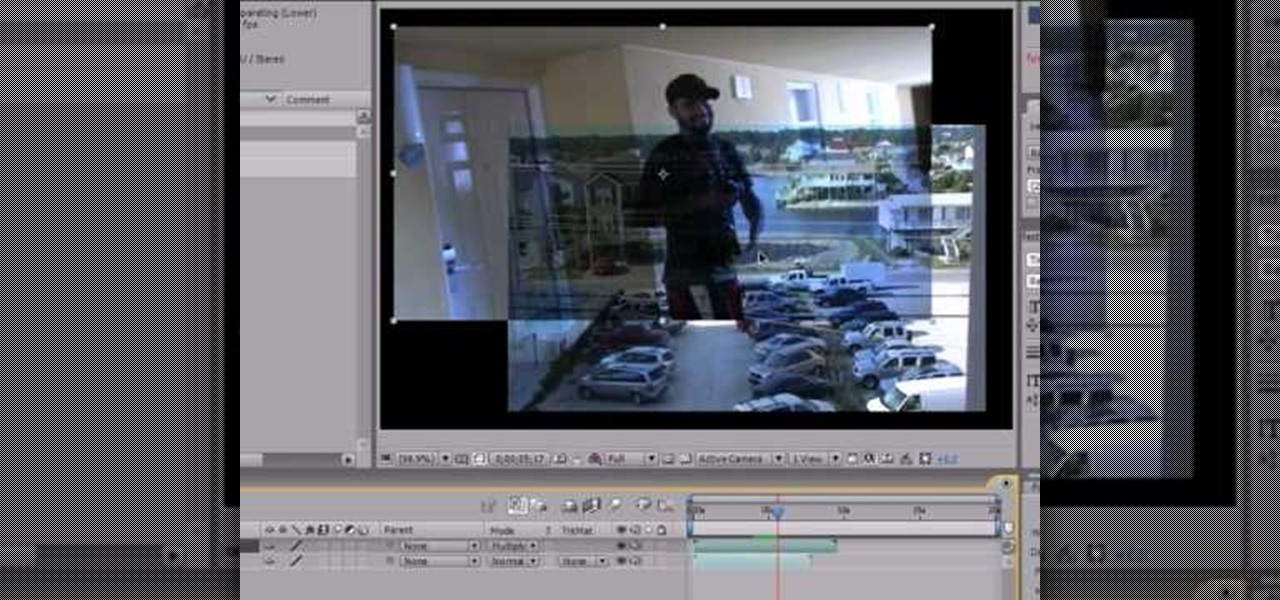
Using three layers of alpha transparent PNG files, we can can create a pseudo 3-dimensional looking background for a web page using the parallax effect. This video screencast covers how to do that from start to finish. Since Internet Explorer 6 and under do not support alpha transparency in PNG's, this screencase also covers how to create a warning message that will display only in those web browsers. You'll see how to use TextMate, Adobe Photshop, Safari, and VMware Fusion for your CSS build...

If you're into knitting and crocheting, you probably know it all. But what about a broomstick lace crochet? If you haven't attempted this fine crochet pattern, you must… now! Broomstick lace crochet forms a visually interesting and beautiful stitch.
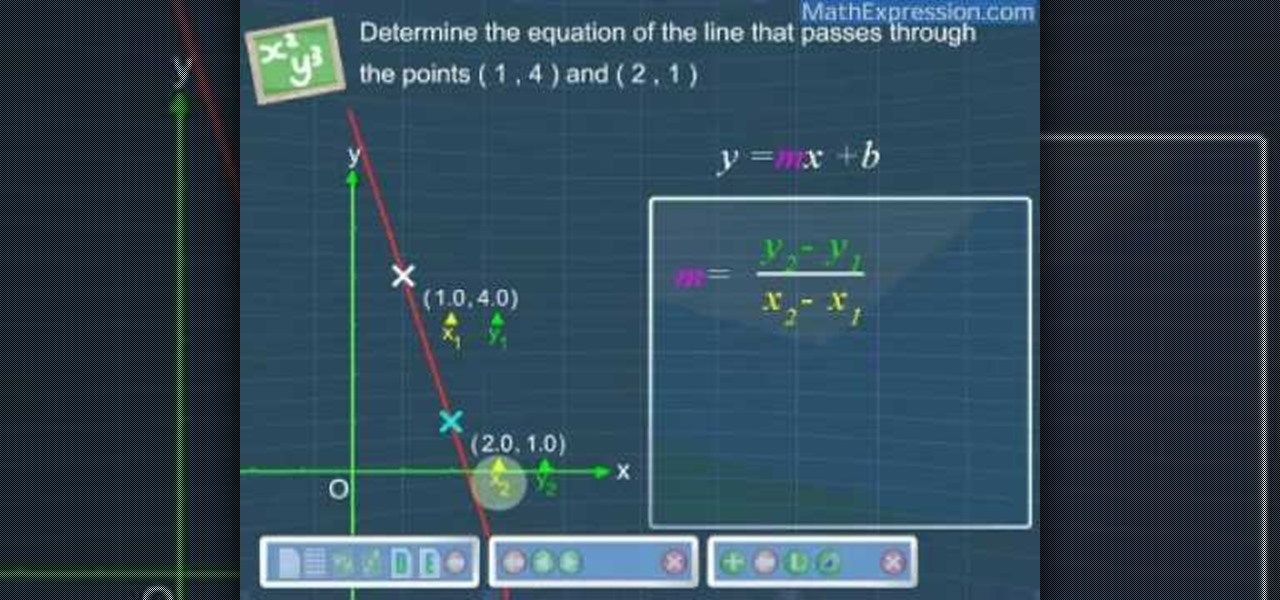
Learn how to determine the equation of a line with this tutorial: The equation of a line can be determined by two given conditions.
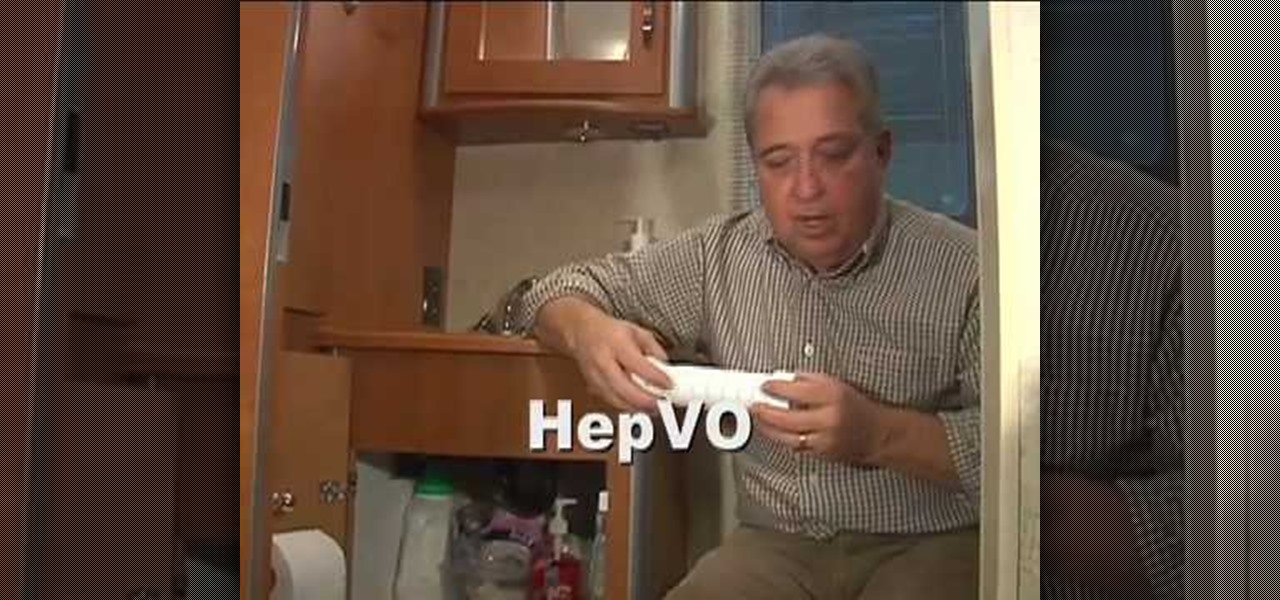
Gary, RV Dr. tip #9 is describing about his new tool called HepVO for the kitchen and bathroom sinks, for the better flow of water and to prohibit the bad gases to come in. Mr. Gary is explaining that how this HepVo can replace P shaped traps. Because the traps are necessary for the flow of water.
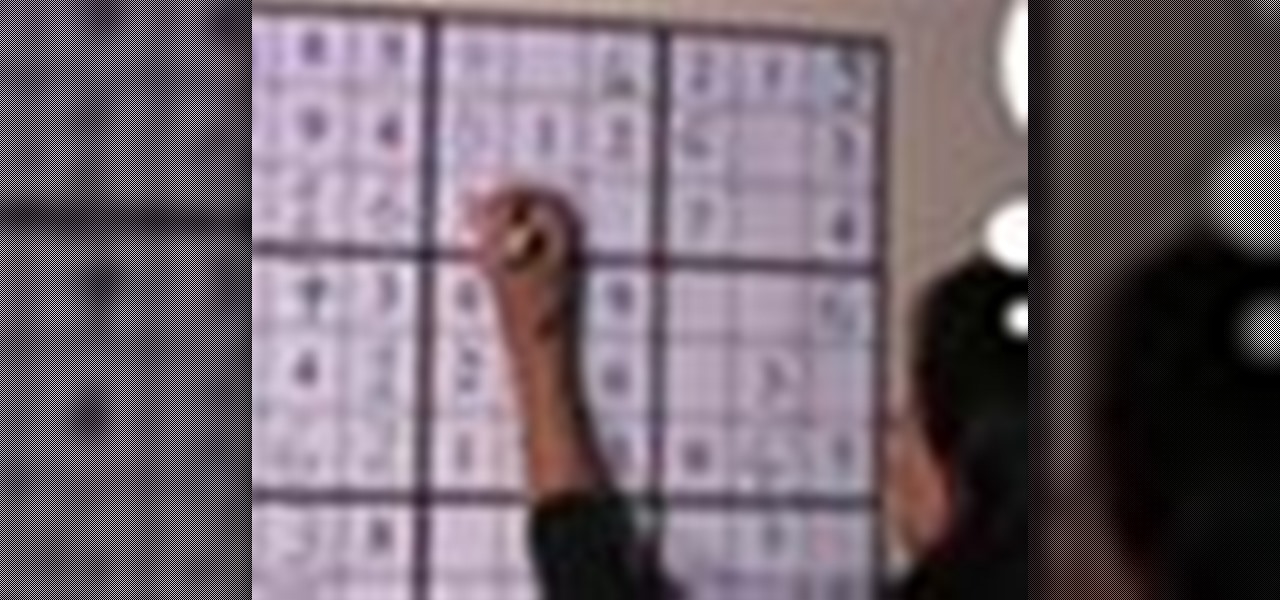
Sudoku is a one-rule puzzle game that can be either satisfyingly simple or deceptively difficult. Step 1
Healing a broken heart can take time, but, if you treat it as a learning experience, you’ll discover a lot about yourself.

As with any investment, putting your money in foreign markets requires due diligence and the willingness to take risks.
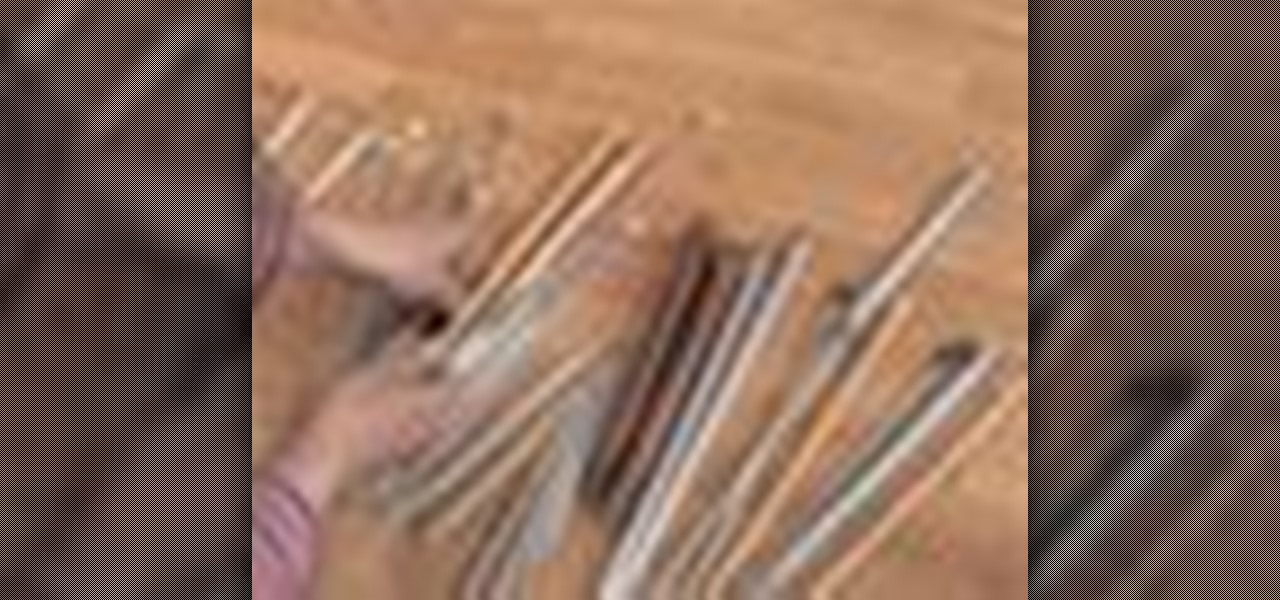
Knitting with the wrong needles is like playing soccer with a bowling ball –you’ll end up frustrated and disappointed.