
How To: Bathe a guinea pig
Guinea pigs rarely need baths, but if your furry friend is dirty or oily, a quick wash is a good idea. He’ll squeal in protest now, but he’ll thank you later. Watch this Howcast video to learn how to bathe your guinea pig.

Guinea pigs rarely need baths, but if your furry friend is dirty or oily, a quick wash is a good idea. He’ll squeal in protest now, but he’ll thank you later. Watch this Howcast video to learn how to bathe your guinea pig.
Tired and hungry after work? This chicken lettuce wrap is a healthy recipe that you can prepare for one or many people. Watch this two part instructional cooking video to prepare this refreshing Asian style dinner.

Amigurumi is the Japanese art of crocheting small stuffed animals. Add personal touches to your handmade items with Amigurumi. This how to video is a tutorial on how to crochet a small ball that can be used to create a small head. Watch and learn.
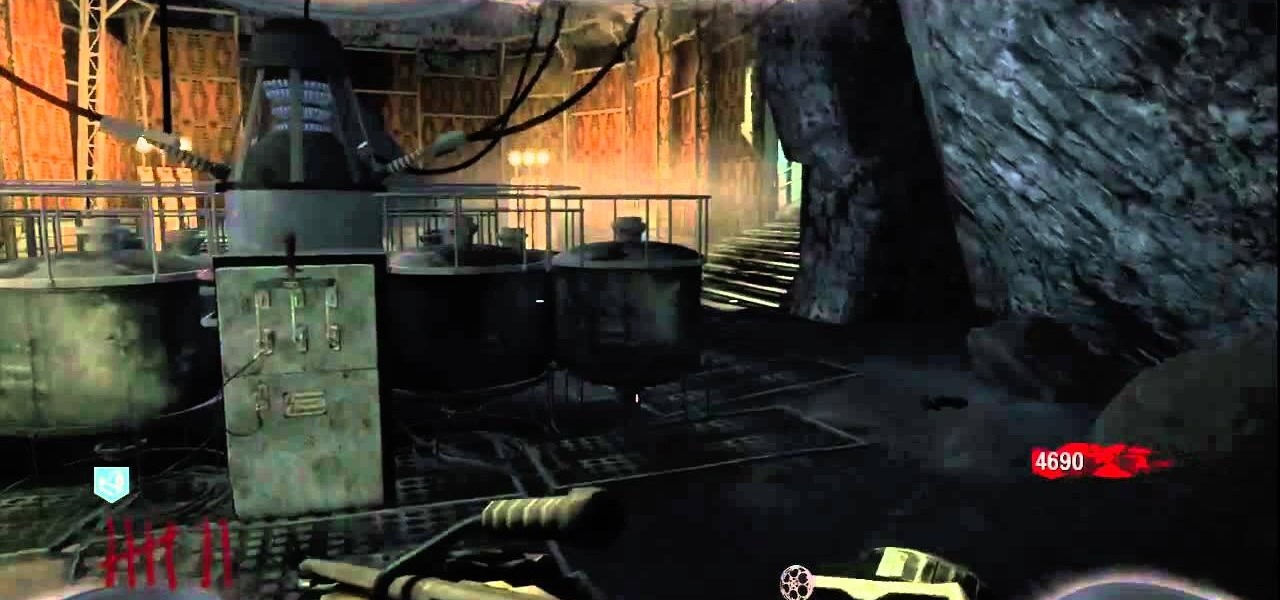
The 'One Small Hack for Man' achievement in Call of Duty: Black Ops is available if you own the Rezurrection DLC and requires you to hack anything within the game with the hacking device. Take a look at this guide from the Achievement Hunters to learn just how to unlock the achievement for your Xbox 360 gamer profile.
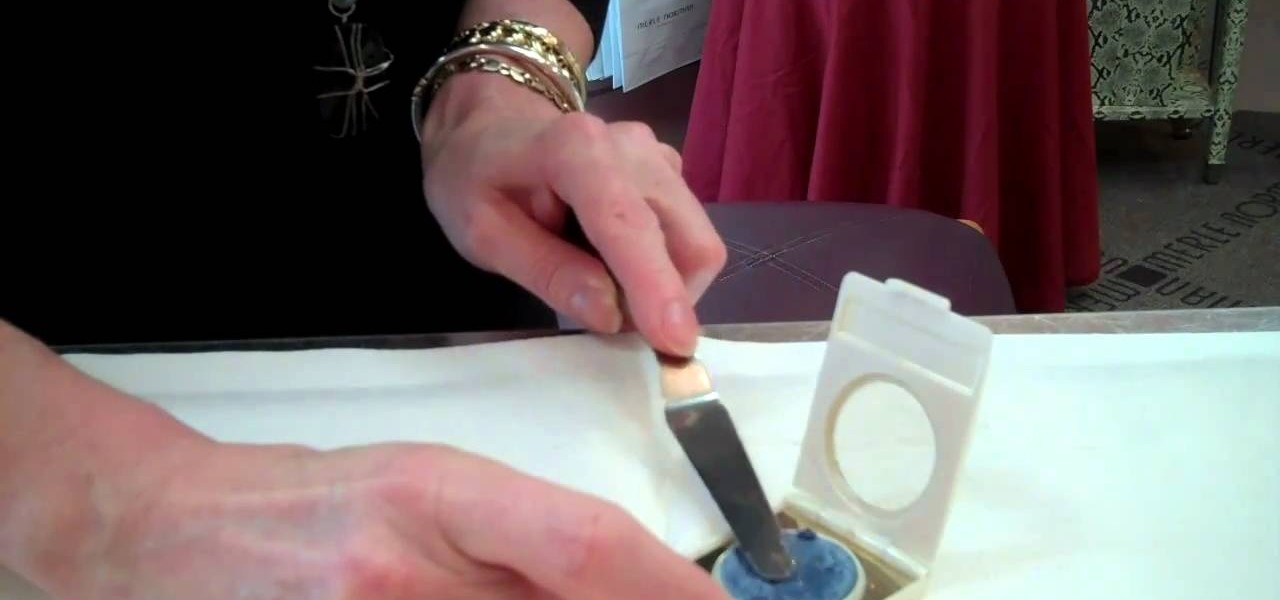
Is your eyeshadow busted and broken up? Don't toss it away just yet— it's totally repairable. Bring back the smoothness with a little tip that will save you tons of money in the long run. The key? Rubbing alcohol. By adding a little bit of rubbing alcohol to your broken eyeshadow, and by mixing it together with a small spatula or butter knife, you can get it back to its original vigor.

In this video, we learn how to make photo magnets. First, clean your glass with vinegar, make sure it's small enough for the magnet. After this, cut your preferred image to fit in the glass, then apply adhesive to the image. Apply the glass with the texture side down, then push it around to work out all the bubbles. Clean the glass off with a damp towel before it dries. Next, apply Diamond Glaze to the back of the magnet and then allow it to dry completely. When finished, attach a magnet to t...

In this tutorial, we learn how to do a complete forearm workout. First, grab a small weight in each hand and start to lift your forearms up into the air. Control your movement when you go both up and down, to help work your arms out better. Next, lift up gently with the weights, relaxing your body and letting the muscles do the work. Don't lift with your back or use momentum, use only your muscles to lift. Continue to do this for several reps. After this, grab a dumbbell and start to lift it ...
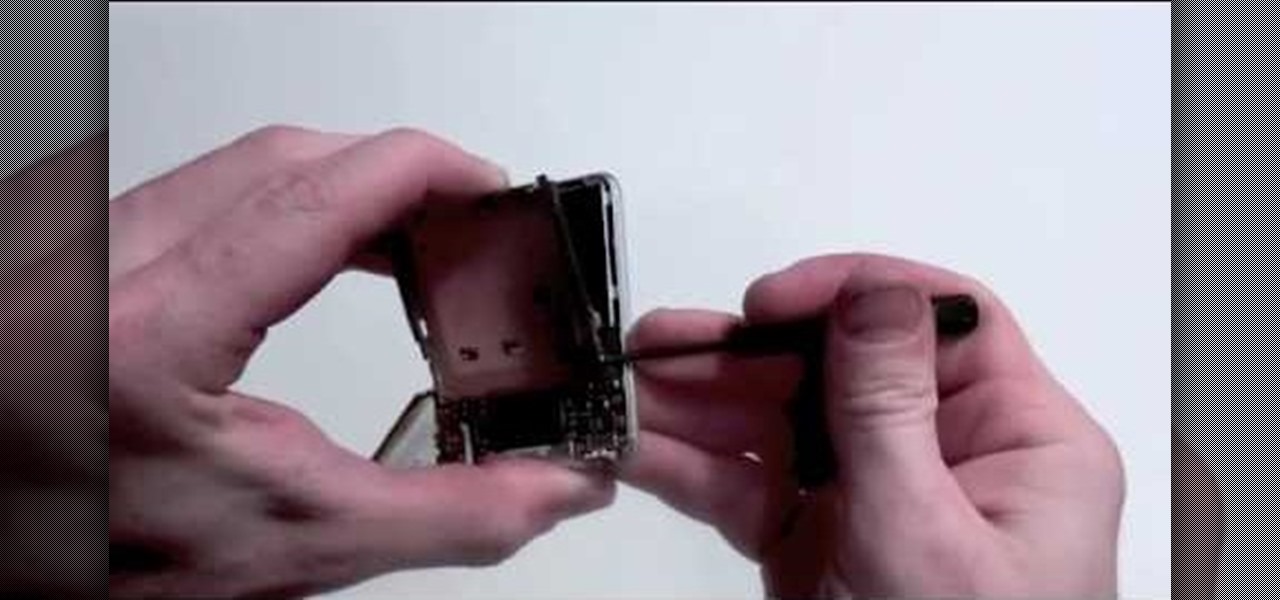
In this tutorial, we learn how to take apart an iPod Nano 3rd generation for repair. First remove the back casing using a guitar pick. Next, use a flat tool to lift up the battery carefully and remove it from the casing. You will see three wires that lead to the launch board, which are soldered into place. Now, use the flat tool to remove the back of the battery casing from the device. Now, remove the logic board by removing the 6 small screws inside of it. Next you will remove the LCD by lif...
Choosing the right gift for your friend or girlfriend is obviously the most important part of gifting, but you can make your gift extra special by wrapping it in a lovely package.

In this Video Games video tutorial you will learn how to access your Xbox 360 hard drive. You need four tools for this. They are an exacto knife, T6 torque wrench, T10 torque wrench and a small fly head screwdriver. With the exacto knife cut a hole in the sticker as shown in the video so that you have access to the screw underneath it. Remove the 4 screws with the T6. Pull out the back, with the screwdriver pop up the two clips on top and remove the back. Now remove the 4 screws with the T10....

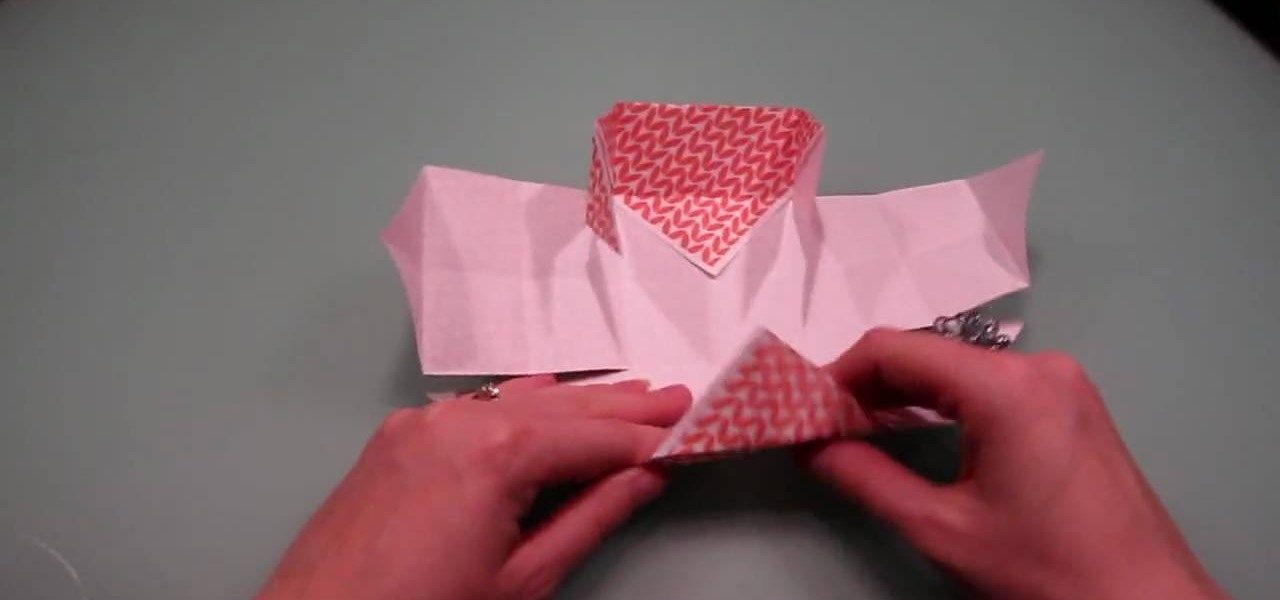
This video illustrates how to fold an origami angel with a wide wing span. Here are the following steps:
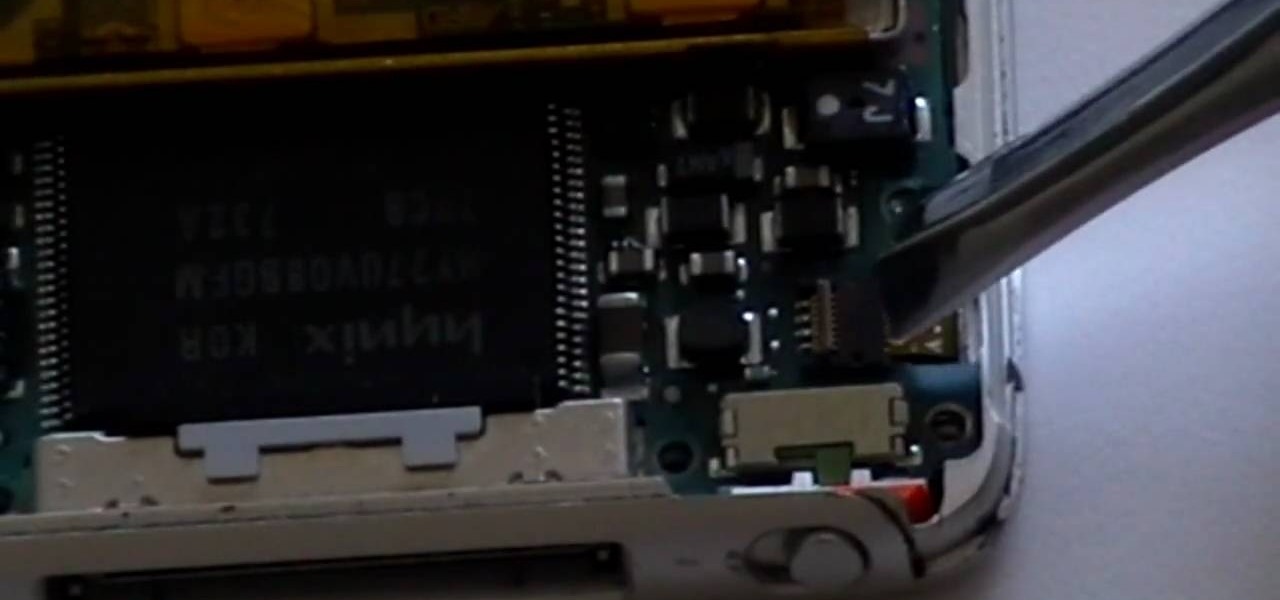
This video shows you how to replace the LCD screen on a third generation iPod nano. Using a plastic safe pry tool, run it along the edges of the iPod, releasing the clips. Once the clips have been released, you should be able to remove the back cover. There are six exposed screws on the bottom of the inside back cover, remove all of them. Next remove the click wheel ribbon cable from the jaw connector. To do this, use the pry tool to lift the connector. Use a pair of tweezers to gently remove...

This excellent three part series takes you from beginning to end on how to make ceramic coggles, or small wheels. You'll learn how to properly spin your glan, glaze your result, as well as how to properly light your kiln. This series is great for any ceramic student, at any level.
The phenakistoscope is a predecessor of the flip book, but don’t worry: it’s easier to make than pronounce.
Need to shoot a film for class and realized you don't have a Fisher Dolly and your cinematographer's hands are a little to shaky for what you would consider good filmmaking? Well, this video tutorial will show you how to make your very own steadycam. Check out how a nautilus design transforms into a more suitable steadycam; the gimbal is the key, and gimbals are very hard to find, especially the right one.
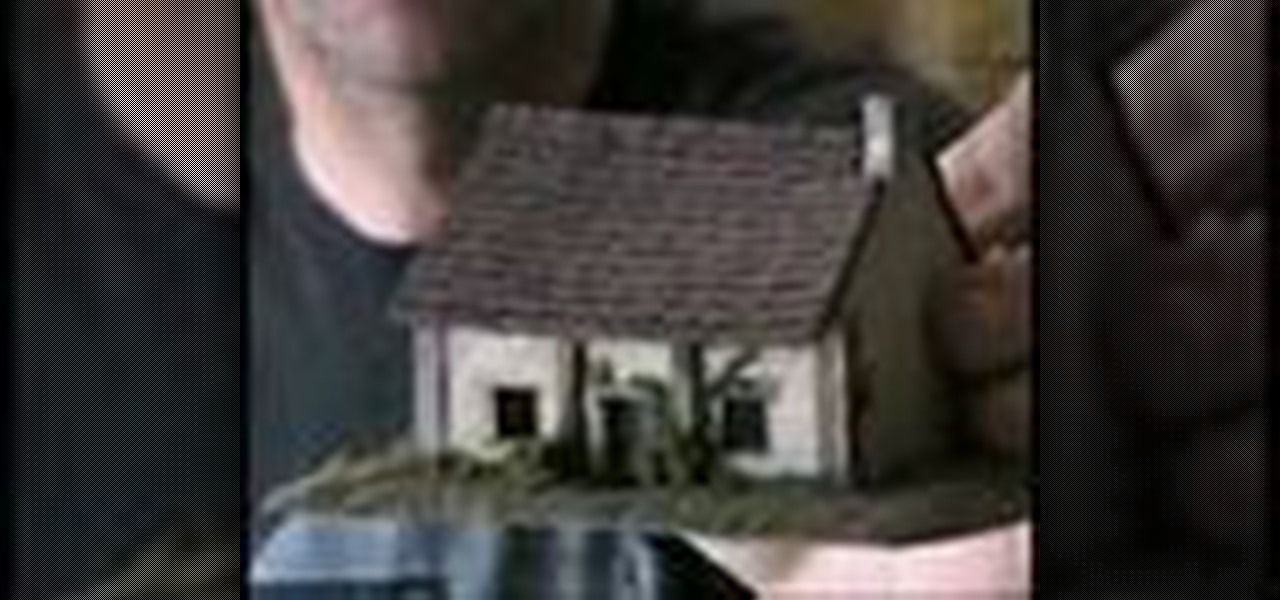
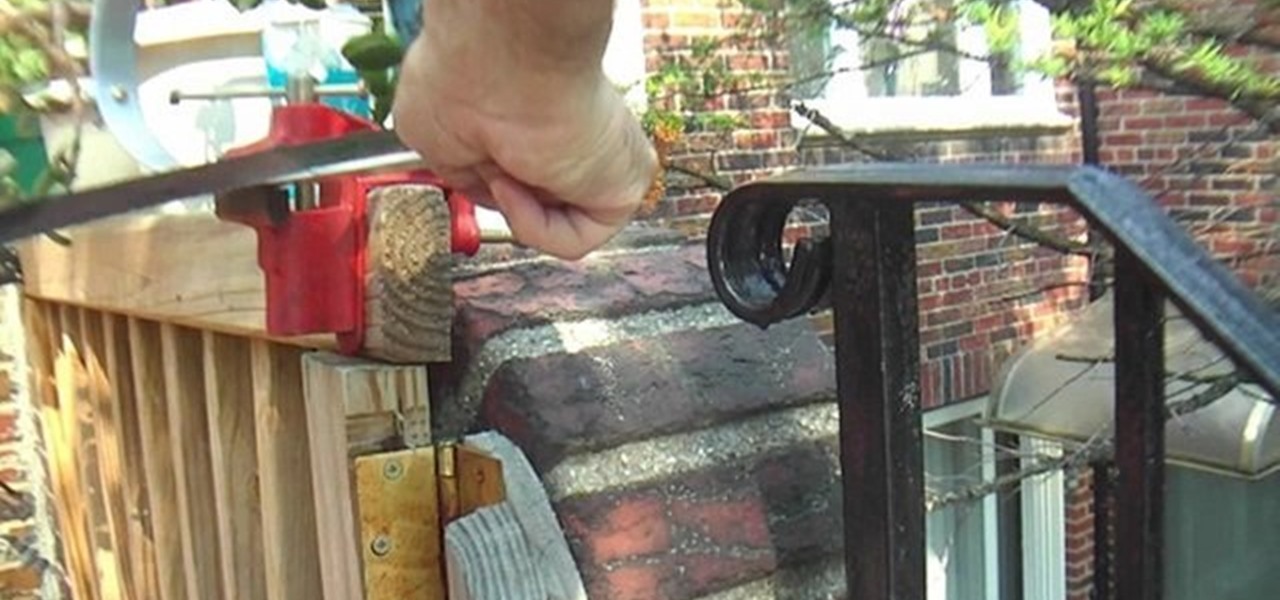
This video provides an introduction to building 15mm scale buildings for Warhammer or miniature dioramas. Simulate roofing shingles and with small pieces of cardboard. Create a haunted scene with real spider webs. Preserve tiny spider webs with a protective spray or make miniature spider webs out of milkweed. Build small scale grapevines with toothpicks, wire, and painted leggy moss.
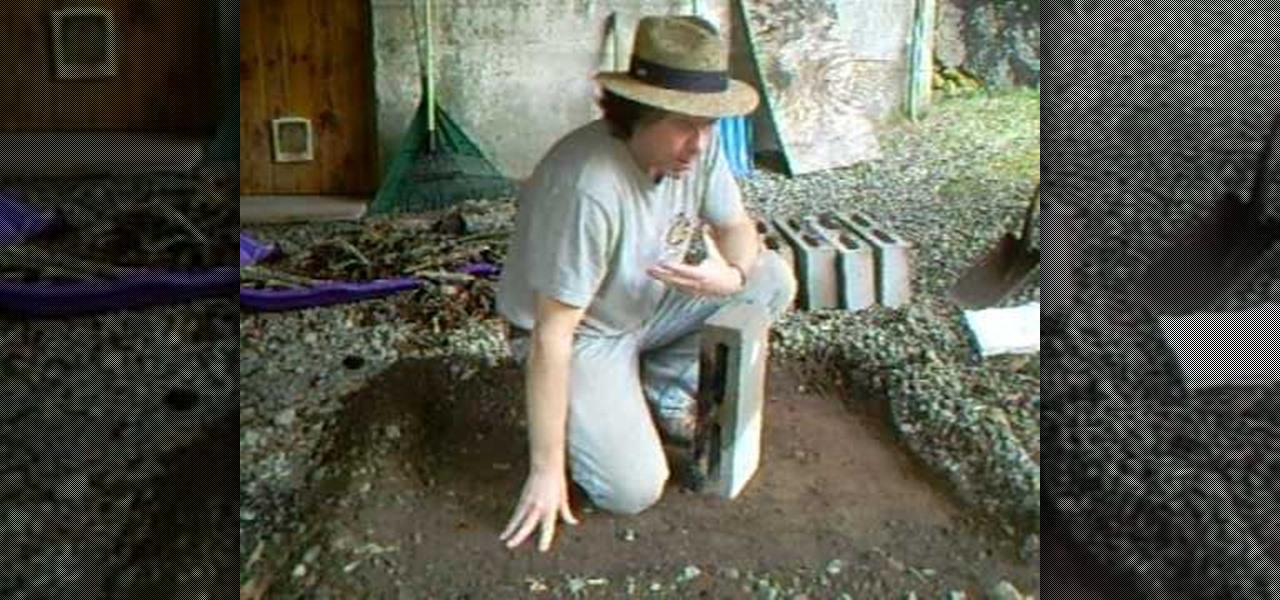
In this 2 part how-to video, Simon Leach, who normally shows you how to make pottery, instead shows you something else. In this tutorial, Leach shows you how to make and build a small propane downdraft kiln. Follow along with Simon Leach, and you too could be building your own kiln in your backyard.
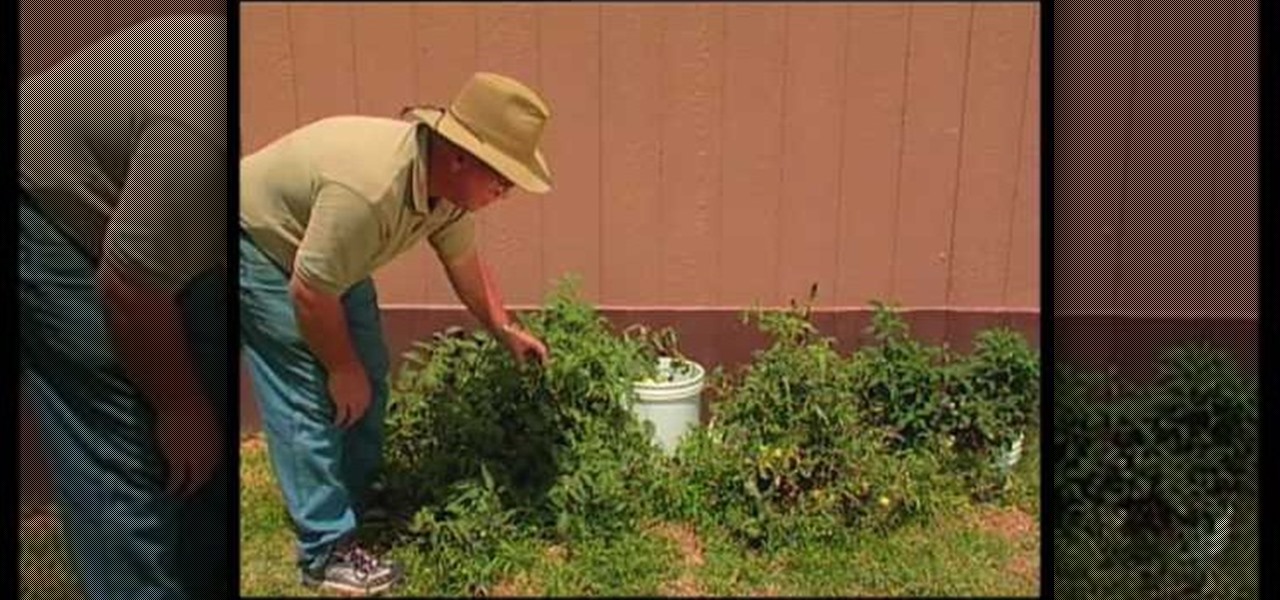
This video explains how to build a home garden in a small space. The video begins with the first small garden example being show, this garden contains corn, tomatoes and summer squash. It is explained that it is very important to shake and loosen the pollen buds on many of the plants to ensure proper pollination. The second small garden shown consisted of tomatoes and various pepper breads. The need to loosen pollen and allow the wind to help the plants get on pollen on the female buds. It is...
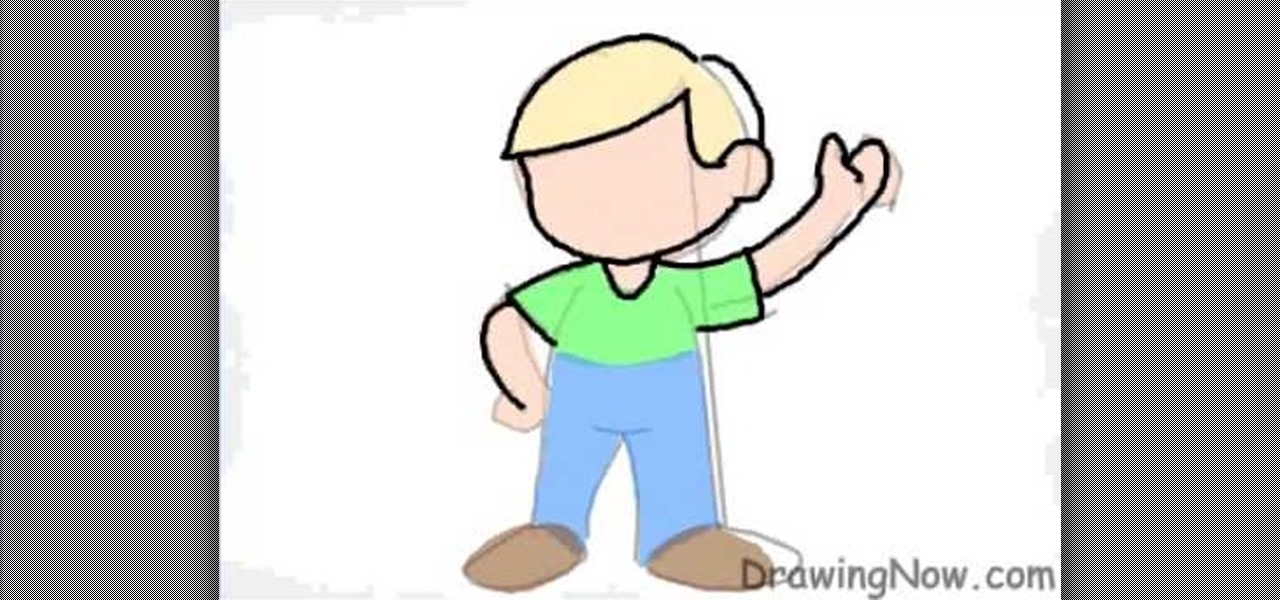
In this tutorial, we learn how to draw a cartoon figure of a boy. Start out by drawing a large circle for the head, then drawing the arms underneath and a circular body. next, draw the hair onto the boy, and add shoes, a shirt, and pants. Now, color the hair yellow, the body skin color, the shirt green, and the pants blue. Outline the drawing with black ink, then add on the facial features. Start with two circular eyes, a nose, and a small mouth that is a curved line. Add in more hair to the ...
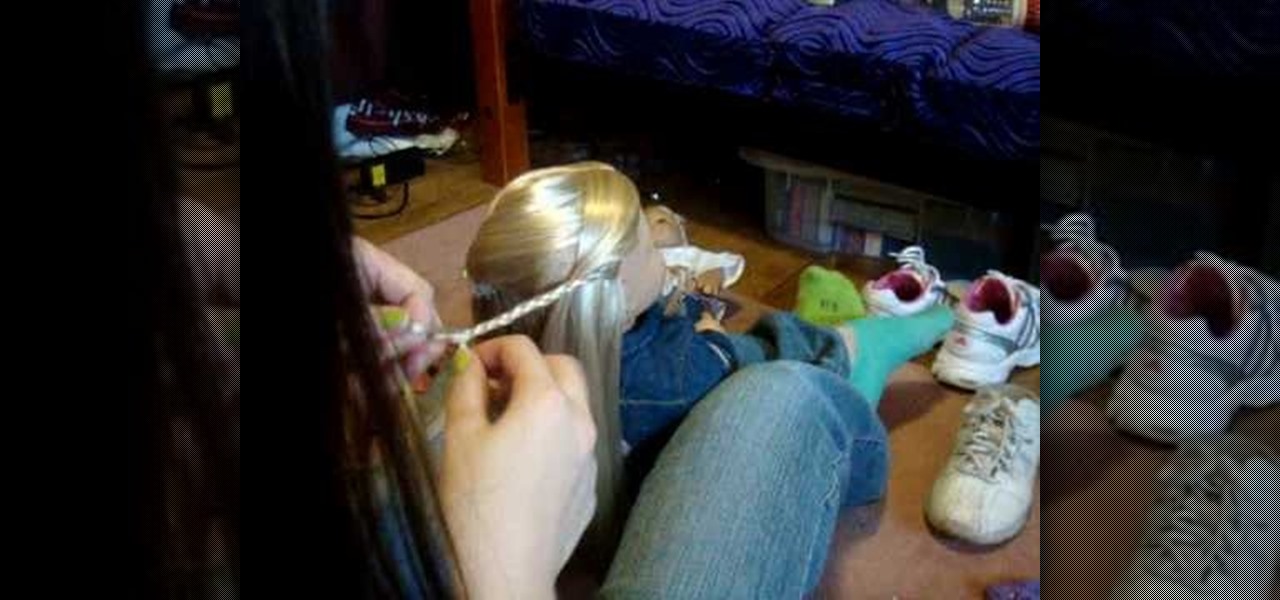
In this video from stephenswodadancer we learn a new hairstyle for your American Girl doll. You need 4 clips and a brush. Take your thumbs in her hair and wrap a circle in the crown of her head. Brush that part out, twist it around, and poof it up. Take the clips and put it on either side of the poof you've just made. You can leave it like that if you want or continue and take a small piece from the side of her hair and begin braiding it. Bring the braided piece across the back and clip the b...

In this video, we learn how to do wrapped pigtails on your American Girl doll. First, separate the hair from side to side. Then, take a small section from the front of the hair and put it aside. After this, you will need to comb the hair back into a ponytail and secure with a rubber band. Secure the other side into a ponytail as well, but put all the hair back into it. After this, you will take the front from the other side and wrap it around the ponytail. Clip it into place and then you will...

In order to create Vanessa Hudges loose waves, you will need the following: hair clips, a large barrel curling iron, and spray.
In this tutorial, we learn how to draw Neopet cartoon cats. First, use a small brush to create the outline of each of the cats. Use light strokes to make the outline, then start to add in the details onto the cat with a darker colored brush. Add in the details of the face, including the whiskers, mouth, and eyes. Don't forget to add on the ears as well. Erase and lines that are on the back of the drawing, so all you see is the darker and more exact lines. Continue on drawing the body, making ...
In this tutorial, we learn how to cheat on a test with a hollowed pen. First, grab your pen and take the top off the ink of it. Now, cut a small slip of paper out of a piece of copy paper. After this, write down the answers that you need for a test. Next, use the scissors to cut the side of the pen and make a slit in it. Now, attach the answer strip to the ink of the pen and place it back into your pen and put the top back on. Now, the sheet of paper that has the answers on it will hide in th...

In this video, we learn how to apply a Chanel temporary tattoo. First, you will need to purchase the tattoos from a store that sells Chanel products. After this, you will need to cut out which tattoo you want from the collection. You can use just a small one or you can connect them together to make one large tattoo. After this, you will need to peel off the plastic from the top of the sheets and apply a wet cloth to the back of it. Next, push the tattoo onto where you want to apply it, then p...

In this video, we learn how to draw a manga chibi eye. Start off by drawing an outline of the eye with the round middle and the lines on top and on the bottom. After this, start to add in the small details of the eye, like the pupil and shine marks on it. Next, start to shade in the eye and make the lines thicker. Continue to draw in black until the back of the eye is covered black and another portion of the eye is white. Switch back and forth between different pencils to help you color in di...

In this tutorial, we learn how to do the veil style for your hair. First, you will section the front of your hair and bangs into three separate and equal sections tied with small rubber bangs. Next, section the layer of hair behind the front row and make four separate sections. Keep doing this until you reach the back of the hair, adding one section each time. After this, braid the hair as far back as it goes to combine with the next box. When you are finished braiding, you will have a veil s...

This video tutorial is in the Arts & Crafts which will show you how to make a dangling picture frame. You will need pictures that you want to frame, old CD cases, a drill with a very thin drill bit and fishing line. Remove all paper from inside the CD cases, cut the pictures to the size of the CD case and place two pictures inside one case back to back. Next you drill a small hole at the top and the bottom of the case in the center. String one CD case with another with the fishing line. You c...
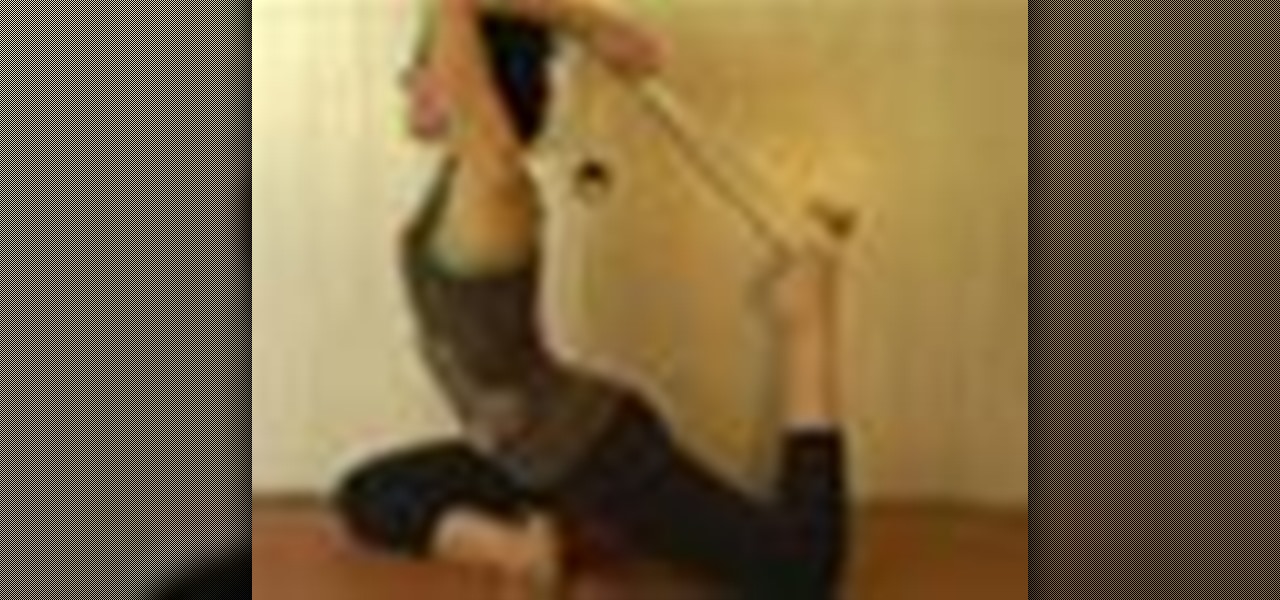
To perform the pigeon pose in yoga safely, you will need the following: a mat, a small pillow or folded blanket, and a strap.

In this tutorial, Kandee shows us how to tease hair and get a lot of volume. First, take a small section of hair and use a round bristle brush to brush the underneath of your hair inwards. After doing this, make sure to use hair spray and style your hair as you like. You can use this technique on both the underneath and top sections of your hair, as well as on the back. When you tease the back of your hair, just pull it straight up and comb against the hair while you're holding it up. When yo...
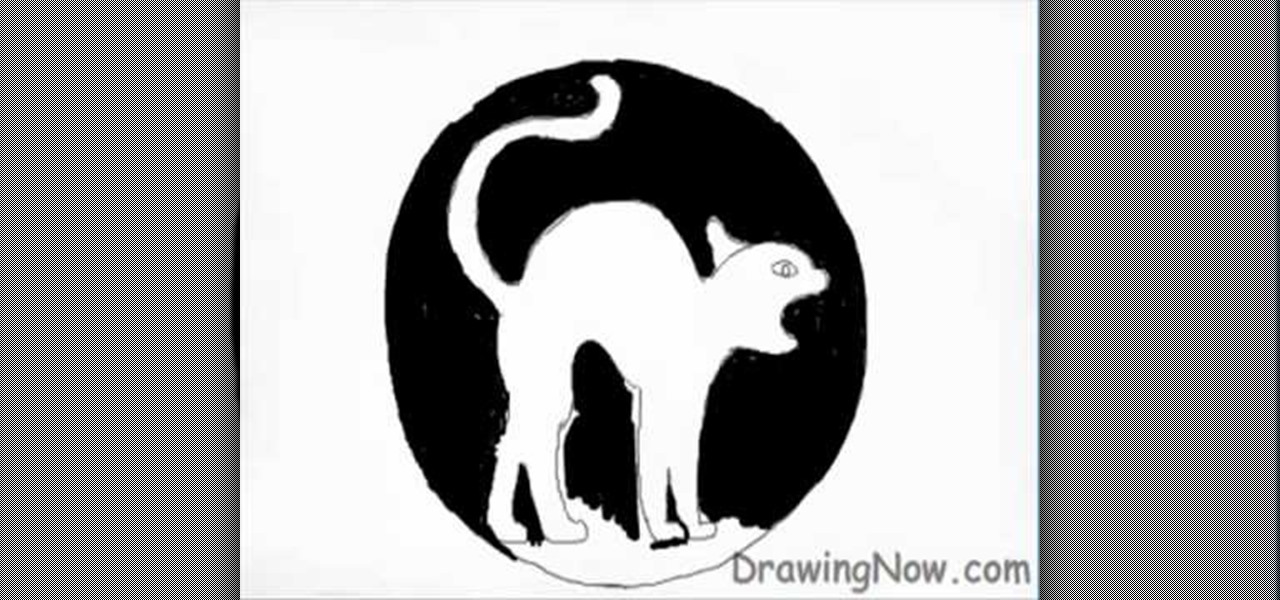
We are shown how to draw a Halloween cat in a several easy steps. First A large circle is drawn. Then in the middle a cat is drawn with an arching back, tail held high. After the cat is completed the background around the cat is filled in with black, giving a silhouette illusion. After the background is completed in black, small details are drawn in white. The fur of the cat, whiskers on the face, hair raising on the arched back and even a gleam in the cat's eye. After this the drawing is com...

This video demonstrates how to paint a rabbit in leftover ground ink. The style used is called sumi-e. Using a the side of a thick brush, create a filled in circle in the center of your page. This will be the head. Below this circle, add an elongated abstract oval shape for the body. Add a small circle at the back bottom area of the body for the tail. From the top back of the head, add two long thick lines for the ears. Using the thin tip of a brush add the details of the face including the n...
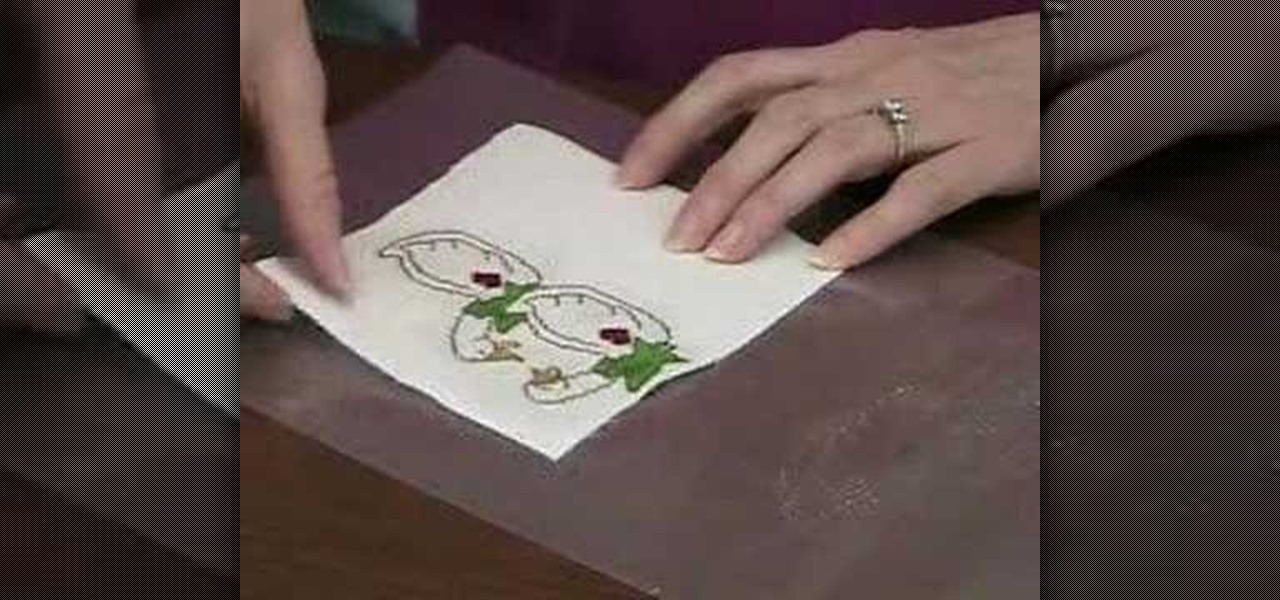
Beth Johnson explains how to use Needlework Finisher to turn cross stitched pieces into ornaments. Needlework Finisher comes out of the bottle as a thick, white liquid, but turns into a clear plastic coating when dry. No special equipment is required, and Beth demonstrates how to daub the Needlework Finisher onto the cross stitched items with a finger tip. She allows one side to dry before coating the other side. The "wrong" side of the cross stitch can be covered with plain fabric, by using ...
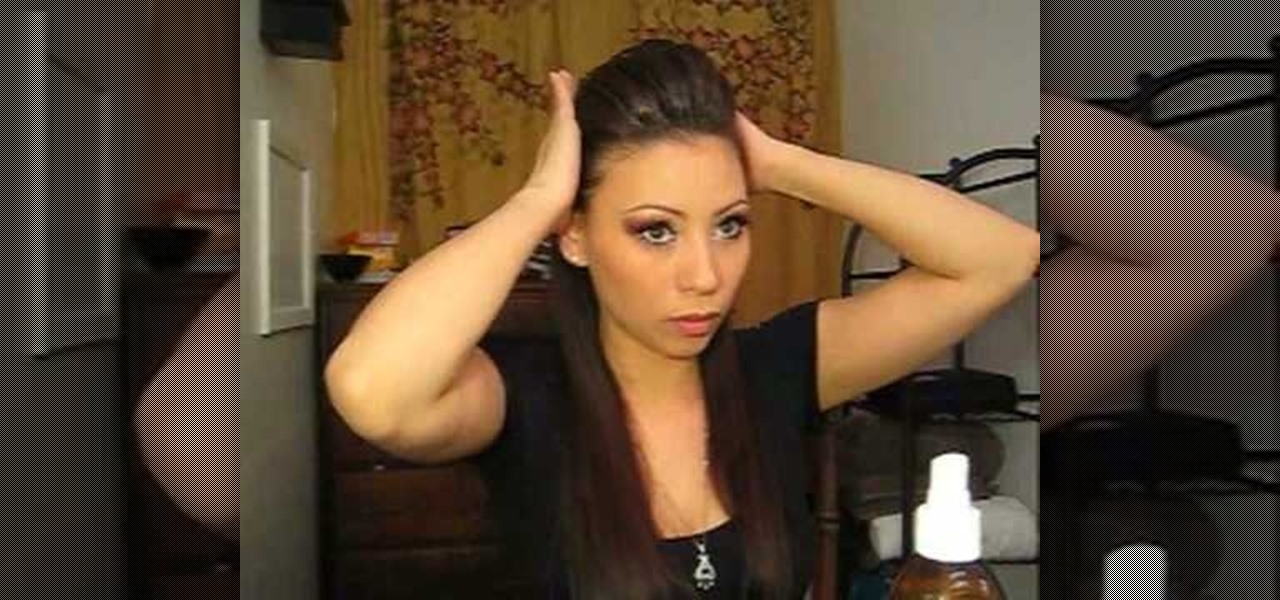
Ashley Fierce unlocks the secrets of getting hair like Beyoncé Knowles in her video "Single Ladies." You can start out by straightening your hair and putting on a plastic headband in order to tame any short baby hairs you might have. Use hairspray to tame the front and sides of your hair and then take a comb and hairspray and lightly tease small sections of your hair in order to give them volume. Take your bangs and bobby pin them to the side so that they are out of your way. You will work wi...
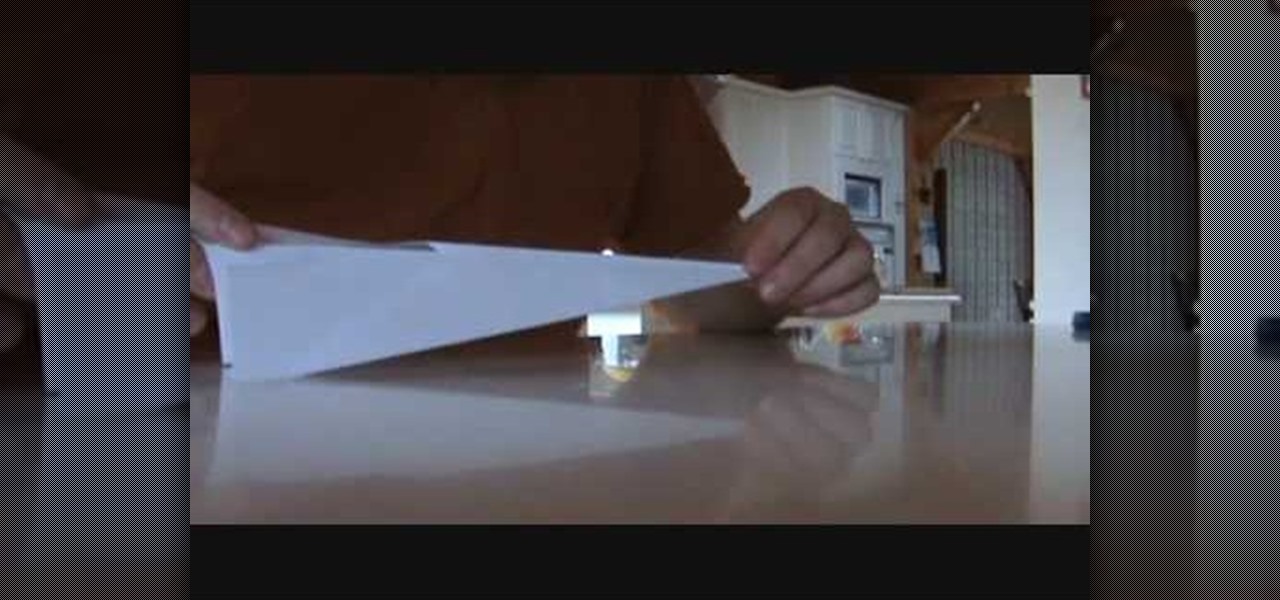
In this video, you are shown how to create a paper airplane and most importantly, how to make it fly farther. You will need a paper airplane, a stapler, and some tape and scissors. You staple the paper airplane all the way to the back without hitting either wing. You create three rows of these staples. This will make the airplane "closed" so it will glide farther. To get even balanced weight which will make it glide further, first tape along the entire top ridge, then you use scissors and mak...

This video will show you how to change your time from military time to the 12 hour time scale on a Window's computer. After being infected by a virus or if you accidentally changed the time on your computer, you can easily change the time display on your computer screen back by following the easy steps in this video. You will first have to go to the Start bar and find the Control Panel. From the Control Panel, find Regional and Language Settings and choose to customize your regional settings....
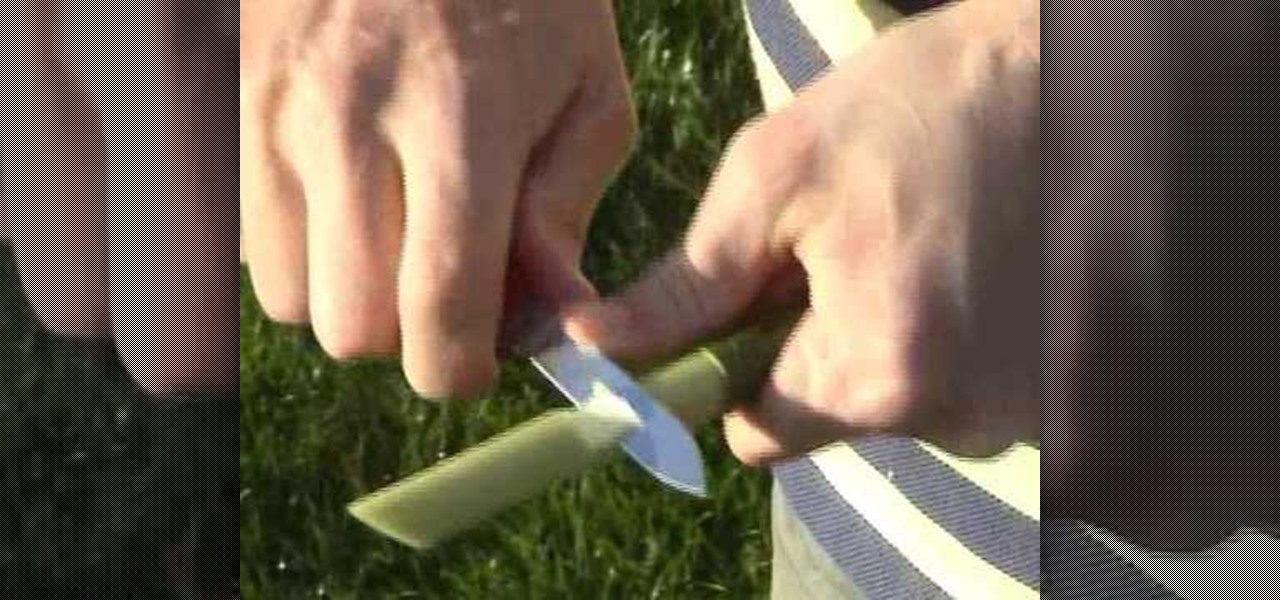
The video guide shows us how to make our very own willow whistle. -Find a willow branch with green bark, cut a small wedge into the bark and in the wood.
To make a bumped ponytail start with your hair down. Put your hair up like you are going to put it half up and spray the back with hair spray and pat dry. Next, take a smaller section of the top and spray that two while patting until dry. Next, separate your bangs from the rest of your hair and gently start to pull your hair back into a ponytail trying to make it look as natural as possible. Secure with a rubber band. Spray your bump with hair spray. Next tighten the bottom of your ponytail a...
See how to make a figure four deadfall trap. This is a great survival trap that can be easily constructed (with practice) out of very basic materials that in most environments can be easily found. The trap can also be made with very limited, or primative tools.
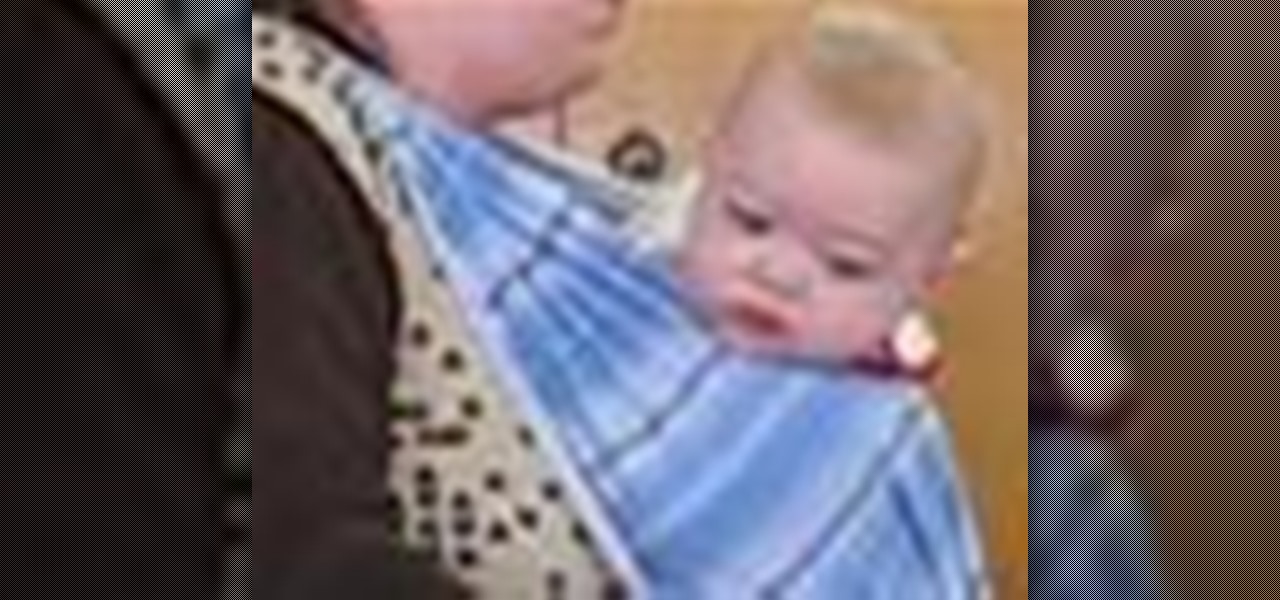
Need a way to carry around your baby while keeping your arms free? No need to buy a special carrier, all you need is a sturdy cloth and the step-by-step instructions in this how-to video. Find the middle of your wrap. Center on the small of the back. Cross each length over opposite shoulder. Adjust for comfort. Take opposite ends in each hand and cross in the back. Tie a square knot in the front. Get your baby. Place each leg on either side of the cross. Spread the fabric out starting with th...