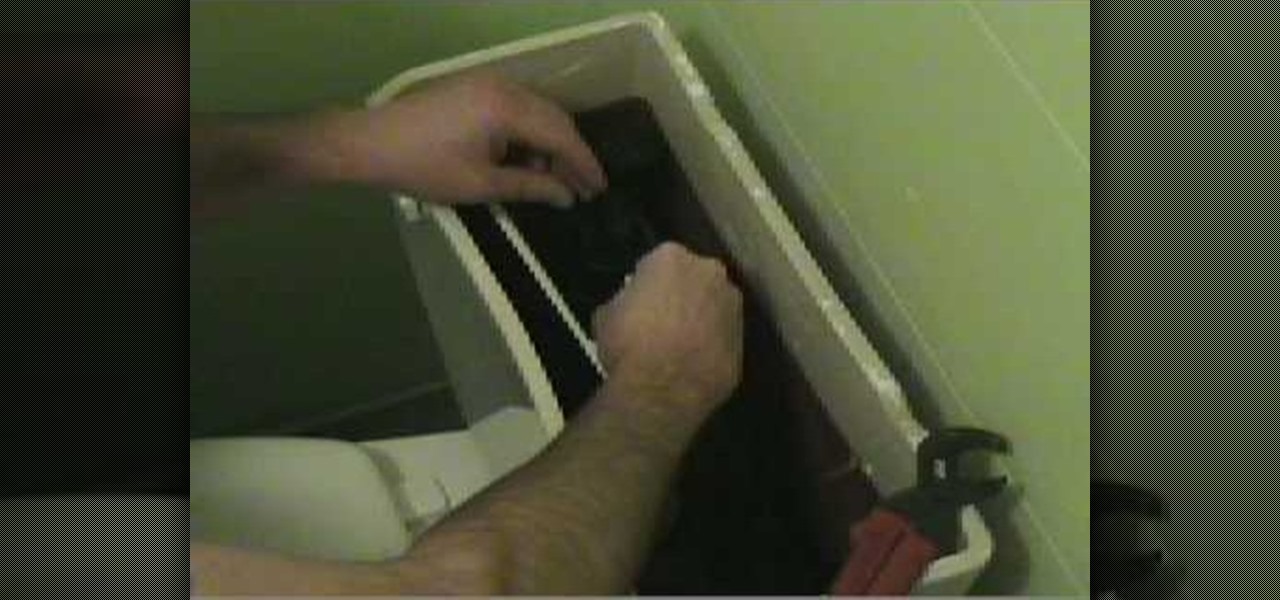
The hardest thing about putting in a new bathroom or kitchen faucet is getting the old one out. For the most part that's true, only because today's faucets are so easy to install! Before you remove that old faucet, make sure you clean out the bottom area to prevent any unnecessary water damage. You'll need a paint tray, adjustable wrench, channel lock pliers, penetrating oil, putty knife, damp cloth and some old towels. This video from Lowe's is by Delta.

The aerator on your faucet serves a very important function: by adding air bubbles, it helps to fuse the water and give it a softer feel. It also helps reduce the amount of water you use. So if you're faucet's water stream is acting funny (like a drop in pressure), it might be time to either clean or replace your aerator. If you're having trouble with your shower head, too, a little vinegar might do the trick.
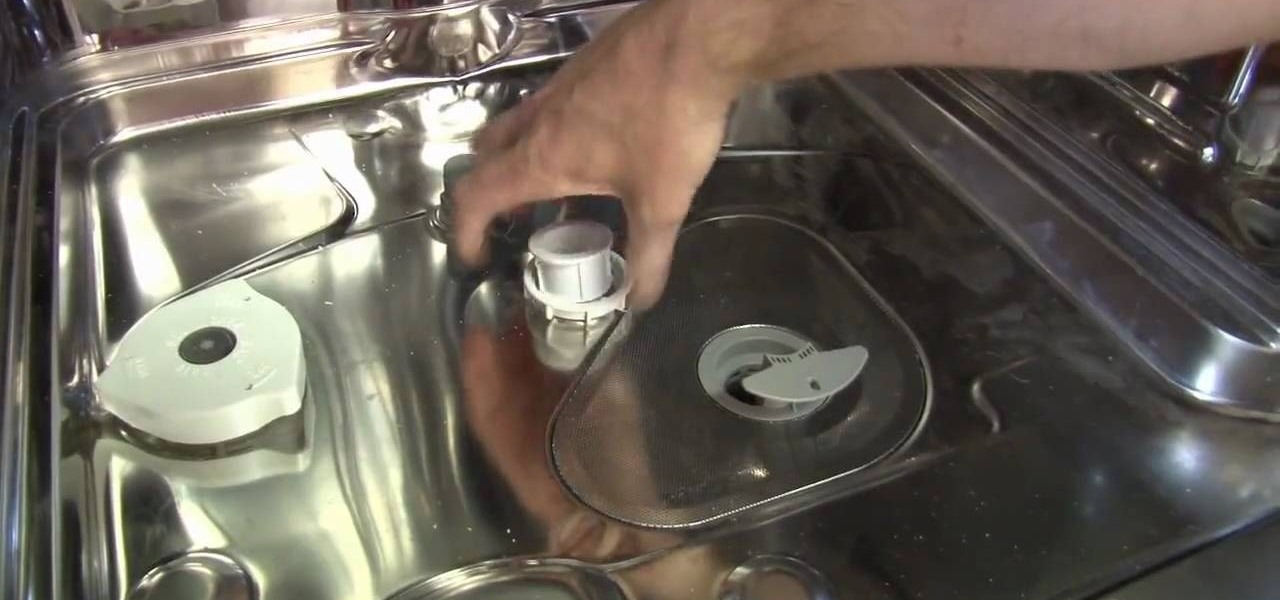
If you have a damaged sprayer in your dishwasher, don't go looking for a repairman or plumber. This is something that can easily be taken care of in no time at all and is very inexpensive.
In this video, we learn how to replace the main gear on a Honey Bee King 3 helicopter. First, take the main blades off with a 2.5mm wrench. Remove the connectors, then remove the nut from the bottom gears and set it aside. Take out the gear and replace it with a new one. Screw it back into place, then make sure it's tightened. After this, you can place the blades back onto the helicopters and screw them into place. It will be hard to place some of the nuts back on, since they are located in s...
In order to fix a broken power window, you will need the following: a screw driver, a socket wrench, a plastic pry tool, and a Phillips head screw driver.
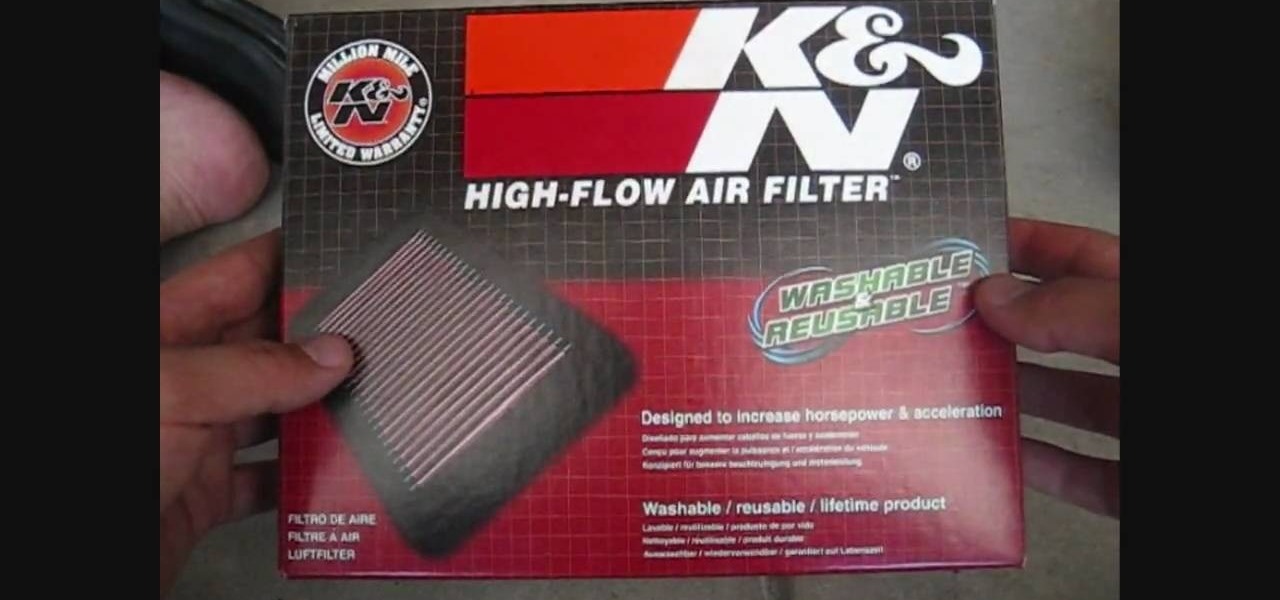
In this tutorial, we learn how to replace the stock air filter on a Ninja motorcycle. Start off by opening up the air box using an Allen wrench. After this, take the bolts out of this and set the air box cover down. Now, remove the air filter to see how dirty it is. If the air filter is full of residue, then you need to change it! Now, clean the inside of the air filter area with a wash cloth . After this, replace your new air filter back into the right spot. Next, apply the filter cover back...

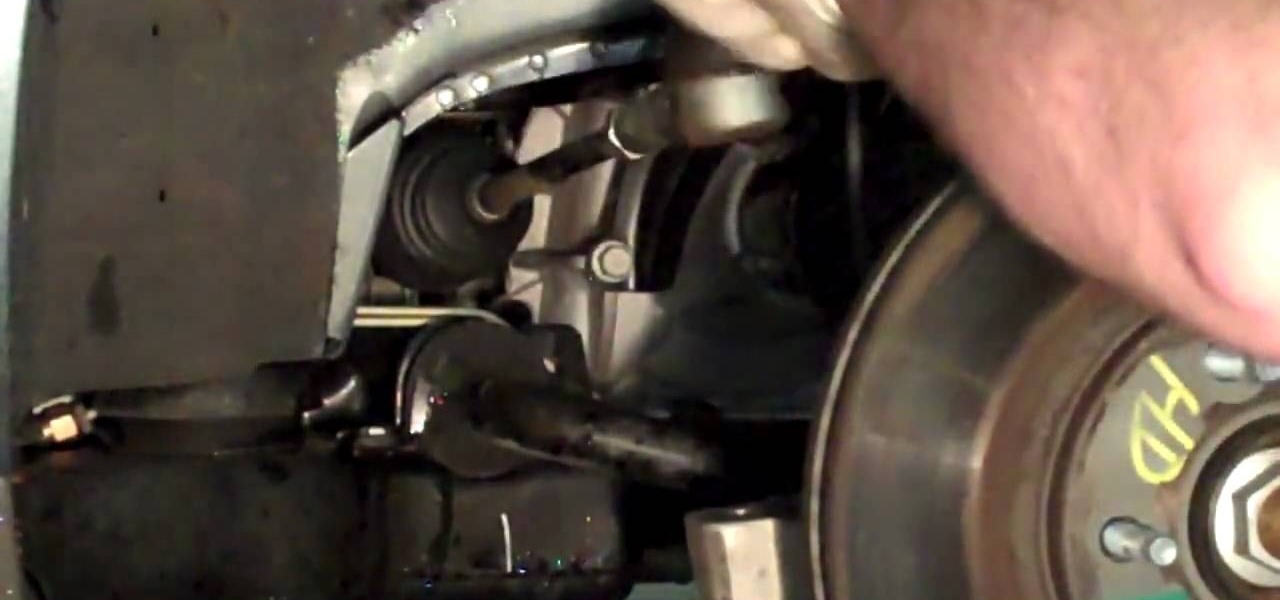
In this video tutorial, viewers learn how to replace the outer tie rod of a 200 Cadillac De Ville. Begin by unscrewing the 5 bolts on the wheel and remove it. Users are able to shake the out tie rod with the wheel on it, and feel the looseness. Now break lose the jam nut at the back of the tie rod with a wrench to be able to disconnect the supporting nut. Then hit the steering knuckle with a hammer to loosen the tie rod. Now rotate the outer tie rod off of the inner tie rod and place on the n...
In this how-to video, you will learn how to remove rust from metal. This is useful if you have rust on bolts and it becomes hard to remove. You can squirt penetrating oil on the bolt in order to easily take it apart. All you have to do is spray it. Leave it for about 10 to 15 minutes. If you still have a hard time, you can use wrenches to do this. You will see that the liquid has penetrated all the way through the threads of the bolt. This is the best way to release any rusty parts. This vide...
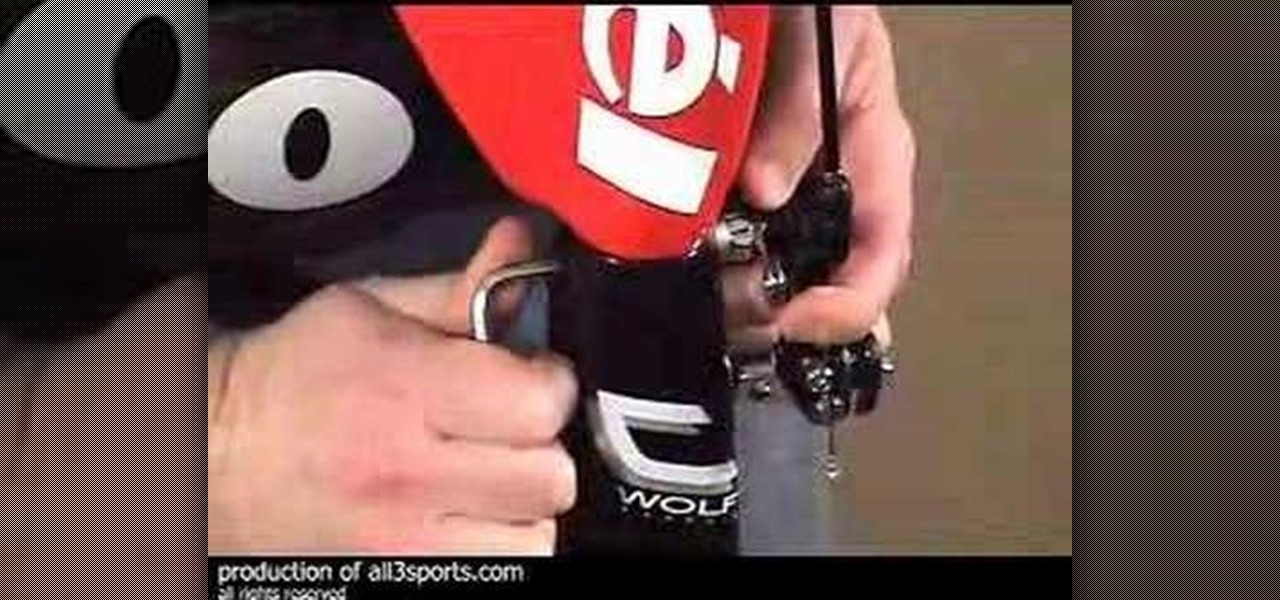
This is a Video clip presentation from all3sports guides us on how to check and assemble the unpacked shipping box. The first step to assemble the motorcycle involves inserting the seat lifter to the reasonable depth and tighten the screws. After that attach the handle bars and front brake and make sure that there is an equal amount of gap between the top and bottom of the handle bars. Then, check the brake cables are properly fit. Then, assemble the arm gauge or arm rest with the two sets of...
This video will show you the advantages of a shower wand and how to install one easily. A shower wand can help you clean the shower and clean pets too. To remove the shower head you will need a strap wrench. You may want to change the shower arm if it has too many scratches; use the handle of a set of pliers. Use Teflon tape when reassembling the fixtures to ensure a watertight fit. The new bracket has a built in holder for the wand.
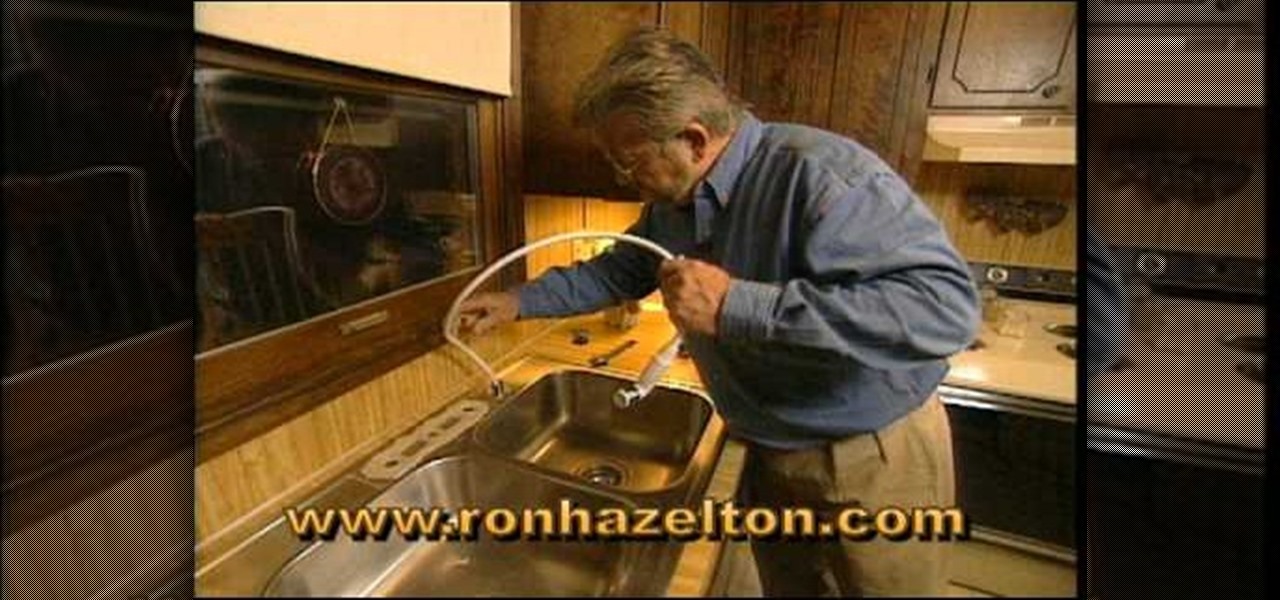
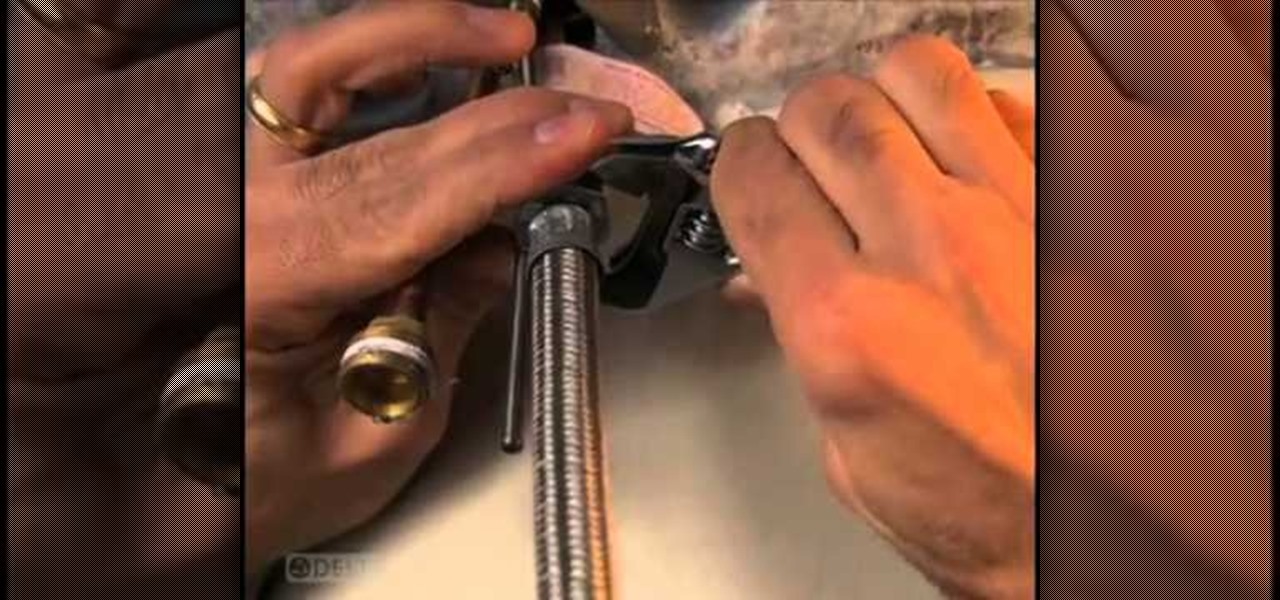
You can replace the kitchen faucet by yourself. If you decide to do it start by turning off both the hot and cold water using the valves under the sink. You'll need a basin wrench to get at and remove the pieces up under the sink. First you will loosen and remove the water lines and then the retainer nuts that hold the faucet in the sink. Pull the old faucet out. Put some plumbers putty on the sink and press the nylon gasket firmly in place. Thread the spray hose through the hole for the spra...
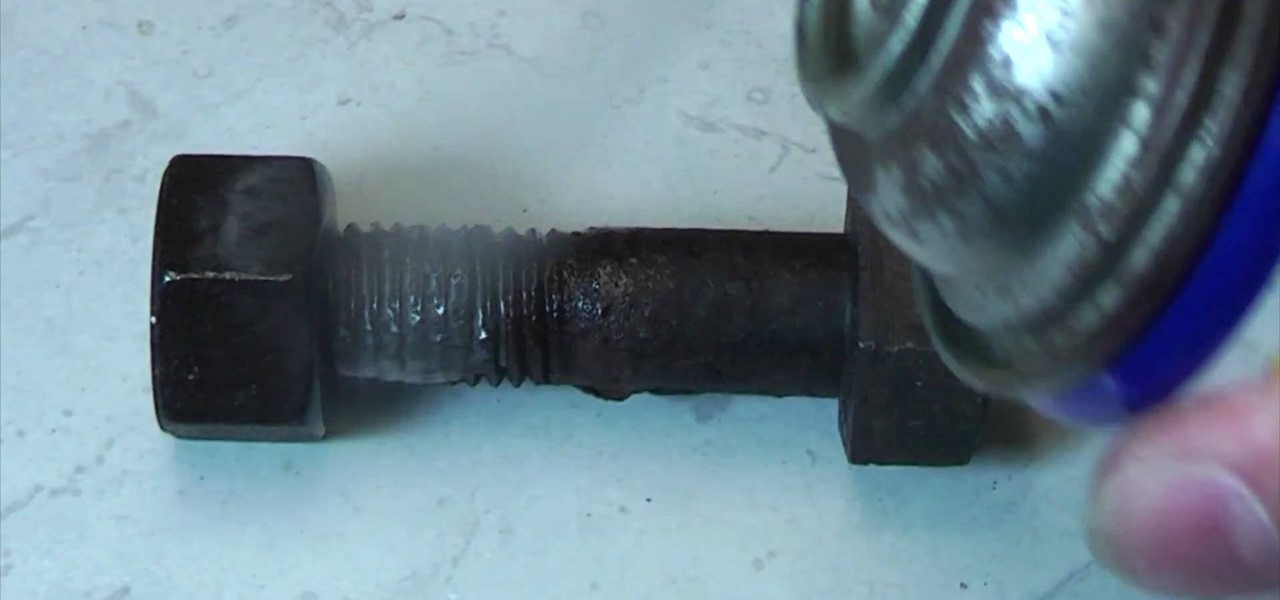
Never be frustrated by a rusted nut and bolt again with this foolproof removal method. Loosen as much rust as possible off the nut with a wire brush. Tap the sides of the nut with a hammer to help the rust separate and fall off. Apply heat to the side of the nut for about a minute. When the bolt is cool enough to touch, spray WD-40 on and around the nut and bolt. Tap the end of the bolt with a hammer to loosen the threads and allow the oil to penetrate. Wait another minute or so for the oil t...
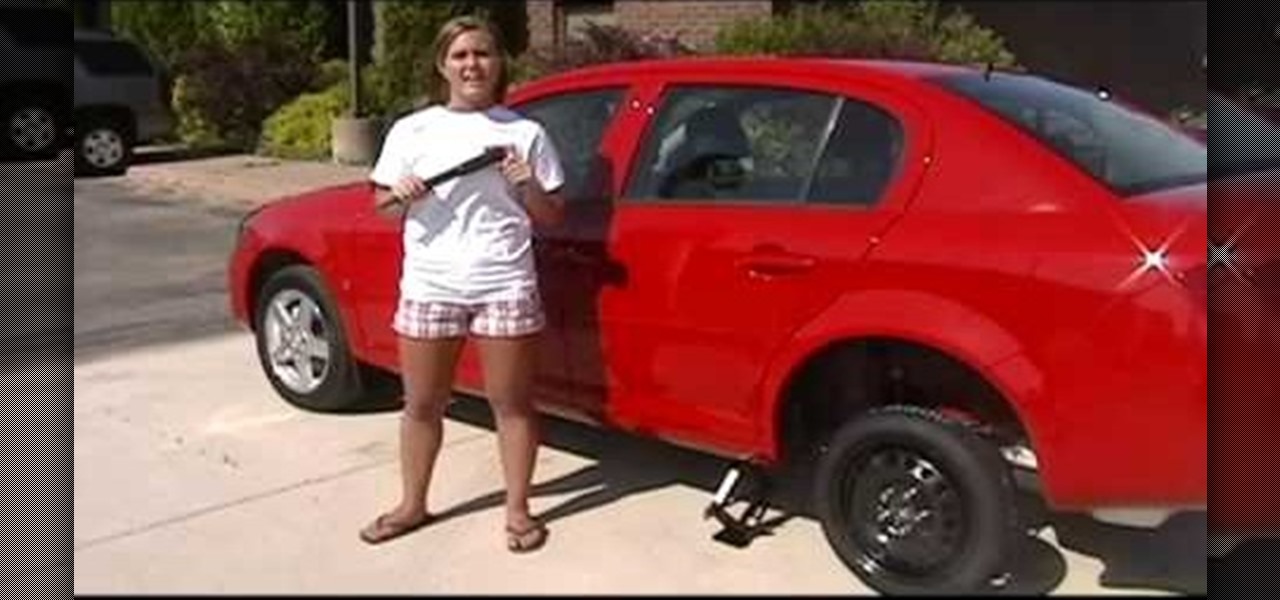
Runde Auto Group demonstrates how to change a flat tire. First, open your vehicle's trunk and remove the spare tire, the jack and the tools. You may need to loosen a wing nut to remove the tire from the trunk. Consult your owner's manual for limitations when driving on the spare tire. Put the jack under your car and line it up with the lip. Jack up the car using the lug wrench as an extender to take a little bit of pressure off the tire. Then, loosen the lug nuts using the lug wrench. Jack up...
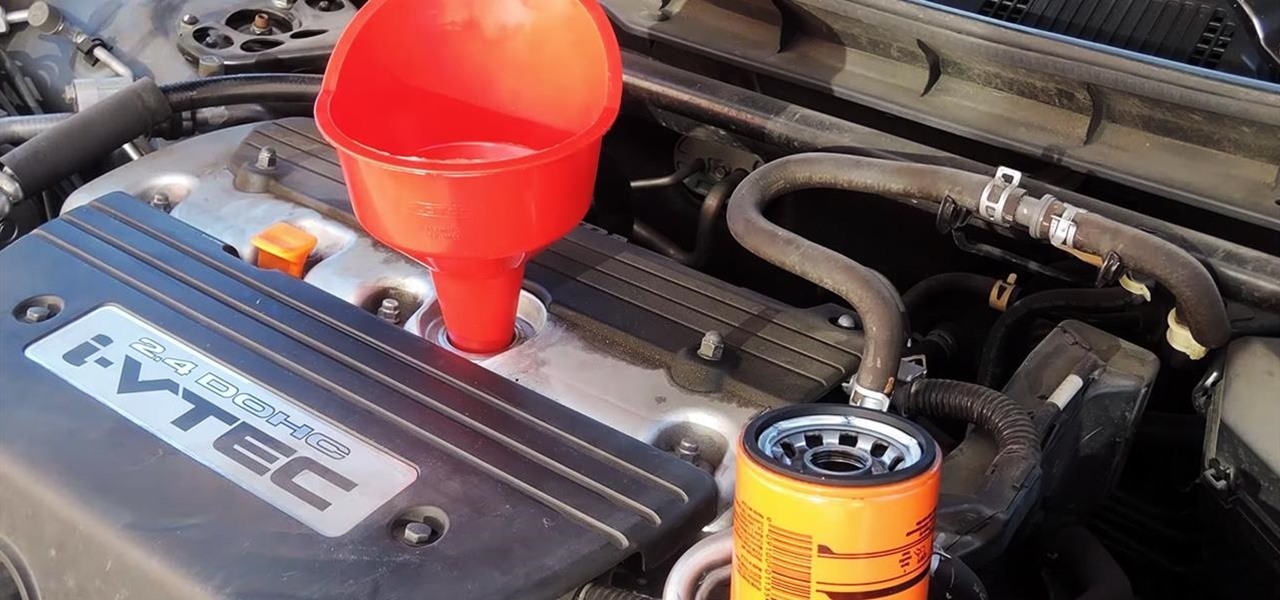
If you're one who enjoys a good DIY project, or if you're just tired of paying exorbitant labor fees to have your vehicle serviced every 5,000 miles, changing your own oil can be a rewarding endeavor. Even though cars and trucks are becoming increasingly over-engineered these days, manufacturers generally see to it that the basic maintenance items can still be taken care of in your driveway with a few common tools.
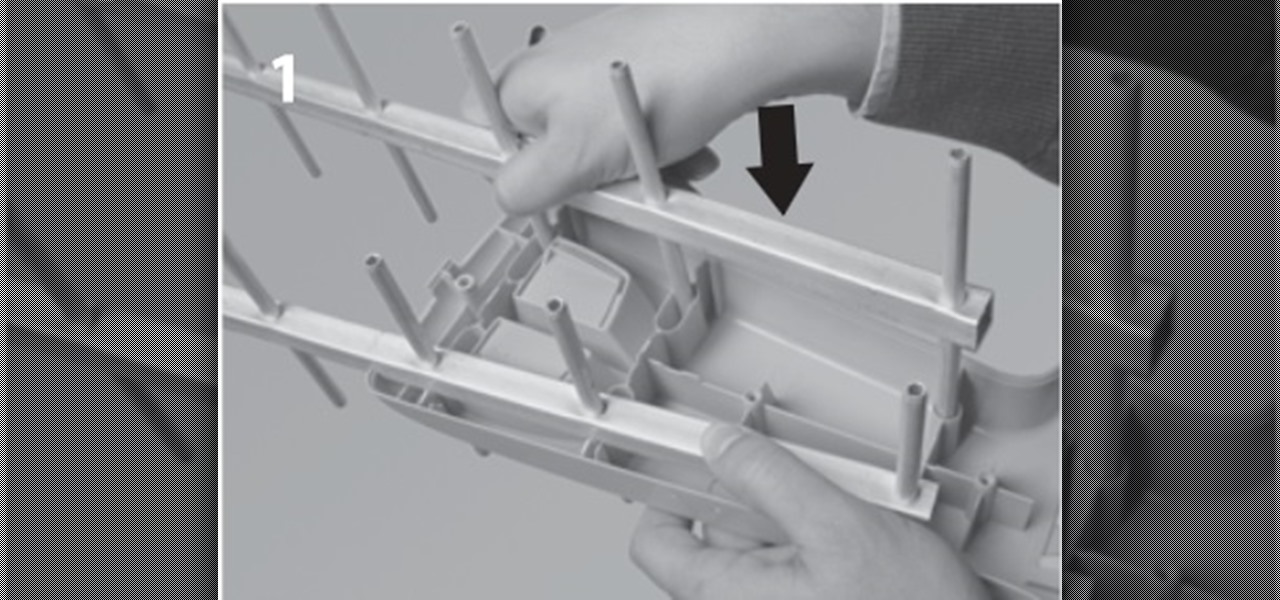
In this post I'm going to explain the assembly of an UHF antenna, step by step. Assembly of v HD Antenna of TELEVÉS We will need a Screwdriver and wrench.
In this tutorial, we learn how to replace a faucet washer. To start, you will first need to prepare this by turning off the water to your faucet completely. Then, you will turn on the faucet to make sure no more water is coming out. After this, remove the headgear from the faucet. You can do this with a screwdriver and a wrench. After everything is removed, replace the faucet washer with a new one. From here, you will place the parts back on in the same way you removed them. When finished, tu...
In this tutorial, we learn how to replace a broken flush handle. First, remove the top from the tank on the back of the toilet. After this, find the chain that is connected to the handle and remove it. From here, take a new handle and place it into the spot the old on was in. Use a wrench to tighten this into place. From here, you will connect this with the lever that will flush the toilet using the pump. When finished, test this out by flushing your toilet! If it works, this means the replac...
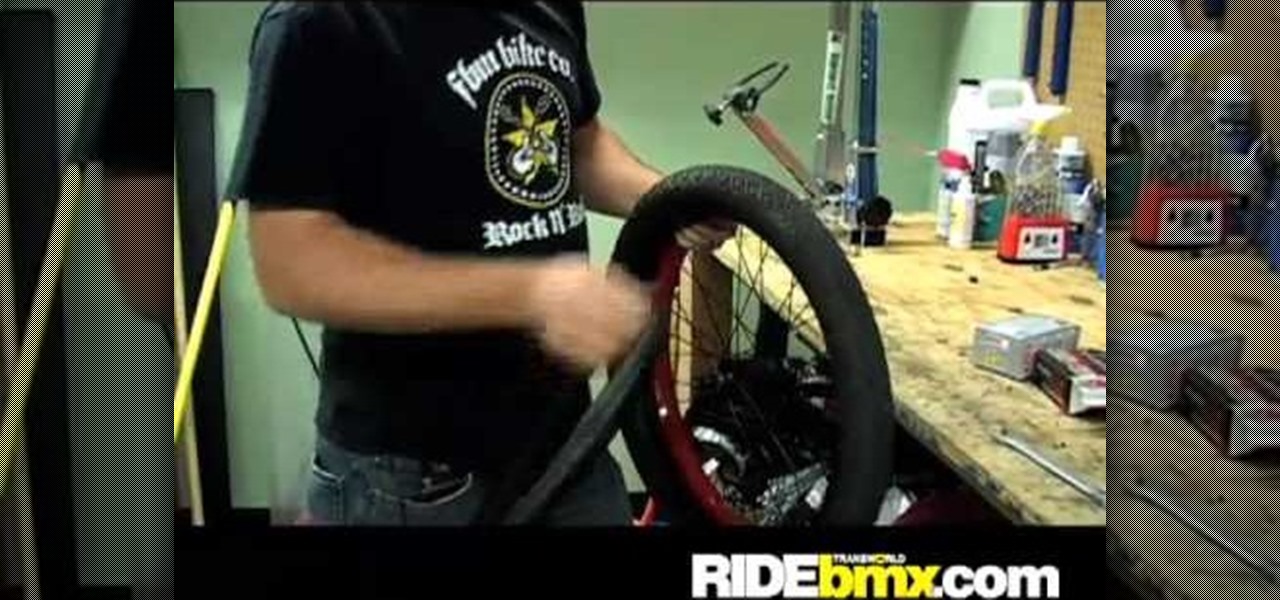
In this tutorial, we learn how to change a flat BMX tire. First, take the wheel off with a wrench. Then, let all the air out of the tire if it's not already completely out. Next, find what gave you the flat tire and make sure you remove it from the tire. After this, grab the top of the tire and pull it off of the wheel. If it's completely flat, it should be easy to take off from the rim. Work your way around until it's completely off. Then, put the new tire on and then pump it with air. After...
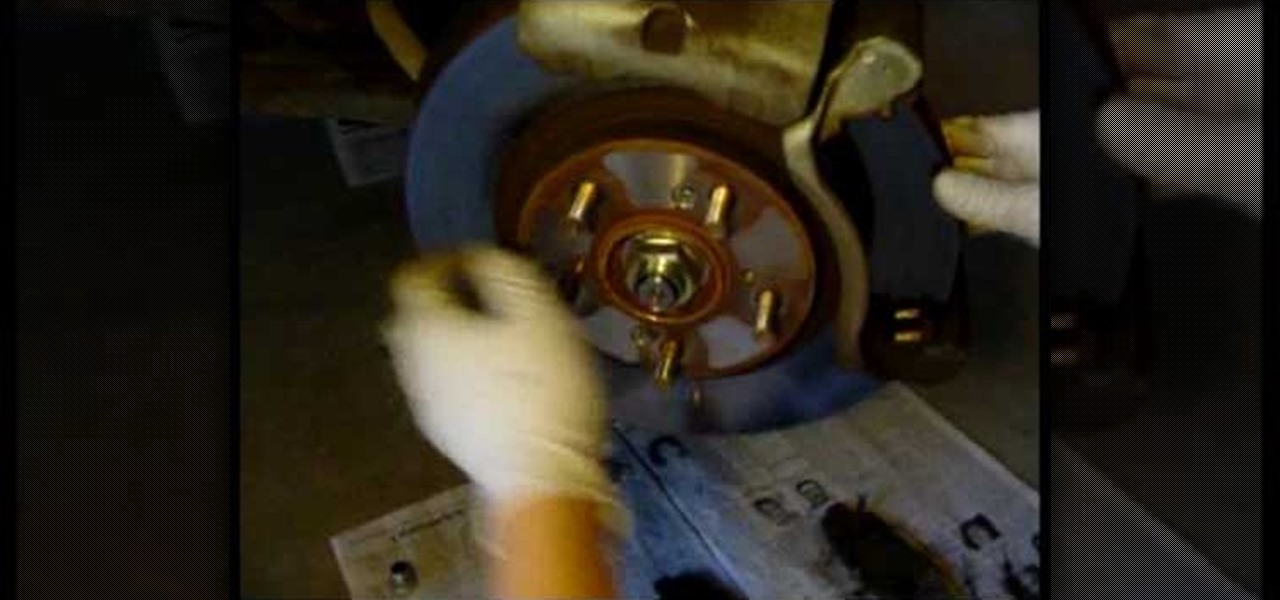
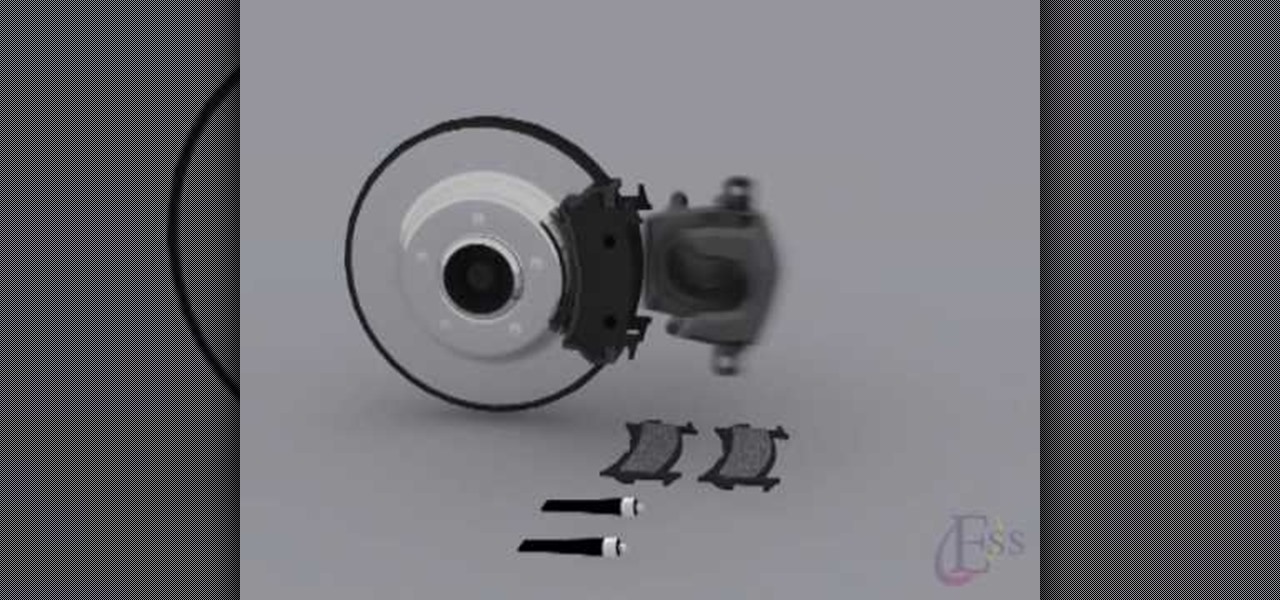
In this tutorial, we learn how to change the brake pads on a 2003 Honda Pilot. First, take off the bolts around the caliper on the rotor. Next, take your caliper straight off and rest it somewhere. Now remove your brake pads from the bracket using a screwdriver. Replace the old one with the new ones, then replace your rotor back into the car. Use your wrench to push all the bolts back onto the car properly. Also put the caliper back on, then double check that everything is bolted back in your...
In this video, we learn how to change the front brake pads on a motorcycle. First, grab a socket wrench and remove the mounting bolts that are around it. Then, remove the caliper from the bike. From here, you will be able to access the brake pads and remove them from the motorcycle. Replace these in with the new brake pads and then replace the caliper and the mounting bolts around the bike. Now you should be finished with changing the brake pads and you can test out the brakes to make sure it...
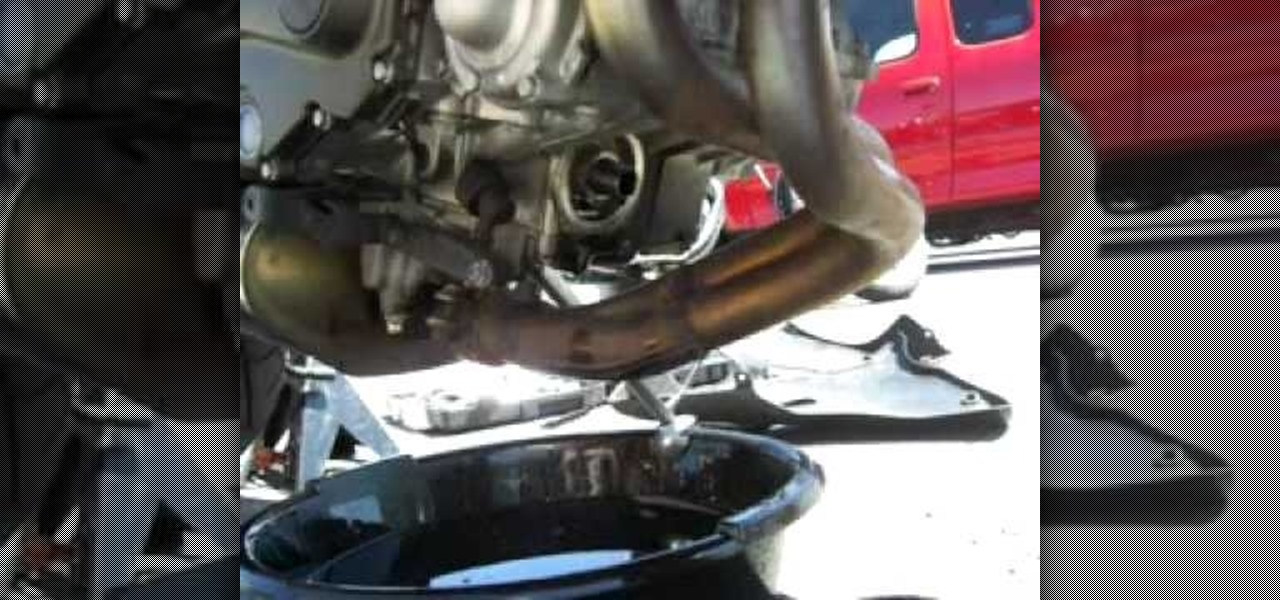
In this tutorial, we learn how to change the oil on a Kawasaki Ninja 650R motorcycle. First, find the oil can on the car and use a socket wrench to remove the drain plug. Let the oil drain into an oil pan until there is no more left inside of it. When finished, replace the plug back on the can tightly. Now, open the cap up on the oil can and pour in your new oil. After this, start your engine and then check your oil level on the motorcycle. Then, you will have changed oil in your motorcycle, ...
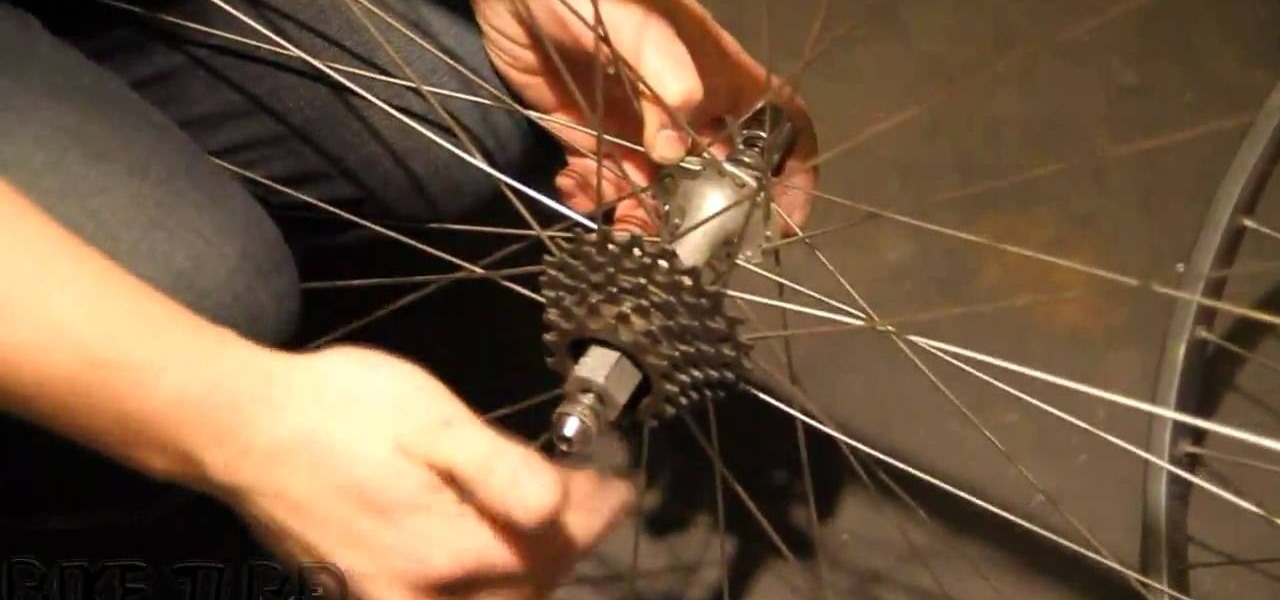
In this video we learn how to properly remove a freewheel with Sasha. First, remove the skewer and then put the end back on. Now, identify the proper tool to remove the free wheel. Use the type of remover for your wheel, then place it over the axle and slide it in. Then, take the skewer, replace it, and slide it in tightly. Now grab a wrench and turn it counter clockwise to take the freewheel off. Once you are finished, your freewheel will be removed and you can clean it or use it how you'd l...
In this tutorial, we learn how to remove and replace the brake pads on your car. First, wash the brake caliper with cleaner, then use a wrench to remove the caliper bolts. After this, remove the assembly and the outer brake pads. Remove the inner brake pads and apply anti-squeal to the backing plates of the pads. Install the pads and then the caliper along with the bolts. From here, you will place the wheel and bolts back onto the car and you will be finished! Make sure everything is tight an...
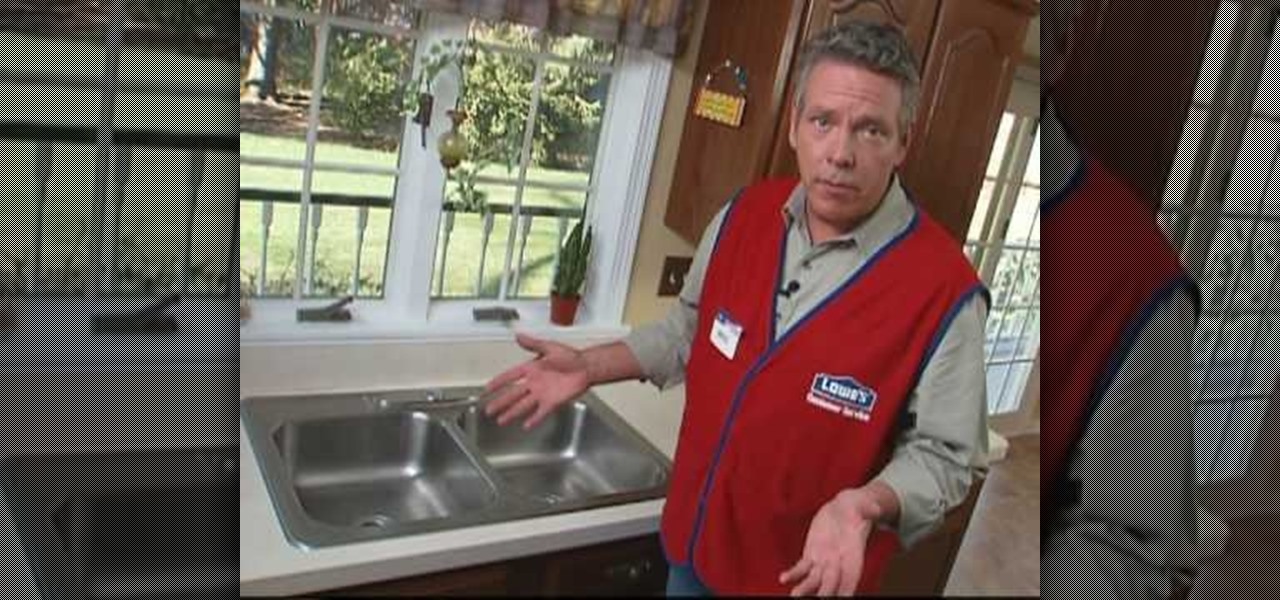
In this tutorial, we learn how to replace and install a kitchen faucet with Lowe's. Start out and check to see how many pipes you have underneath your faucet. After this, purchase your new faucet and all of the parts that go along with it. Once you have all of these, turn off your water and remove your old faucet. You will need to use screwdrivers and wrenches to remove the handles and the rest of the faucet parts. Once you have this done, insert in your new faucet and all of the appropriate ...
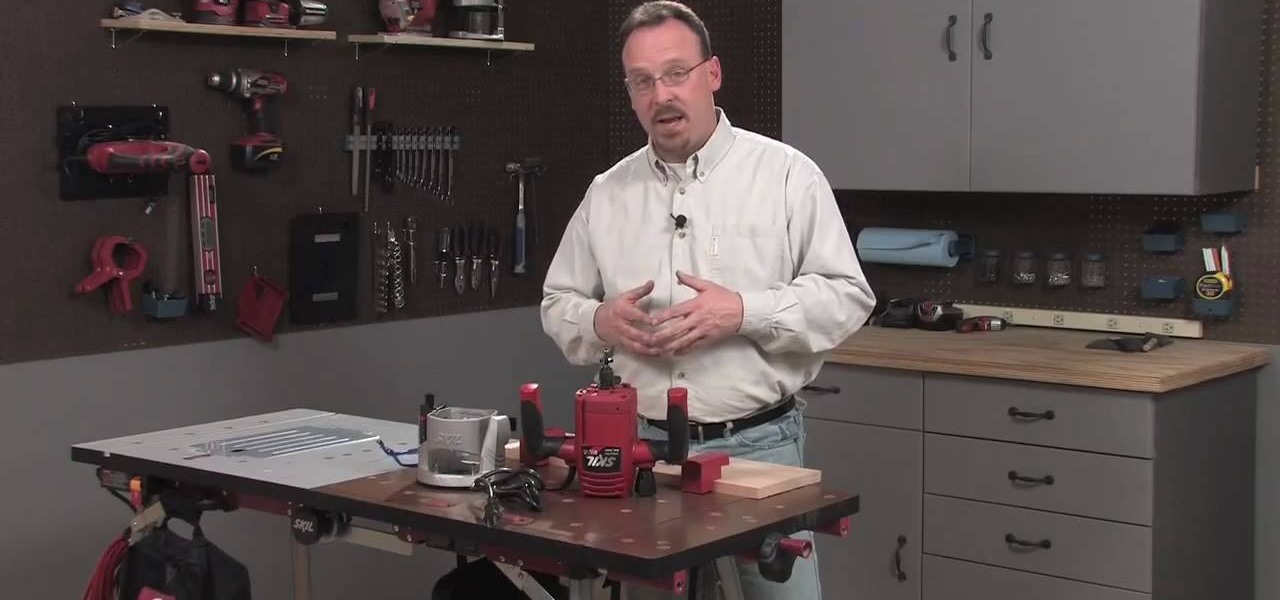
In this tutorial, we learn how to use a handheld router with Skil & Lowe's. There are countless ways to use the router in all your project, but there is one that's the most popular. You have a lot of choices, like a round over, a chamfer, or an ogee. Regardless of which you choose, the technique is always the same. Begin with mounting the bit in the router, then use a wrench to tighten it and make it secure. After the bit is on, reinstall the base and you will be ready to use your machine. Us...
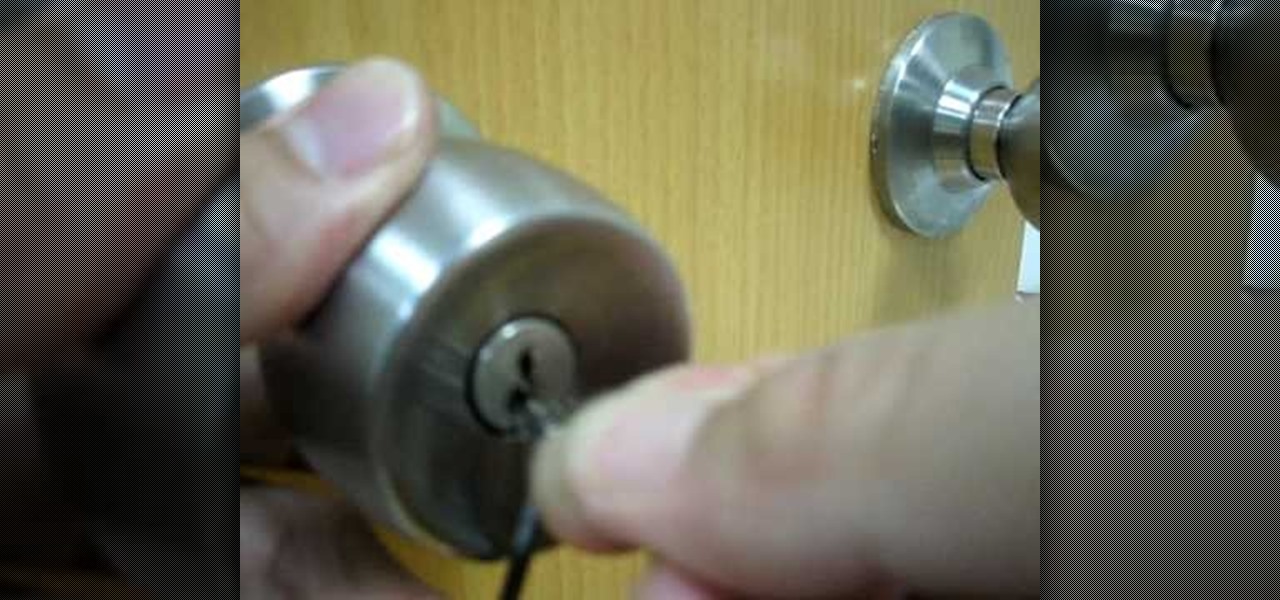
In this tutorial, we learn how to pick a locked door with a paperclip. First, open up your paperclip and then twist the end of it so it's a spiral shape. Then, scrub over the pins and create a spiral shape with these as well. Try your best to make the shape of the paperclip to look like the unlocking saw. Now, take a tension wrench and force it into the bottom of the lock. Then, stick the paperclip into the top of this and turn upwards several times going quickly. When you hear the lock come ...
In this video tutorial, viewers learn how to cut a bolt and save the threads. The materials required for this task are: a hacksaw, steel bristle brush, bolt cutters, wrench, oil and a filer. Begin by putting some oil onto the threads of the bolt. Then place the saw on the desired groove and cut across through the thread. Now brush it with the steel bristle brush to remove the debris. Finish by removing the excess metal with the filer and unscrew the bolt(s). This video will benefit those view...
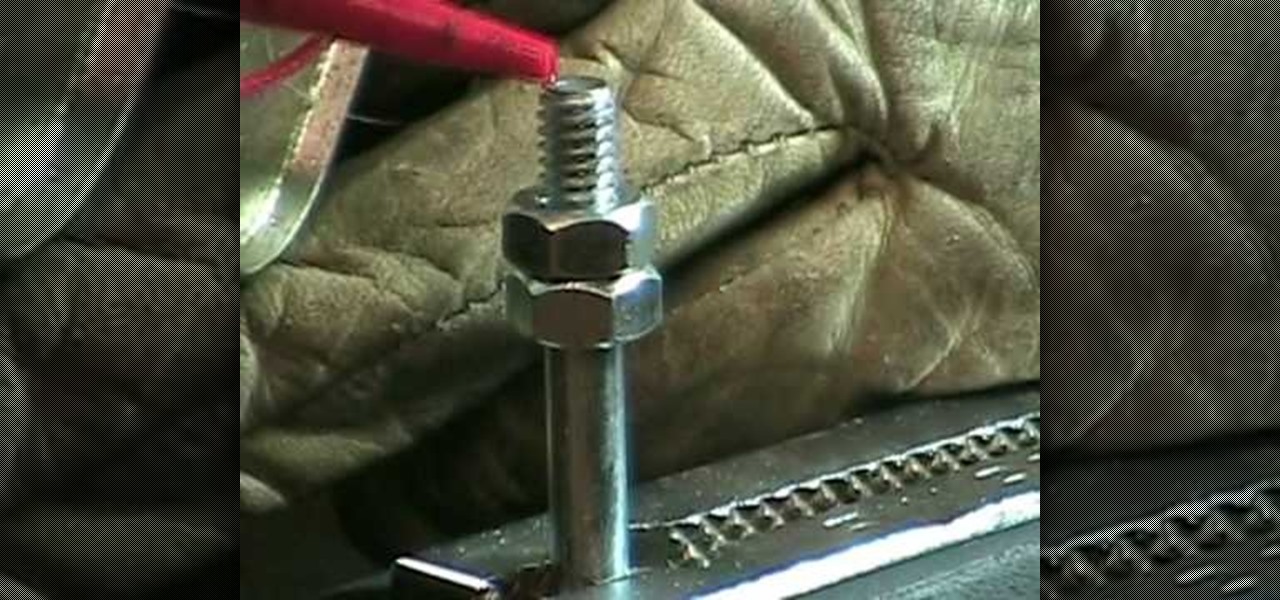
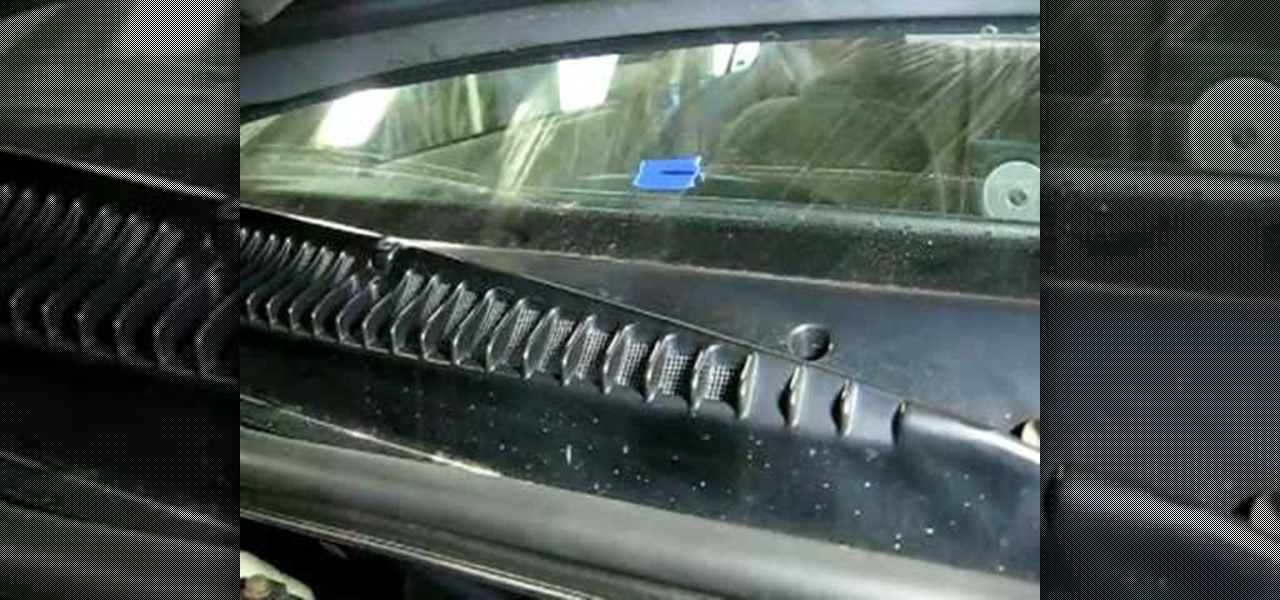
In this video, we learn how to replace a windshield washer nozzle. First, use tape to mark where the wipers were at so you know where to replace them. After this, remove the wipers from the vehicle by using a wrench. Now, pop the hood of the car and remove the screws that are on the front of the car surrounding the nozzles. Once you get the top area removed, you will find the nozzle and hose underneath it. After this, replace the old nozzle with the new one and then put it back. When finished...
If you've been thinking about replacing your old shower head with a new model, or maybe even adding a hand shower, you'll be glad to know it's a pretty simple process. To replace the shower head, you don't even have to shut off the water supply. You just twist off the old one, replace the thread tape and twist on the new one. The hand shower system is a little more complicated, but Lowe's and Delta show you how.
In this tutorial, we learn how to replace spark plugs in a 2005 Jeep Grand Cherokee. First, prop your hood up and leave it open. Next, remove the hoses around the spark plugs and use a wrench to remove the casing around the plugs. After this, squeeze the top of the connector and unplug the wires. Next, remove the spark plugs and replace the new ones back inside. When you are finished, you will need to replace all the items that you removed, making sure to replace everything where it was origi...
In this tutorial, we learn how to remove and install a free wheel. First, take out the skewer from the wheel. Then, take off the nut from the inside of the hub with a cone wrench. After this, go to the other side of the axle and loosen it up. Now place your free wheel tool onto the wheel. Firmly secure the free wheel tool onto the wheel until you're sure it won't come off, with any tools you have available. When you are finished, put your nuts and bolts back onto the axle, then use bicycle lu...
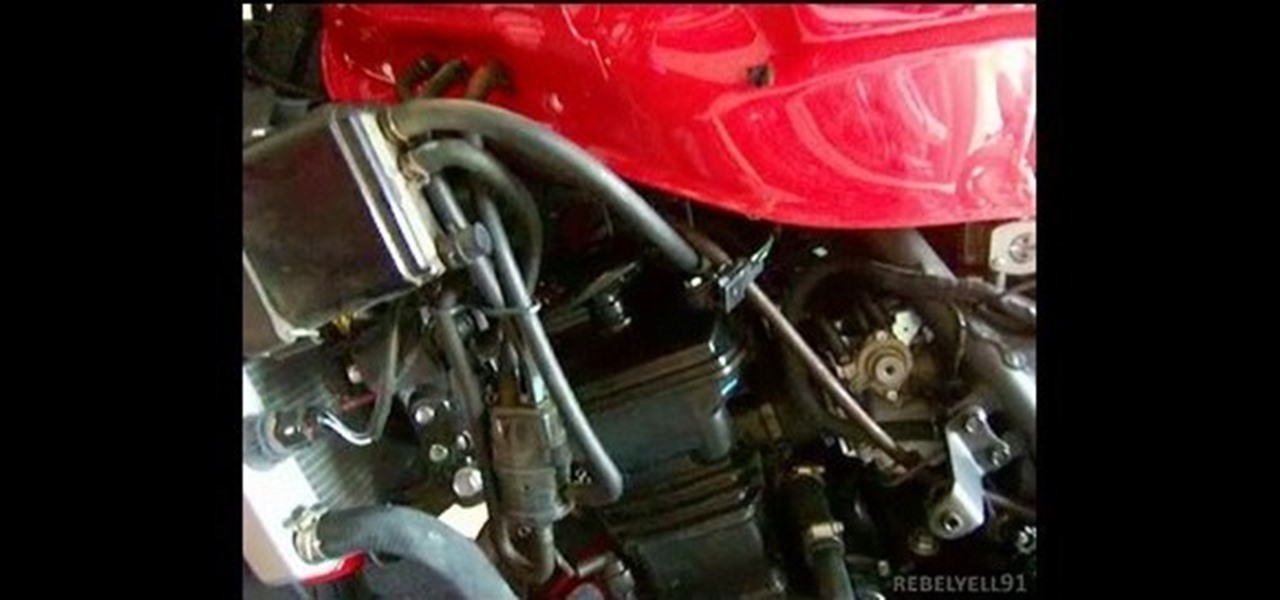
In this tutorial, we learn how to replace the spark plugs on a 2008 Kawasaki Ninja 250. First look underneath your bike to find out exactly where the spark plugs are at. Next, use wrenches and ratchets to loosen the parts around the spark plugs, then remove the spark plugs completely. After you have pulled them out, replace them with the new one and secure them into place. When finished, replace all the casing around the plugs and make sure you secure them tightly. Add on all bolts when you a...
In this tutorial, we learn how to make a single speed bike crank. You will need: chain ring bolt tool, large screwdriver, Allen wrench, file, hacksaw, vise, and crank set with 2 ring. First, grab your chain ring bolts and cut about 3mm off of the end. If the nut moves while you are cutting it, adjust it. After this, put your chain ring on the inside of the crank arm to align the chain. When you are finished, you will have a single speed bike crank! This tool shouldn't take too long to create,...
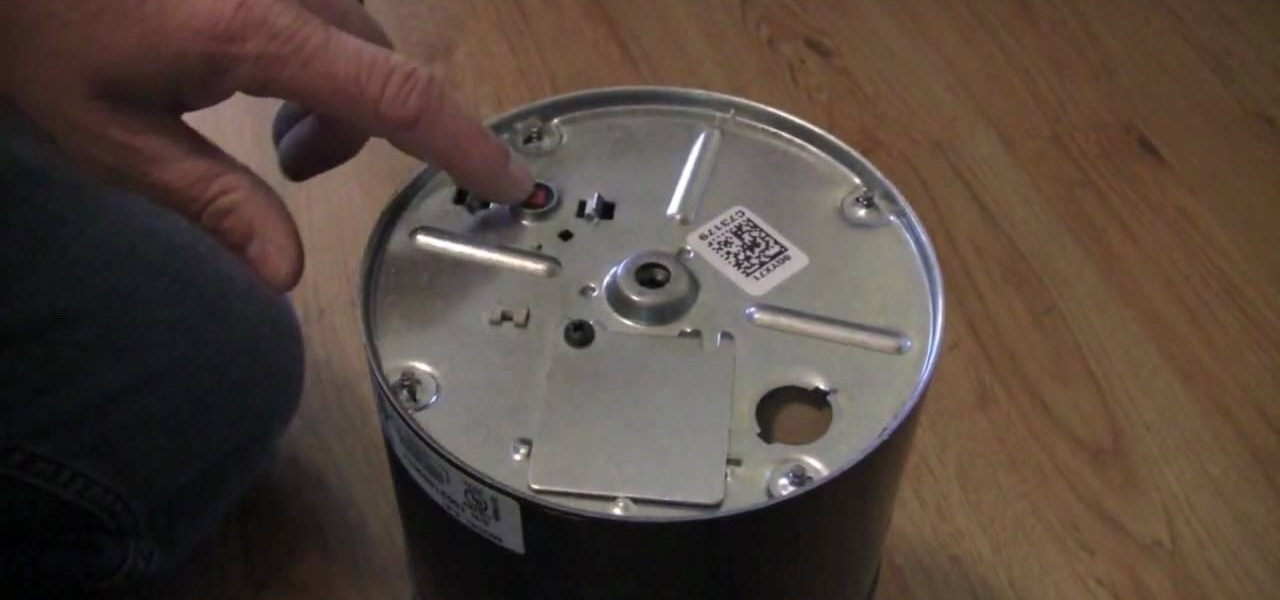
In this video tutorial, viewers learn how to reset a garbage disposal. Begin by making sure that the garbage disposal is turned off. Then look for a red button underneath the garbage disposal. This red button is the reset button. If the button is pushed out, push it back in to reset the unit. If it still will not start, look down the sink hole for any obvious obstructions. Another solution is to insert the included wrench into the center of the unit. Then turn it 1/4 - 1/2 turn. This video wi...
In this Home & Garden video tutorial you will learn how to unclog a sink in the bathroom or kitchen. It's extremely simple. Put a bowl under the U joint. Unscrew the plunger rod located under the sink and pull it out. Then remove the sink blocker and remove any dirt from inside the pipe. Now unscrew the PVC U joint at both ends and remove it. This can be done with your hands. Most of the time this part is clogged. Clean it up. Then clean up the pipe coming down from the sink. Look from top an...
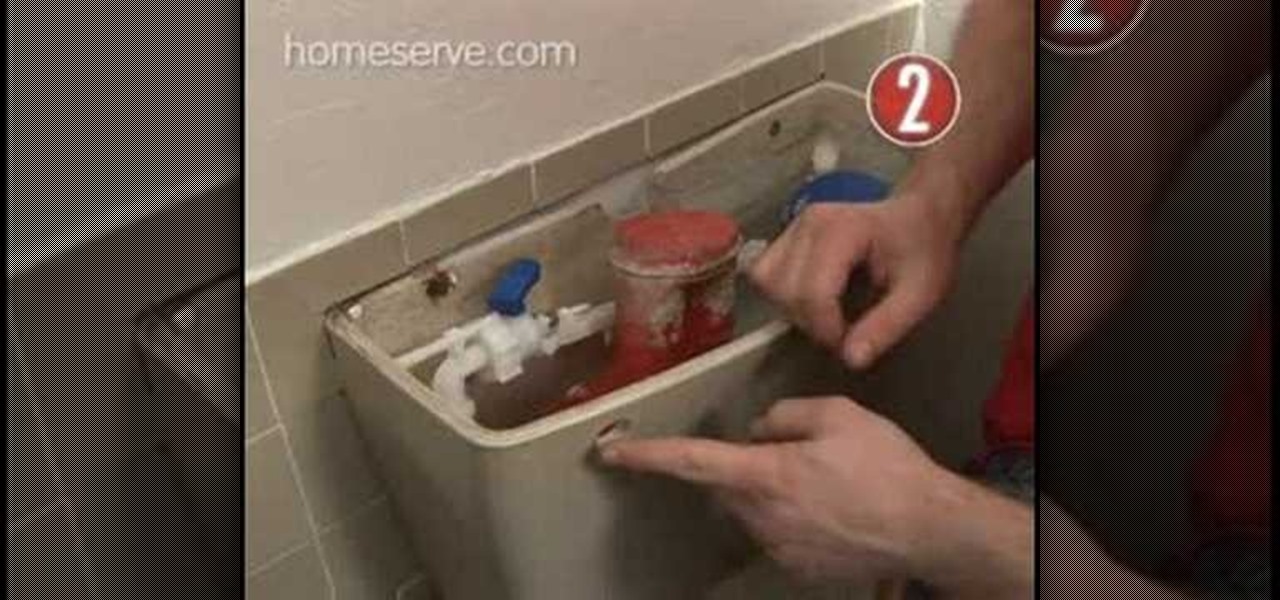
This Home & Garden video shows you how to replace a running old style fill valve toilet with something more modern. Shut the supply line to the toilet and flush to remove the water from the tank. Then remove the supply line. Now take a wrench and loosen the plastic nut of the old fill valve located under the tank. Then lift the old valve and keep it aside. Take a 'flow master', which is a new type fill valve, place it in the same spot and hand tighten the nut under the tank to hold the flow m...
Big fan of Ana Free's successful 2008 single "In My Place"? In this tutorial, learn how to play this Portugal born singer-songwriter's hit with a little help from Ana herself! Be sure to watch both part 1 and part 2 from this lesson to get this heart wrenching song mastered!
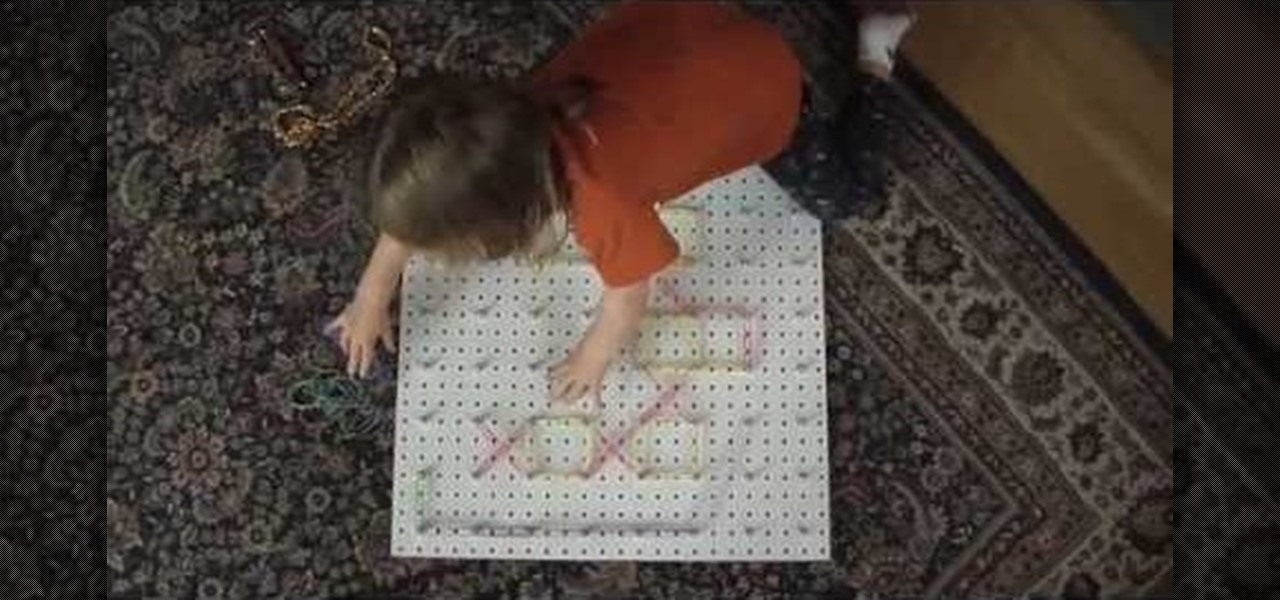
Geoboards are fun tools to teach your child the basic concepts of shapes and how they work in math; any kid would love a gigantic one! Firstly, you need to obtain a pegboard (what they hang merchandise on in hardware and similar stores). They usually come in 4x8' sheets, so you may need to ask an employee to cut one into fourths for you. The fourth piece should have 64 holes in 8 rows of 8, which means you need 64 nuts and bolts to make the board. Assembly is a no-brainer; you and your kids s...
In this video you are shown how to fix garbage disposal jams. Jams or electrical surges in your garbage disposal may make it appear that it is no longer working which is in fact not the case. Many people buy whole new units when that is unnecessary. If your garbage disposal jams, you can take a jam buster, which is basically an Allen wrench, and insert it into the small hole in the center of the bottom of your disposal. Twist until the jam, or whatever is obstructing your disposal, is broken....
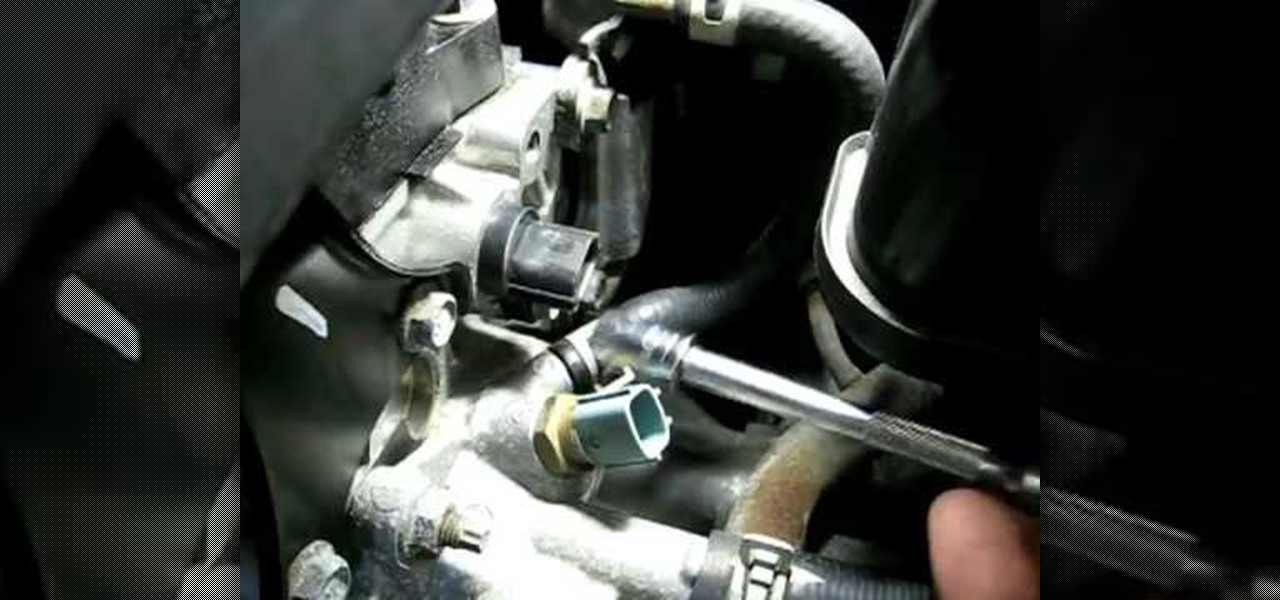
In this video, Richpin demonstrates how to replace the camshaft sensor in a Nissan Altima. The cam sensor is located by the cylinder box. First, remove the electrical connector off of the sensor. Push up on the lock on the bottom of the sensor to pull back and remove the connector. The sensor is held in by a bolt so remove the bolt with a ratchet wrench. Next, pull out the sensor. Wiggle it to remove the seal of the o-ring. Rub the residual oil on the new sensor's o-ring. Then, slide the new ...