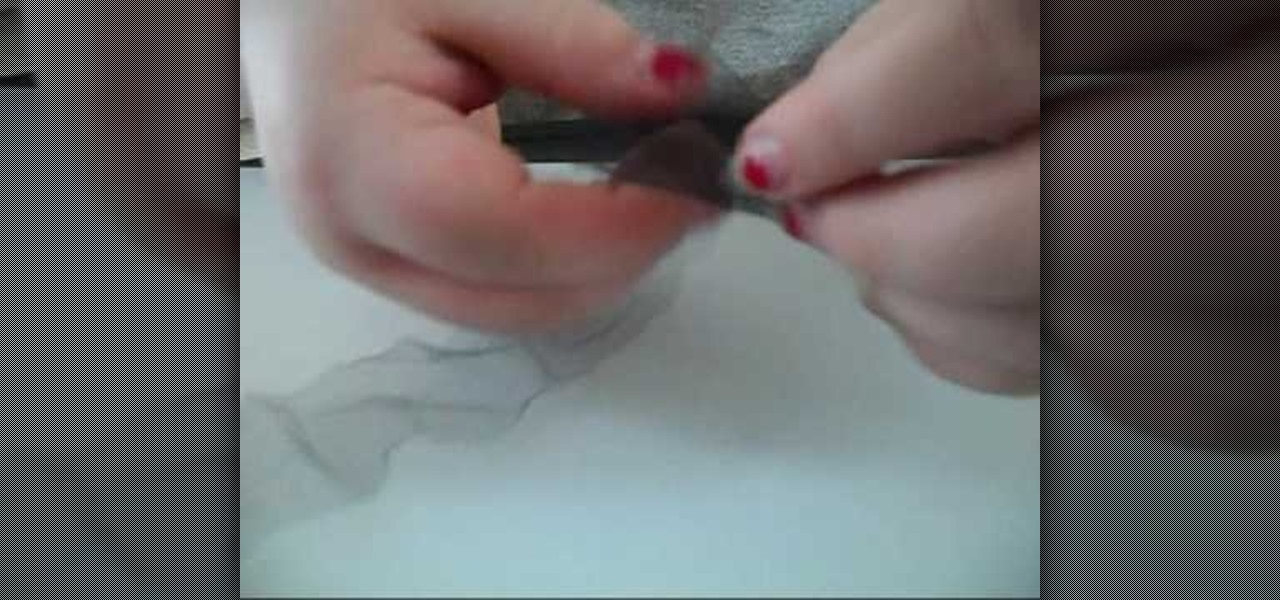
This is a video tutorial describing how to construct a mini loofah for your dollhouse. The first step is to gather your supplies. You will need a needle, scissors, thread, and tulle. The tulle and the thread should be the same color. Next your tulle should be cut to be 1.5 feet long. Then bunch up the tulle so that it is small and compact just like a loofah. Next you should thread your needle. Next sew the tulle so that it stays in the shape that you would like it to be in. Finally cut off al...
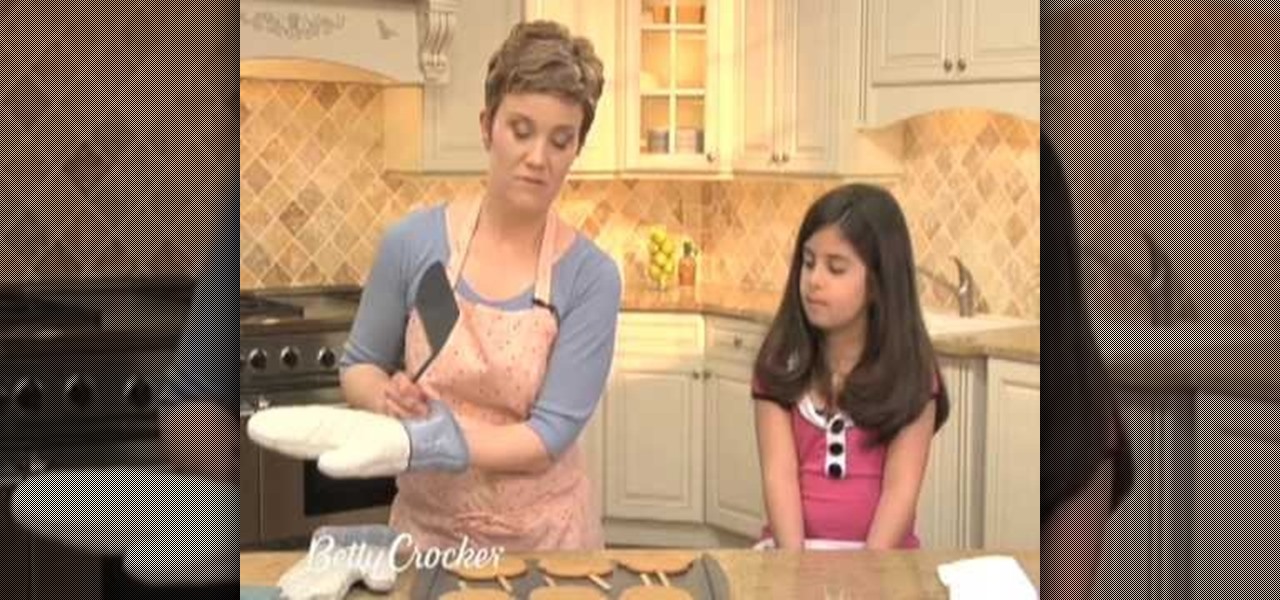
In this video, we learn how to make teddy bear cookie pops. To start, preheat your oven to 375 degrees. Ingredients you will need: 1 pouch pre-made peanut butter cookie mix, 3 tbsp vegetable oil, 1 tbsp water, 1 egg, 12 wooden sticks, 24 flat round candies, 12 Hersheys kisses and 1 tube red decorating gel. In a mixing bowl, mix together cookie mix, oil, water and egg until you have a dough. Next, shape your dough into small balls, making a bear head shape, and place on an un-greased cookie sh...
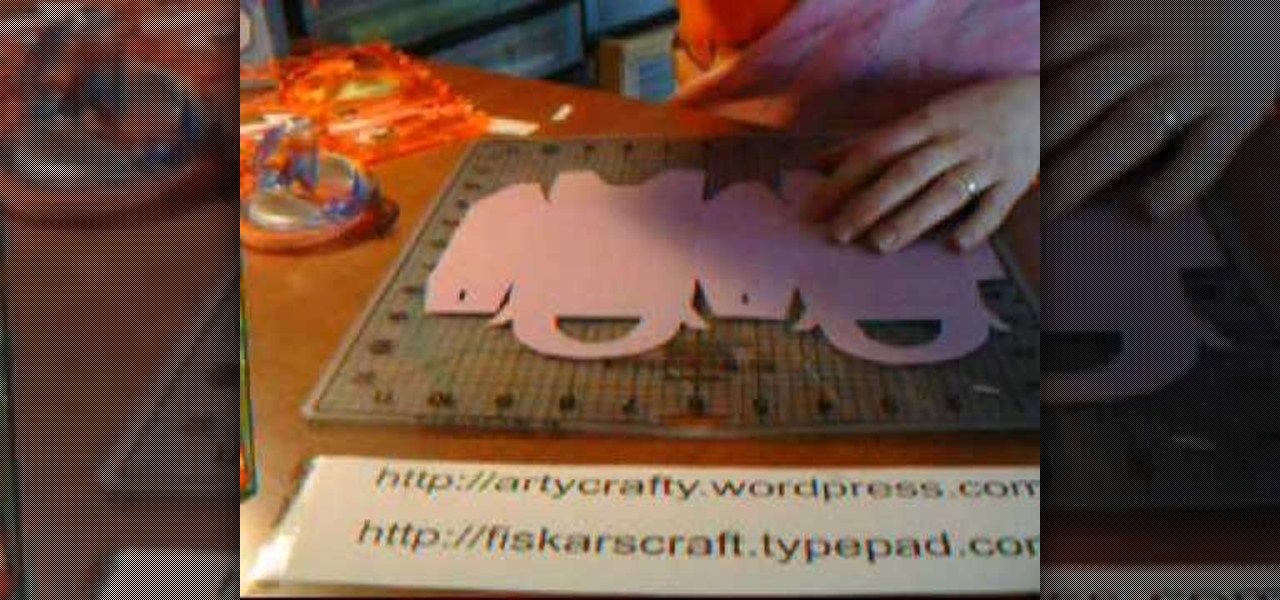
In this Arts & Crafts video tutorial you will learn how to make handmade treat boxes. Materials needed for this project are trimmer with scoring blade, PDF template, cardstock, scissors, Fiskars fingertip craft knife, Fiskars templates, Fiskars ultra shape Xpress, decorative scissors and embellishments. Download the PDF template from http://artycrafty.wordpress.com, print it out on a cardstock on the non-decorative side and cut out the shape along the thick line. Then score along the dotted l...
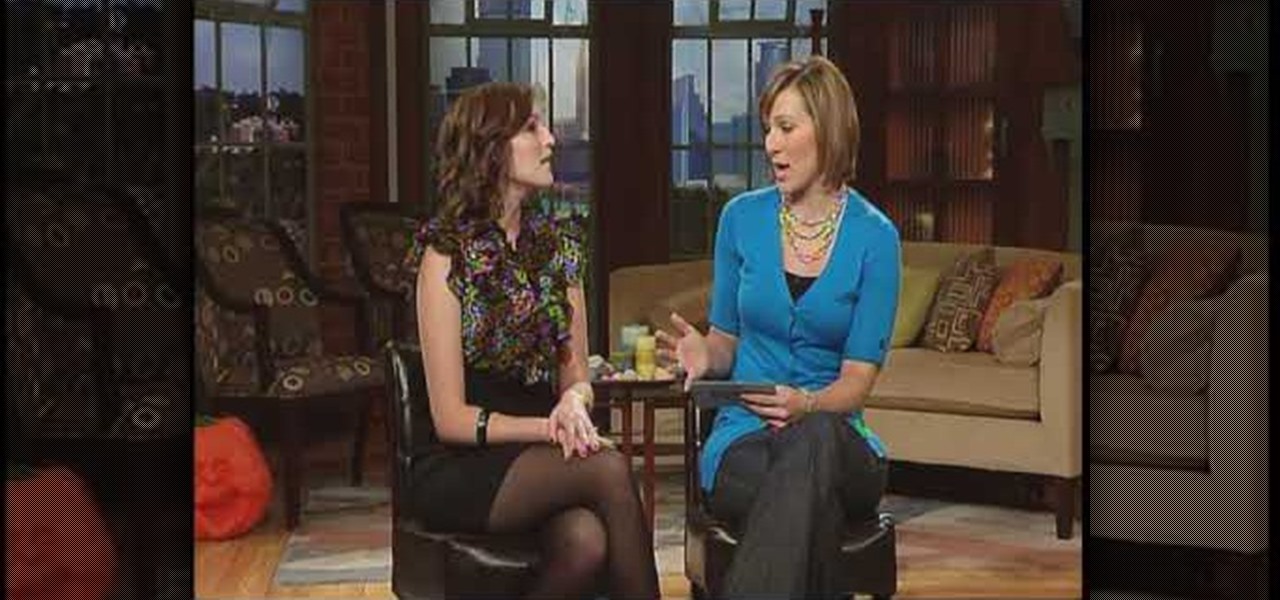
This video is about how to dress to flatter your body type. Curvy body types look good with vertical stripes and clothing that accentuates the waist. High-waisted and belted bottoms and over-sized accessories work well for this body type. Pear body shapes look good in structured clothing. Form fitting tops work well with a smaller bust, making "pears" look slimmer. Cinching in the waist is also flattering for pear body shapes. For athletic body types look good in skinny jeans to show off thei...
Three circles are drawn ontop of each other and a foot and a hand is added to the left side of the bottom and middle circles respectively; with the foot in a running motion. A rectangular shape is added in a way that the hand grasps it. A cloud is added below the forming person, so that he sits on it. Wings, a crown, a nose, an ear, hair, eyebrows, eye and a mouth with a smile are created in and above the first circle. The middle circle is traced onwards to the hand, to create the back,chest ...
To carve a wooden propeller first join six pieces of wood together to form a block. Mark the outline of the propeller on the block in pencil. Use a hand chisel and hammer to form the rough shape of the propeller. Once the rough shape is complete use a motorized hand grinder and then a motorized hand held sander to make the propeller smooth. After the sanding is complete you will need to finish it off with a coat of polish. Finally, you will need to balance the motor before fitting it into pla...

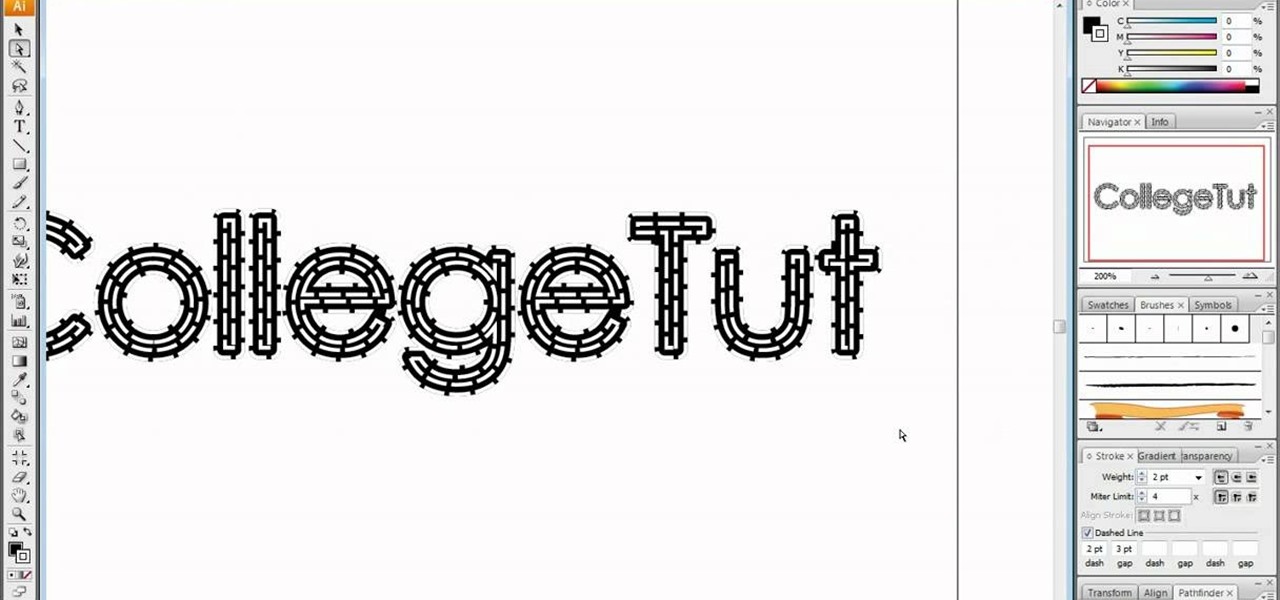
In this tutorial, user CollegeTut shows you how to customize the shapes of various fonts and text, essentially creating your own custom fonts, by converting the text of any font to outlines and then editing those outlines (bezier paths/strokes). You can modify the points on the path to create different shapes for the letters in your text, or you can manipulate the strokes of the text. You'll create some cool text effects such as text that looks like it's made of bricks, by converting the stro...
In this how to video, you will learn how to draw a violin. First, start off with the shape of the basic shape of the body. Next, draw the neck of the violin and the tuning pegs at the top. From here, you can draw the bridge, shoulder pad, and the F holes of the body. Next, fill in the outlines of the body. Color in the bridge and the neck with a black color. Now you can fill in the body with a brown color. Create highlights by selecting a lighter shade of brown and painting it at the right sp...
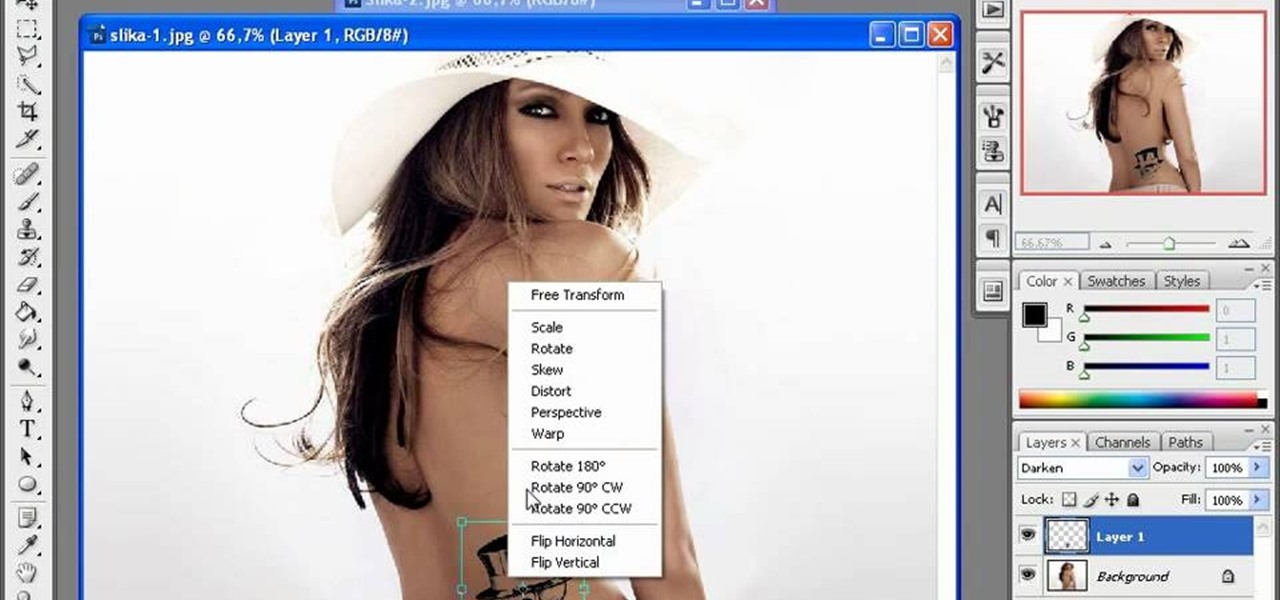
The first thing to do is open up Photoshop. Find a pic of a person and clip art you would like to use. Open those documents. On the side of the toolbar, find the brush tool to adjust the clip art correctly. Make a rectangle inside the clip art. Then hit Ctrl+c to cut the clip art out of the box and paste in the picture of the person. Then you remove the white in the picture by clicking on layers, and darken. When you do that, you are ready to shape the clip art to the body by clicking the box...
In this video, we learn how to dress if you have an apple shape. Go for styles that show off our cleavage, like a deep v-neck top. An empire line will disguise your waist and make your bust the focal point. A coat with a belt around the wait will trim your waist in no time. Long dark top will draw attention away from your waist and light jeans will pair nicely. Use as many accessories in bright colors and you wish. These accessories will draw any attention away from your waist and make you lo...
This video illustrate us how to draw a furry cartoon fox. Here are the following steps.Step 1: First of all take a sheet of paper and pencil and start by drawing a oval shape representing the face of the fox.Step 2: Now draw a nose and two oval shape eyes in the face.Now from the bottom of the face draw an oval structure representing the belly of the fox.Step 3: Now from the lower belly draw two small legs with feet.Step 4: Now draw a tail from the back of the mid lower portion representing t...
Seven easy basic art methods and steps to drawing Anakin Skywalker. The first 1-3 steps illustrates the basic drawing methods for the human head shape, and line placement for a basic human head. The fourth step illustrates basic drawing of the eyes, nose, mouth and ears. Step five illustrates the basic shading around the eyes, nose, ears and mouth. Step six illustrates how to add the shaping and styling of the hair and facial features. The final step illustrates how to shade the hair. It also...
This video illustrate us how to make a desk organizer out of clay. Here are the following steps:Step 1: First of all take clay in different colors and now shape them round.Step 2: Now take one ball and press it into a flat sheet.step 3: Now take another ball and shape them in cylinders.Step 3: Now place these cylinders on the flat sheet keeping space between them.Step 4: Now take two balls and make small vessel out of these two balls .Step 5: Place these vessels between the cylinders, these v...
This video illustrates the method to Make a nuno felt purse. You need colored paper, a piece of cloth and a pair of scissors to make it. This process is comprised of the following steps -Step 1Cut a oval shaped figure from the sheet of colored paper. Make a crease in the middle and fold the paper.Step 2Cover the paper with the cloth piece. Stitch the end of the piece of cloth and cut the cloth in a proper manner.Step 3Make the oval shaped figure into a rectangular figure. Add some nuno paste ...
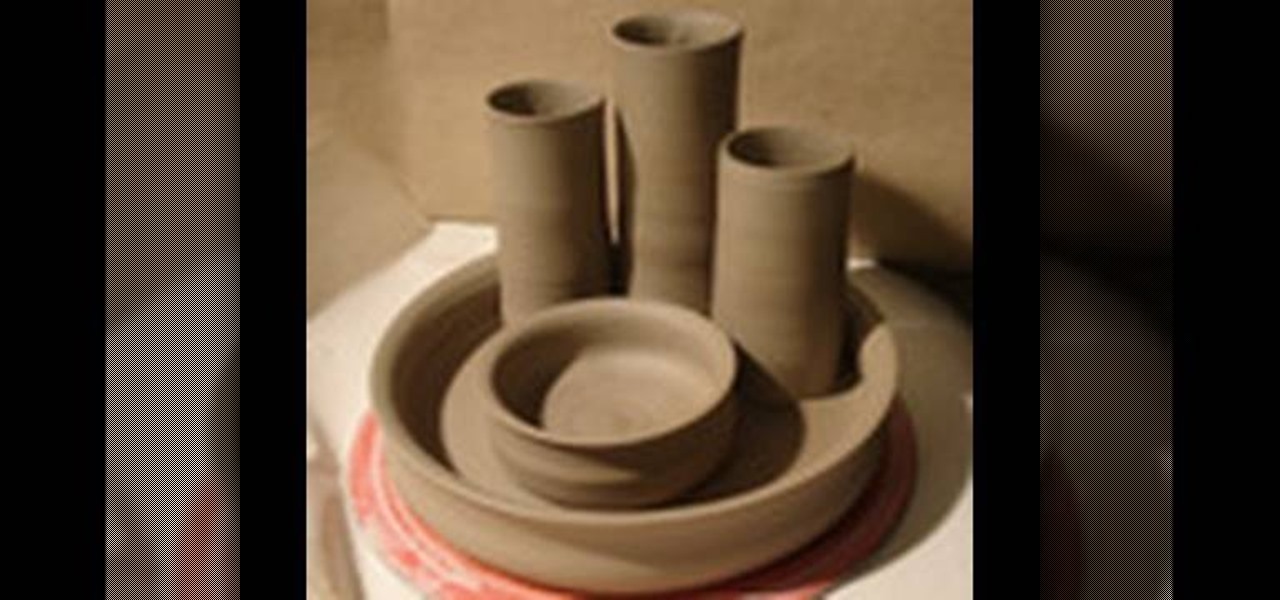
This video shows the method to use a puggmill in pottery throwing. Take the two packets of clay and take the clay out on the table. Take a thread and cut the two pieces of clay in the middle to form four bricks. Put the bricks in the puggmill one by one and wait for it to come out. The pugged clay comes out from the bottom in a cylindrical shape. Take out the four cylinders from the four bricks of clay. After this, put the cylinders in the pugmill again so that they are pugged thoroughly. Put...
In this video, you can see how to easily draw the Storm Troopers from the Star Wars movies. Start out with the feet, which are a couple of easy circles. Then draw the lower half of the legs, with basic shapes again to form up to the knee. For the knees themselves you draw a shape somewhat resembling an animal hoof right above where you stopped before. The upper legs look somewhat like the lower half, but with a line down the middle. Add the belt and torso, then move onto the head. Finish it o...
In this how-to video, you will learn how to draw Ned Flanders from The Simpsons. First, start off with the basic outline of the body. Use simple shapes for this. Next, fill in the eyes, hair, nose, mustache, ears, and mouth of the figure. From there, you can move on to the details of the clothing such as the collar and cuffs of the sweater. Finish with the shoes and the fingers on the hand. The basic outline is finished. Now, go in and erase the simple shapes from the drawing and fill in more...
1.First take 1 cup of All purpose flour in a plate and 2 cups of same flour in another plate. And then take a stuffer can be anything like sweet coconut, chocolate flavor to put inside the puff.2.First add one tablespoon of vegetable oil to each plate and slowly make it out by hand and add some water and make flour mix. Now separate the 2 cups flour mix into 4 to 5 big pieces and separate the 1 cup flour mix into 4 to 5 small pieces.3.cover the small pieces with big pieces of each. Now just r...
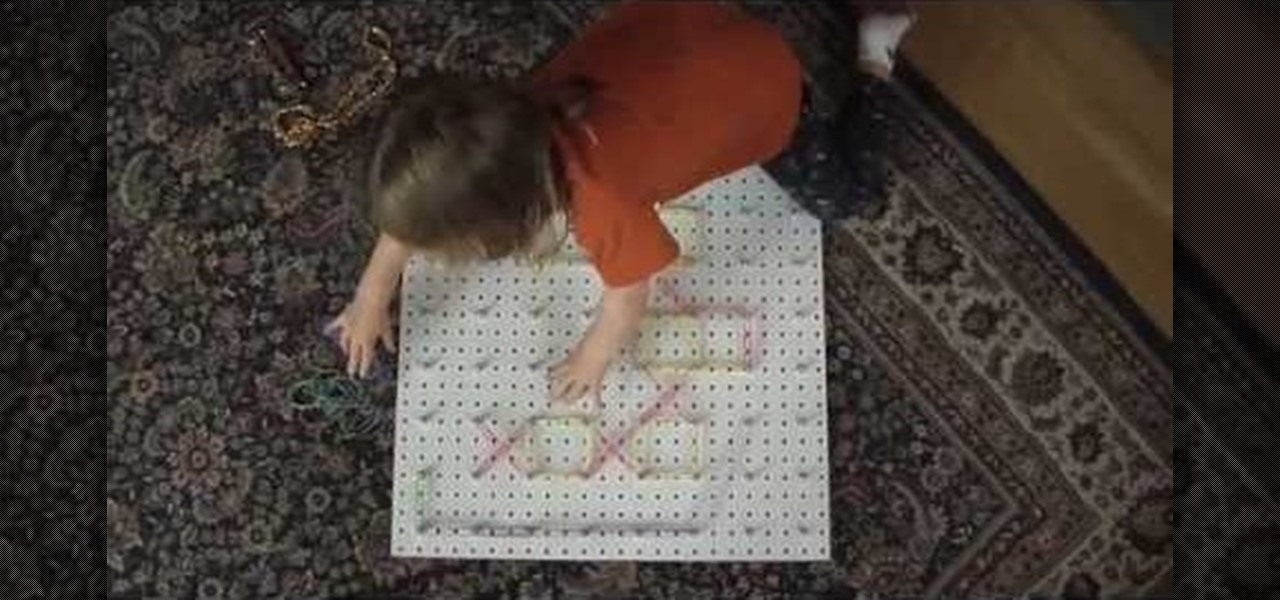
Geoboards are fun tools to teach your child the basic concepts of shapes and how they work in math; any kid would love a gigantic one! Firstly, you need to obtain a pegboard (what they hang merchandise on in hardware and similar stores). They usually come in 4x8' sheets, so you may need to ask an employee to cut one into fourths for you. The fourth piece should have 64 holes in 8 rows of 8, which means you need 64 nuts and bolts to make the board. Assembly is a no-brainer; you and your kids s...
In this video, Mr. G demonstrates how to draw a wintery snowflake. You will need a plain pencil, or a blue and black colored pencil for this drawing. Start by writing your name and the date on a white sheet of paper. Then, begin lightly drawing the base of your snowflake. After you have drawn your base, Mr. G will show you how to make the lines darker to form the shape of your snowflake. Then, you will learn how to detail your snowflake by drawing small triangles inside the basic shape that y...
Folding fitted sheets is always trickier than folding a conventional rectangular sheet. First, throw the sheet onto the bed. Then use your hands to tuck all the corners in on themselves. Then lay the sheet back down and straighten it. It makes a horseshoe shape with its elastic. Then fold one corner over the top so that all your elastic hangs over one hand. With the other hand grab the other corner so you can lay it down flat in a half moon shape with all the elastic together in one place. Th...
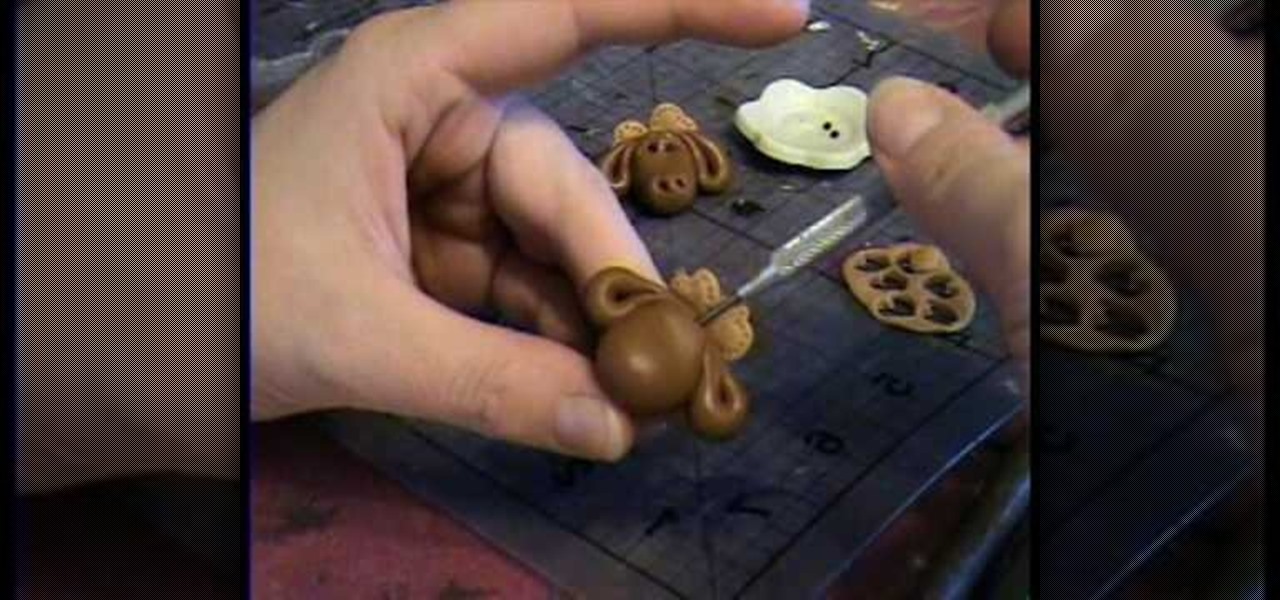
This video shows how to make a bay girl and boy head made of clay. The first thing you need to do is get a small round ball of clay that is a skin color color. Then you get the small black beads and place it firmly on the ball they will act as the eyes. Then make the eye creases on the side of both eyes. After that you add the other physical features like nose, mouth, ears, and eyebrows. The last thing you do is fold two square pieces of clay into the shape of a bow then place it on the top o...
This video gives instructions on how to make a stencil from a manila folder and a number of additional supplies. Supplies required aside from the manila folder include an X-acto knife, a pencil, an eraser, and a cutting board, the cutting board and manila folder are recommended. First step to producing the stencil is to draw an image to serve as the stencil pattern. After making the design, cuts must be placed in the design known as 'Bridges', bridges are links in the design which holds the p...
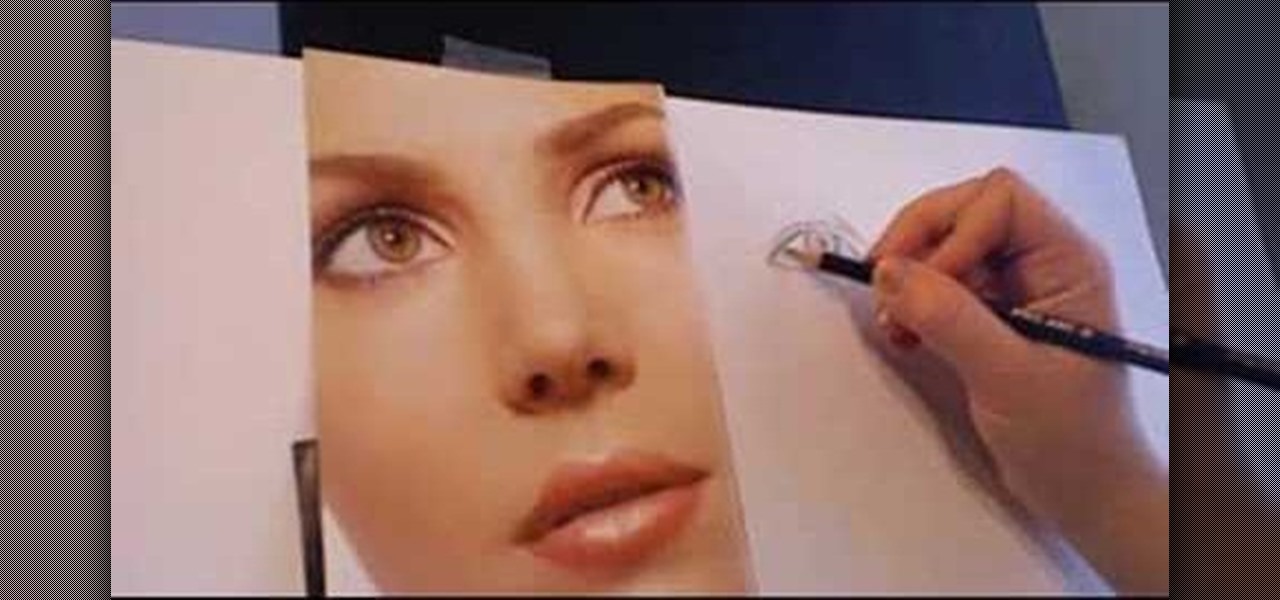
TVLessonDotCom teaches you how to draw a person's face from the front. Start with a basic oval shape. You can do this part in pencil and then erase it. Use a vertical cross line and a horizontal one. Add two more horizontal ones to break the face into sections: hairline, eyes, nose and mouth and then chin. The eyes are small oval shapes. You can also create a small circle in the middle and then eyebrows. Draw the nose next and then add the mouth. Everything must be in proportion, so the verti...
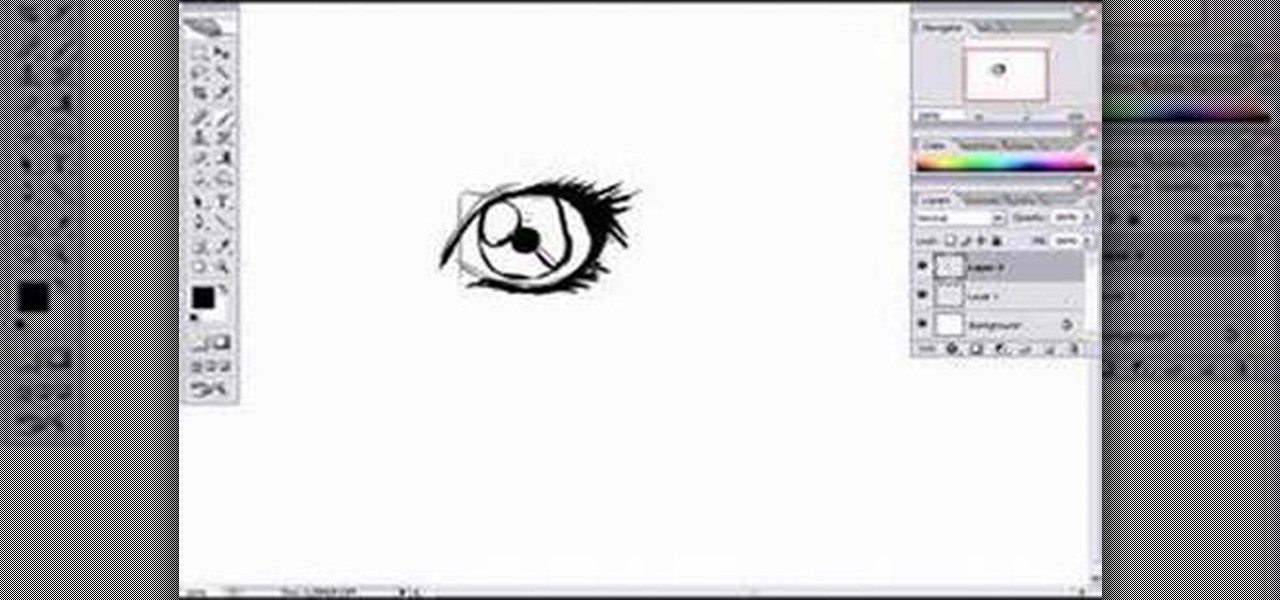
In this video tutorial, viewers learn how to draw a female eye using Photoshop. Begin by creating a rectangular box. This will contain the eye. Now draw the shape of the eye in the box. Now add in the details. Draw in the shape, eyelashes, eye brows, eye lids and eye ball. When drawing the lashes, draw them as a mass instead of individually. Then add the eye lids with a few lines above the eye. Then draw two circles for the eye (eye ball and pupil). This video will benefit those viewers who e...
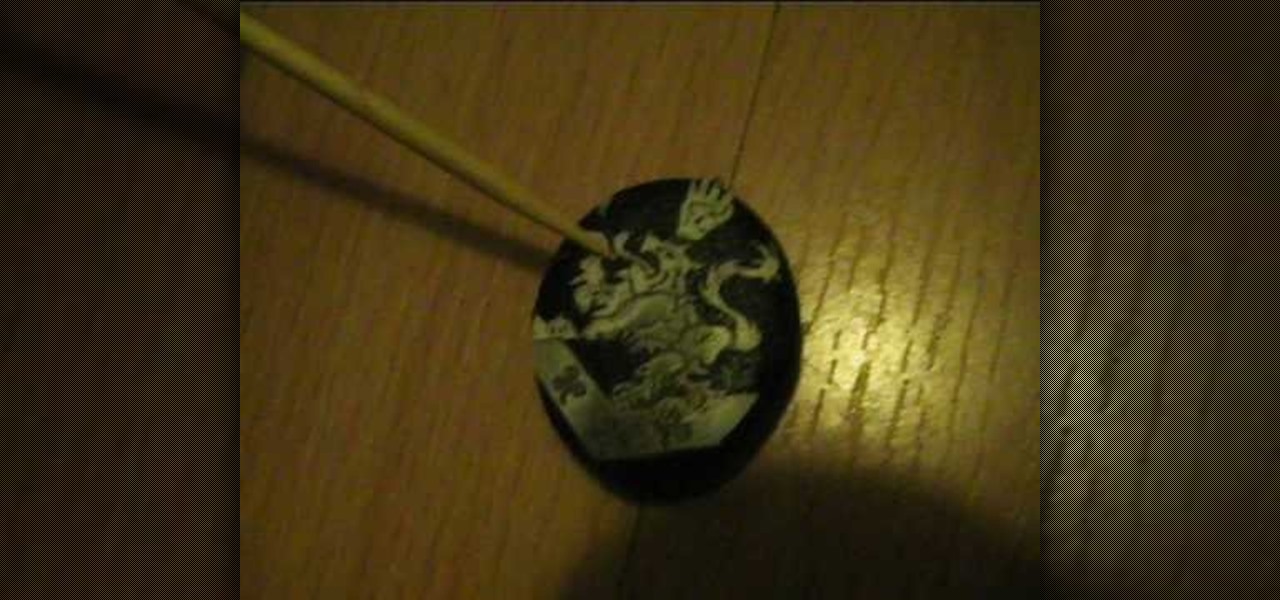
In this video, Alice demonstrates how to make a crest necklace using simple things. For making this necklace she collects some materials such as oblong shaped rock or polymer clay, some paints, a computer print of a cullen crest and so on. She uses the ordinary black paint to paint the rock completely. Next, she collect a computer print of a layout for the culler crest and carefully cutout the shape and using craft glue she stick it on the painted rock to see it fit. she takes some white pain...
An unknown artist demonstrates step by step how to draw a realistic eye in this video. She first begins with lightly drawing the eyes shape, starting with the upper lid and gradually beginning to darken the line once she is satisfied with the shape an contour. She then draws the upper lid and continues on to the iris, pupil, and cornea. Then she works on shading the eye, drawing the lashes, and then using the eraser to remove any stray lines and whiten certain areas. Then, she begins drawing ...
This video shows you how to make a flexible mold using Amazing Molding Putty. You can make molds of just about anything that has the desired shape and texture you want.
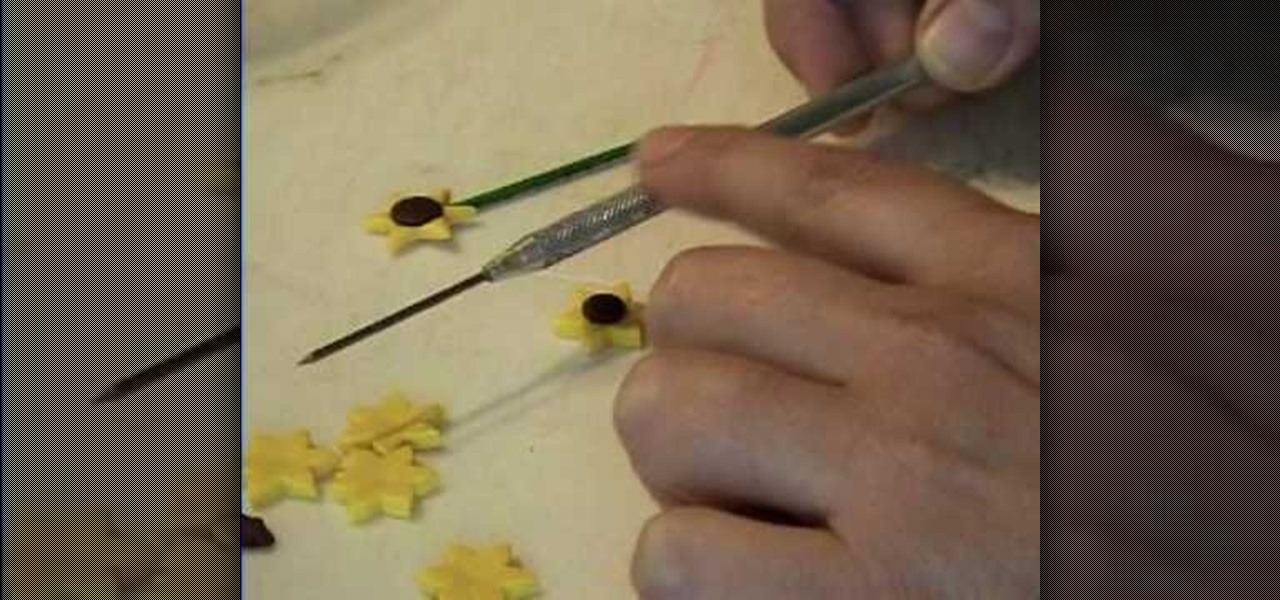
This video shows how to make a tiny sunflower from polymer clay. Start with some yellow clay and roll it out using a pasta machine using the number 1 setting on the pasta machine. Wilton cake decorating supplies makes a flower shaped cutter that is designed to cut pieces of fondant, but works well for polymer clay. Make some of the flower shapes and even out the cut edges. You can texturize the flower petals so they are not left completely smooth. Add a piece of brown clay to the middle of th...
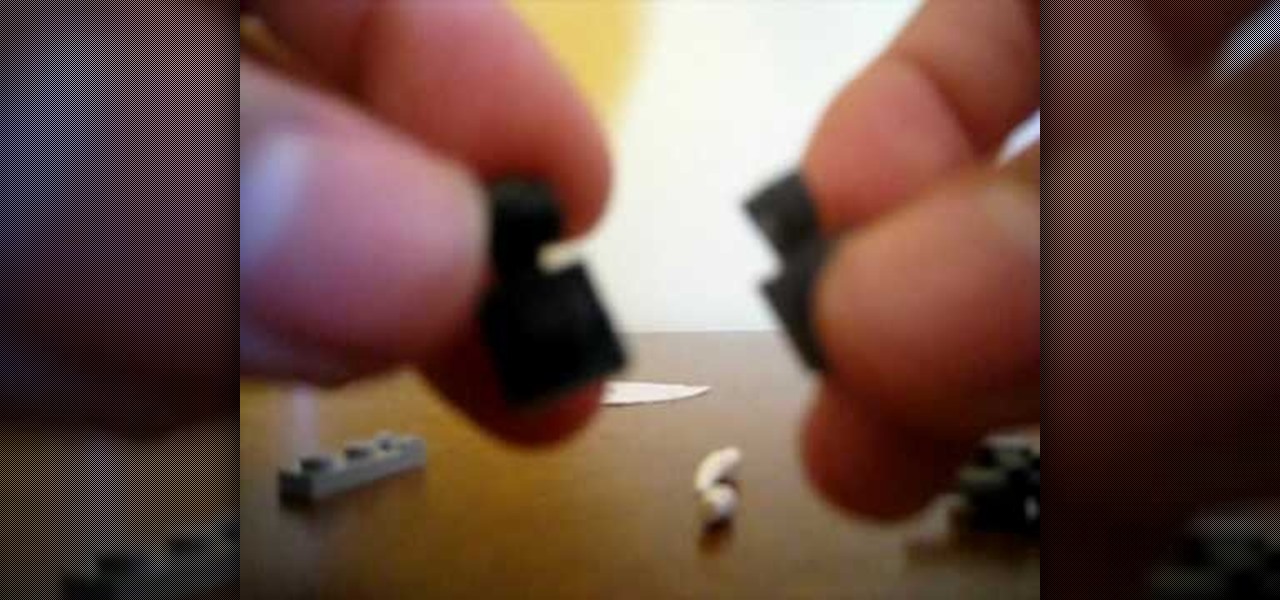
The girl in this video demonstrates the way of making a LEGO crossbow at home. She first shows you what all pieces that you require for the process. Then she asks you pick up the rod-shaped piece and stick it to the back of the spark piece. Then you have to put the two tiny pieces together as shown by her. Then she asks you to attach this piece to the stick and push it all the way to the end touching the spark piece. Then you have to stick the two horn-shaped pieces to the sides of another pi...
This video explains how to create a pair of Swarovski crystal earrings. You will need a tooth headpin, two pear-shaped crystals, two spacers, two diamond beads, and sterling silver ear hooks. First, slide the pear-shaped crystal onto the head pin. Follow with a spacer, a bead, then use a pair of pliers with a side-cutting edge to cut the wire and bend at a 90 degree angle. Use round-nose pliers to then create a circle at the end of the wire, then 'squash' a bit with the other pliers. Then ope...
This video tutorial is going to show you how to make a Moose Bead from Polymer Clay by Garden of Imagination. You begin with clay and make a shape it like the head of the moose as shown in the video. Then take more clay and make the ears and attach them to the head. Now take lighter color clay, cut it out into heart shapes, poke around the edge with a pin, and attach them behind the head. Take a pin and make a hole at the top end of the head to make it a bead. Watch the video to finish the pr...
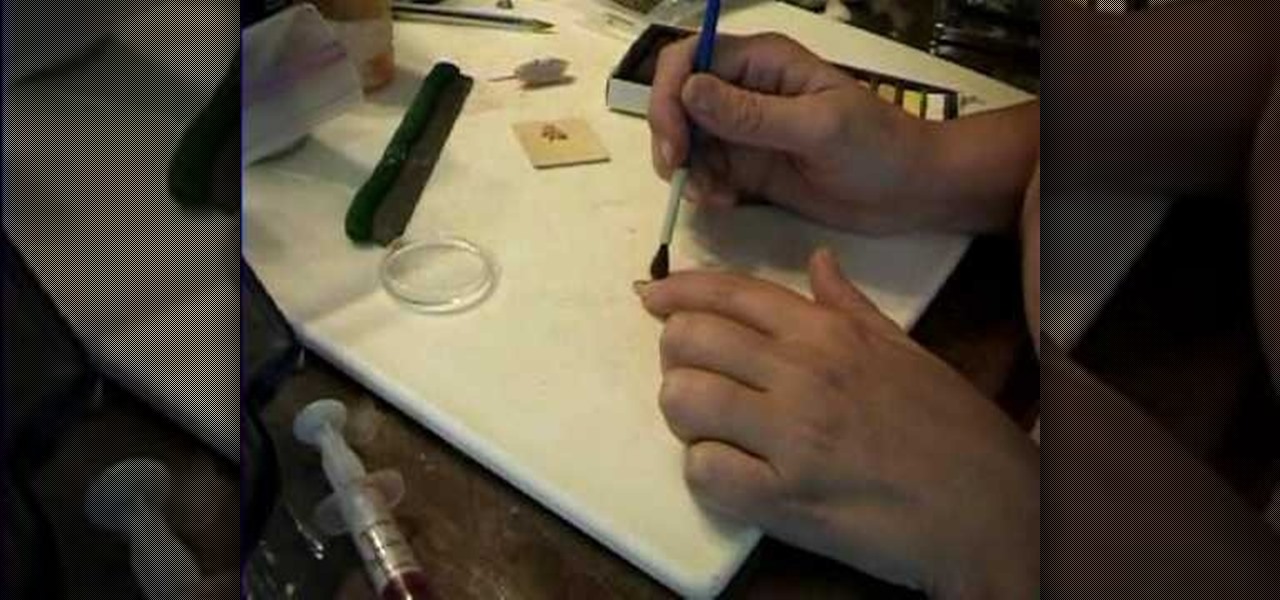
Garden of Imagination presents a video that teaches how to create a miniature pretzel for a dollhouse. First, she rolls polymer clay into a tiny snake-like roll. Then, she wraps the clay to form a pretzel shape. After she gets the shape she wants, she cuts the clay to make it even. Next, she retrieves chalk. She breaks up a little to dust the pretzel. She uses a dark yellow and brown to achieve a baked look. Then, she adds sea salt from her kitchen. Last, she instructs to bake the pretzel in ...
Garden of Imagination demonstrates how to make a miniature corn on the cob out of polymer clay. First, roll and flatten two small balls of green clay to make the corn husks. Make the husks pointed on both ends. Take a piece of yellow clay and roll it into a conical corn cob shape. Insert the corn on the cob into the texture piece and roll it to achieve the textured corn kernels. Wrap the corn on the cob between the two green husks. Make sure the husk leaves overlap in the front. Squeeze the c...
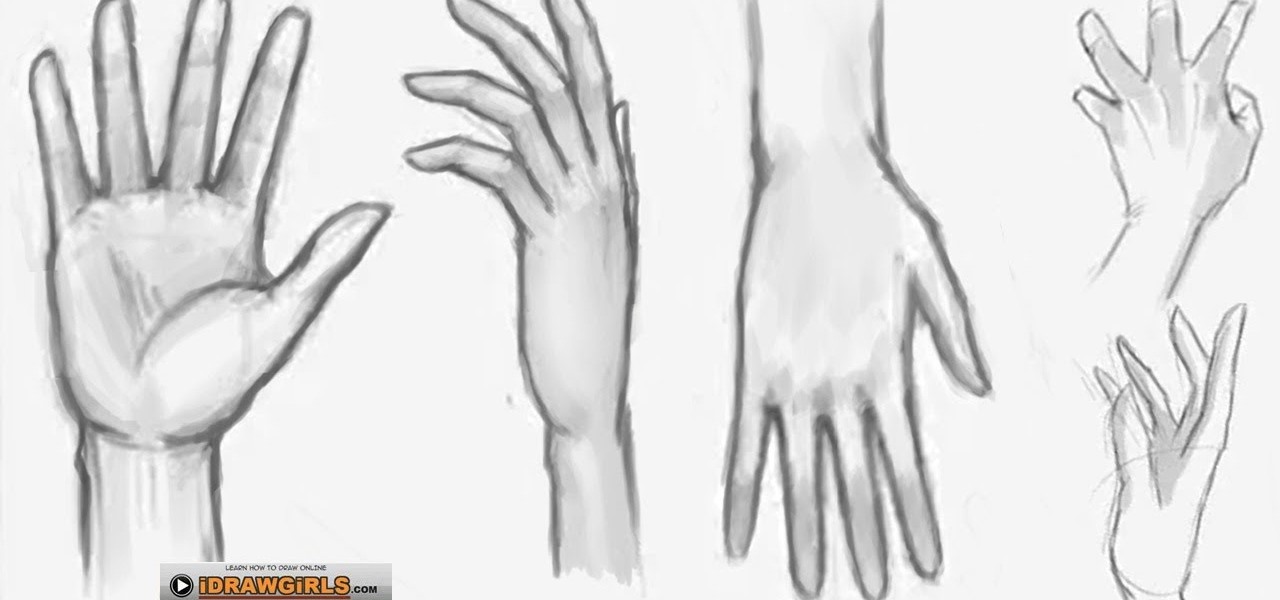
The video demonstrated clearly about how to draw and sketch the hand of a girl in an easy way. First the illustrator drew a rectangular circle in the plain window. Then he drew another rectangular shape close to the first and divided the second shape into two halves so that it will look like fingers.
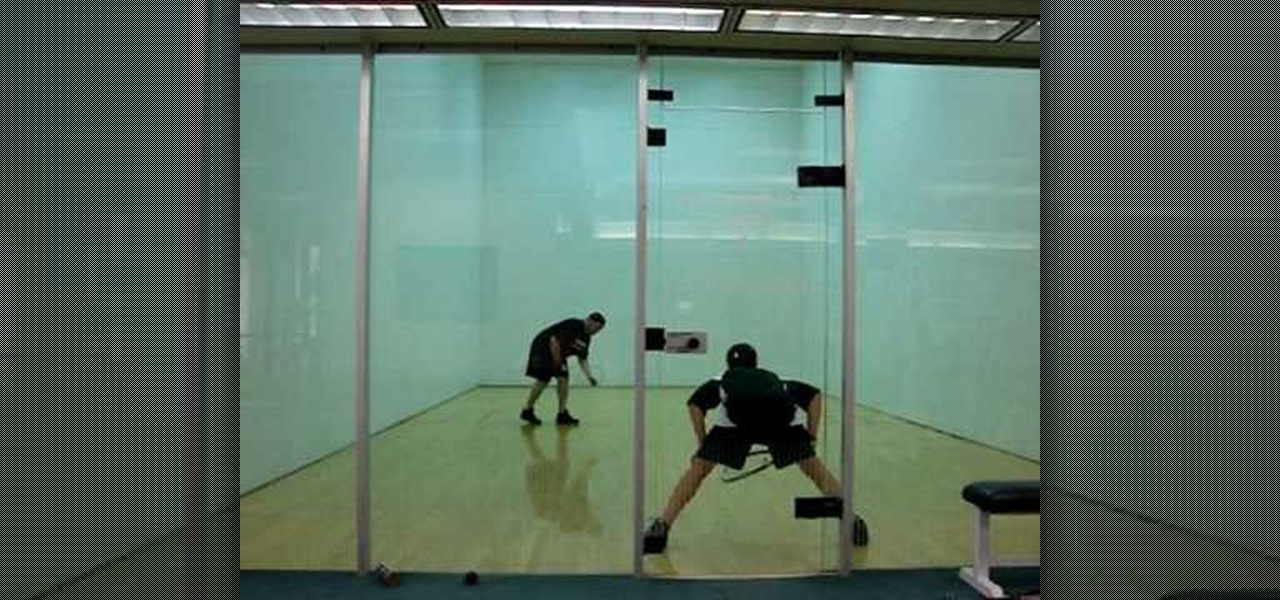
This video shows the viewer how be deceptive with their racket ball serve. Most players change the direction they will serve to by changing the alignment of their body or their contact point on the ball -some people even adjust the shape of their swing. This gives away the direction of the serve. This video suggests simply changing the point at which the ball is dropped. This allows the player to serve to both sides of the court with no obvious differences. This makes it harder for the oppone...
StudioMallory teaches you how to make a brass Sailor Moon tiara for cosplay. You will need a dremel with a grinding bit, a mechanical pencil, titanium covered scissors, two jewels, cardboard template and a piece of cheap metal. Trace the template on the metal using the pencil. Cut it using the scissors. Use goggles when using the dremel on the metal tiara. You have to grind it to make round corners. Now bend the metal in the shape you want. Use glue to apply the jewels. Once it's all dry, mak...
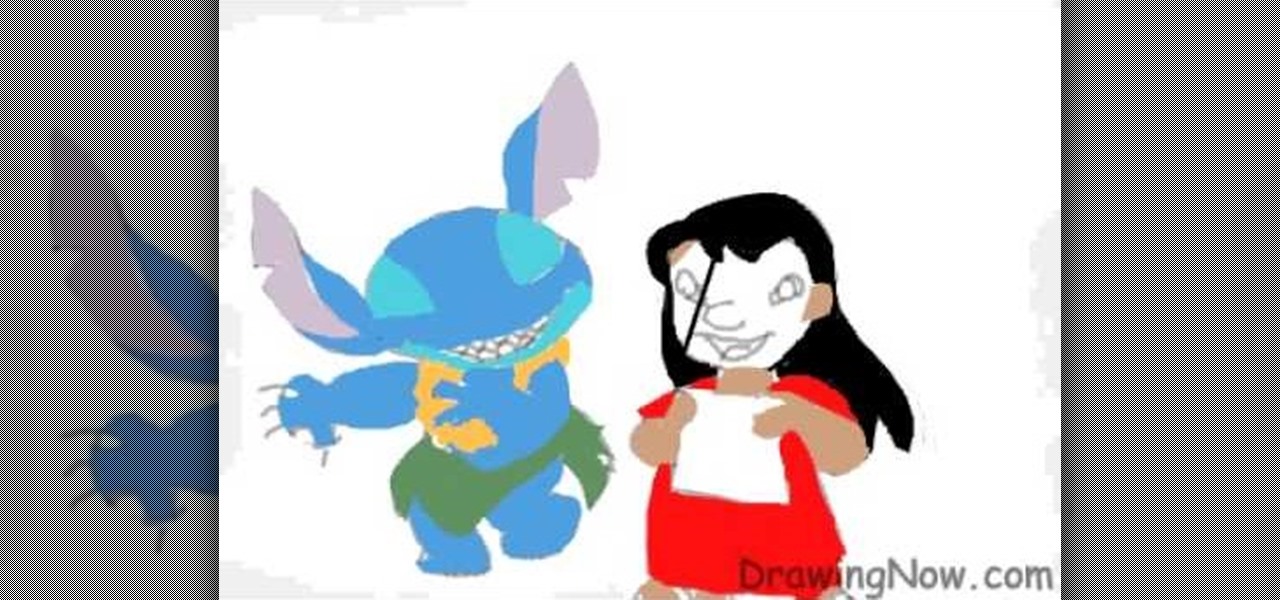
Begin by drawing an oval and attach two feathered shaped ears to head. Draw guidelines for the face. Draw the face and a marshmallow shaped torso. Add the legs and arms. Add the detail and start erasing the guidelines. Repeat the similar steps for Lilo. Once finished both characters, color them. Add a darker shade of the colors for shading. Outline the characters and add all the details. This video will benefit those viewers who enjoy drawing on the computer and would like to learn how to dra...
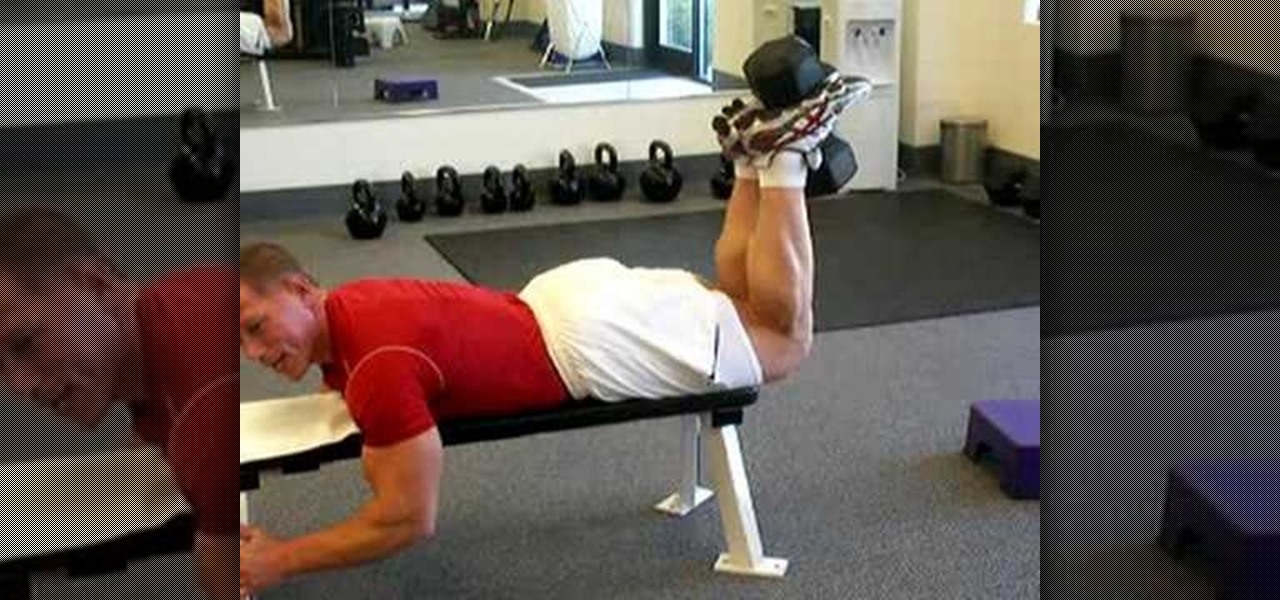
Fatloss LifeStyle shows you the best way to "blast those hammys!" Using a bench and a weight is all you need to shape and sculpt your legs to perfection. First, lay down on your stomach on a bench and position your ankles around a free weight. Make sure that you do not use a weight that is too heavy. Start light and build from there. Now using your hamstrings lift up the weight that is between your ankles slowly and controlled so that your body is level. Then slowly and controlled bring the w...
In this video tutorial, viewers learn how to peel tomato skin off. Before peeling the tomato skin, users will need to have a boiling pot of water. Begin by cutting a little X-shape onto the tomato. Then put the tomato into the boiling water. Let it boil for about 20 seconds. Then take out the tomato and peel it where you cut the X-shape. Peeling a tomato is not common and difficult to do without boiling. People may choose to peel tomatoes to make tomato pies, marinara sauce or stewed tomatoes...