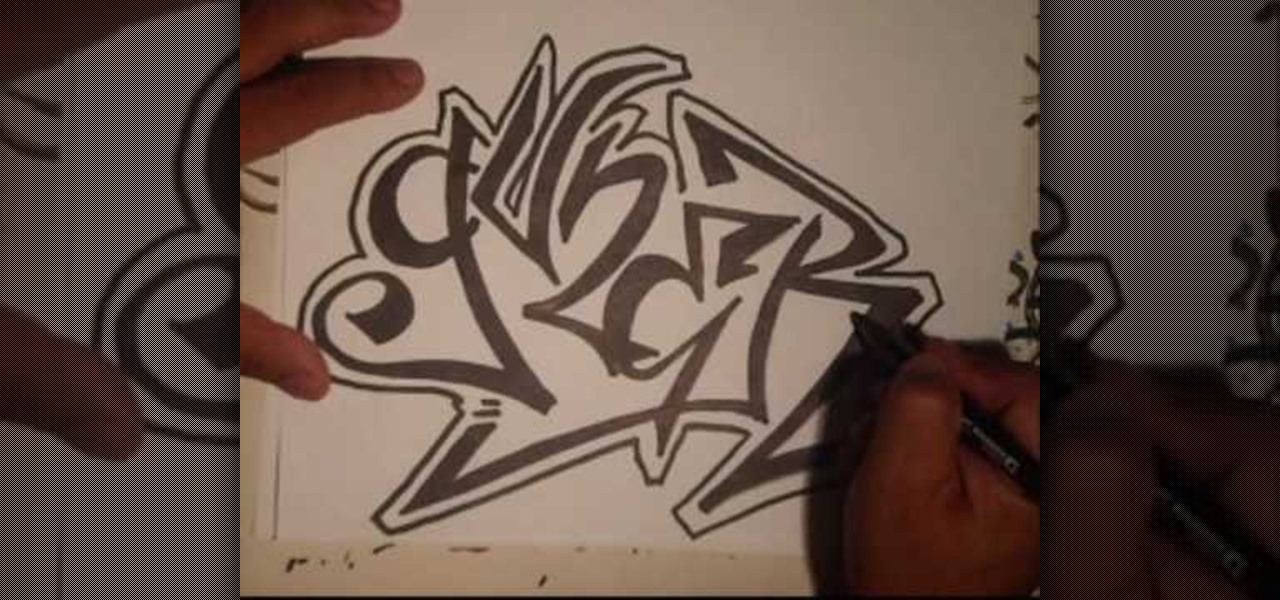
If you're anything like us, you hated your name for a good three or four years during your childhood, occuring probably not so surprisingly around our awkward puberty years. Whether you like your name or not, putting it in graffiti - transforming it into art, if you will - puts a whole new spin on things.
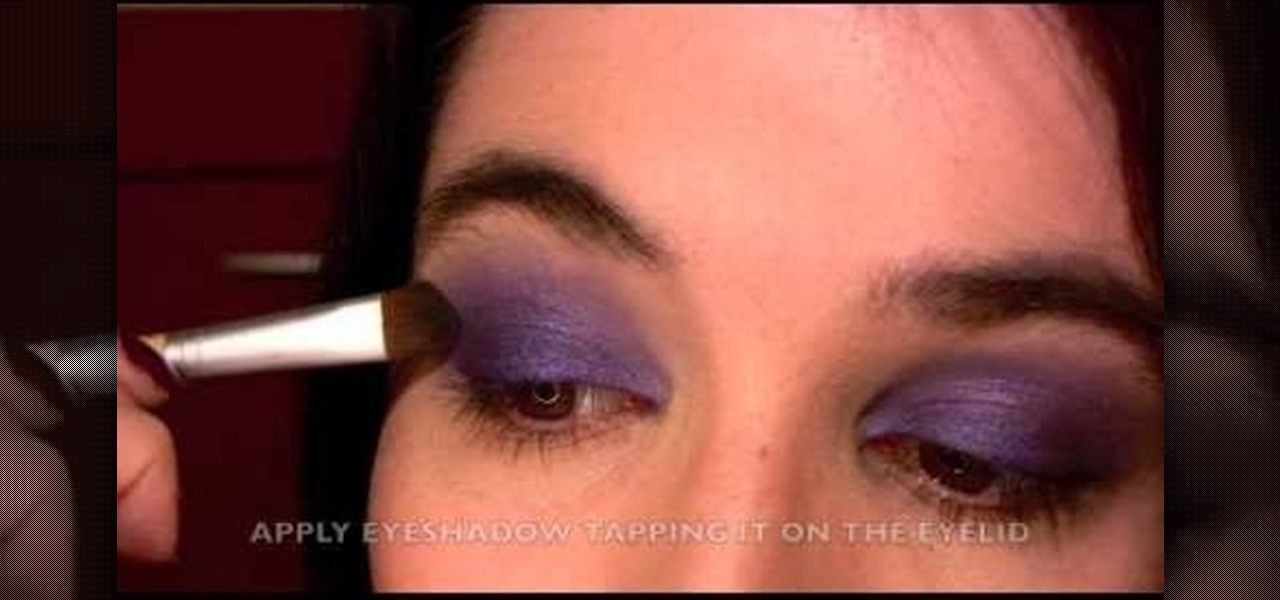
Love purple? Then this purple-filled eyeshadow style is sure to rock your boat. Croatian photographer Marina Filipovic Marinshe sets aside her usual fashion, portrait and art photographs, and brings you this makeup tutorial for recreating her rich purple eyes look. Check it out. You won't be sorry.
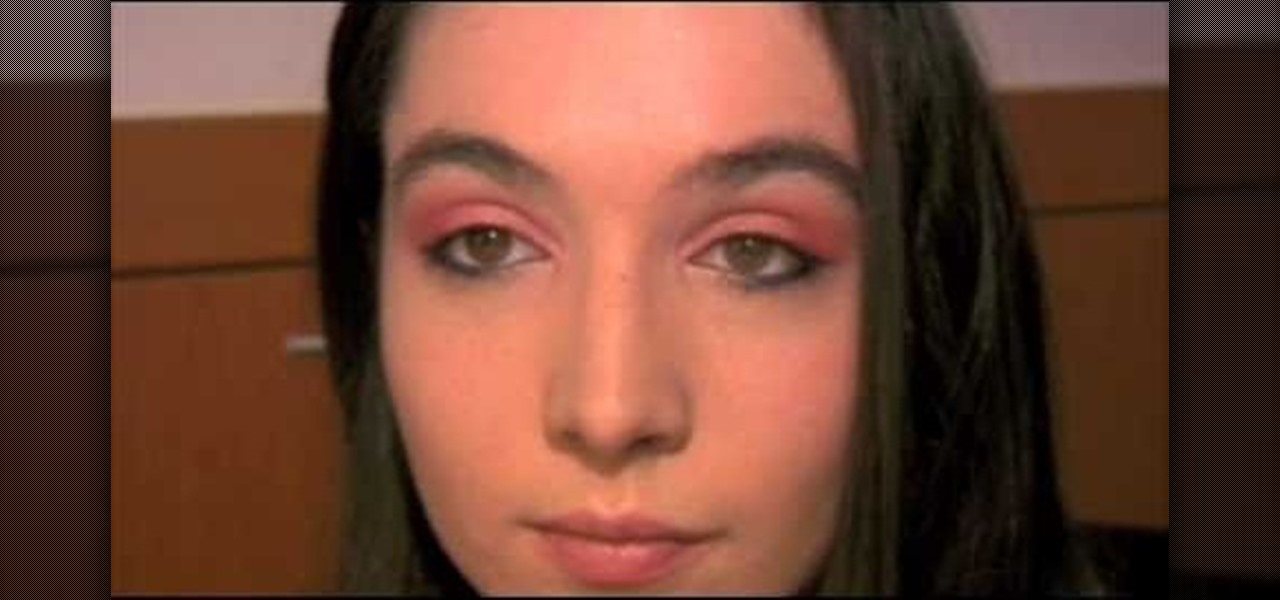
Croatian photographer Marina Filipovic Marinshe sets aside her usual fashion, portrait and art photographs to delve into the world of makeup tutorials! In this video, she shows you her "Pretty in Pink" full face makeup look, with lots of pink!
In this video tutorial, viewers learn how to do an arresting technique for handling and restraining. As the opponent begins to punch you, grab the opponent's wrist with one hand. Then push the other arm under the opponent's bicep and under the armpit. Now pull the opponent towards you and push their arm to their back. Make sure you grab over the opponent's hand. Then use your knee to push against and opponent's hamstring and pull down their shoulder to throw them down on the floor. Continue l...
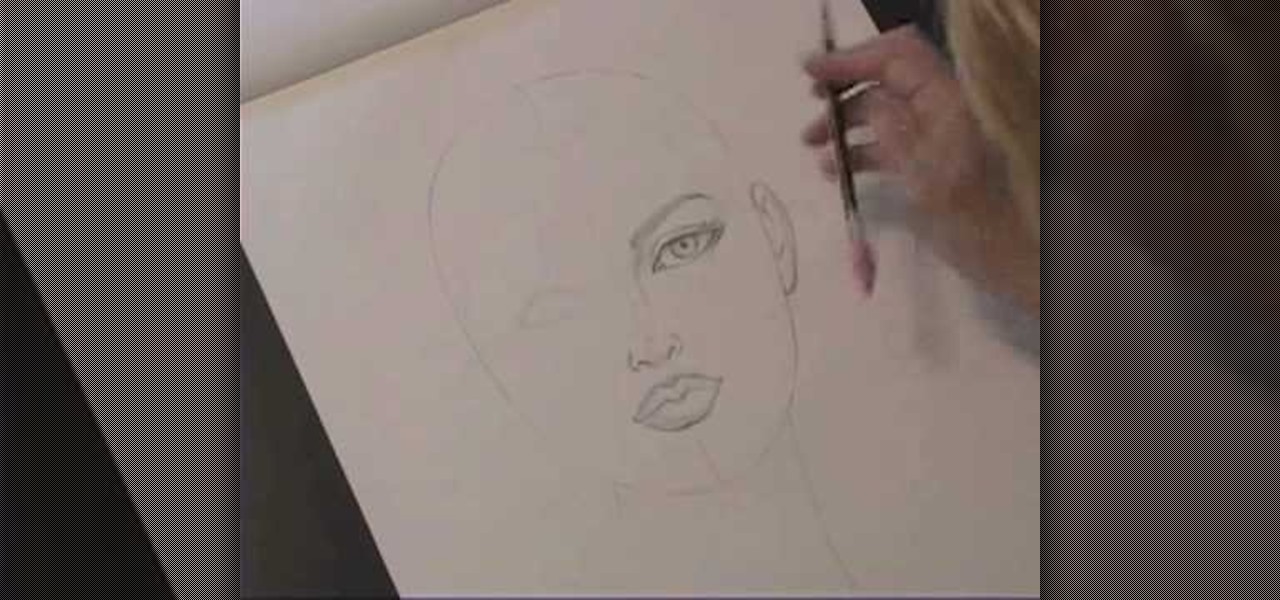
Kathryn Hagen teaches us how to draw female heads in this tutorial. Start with an oval and dissect it horizontally and vertically. Draw in the hairline, as well as the eyes, nose, and mouth. You can measure out where everything should go by using the lines as a reference point. Add details into the eye, then continue on to add more details to the nose, showing the nostrils. Draw more details on the mouth, then define the center of the lip and shape. Draw on the ears, and add a line where the ...

In this tutorial, we learn how to create stencil graffiti. First, take a picture and then separate into four layers. After you do this, you will draw out each layer and then cut each of them out. After you do this, synchronize all of the layers. Next, spray paint the background color. Last, you will add color to the actual picture then wait until it dries. This is a great idea for wall art for your home, and it adds a unique touch. Make sure to take your time with this when painting on the st...

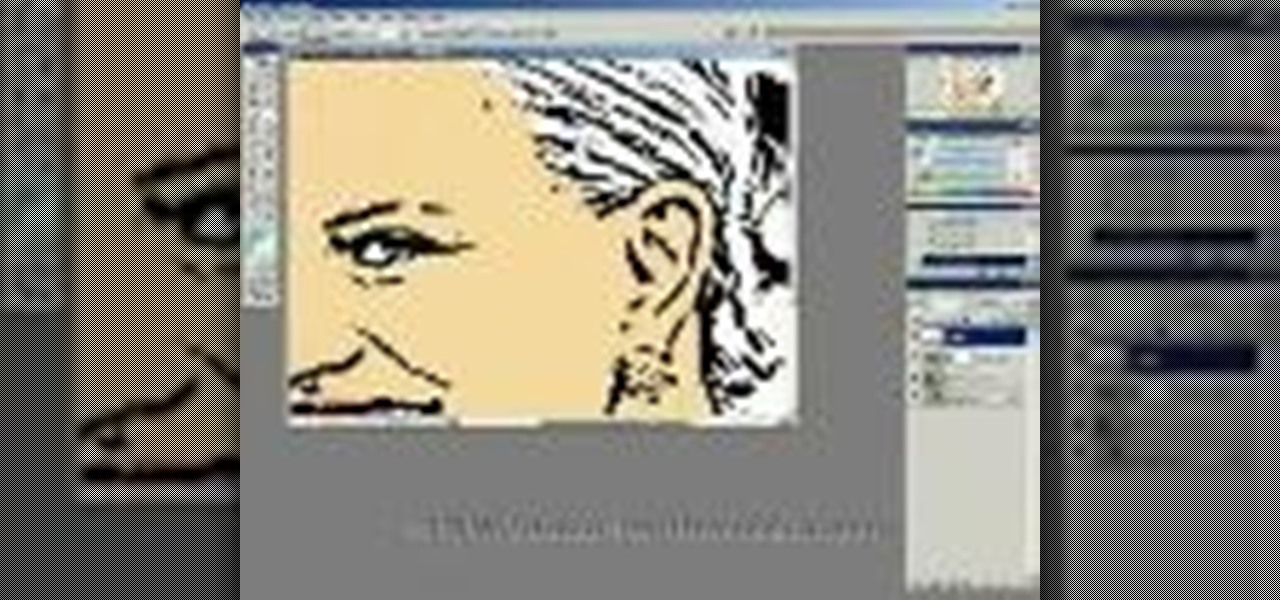
This tutorial shows you how to turn a photo into a cartoon that has a pop art feel to it using Photoshop. Whether you're new to Adobe's popular raster graphics editing software or a seasoned professional just looking to better acquaint yourself with the program and its various features and filters, you're sure to be well served by this video tutorial. For more information, including detailed, step-by-step instructions, watch this free video guide.
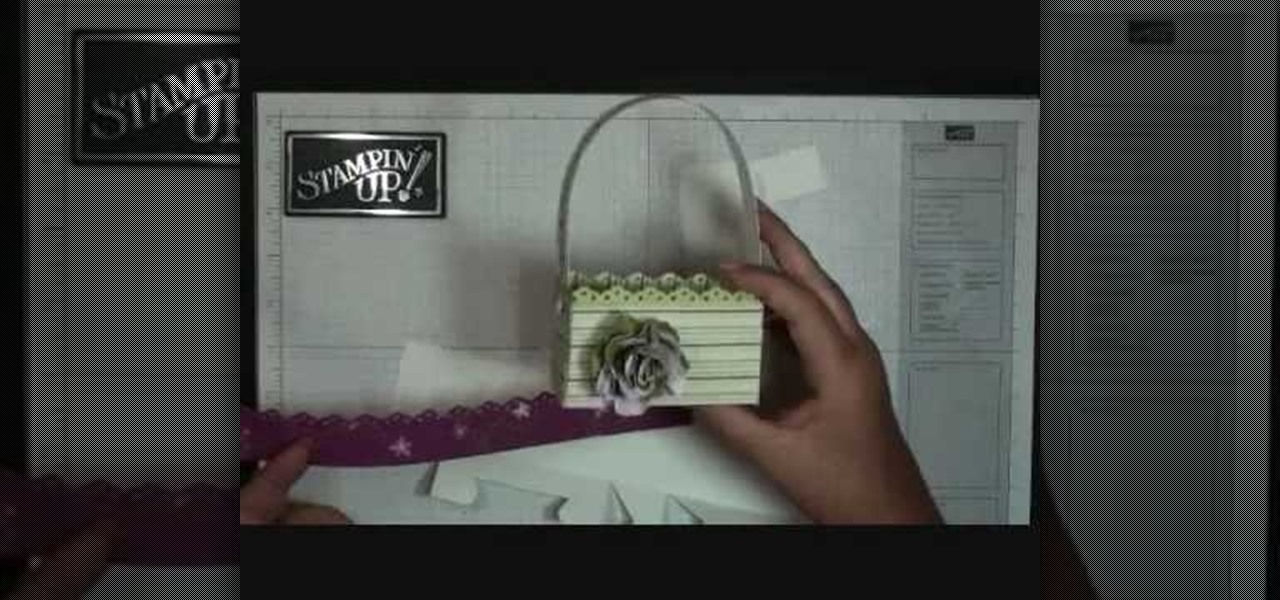
This video tutorial is in the Arts & Crafts category where you will learn how to make a mini Big Shot Box with Stampin' Up! For this you got to use the Bigz Die Box #2. Cut a Whisper white card stock at 6" x 11", place it on the die box and run it through the machine to get the box template. Cut off one edge of the template along the score line with scissors. This will be the top part of the open box. Now fold the bottom part of the box along the score line. Take a strip of cottage wall desig...
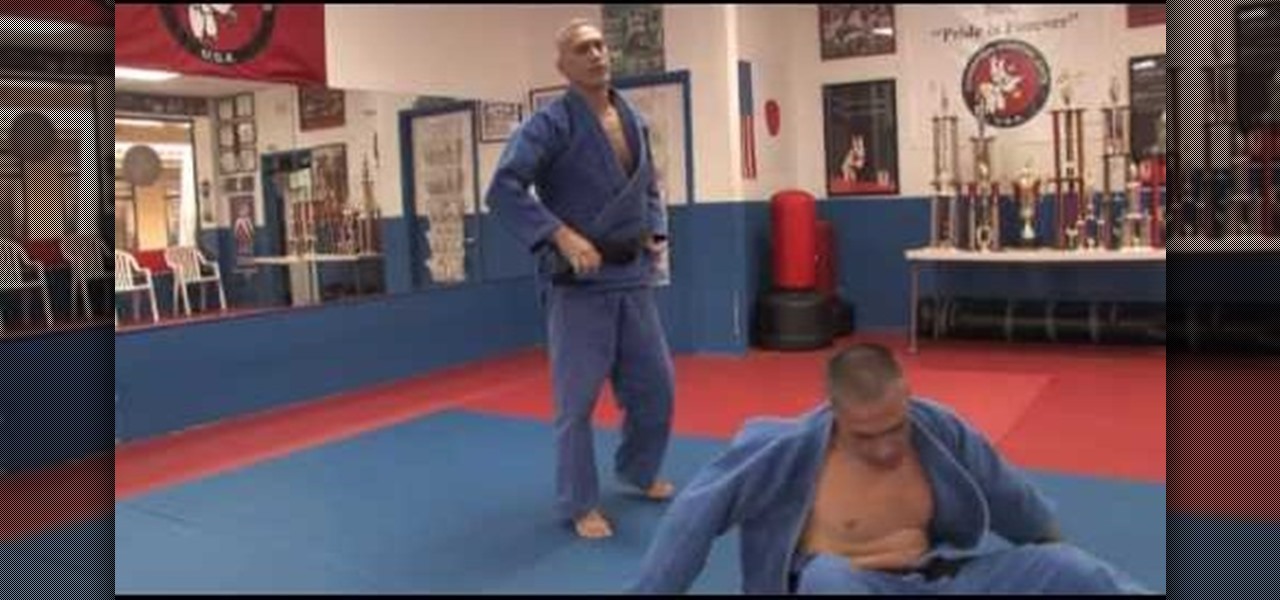
In this video tutorial, viewers learn how to do the major outside foot reap in judo. This task is very easy, simple and fast to do. Begin by grabbing onto the opponent's arm and shoulder. Then step in towards the opponent and pull the opponent towards you. Now bring out your leg and sweep the opponent by push back their leg. This can be done on either right or left side. This video will benefit those viewers who are interested in martial arts and self defense, and would like to learn differen...
In this video tutorial, viewers learn how to do a Kyokushin/kickboxing low kick combination. Begin by making a low kick to the opponent's inner thigh and instantly punch/push to make distance. At the same time, position yourself to the opponent's side. Then perform a low kick on the opponent's front upper leg. Bend your knees when kicking for more power and prevent your opponent from closing in. This video will benefit those viewers who are interested in learning martial arts and self defense...
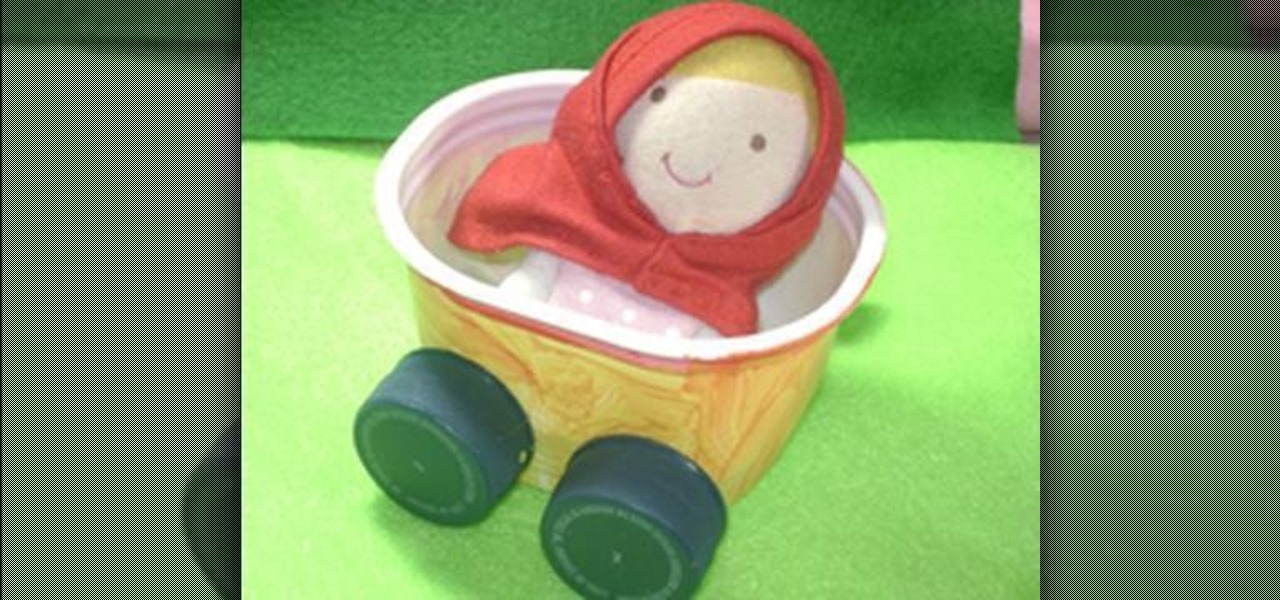
In this video tutorial, viewers learn how to make a recycled potato container car. The materials required for this project are: a recycled potato chips, half of a skewer stick, 4 recycled plastic soda caps, glue and a sharp pencil. Users may also need paint, brush and string. Begin by peeling off the label of the container and poke 2 holes on each side of the container. Then apply glue onto 2 of the caps attach them onto the ends of a skewer. Now put the skewers through the holes of the car a...
Part of the beauty of summer is the stark contrast between day (hot, sunny, bright) and night (chilly, starry). While loads of makeup tutorials can be found that will teach you how to get the "summer glow" and infuse your face with more bronzer than Mr. Armani has ever encountered in his lifetime, gorgeous summer nights are often neglected as a beauty inspiration.
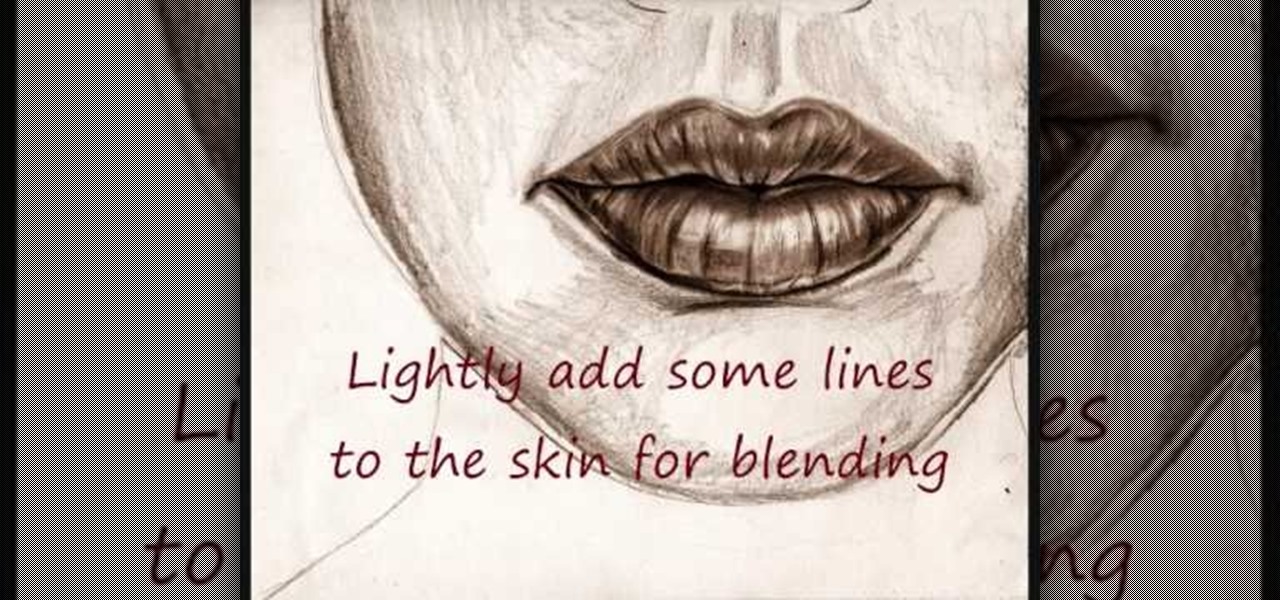
In this video tutorial, viewers learn how to draw lips. Begin by drawing a horizontal line for the mouth and draw a Mickey Mouse shape in between the line. Then sketch the upper lip with the 2 smaller circles on top and draw the lower lip with the large circle as guidelines. Now users may draw the rest of the face. Then darken and define the upper and lower lips. Now lightly sketch some lines on the lips to show depth. Then darken and shade the lips. This video will benefit those viewers who ...
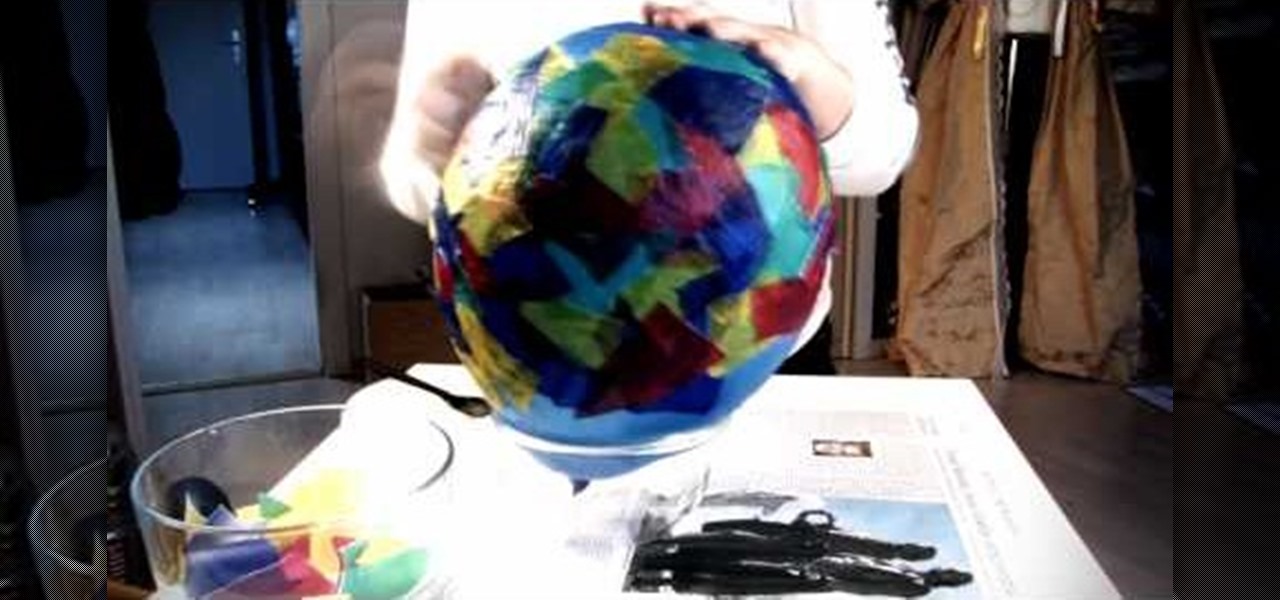
In this video tutorial, viewers learn how to make a balloon lantern. The materials required for this project are: balloons, lantern paper, wallpaper paste, bowl and scissors. Begin by ripping the paper into small pieces and place it into the bowl. Then shake the bowl and blow up a balloon. Now put some paste onto the balloon and layer it with the lantern paper pieces. Then let the paste dry and pop the balloon. Remove the balloon and cut off the lantern edges. Finish by hanging it and add a c...
In this Fine Art video tutorial you will learn how to draw with basic shapes and apply them. The four basic shapes are spheres, cubes, cylinders and cones. A sphere is a three dimensional circle. On paper it will look flat without shading. Make sure you practice all kinds of circles. A cube is a three dimensional square. You can make a basic cube by drawing two squares and then join the corners. Cylinders are tubes or pipes. Draw two ellipses and join them by lines. If you are just starting o...
This video tutorial is in the Arts & Crafts category which will show you how to tie a decorative Door Knocker knot. Take a piece of rope and make a loop at the center with the left hand end of the rope over the right hand end. Now pass the right end above and through the loop to make a half knot. Twist the loop to make a figure of eight, pass the right hand end through the lower loop of the "8" and back through the upper loop. Repeat this once again. Now repeat these steps with the left hand ...
In this Fine Art video tutorial you will learn how to write the letter Q in calligraphy copperplate. Hamid Reza Ebrahimi shows you how to this using a Brause & Co No 86 nib, Persian traditional black calligraphy ink, Brause marbled penholder and Persian leather pasteboard and Steinbach pasteboard. To write the capital "Q", dip the nib in to the ink, then starting at the 2nd horizontal line, write upwards touching the top line. Then continue writing downwards till you touch the 4th line and no...
In this video tutorial, viewers learn how to make a Hello Kitty princess mirror. The materials required for this project are: epoxy glue, tweezers, pendants, gems and a plain mirror. If the mirror has a logo, you can remove it by rubbing over it with some nail polish remover. Begin by mixing the epoxy. Then stick the Hello Kitty pendant and a pearl heart on the top cover of the mirror. Use a stick to apply the glue and tweezers to place the heart on the mirror cover. This video will benefit t...
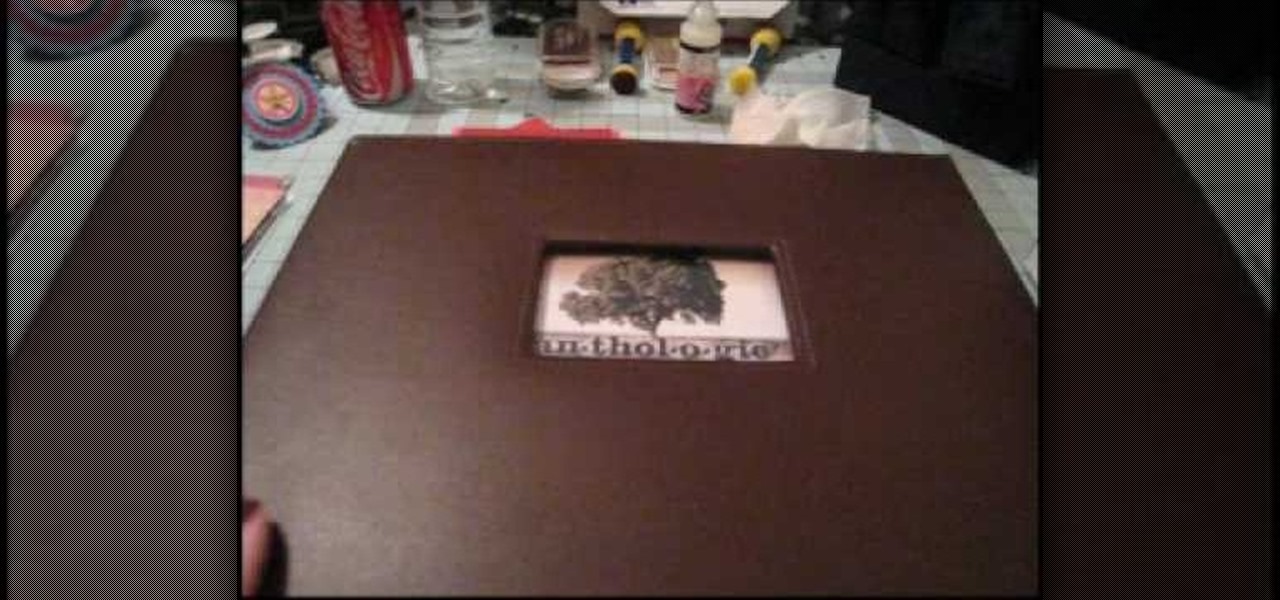
In this Arts & Crafts video tutorial you will learn how to use non-standard page protectors when scrapbooking. It is a tip on getting a large number of photos in an album without taking up too much space or using too many supplies. You can get 12 x 12 page protectors in terms of size but with pockets for 4 x 6 photos. This way you will have 6 photos on each side of the protector. Or maybe you put 5 photos and a card on one side. If you don't want to mess around with extra page protectors, you...
Seriously gals, how easy is this? Unless you're a bum living in a box under a bridge, you can probably muster up the simple tools needed to make this makeup organizer. All you need is Elmer's household cement and six office stamper covers.
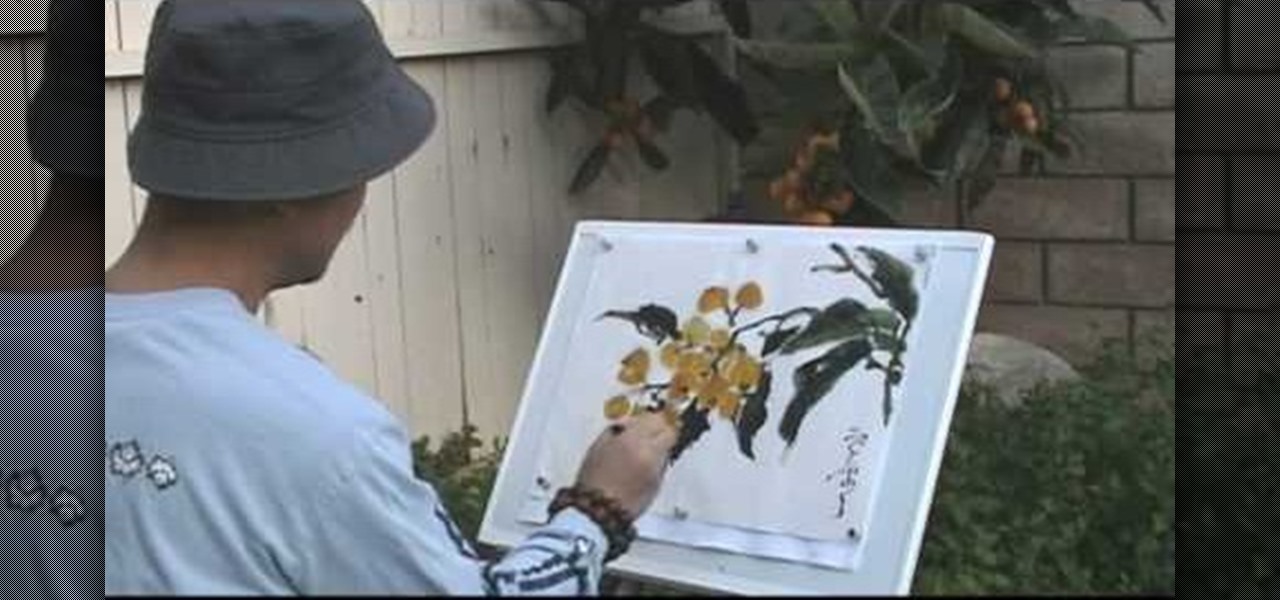
In Chinese watercolor paiting, static subjects like cherry blossoms and peach trees never go out of fashion because they represent the teeming life and beauty of nature that most Chinese watercolor artists enjoy representing.
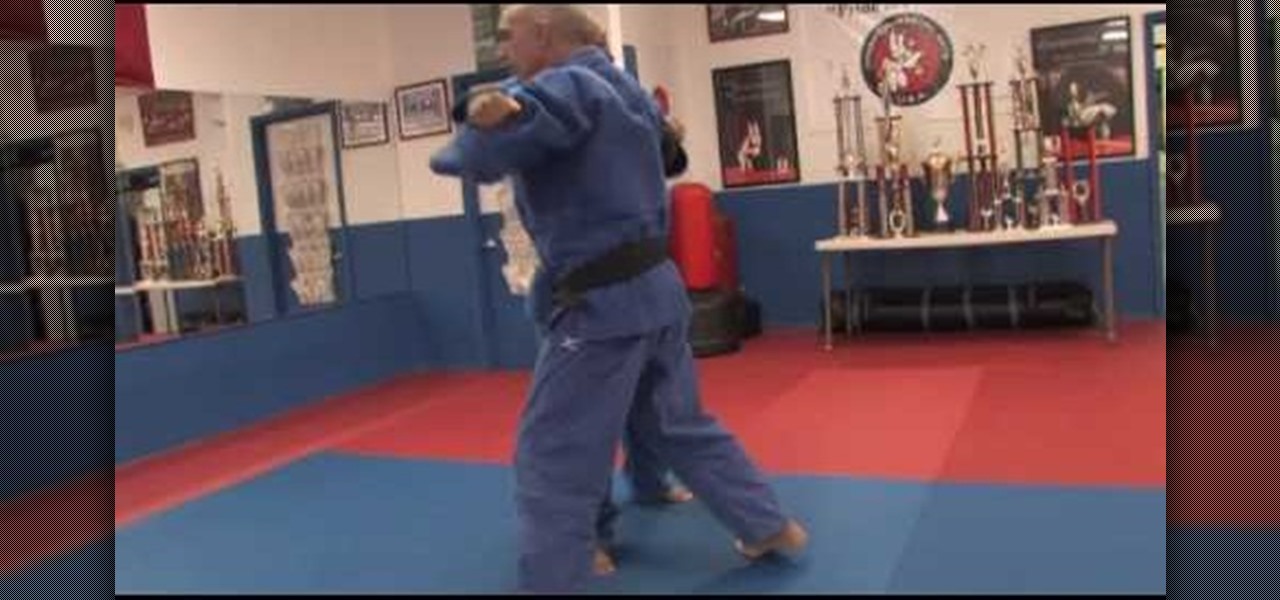
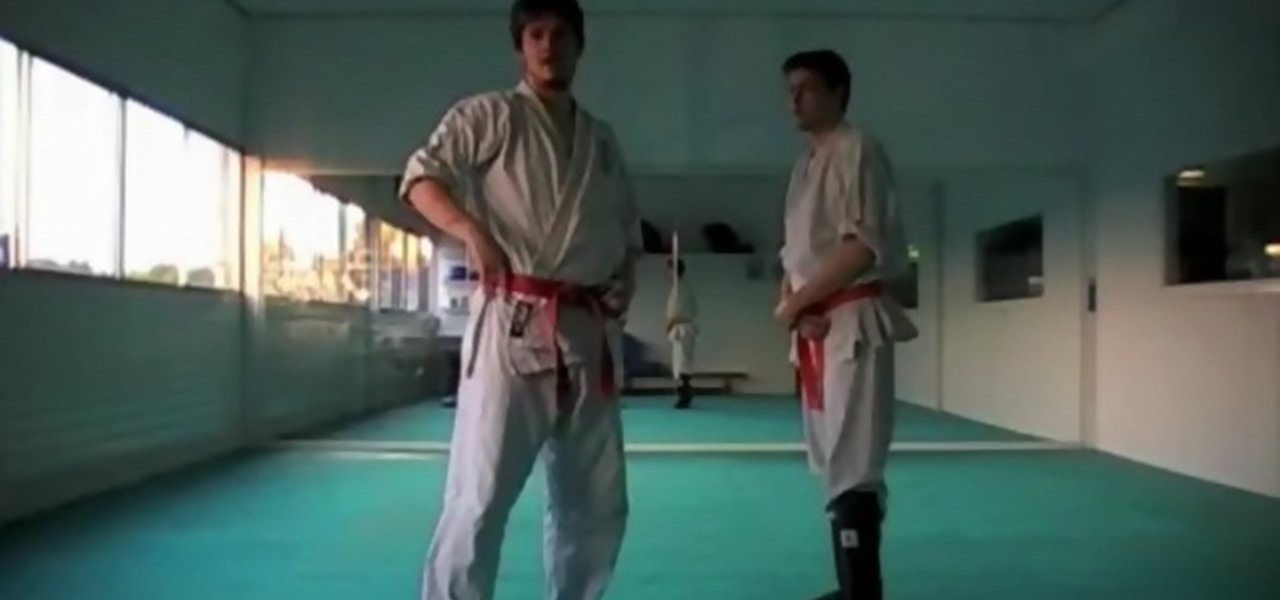
In this sports video tutorial you will learn how to execute a two handed grip shoulder throw. Sensei Angel Perez from Champion Martial Arts demonstrates this. Grip the opponent's right lapel with your right hand and with your left hand grip the opponent's right sleeve under the elbow. Keep your right foot in front and get your right elbow under the opponent's right shoulder. Then step back, bend your knees and throw the opponent over your right shoulder while continuing with the grip. The sam...
In this Arts & Crafts video tutorial you will learn how to sew a blind hem. Use a blind hem stitch when sewing the bottom hem of your Roman shade. It is very easy to do. For this you will need a sewing machine that has blind hem stitch already programmed in to it and a blind hem foot. Hem your fabric and pin it. Make sure the pointed ends of the pins are pointing outwards. Lay your fabric with the hemmed side facing up and the hemmed side towards the pressure foot. Then flip the hem upside so...
In this Arts & Crafts video tutorial you will learn how to tie a Padlock style decorative knot. Padlock knot is a clever way to achieve the look and function of a padlock without having to bother about the key. Take a piece of rope, bend it in the center and make two loops on either side of the rope. Ensure the working end is over the rope in the left side loop and under the rope in the right side loop. Now overlap both the loops so that the left side loop is over the other loop. Now pass the...
In this Arts & Crafts video tutorial, Ana Maria, Origami artist, will show you how to fold an origami paper pyramid. For this you will need a square piece of paper; preferably colored. Fold the paper in half, open it up and fold in half in the other direction. Open up and fold all corners to the center point of the paper. Now fold it in half in both directions. Open up the last fold and fold one of the edges inwards. Open up again, unfold the adjacent flap and lock the flap down as shown in t...
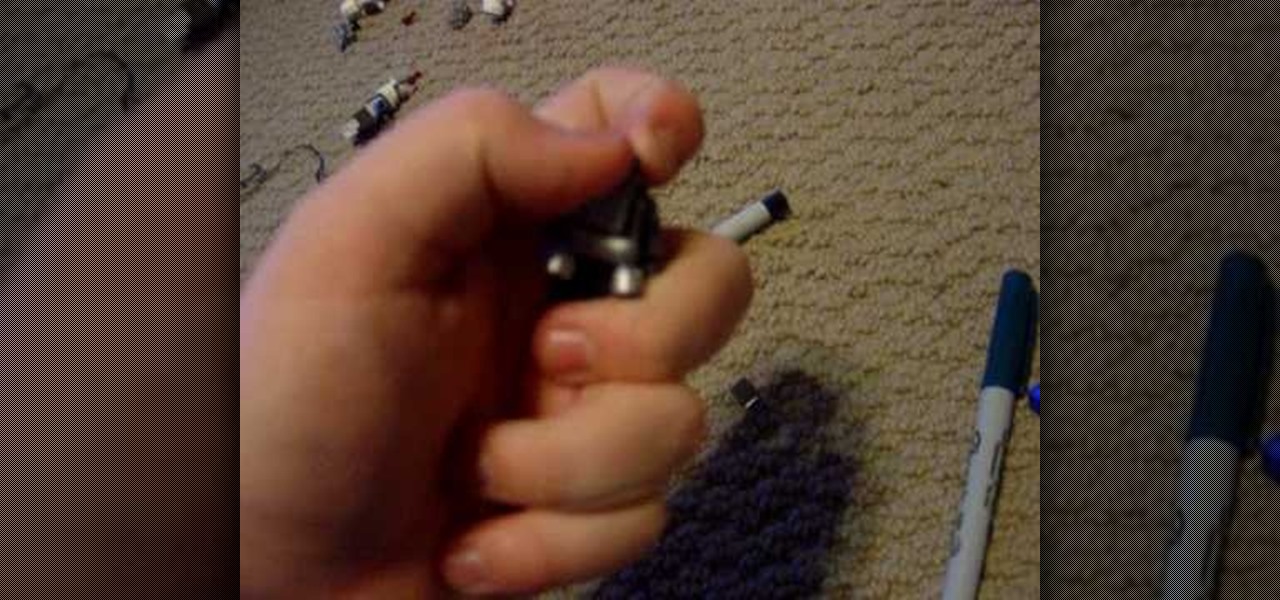
Jango Fett and his father Boba from Star Wars are arguably the two most famous bounty hunters in all of modern Western art. This video will teach your how to make a custom Lego minifigure of Jango, using only simple hobby tools and patience. This is one of the more difficult Lego minifigures on the site, but then again, he's also one of the coolest, so try it out!
Remember film? With Adobe Illustrator, it's easy to make an old-timey film strip icon perfect for a video application. This clip will show you how it's done. Whether you're new to Adobe's popular vector graphics editor program or a seasoned graphic arts professional looking to better acquaint yourself with the new features and functions of this particular iteration of the application, you're sure to benefit from this free software tutorial. For more information, watch this designer's guide.
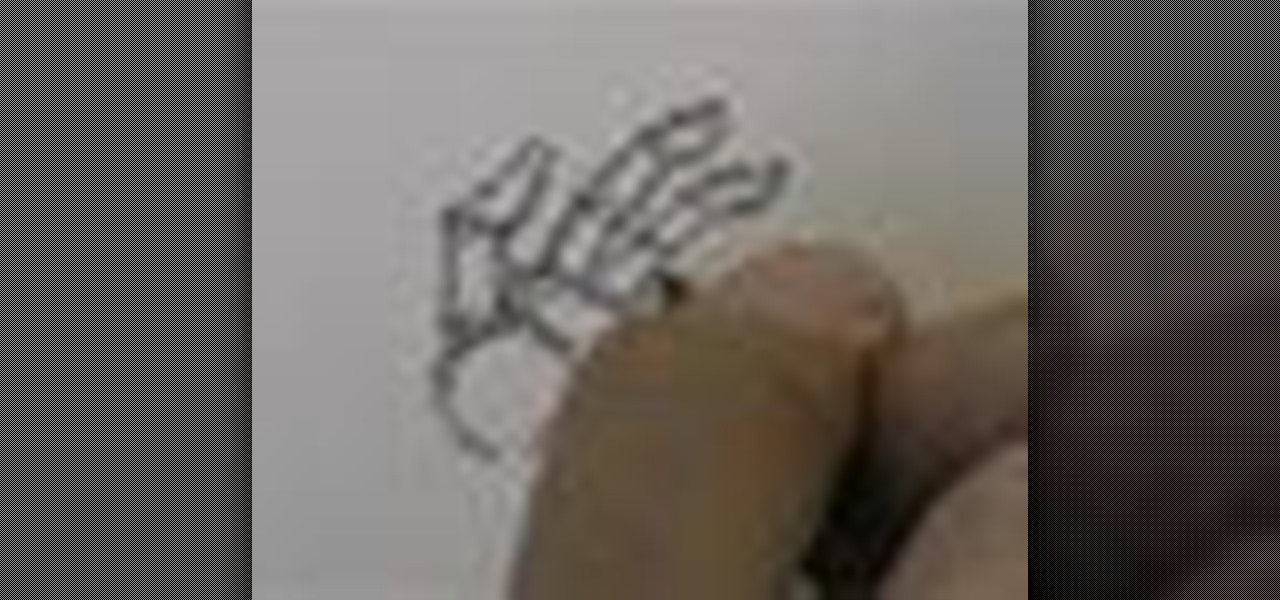
The nose is a focal point of someone's face. In this tutorial, learn how to master the art of the "comic book nose" so that your characters really come alive.
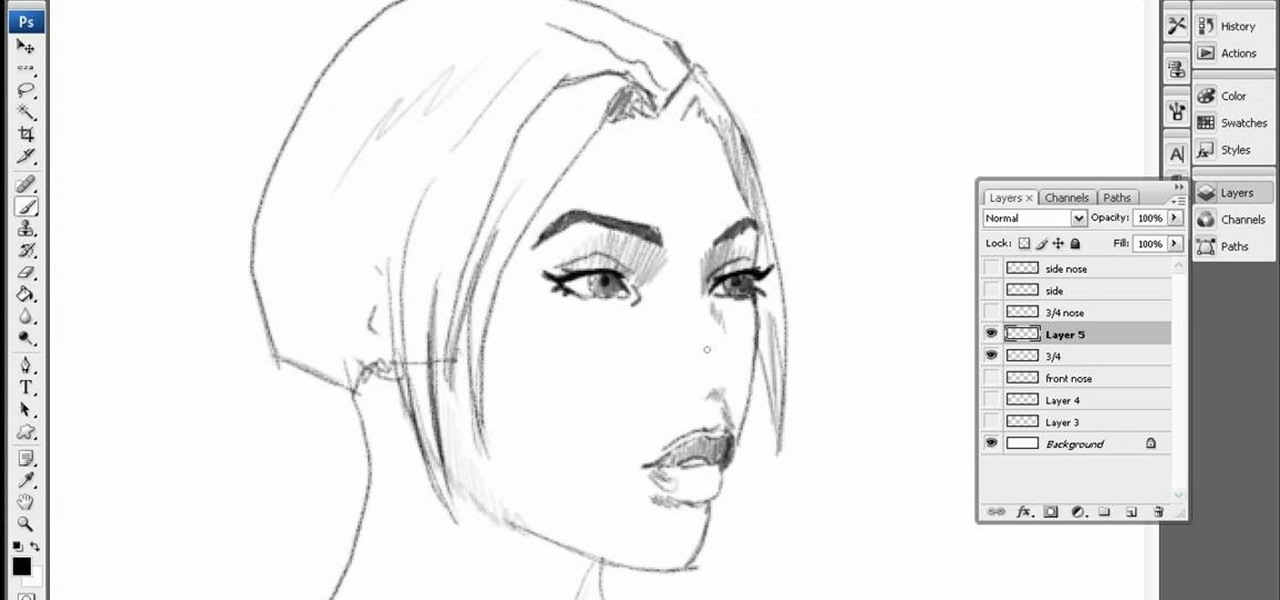
Drawing the human head is a challenging task in any artistic medium. This two-part video demonstrates and explains how to draw heads and faces from a lot of different angles using a computer art program. Practice the techniques from this video and even if you are a novice artist you will be drawing perfect heads in no time!
In this math tutorial, you'll be trained in the arcane art of adding and subtracting rational expressions by finding the common denominator. A skill many discard upon leaving middle school, it is used by the villians who operate under the acronym "SAT" to test those caught blank minded and whose minds are unrationalized.
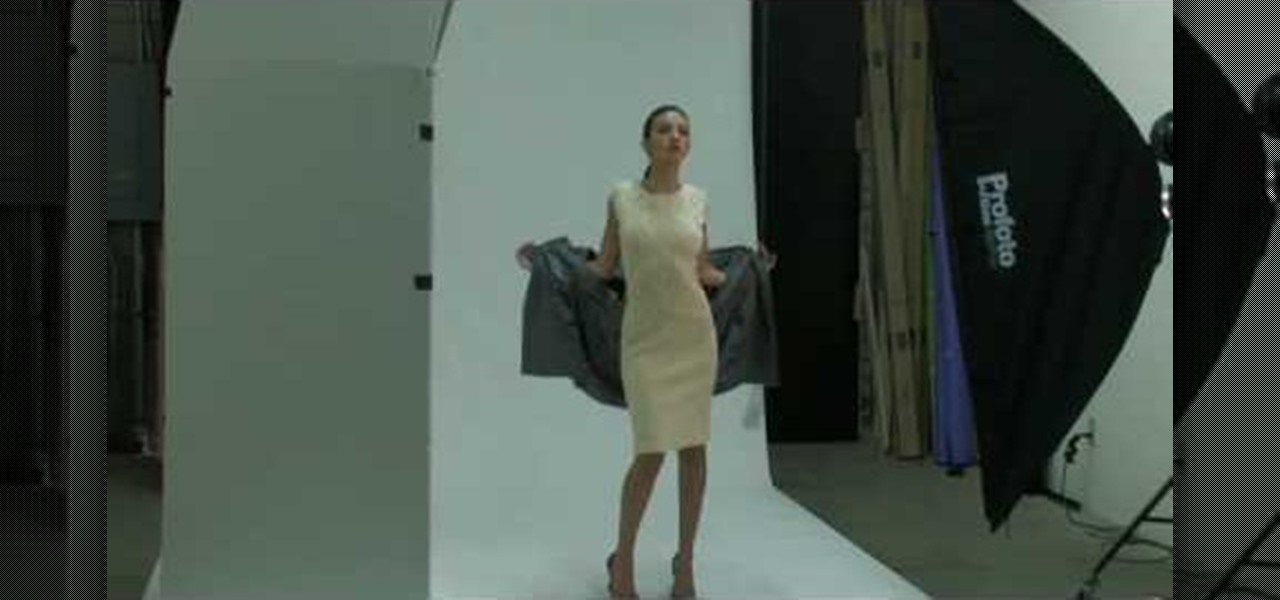
One popular way to use light in photography is with a three point lighting setup. In this tutorial, learn how to set up three point lights in portrait photography and get the most flattering shot of your subject. There is an art to making people look good and proper lighting is very important. So, if you have your equipment and are ready to start assembling it all, have a look at this instructional clip and follow the step by step to get started.
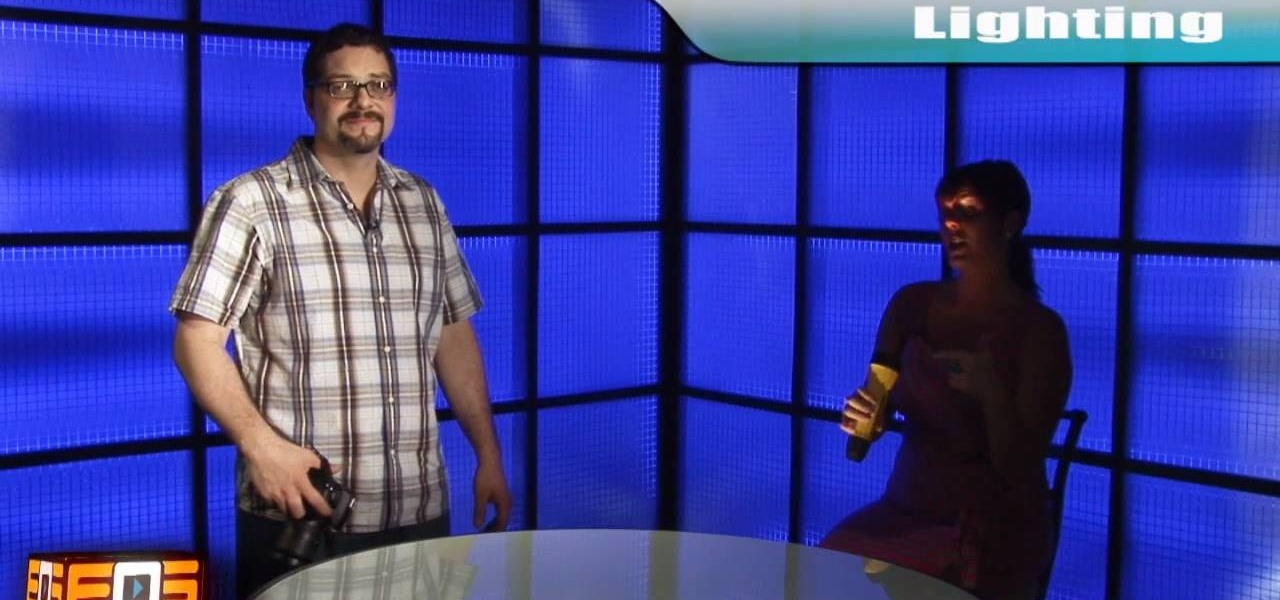
Lighting is very important to photography. The proper lighting can make your subject or scene appear in a totally new way. Whether you are adding, or eliminating shadow, using light to manipulate the way something looks, or just setting up for a flattering portrait, you will need to know some light basics. In this tutorial, Mark will show you how to set up lighting for a fantastic picture. You will learn seven different setups to make sure you have the right arrangement for your particular ne...
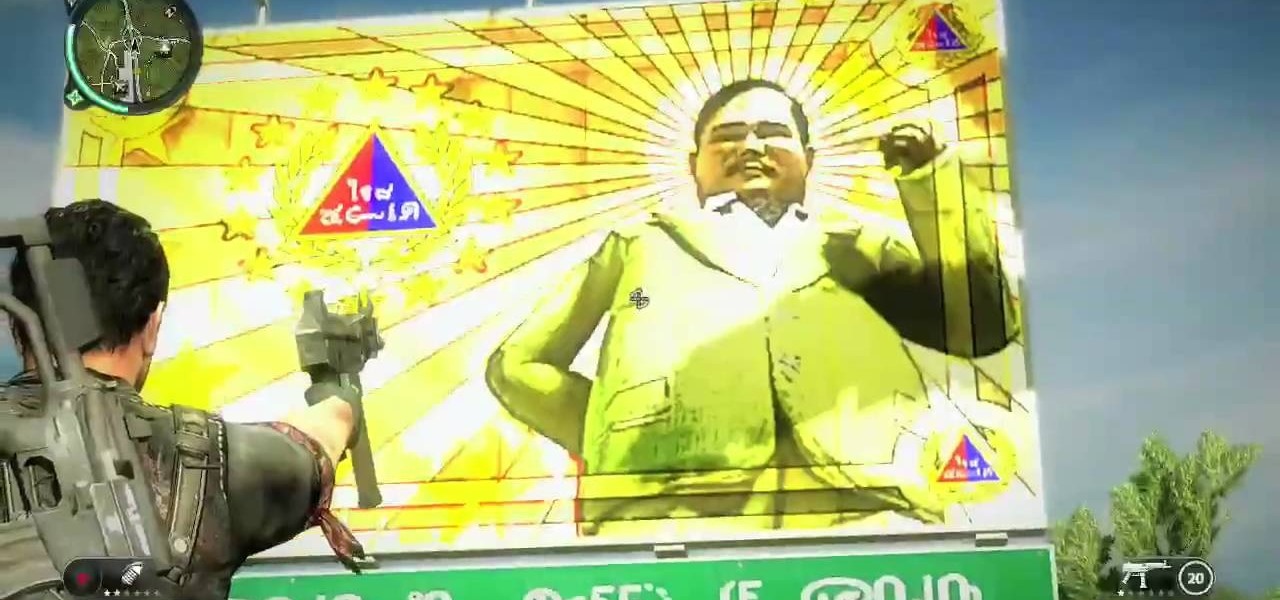
The cool thing about Just Cause 2, is not only do you play a shoot first, ask questions later type of character, but the game is stocked with a lot of hidden secrets. Or as they are referred to, easter eggs. This video tutorial is presented by the guys at Achievement Hunter and they show you how to find the "Baby" Panay Moustache easter egg. It's easy to find and involves some interesting art. Enjoy!
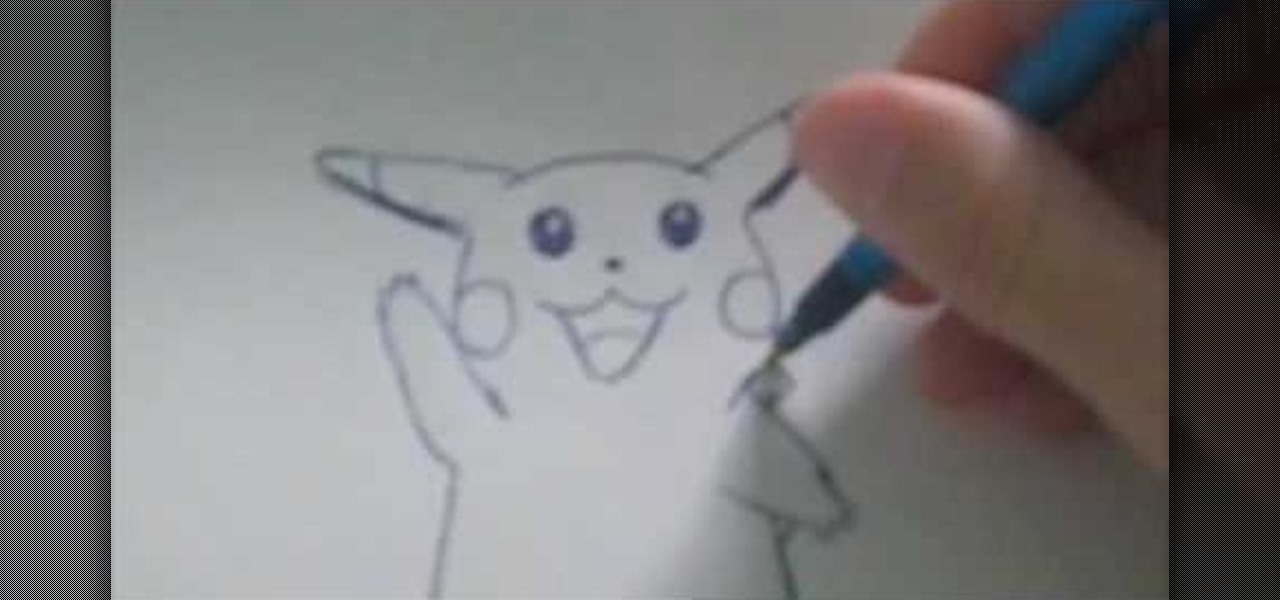
There are two different ways to draw Pickachu from Pokemon. There is old school Pika, from when Pokemon first debuted, and then there is new school Pika, which is probably the most famous version of this little guy.
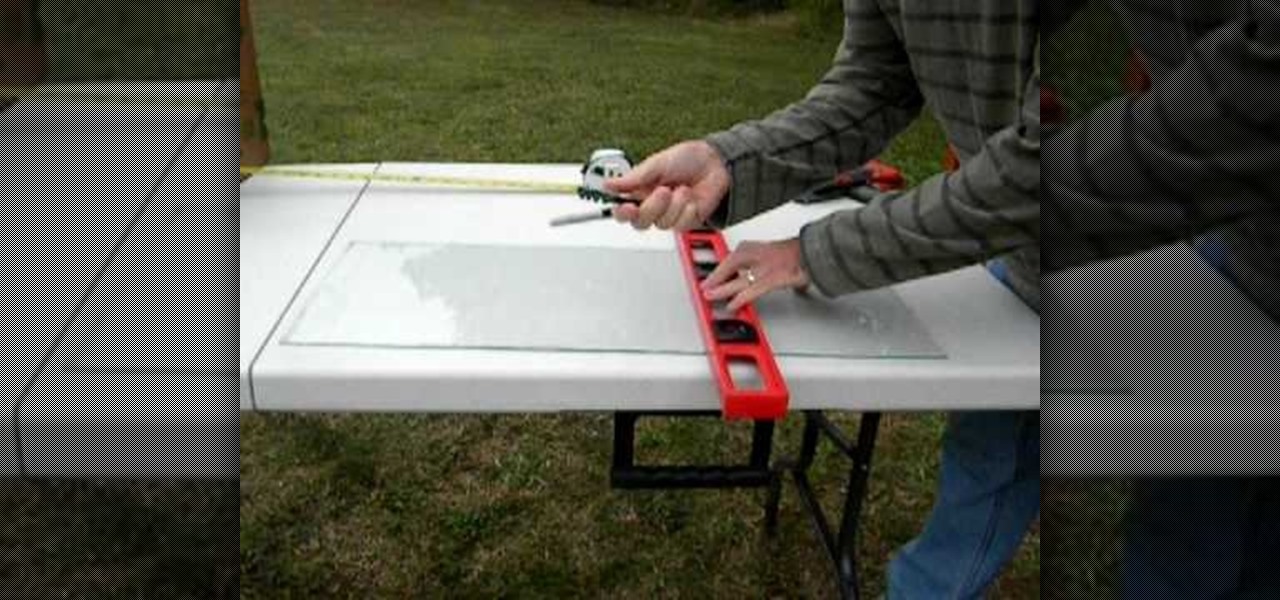
When you begin a hobby like custom framing or any other type of art involving glass, you will need to know how to safely cut and shape glass without breaking it.
Are you an aspiring crowd entertainer? Balloon art s a great way to lure a crowd. In this video, learn how to make a very basic pirate sword, perfect for beginners.
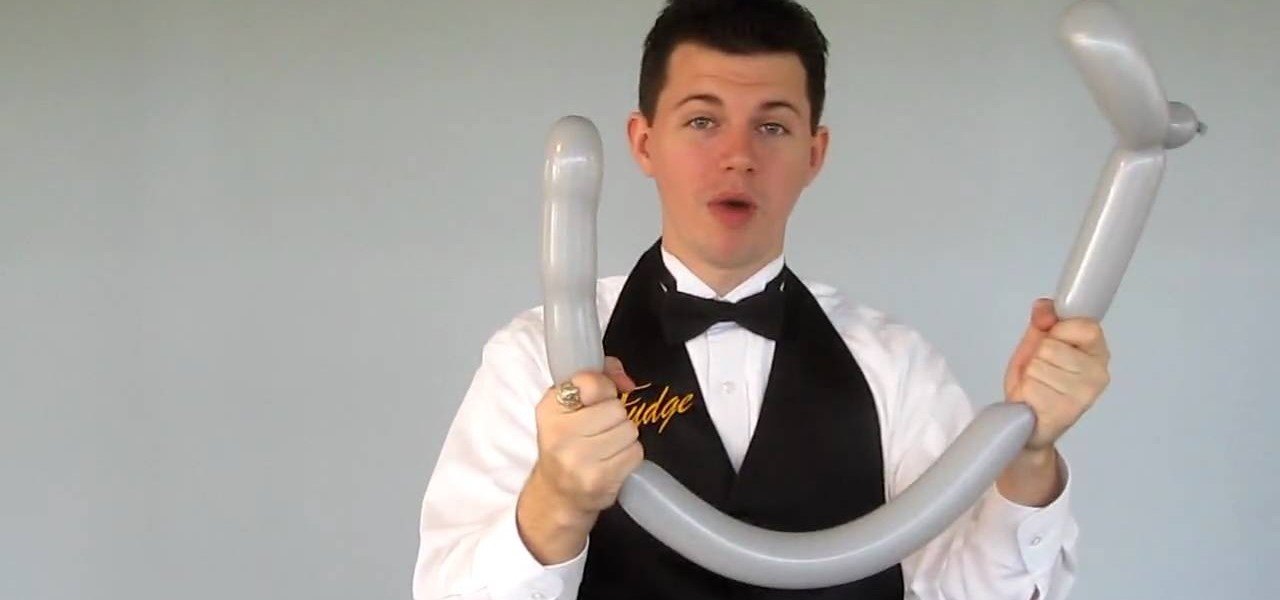
Balloon masters, hone your skills! In this free balloon art tutorial, learn how to make one of the most basic of swords: the 3 fold, 1 twist sword. This sword is perfect for any crowd, of any age. Your Balloon Man, Mr. Fudge, is full of balloon tricks! Be sure to find other balloon videos on WonderHowTo from Mr. Fudge teaching everything from animals to planes! In a few twists and a few ties, you'll be an expert balloon artist in no time!
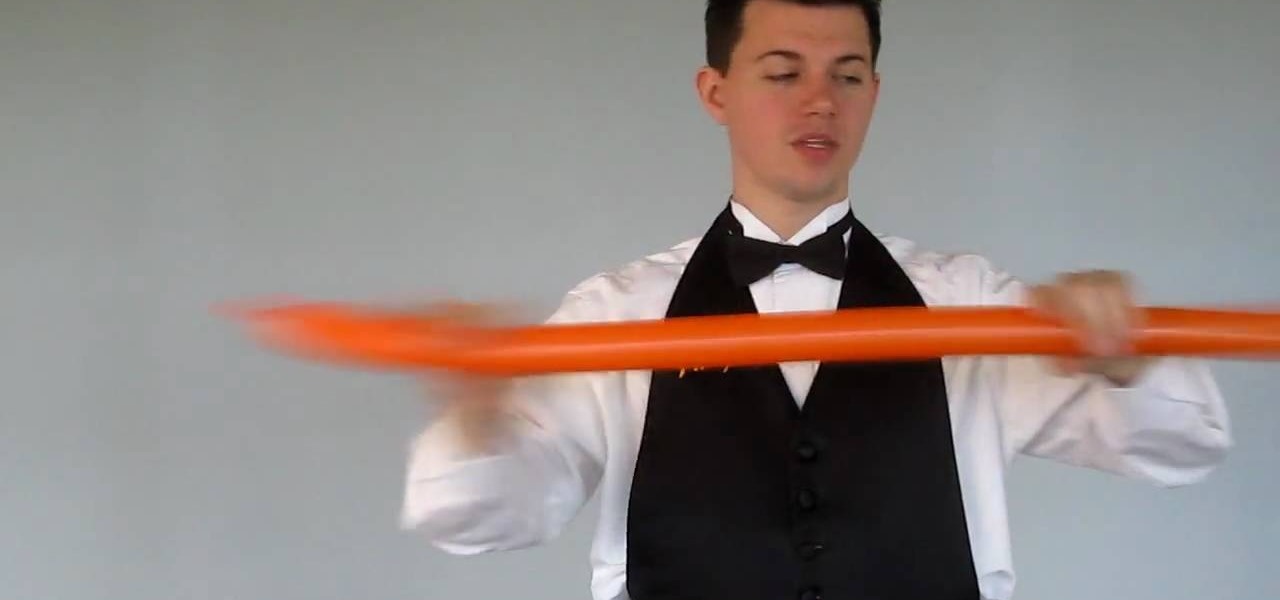
In this free balloon art tutorial, learn how to make a basic balloon sword: the 2 fold, 1 twist sword. This is very simple balloon project, perfect for beginners! Your Balloon Man, Mr. Fudge, is full of balloon tricks! Be sure to find other balloon videos on WonderHowTo from Mr. Fudge teaching everything from animals to planes! In a few twists and a few ties, you'll be an expert balloon artist in no time!
The first thing to do is open a new document with Adobe Illustrator. Inside the document, make a box, width 200 pt, height 20 pt. Click the bottom right corner with your mouse and hit delete. Then hold down the top right with shift, and tap the down arrow once. Then, click bottom left point, hold shift, join the objects by half. Go to brushes pallet and create a new brush. Click the spiral tool. Use the up and down with the mouse to select range you would like. Select the art brush, and click...
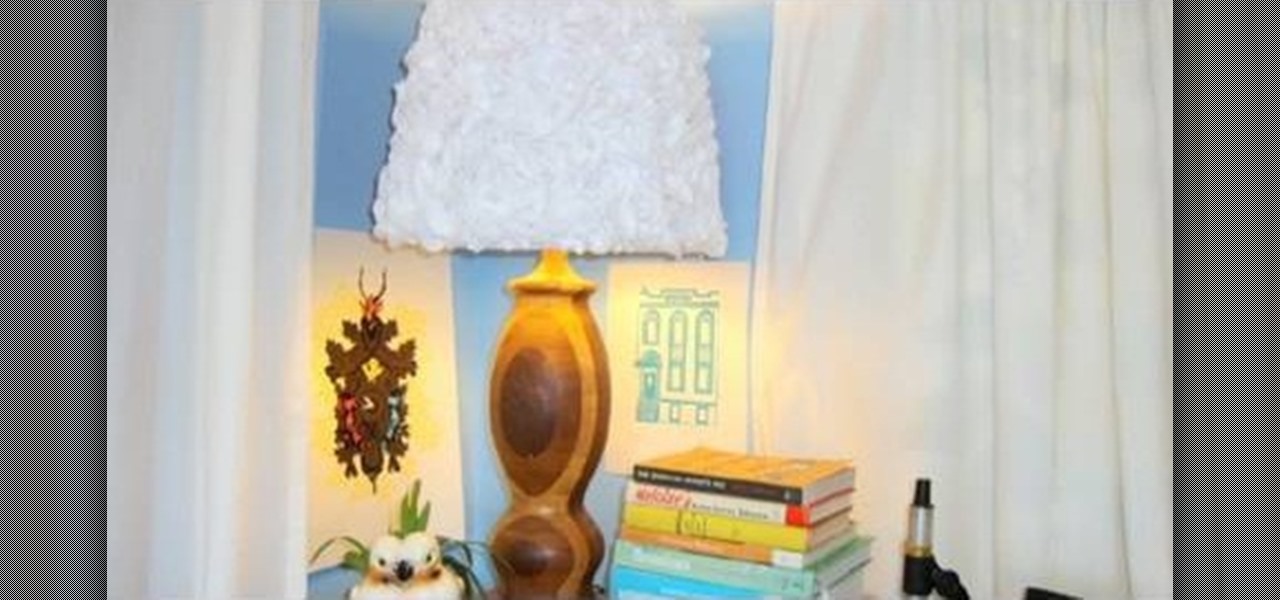
In this video tutorial, viewers learn how to upgrade an old lamp shade into a blossom lamp. The materials required are: 1 1/2 yard of felt, old lamp shade, bias tape, glue gun and scissors. Begin by folding the bias tape in half and iron it down. Then glue the bias tape from the half fold on the top and bottom of the lamp shade. Cut the felt into 3x3" square pieces and then cut them into circles. Fold the felt circle in half and glue it onto the lamp shade. Continue doing this for the rest of...