This is a video tutorial in the Arts & Crafts category where you are going to learn how to make mini album pockets. Take a 6 x 6 piece of card stock and cut it at 3 1/2. Now score it at the halfway mark and fold it backwards. Next score it at 1/2 from both longitudinal edges. Then you cut out along the 1/2 score line on one half of the card. Take a 2 1/2 " circle punch and punch a circle out of scrap paper. With this draw a semi-circle on the wider half of the card and watch the video for fur...

Tutting is one of the members of the larger Popping family of hip-hop dance styles, so named because the moves are inspired by the right angle heavy art of early Egyptians. It looks very cool and doesn't requires as much full-body coordination as many other dances, so learn it! This video will give you some tips for making your King Tut Style look more clean. It doesn't feature many new moves, but should make all your other moves look better.

The bohemian look has really been in recently. After all, with famous starlets like Nicole Richie and Jessica Szhor working long, messy waves, beaded headbands, and flowy floral maxi dresses, the trend looks good and we don't mind following along.

Remember the heyday of video games during the '80s when all video games were 8 bit and super pixelated? While we're glad to have video games that look so real we mistake them for reality sometimes, pixelation is still a cool way to add retro flair to any crafts project.
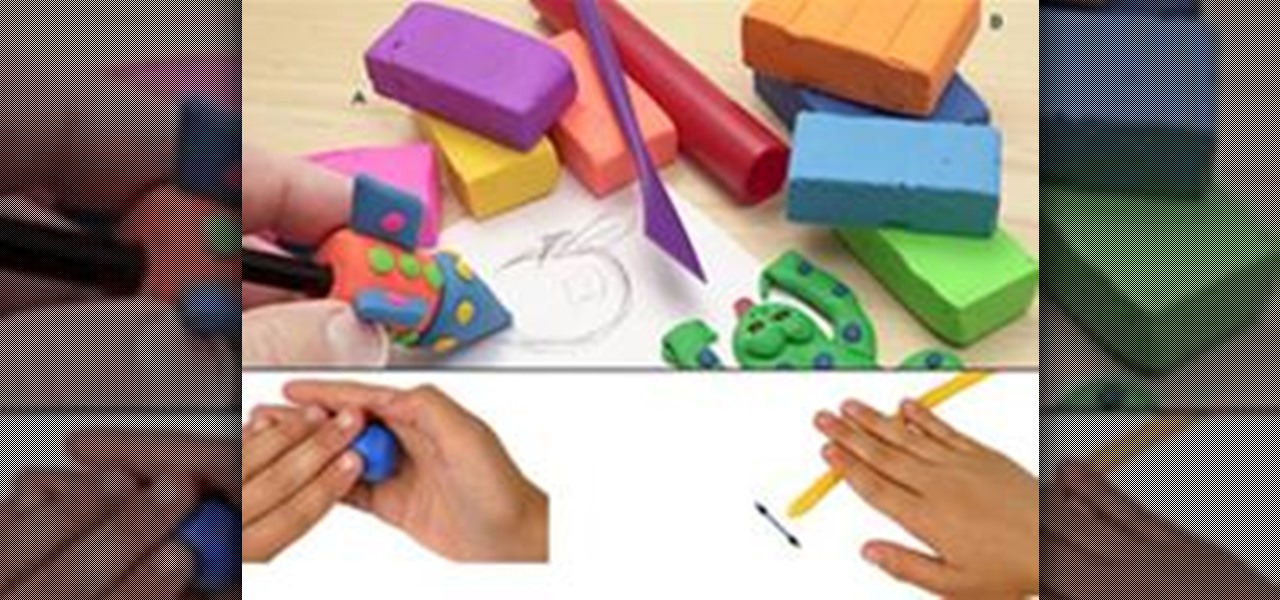
Polymer clay is an exciting arts & crafts medium. Actually, "clay" is a misnomer; it contains no true clay, but rather consists of tiny particles of polyvinyl chloride (PVC) combined with plasticizer, which is what makes it malleable like clay.
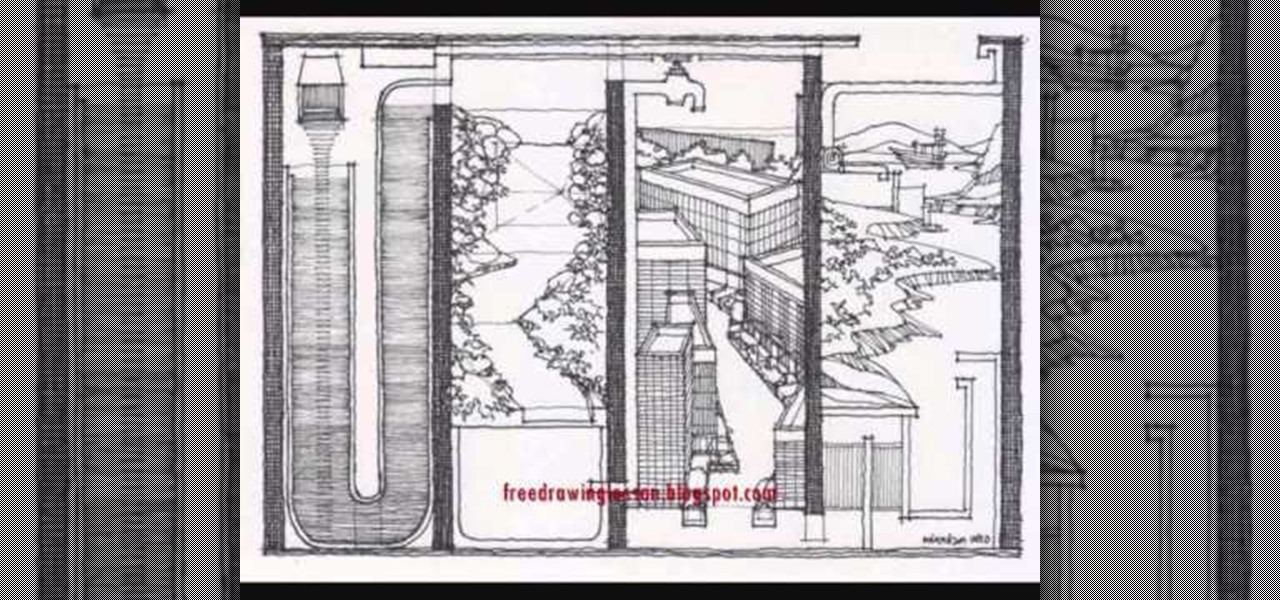
What's the best way to get better at drawing? Practicing, of course! When it comes to art, especially its more technical side of drafting, sketching out buildings in relation to a vanishing point or a suburban garden scene filled with lots of architectural elements increases your ability to draw more realistically.

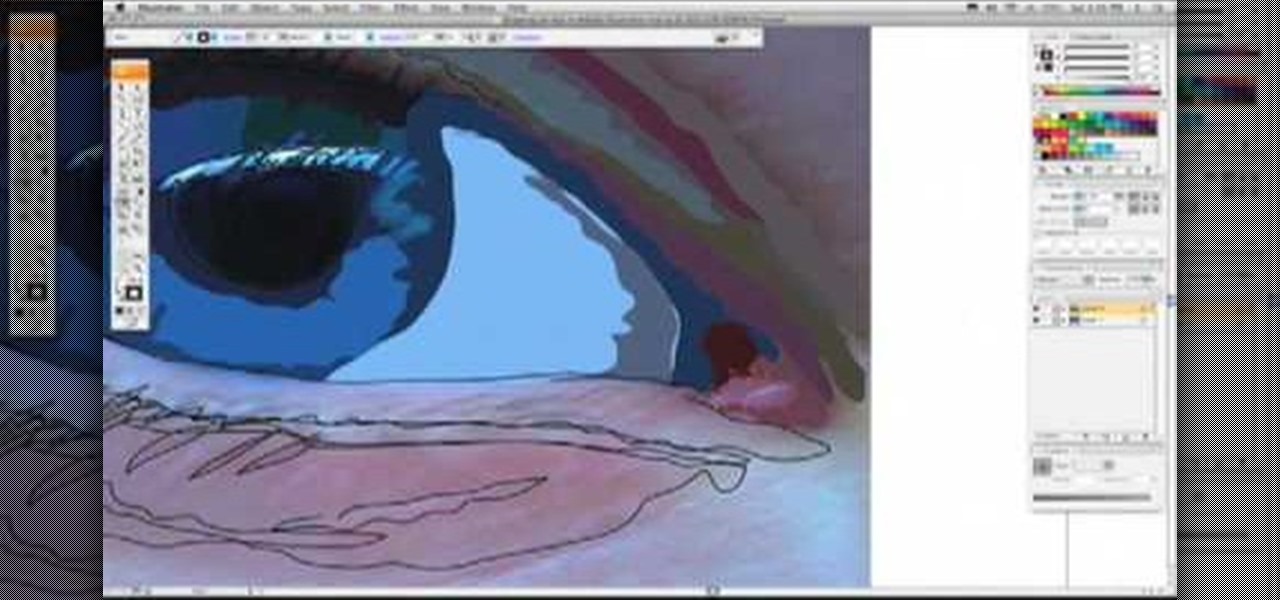
If you love Adobe Illustrator and are looking for an interesting and creative way really to bring the life out of your pictures, this video has an interesting twist. If you remember the movie, "A Scanner Darkly" and the art style that they used, it was quite impressive and unique and called rotoscoping. In this video Karl Gude goes into great lengths showing you his method of tracing the picture and then adding the right colors all the way to the finished product.
In this video, we learn how to change The Windows 7 Start Orb. First, you will need to download Universal Theme Patcher to your computer, which you can find at: Freeware Geeks. Once you download this, install it to your computer and make sure you choose the right type to download. Also, download the registry files from MediaFire, click the "take ownership" option when you right click on this, then double click on it. When the window comes up, click to add the ownership option. Now, go to the ...
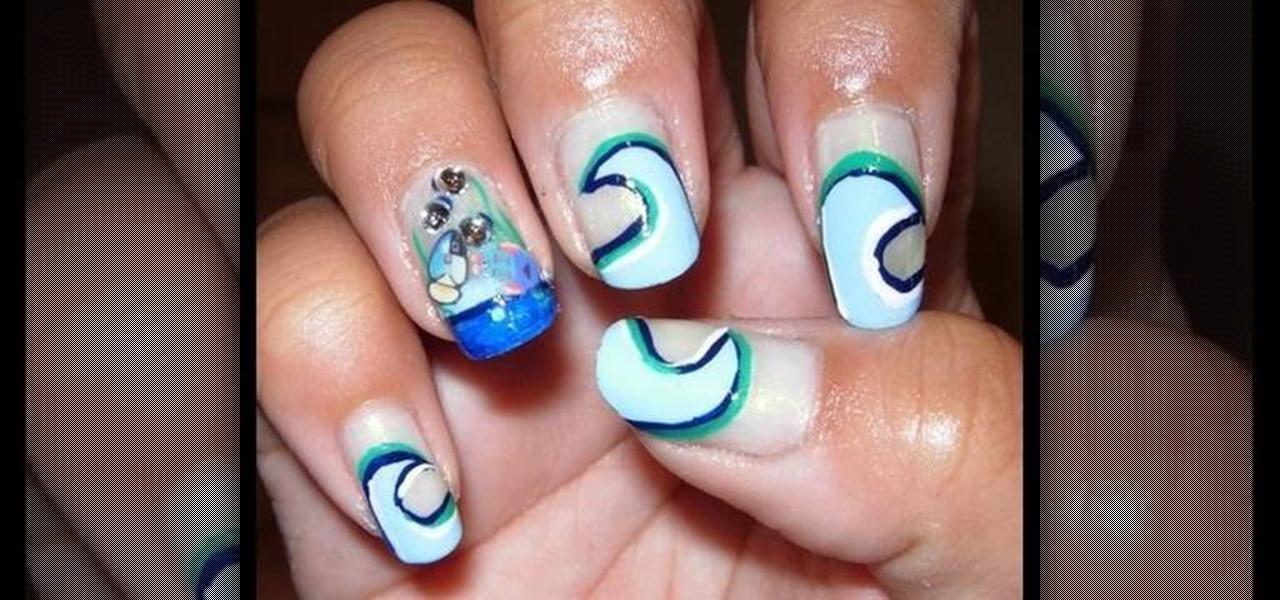
Not that we have anything against painting on an aubergine nail polish for a night out on the town, but why not get a little inventive next time you do your nails by creating unique designs? Become a nail Picasso by checking out this nail tutorial for creating nautical-inspired nails featuring ocean waves, jumping fish, and pretty rhinestone air bubbles.
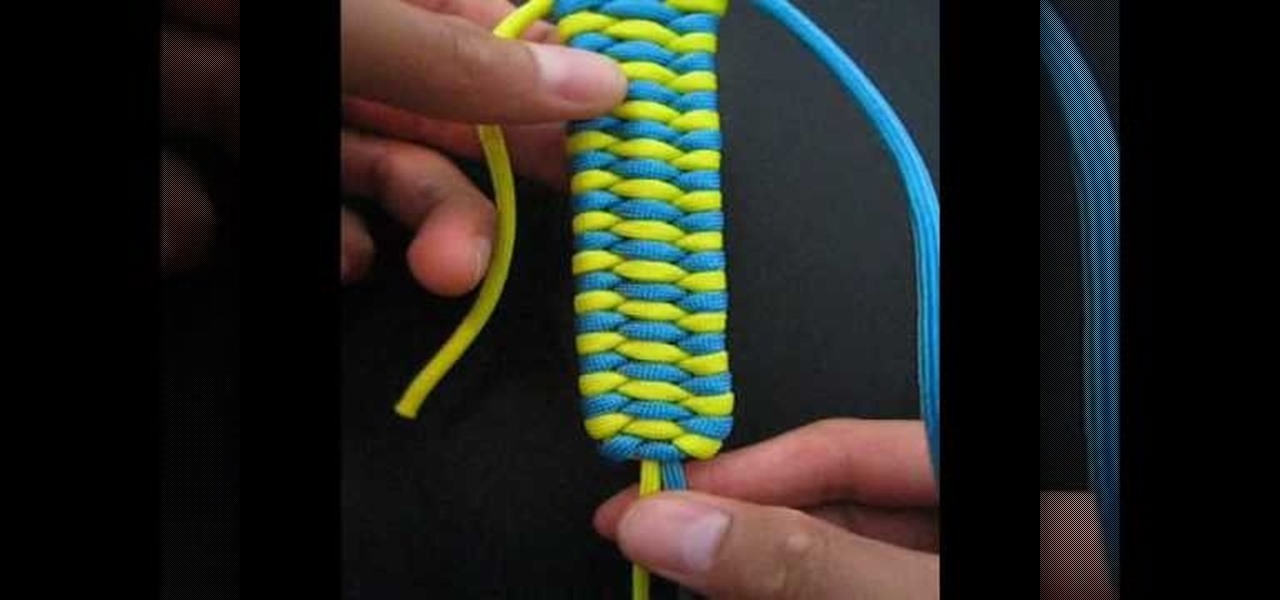
Who knew that knots could be their very own art form? According to TIAT, or Tying It All Together, knots can be sexy, sensual, and beautiful. And we're totally getting that by the looks of this pretty triobite bar.
Origami is a lot of fun (okay, and also a lot of frustration), but what often turns beginners off from the Japanese art form is simply that it requires special origami tissue paper. While it's true that thin paper made exclusively for origami is preferable for any origami project, you can substitute plain old printer paper instead if you're low on money or just out of origami tissue paper.
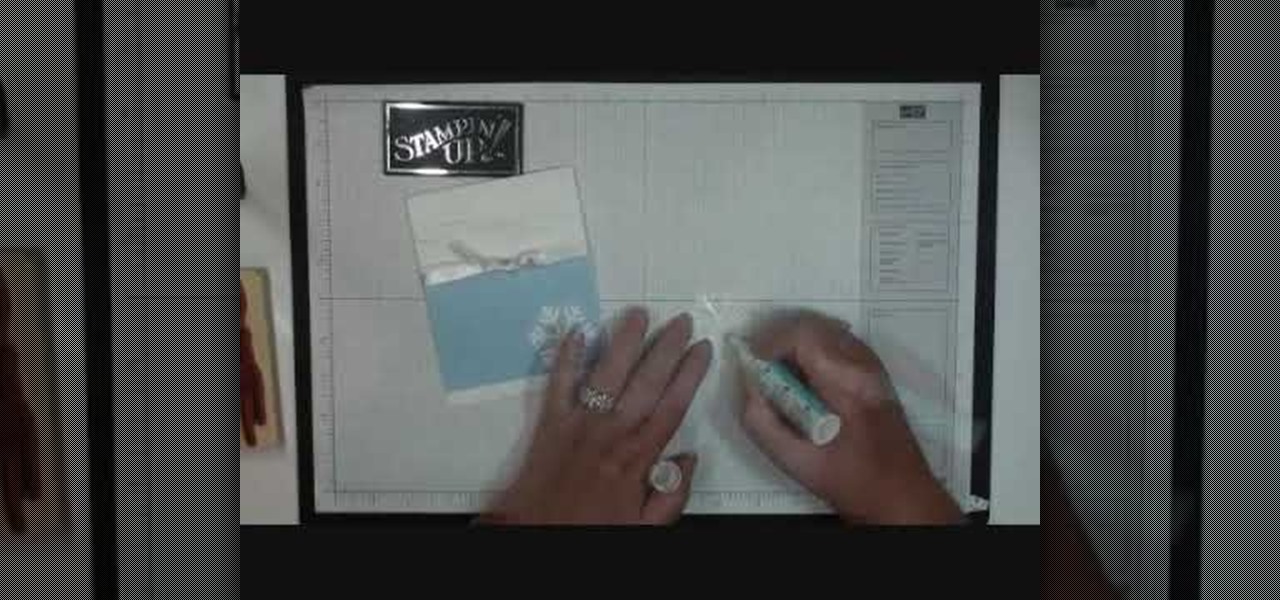
This video tutorial is in the Arts & Crafts category where you will learn how to make a quick and simple Christmas card with Stampin' Up! You will need the bashful blue classic ink, a bashful blue cardstock cut at 3" x 4 1/4", a piece of whisper white cut at 4 1/4" x 11" and scored at 5 1/2", a piece of whisper white organza ribbon and scrap cardstock for two snowflakes. Cut out the snowflakes with the jumbo snowflake punch. Stick the bashful blue on the whisper white cardstock. Using the hea...
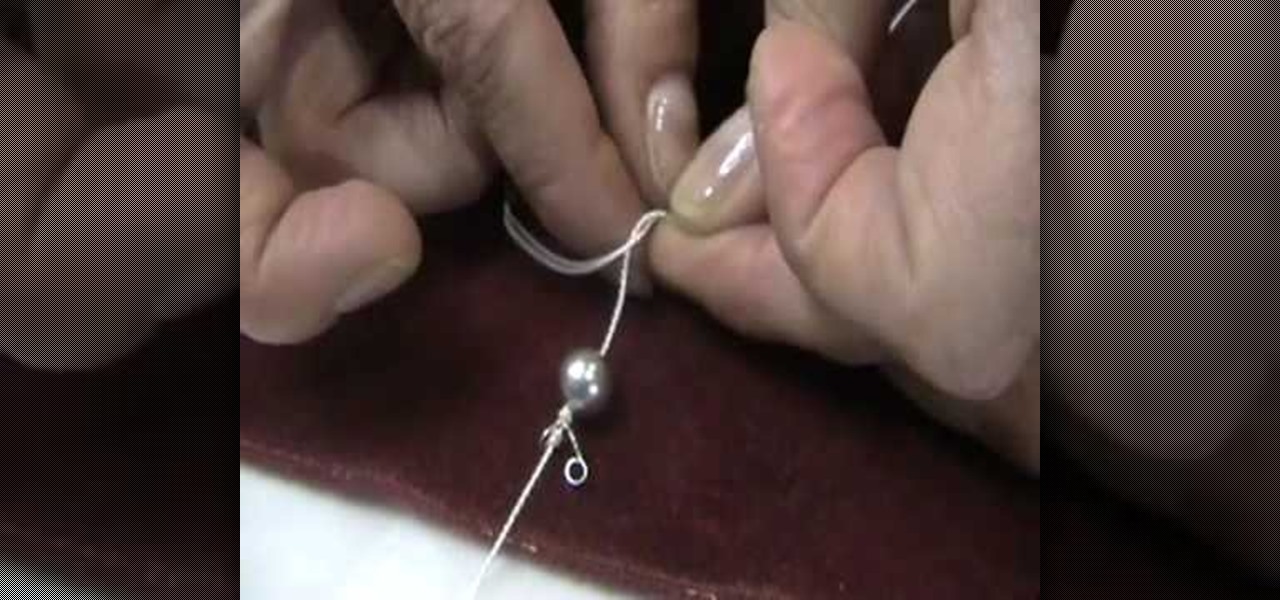
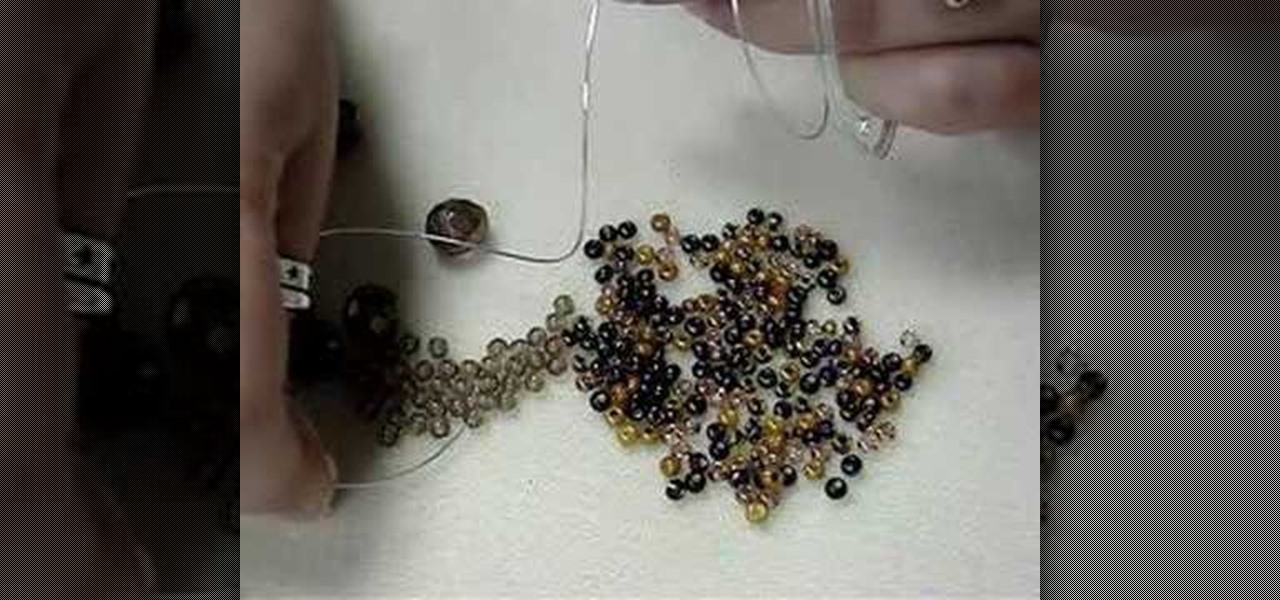
This video tutorial is in the Arts & Crafts category where you will learn how to knot pearl beads from Brenda. Pearl knotting is making a simple knot between each pearl on a strand. They not only give a professional look, they also keep the pearls in place and prevent them from rubbing against each other. After you have strung the clamp to the end of the string, tie a double over head knot and string your first pearl. Make a simple knot on the string behind the pearl. Grab the string with a t...
This video tutorial belongs to the Arts & Crafts category in which Maricela is going to show you how to apply a crimp bead cover. First take a crimp bead cover. Now slide it over the crimp bead through the open jaw. Next take your crimp forming tool and applying a slight pressure to close the crimp bead cover around the crimp bead. If too much pressure is not applied, the crimp bead cover will close evenly around the crimp bead and the effect will be that of a seamless round bead. And that's ...
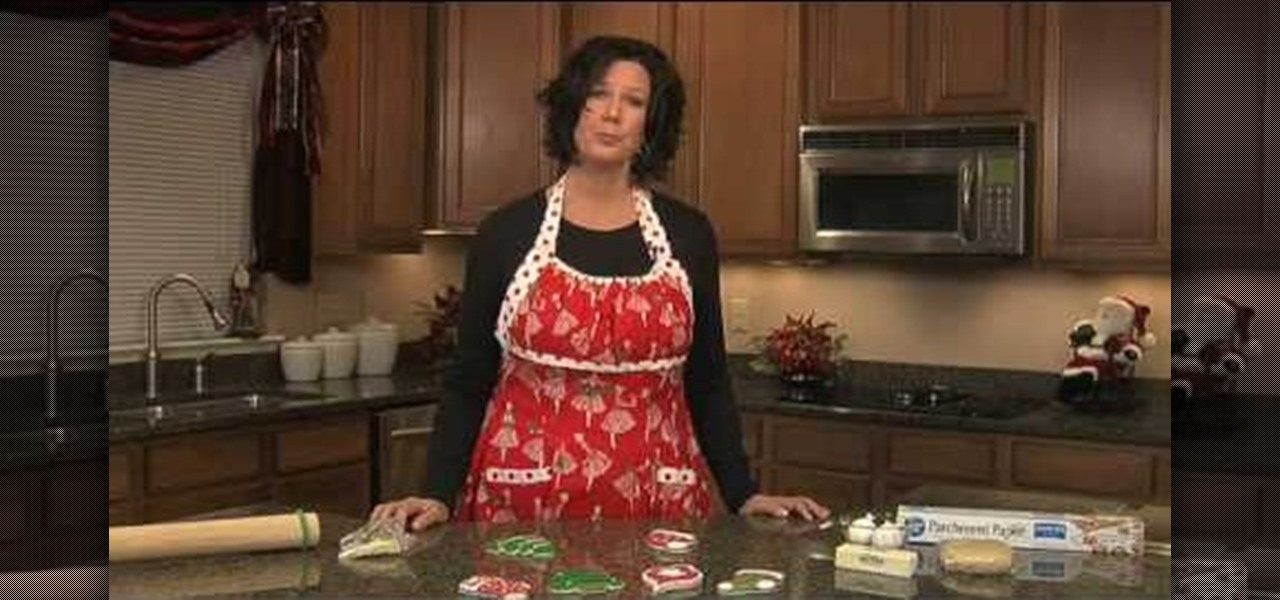
Ask any pastry chef and he/she will tell you that cookie and cake decorating is an art. Instead of paint you have all different types of icing and fondant, and instead of brushes you have your dexterous fingertips. And all these things go toward creating a crowning masterpiece.
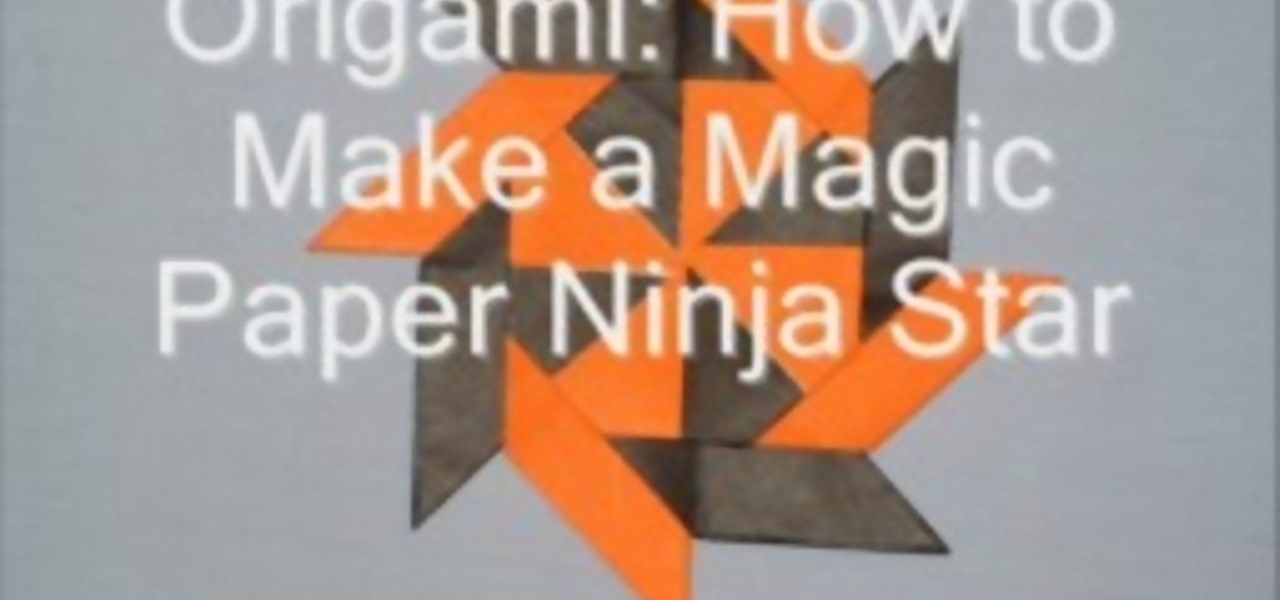
This video tutorial is in the Arts & Crafts category where you will learn how to make a magic paper ninja star. For this you will need 8 sheets of square paper, all of the same size. Fold one sheet in half, open it up and fold both corners of one edge inwards along the centerline. Now fold the whole sheet in half inwards. Then fold the lower part in a triangular pattern, make a crease and open up the sheet. Fold the lower part inwards from the center and collapse the sheet over the fold. Do t...
In this video tutorial, viewers learn how to make a colorful paper banner. This task is very easy, fast and simple to do. The materials required for this project are: construction paper, yarn, scissors and a hole puncher. Begin by folding the construction in half. Then fold it in half on again. Now cut pattern on the side edge of the paper and repeat this process for additional paper. Open the paper to reveal the symmetrical cut out pattern. This video will benefit those viewers who are inter...
In this video tutorial, viewers learn how to draw a chibi-style animation face. This task is very fast, easy and simple to do. Begin by drawing box-like face with any type of angle, depending on the character's emotion. Then add an ear. Now draw the eye. Make sure that the eyes are exaggerated and over-sized. Then draw a small nose in the center of the face and add a mouth. Add detail to the mouth such as: teeth, tongue and a chin. Finally, add the eyebrows and hair. This video will benefit t...
This next video tutorial is going to show you how to make a cool looking, yet difficult origami star. If you have never folded anything before, you can expect a little bit of trouble. This origami eight point star is made by using one sheet of paper and and can turn out to be one cool looking piece of art. Good luck and enjoy!
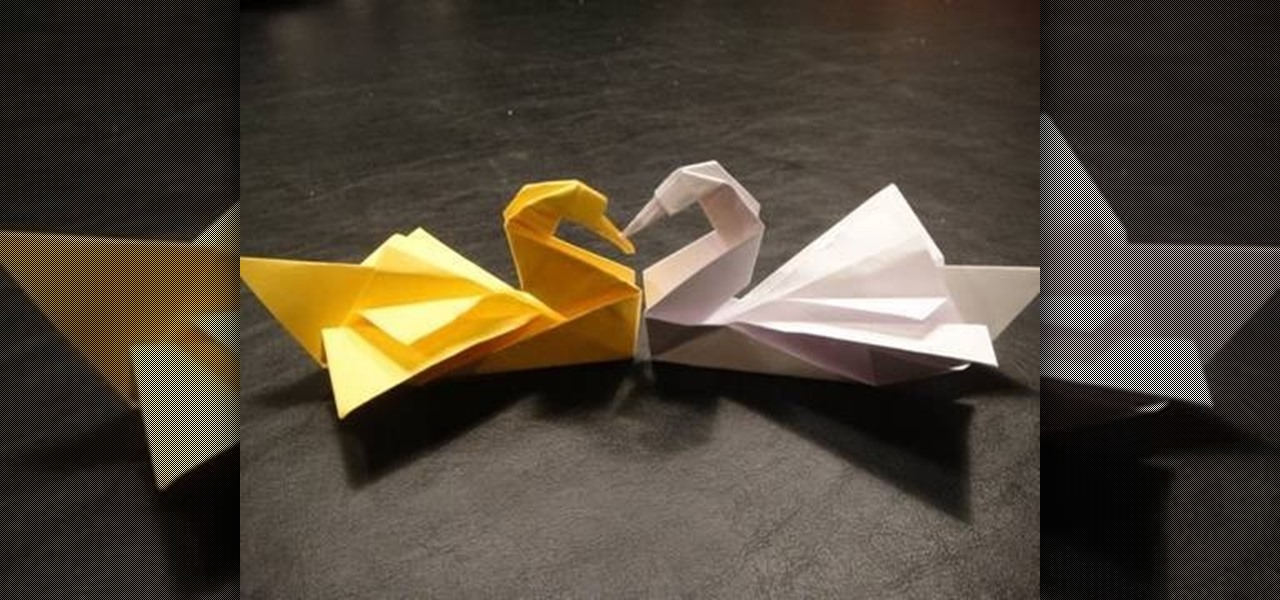
For this next video tutorial, you're going to find out how to make a really simple and easy origami crane. Origami is the traditional Japanese folk art of paper folding which took place during the 17 century.
Origami is an art form that requires time, patience, and the ability to fold things in order for it to take a 3D shape. This next tutorial is an easy video on how to make an origami box. You can use three magazine papers so that you can actually hold things in it. It's good for holding things in like paper clips, orange peel, and much more. So sit back, pay attention, and enjoy!
This video tutorial belongs to the Arts & Crafts how category which is going to show you how to do back stitch when embroidering. This is really simple and easy to do and takes no time to learn. For starting, mark five dots on the cloth. Then you stitch from point 1 towards 5. First you pass the needle from under the cloth through point #1, pull up the thread and pass it down through point #2. Now pull the thread up through point #3 and pass it back down through point #2. Then you pull the th...
In this Arts & Crafts video tutorial you are going to learn how to fold an origami ninja star. Take a normal paper. Fold it diagonally from one corner and cut off the extra portion to make a square. Fold it in half and cut into 2 rectangles. Fold each piece in half along the length. Fold both ends of each piece in opposite directions to make a triangle. Now fold the ends again to make a bigger triangle at both ends of each piece of paper. Each sheet will form a 'Z' shape. Now place one sheet ...
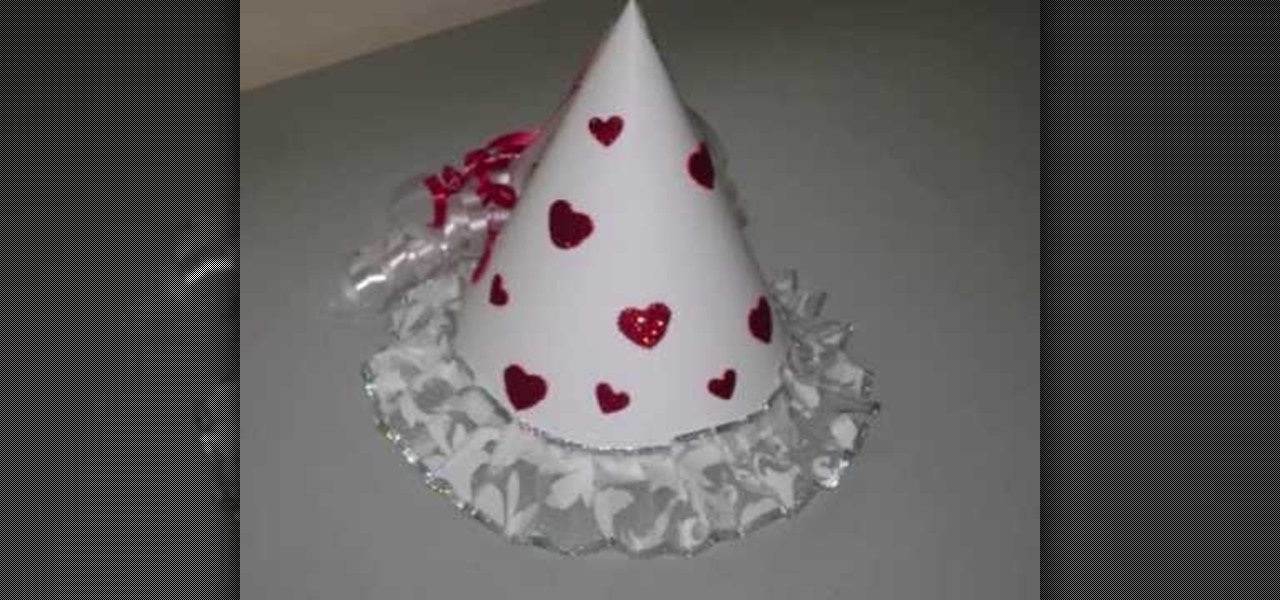
In this video tutorial, viewers learn how to make a fairy princess hat. The materials required for this project are: white cardboard/postcard, glitter stickers, glue, white lace/ribbon, red and white thin plastic ribbons and scissors. Begin by folding the white cardboard into a cone shape and glue it together. Trim the bottom of the cone. Then scrunch the lace ribbon to an accordion style fold and glue it to the bottom of the cone. Now decorate the cone with stickers or paint. Then glue the r...
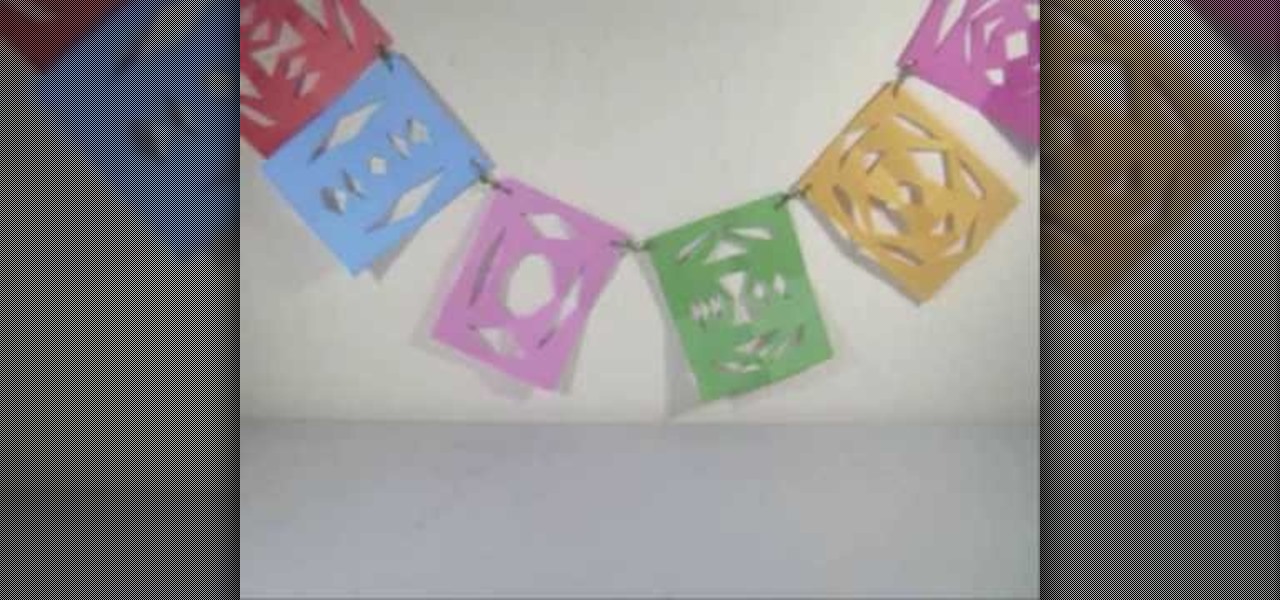
This video tutorial is in the Arts & Crafts category where you will learn how to make papel picado using chisels. This is a traditional paper craft of Mexico. The designs you can cut on paper are only limited by your imagination. First you got to make a design on paper. Then you got to stack up 40 to 50 sheets of paper and staple them together. Now you can start cutting the paper stack using a chisel and a hammer. Choose the appropriate chisel for the design and place it close to the outline ...
This art tutorial debunks the myth that male artists are sissies. Okay, maybe if you were a dude who just died over painting watercolor lillies then we would question your, uh, orientation, but when it comes to drawing beefcake football players, it's full on masculinity.
We love shiny things. Pretty baubles, Swavarski crystals, long link chains holding art deco pendants. And that's why we also have an extremely messy jewelry storage system. Basicall this is how it goes: we buy a necklace, wear it once or twice, and then toss it into a sort of bin type thingy.
In this video tutorial, viewers learn how to draw Obi-Wan from Star Wars. Begin by drawing a circle for the head and rectangular shape for the jaw. Then draw a line 1/3 way across the circle. Draw the eyes on the line and the nose just underneath the line. Now draw 2 lines from the ends of the eyes to the rectangular shape. Use those lines as a guide to draw the length of the mouth. Then add the ears, eyebrows and beard. Now lightly draw the hair. Finish by coloring and shading the image. Thi...
This video tutorial is in the Arts & Crafts category where you will learn how to tie a sheet bend knot for camping. Take two ropes, make a bite at the end of one rope. Pass the end of the other rope through this bite from underneath and come back through the loop in the second rope and pull it tight. This knot is used to tie two ropes of different sizes together. A variation to this knot is called the double sheet bend. Here you make two loops with the second rope and pass the standing end th...
This video tutorial is in the Arts & Crafts category where you will learn how to make Mexican papel picado paper cuts using chisels. This is a traditional craft of Mexico. There are various forms and sizes of chisels used for this purpose. The designs you can cut on paper are only limited by your imagination. First you got to make a design on paper. Then you got to stack up 40 to 50 sheets of paper and staple them together. Now you can start cutting the paper stack using a chisel and a hammer...
This video tutorial is in the Arts & Crafts category which will show you how to fold a circular teabag paper. This is a simple process and doesn't take much time to do. First fold the circular paper in half to get a semi-circle and then fold it in half again in to a quarter. Unfold the last fold and fold one quarter back to the halfway mark. Then turn the paper over and fold the bigger side of the paper along the fold line exactly matching the edge as shown in the video. Now you get a little ...
This video tutorial is in the Arts & Crafts which will show you how to make a dangling picture frame. You will need pictures that you want to frame, old CD cases, a drill with a very thin drill bit and fishing line. Remove all paper from inside the CD cases, cut the pictures to the size of the CD case and place two pictures inside one case back to back. Next you drill a small hole at the top and the bottom of the case in the center. String one CD case with another with the fishing line. You c...
In this video tutorial, viewers learn how to make a carrot patch. Begin by cutting out a egg carton with 4 egg holders. Then cover it with a green felt and staple the bottom. Now poke a hole in the center of each egg cup. Then fold a green 3 inch pipe cleaner in half and add 2 orange beans into the pipe cleaner. Bend the ends down and make 3 more carrots. Finish by inserting the 4 carrots into the 4 holes in the egg carton. This video will benefit those viewers who enjoy making arts and craft...
You know how in art class one of the main principles of drawing realistically is shading an object to establish its shape and contours? The same idea applies to makeup application. While our faces have natural dimension and contours, their hills and valleys can be further emphasized with strategic contouring via highlighters and bronzers.
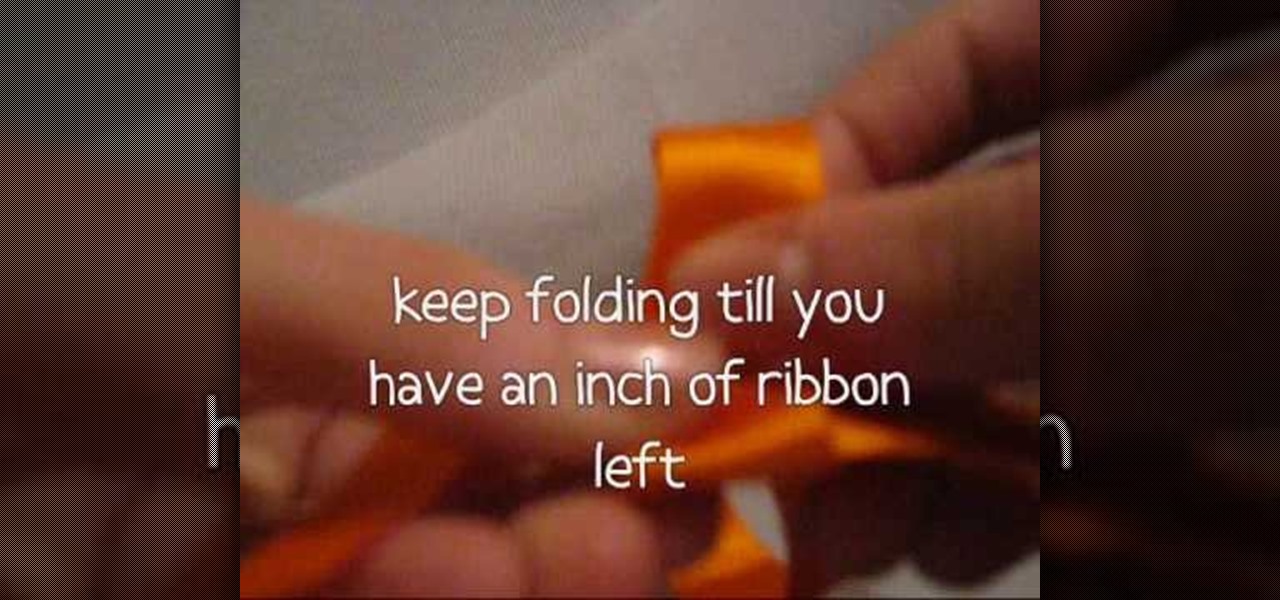
In this video tutorial, viewers learn how to make a ribbon rose. Users will need approximately 60 cm of 16 mm of satin ribbon. Begin by folding your ribbon in half and then pinch fold the end. Now fold the front half sideways and pinch it in place. Then turn it over and fold the ribbon to the opposite side. Keep folding until there is only about 1 inch of ribbon left. Users should end up with a pile of little folds. Pinch the two ends together and let go of the pile. As you pinch the ends tog...
This video tutorial is in the Fine Art category which will show you how to draw a deer from a triangle. First you draw an inverted triangle which will make up the face of the deer. Then you draw two small curves starting at the two top corners of the triangle to make the horns of the deer. You can also draw more short curves or straight lines starting from these curves to make up the complete horns. Then you draw the ears starting just below the horns. Draw the eyes and color in the ears and ...
In this Arts & Crafts video tutorial you will learn how to make a growing flower pot card. First you make a flower out of a tea bag. Then cut out a piece of paper in the shape of a flower pot. Now take a couple of sheets of 8x4 card of the same color. Score one card in half and fold it. From the other card cut out a piece equal to the size of an A5 card, which is 14.85 x 10 cms. Now glue the flower pot shaped paper on to this card. Now cut a long strip of the card, 30 x 3 cms and fold it in h...
Share your Mexican pride or simply make a cool graffiti tag of your friend Mex by watching this graffiti tutorial by Wizard. Wizard shows you how to do a basic graffiti version of the word "Mex."
Thanks to advances in CGI, lots of ordinarily silent or non-alive things have been animated (or anthropomorphized for all you English majors out there). Dogs, cats, squirrels, and thanks to the "Toy Story" series, Barbie and Ken, too.
Jewelry making is a fine art, with some jewelers devoting their entire lifetimes to learning how to perfect beading, wiring, sautering, and arranging. But that doesn't mean you can't make a beautiful bracelet if you're a jewelry making beginner!