

How To: Draw cartoon fire and flames
Need to set your cartoon on fire? No worries! In this tutorial, learn how to draw professional looking cartoon flames that will make any drawing hot and spicy!

Need to set your cartoon on fire? No worries! In this tutorial, learn how to draw professional looking cartoon flames that will make any drawing hot and spicy!

What are you doing this Cinco de Mayo? If you are celebrating this tequila filled holiday, you will no doubt have tons of fun with these maracas.

Funky Foam? This product is for kids and can be found in any arts and crafts store, and it's the key to making homemade stamps in this video crafty project. See how to make your own stamps with funky foam! It's cheeps and oh so simple. You can either create your own designs or convert your die cutters into coordinating stamps for embossing, etc. Quick, easy, and super cheap stamps!
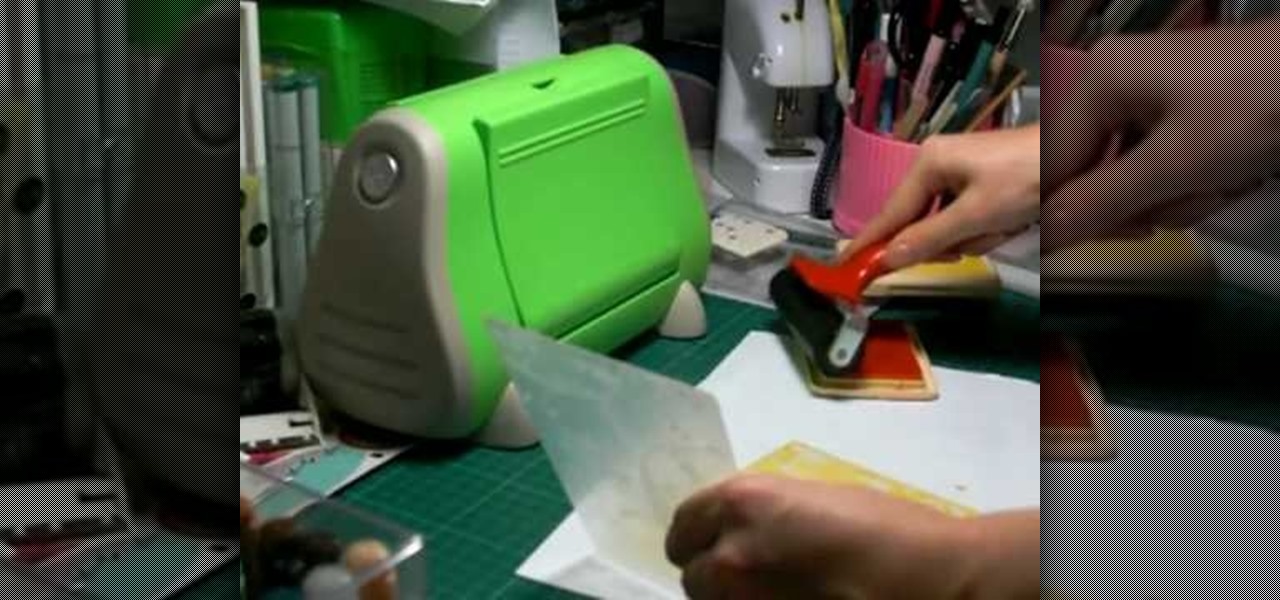
In this Arts & Crafts video tutorial you will learn how to do the Cuttlebug 'smoosh' technique. For this project you will need a brayer, ink pad, an embossing folder and a Cuttlebug. Ink the brayer well and with it apply the ink on the embossing folder. Make sure the ink is applied thoroughly on the whole surface. Get the Cuttlebug ready, place the card stock inside the embossing folder, place a couple of ‘C’ plates in the Cuttlebug, put the embossing folder with one more ‘C’ plate ab...
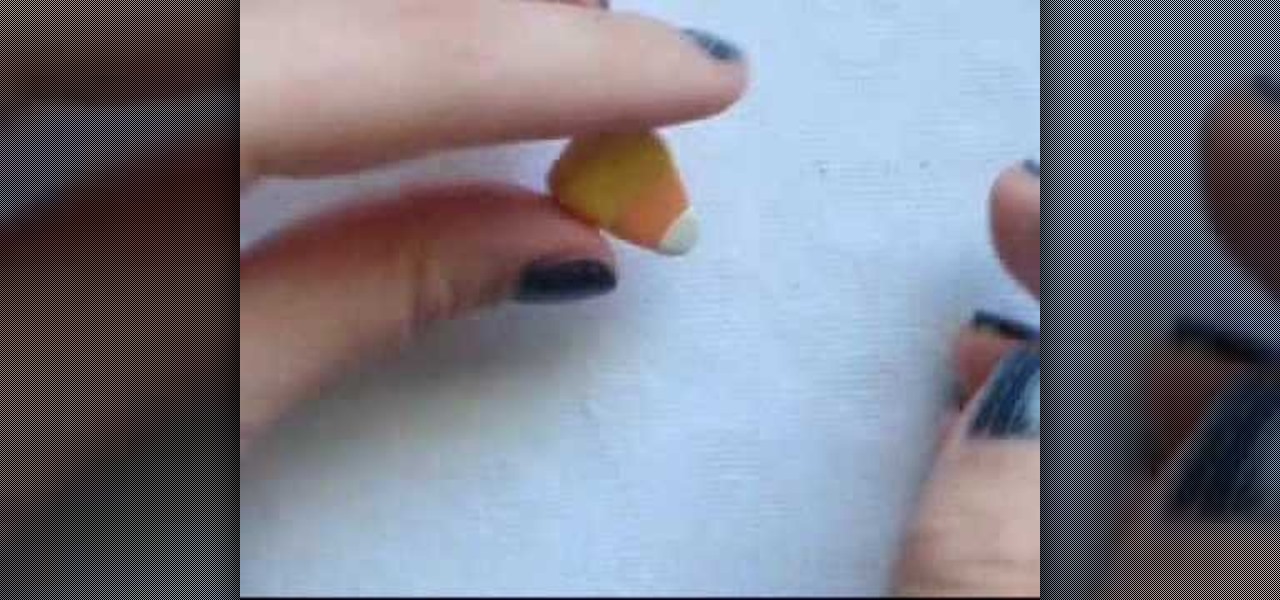
In this video tutorial, viewers learn how to make candy corn out of polymer clay. Users will need yellow, orange and white polymer clay. The yellow is the largest, the orange is the medium and the white is the smallest. Begin by rolling each of the clay into balls and stack them on each other like an ice cream cone. Then flatten it and press on the sides to inflate and square it. Make the top part the widest (yellow) and make the bottom the most narrow (white). It should be in a shape of a tr...

Do you own a bunch of old looking books and have no idea what to do with them? Are you looking to spruce up a door in your home with some kind of decoration? Do you enjoy arts and crafts and want to tackle a project that is easy to make and results in something cool to look at? Have you done the math yet? Well if not, this video tutorial will show you how to make a awesome door wreath using old book pages. Enjoy!
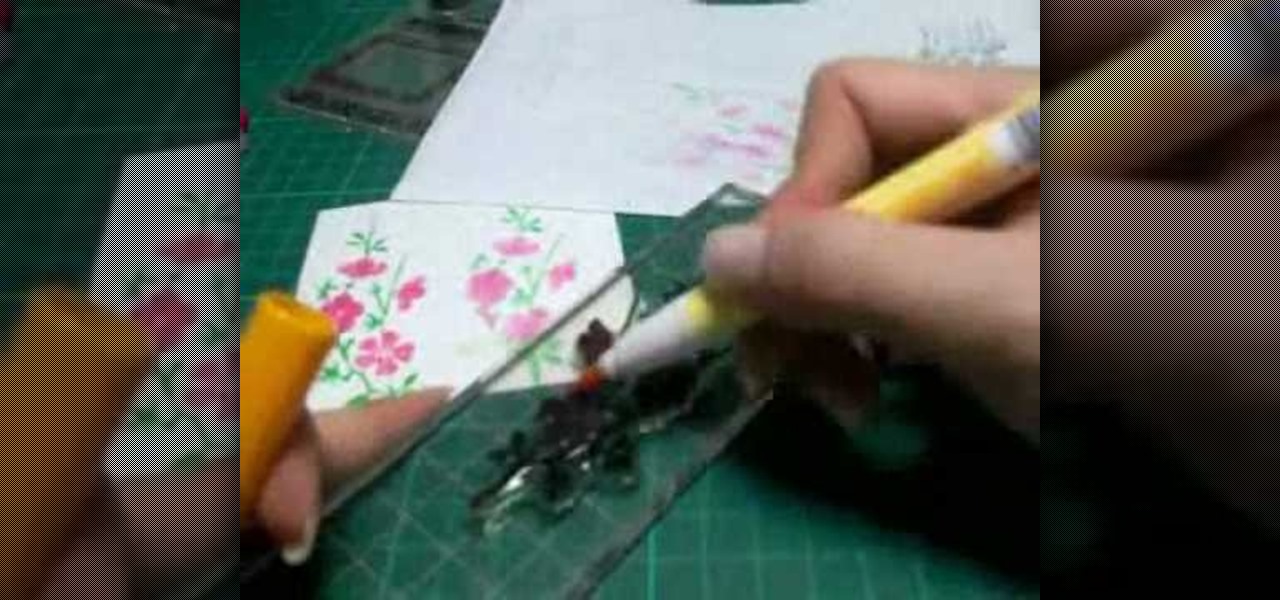
In this Arts & Crafts video tutorial you will learn how to use markers & water to create a watercolor stamp look. You can use rubber and acrylic stamp for this. You will need water based markers, minimister and card stock. Select you stamp and color it with markers as you would do in a painting. For example, you can color the leaves green and flowers red. You can also apply different shades. Then spray water with the minimister and stamp the image. Just stamp and lift, don't keep it too long ...
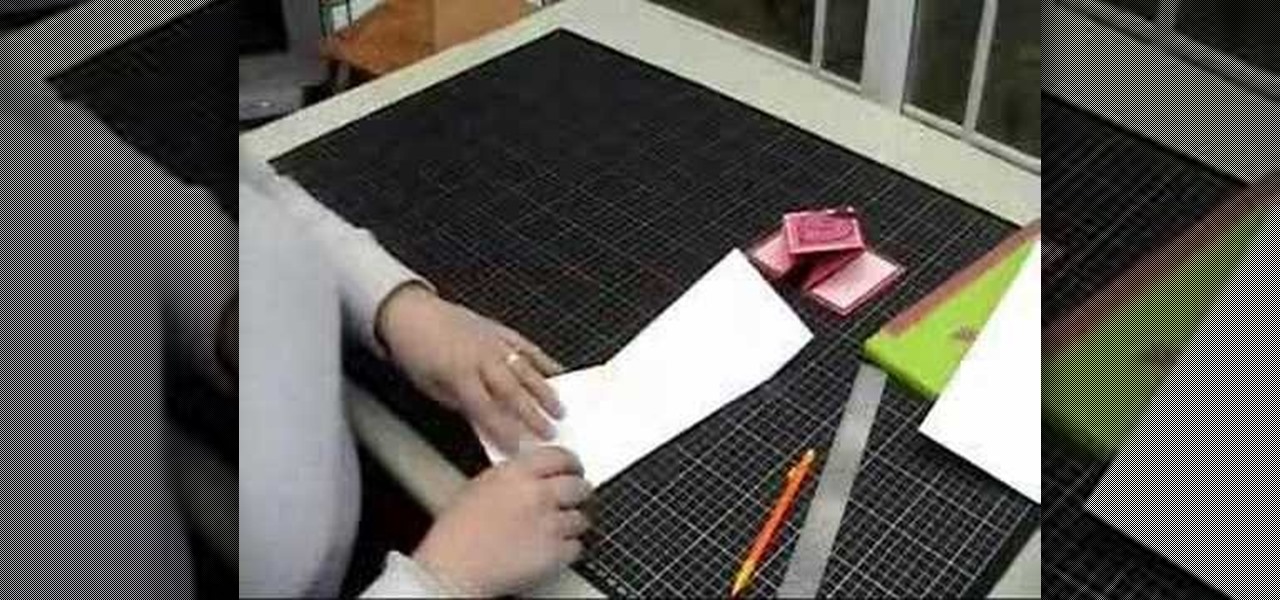
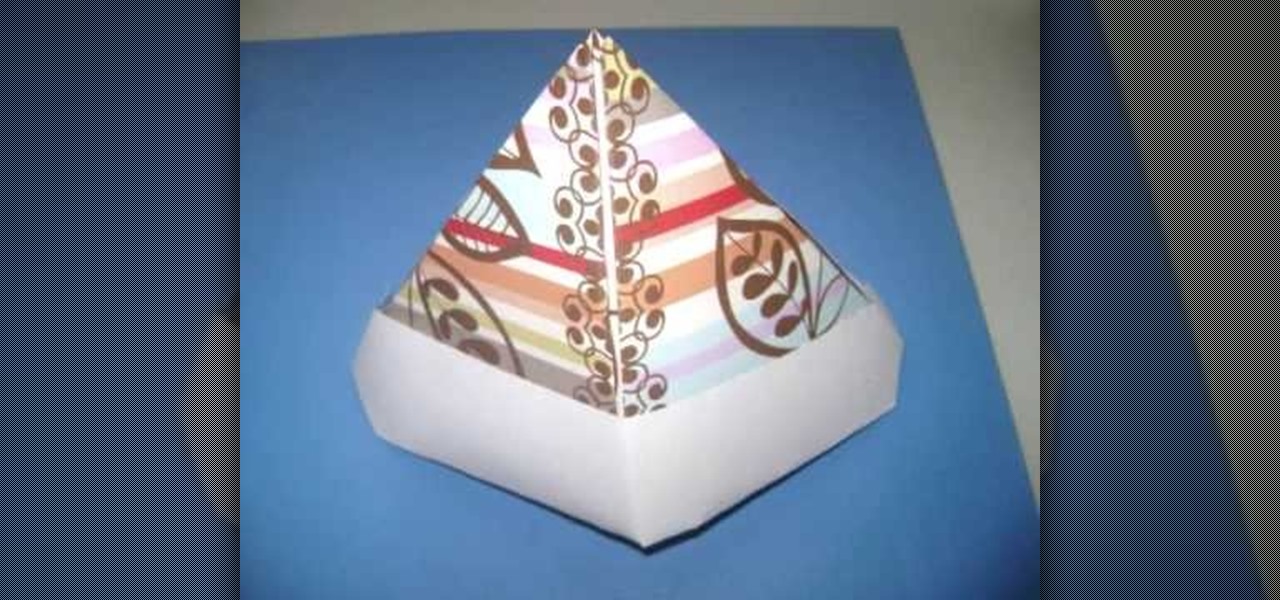
In this Arts & Crafts video tutorial you will learn how to make a diamond folded card. Get a sheet of paper 4x12 inches. Draw a pencil line at the half way mark, that is, at 6inches. Fold one of the lengths to the center pencil line. Do the same to other half of the paper. Open up the sheet and do the same fold in the opposite direction. Open up the paper and flip it over and you will see the diamond fold in the center. Now you fold from each side up to the cross where the diamond begins. Fli...
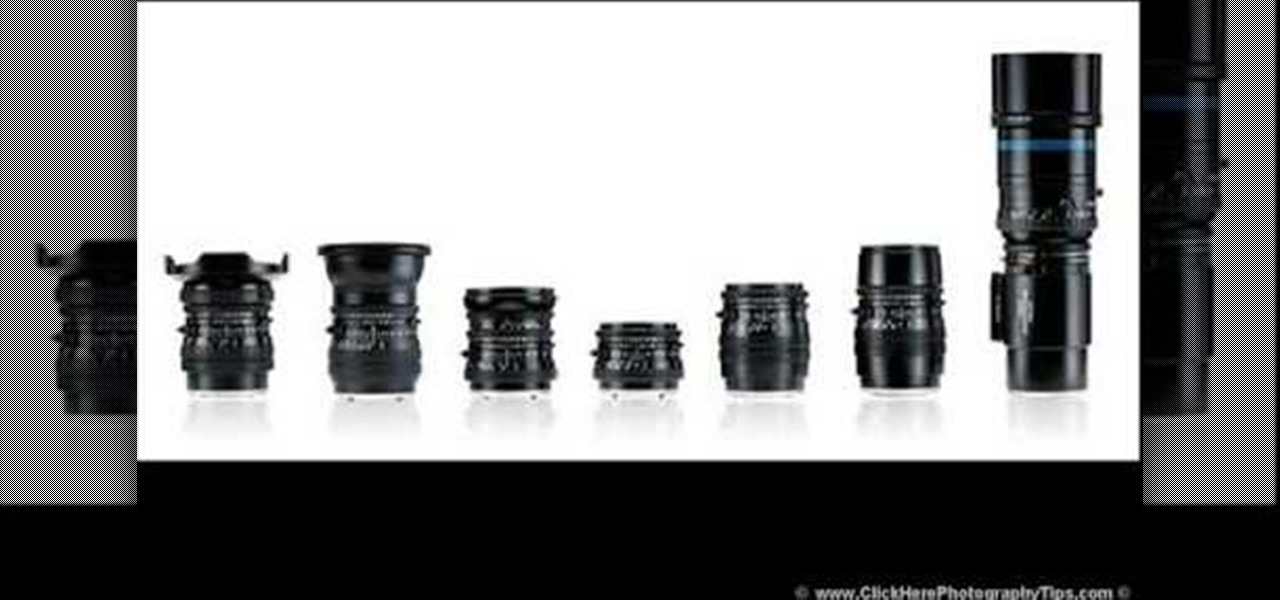
In this Fine Art video tutorial you will learn how to understand your lens and its effect on depth of field. The lens in the video has some inscriptions which are interpreted like this. 50mm is the focal length of the lens. The aperture is from f1.4, which is the widest lens opening to f16, which is the smallest lens opening. The higher the number the lesser the lens opening. Aperture determines the amount light that comes through the lens. Aperture also decides the depth of field. With a wid...

In this Arts & Crafts video tutorial you will learn how to fold a hexagonal, six-point paper star with origami. Take a hexagonal sheet of paper and fold in half from all corners. Then fold each side inward up to the center point. Open up all the folds. Now fold one side up to the center point. Then fold one corner back over itself and fold the next side of the paper up to the center point. Continue like this for all sides and you will now have a smaller folded hexagon. Then lift up each flap ...
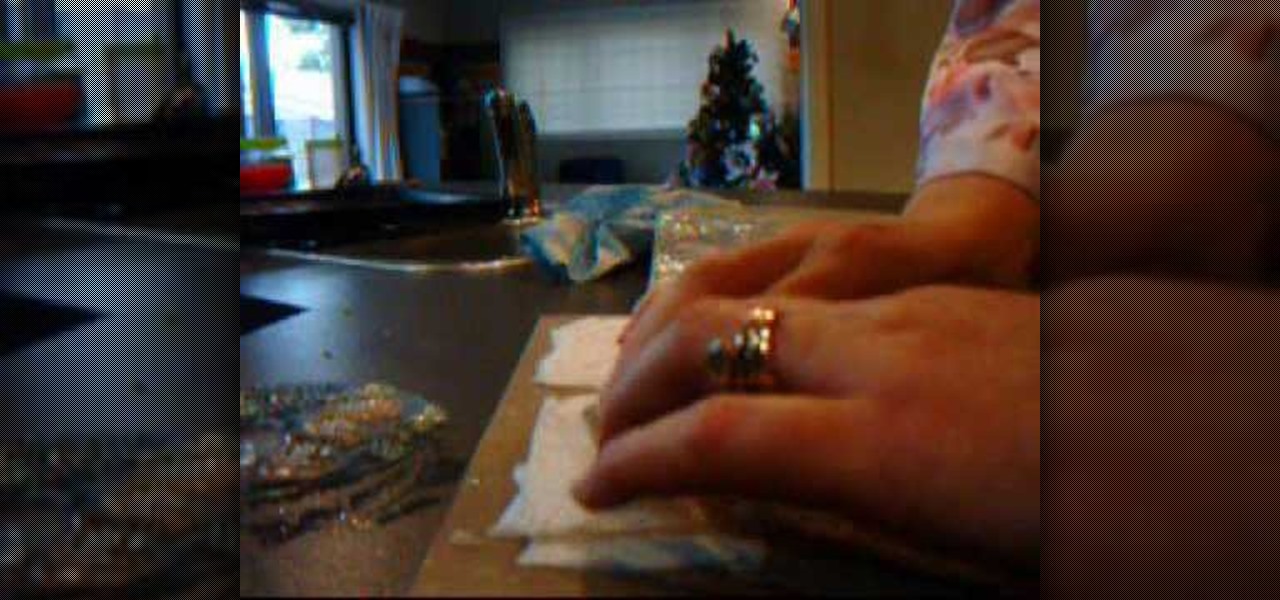
In this video tutorial, viewers learn how to make a shimmer mist mixture for cards. Begin by filling a small spray bottle with rubbing alcohol. Now add about 1/2 tsp-tbsp of Champagne Mist shimmer paint into the spray bottle and shake it to mix it. Users can also use frost white or platinum shimmer paint. To apply the shimmer mixture on a card, spray the mist in the air and wave the card stock into the mist. The alcohol will help dry the paint faster. This video will benefit those viewers who...

In this Arts & Crafts video tutorial you will learn how to make a lily flower from folded paper with origami. For this, you need a square sheet of paper. First you fold it in half and then fold it in half in the other direction. Next you fold it diagonally across to form a triangle. Then fold it again across the other diagonal. Open up the paper and push the diagonal folds inwards slightly so that the center point is pointing upwards. Then press the folds in to form a triangle. Take one of th...
In this Arts & Crafts video tutorial you will learn how to make a stamped notepad cover. Put the note pad on the edge of a bigger sheet of paper, draw the outline and cut the paper along the lines. The paper should be longer than the notepad. Put the note pad on top of the paper aligned with one end and fold the other end of the paper. Remove the paper and crease it properly along the scoring lines. Depending on the theme you want for the cover, apply the required ink with sponge on the paper...
In this Arts & Crafts video tutorial you will learn how to fold a Heavy Rain-style paper origami bird. For this project, you will need a square sheet of paper. Fold it diagonally across both diagonals. Open it up and fold one corner up to the center point of the paper. Flip it over and fold the other three corners to the center point. Now fold all the four corners to the center point. Flip it over and now fold it in half as shown in the video. Then you pull out both ends from the center and w...
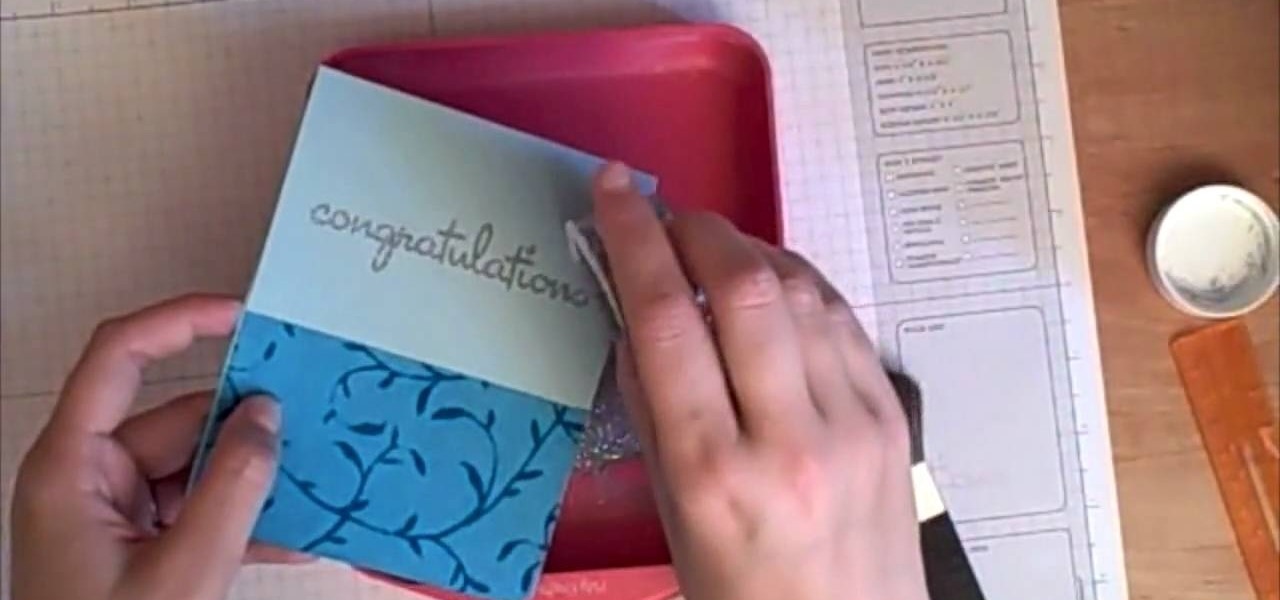
In this Arts & Crafts video tutorial you will learn how to make a vertical Easter greeting card. Take a 6x6 yellow card and fold it in half. Using the Valentrio Fiskars corner punch, you can punch one corner. Cut a 2 1/2” wide metallic cardstock, a 1” wide paper strip, stamp a picture or a design and punch it with Fiskars punch. Punch the 1” wide strip with the Fiskars border punch and glue both the pieces above and below the metallic card stock. Glue the metallic card stock and the pic...

This video shows how to paint your nails with a very attractive red and yellow nail art design. Using a glitter nail polish, dip it in yellow glitter powder. Pat it on the nail, rather than brushing it on. Then apply large glitter shimmers randomly all over the nail, and this forms the background.

In this Arts & Crafts video tutorial you will learn how to create a box to hold a mini album or small cards. Take a shiny card stock 10.5 x 6 inches. On the 6" side, score at .5" and 1" on both sides. On the longer side, score at 3, 3.5, 7.5 and 8 inches. Cut out the corners on the flap side of the card as shown in the video. Do a step cut on the other side of the card as in the video. Round the four corners with a corner rounder. You can do some stamping now if you want or you can also glue ...
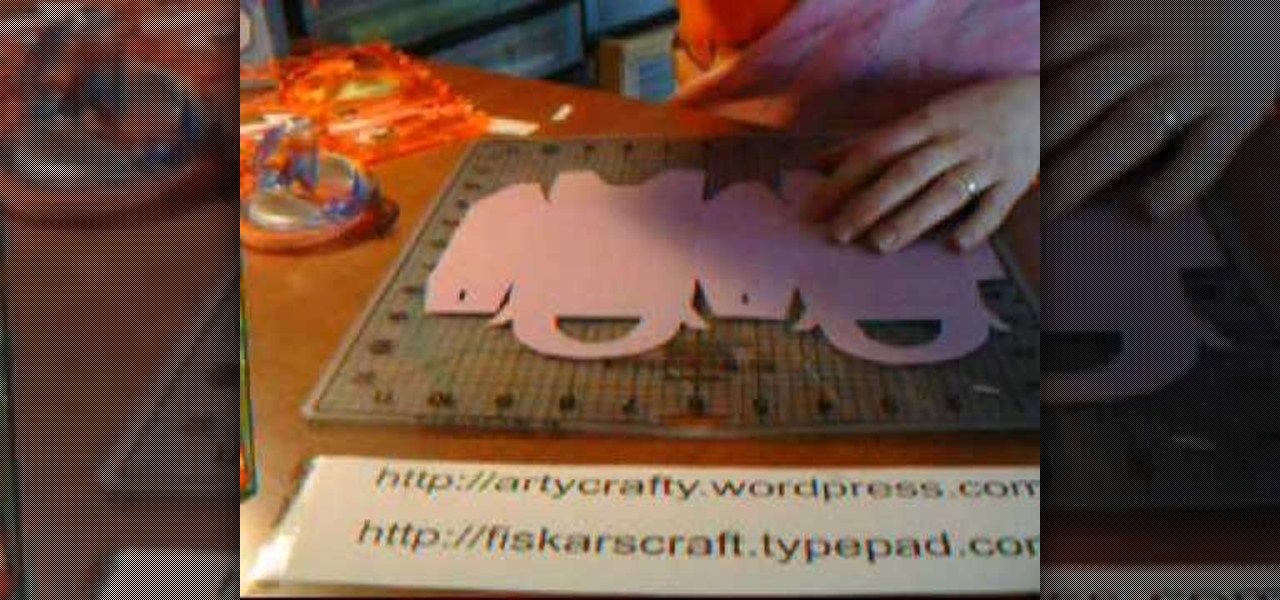
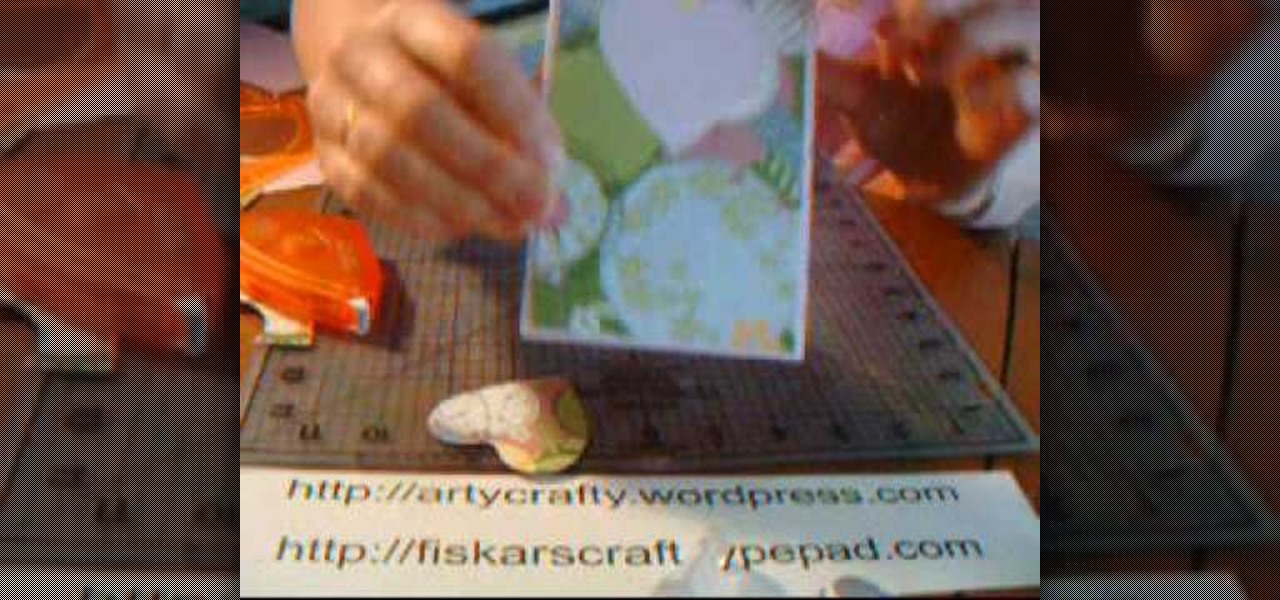
In this Arts & Crafts video tutorial you will learn how to make handmade treat boxes. Materials needed for this project are trimmer with scoring blade, PDF template, cardstock, scissors, Fiskars fingertip craft knife, Fiskars templates, Fiskars ultra shape Xpress, decorative scissors and embellishments. Download the PDF template from http://artycrafty.wordpress.com, print it out on a cardstock on the non-decorative side and cut out the shape along the thick line. Then score along the dotted l...
In this Arts & Crafts video tutorial you will learn how to stamp & heat emboss on a card. First you rub in a powder on the paper on which you are going to emboss, because embossing powder is really sticky. Then you select the stamp that you want to emboss and apply sticky transparent ink on the stamp. Make sure you do a through job of this. This will make the embossing powder stick to it. Now stamp the card and press it evenly to ensure that the impression is complete. Then pour embossing pow...

In this Arts & Crafts video tutorial you will learn how to make a folded paper ostrich with origami. For this project, you need a square sheet of paper. First you fold it diagonally across to form a triangle and cut it off in two. Then take one piece, fold it in half to form a smaller triangle, open and fold down along the centerline from the top of the triangle. Open it up and again fold along the centerline from the base of the triangle. Now fold from one of the corners up to the intersecti...

To some, graffiti is an art form that can only be expressed on the streets to share with everyone around there. To others, it's nothing more than a stupid way to deface property and cause the city to spend thousands of dollars to clean up. Either way, it take a certain skill set to come up with some great looking graffiti. This tutorial will give those aspiring taggers or artists an idea of how to draw the alphabet graffiti style. Enjoy!
The shape stamp tool in Photoshop is similar to using old fashioned clip art. Shapes are extremely easy to access and you will get the hang of them quickly. These shapes can be used to enhance your existing photos or to create graphics like banners and icons. In this tutorial, you will learn exactly how to access and use the shape stamp tool in Photoshop CS3. You will no doubt have this down pat in no time and will soon be on your way to using stamps - just one of Photoshop's many helpful tools.
In this video tutorial, viewers learn how to make molded paper. The materials required are toilet paper and stamps. Begin by wetting the toilet paper under some water and lay it down. Use about 10 layers of 2 ply toilet paper. Now press the stamp onto the wet toilet paper and then press down on the stamp with a towel or cloth. Remove the stamp and heat dry the toilet paper. Now let the toilet paper dry fully overnight or half of the day. This video will benefit those viewers who are intereste...

In this Fine Art video tutorial you will learn how to make your own duct tape dress form. This video is from www.thunderlily.com. The materials you will need for this project are an old t-shirt, duct tape, strips of fabric to put around your neck and arms and a pair of gloves. Wear the old t-shirt and stand upright. Tape around the chest and waist to keep your shape as shown in the video. Add extra fabric around the neck. Then tape all over the t-shirt and cover the entire t-shirt. Then remov...
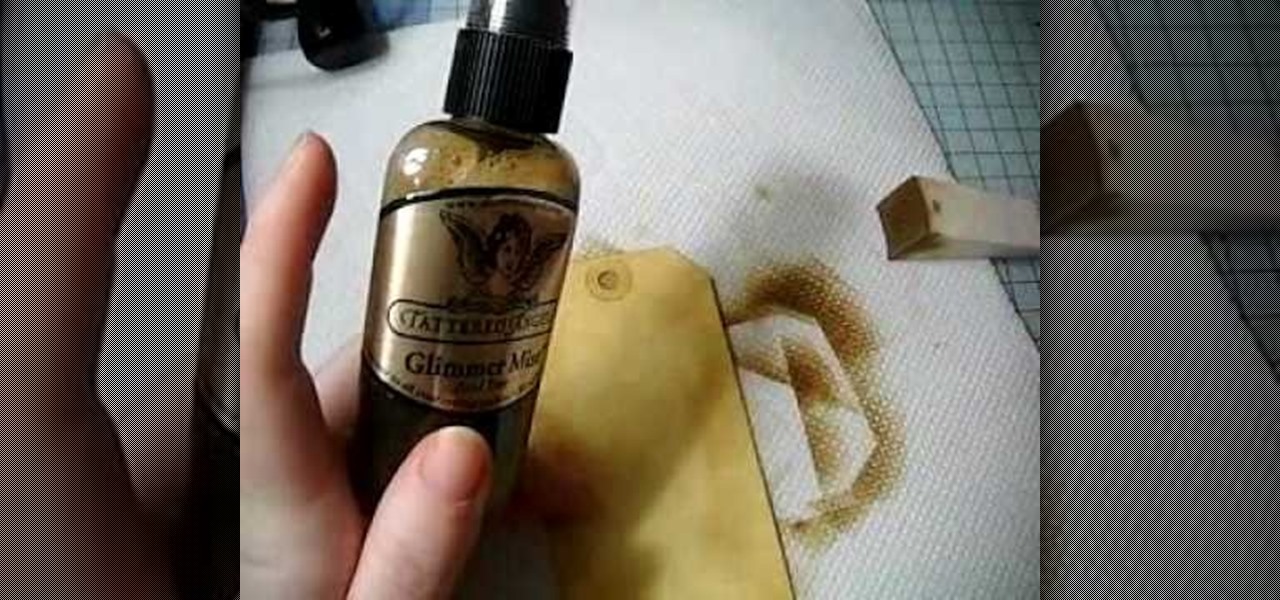
In this Arts & Crafts video tutorial you will learn how to make a distressed scarpbook tag. Take two tags, one red color and one yellow color and strip the threads off. Take a light color ‘Distress’ ink on a sponge and dab one side of the yellow tag with it to give it a light rough look. Now take little darker brown ink on another sponge and dab the edges of the tag with it. Then place the tag in a box and spray Glimmer mist on the tag. Dry the tag with a dryer. Now dab some more brown in...
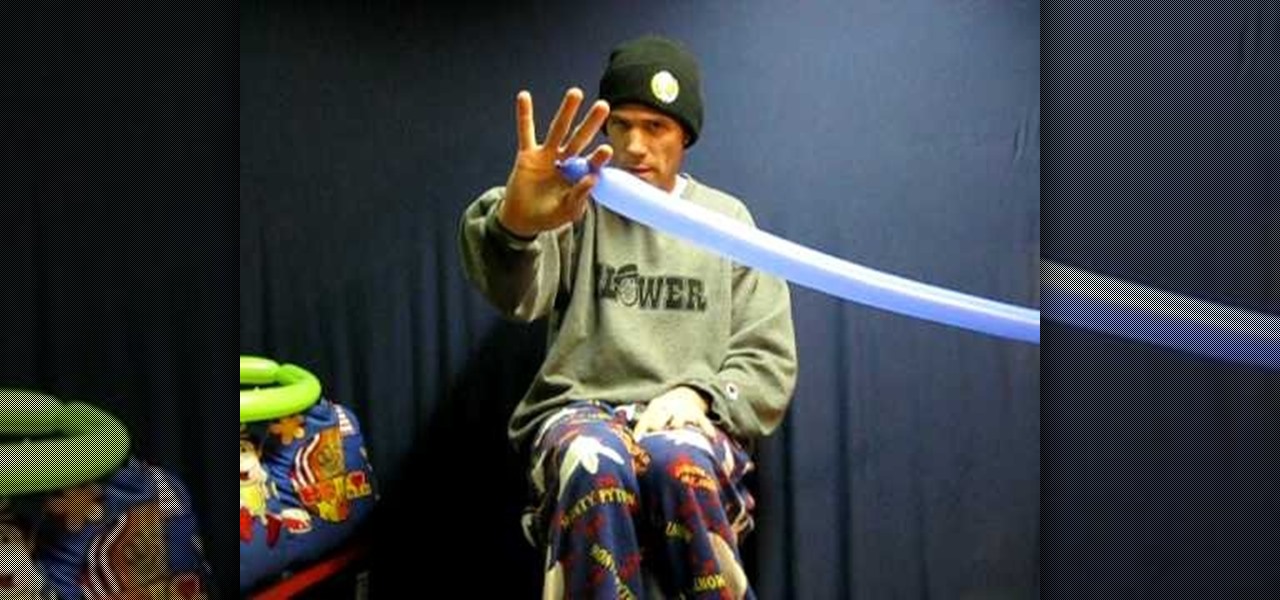
FlowerClown demonstrates the art of balloon folding and shows you how to make a basic aeroplane out of a couple of balloons. The balloon aeroplane is a hit among children and and can be used for entertainment purposes at parties, weddings and family events. Just a pop there, a twist here, a turn there, and you have the basic aeroplane all ready to pop into action, it also comes with a long balloon to help pilot this lean mean flying machine. Although don't expect it to bomb the neighbours ann...
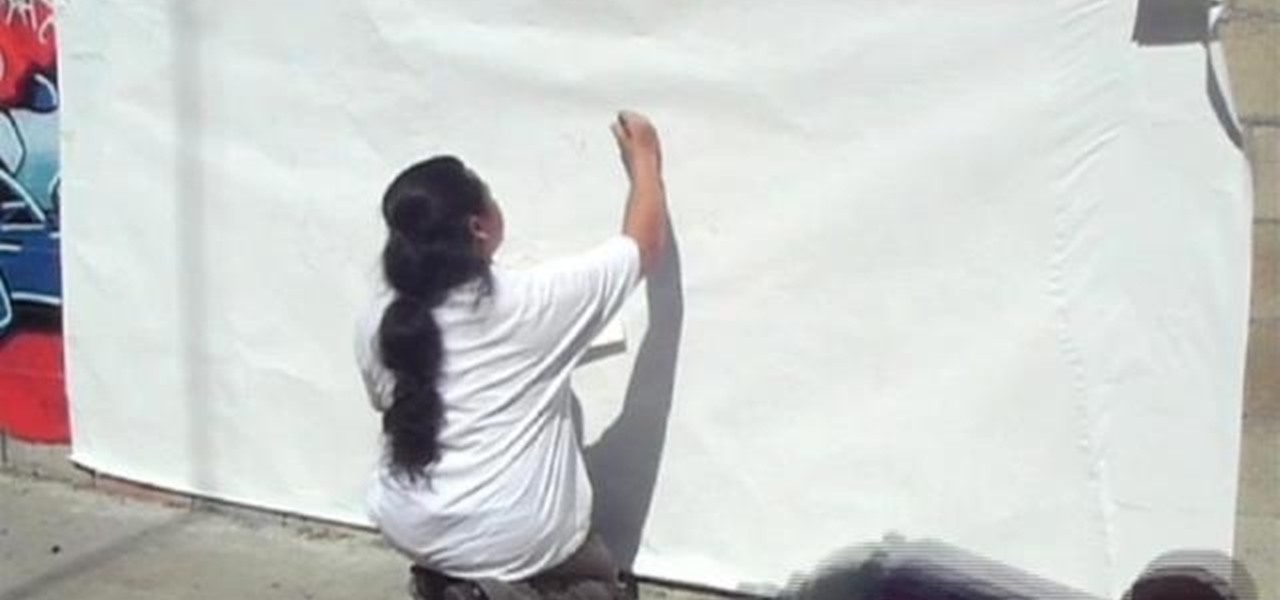
This is your basis step by step on how to do graffiti on walls - in your house for decoration, of course, not on the streets for vandalism! The best spray paint is made with krypotnite added into the paint. While you will want to paint directly on the surface, you don't want to be exposed to excessive winds or temperature when doing your graffiti, so you may be somewhat at the mercy of mother nature. Start by sketching your design with pencil, making sure that it takes the maximum amount of s...
In this Arts & Crafts video tutorial you will learn how to use clear stamps & make a card. You will need acrylic stamps for this project. The products used in the video are from papertrayink.com. The stamps are clear and have a sticky back with which you can attach them to an acrylic base to make the stamp block. Then ink the stamp and stamp it on the paper. Since, it is clear, you can ass and align it properly on the paper. The other cool thing about acrylic stamps is that you can take more ...
In this Arts & Crafts video tutorial you will learn how to make window cards. Supplies needed are trimmer with scoring blade, Fiskars templates, Fiskars ultra shape xpress, glitter, cardstock and embellishments. Take a 81/2 x 6 inch cardstock , score the center at 3‚Äù mark and fold it. Take a colored paper about ¬O‚Äù smaller than the card, cut out a 2.5 heart with the help of the template and glue it on the card. Then open the card and cut out a 1.5 heart from the center of the 2.5 heart. N...
Looking for a fun activity for your kids birthday party? In this tutorial, learn how to origami a paper hat with your kids. The benefit of using these hats is two fold! Not only do they make great party favors, they also provide an arts and crafts project to keep the kids entertained for a while.
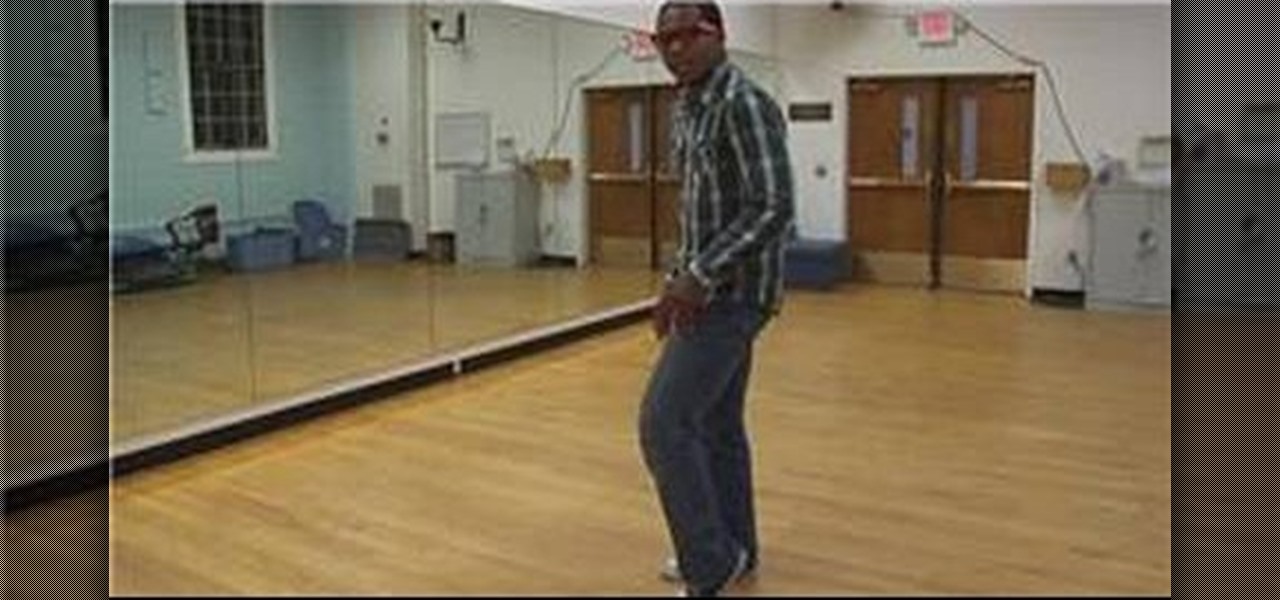
If you're hoping to blow away Michael Jackson's moonwalk, you better be prepared for practice! In this video, learn from one expert how to dance the moonwalk like the King of Pop. Master the moonwalk dance with guidance from this video.
One of the biggest perks of having a flat panel television is that you don't have to take up any space in your living room with it! In this tutorial, learn how to buy, install and mount a TV in your living room. By mounting your boob tube, you will save tons of space and also create a very cool piece of 'art' for your bare walls. So, make sure you have the right mounts for your TV and any tools you may need and get started. You will love the new look of your room.

In this video tutorial, viewers learn how to tie a karate belt. Begin by putting the belt on your left hip. Then wrap it around all the way to the front, keeping it flat. Now wrap it around one more time to the front, on top of the other piece. Then tuck the top piece underneath the two layers of the belt, make the tips even and then pull on them to tighten the belt. To help children tie the belt, only hold one side of the belt and do not wrap it for them. Give them the instructions. This vid...
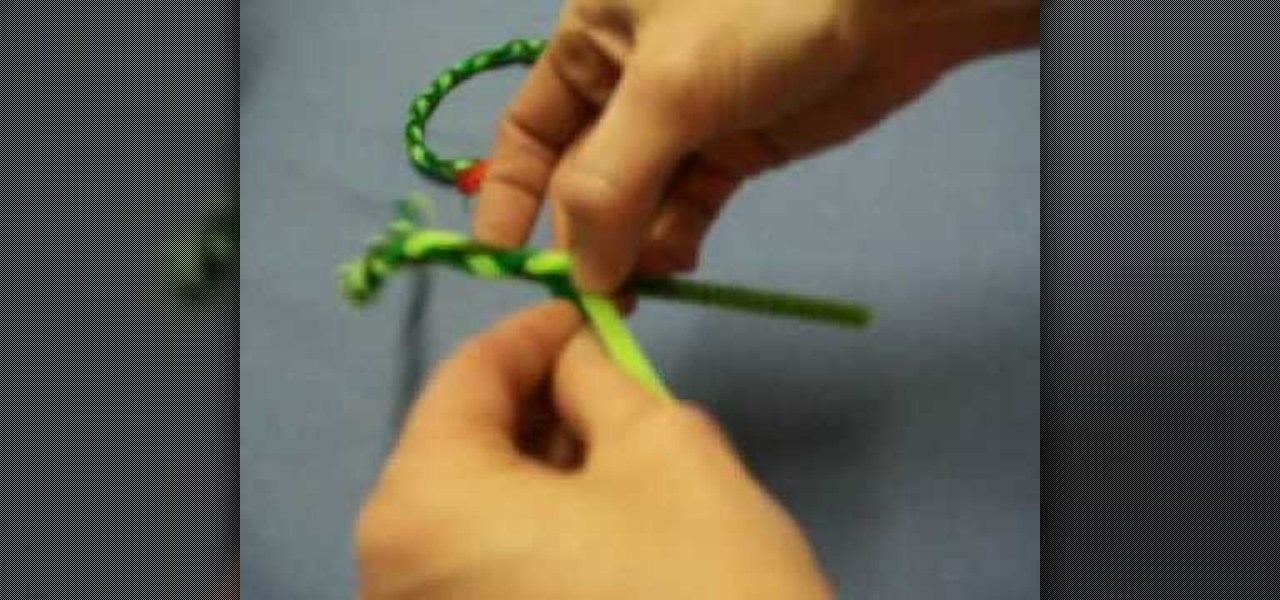
How to make mini Christmas wreaths out of pipe cleanersIn this video we are about to see how to make mini Christmas wreaths out of pipe cleaners. To start with we get colors of pipe cleaners. Now take them of equal length and twists their ends together so that they don’t come off. Start braiding from the attached ends. The art of braiding is very easy. Just take the middle over the left and the middle over the right. Repeat the process till the end of the pipe cleaners. Leave out a small port...

Seven easy basic art methods and steps to drawing Anakin Skywalker. The first 1-3 steps illustrates the basic drawing methods for the human head shape, and line placement for a basic human head. The fourth step illustrates basic drawing of the eyes, nose, mouth and ears. Step five illustrates the basic shading around the eyes, nose, ears and mouth. Step six illustrates how to add the shaping and styling of the hair and facial features. The final step illustrates how to shade the hair. It also...
Love4Nails demonstrates how to paint nails with a pink and white sparkly design. First, apply a hydrating base coat. On top of the base coat, apply the color of your choice like a light pink color. Then, create the side swipe which is about half of the nail. Create a straight side swipe in a white color. You may need to do two coats. Then, create a flower with the background color on the white polish. Add a pink rhinestone to the flower. Repeat the technique making a white flower on the pink ...
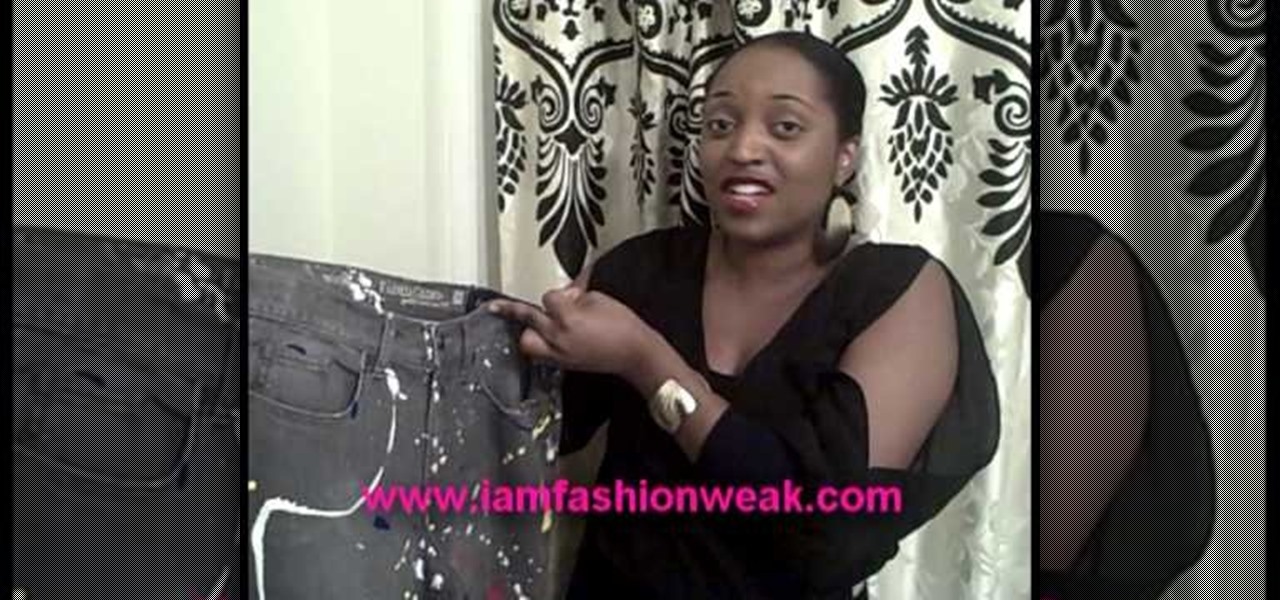
Angela and Shane from I Am Fashion Weak demonstrates how to bleach and paint splatter your own jeans. All you need to bleach your jeans is bleach and a measuring cup. If you bleach black jeans, you can get tan and gray shades. A bathtub is a safe place to bleach your jeans. Crinkle the jeans and pour the bleach over the crinkled spots until it changes into the color you want. After you bleach the jeans, wash them and dry them. You can also use a sanding technique to give the jeans a distresse...

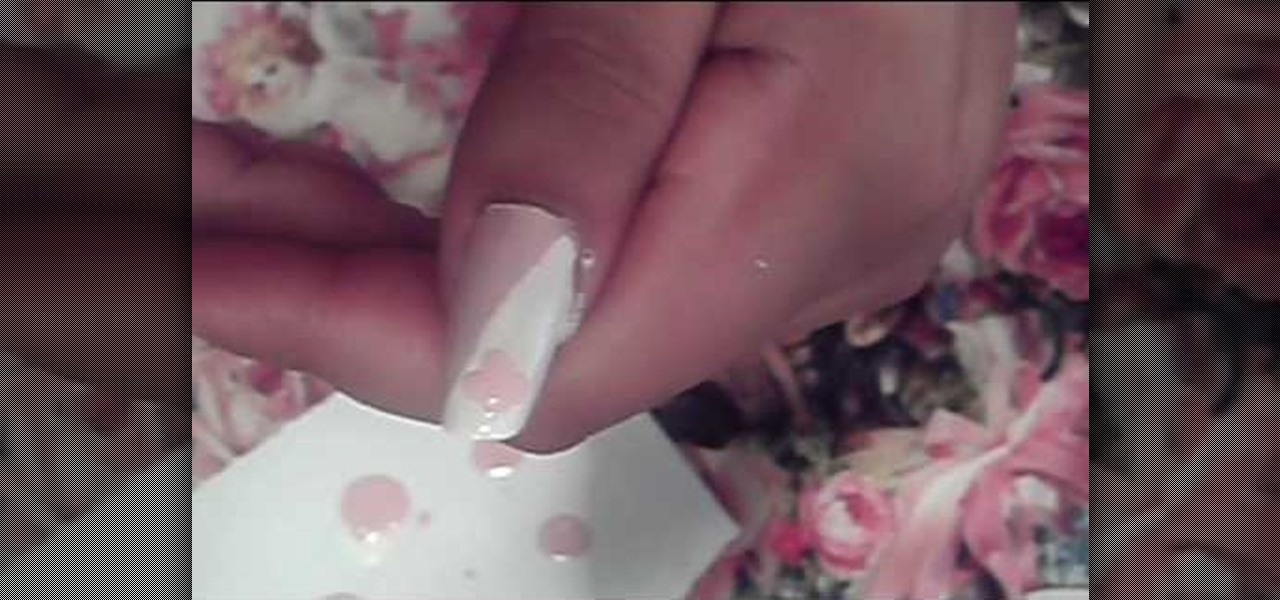
Make sure you nails are already clean and dry. Choose you colors. Add the lightest color first. Using a makeup sponge works great to apply the fading effect. Apply to French manicure area not straight. Reapply pink polish just at the tip of the nail. Apply glitter polish over the pink on the tip of the nail. After applying the shimmer get the nail art polish and make your deign. Make sure your brush is thinned out. Add your design then you can add your gem stones and finish it off with some c...
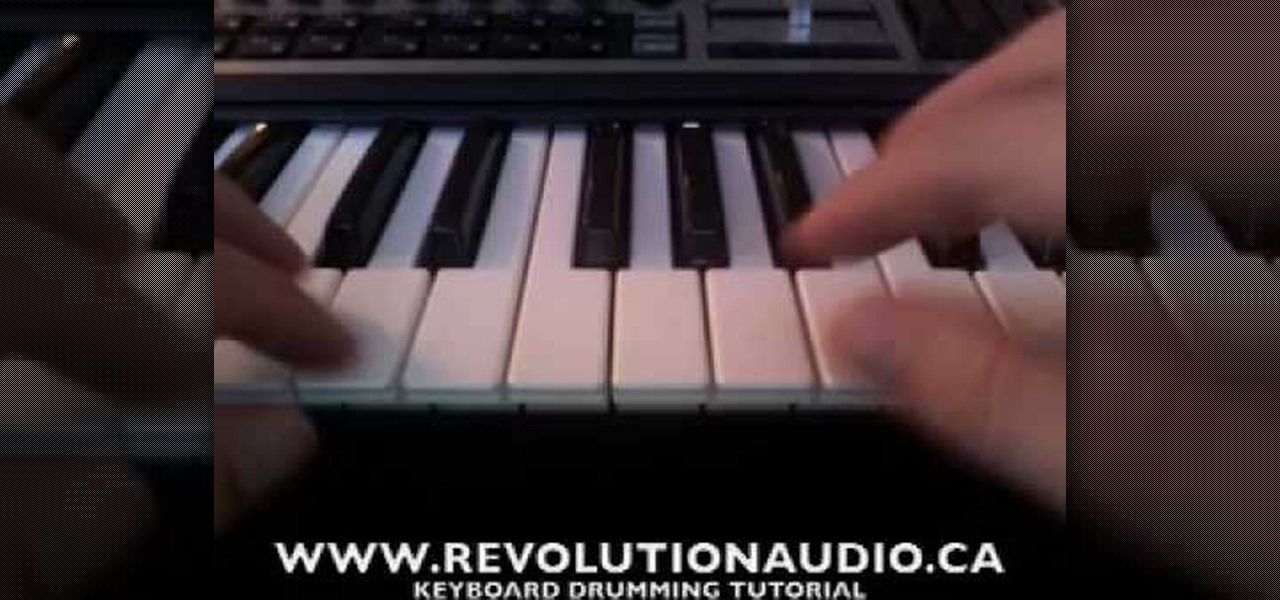
Jason Johnson with Revolution Audio shows us some easy steps to creating a basic midi drumbeat using your keyboard. To start, the kick drum is located at C1, this is in a different location depending on the number of keys your keyboard has. The other drums which are included are left and right snares, the tones, high hat closed, open high hat, and the pedal high hat. There are also the cymbals which include the crash, often used at the end of measures and the ride which is employed often in j...
In this video tutorial, viewers learn how to make a Halloween lanterns. Users will need to visit this website: jennadeangeles/] and download the Halloween template. The materials required for this project are: download template, vellum, poster, rubber stamps, metal ruler, glue and orange card stock. Begin by cutting out the lantern with the openings as well. Now stamp the vellum with some black acrylic paint. Finish by closing the lantern with glue. This video i...