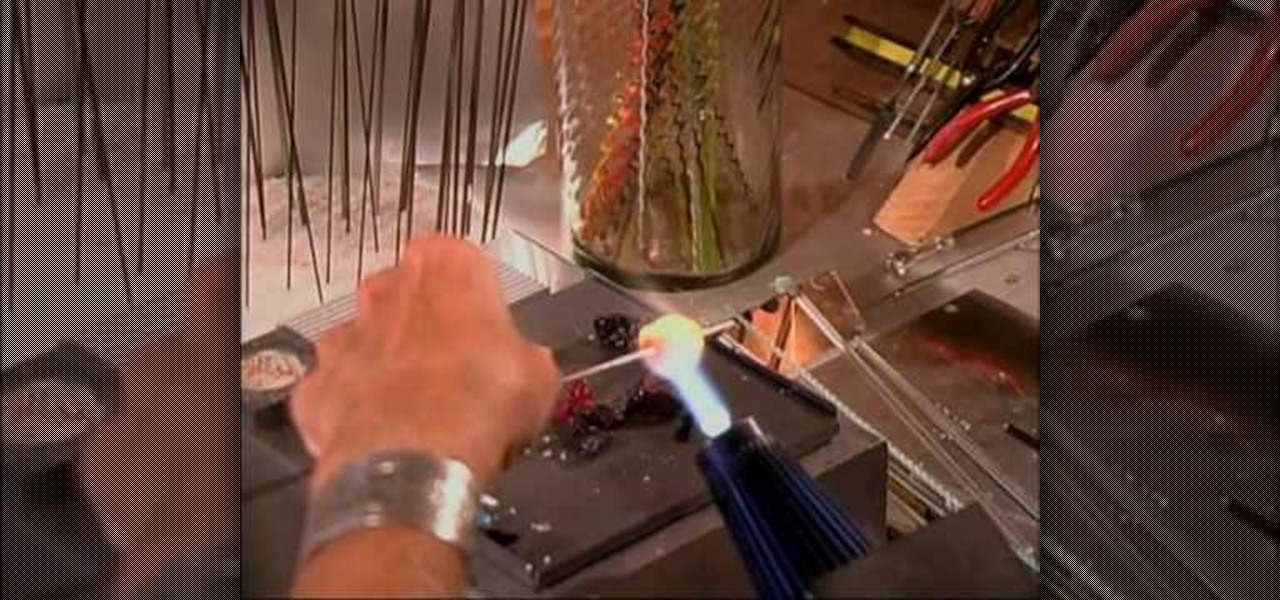
Hosting a Twilight-themed party? Of course you're going to want a cake! This video shows you how to use gumpaste or fondant to make a ruffled tulip like the one on the cover of New Moon. Fondant is an edible, easy to work with material that you can use to shape just about any kind of cake decoration you can think of. You'll need: wire, wire cutters, a rolling pin, a cutting board, grease, water, an orchid press, a veining tool, a fondant cutter and a thin piece of foam.
If you say Ke$ha at the MVAs you saw her new look: a dress made from a trash bag! Well, if you're looking to create something cool for less than $2, check out this video and see how to make Ke$sha's inspired garbage bag dress. You don't have to spend a million dollars to turn heads, in fact, you likey have all the materials you need right under your kitchen sink! For this project you'll need a trash bag, some scissors, some tape and a stapler. For your own flair, grab sparkles, streamers or w...
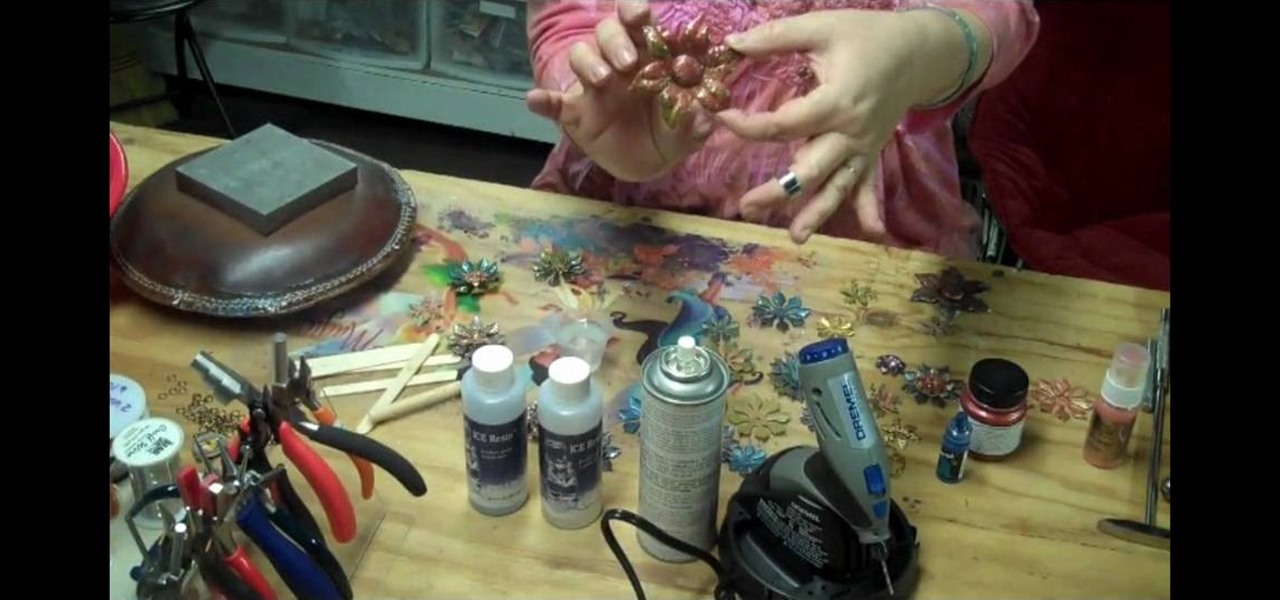
If you enjoy creating vintage inspired jewelry, then there's no way you can get around not using brass stampings. Already infused with a rusty colored hue, they're very antique-looking and their colors can be altered. Check out this jewelry crafting video to learn how to color vintage flower brass stampings using materials including acrylic paint and resin.
If you want to make cakes that look professional and almost good enough to sell, then meet gumpaste, your new BFF. A mixture of sugar, water, egg white and gelatin, it's a sweet, pliable cake decorating material that's as easy to shape as polymer clay.
The first part of the video shows examples of completed Spartan leg guards. The materials needed for this project include boxes of cardboard, two liters of soda pop, gold paint, masking tape, scissors and wire. you must first print out the template shown by the narrator and use it to cut out the leggings to the appropriate size. Now use the two liters to fold the cardboard around the two liters to give the legs their shape. Once the cardboard has shape use the wire to hold to the paper in it'...

This is a video tutorial in the Fine Art category where you are going to learn how to make a hippie chiffon one shoulder top. The materials you will need are chiffon, studs, elastic thread and elastic. Use a simple tank top pattern to cut out the chiffon. Elongate the center of the fabric; this will give it the flowy look. Shirr 5 rows into the middle of the fabric making sure the elastic is on the wrong side of the fabric. Fold in half, right sides together. Sew the side seam and the shoulde...

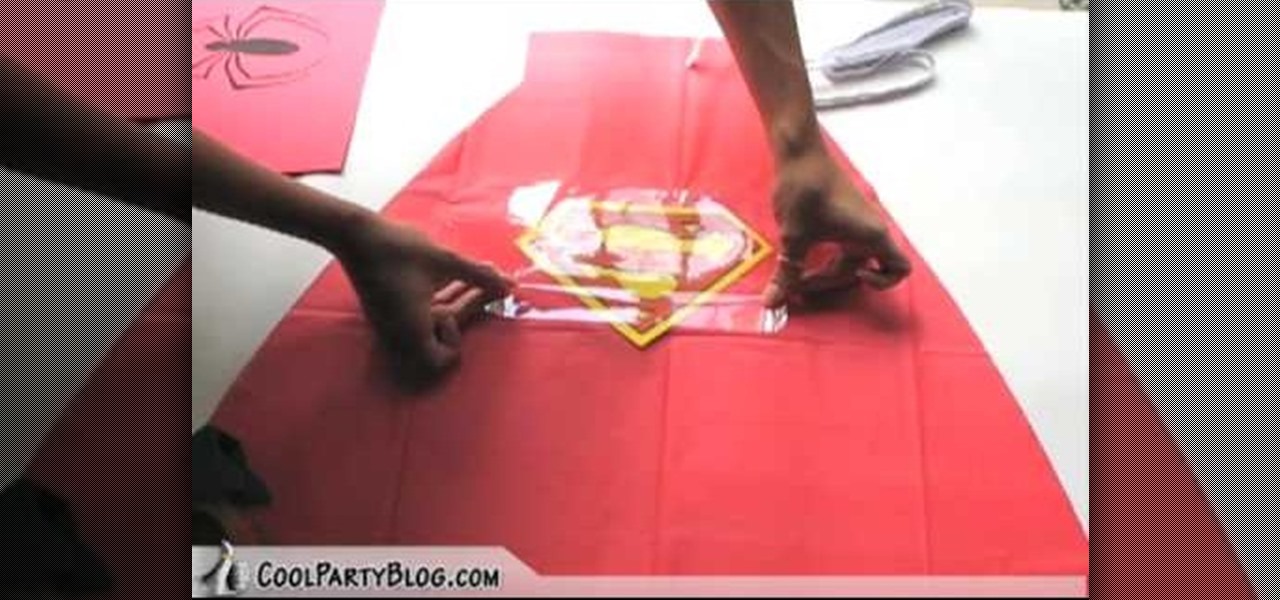
In this tutorial, we learn how to create super hero cape party favors. First, take a plastic red table cover and remove it from the package. Next, open it up and fold it in half twice, so you end up with a rectangle. Then, take scissors and cut a large triangle shape out of the material. When finished, open up the cover and it will be in the shape of a cape! Then, cut out some "s" for Superman signs and tape it on the back of the cape. Then, tie string around the top so it can be worn and you...
In this tutorial, we learn how to make an iron on transfer for a t-shirt. The materials you will need are: a printer, an iron, hard surface, transfer paper, and t-shirt! To start, find the art that you want to put on your picture and then you will need to transfer it onto the paper for your shirt. Once this is fully transferred with the scanner, load it to your computer. Then, print it out on transfer paper. After this, you will place the paper down on the shirt and iron it for a few minutes....
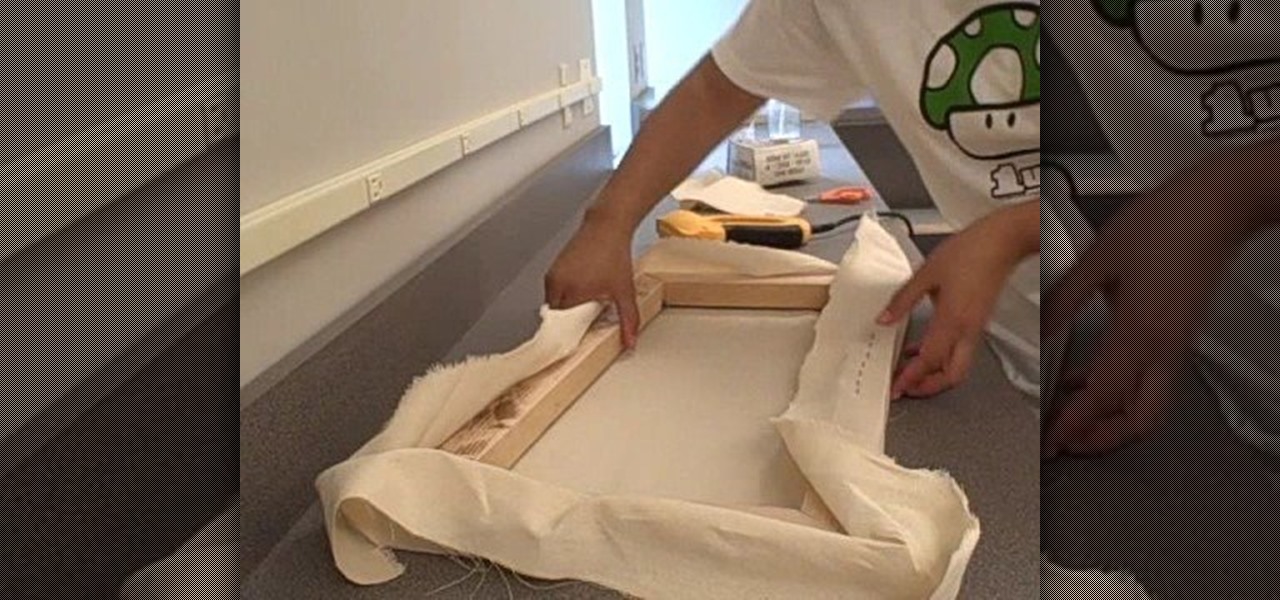
This video begins with an unfolded painter's canvas unfolded on a table and a frame which will be used to stretch and mend the canvas. The canvas needs to be laid beneath the wooden frame. The canvas must then be stretched over the sides of the wooden frame and then stapled into place. After the canvas has been stretched and stapled over the wooden frame you can pull the corners to tighten the canvas fabric. After the canvas is being stretched within the frame you must let it sit until it bec...
In this video from ViralVideoJunkies we learn the magic trick where you pass a coin through a handkerchief. Take the coin and place it underneath the scarf. Hold it by the coin and pinch it so you have a bit of material in between the coin and your other finger. When you make the move to put the coin back in the scarf you are actually not just covering the quarter back up, but you are taking both sides of the scarf and flipping it. Now you have a firm grip with your thumb and finger on the co...
In this tutorial, we learn how to make a standard blanket from crocheting. First, you will start your crochet by positioning the material into your hand. Then, you will need to tuck in between your ring and middle finger and around the others. The fingers will control the tension in the string. Now, start the first stitch by rotating the string around the finger. Then, grab the back one and pull it over the front. Use your finger to pus up and then you have your first stitch. put it on your h...
In this tutorial, we learn how to make a homemade compost tumbler. Find a large barrel and mount it on a wood frame. You can use recycled materials, like an old pickle barrel if you can find one. There should be an axle in the middle of the wooden posts that runs through the tumbler as well. There should be a pipe in the middle bottom of the barrel to run air through, that will exit through the top where the handles are at. The aeration system will help your compost work properly, so you can ...
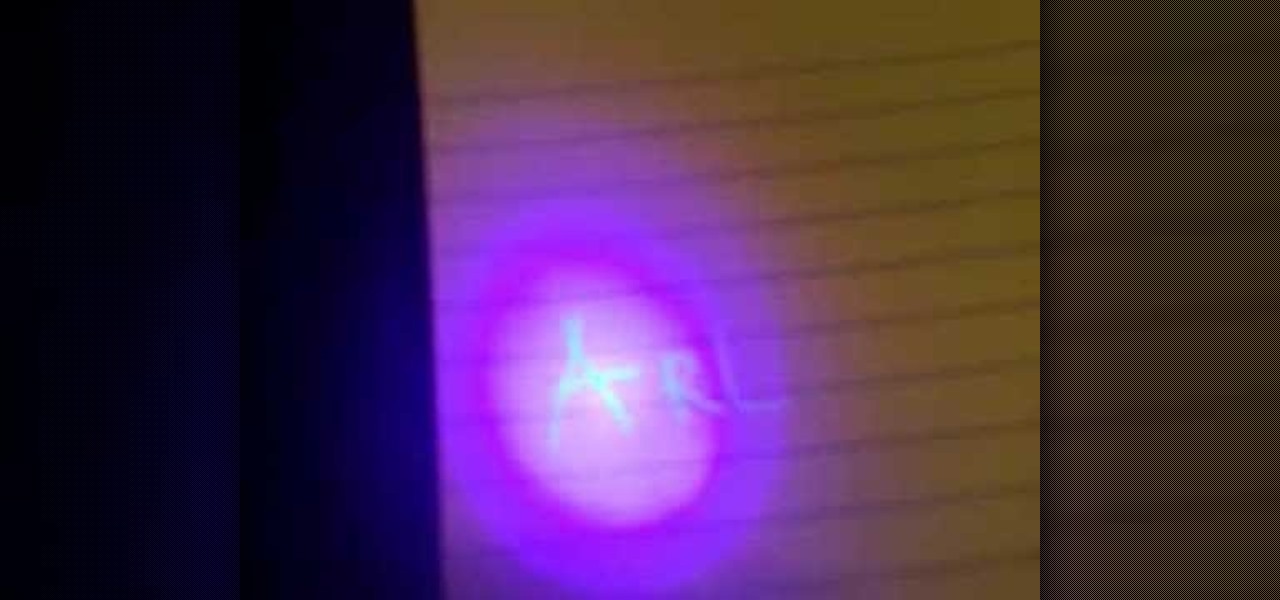
In this video, we learn how to cheat on a test or exam with a light. To do this, you're going to need a small hand held black light and a pen that writes in white. After you have these materials, you will write out the answers and information that you need onto a blank piece of paper with the pen. After you have everything written out, shine the small black light onto the paper. Now you should be able to see the writing as clear as day! Use this on a test and nobody will know you have all the...
In this tutorial, we learn how to make a miniature table. Materials you will need are: a wood slat, 4 popsicle sticks cut in half, paint, paintbrush, and glue. Heat up your hot glue gun and then grab your popsicle sticks. Glue one stick to the side of every corner of the slat. After this, you should have two on each side of all four corners of the wooden slat. After you're finished placing them on, let the glue cool and then harden. To finish, you can paint this and decorate it and use it ins...
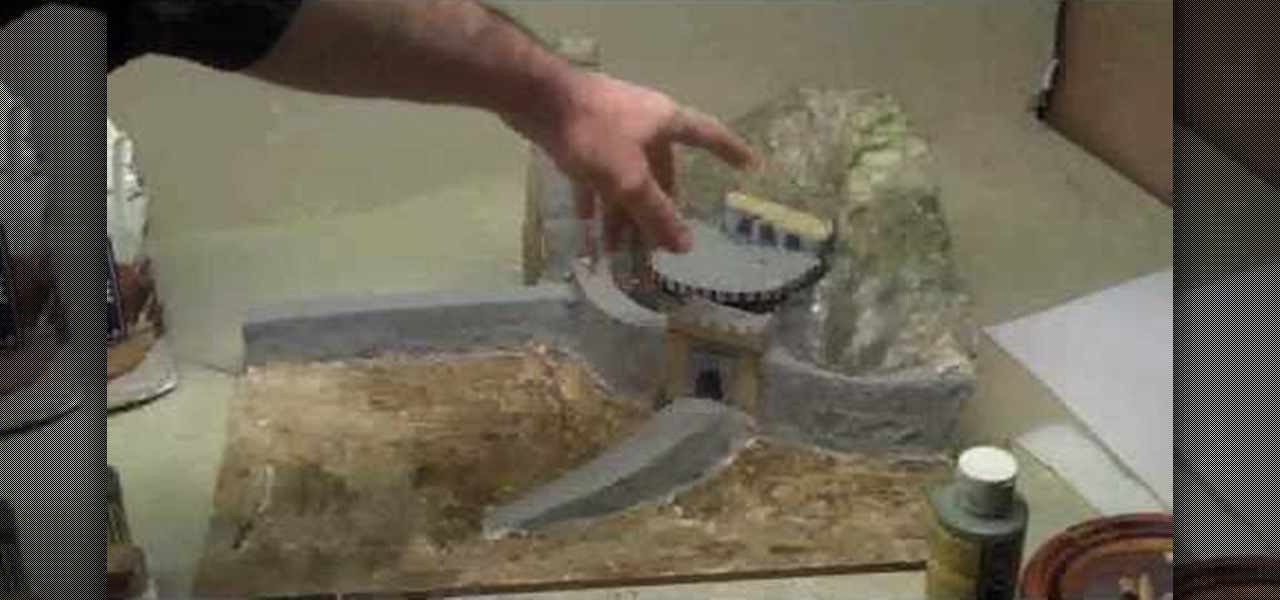
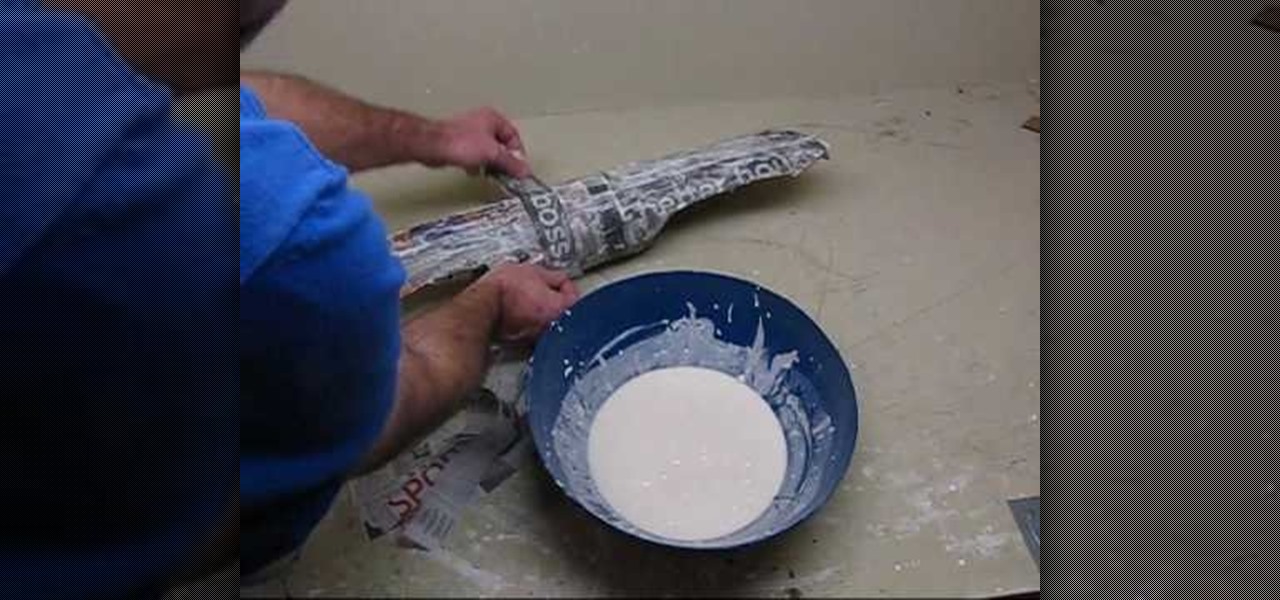
In this tutorial, we learn how to make a paper mache Helm's Deep. You can make a pretty good one just using paper mache if you don't have the professional materials. Build it on a cardboard surface and then use cut outs from cereal boxes to make the structures and building features. The paper mache will go over the buildings, so you can make different types of structures. You can also use crumpled up news paper to make the terrain so it will maintain its shape. After you put the mache on, it ...
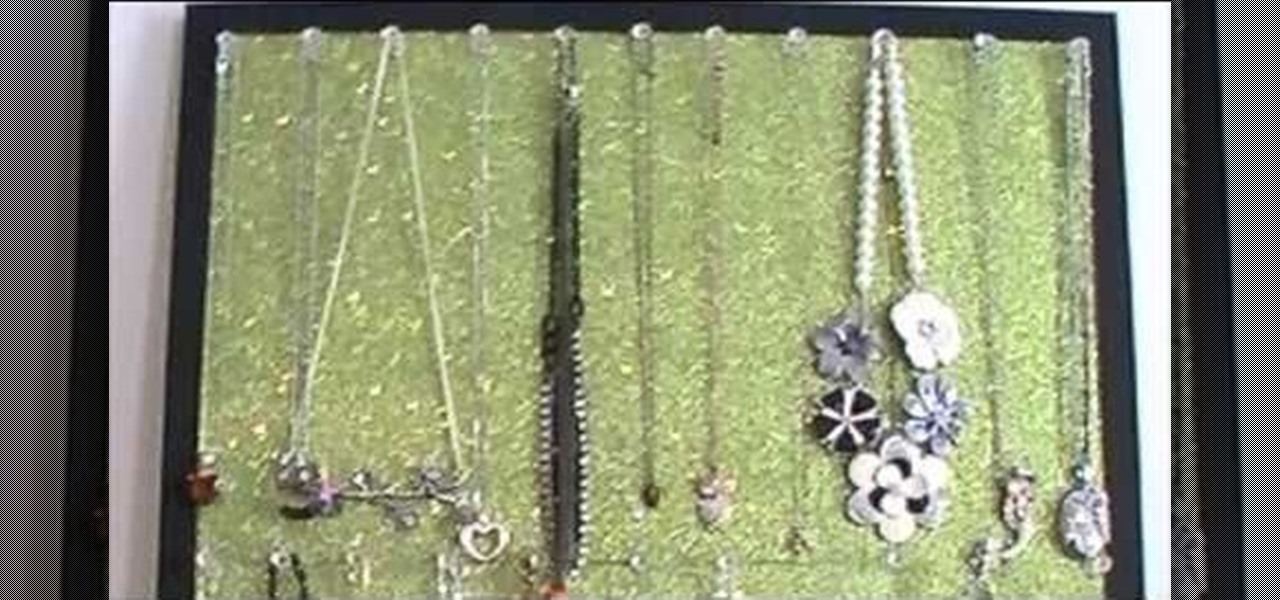
If you're anything like us, then it takes you forever and a day to find that perfect earring and necklace you want to go out, not because it's hard to decide which one, but because everything's so tangled up together you can't make out one necklace from another.
This is a video tutorial in the Home & Garden category where you are going to learn how to deal with a hollow door when installing bath fixtures. Bob Schmidt shows you how to do this while installing bath accessories such as robe hooks, towel bars or towel rings. The product that you need to do this is called easy anchor. It is a metal anchor specifically designed for the right depth for a hollow core door. Take the anchor and drill it down the door until it is fairly close to going in fully....
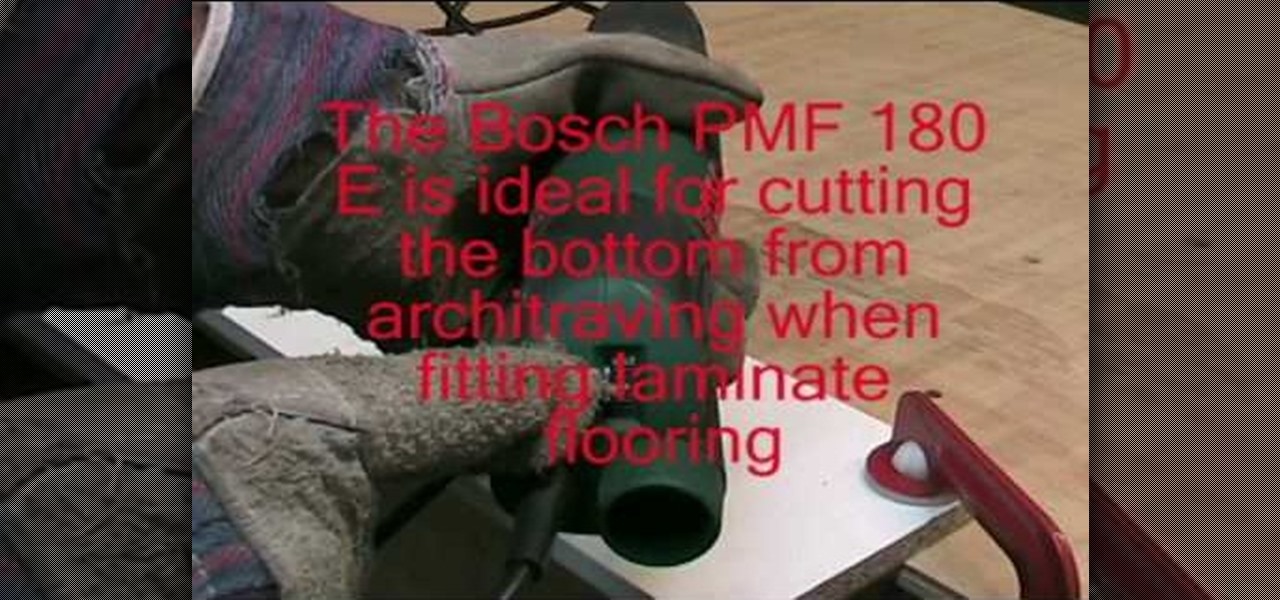
In this tutorial, we learn how to use the Bosch PMF 180E multi-purpose saw and sander. First, lock the blade into the saw and then place the screw in using a screwdriver. After this, you will be able to use the saw to cut out what you need to on your type of material. Make sure it's plugged in and you have safety gloves on while you're doing this. To change the blade, wear your gloves and unplug the machine. Remove the bolt to get the blade out and then replace it with the blade that you need...
In this tutorial, we learn how to make fur suit eyes for a mask. First, grab a simple paint pallet that has dips down in it for the paint. Then, cut the dips out of the tray they come in with a small saw. Then, grab a hot glue gun and melt down the middle of the dip so it's hollow. Then, apply hot glue to the top of the hollowed out eyes. Then, apply felt around this and cut it out so you can see the eye. Push the material through the bottom to create the pupil, then your eyes are finished.
In this video, we learn how to make a prosthetic Glasgow smile like the joker. First, smooth the material onto the face and around the lips. Follow the shape of the lips for the sides of the mouth to make it look larger. Use a Q-tip to push on the prosthetic onto the face. Once this is attached, you can add in the color to the lips to make it look more realistic. Makeup will need to be added to the entire face. White should be on the face, black should be around the eyes. Go for a cracked and...
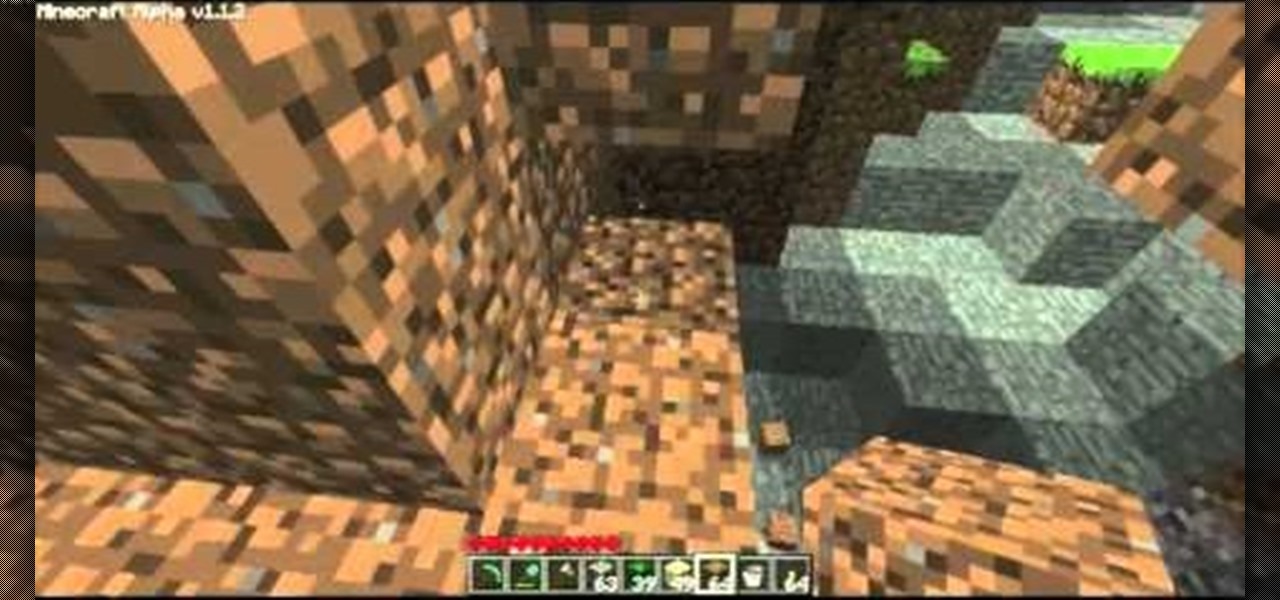
Having an epic base in Minecraft is one thing, having an epic moat, much more awesome. But let's up the stakes, a moat that also doubles as a way of killing those nasty zombis, spiders, creepers and more and then transports all their loot right into a little holding area that you can claim them from. In this two part video series you'll learn how to construct the moat itself, although he does it for a 6x6x6 building you can do it for larger, it will just require more materials.
In this tutorial, we learn how to create a crafters tool caddy for your desk. First, you will need to gather a few pieces of chip board coasters and cut them to the specifications you would like your caddy to be. After you have done this, put your caddy together by locking them together using cut lines inside the middle of each of them. Once you have finished this, place additional pieces of chip boards inside to create different sections of the caddy. Once you are finished, place in your mat...
In this tutorial, we learn how to make an easy hair bow. First, grab some thick ribbon in any color or material that you want to have. Use more ribbon if you want a larger one and less if you want a smaller one. Measure it out or use your eye to measure. After this, heat seal the ends so they don't fray by passing them through a lighter quickly. Now, fold the ribbon in half length wise, then place a crease there. After this, use a hot glue gun to fold down the two sides of the ribbon with a k...
This Halloween, forget store-bought prosthetics and expensive makeup artists. If you're looking for that creepy undead look, nasty nails are easily made at home. This video will show you how to make some horrific and ghastly fingernails for your zombie, vampire or other creature costume. The key to these Halloween nails are clear plastic report / presentation covers that you can get from any office supply store.
Your family is your family no matter where they are, but if members of your family are living far away in another state or even another country it becomes hard to keep in touch and show you care as often as you want. And making cakes for them is nigh impossible, giving the shipping problems.
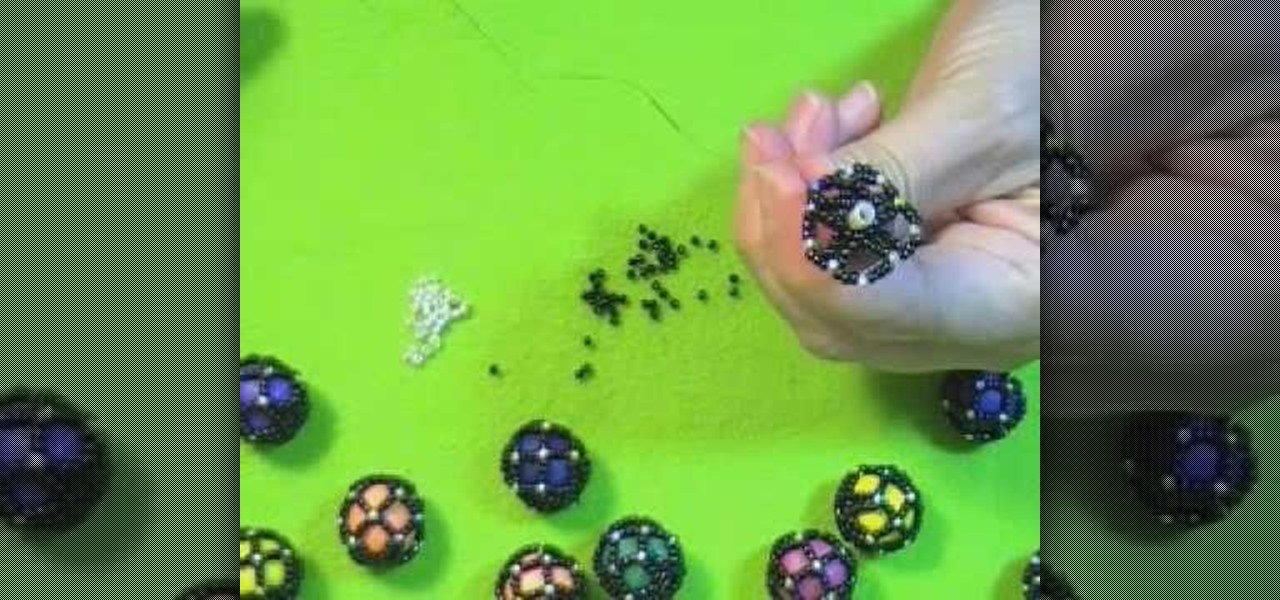
Want to create netted necklaces, earrings, purse decorations or any other netted designs. This video demonstrates and explains how to create a netted bead. However, the basic procedures which are
In this 3-part video, Chris White shows you how you can take an old pair of boxer briefs, make a pattern for new boxer briefs, and then create an entirely new one. You'll need some tools, and materials, including elastic, sewing machine with zigzag, serger, stretch fabric, pattern paper, scissors, thread, pins, rulers, and a pencil. Save some dough and make your own underwear that actually fits properly!
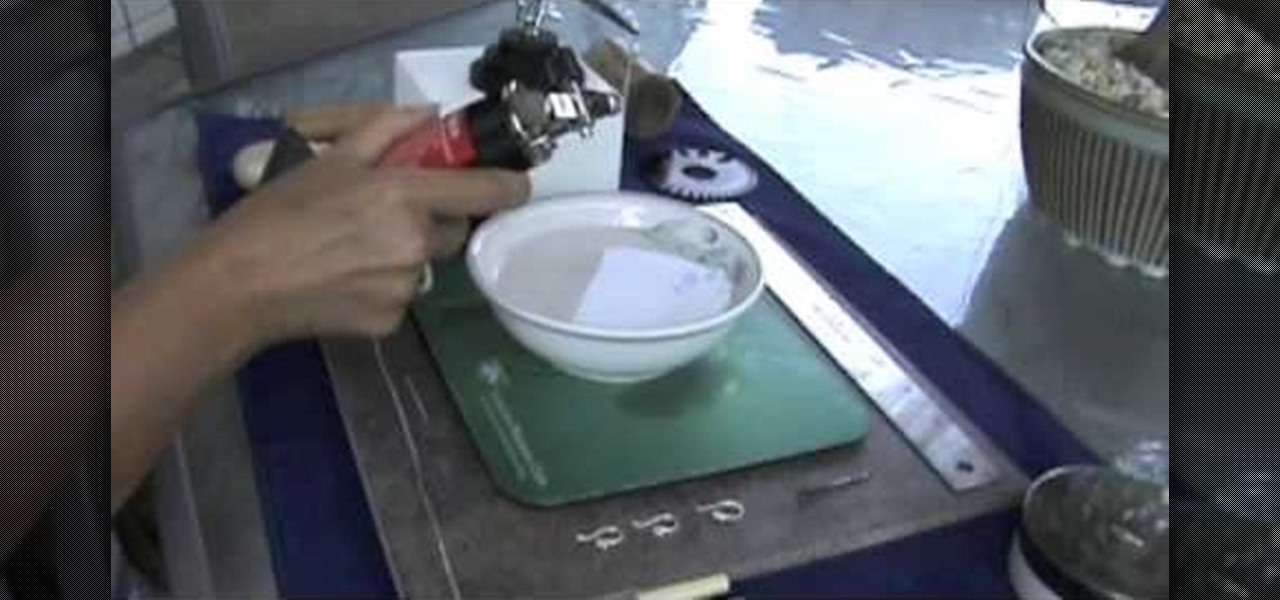
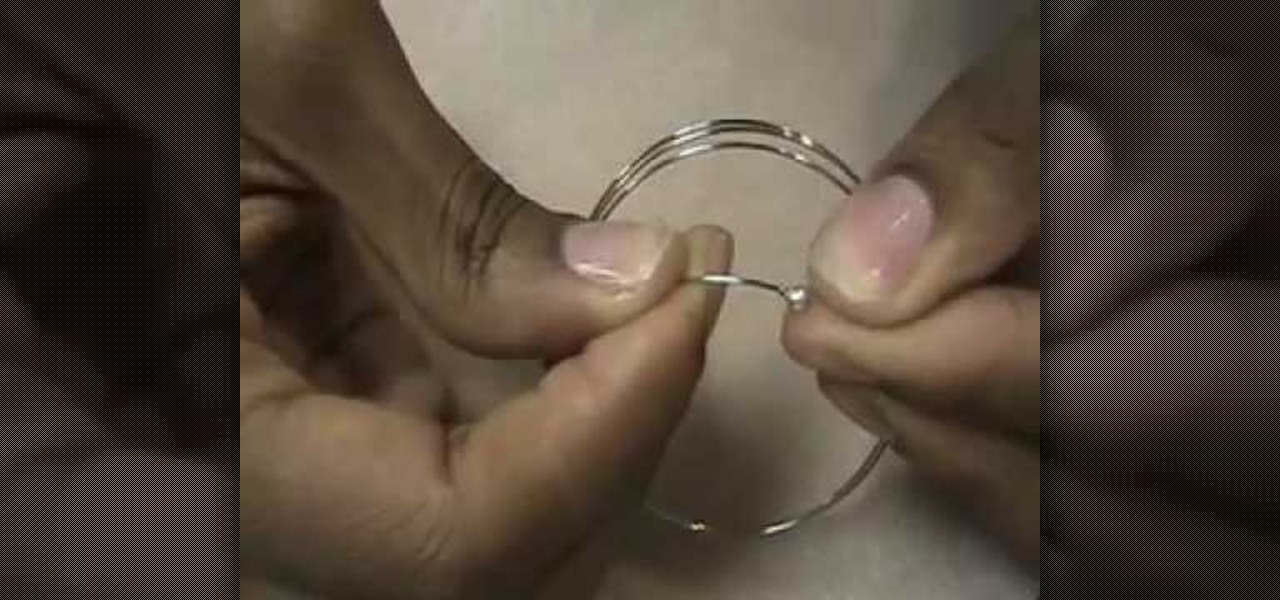
Make fine silver ball earring wires
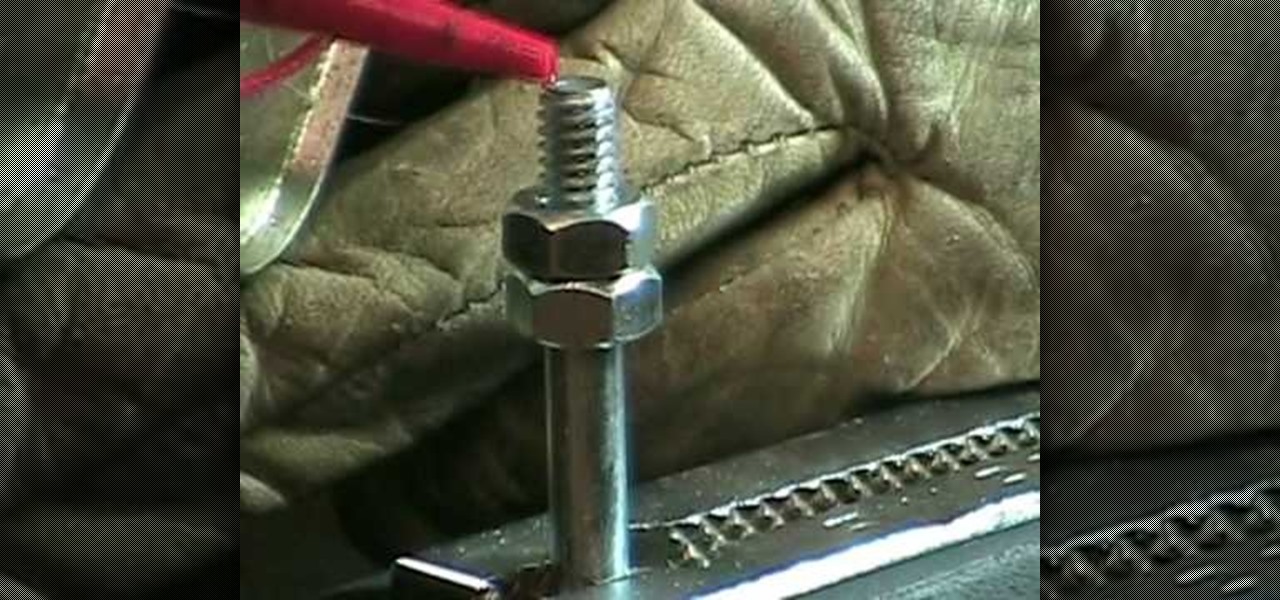
In this video tutorial, viewers learn how to cut a bolt and save the threads. The materials required for this task are: a hacksaw, steel bristle brush, bolt cutters, wrench, oil and a filer. Begin by putting some oil onto the threads of the bolt. Then place the saw on the desired groove and cut across through the thread. Now brush it with the steel bristle brush to remove the debris. Finish by removing the excess metal with the filer and unscrew the bolt(s). This video will benefit those view...
One of the coolest beading effects is the kind that suspends various materials - from flowers to Latticinos - in a clear glass case. Swirled or marbeled shapes can also be added for interest, but either way the resulting work is like looking into a prehistoric block of amber and peeking around at such curious fragments.
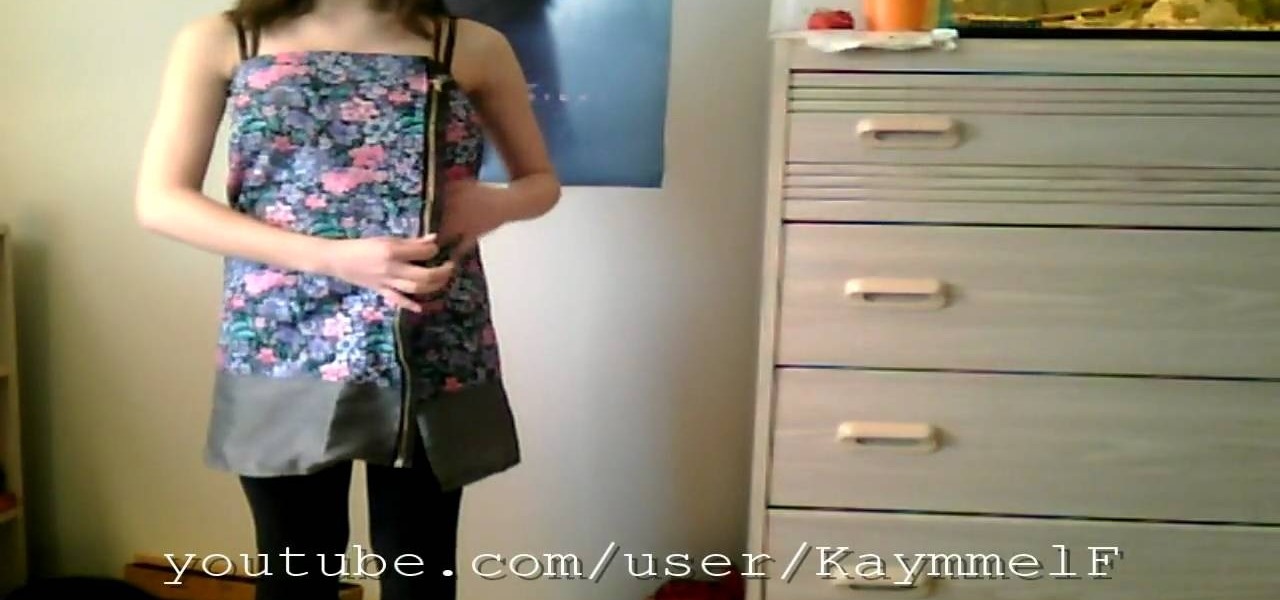
You really can't go wrong with florals and zippers. The two fashion trends are indeed opposites, with florals being overly dainty and zippers being more punk rock, but when you combine them together you achieve a striking balance.
If your son or daughter is planning on making a diorama for a classroom project or just because, making a cool water feature can be a great idea. Using real water may be fine and all, but if you want to prevent any kind of mess from happening, you can build one using materials that give a water like feel. So in this tutorial, you'll be finding out how to make a diorama waterfall from scratch. It's great for dioramas and is sure to be a much better fit than actual water. So good luck and enjoy!
In this video tutorial, viewers learn how to make a Mediterranean blue bracelet. The materials required for this project are: memory wire, Mediterranean Czech glass bead mix, 4mm sea side mix Czech fire polish round beads, wire cutter, super glue, bead stopper and 2 3mm memory wire end caps. Begin by cutting 3 1/2 clamps of wire and glue one memory wire end cap to the end of the wire. Then string the beads. Users may decide to make a repetitive pattern with the beads or randomly string the be...
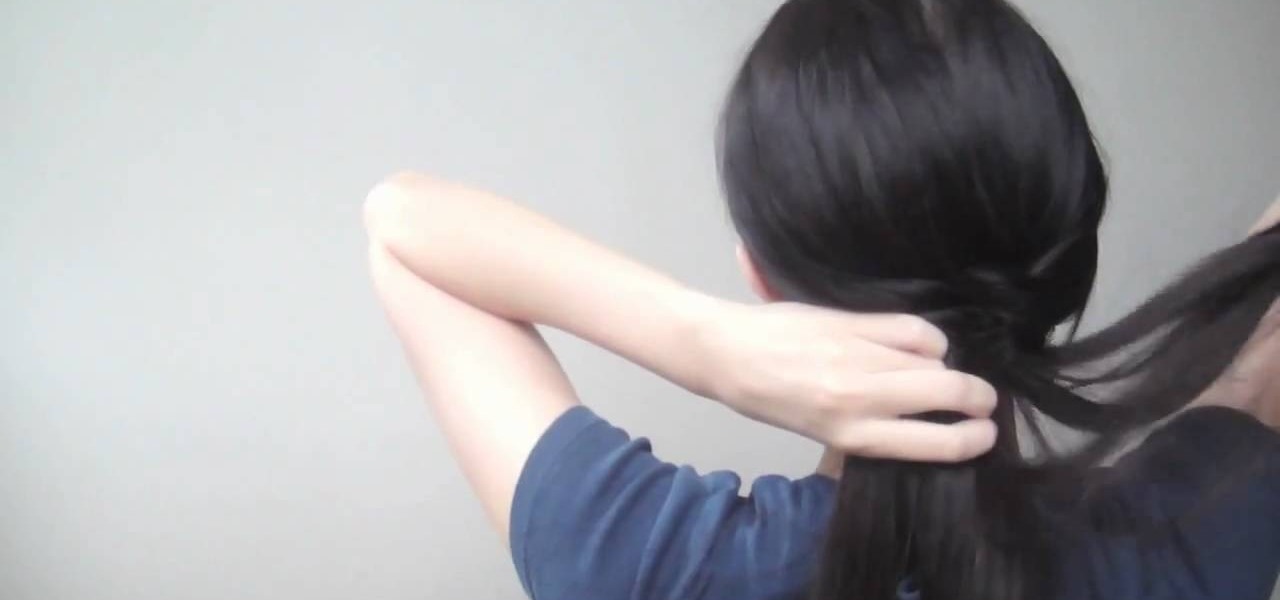
Fishtail braids are really not much different from your typical braids, only that they trail off from being thick at the top to very thin and delicate on the bottom (yes, like a fish tail). But this one feature is what makes them infinitely more elegant and romantic than the typical braids we wore in 5th grade.
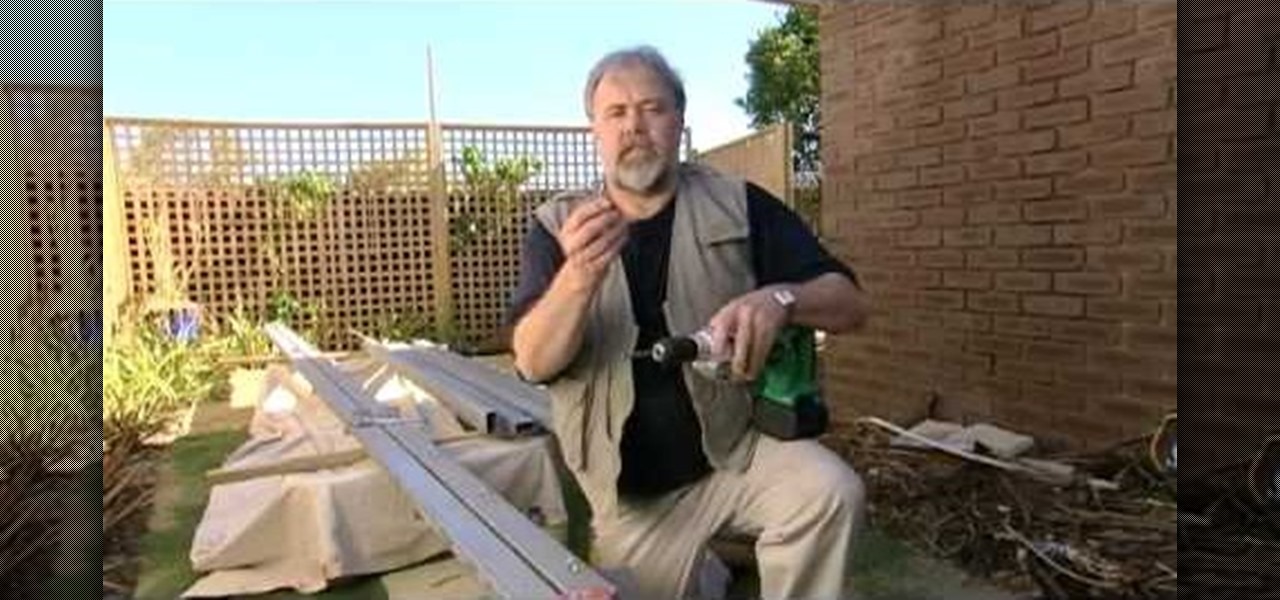
If you enjoy spending time outside, but can't stand being in the sun for too long, you have a bit of a problem. Buying patio furniture or an umbrella is a good idea, but it can be a pain lugging it around, especially if it's not weatherproof. Another great option is creating a shade cloth.
In this video tutorial, viewers learn how to get water of their ear. The materials required for this task are a towel and rubbing alcohol. Begin by laying out the towel on a table. Then place the head on the towel and cover part of the towel over the face. Have another person pour the alcohol into the bottle's lid and then pour it into the patient's ear. Now move the ear and wait for several seconds. Then turn the head over. This video will benefit those viewers who enjoy swimming, and would ...
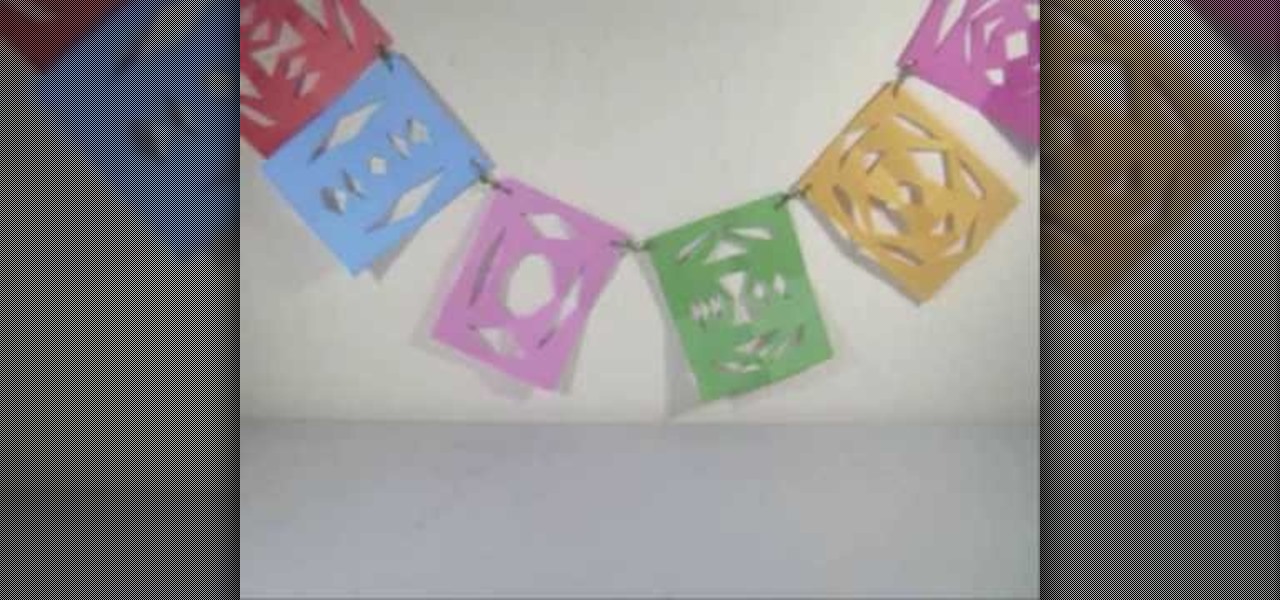
In this video tutorial, viewers learn how to make a colorful paper banner. This task is very easy, fast and simple to do. The materials required for this project are: construction paper, yarn, scissors and a hole puncher. Begin by folding the construction in half. Then fold it in half on again. Now cut pattern on the side edge of the paper and repeat this process for additional paper. Open the paper to reveal the symmetrical cut out pattern. This video will benefit those viewers who are inter...
Who knew that that mess of random old clothes and knick knacks piled on your bedroom floor that makes it seem like a tornado just rolled on through could actually help you clean up the mess? Often when we see such clutter (and actually decide to do something about it) the natural and easy thing to do is simply to pick up the junk and toss.
If you're range burner isn't working properly, there may be a number of reasons for this. One of the most obvious and easiest problems to take care of, is that it might be clogged. Overflowing liquids and other food materials can get into the burners and cause them to become clogged. This leads to an insufficient working burner that needs to be fixed soon.
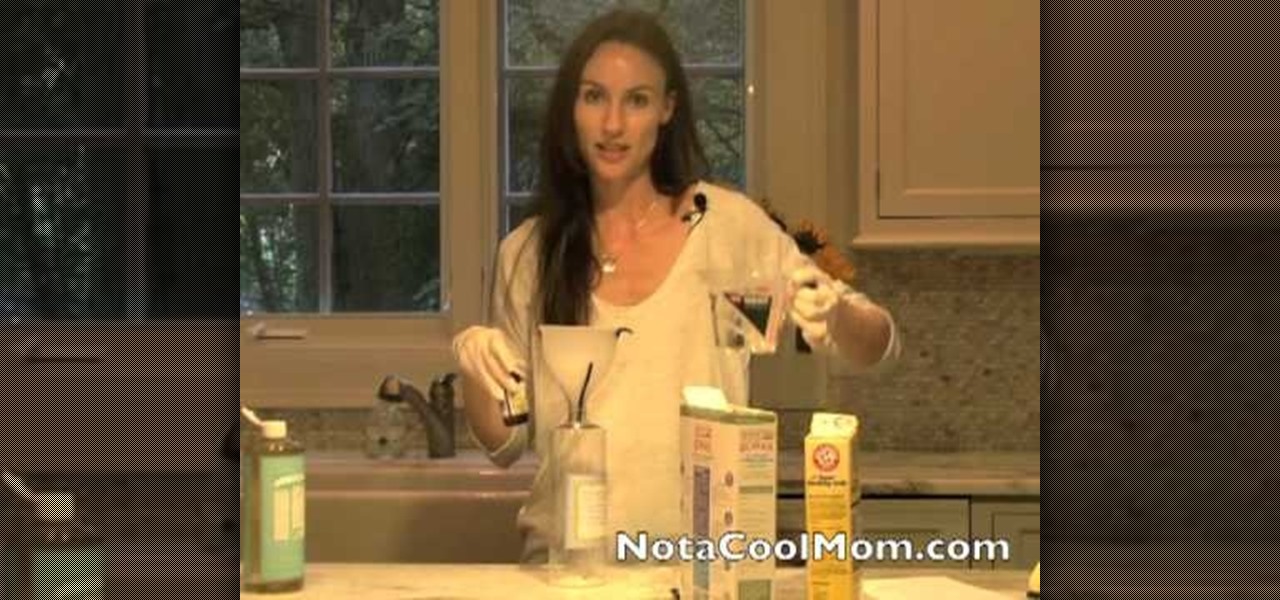
If you've just ran out of all purpose cleaner, hold on to your waller for just a couple of minutes. Most of the all purpose cleaners, or any cleaner for that matter, contains chemicals that can be harmful for you and others. Not only that, but it produces more trash that can easily be avoided. How so? By making your own stuff from scratch.