At midnight on February 17, 2009, all full-power television stations in the United States will stop broadcasting in analog and switch to 100% digital broadcasting. Digital broadcasting promises to provide a clearer picture and more programming options and will free up airwaves for use by emergency responders.

This instructional video demonstrates how to center a piece of clay on a pottery wheel. Using electric pottery wheels, a steady hand is necessary to prevent the clay from flying off center. It helps to lock one's elbows to control the clay and eventually sculpt a perfectly centered cylinder.

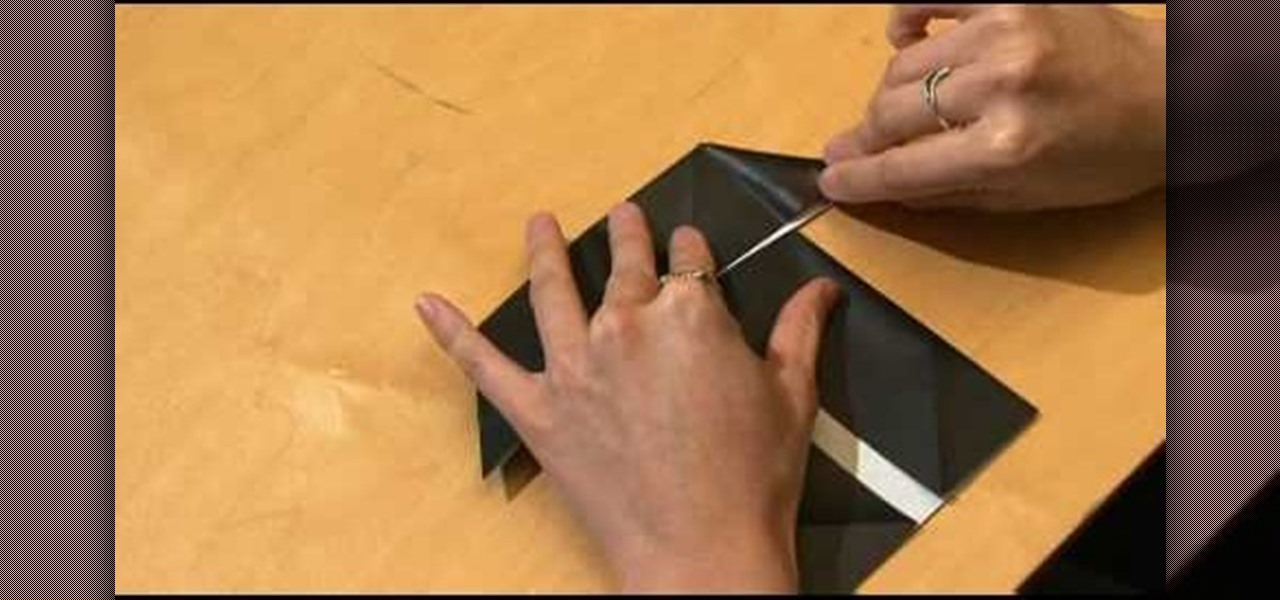
This video tutorial demonstrates how to make an Origami necktie and a shirt card. Begin with a square two sided paper. Fold the paper in half, forming a triangle. Open it back up and use the center fold as a guide. Take one corner and fold it in toward the center fold. Repeat this on the other side. You end up with a kite shape. Turn your paper over. To make the front knot of the tie, fold down the smaller corner toward the center about a third of the way. Fold the point back up toward the to...

How to Make a Lattice Top Pie Once the base of your pie is made, roll out a thin, circular piece of dough. This circle should be just a bit larger than the base of the pie. With a pizza cutter, cut 1-inch wide lines through the dough. Starting with the longest strips, place one strip horizontally on top of the center of the pie and one strip vertically on the pie. The strips should form a “plus sign” on the pie.
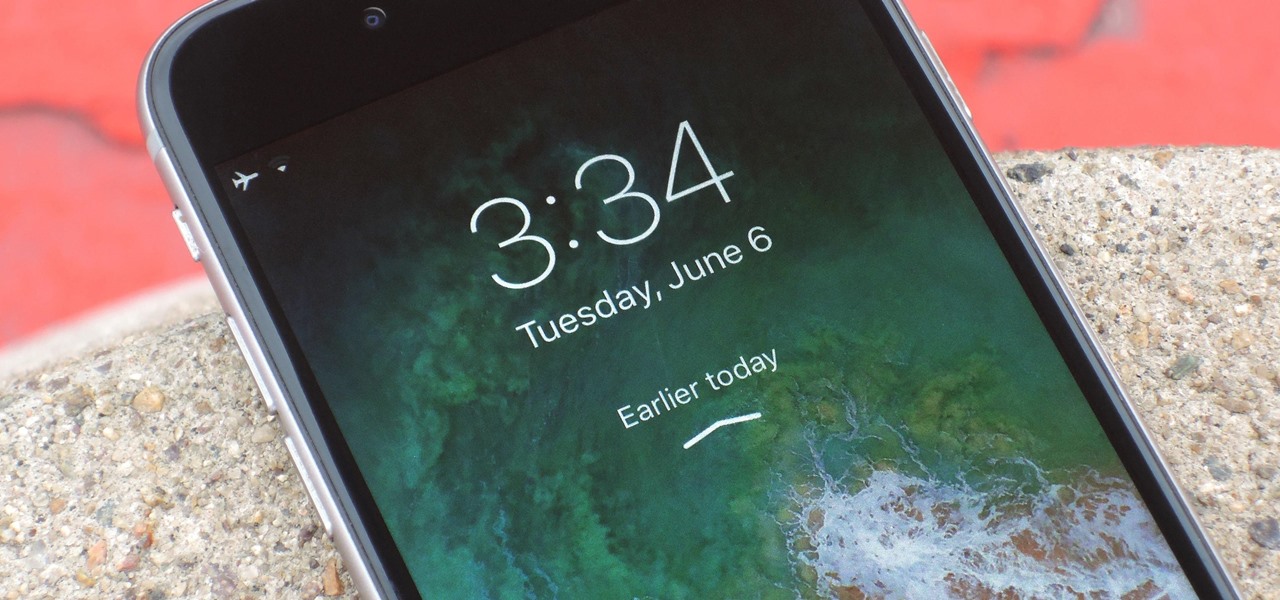
One of the first things you'll notice about iOS 11 is how the Notification Center now has the same interface as your lock screen. It's pretty confusing at first, and it's pissed off tons of users, but it's really not that bad once you learn all of its features.

By now we all know the slogan "Reduce, Reuse, Recycle." And many of us do just that every Sunday, visiting the recyling center to dump our latest fill of glass and plastic bottles.

Adobe Dreamweaver CS4 is one of the most powerful tools for creating websites today. This video teaches you how to center your swl file on your website using an xhtml workaround and css. It will look much more professional as a result, since it won't be out of alignment when viewed in large browser windows.
To start making your tea and toast, roll about a section of white fondant about four inches by six about 1/8th inch thick. Now take a one inch circle cutter and cut out one circle. Now taking a half inch circle cutter, make an impression in the center of the first circle being careful not to go all the way through. Now you have your saucer for your toast. Next, take a one inch square cutter and cut that out of the fondant as well. Cut it in half diagonally and poke tiny little holes with a to...
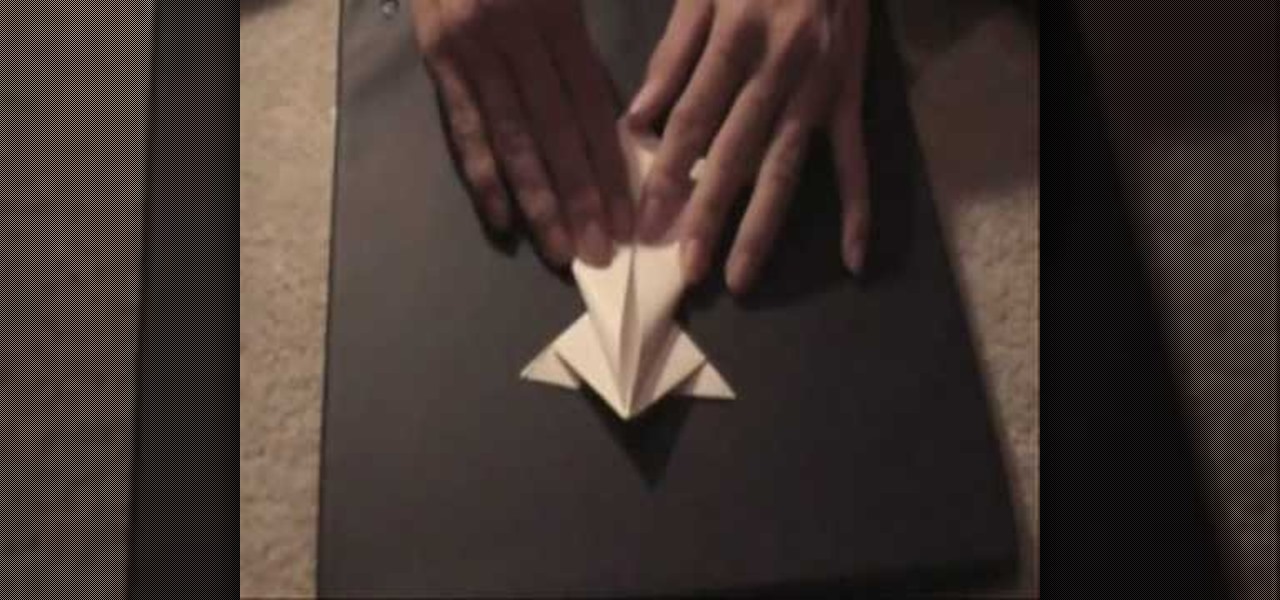
Kevin demonstrates how to make a paper frog. Take a regular sheet of construction paper. Fold the outer ends towards the center forming a triangle. Fold a crease at the base of the triangle and cut it out. Open the folds and you can observe two creases. Create two X-shaped creases by bending the opposite corners. Hold the triangles on the side of the X and squash it down such that the other two triangles meet. Repeat the process on the other side. This forms a square with a diagonal cut conta...
Go beyond the traditional 3D workflow to an immersive creative experience with the software Modo, created by Luxology. Modo is the next evolution of 3D modeling, painting and rendering for Mac and PC. Modo includes 3D sculpting tools, animation and network rendering, and advanced features such as n-gons and edge weighting.
How to Use Your Mac as a Server: Turn your Mac Mini into a server! Yes, that's right, with a little know-how and a little spunk, you can turn an inexpensive Mac Mini computer into a server to provide services over you network. You won't even need the Mac OS X Server, just the Mac OS X Client, so there is no extra software to buy, just the Mac Mini and it's operating system.
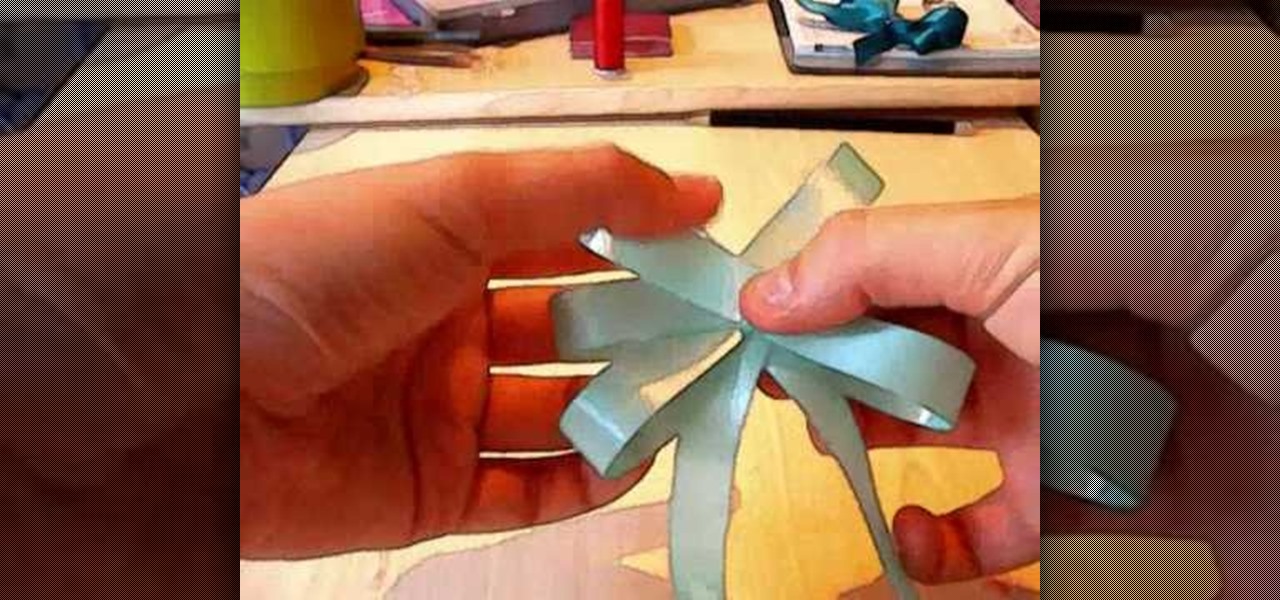
First of all you have to place your thumb or attach a pin on the ribbon such that there is a space of two to three inches left outside. Bend the ribbon back to the center to create your first loop. Now you have to pass the ribbon back underneath the bow. Then you have to again return to the center to create a complete second loop. Now continue passing the ribbon over and under the bow. Now return to the center and then repeat this step to create six loops in total. After this you have to turn...
Simon Leach shows us an easy way to center your clay on the wheel
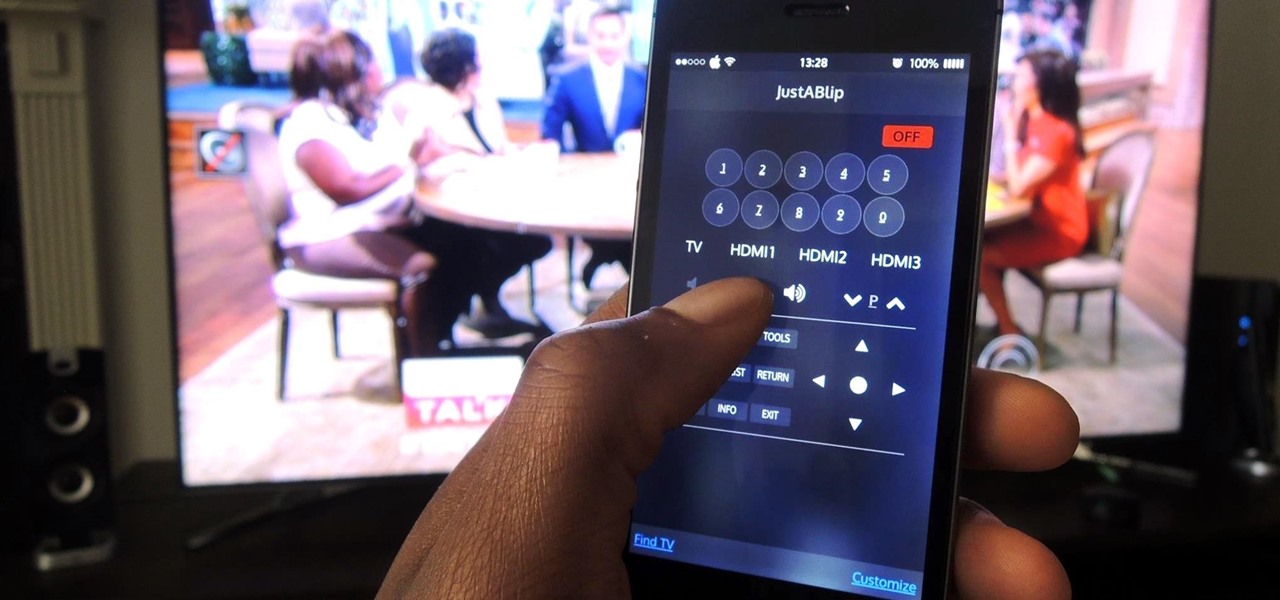
After I traded in my Samsung Galaxy S5 for an iPhone 5S, the one feature I truly missed was the Smart Remote app. My television remote was broken and the S5 saved me from, you know, actually having to get up and change the channel.
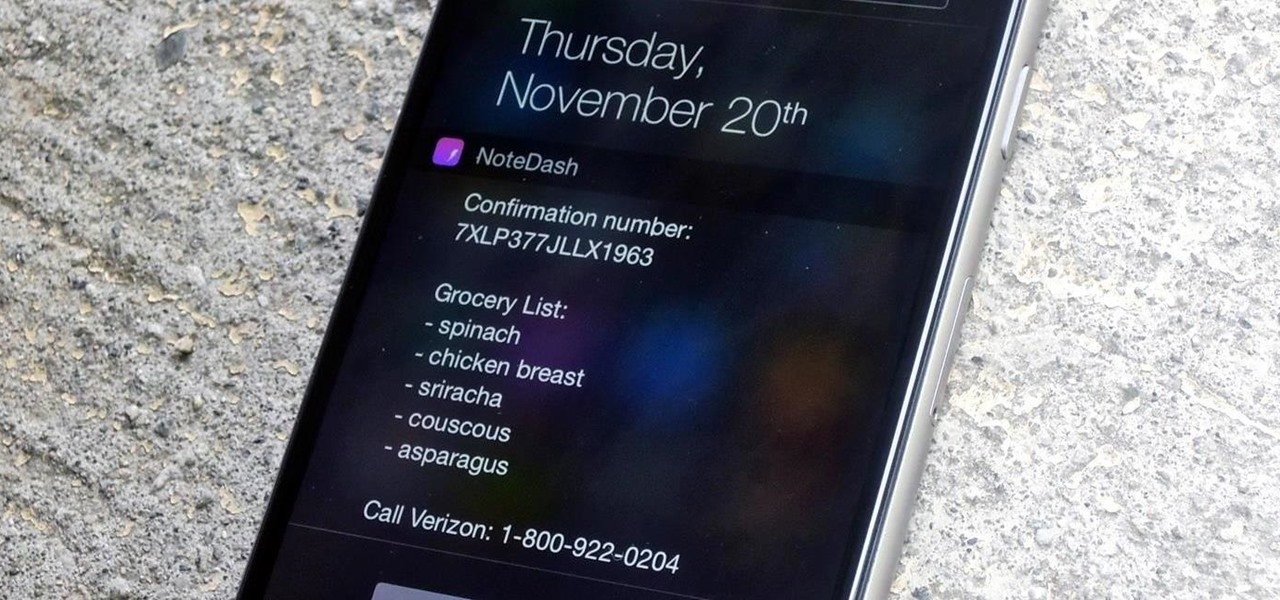
Confirmation numbers, grocery lists, addresses, and phone numbers are all things we need to quickly jot down on our phones, but the thing is, they're never extremely easy to access later. You have to figure out which app you wrote them in, meaning lots of needless searching and scrolling. Even if you use a dedicated note-taking app, those extra steps of actually opening the app to find a UPS tracking number can be an unnecessary pain.
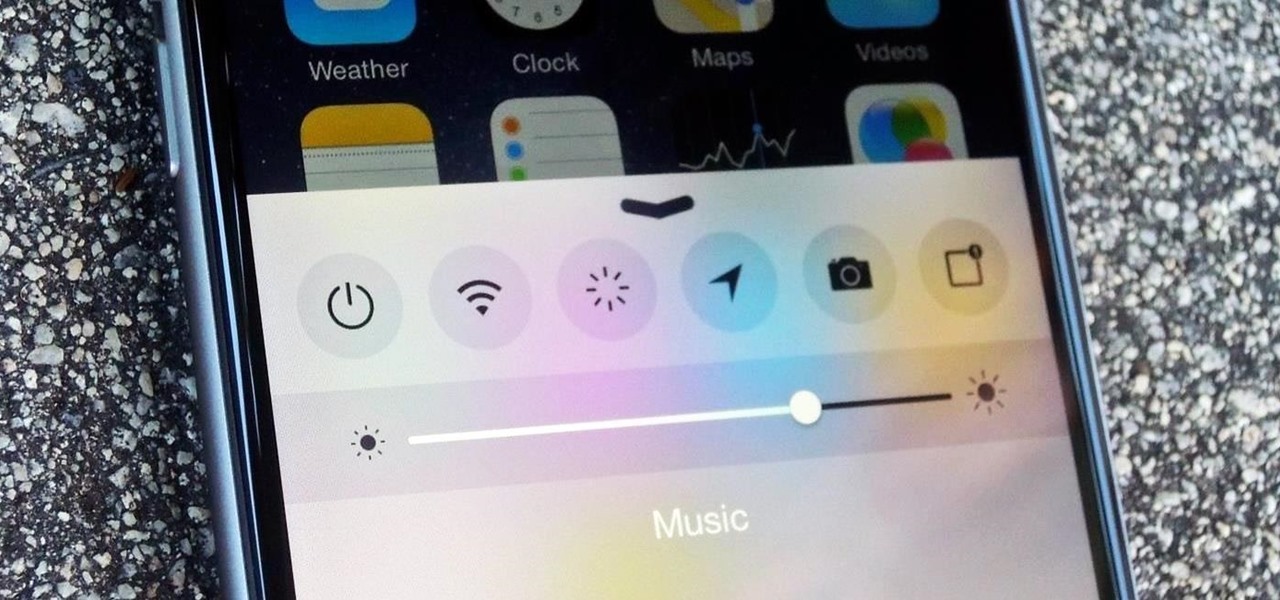
As far as customization goes, there's nothing you can do to change the look and function of the Control Center on your iPhone. By default, you can't alter the system toggles, but if your device is jailbroken, it's a completely different story. With the help of a tweak from developer plipala, called CCSettings for iOS 8, you can add, remove, and rearrange your Control Center toggles.
Unless you are or know a developer, you'll have to wait until sometime in September for the official iOS 8 to hit your iPad or iPhone. However, that doesn't mean you can't get some of iOS 8's new features on your iOS 7 device right now. For example, the new Notification Center, which I'll show you how to install below.
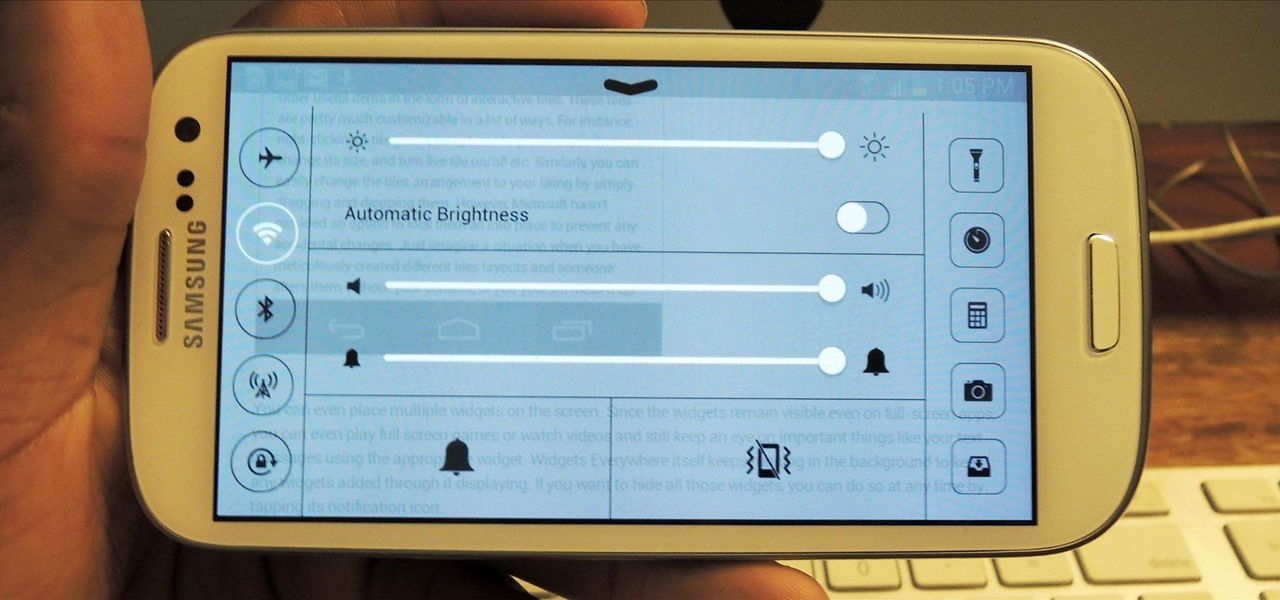
Personally, my favorite new feature in iOS 7 is the Control Center. With it, you can very quickly and efficiently access popular and much used settings, such as Wi-Fi, Bluetooth, brightness and more—all with one simple swipe.
Apple may have unabashedly lifted their upcoming "Control Center" from Android devices, but visually speaking, it's an awesome take on Quick Settings that would look pretty good on a Samsung Galaxy S3.
There are very few things Android users would want to borrow from Apple's iOS, but let's move beyond the fanboy/girl biases and admit that Apple actually does a few things pretty well. One of those things is looks, and the new iOS 7 looks pretty amazing to me.
1: Place paper sideways. Place the paper on the flat surface with the long edges at the top and bottom. 2: Fold long edge to opposite edge and unfold. Fold one long edge to the opposite long edge, crease, then unfold. 3: Fold longs edge to center and unfold. Fold one long edge to meet the center crease you just made. Now do the same with the other long edge, so they both meet in the center. Unfold completely. 4: Fold short edge to opposite edge and unfold Rotate your paper and fold one short ...
If you're not technologically savvy, don't stress. You probably want to jump right into the game, so check out this video on how to properly install your Playstation 3.
If you've already mastered the crane and the basic origami lucky star, then this five-pointed star is the next logical step to take. Made from a dollar bill, this origami project doesn't even require special materials to assemble.
Interested in burning in docking windows to the left, right or center of your screen? This Windows 7 tutorial will show you how it's done! It's easy! So easy, in fact, that this home-computing how-to can present a complete overview of the process in just over a minute's time. For more information, including detailed, step-by-step instructions, watch this Win 7 user's guide.
Interested in centering icons within the MS Windows 7 taskbar without third-party software? It can be done! And quite easily. So easily, in fact, that this home computing how-to can present a complete, step-by-step overview of the process in about five minutes. For complete instructions, and to get started using this Win 7 trick yourself, take a look.
Take a square piece of paper and fold in half. Open the paper crease from the other side and mark it as previously.
Watch a person fold an origami box. This is an open box, like a drawer, but not like a cube. First step is typical, just make creases between the opposite corners. next step is to fold all four corners to the center point where the first two creases cross. next two opposite flat sides are folded over to the center so the fold is parallel to the sides. then unfold these last two folds, and redo it with the other two perpendicular sides. then unfold everything but two of the corner-to-center fo...
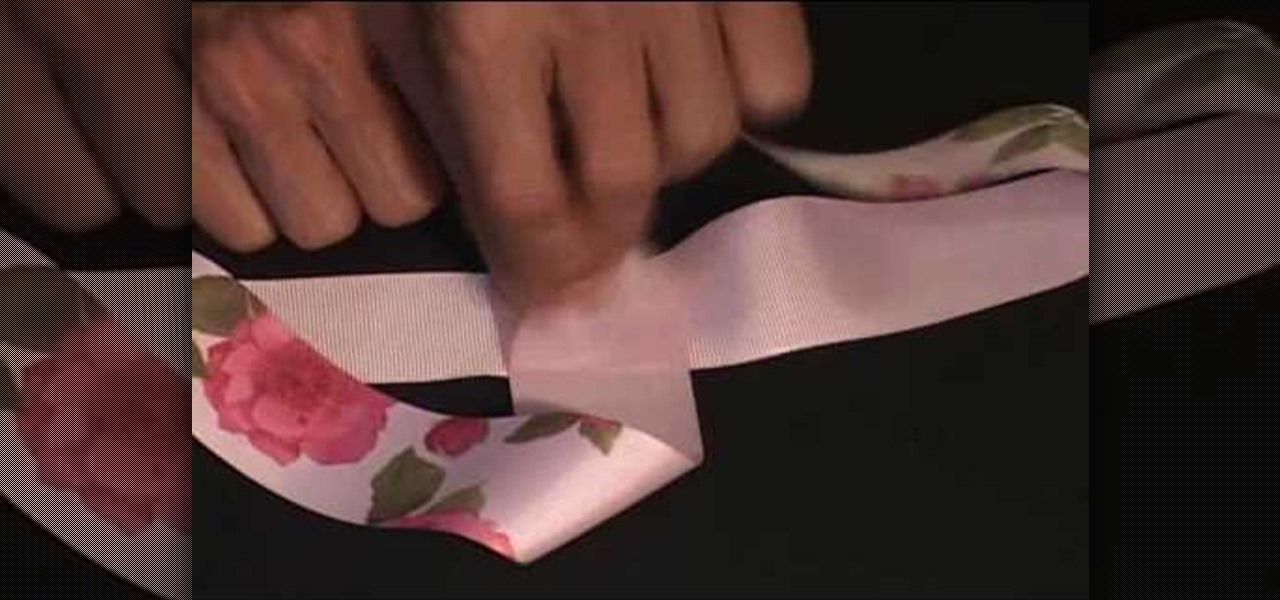
get a long piece of ribbon, put the ends together and make a crease at wear the ribbon folds, that'll be your center point. Now get one end of the ribbon, and without it flipping over, bring the end to the center of the ribbon and lay it perpendicular to the direction of the ribbon. Also bring the other end of the ribbon to the center of the ribbon but from the other direction. Hold the ribbon together using a gator clip. Obtain a piece of string or plastic strip, tie the folded ribbon tightl...
Learn about the L4D2 gameplay for Campaign 1: Dead Center - Atrium. Get the goodies and walk out of the safe house. Turn right and go down the hallway, making another right through the door at the end. You will find yourself back in the mall. Continue on the makeshift walkway, bearing left at the end until you reach an elevator. The blue door across from you is a dead end. For more info, watch the whole gameplay.
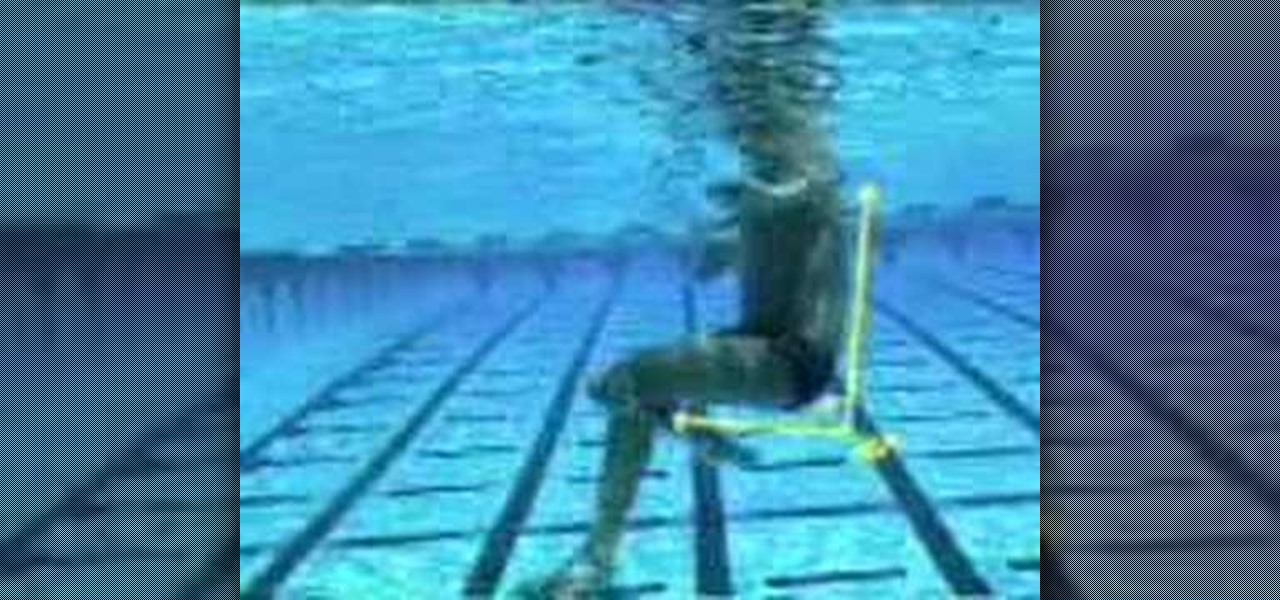
This is the classic water polo body position. You are in a seated chair position, sculling your hands while eggbeater with both legs. This is the position optimal for moving to and from the ball. This is also called the center forward position in water polo.
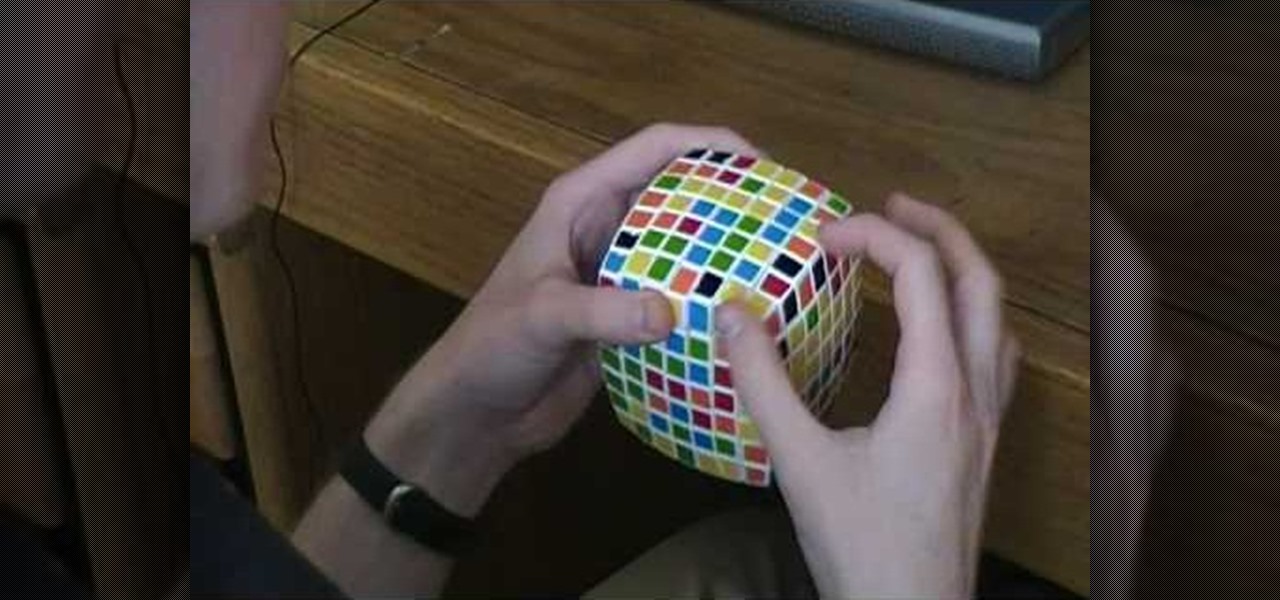
The V-Cube 7 is the grandaddy of all Rubik's Cube style puzzles, and it's on of the hardest puzzles to solve, with its 7x7 sides. If you're having a hard time getting started with the puzzle beast, specifically the 5x5 center, then this video tutorial should help you out. See how to solve the center of the V-Cube 7 puzzle. If you can solve a regular Rubik's Cube, it could help you out, because a lot of the principles are the same.
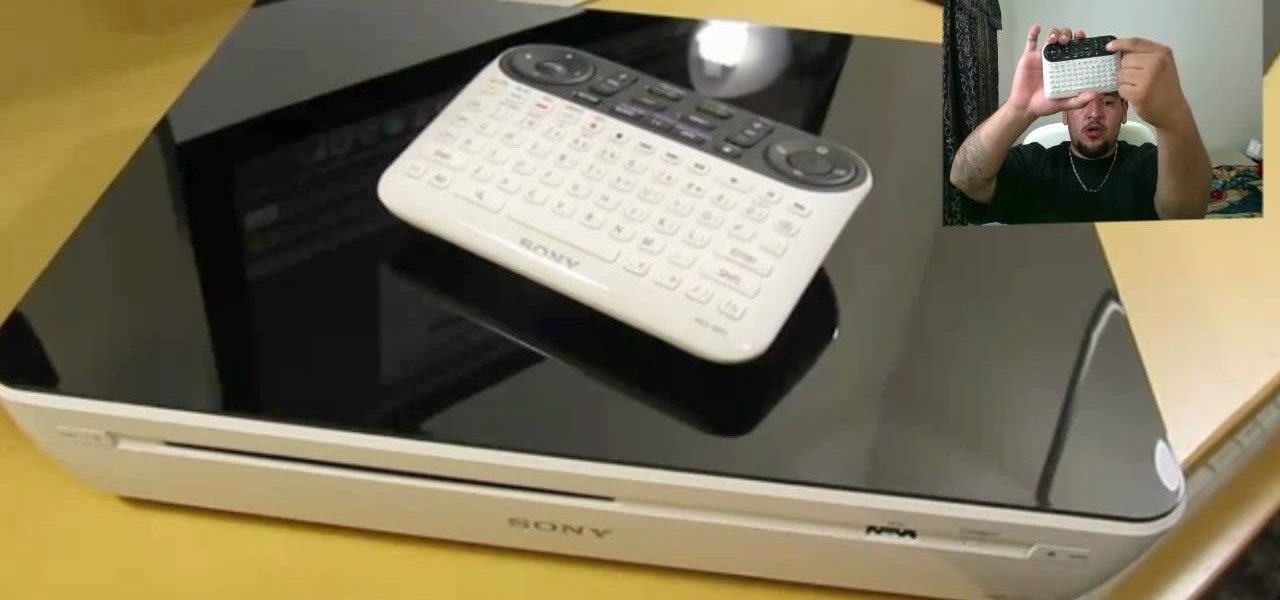
Google TV is a revolutionary new way to enjoy your two favorite things in life— Internet and TV. And Sony just happens to be the first company to design television products powered by Google, like their Internet TV Blu-ray Disc Player (Model NSZ-GT1). If you're thinking of getting one, this video provides a hands on, showing you how to use the new Sony Internet TV, paired with practically any television.
In this clip, you'll receive some tips on where to place your high-definition television for an optimum viewing distance. For a complete demonstration of the process and detailed, step-by-step instructions, watch this handy home-theatre how-to from the folks at CNET.
For those who have no idea what a Millennium Falcon is, watch the Star Wars movie franchise. It is the name of the spacecraft piloted by Harrison Ford in the original movie.
Jazz is a complicated style of music that takes a completely different style of thinking and playing to even do it somewhat decently. Soloing in its own right is the toughest, but there's a great way of getting started, and thanks to Jeff Richman from Musician's Institute, you will learn how! In this amazing video lesson, he goes through showing you the various ways of using melodies and key centers to really bring out your solo over any sort of Jazz Changes.
Tired of your PC pestering you to check this or fix that? Are you sick of all those pop-up balloons? Well, Windows 7 now has a feature called Action Center, and it lets you decide which alerts you see and which ones you don’t. See it in action!
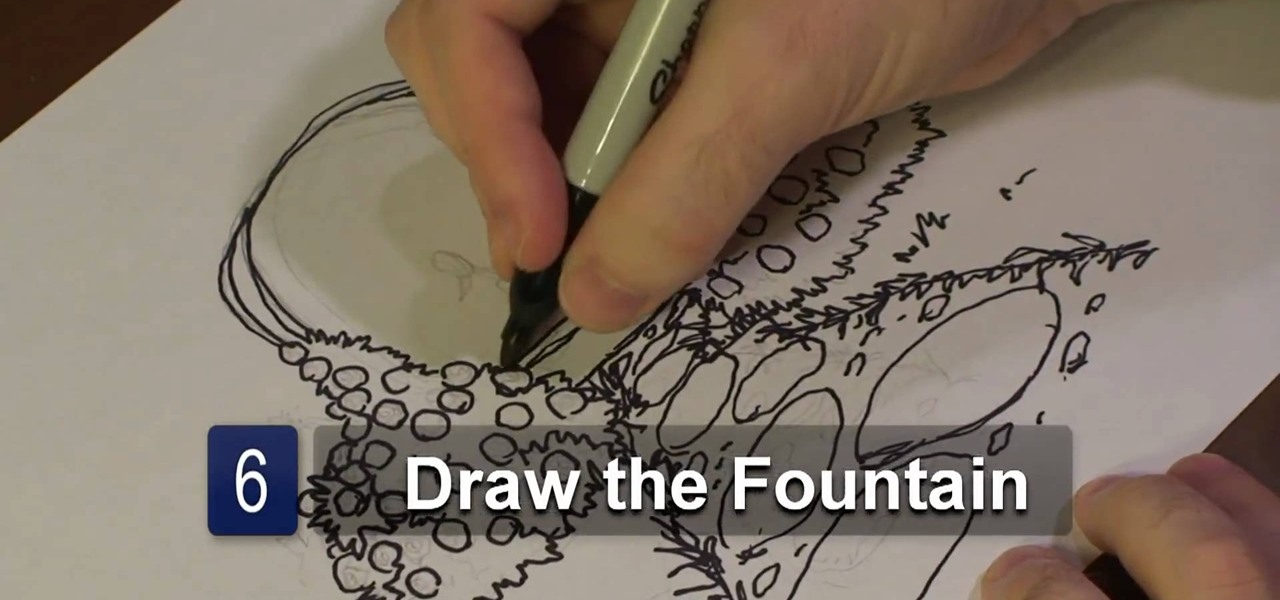
In this video tutorial, viewers learn how to draw a rose garden. Begin by marking the locations of the objects. Then draw the rose bushes around the garden pathway. Draw the lines with some cross hatching. This will give the bushes some form and feel. Add some circular boxes in the bushes to represent the roses. On the pathway, add some grass on the edges and stones on the path. In the center, draw a center piece and draw an arch over it. Finish by adding details to the roses. This video will...
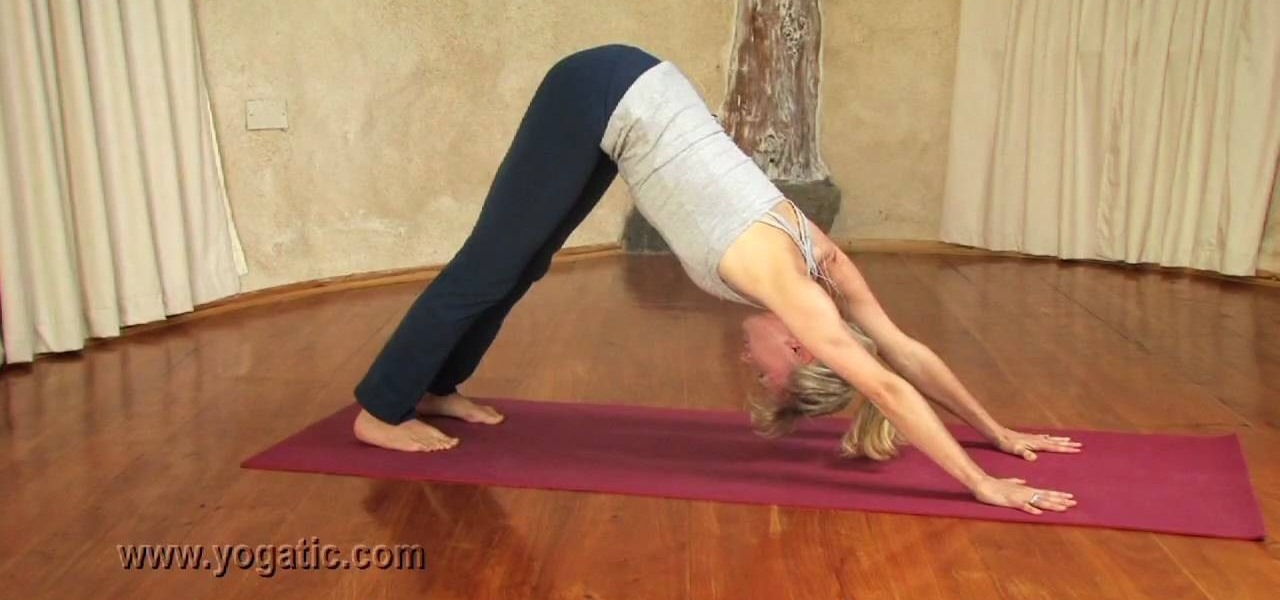
In this tutorial, we learn how to master the downward facing dog pose. When you do this pose, you will be opening up your entire body. Start by centering yourself for a few moments and center yourself. Place your hands on your stomach and feel yourself deep breathe. Start to clear your mind and stop thinking about your problems and issues for the day. Stay in this seated position for several minutes before you come into downward facing dog. When you get into this position, feel yourself breat...
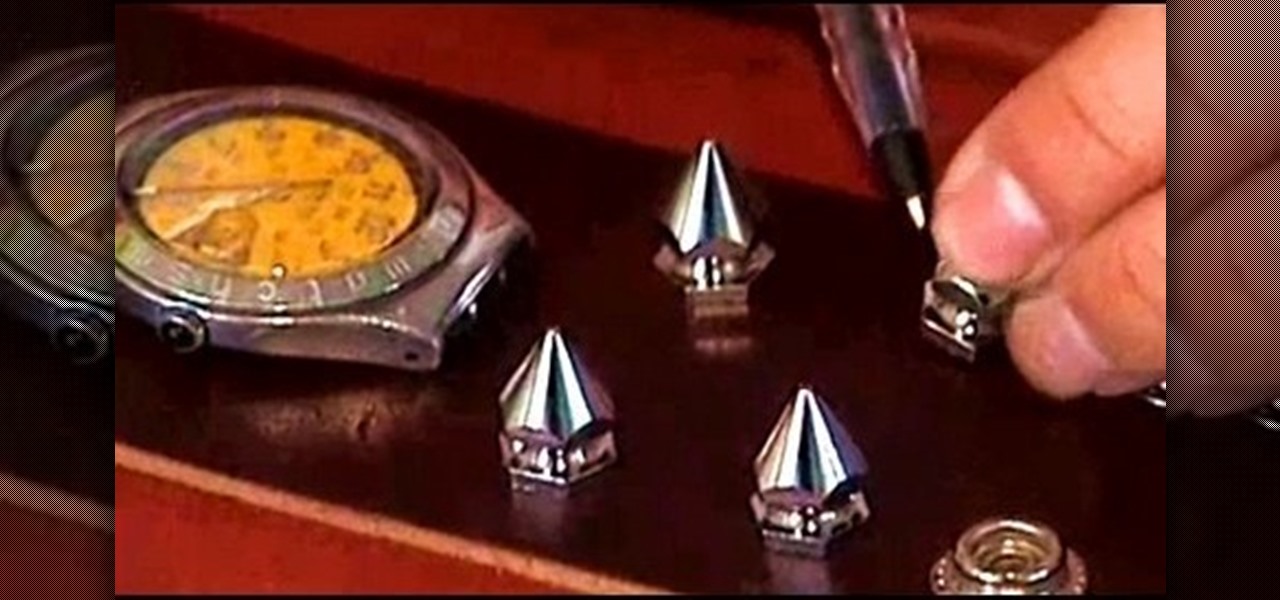
In this tutorial, we learn how to make a studded watch out of an old watch. First, take your old watch and remove the straps from it. Now, place the watch center onto a new wrist band. Next, apply spikes onto the wrist band by poking holes through the leather and shoving the spikes through. Now, string wires through the watch center and poke them through the leather wrist band and use pliers to bend them into place where the wires won't poke into your skin. Use a screwdriver to put the bottom...
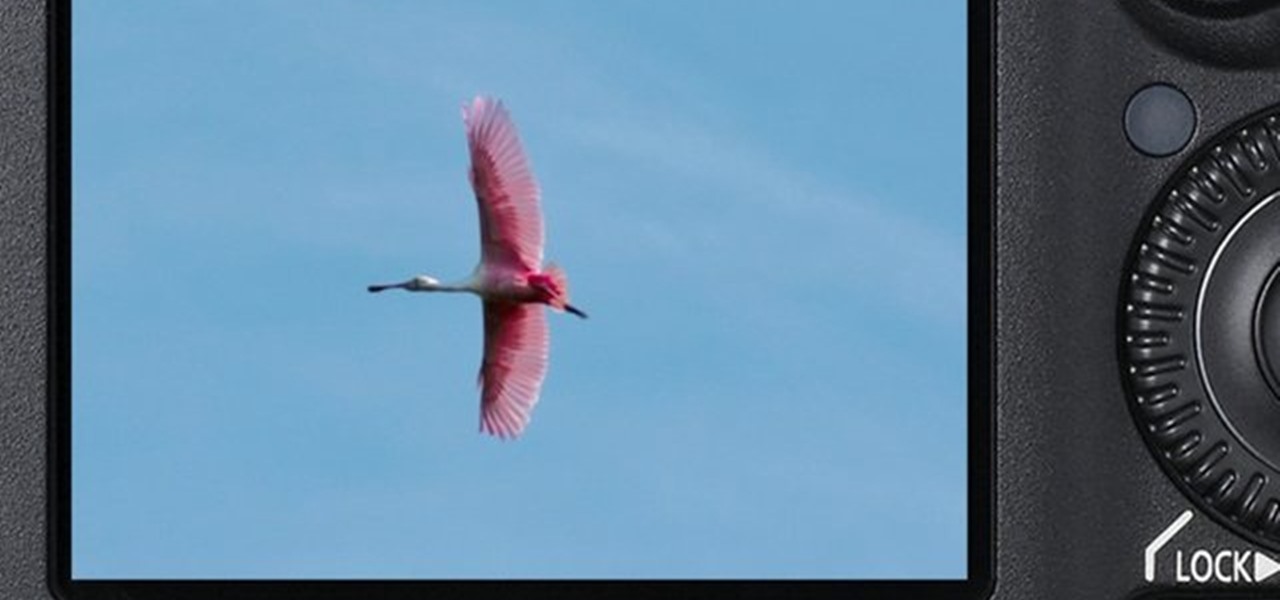
The Zone AF option on the Canon EOD 7D is a brand new feature, and it lets you select a cluster of AF points, which could be in center or off-center. In this video, see how to actually use the Zone AF selection on your digital SLR camera.