In this tutorial, we learn how to make a toga in less than five minutes. First, you will need 6 yards of fabric and about 4 safety pins. Once you have these, you will be able to make your toga. Wrap the fabric around your body tightly, then take a safety pin and pin it to your shirt that you're wearing so you know where to sew it at. After this, bring the last portion of the cloth up and around your shoulder. Once you have done this, you will have a cute toga! You can take this off and sew it...

This is an easy tutorial as to how to make a Halloween banner using just a few cupcake papers, scrapbook paper, some knitting yarn and paper cutout letters. Then glue it all together and string it on a cord for your own Halloween decoration!
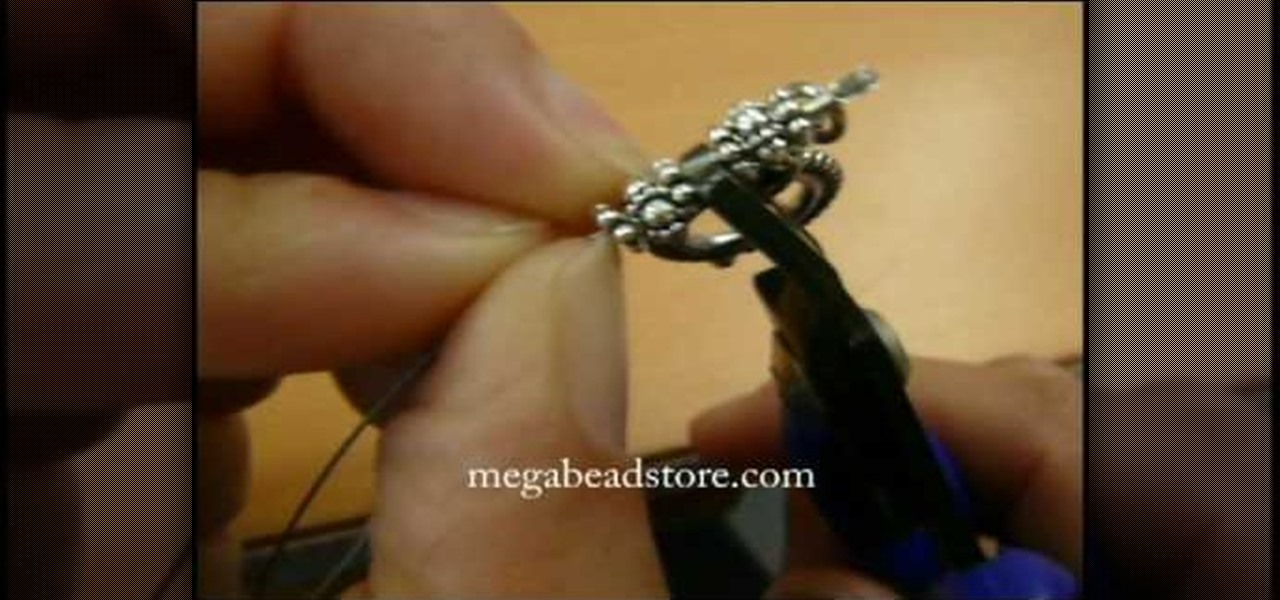
In this video, we learn how to hide a crimp bead with a crimp bead cover. First, string your spacer followed by a crimp bead and another spacer. At the end, you will have the end piece with the wire protector next to it. Then, bring the piece of jewelry through the crimp bead twice, then through the spacer once more. Now the spacers and crimp beads will be pressed with the crimping tool tightly. Pull on the string to test it out, then slip in your crimp bead cover so it looks like another bea...

Finger curls probably don't sound familiar to you, but we can bet you've seen them before. Think Marilyn Monroe's tightly curled hairdo, Gwen Stefani's tight waves in her cameo for "The Aviator," or Rachel McAdams' curls at one of the "Sherlock Holmes" premieres.
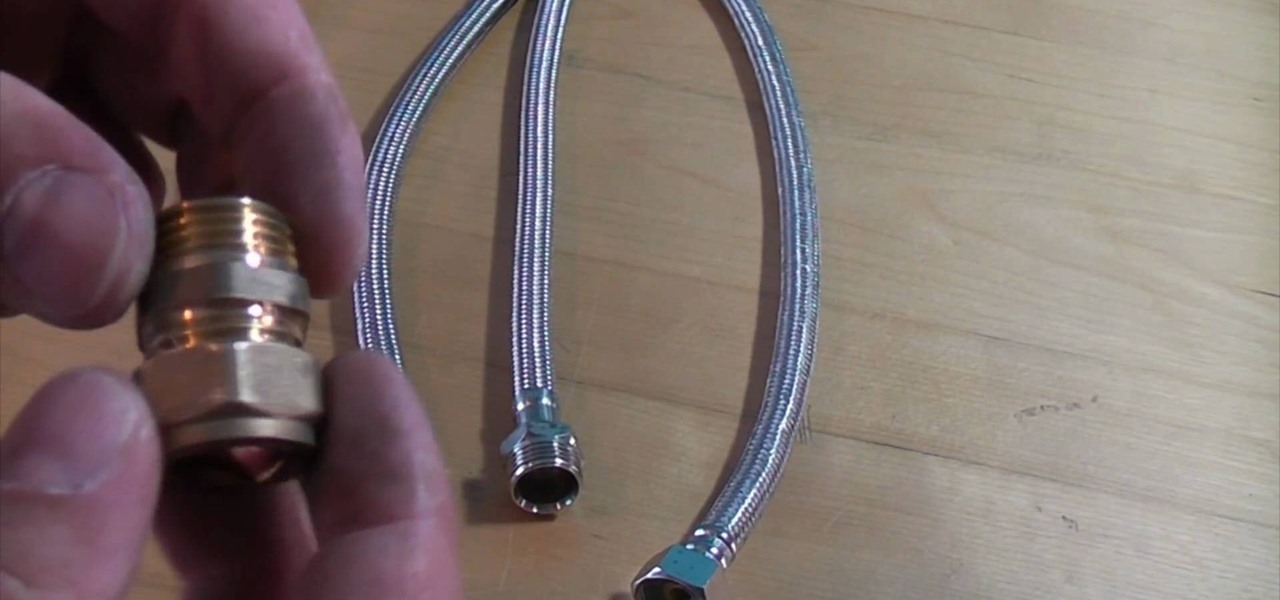
In this video, we learn how to connect flexi-tails properly. First, take your flexi-tails and grab one with a female end that will screw onto the end of a male. After this, use an isolating valve to fit the compression onto the valves and then tighten it up. Screw the flexible tail onto the end of this. Be careful buying this off Ebay, because a lot of fittings will not screw onto a compression knot. It is very simple to make this, you just have to connect the two tails and make sure they are...
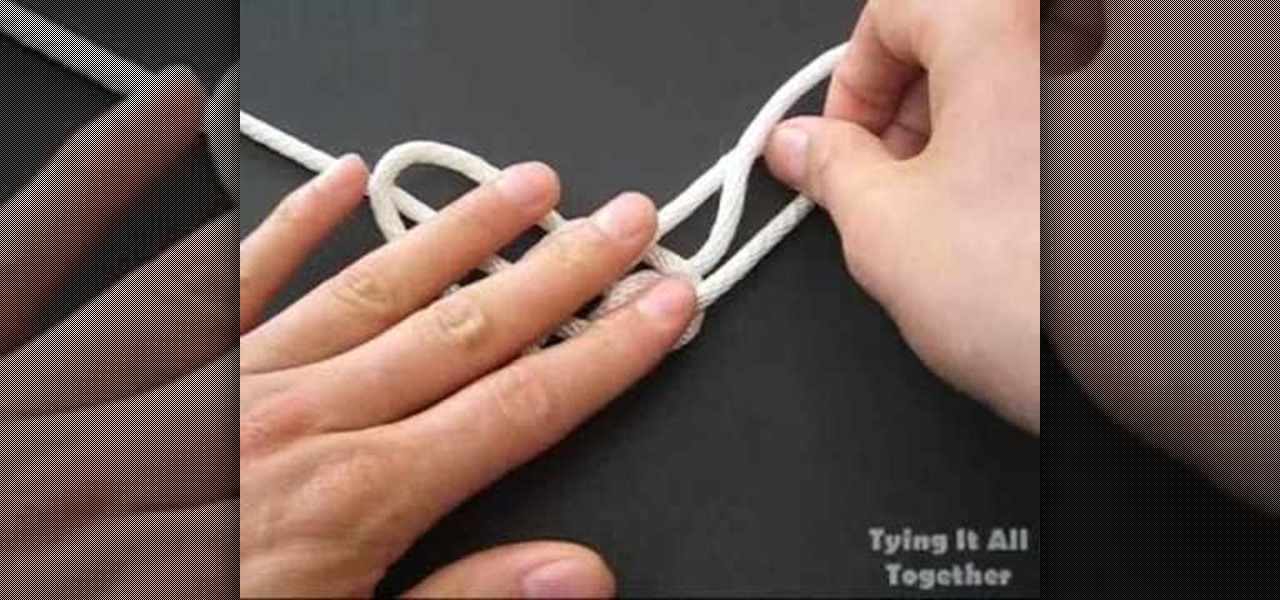
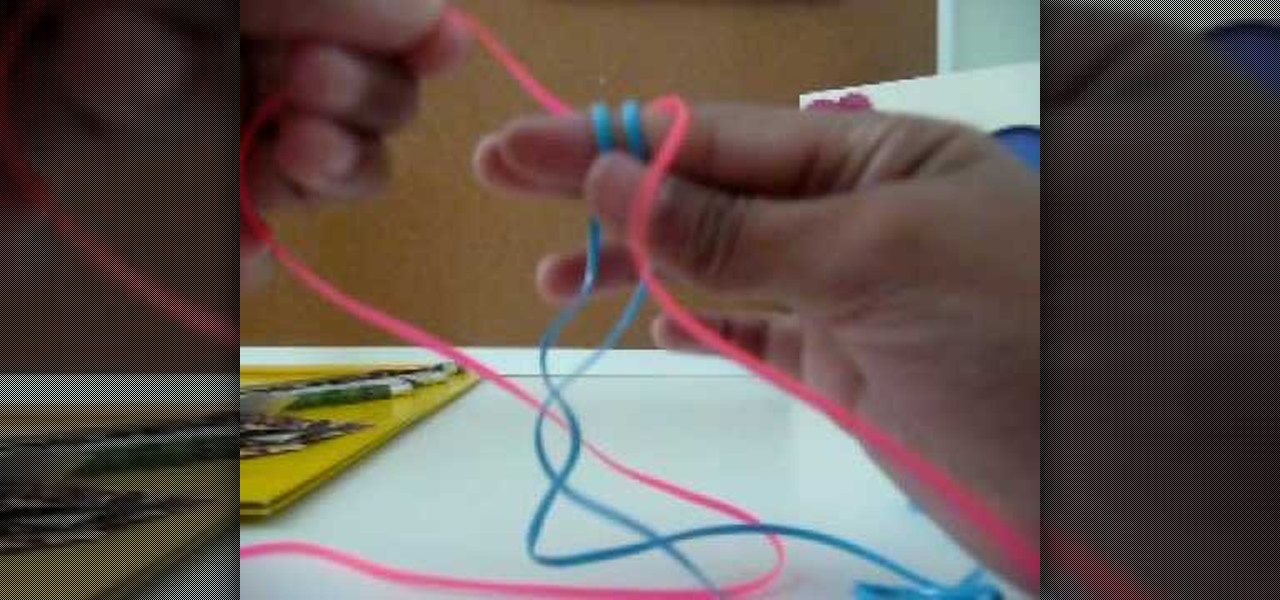
In this video, we learn how to tie the longhorn knot. First, make a spike with your rope, then push the rope around it and through it, making a circle. Then, push the loops on the bottom down and make a pretzel shape with it. Bring the left hand side string down and pull it through the loop, then do the same with the other side. Next, pull the strings on the top up to make larger loops, then pull the string through the left loop. Now, do this to the other side of the rope as well. To finish t...

In this video, we learn how to tie a tie in ten easy steps. First, you will need to put the tie on and put the wide end in your right hand and the thin end in your left hand. After this, place the wide end over the top of the narrow, then put the wide end back over top the narrow end. Next, put the wide end through the loop made with the tie and your neck. After this, put the wide side through the front loop of the knot and pull the wide end down tightly. After this, hold the knot and pull th...
In this video, we learn how to recycle old windows into new decorations. First, you can make a coffee table by using the old window and adding legs onto the bottom of it. You can also place a box around the bottom and hinge the window to make a display case. This is simple to make and doesn't cost much, you only need to pay for the legs of the table! You can also use the window to make a pot rack, but make sure you have strong hooks in the ceiling to hold the rack tightly and it will be able ...
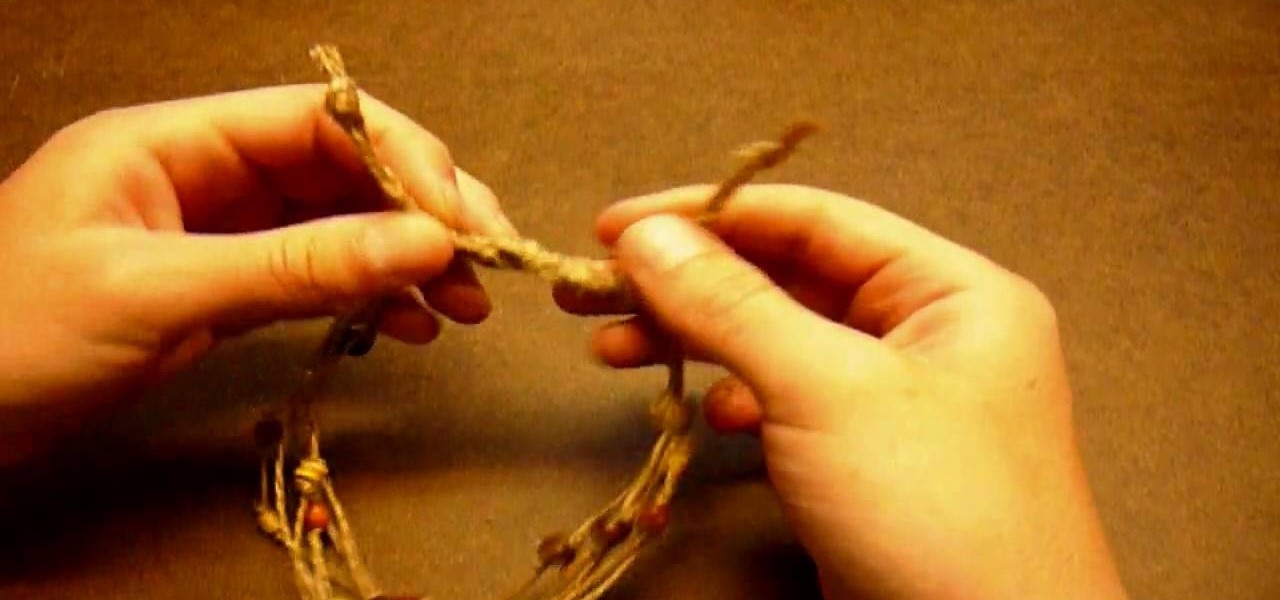
In this tutorial, we will learn how to make a simple beaded hemp anklet. Start off by measuring six 34" strands of hemp. Now gather the hemp strands and tie them into a knot at the end, pulling the strands tight. Clip the end into the clipboard and start to tie your hemp strands into a braid. When you reach the bottom, tie a knot and pull tightly. Now, add wooden beads onto your anklet and keep braiding in between these on other anklets. When you are finished, you can give these to friends as...
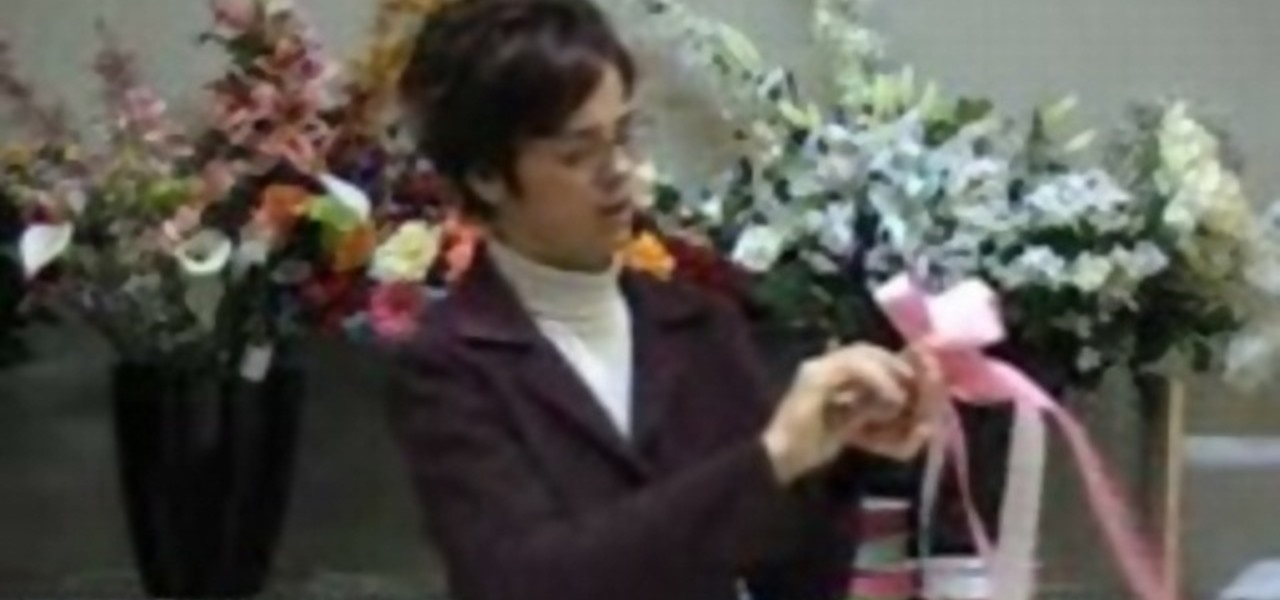
In this tutorial, we learn how to make a double bow with Sandy. First, take two satin ribbons of different colors and place one on top of the other. Leave a long tail, then make a large loop and scrunch it in. Make a loop on the top and a loop on the bottom. Each should get a half a twist and be opposite of the one you made before it. Practice with a single ribbon before you do this one. After you have six loops, create four more to make a bigger bow. When finished, you will have six large lo...
In this video, we learn how to wear a beret securely. This is used to keep the beret on your head so it doesn't fly away. To do this, you will need the beret and bobby pins. First, place the beret onto your head and style your hair around it so it looks how you prefer. Next, grab your pins and place then inside the beret holes onto your hair. Use a couple of the pins to make sure the hat and hair are connected and secured tightly. When finished, move the hat slightly to make sure it is secure...
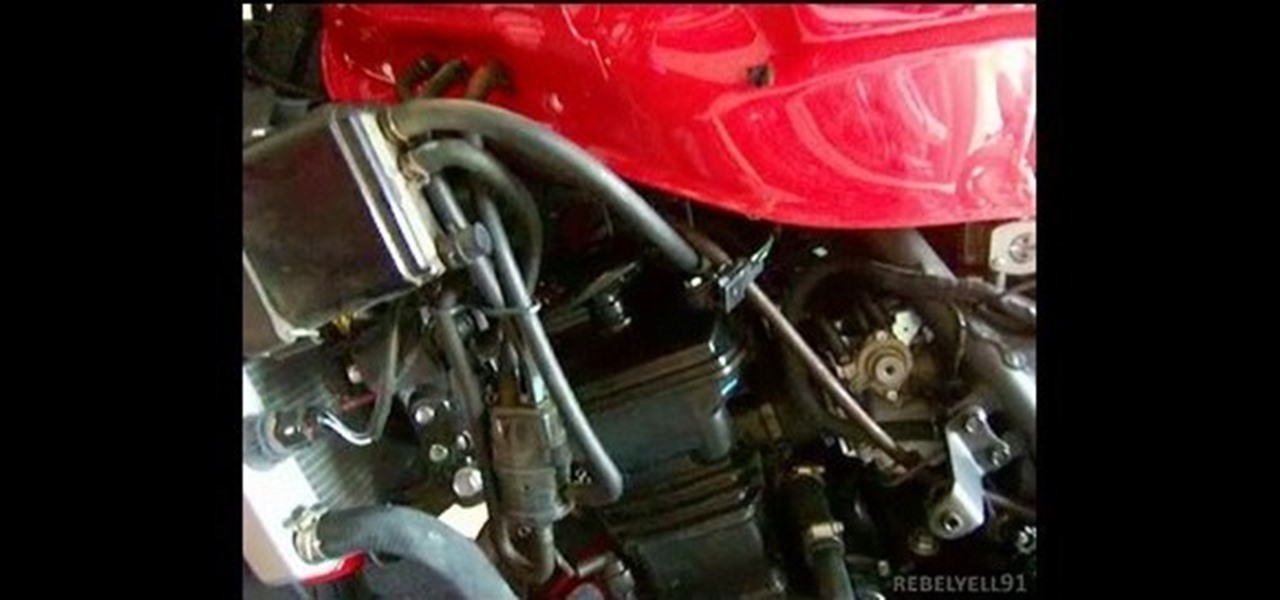
In this tutorial, we learn how to replace the spark plugs on a 2008 Kawasaki Ninja 250. First look underneath your bike to find out exactly where the spark plugs are at. Next, use wrenches and ratchets to loosen the parts around the spark plugs, then remove the spark plugs completely. After you have pulled them out, replace them with the new one and secure them into place. When finished, replace all the casing around the plugs and make sure you secure them tightly. Add on all bolts when you a...
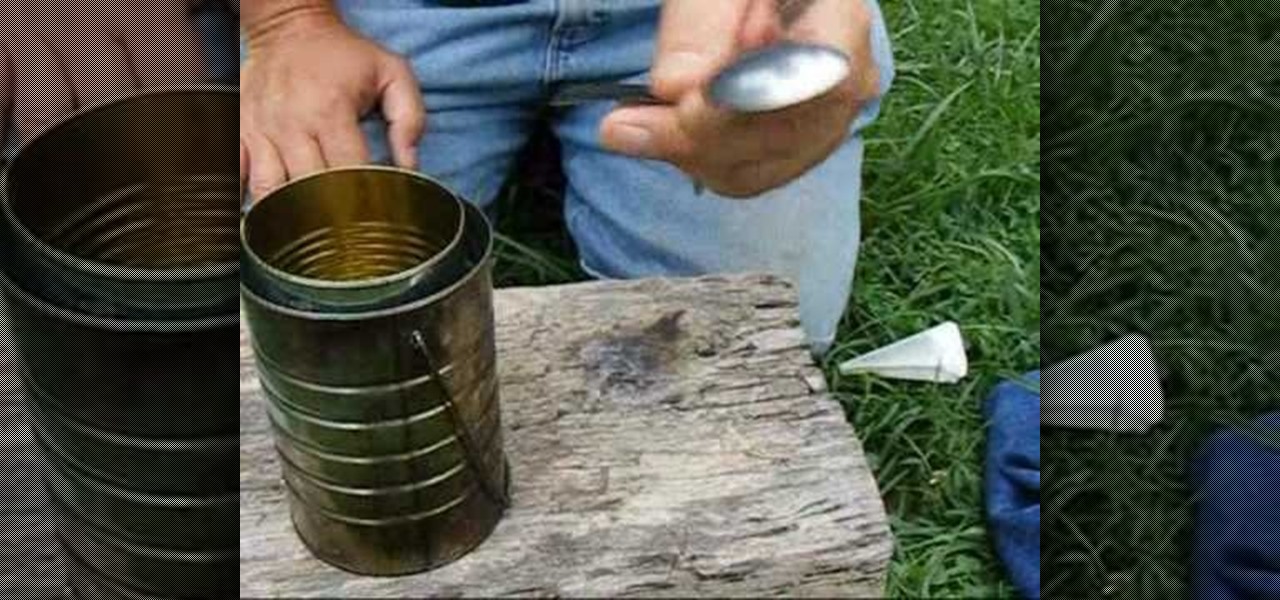
In this tutorial, we learn how to put together a cooking kit and canteen on a budget. To make a cheap pouch, you can take a pair of pants and cut the leg off. Then, sew one end completely and sew the other as a drawstring. To pack your kit, make sure you have an absorbent towel to help with everyday things. Also, make sure you have a cooking kit, which can be made by an empty coffee can, water bottle, empty soup can, utensils, and water bottle. The last things to include in your pouch are a p...
In this tutorial, we learn how to straight pipe your small tractor engine. First, insert a one inch screw pipe to your exhaust, then connect pipes into it so it connects to the back of the vehicle. You will need to install several elbow pipes as well as longer straight pipes. The pipes should reach the end of your tractor out of the tires. Make sure it's secured tightly to the floor boards and screwed in on the bottom of the tractor. You can experiment with different types and shapes of pipes...
In this tutorial, Tony Vo teaches us how to cut a bottle. You will need: a glass bottle, yarn, lighter, sink of cold water, and acetone or alcohol. First, take your glass bottle and tie a piece of yarn around the part you want to cut. Wrap the yarn two times around, then tie it tie it tightly. Now, take the acetone and drop it onto the yarn until the entire piece is saturated. Next, take your lighter and burn the yarn on the bottle. As soon as the flames die down, place the bottle into a sink...
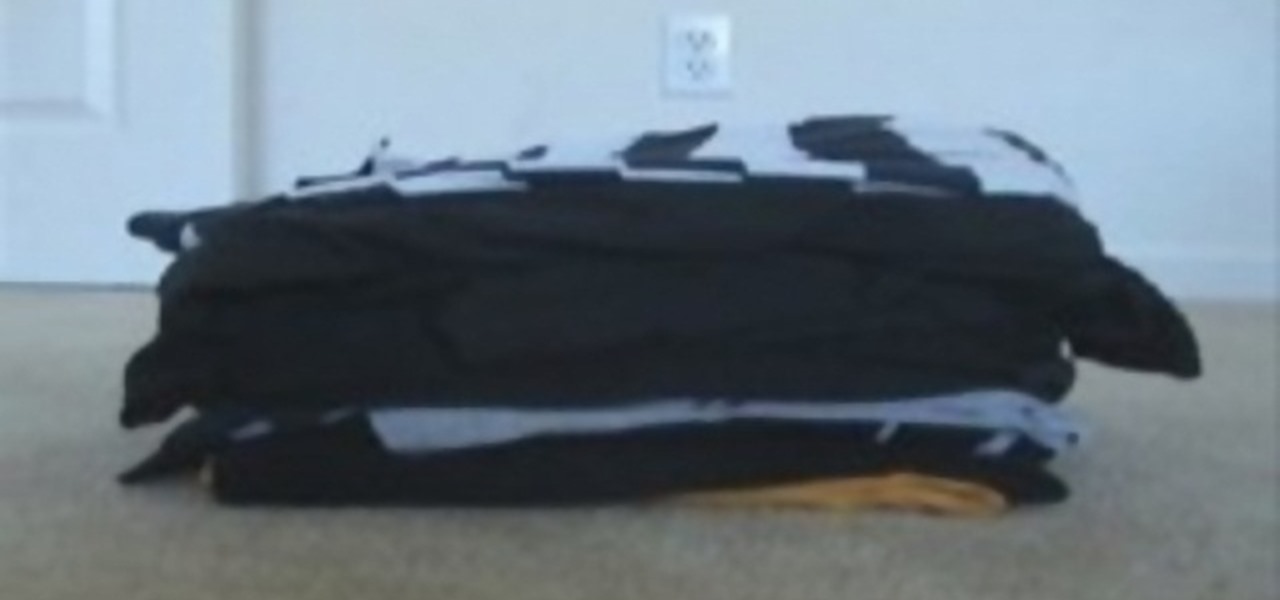
In this video, we learn how to save space while packing using 3 household items. You will need the following items: garbage bag, vacuum, and rubber band. First, fold your clothes and stack them on top of each other in a pile, then place a garbage bag around them. Now, take your rubber band and tie it around the bag, then stick the hose of the vacuum into the hole. Now, turn your vacuum on and let it suck the air out of the bag, and you will see the bag shrink within just a few minutes. Keep s...
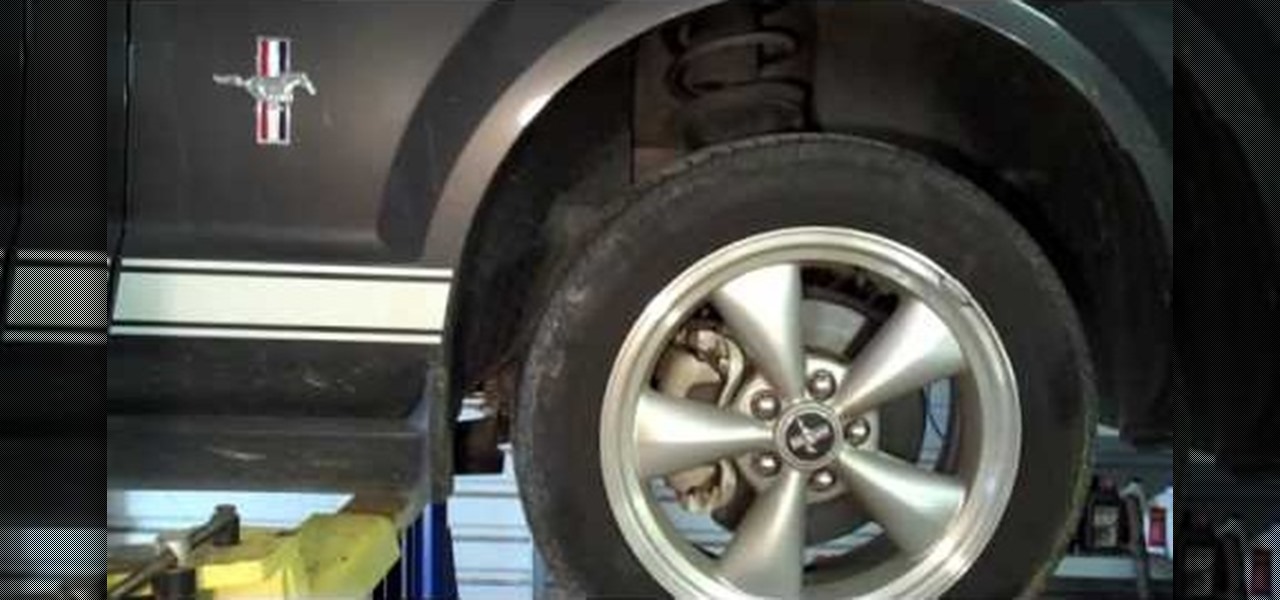
In this video, we learn how to inspect and replace rear brake pads. Test your brakes out while driving to see how well your brakes perform. First, check your fluid level for your brakes inside your car and make sure it's full. Now, lift the car up and remove the tire and bolts. You will now use a brake pad thickness gauge on your brake pad to see if it needs to be replaced, or if it's still good. If they need to be replaced, remove the parts and bolts, and put the new brake pads in. After you...
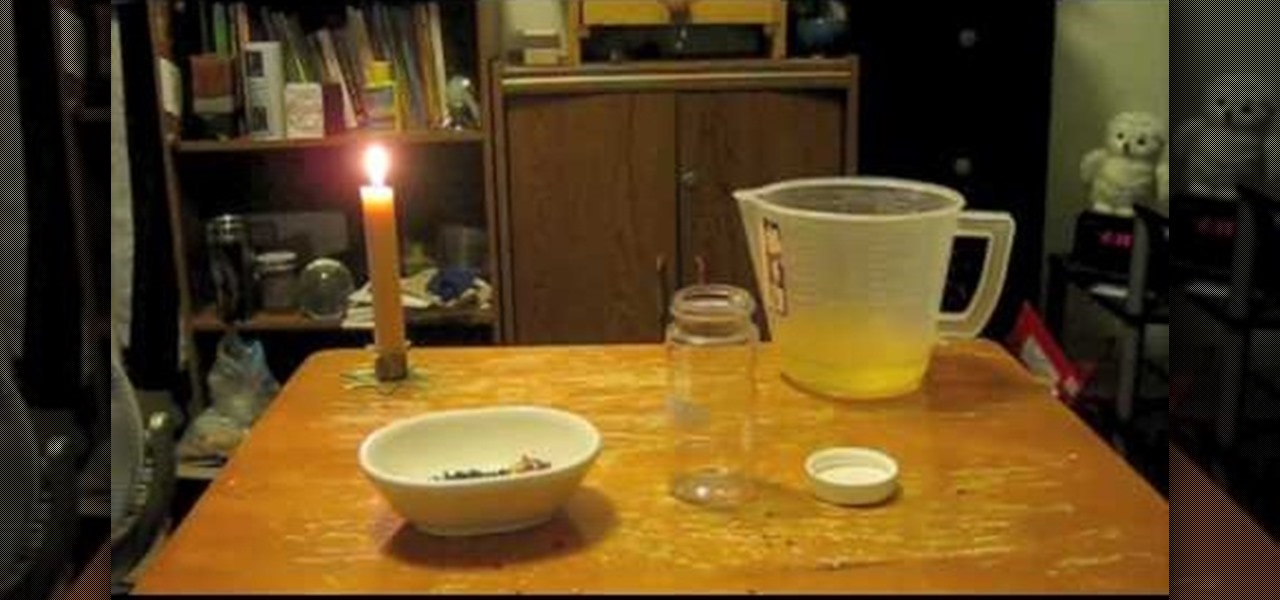
Grapes, raisins and pomolo are placed in jars and spring water is added to them. The jars are tightly covered and left for 5 days to a week; until fermented. The jars are shaken once daily and the lid is opened to allow air to get in. After maturity, where they made fizzing sounds and they started to swell to the top . They are strained and the liquid is put to back into the jars, closed and left for a week. An amount of the liquid is poured out of the jars and flour is placed in each and sti...
Following are the steps to describe how-to make small jewelry with head pins: 1. Materials needed are long head pins, beads, wire, cutting player.
How to start a square or cube lanyard is demonstrated in this video.There are other videos to demonstrate how to stitch.
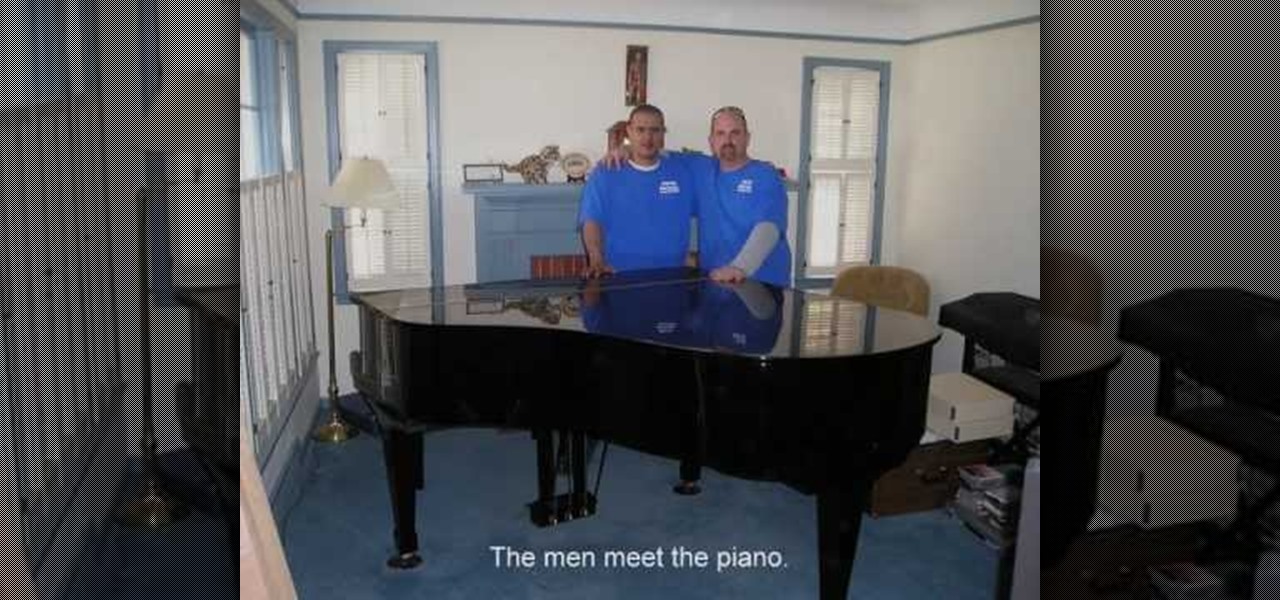
In this tutorial we learn how to pack and move a baby grand piano. First, remove cover of the piano and wrap it in moving pads. Next, remove cover hinges and screws from the piano and dismantle the petals. After this, remove the legs of the piano. Now, place the piano board onto soft moving pads and wrap well as well as shrink wrap. Now wrap all of the piano legs and other parts with moving wrap, making sure it's packed tightly and taped together. Place the piano onto a wheeled board and you ...
This video demonstrates how to make rootwork oils for spell craft. This will take an investment of time to get the most out of this. You must have a preservative in your oil for this project. Here, you will need to use either jojoba oil or vitamin E oil. These will not have to be used as the base, but they will need to be present for preservation.
In this jewelry-making basics tutorial, learn how to make an eye pin. To create an eye pin, you will need wire. Size 24 or 22 gauge wire is the best kind of wire to make an eye pin. The thicker the wire, the more difficult it may be to work with. To begin, straighten out your wire and cut the length you need to make your eye pin. Taking some round nose pliers, you will bend the wire up while rolling it toward yourself. Do not pinch the wire too tightly with the pliers because it can leave per...
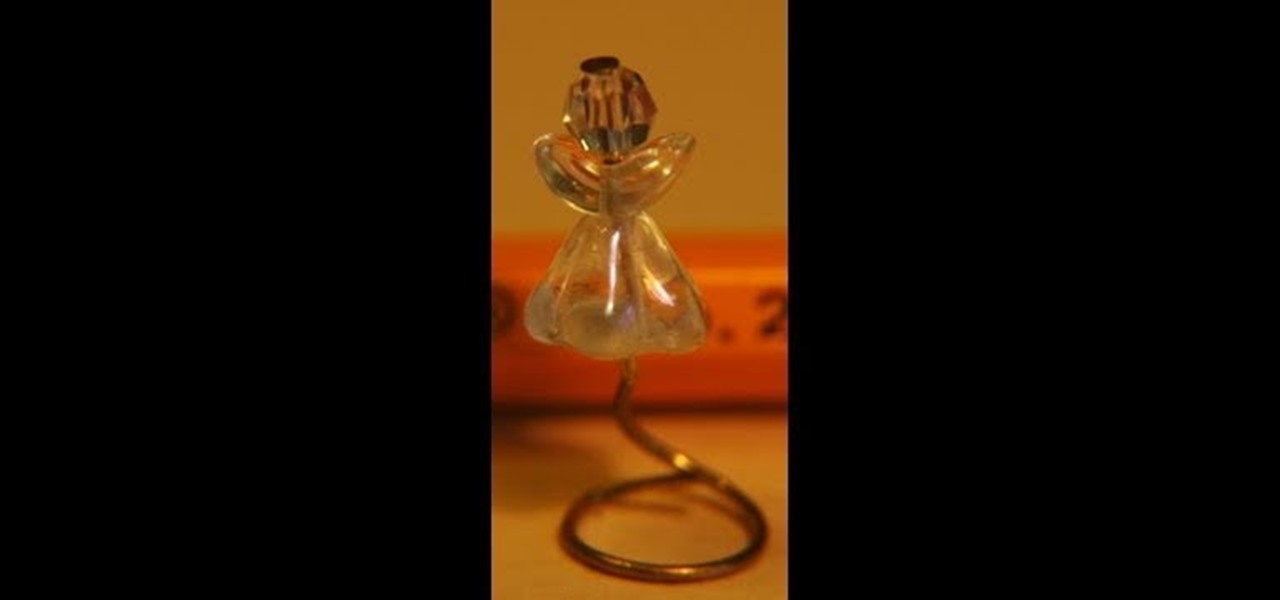
In this demonstration garden of imagination shows how to make a doll house Christmas tree angel topper ,which is less expensive and easy to be made at home .First she inserts a round bead in an eye pin which is for the crown of the angel and followed by crystal ball .after that small glass wings are inserted and then followed by a flower crystal which will be inserted upside down so it will look like an angel skirt and then inserts a bottom of an earring for the base and fixes tightly as it s...
This video demonstrates a simple method of how to make beef jerky at home. First, combine lean ground beef, seasoning, and a packet of cure is combined in mixing bowl until evenly mixed. The beef mixture is then tightly compacted into a jerky gun. Once the beef mixture is filled to the top and the cap of the gun is inserted, the trigger is pressed on the gun to release the jerky mixture on the dehydrator tray. Once the dehydrator tray is full, it is turned on and the beef is dried until it re...
There are a number of things that users must check on their roof to insure safety and prevent any leaking. For example, users should check that the roof vent is fastened and ensure that there are washers or caulk under the nails. On the chimney, make sure the flashing is fastened tightly and downwards. Users should also inspect the condition of the chimney. Remove any tree branches and clean the roof. This video will benefit those viewers who want to learn how to secure their roof from proble...
We need a pen, thread or twine, small stick or wooden skewer, and scissors to make a mini bow and arrow.
In this video tutorial, viewers learn how to shuck a fresh oyster with an oyster knife. An oyster knife is a knife which has been specially designed for the purpose of opening oysters. Users will also need a towel. Make sure oyster is cleaned that it is tightly closed. Put the knife in the oyster gap and go across the top of the shell. Then slide the knife under the body of the oyster, cutting the mussels that are attached to the body. This video will benefit those viewers who want to learn h...
1. This video describes how to warm tortillas. If you have a gas stove, set the burner to simmer and put the tortilla on the burner and keep the tortilla for 8 to 10 seconds on each side. After that transfer it to a pan covered with foil to keep tortilla warm.
If you are learning the English language make sure to follow this video which can better explain to you how to pronounce the letter R. When speaking in the English language we may often make common errors on how to pronounce the letter R in the words we use. One tip to pronounce the letter r better is not to touch the top of our mouth with our tongue when saying the letter r. Secondly, you have to make your lips shape in a tightly rounded manner to say the letter r accurately. You could also ...
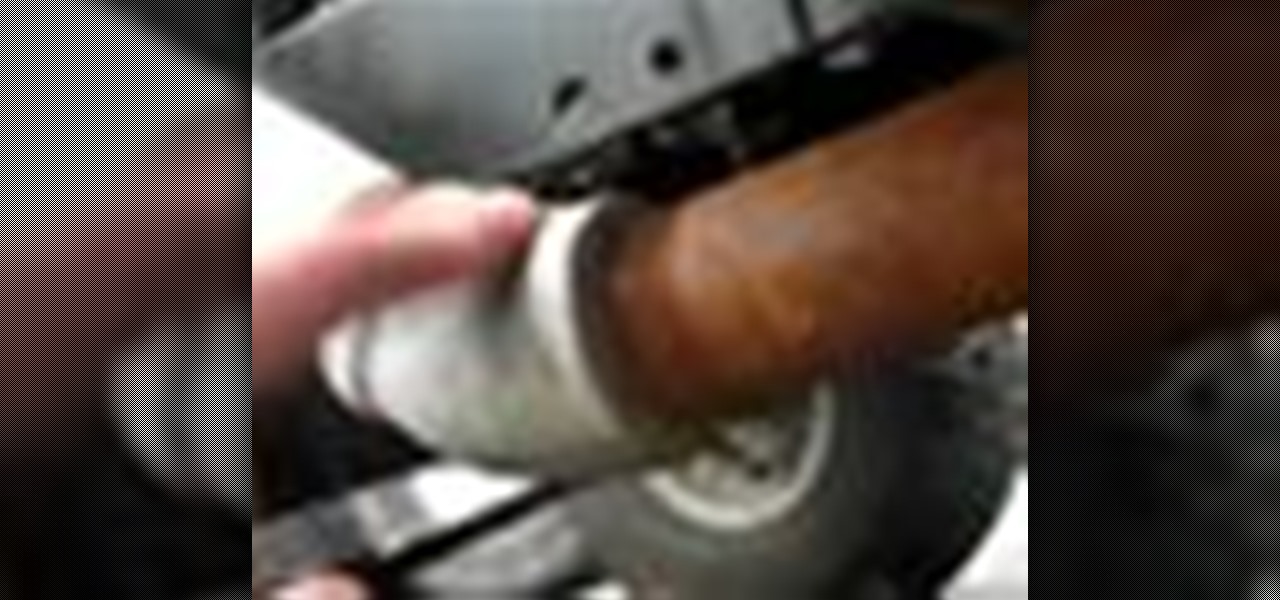
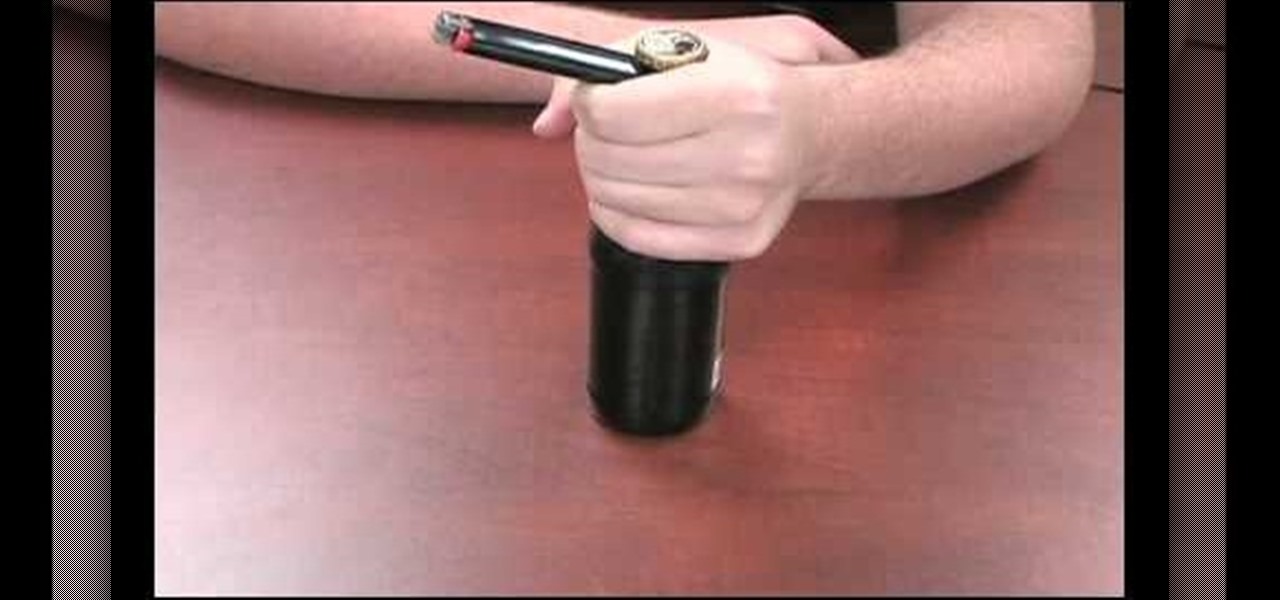
This video shows us how to open a glass bottle with your lighter. To open a bottle using a lighter: Hold around the top of the bottle using your left hand. The key is that the index finger must be around the top of the bottle. Hold the lighter with your right hand and place the blunt end of the lighter solidly between your lowest knuckle and the edge of the bottle cap. Hold the lighter perpendicular to the bottle. Tuck the lighter so that the edge is under the teeth of the bottle cap. Squeeze...
How to make a Cuban style roast pork in five easy steps. Mix 1 cup naranja agria (sour orange), 1/2 teaspoon cumin, 1 teaspoon dried oregano, 4 tablespoon crushed garlic, salt and pepper, and olive oil in a bowl. Place 1 small boneless pork loin roast in a re-sealable plastic bag. Pour marinate into the bag and refrigerate over night. Place the marinated pork loin roast in a baking dish and cover tightly with aluminum foil. Bake at 325 degrees for 1 to 1 1/2 hours. Remove foil in the last 15 ...
This video describes how to make a whiskey sour cocktail. First take the following ingredients Bourbon Whiskey, Lemon Juice, Gomme Syrup, Cocktail Glass, Strainer, and Shaker. Now take Cocktail glass with full of "Ice cubes", and stir it well and using "strainer" filter the water out and pour the "Lemon Juice" of 1 1/2 oz(ounce),and add 3/4 oz of "Gomme syrup" and then now pour 1 1/2 oz of Bourbon Whiskey into Cocktail glass added with ice cubes. After added all the ingredients take the "Shak...
Toni and Guy Vancouver show you how to French braid hair. You should sweep hair in the front to the side. Then starting at the crown of the hair you should start your braid. After braiding a few strands you then start adding in pieces of hair while braiding keeping the tension and pulling tightly. You can either choose to put a band in the middle or braid down to the ends. It's supposed to look messy and sexy.
To prepare the tuna, start by cutting the jugular to bleed the tuna out. Cut right at the top of the gill plate and cut up toward the eyes. Do this on both sides of the tuna. Then, cut a circle around the anus to free up the guts. Go back to the gill plate and cut the membrane in the gut cavity on both sides and, with one swift pull, the head and guts come out of the tuna. Then, you will pack the core very tightly with ice to keep the core cool. It is now ready to go on the table for sushi.
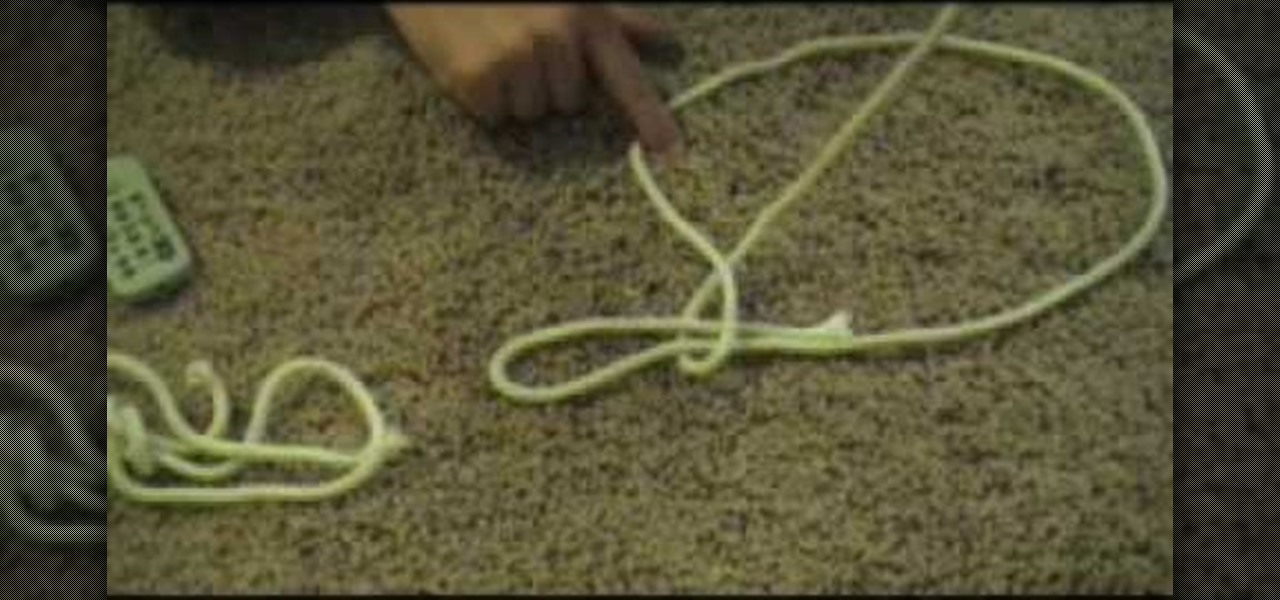
The slip knot, also called a running knot, is a very diverse knot. It's practical application ranges wildly from crochet and knitting to building a noose. The basic function of a slip knot is to create a flexible knot, with one end tied to the middle for greater mobility. Check out this how to video and learn how to tie a slip knot, because you never know when you might need it.
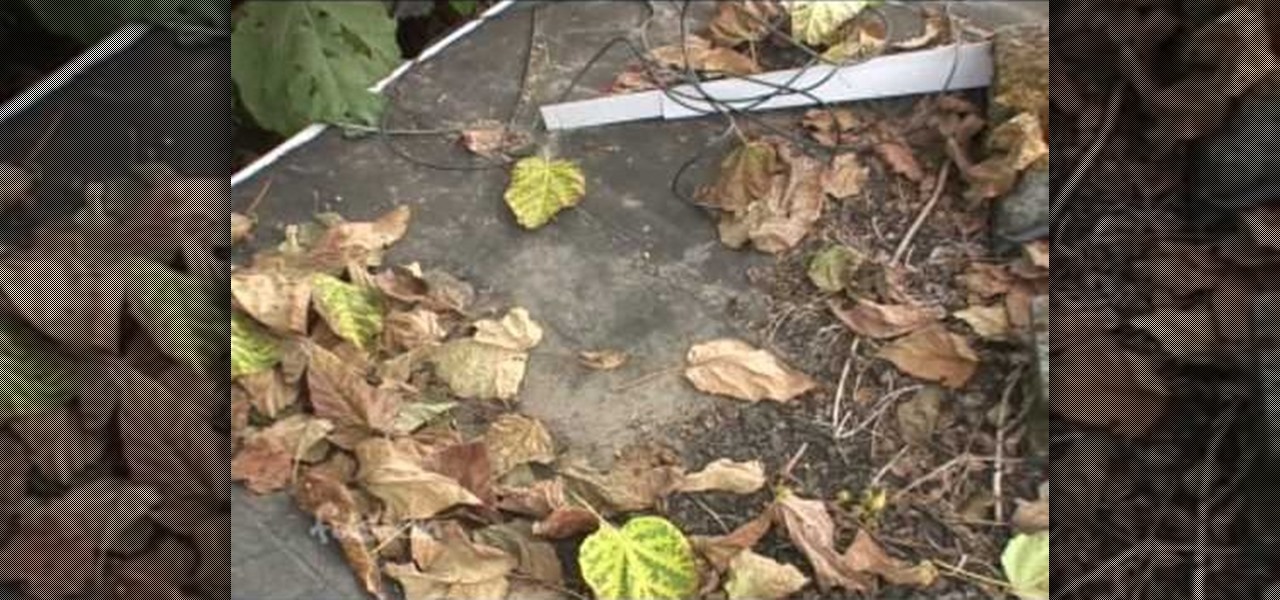
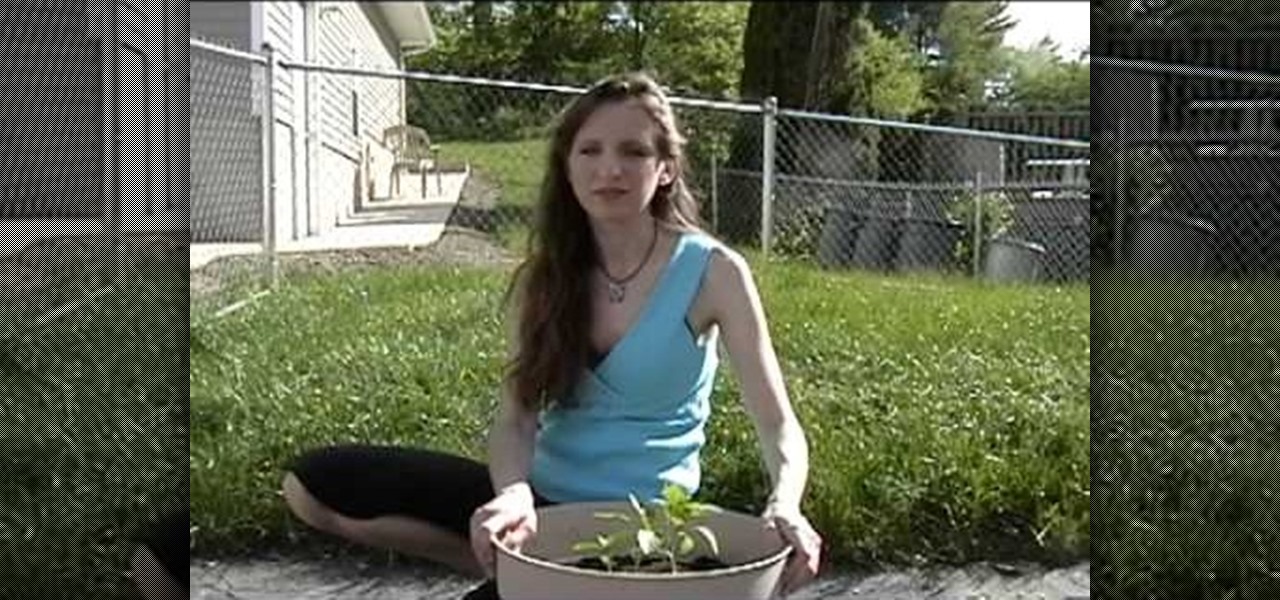
Learn all there is to learn about gardening from Naztazia... watch this video tutorial to learn how to start a basic container garden.
The classic French twist is incredibly elegant, and it’s so easy to do. You Will Need:
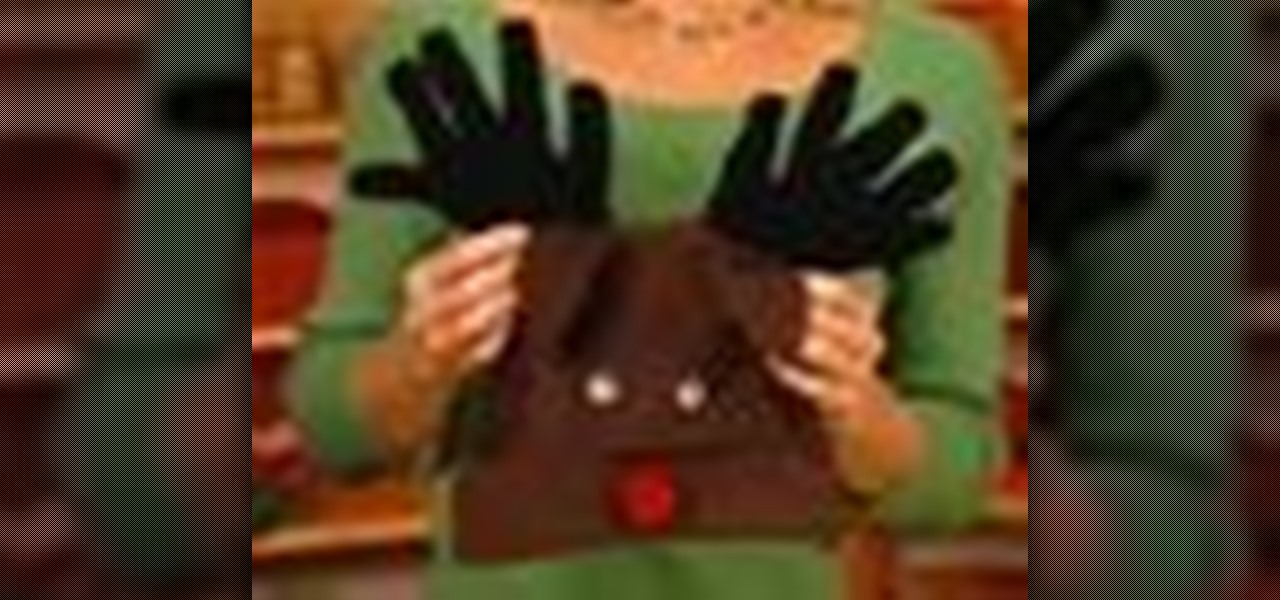
When the weather outside is frightful, we have a holiday hat your kids will actually want to wear. This video shows how to make a beautiful reindeer hat. Your child will lead the pack in true Rudolph style with this cap whose fanciful antlers are made from a pair of basic knit gloves. This is a fun Christmas craft project! Make it with your kids at their holiday party.
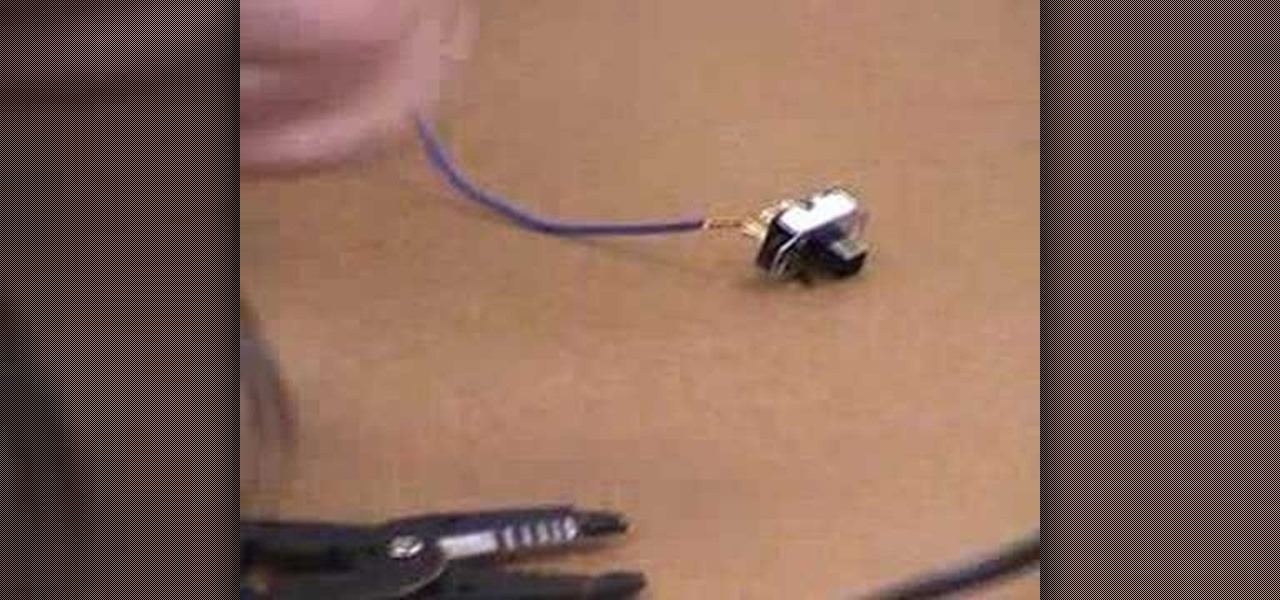
This is an instructional video featuring Doug Prime, founder of the Future Engineers Center at the University of Massachusetts Lowell. Strip the wire and make sure the wire is tied on tightly before soldering. Don't drip balls of solder. Make sure the tip is clean. Then hold it on the joint to be soldered for 4 seconds. Then poke the solder on the surface and it will melt with the heat.