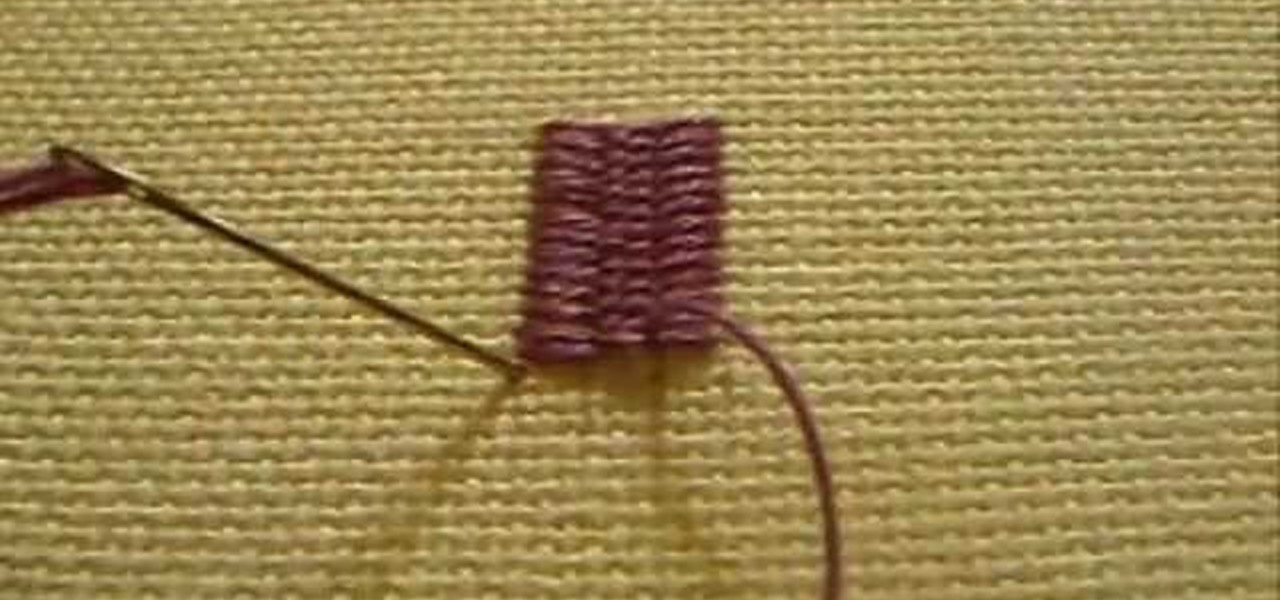
The cretan stitch is used in hand embroidery to create bands, to fill (any shape - leaves, for example), and it can be worked closed or open, depending on the effect you want. Watch this video from Needle 'n Thread to see how it's done.
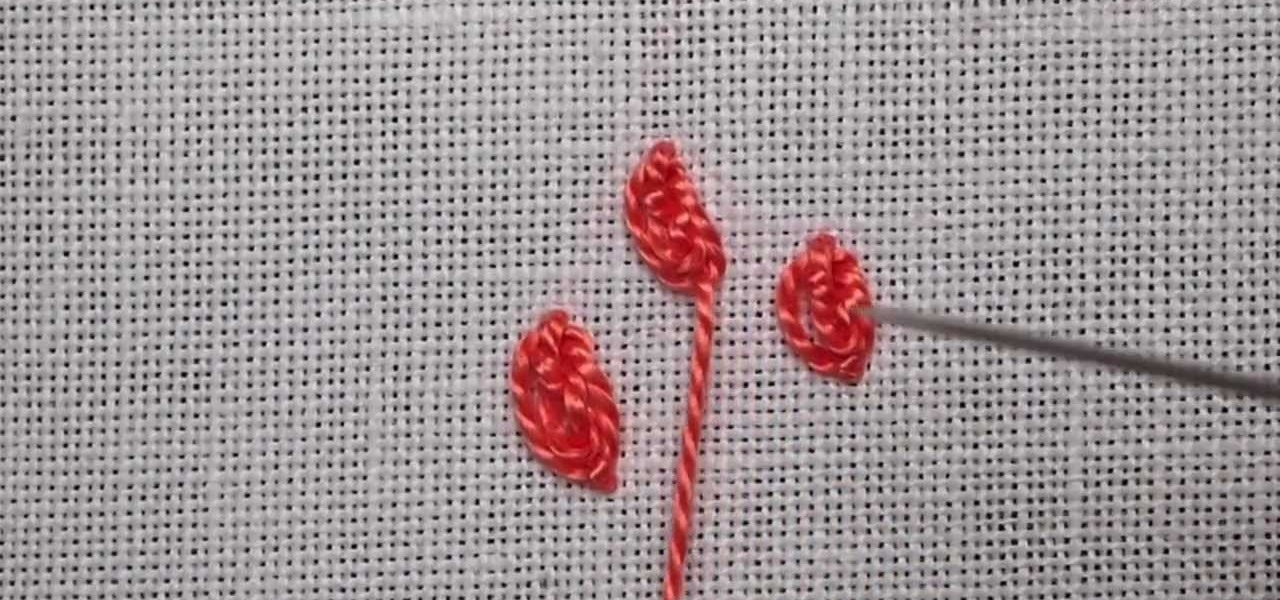
The oyster stitch is an isolated stitch. It is a combination stitch using the twisted detached chain stitch which is "surrounded" by an "open" chain stitch, or even a fly stitch. The oyster stitch makes a filled oval shape, suitable for flower petals or individual buds and accents. Watch this video from Needle 'n Thread to see how it's done.
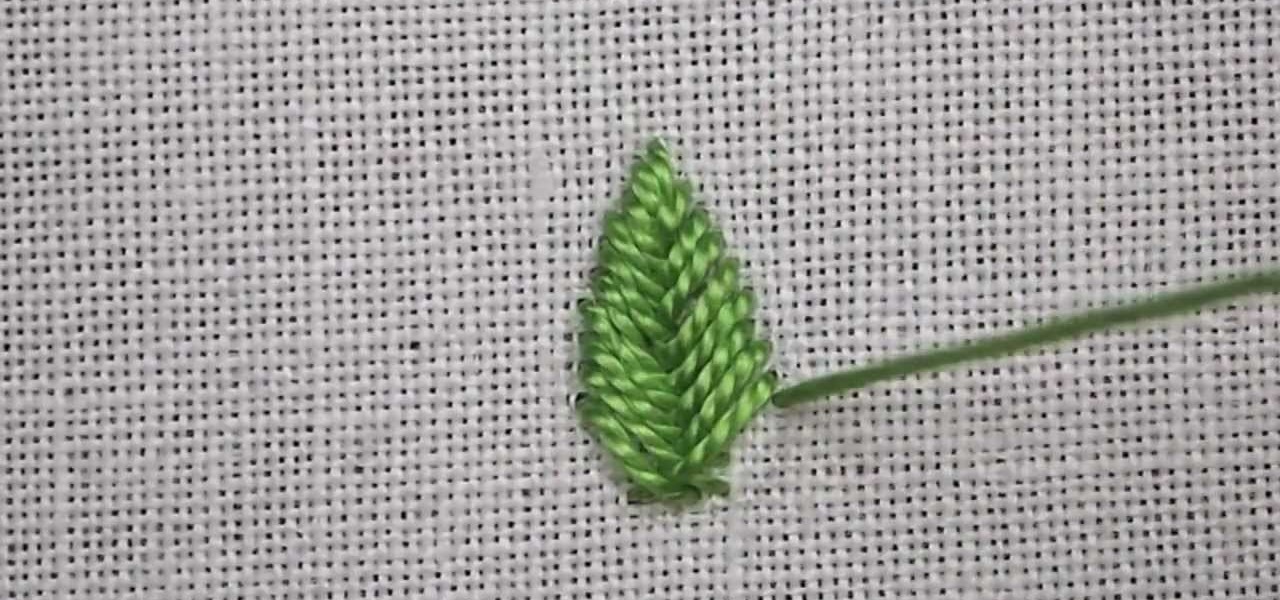
As you'll see in this video tutorial (from Needle 'n Thread), the fishbone stitch is an easy embroidery stitch to use for filling in leaves (and other shapes, too). The stitch is a good stepping-stone to satin stitch, as it requires you to keep a neat edge on the outside of your design.
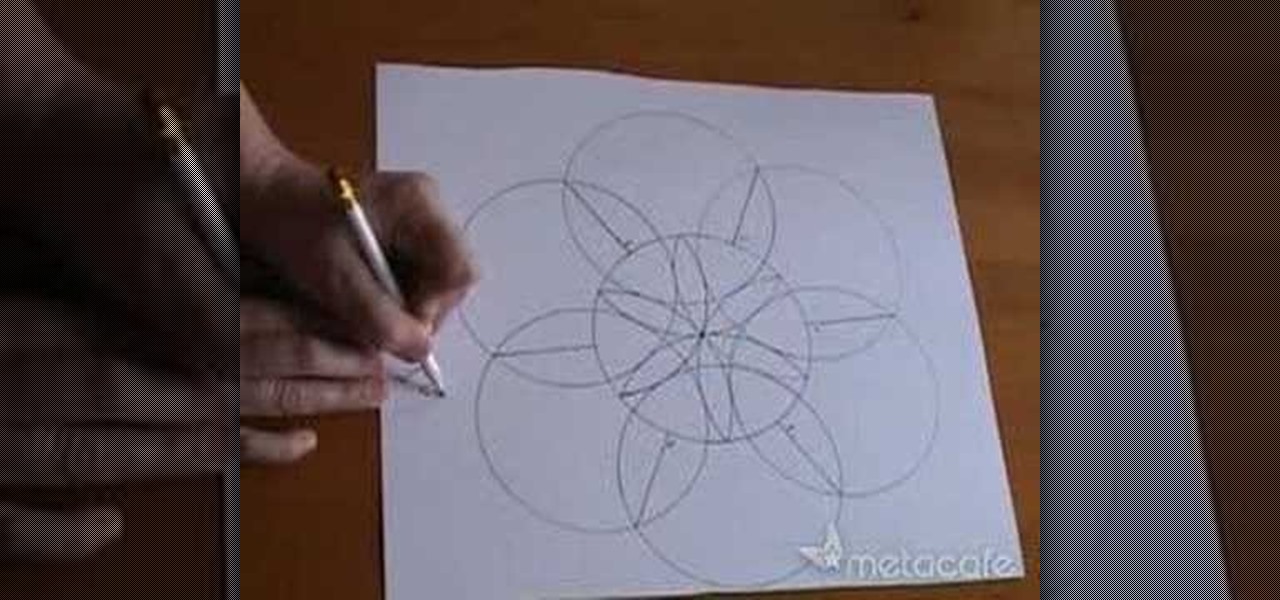
Use a 35x35cm piece of paper to trace your CD into a flower shape. Use a pencil and scissors to complete the design.
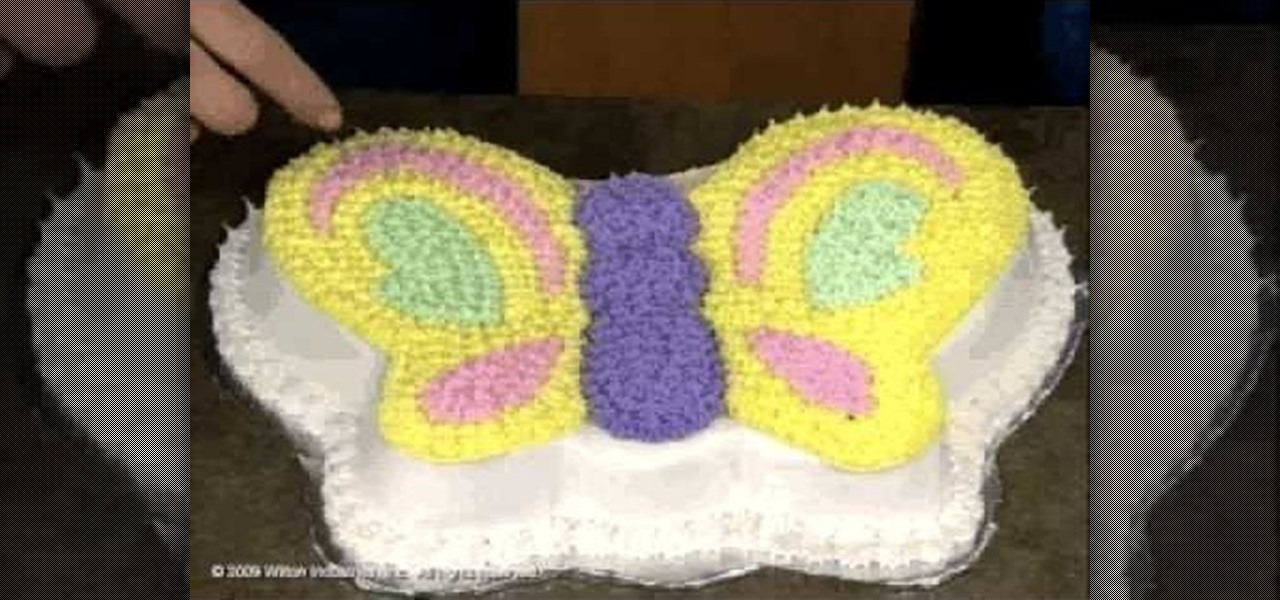
In this tutorial, we learn how to make & decorate a butterfly cake. First, you will use a butterfly shaped pan to bake the cake in so it's already shaped. After letting it cool, you can cover the entire thing in a thin layer of white icing. Then, fill some icing into bags, using different pastel colors. From here, you will use the star tip to dab the starts on the top of the butterfly, following the design. Continue to do this until you are finished with the entire thing, then you have the ch...
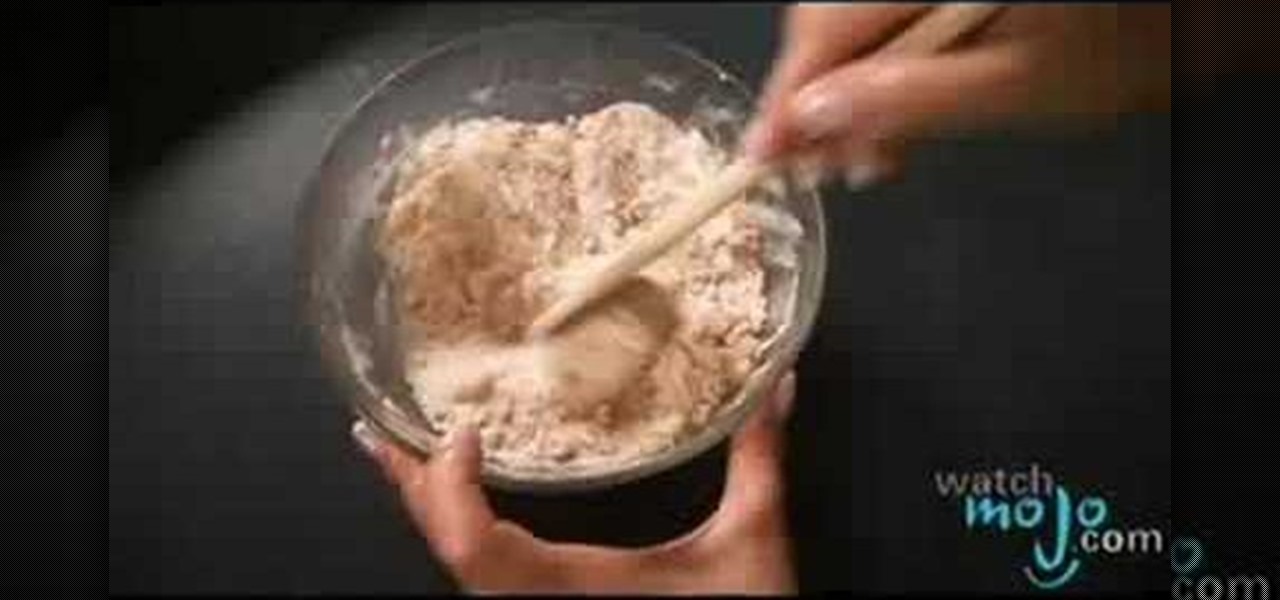
In this tutorial, we learn how to make an American apple pie. You will need: 2 c flour, 1 tsp salt, 3/4 c shortening, and 5-6 tbsp cold water for the crust. Mix all the ingredients together, then shape it into the pie dish to make the crust complete. Also shape the dough for the top of the pie. Next, prepare the filling with: 2/3 c sugar, 2 tbsp flour, 1/3 tsp cinnamon, 1/4 tsp nutmeg, 1/2 tsp lemon peel, 1 tsp lemon juice, 1 tbsp butter, milk, and 6 c thinly sliced apples. Mix the ingredient...

In this video, we learn how to make old fashioned sugar cookies. First, you will need 2 sticks of butter and 1 3/4 c sugar. Mix this together, then add in two eggs to the bowl and mix together again. Now, add in 2 3/4 c flour and mix this up with a spoon. Form into a large bowl, then roll out on a flat surface. After this, you can cut out round shapes or any other shape you would like. Bake the cookies in the oven until they are golden brown, then enjoy and eat with milk or ice cream.
Want to create your own camera? The simplest one that you can create is a pinhole camera which can be constructed from everyday household items.
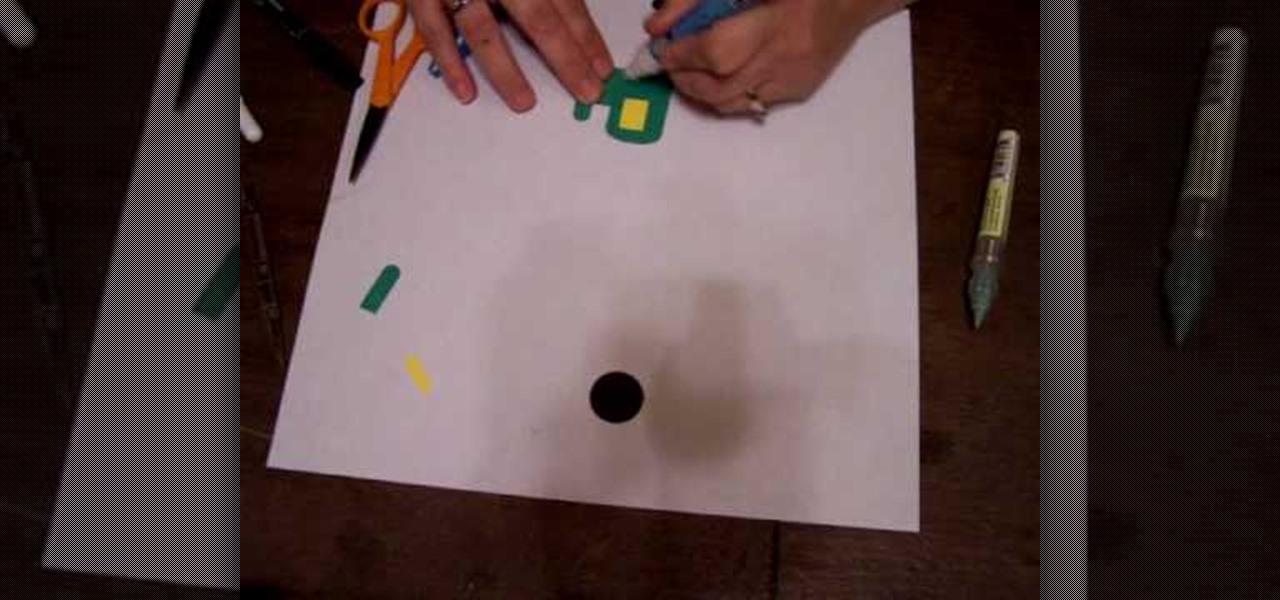
In this tutorial, we learn how to make a Tractor using Stampin' Up punches. First, you will need to punch out a black scallop circle, another black circle, two yellow circles, a yellow square, and four green square shapes. After you have these cut out, you will glue the black scallop circle to the yellow circle so it's underneath. Then, take the green piece and glue it with the other yellows to create the shape of the tractor. Glue the circles at the bottom to make the wheels, then save this ...
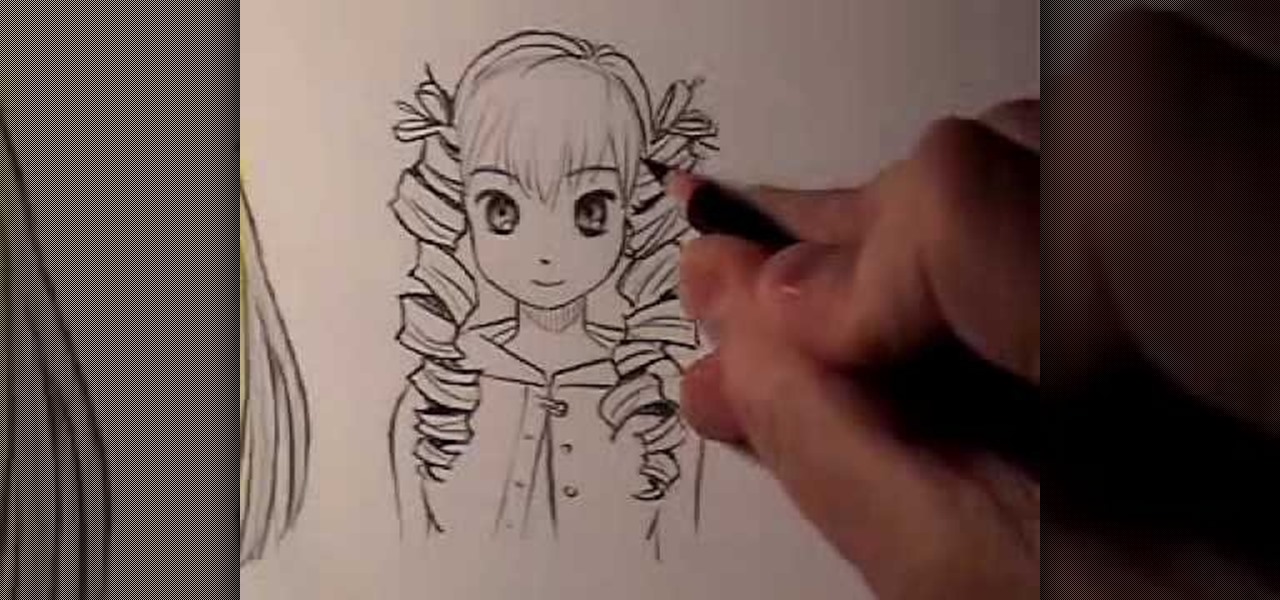
In this tutorial, we learn how to draw Manga hair (curly vs. straight). When drawing the straight hair, you will draw lines first at the top of the head to indicate how the hair is coming out of the head. Then, draw some lines around the head you've sketched. Curve the hair around the body and draw it going behind the shoulders. Draw gentle curves so it looks more realistic. Add in lines in the hair to make strands. For curly hair, start by drawing in different shapes that kind of looks like ...
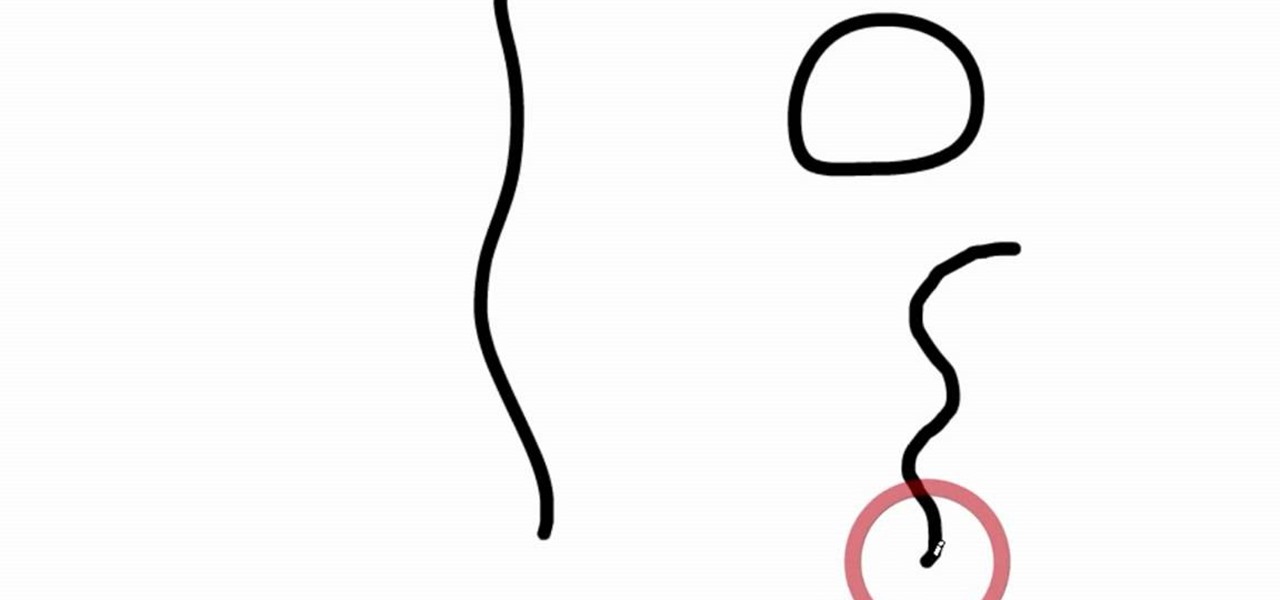
First select the pencil tool then click on pencil mode which is located at the bottom of the toolbar, select straighten and draw a line as in the video. Now you can see that the line is automatically adjusted, it will make the round and straight shape in the line depending on how you drew it. Now delete your shapes and select the smooth in pencil mode and draw a line as in the video. Now you can see that the line is automatically smoothed. And finally select the ink in pencil mode and draw a ...
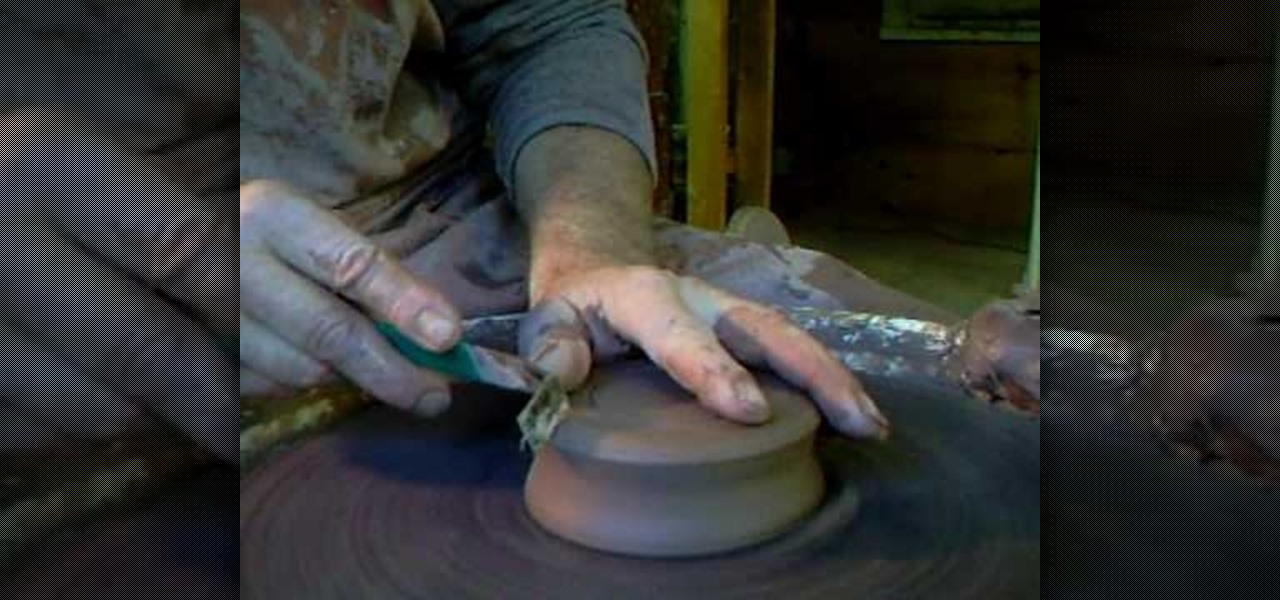
In this tutorial, we learn how to make simple pot stands. Start with your clay on the table and use water and your hands to start to shape it. Press down on the ball until it forms into a low bowl shape. Then, start to add more clay and water to the sides of the pot so that it's thicker on the edges. After this, place the pot stand onto a ceramic drying area, then you will be able to glaze it and fire it. Clean off your spinning table after you are finished, then enjoy your pot and pot stand!
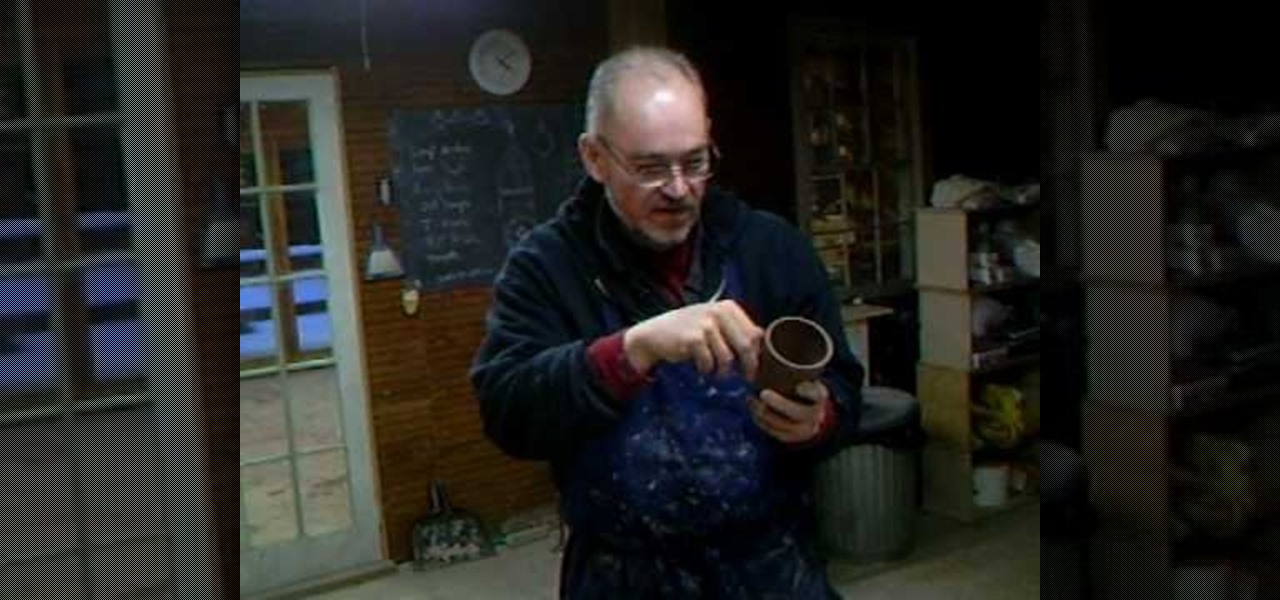
Simon Leach teaches us how to put handles on your ceramics in this tutorial. The key thing is to never let the handle fall as you are adding it to a cup, always keep it supported. Look at the handle as you are placing it on and think about proportion and size. If it's sticking out too far it's going to get knocked off. You need to have an elliptical shaped handle when you are shaping them so they can be gripped properly. Don't score the bottom part when you are joining the handle to the botto...
This video shows aspiring artists how to draw the head in a 3/4 or a side view. Three lines should first be drawn in a pie-wedge like shape. First, a line is drawn from the chin to the hair line and another one is connected to that, arching across the forehead to the back of the cranium. Then a final line is drawn from the endpoint here to the base of the chin. A face can then be drawn along line 1, to show the profile or side-view of your character. A triangular shape is drawn about half-way...
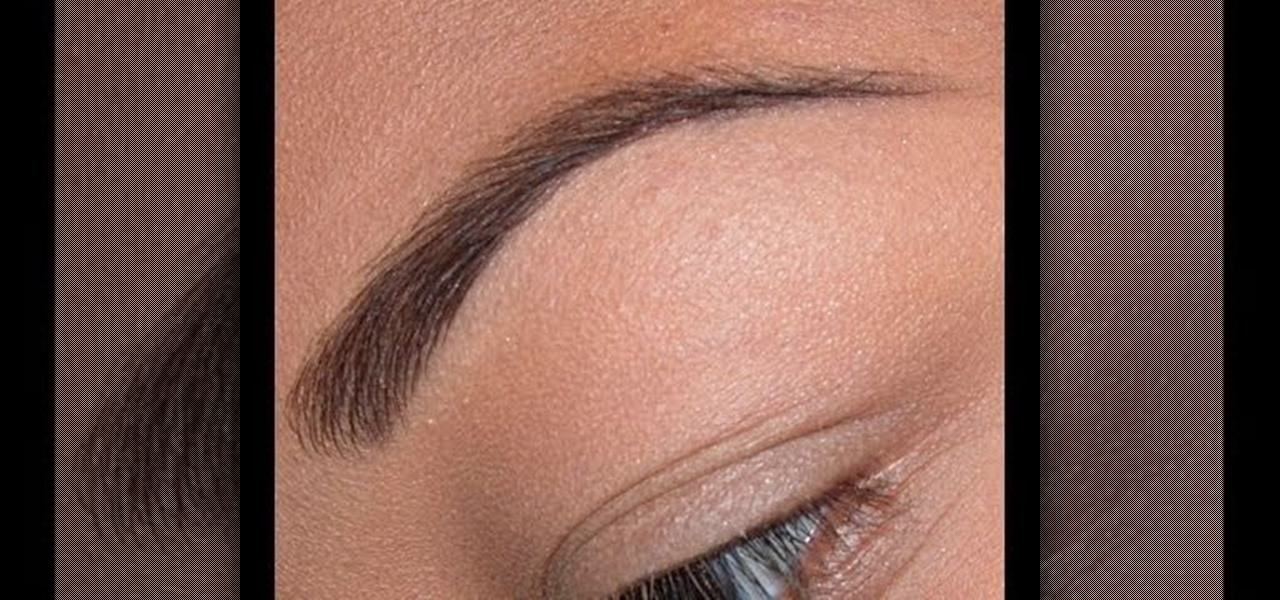
Katy Perry doesn't leave the house without first filling in her eyebrows. Why? Well, other than curling your eyelashes, it's the one big - yet easy - thing you can do to instantly make yourself look more awake and youthful. Additionally, drawing in your brows makes your face look more structured as it adds face-framing and slimming lines.
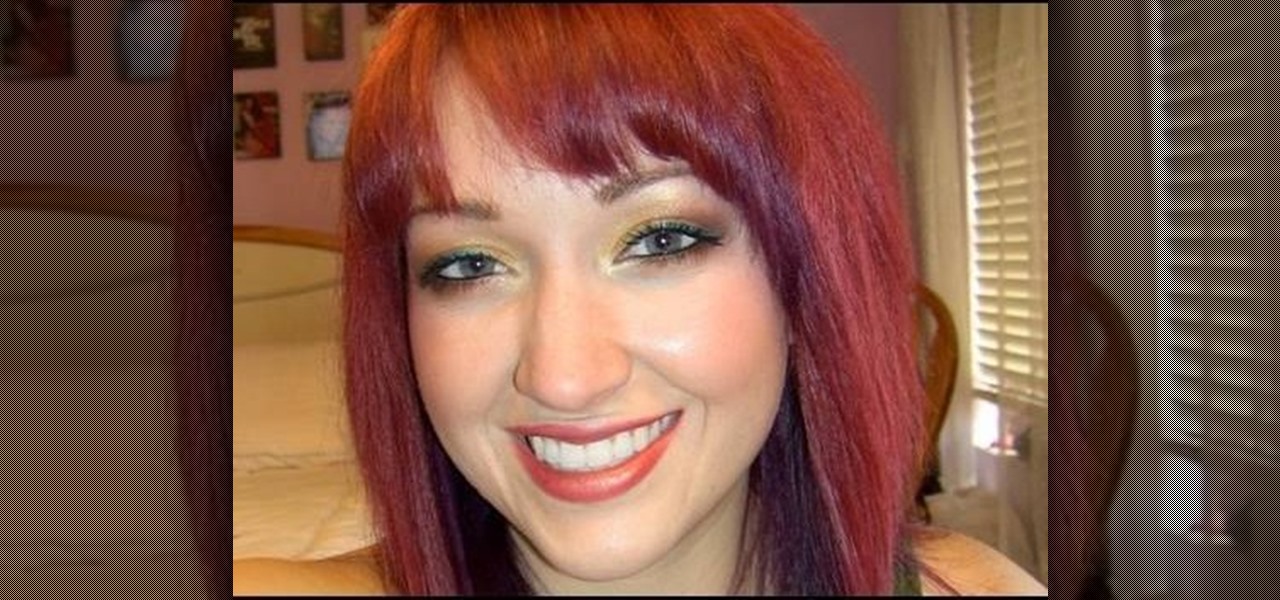
Think there's only one way to apply makeup? While it's true that the same general rules apply to shaping your brows and applying foundation, certain makeup tasks like putting on eyeshadow and blush vary in method depending on individual traits like the shape of your face and your eye color.
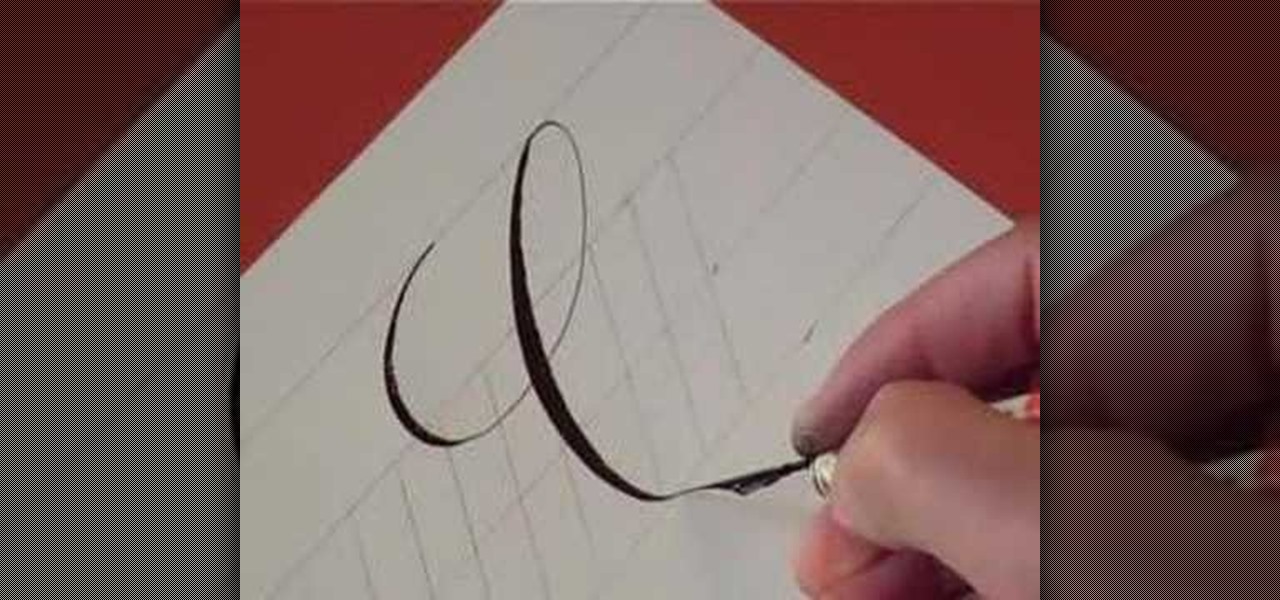
In this video, we learn how to write the letter "c" in calligraphy copperplate. First, dip your calligraphy pen into ink and start out making a large half circle on the paper. Dip the pen into ink again and make a loop with the top of the letter, then drag the pen down, making the "c" shape. End the letter with a loop on the bottom that isn't touching the inside of the letter. Make the lower case "c" by drawing the basic shape of the letter and adding a ball filled in with ink to the top of t...
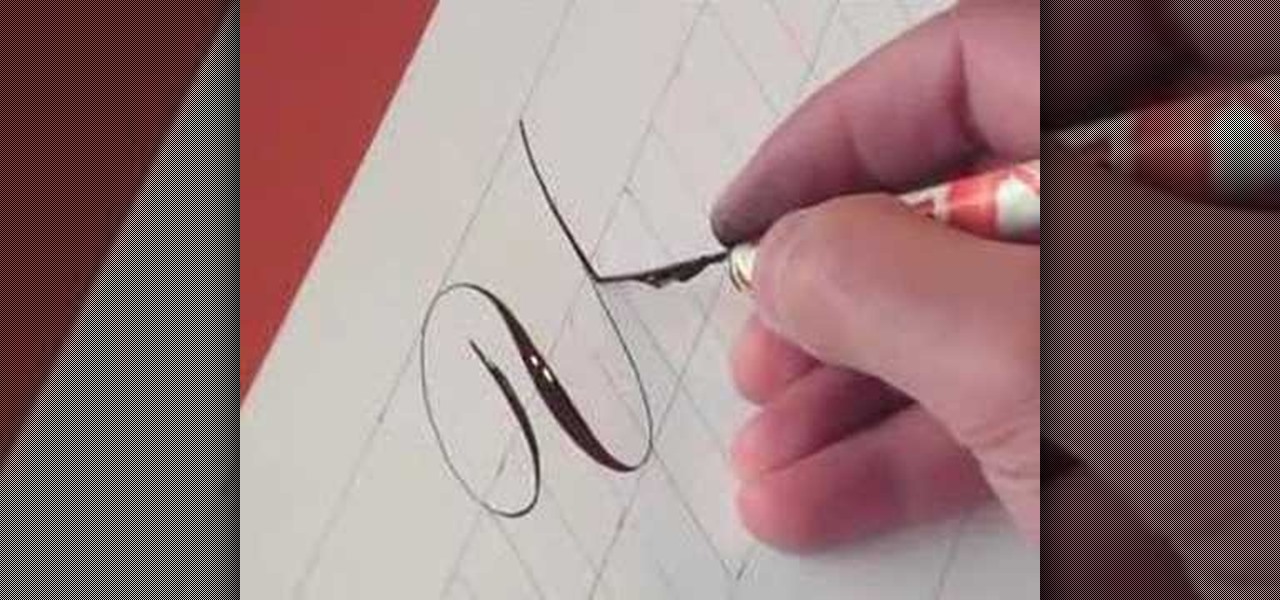
In this tutorial, we learn how to write the letter Y in calligraphy copperplate. First, make a thin line with the pen, going thicker as you go down, make a loop and then come back down. Make a "u" shape, then connect a curved line to the other side finished with a dot on the bottom to complete the letter. To make the lower case letter, make a small thin hump, then drag the pen down to a thicker line. Make a new line on the other side, making a thicker line and connect it with the other shape ...
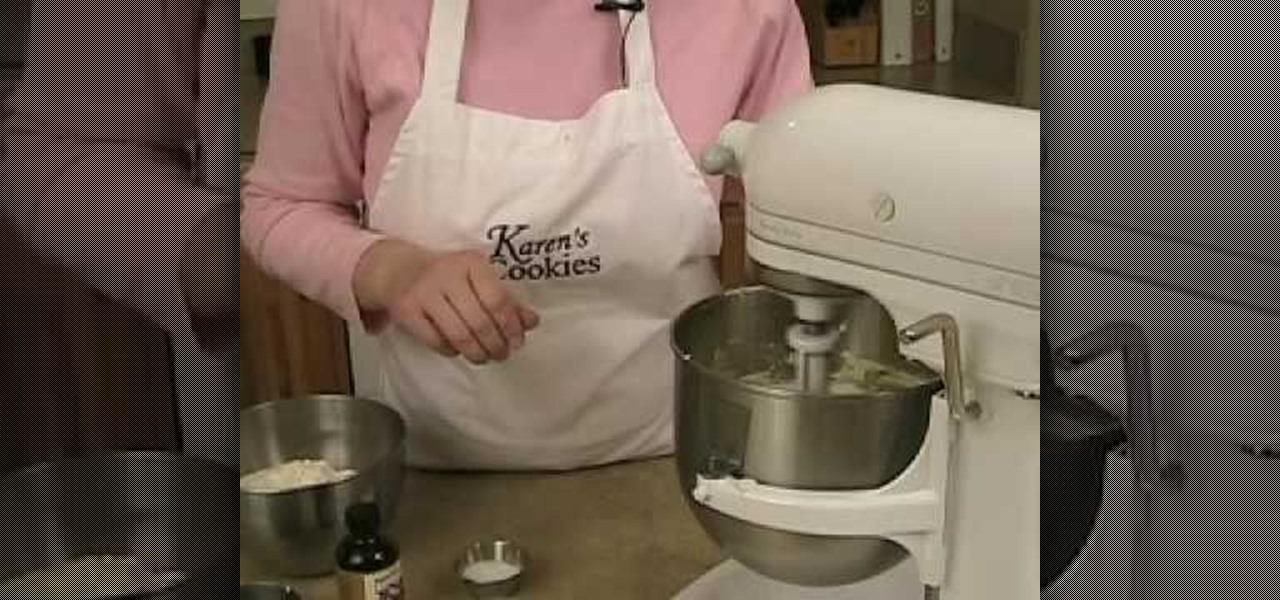
When we're baking sugar cookies, we all tend to do the same thing: Rush through the boring mixing and baking part, and then spend three times as long on putting on the icing and forming pretty motifs. But to create truly spectacular sugar cookies, there is more to crafting dough then simply throwing in the ingredients and blending.
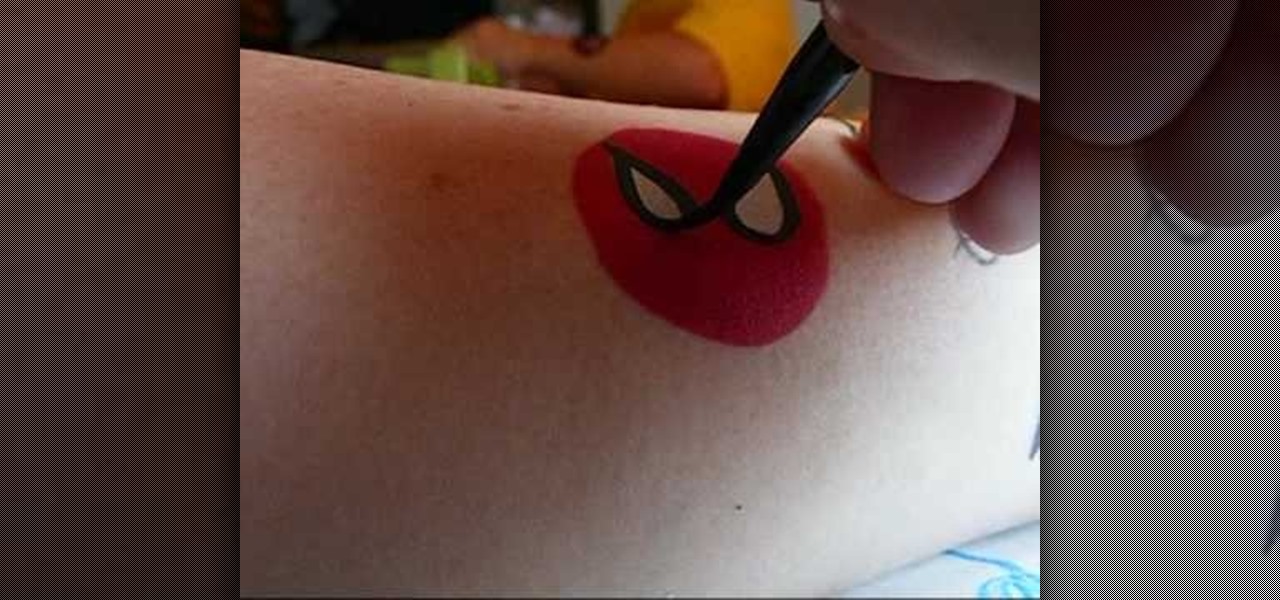
In this video, we learn how to make five easy face or body paint designs. First, to make a shooting star, grab a sponge and apply your paint to the edge of it. You will want to paint three colors next to each other on the edge of the sponge. Now, drag this across the skin and make a point at the end, then paint on a star. Next, to make a flower you will paint four hearts that are all touching with their points in the middle, then paint on leaves by swiping the brush sideways. To paint Spiderm...
Wire jewelry is one of the most beautiful types out there. With a delicate appearance and ability to bend into gorgeous curvalinear patterns or wrap endlessly around necklace pendants, wire jewelry is also easy to maneuver for beginners.
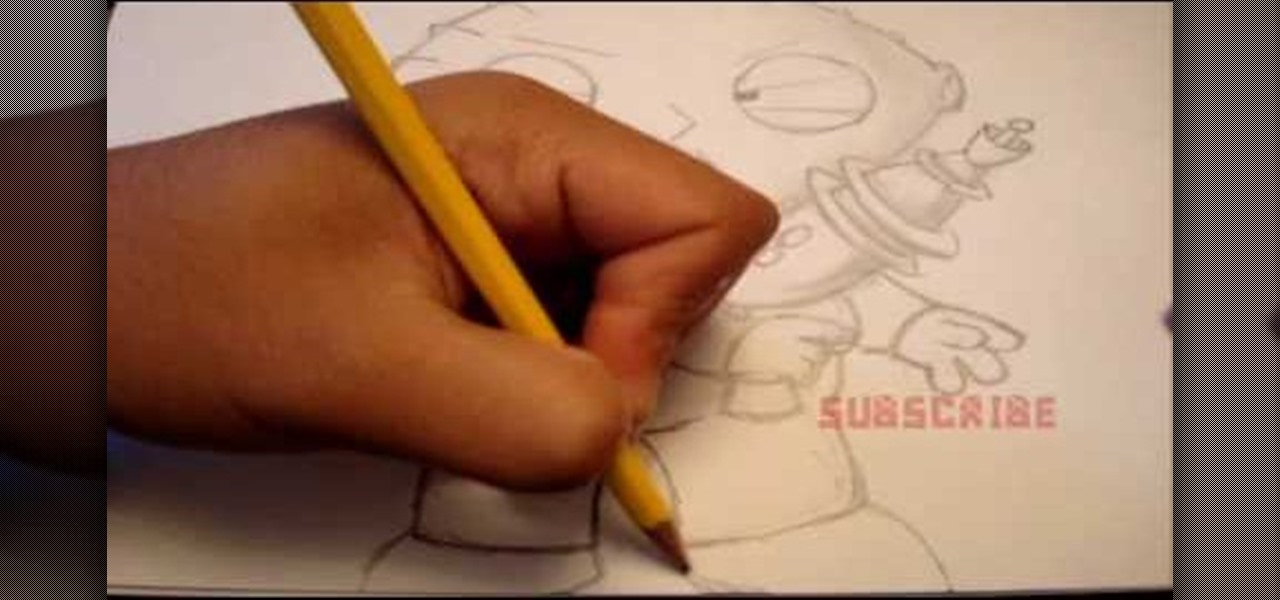
In this tutorial, we learn how to draw Stewie Griffin from Family Guy with a pencil. Start off by drawing the ears, then the football shaped head around the ears. next, draw the arms with the shirt on it, and make the hands. Also, draw a rocket with Stewie holding it. Keep drawing downwards, making the arms around the rocket and the body with pants and a bib on top. Draw in the details of the face, giving the character large eyes and a triangle shaped nose. Give the character narrow eyebrows ...
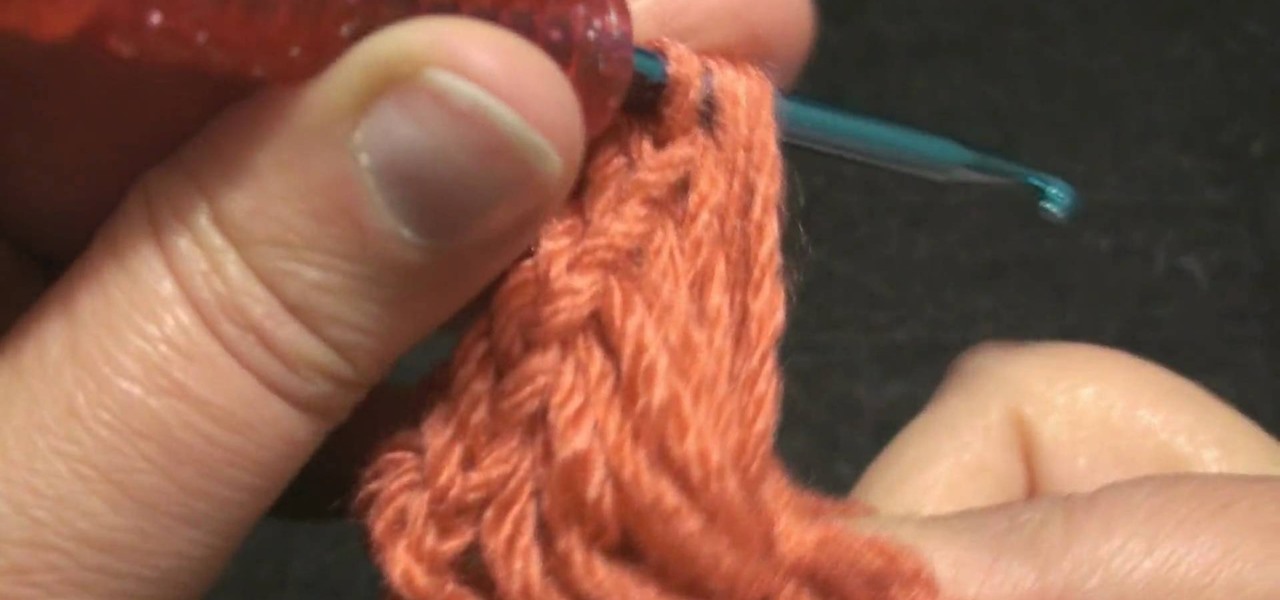
In this video, we learn how to crochet a left hand radiant butterfly. First, attach the slipknot to the crochet hook and chain four. Next, work four chain four loops. Slip stitch through the center of the chain four, then chain four again. Continue to do this until you finish one side of the butterfly wing. Next, continue on to create the next butterfly wing by chaining seven, then cut off the additional string after you knot it off. Now, use a pipe cleaner to shape it into the shape of the b...
Have you always wanted to bake awe-inspiring cakes and desserts, but have two left hands when it comes to doing anything with the oven? We feel you, and luckily this tutorial is perfect for you.
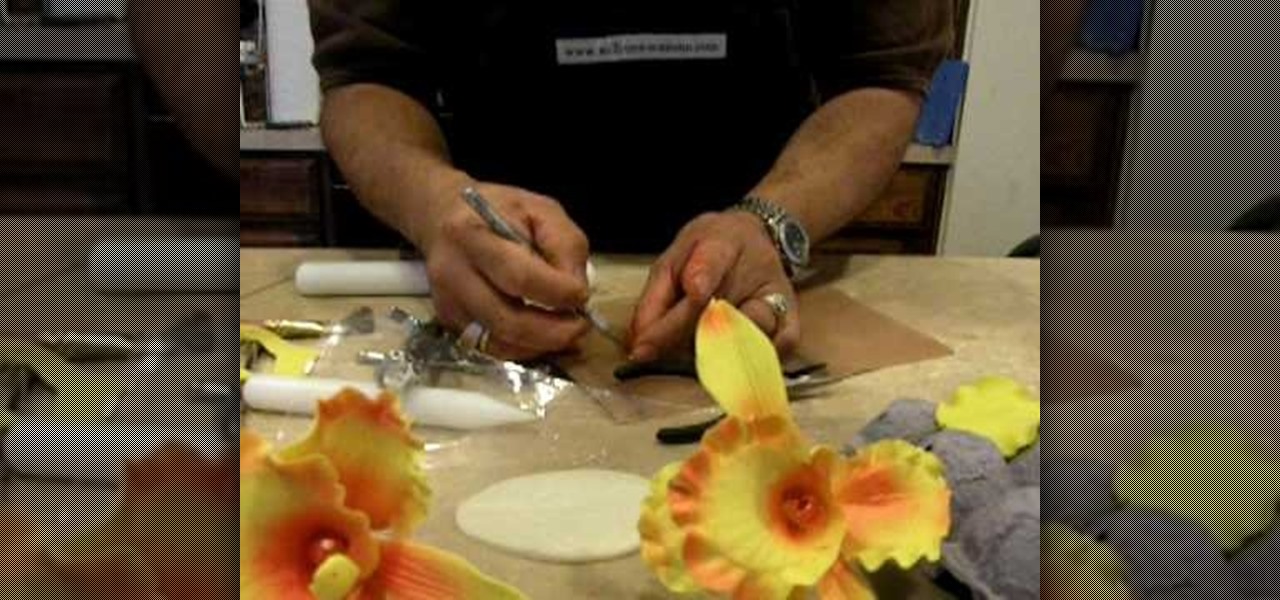
In this tutorial, we learn how to make an orchid flower with gum paste. First, roll out the gum paste and then cut it into three different shapes to make the flower. Next, place a wire in the center of the petals and then place them on a mold to get the correct texture. After this, push a ball onto the ends of the petals to make them look more realistic. Make the last flower by putting a pointed cone in the middle and wrapping it around. Now, place a ball shaped gum paste in the middle of the...
In this video tutorial, viewers learn how to align and group objects, and use gridlines. Begin by clicking the Insert tab and select a shape from Shapes. To align the object, go to the Format tab and select the Align menu. From there, users are able to align the selected object in any direction. In the Align menu, users are also able to add gridlines by selecting View Gridlines. To configure the grid-line options, click on gridlines Settings. This video will benefit those viewers who use Micr...
This gorgeous crescent moon hairstyle consists of loose hair braided behind your head into a twisted chignon, the rest of your hair on the other side let loose for a novel take on the idea of a half up, half down hairstyle.
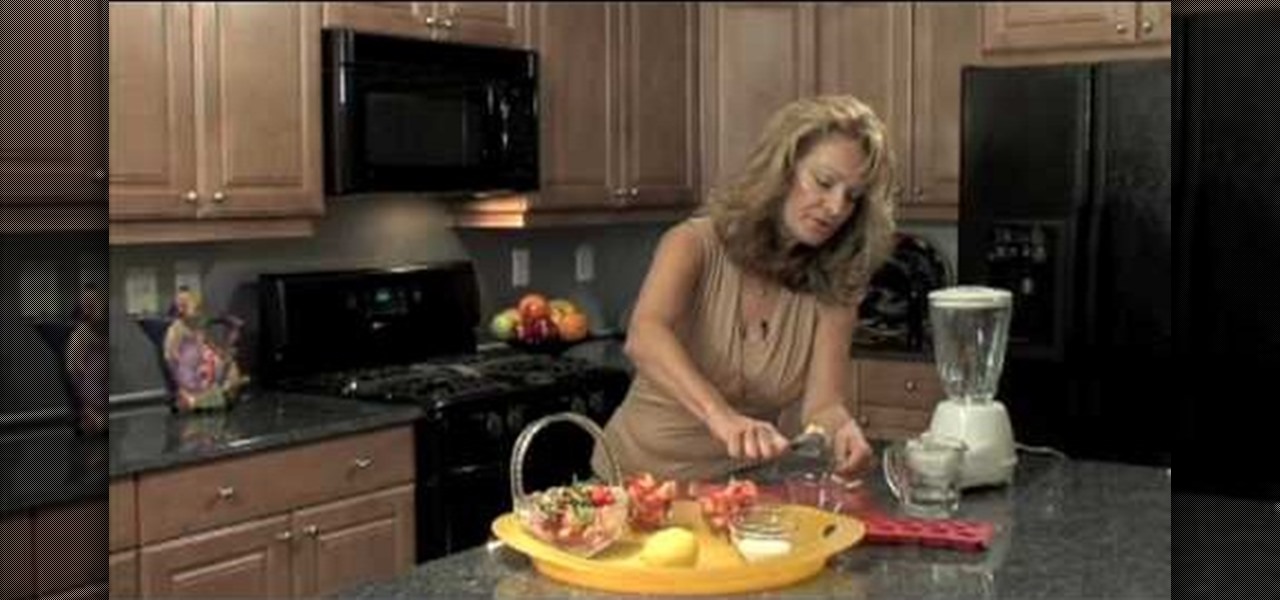
One thing hosts overlook is presentation. It's all about presentation. And one of the easiest ways to delight your friends and guests is with ice cubes. No, not the ones sitting in your ice tray, the one's you're about to make. The tiny details are the best way to have a successful party, and these heart-shaped strawberry ice cubes are the best way to go! They're yummy and a conversation piece. Learn how to create these sweet strawberry cubes, which are a great way to add pizzazz to any get-t...
Drugstore valentines? Pssh, why would you want to get the same cards every other kid is passing around on Valentine's Day when you can make your own?
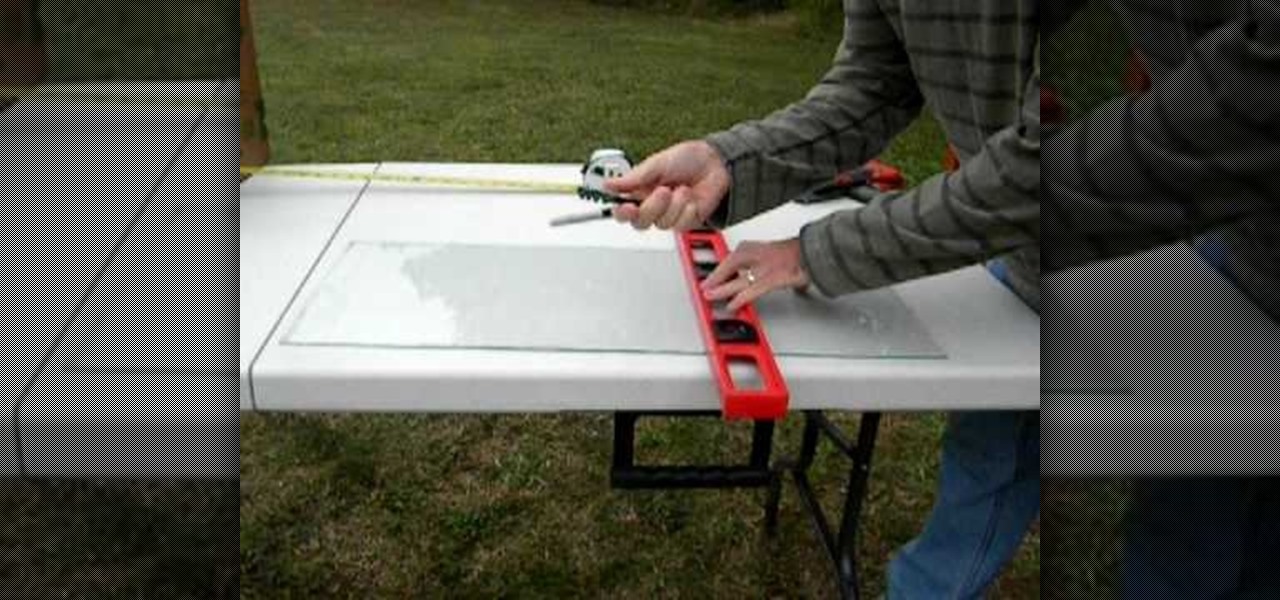
When you begin a hobby like custom framing or any other type of art involving glass, you will need to know how to safely cut and shape glass without breaking it.
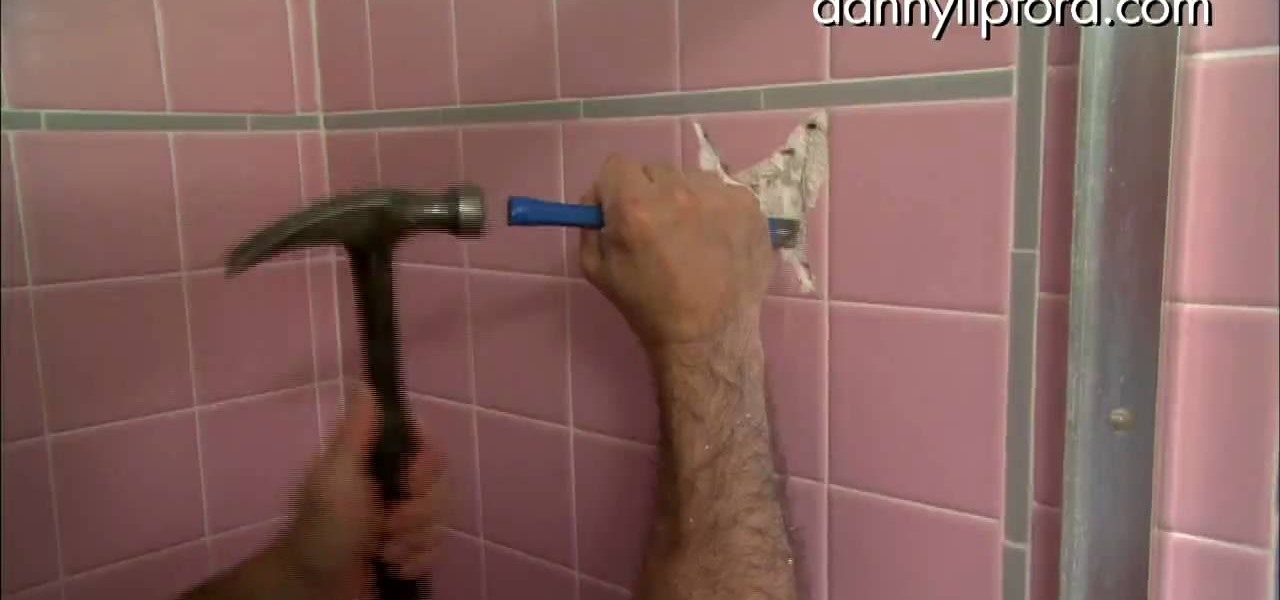
In this video tutorial, viewers learn how to remove a tile from a floor or wall. Begin by marking the tiles with a hammer and punch. These marks are used as guidelines for the drill. Create an X shape with the markings. Now use a drill to drill through the tile holes, but not through the wall. Now complete the X-shape pattern by connect the holes with a chisel and hammer. Then crack the tile into pieces and pry the pieces off the wall. This video will benefit those viewers who are doing home ...
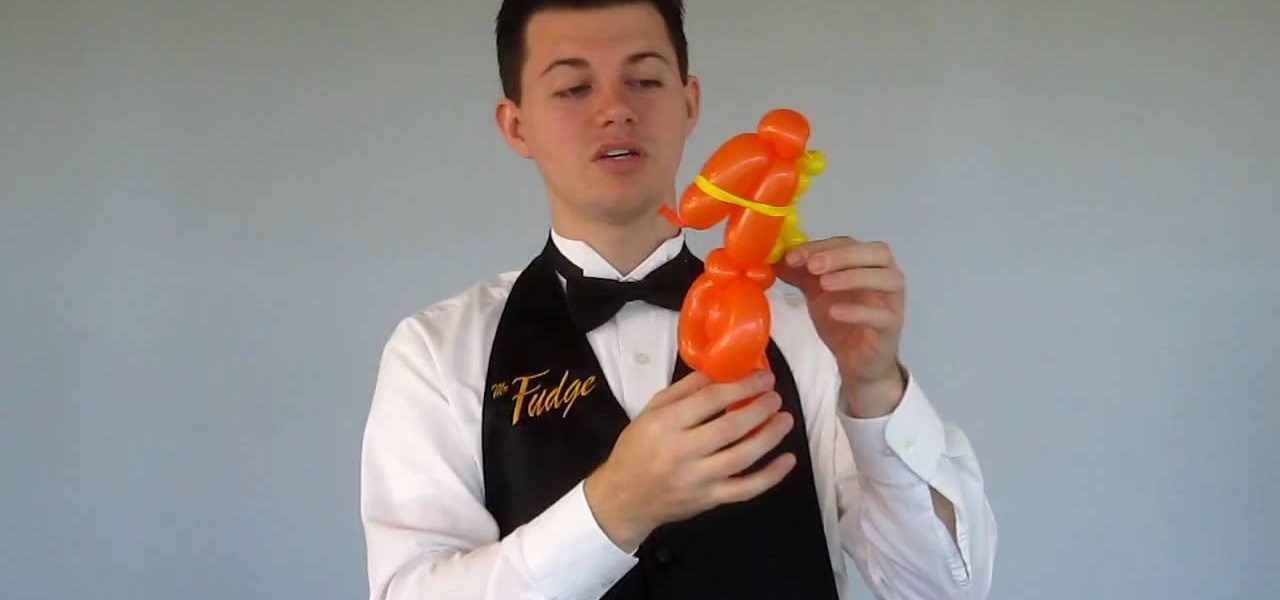
In this free balloon tutorial, Mr. Fudge shows how to take a simple mouse on a unicycle balloon creation and turn it into a number of shapes including a teddy bear, cat, human, dog, giraffe, horse, t-rex, or even an alligator just by making a few slight variations. Your Balloon Man, Mr. Fudge, is full of balloon tricks! Be sure to find other balloon videos on WonderHowTo from Mr. Fudge teaching everything from animals to planes! In a few twists and a few ties, you'll be an expert balloon arti...
To make a mini croissant out of polymer clay, you will need the following: polymer clay (tan), pastels, a paintbrush, and oil paint. Roll the clay into a ball. Next, roll it out into a log. Twist the ends. Next, shape the clay into a crescent moon shape. Use a paintbrush to dust yellow pastel onto your croissant. Start with a muddy yellow color pastels. You may need to layer the colors to get the best shade.
In this video tutorial, viewers learn how to make a plain paper clip into a spinner. The materials required for this spinner are a paper clip and a pair of pliers. Take the paper clip and straighten it. Now use the pliers to bend the tip of the clip at 90 degrees. Then bend it 90 degrees to left side and start bending the wire into a circular shape. The shape will look like a pretzel. Now bend the end tip of the wire 90 degrees to the opposite direction of the first bend. You should end up wi...
In this how-to video, you will learn how to draw a duck or a swan in the easiest way possible. To do this, you will need a writing tool such as a sharpie, pen, or pencil and a piece of paper. First, draw a v like shape smoothly. Next, Follow the shape once more, except make the outline of the swan. Next, fill the top in to complete the drawing, as well as the eye of the swan. You can add water to the drawing with a blue pen or marker. This video shows just how easy it is to create this drawing.
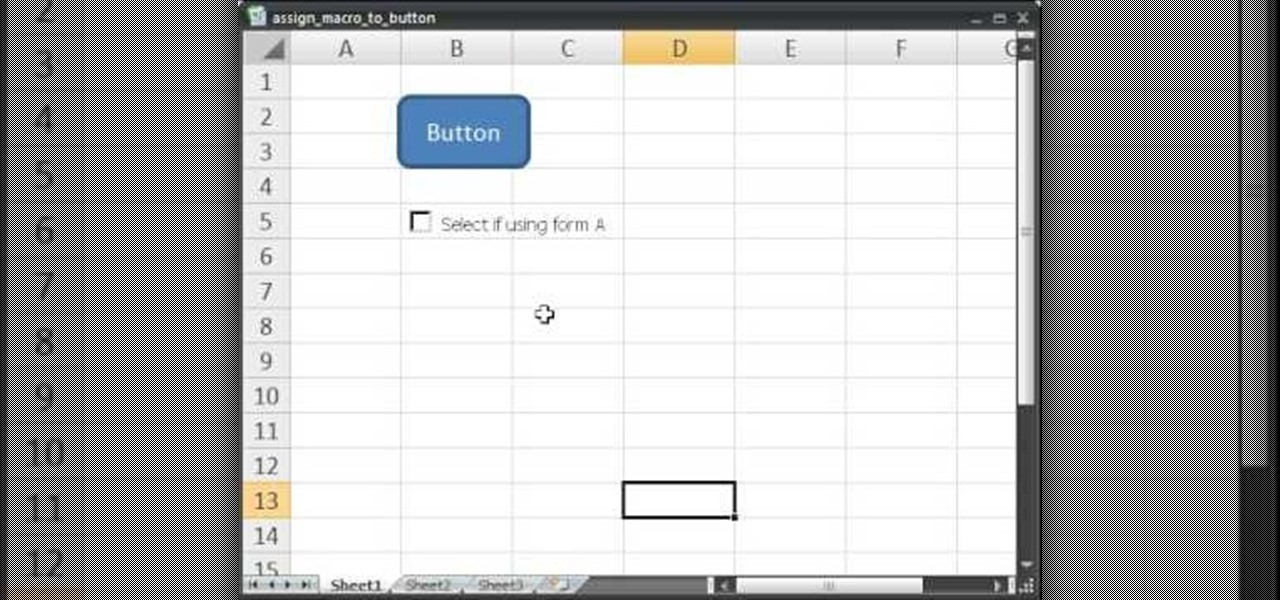
In this video tutorial we learn how to assign a macro to a button or a check box in Excel. The first thing you want to do is to place the macros you want to use in the spreadsheet. You can assign a macro to any object within Excel. Next draw the shape in the spreadsheet that you will want to assign the macro to. Then, right click on the shape that you've drawn. Then go down to assign macro and select your Macro in the pop up box and click OK. Now, anytime you click on the button the Macro wil...
Showing how to make of a cucumber out of polymer clay. The instructor begins with the color of clay she is going to be using, greens and translucent. She makes six inner 'seeds', then she shapes them around a core piece. Around the middle, she wraps 2 layers of translucent clay, then a light green, and the final dark green outside. The whole time she's lightly shaping the piece into a tighter compact whole, saying this needs to be done while the clay is warm, and not to walk away or take any ...
In this video tutorial, viewers learn how to use the vanishing point filter in Adobe Photoshop. Begin by selecting the image you want with rectangular marking tool. Then hold Control and C to copy it. Now go to your 3D shape. Press on Filter and select Vanishing Point. Click on one of the corners and drag to each corner. Hold Control and drag it down to create another selection. Now paste the photo by hold Control and V. Then drag the photo to the selected shape area. This video will benefit ...
For that, first, click insert, select any shape from the given options. Take drawing tools from format option. In that, we can choose from the most used colors , like, black, blue and red. Also we have options like, fill color. In that, theme color can be used for different type of colors. Also there are options for gradient colors, color effects. We can make 3D effects of the shape we inserted 3D options in format option. In text wrapping option, we have edit wrap points.
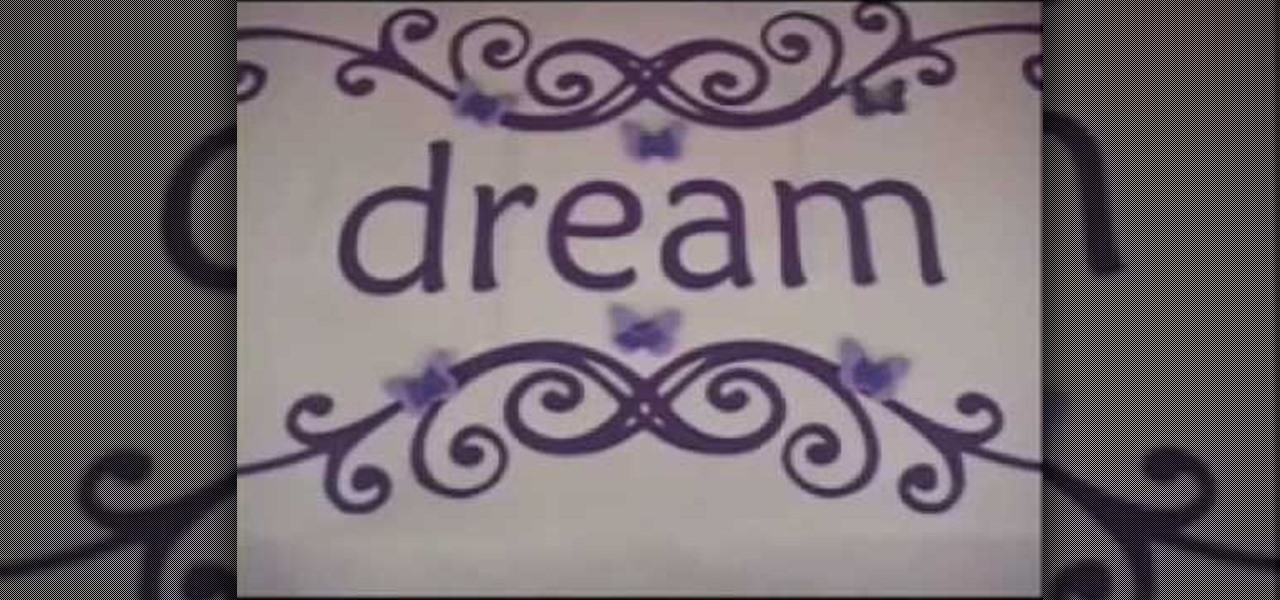
Ilysa Bierer and Kira Slye with Polymer Clay TV demonstrate how to embellish wall decals with polymer clay. Wall decals come in a variety of styles. You can embellish wall decals in a variety of ways to make them your own. Take transfer paper and use parts of the design to incorporate into your polymer clay figures. Cookie cutters are handy ways to cut out polymer clay shapes. After you cut out your shapes with the cookie cutter, you can use the piece of clay with the negative space and place...