

How To: Draw Gwen Tennyson from Ben 10
Ben 10 is one of the most popular shows in Cartoon Network's history. This video from Drawing Now will teach you how to draw his iconic older sister Gwen Tennyson. Here are some instructions from the artist:

Ben 10 is one of the most popular shows in Cartoon Network's history. This video from Drawing Now will teach you how to draw his iconic older sister Gwen Tennyson. Here are some instructions from the artist:
The crystal-clear blue seas of summer have inspired everyone from painters and poets to the creators of "The Smurfs."
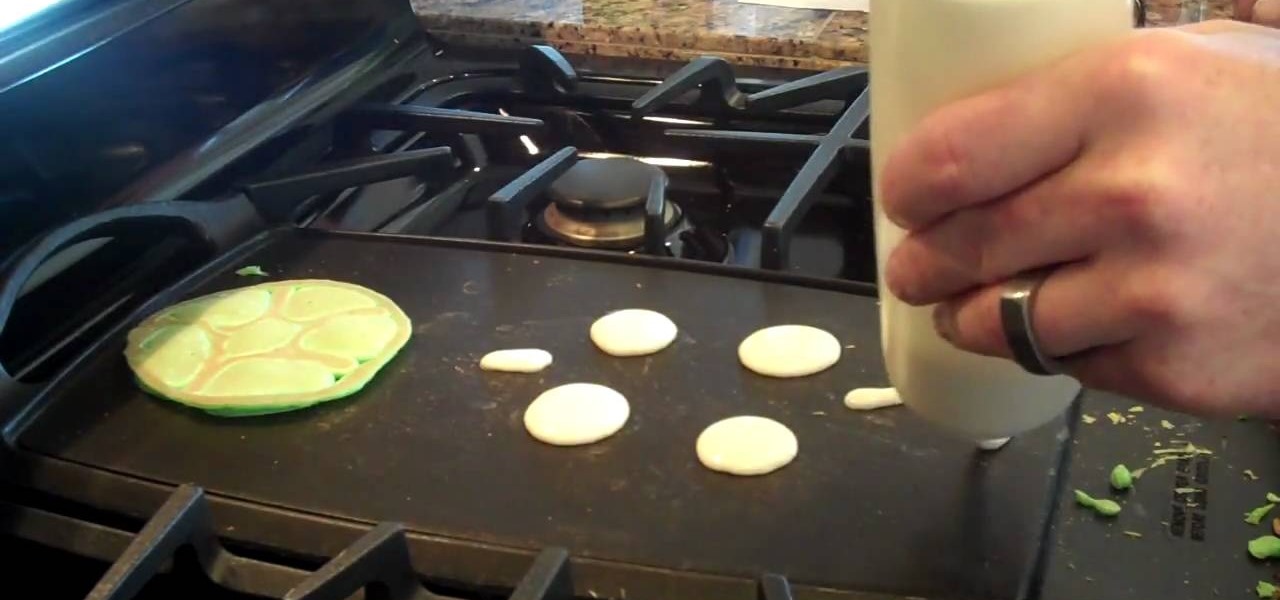
This video will show you the ins and outs to cooking turtles. No! We're not talking about turtle soup here— these are breakfast turtle flapjacks. These turtle pancakes are perfect for starting off the day right— with a happy and fun breakfast meal. Great for children.

The only thing that can get in the way of your creativity being used in Photoshop is yourself. The software has so many different tools that can be used to add color to a lifeless photograph or remove unwanted imperfections such as moles and body fat. Another thing it can do is blend images together. And that's exactly what this tutorial is about. Find out how to blend and merge faces together using Photoshop. Enjoy!
You've never had mayonnaise like this before. Watch this video to learn how to make homemade mayonnaise from scratch. The secret ingredient is a few drops of hot sauce, to add a nice, fresh spicy kick to your sandwiches or potato salad.
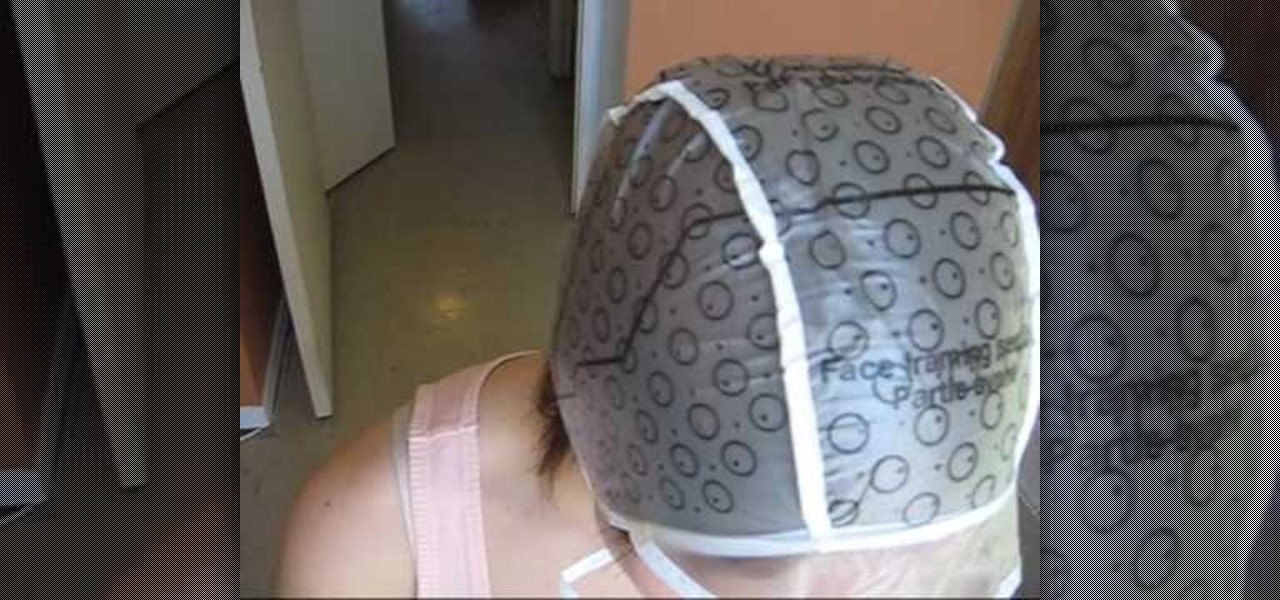
In this tutorial, you will learn how to dye your hair like a pro. Get tips and tricks on dying your dark brown or black hair to a nice blonde color without going orange. In addition to learning to lighten your whole head, you will also receive tips on how to use a hair cap to highlight your locks. By highlighting you will create a defined, multi faceted look that will look great and unique. So follow along and get ready to give yourself a professional style makeover.
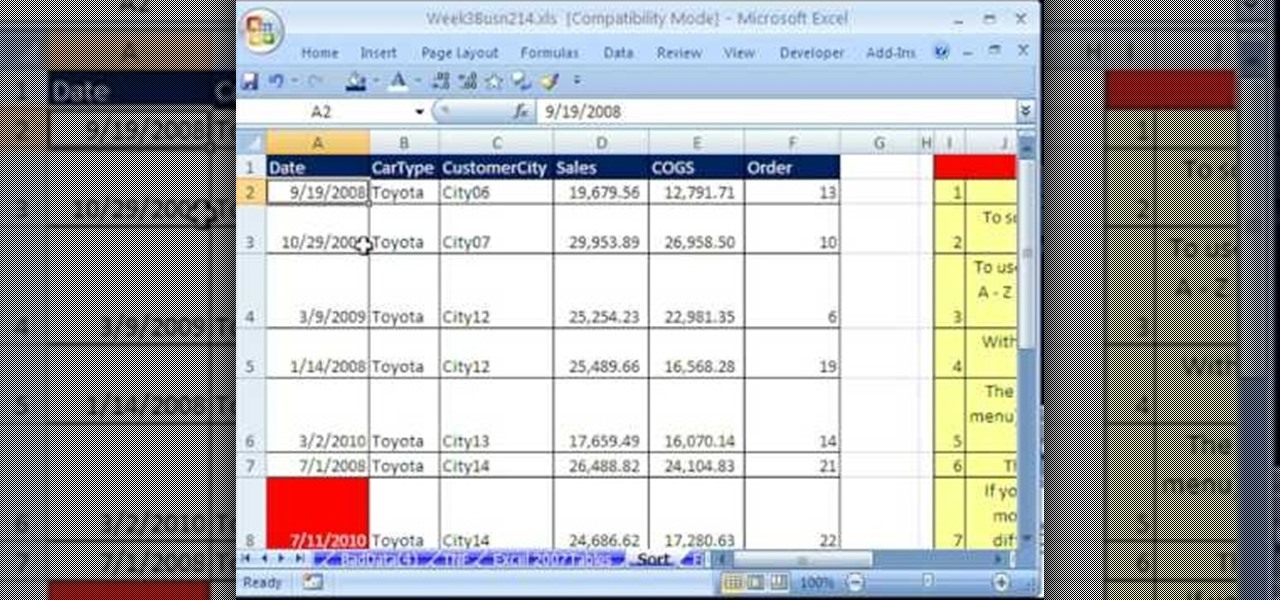
Whether you're interested in learning Microsoft Excel from the bottom up or just looking to pick up a few tips and tricks, you're in the right place. In this tutorial from everyone's favorite digital spreadsheet guru, ExcelIsFun, the 16th installment in his "Highline Excel Class" series of free video Excel lessons, you'll learn how to sort data in MS Excel. Specifically, you'll see the following:
There are so many ways to enhance your photos in Photoshop these days, it is amazing we need actual models at all! In this video, learn how to add or change the makeup on your model. If you have changed your artistic idea after shooting, or feel like your subject could just use a little something, check out this tutorial and learn how to add color to your photos.
In this free ballooning tutorial, learn how to make your very own multi-colored balloons (agates) by using a very simple (but difficult at first) technique called "the blend". The blend actually rips apart the balloon while melting other parts together. Tip from Mr. Fudge: "Do NOT use the whole balloon. It makes it too difficult and you end up with large lumps in your final product."
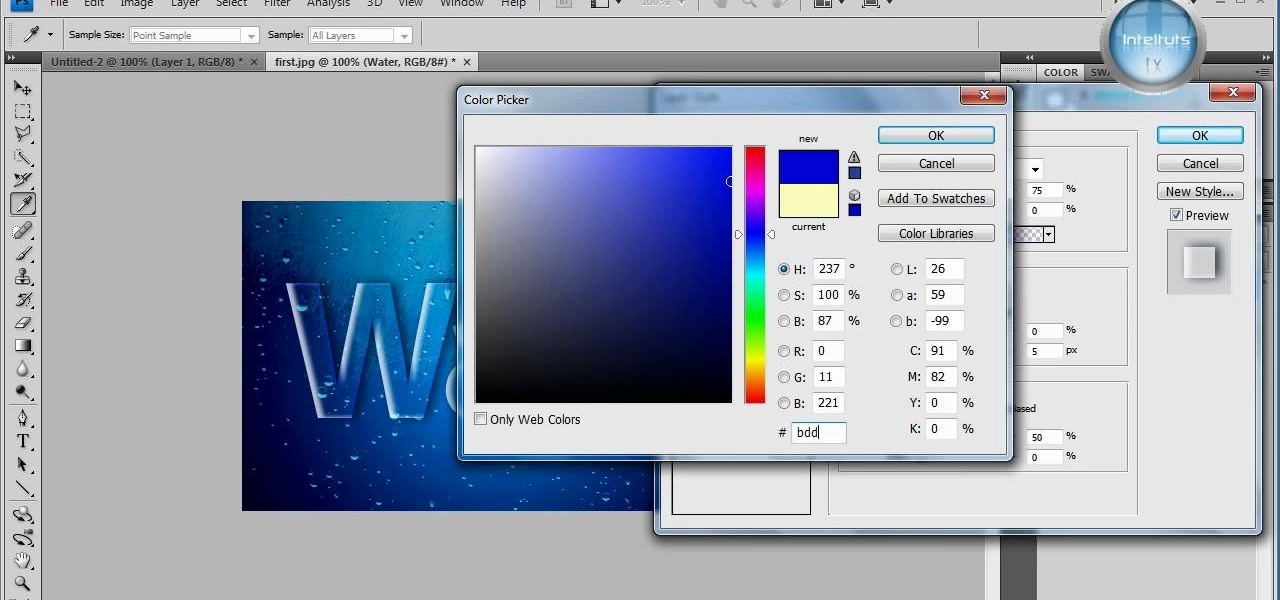
In this tutorial, learn how to make a very cool wet writing effect that you can use for graphics and logos. You will be creating this effect in Photoshop CS4. In this video, you will learn how to take tons of different layer styles and transform a basic text layer into a majestic piece of artwork. You will be shown the process step by step from the very beginning. This tutorial also shows the use of gradients and color corrections tools to optimize the full piece of work.

Are you looking for a unique type of flower that will never wilt or die? Check out this tutorial for a cool, homemade alternative to the silk variety. All you need to make these flowers is some funky colored paper.

This video illustrates how to draw the cartoon character,Betty Boop. Here are the following steps: Step 1: Take a sheet of paper and pencil and start drawing a circle and below it draw a outline of human body.
In this video tutorial, viewers learn how to add a watermark to an image using Adobe Photoshop. Begin by importing the image into the program. Select the Horizontal Type Mask Tool under the Text tool. Then select the font color, type and size. Now type in the text and click out of it when finished. Then press the Control and J key to open the text into a layer. Click on the layer and select the style. Now finish by editing and customizing the text. This video will benefit those viewers who ha...

Chrysanthemums are a beautiful flower to have in your garden for color and for picking to take into the house. There are two very important factors with planting mums. One is that you must have the right kind of chrysanthemum and two you must plant it at the proper time. There are two types of mum plants. One is the garden center plant and the other is the mail order plant. Scott, on the video, recommends the mail order plant. The garden center plant will only last one season where the mail o...
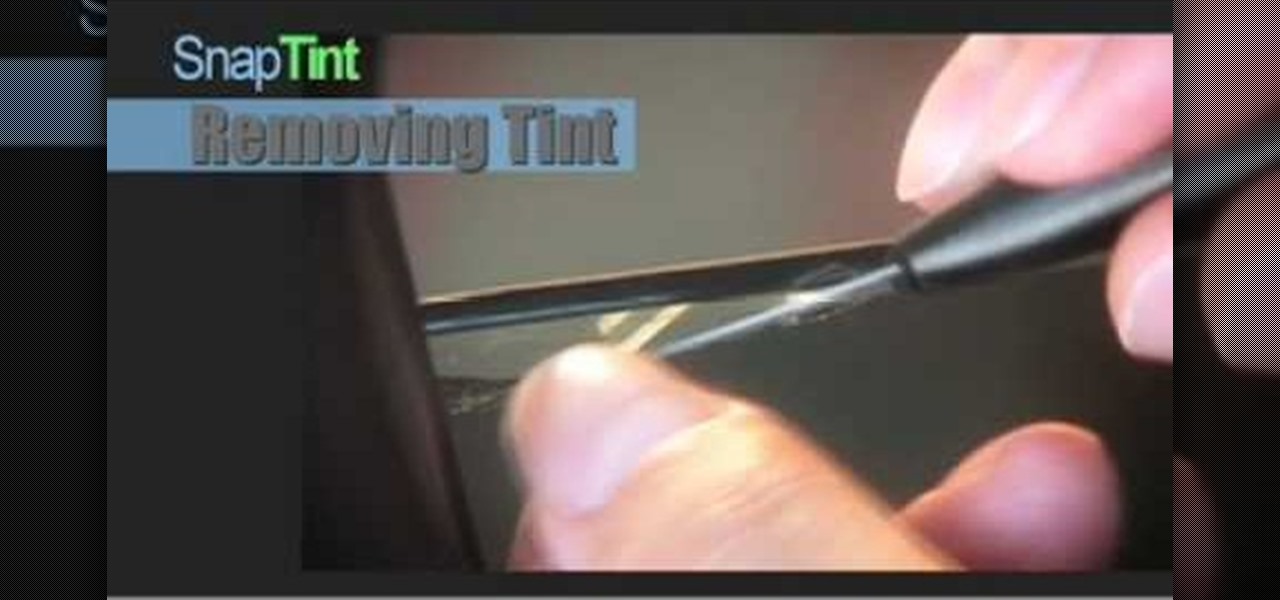
Is the tint on your windows losing its luster? In this video, learn how to remedy a bad window tint. All window film deteriorates with age and eventually have to be removed. Two of the most common symptoms of dying film are the dreaded "purple film" and the "bubbling film". Purple film is caused by non-metallic dyes in the film breaking down and changing color. Bubbling film is a sign that the adhesive used to apply the tint to the window is failing. After a single bubble appears, many more w...
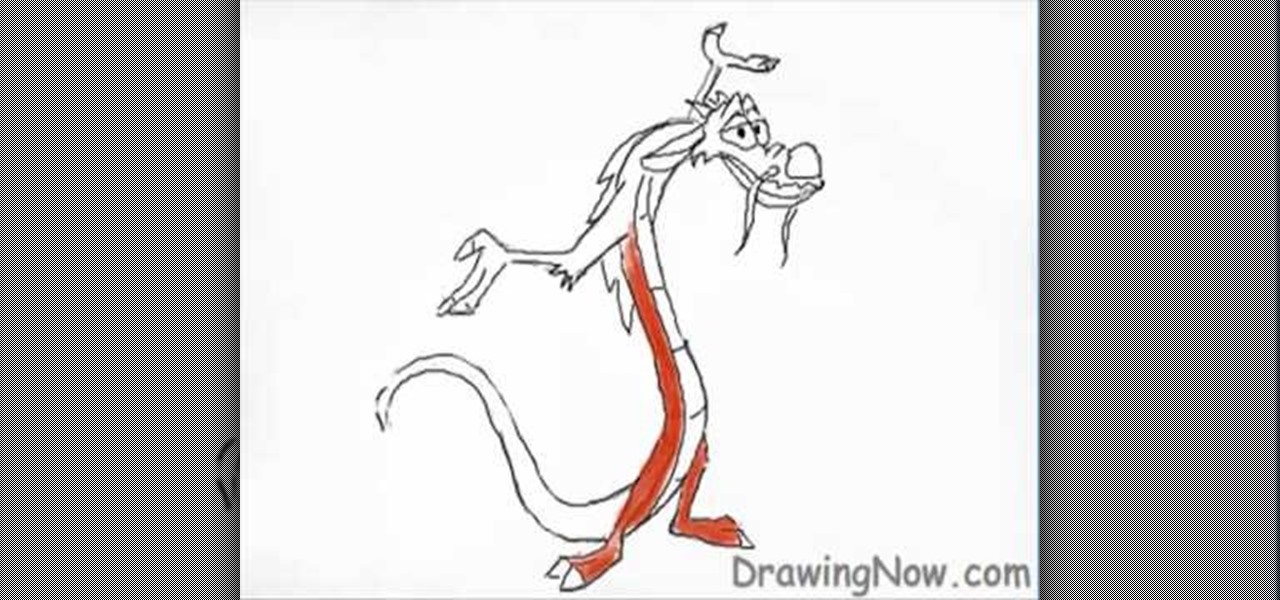
This video illustrate us how to draw Disney's Mushu from Mulan. Here are the following steps: Step 1:first of all draw a oval representing the face and then from the face raw double "S" to form the body.
This video demonstrates how to make a broken mirror effect using Photoshop.
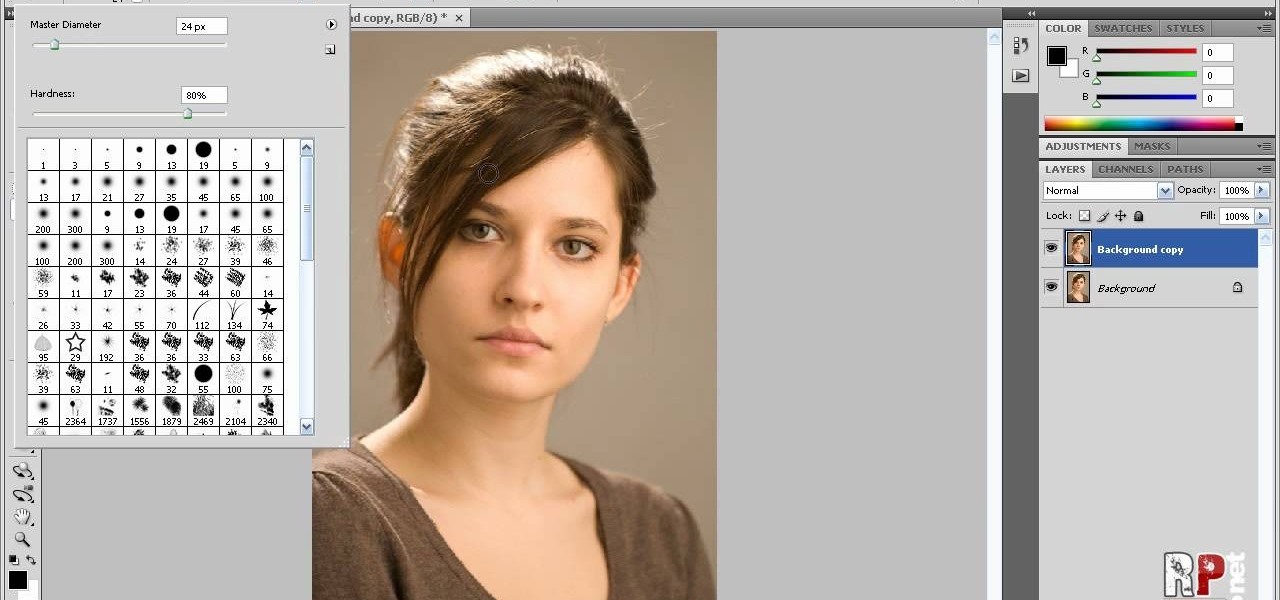
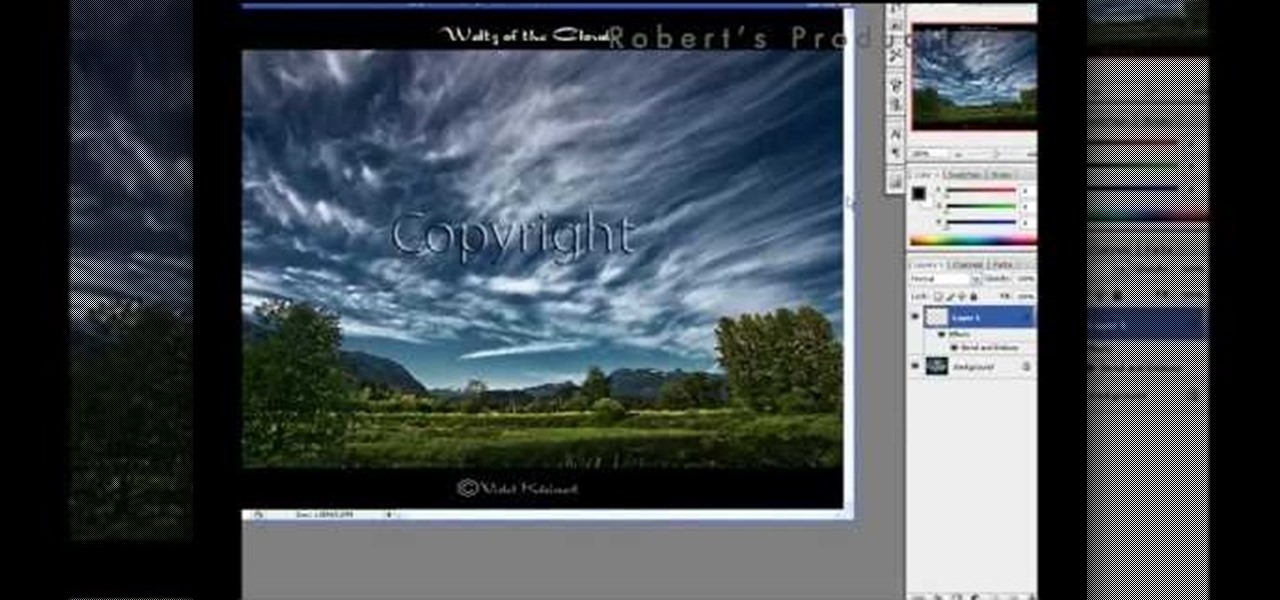
Robert demonstrates how to use Photoshop to give yourself a tan. First, you need to upload your picture(s) into Photoshop. Then pick one to work on. Next, you will need to copy the background to save the original image. On the right side drag the background label to the new layer icon (you can just hit control J). You will then need to select a paintbrush tool. Go up to the tool bar and click on the paintbrush settings to set the hardness at 80%. The master diameter will be adjusted as you wo...

In this video, we learn how to turn a photo partially black and white using PhotoShop. First, open up the program and open up the picture you'd like to change. Now, click with the right key above the layer and choose duplicate "layer". Now click above the eye icon to hide the layer, then select the layer. Now you can go to image, adjustments, then black and white. Now make the second layer visible and select the eraser tool. Wave your brush over everything but what you want to keep colorful. ...
In this how to video, you will learn how to create a rock texture in Photoshop. First, open the program. Select your foreground as a gray color and the background as a darker gray. Go to filter and render clouds. Go to filter and noise to add noise. Add about 3 percent and click okay. Add a channel and click filter. Apply the difference clouds multiple times until you get something very dark. Add more noise and then fade the add noise filter. Go back to the original layer and go to filter and...

In this video, we learn how to make homemade Kefir Ginger Ale. First, you will need a 2 qt jar of filtered water and add in 1/4 c of honey into it. Mix this together until it's combined and the water is a yellow color. Now add in milk kefir grains that have been soaked in ginger. Next you will add ginger and tumrick that have been chopped up and add into the jar. Also add a squirt of lemon and lime, as well as a piece of coral calcium. Place the top back onto the jar and let it sit for at lea...
This video shows how to create a menu with rollover images in Dreamweaver. Open a new document and create a table with one row and one column. To add your rollover images, go to the "Image" tab and select “Rollover Image”. In the “Insert Rollover Image” box, give the image a name, then click “Browse” under “Original Image” to find your images. You can select your rollover images in the same window. Then enter your alternate text and click OK.

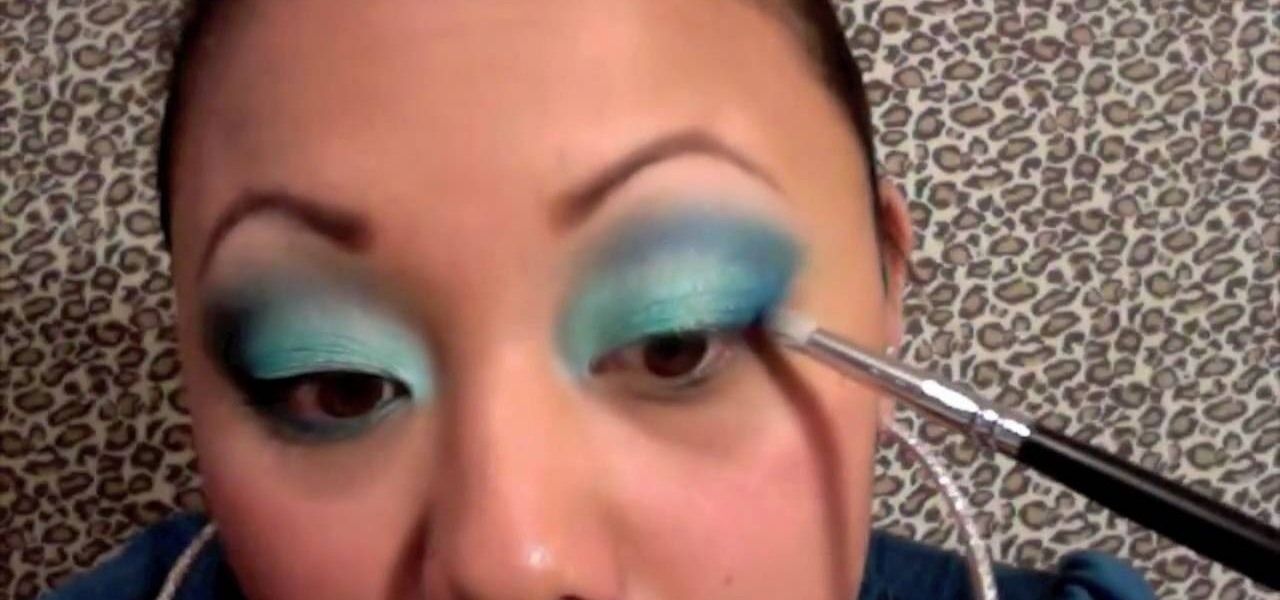
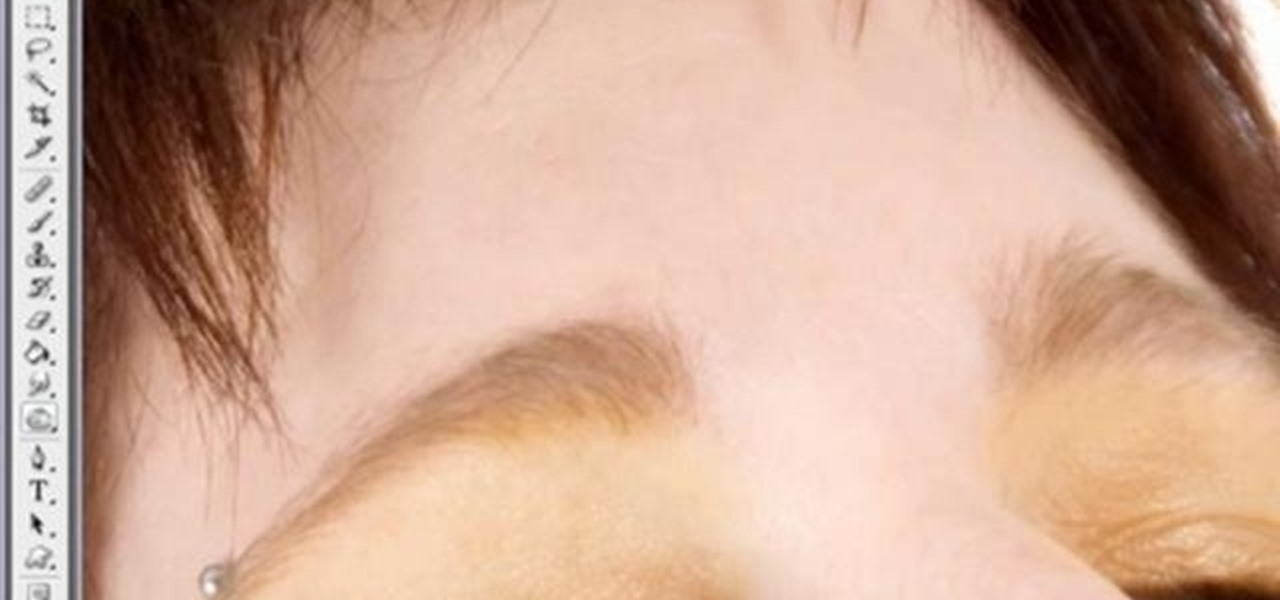
In this video, we learn how to put eyeshadow onto a picture using PhotoShop. First, open up the program and open your picture. Click on layer then new the click layer again.On the new layer put as blend mode "multiply". Make the opacity 50% and choose a color. Then select the brush that is the right size for your picture. Next, you will be able to brush the mouse over the eyelid and put eyeshadow onto the lid of the eye. You can change the intensity of the eyeshadow by changing the opacity hi...
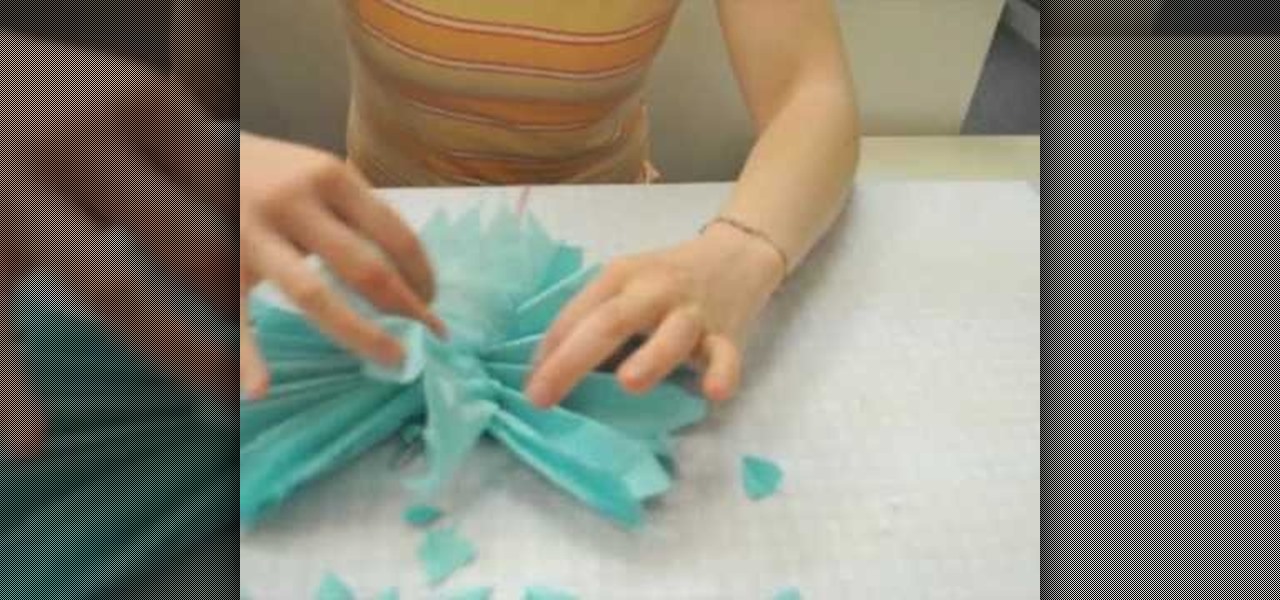
This video shows you how to make a puff flower ball using tissue paper.Spread out a tissue paper,of any colour,on a table.Keep one of the short ends of the paper,facing you and away from you.Then fold it back and forth,from one short to the other side until the whole of the tissue paper is used up.Fold this into half and release.Take a piece of ribbon and tie it on the center.Give the edges a pointed, partyish look by cutting them using a pair of scissors.Now take a single piece of tissue pap...
In this how-to video, you will learn how to create flashy pictures and animated gifs for your profile pictures. This is useful if you want to put an animation as your facebook or myspace default photo. First, find and open the image you want to use. It should open in MSpaint. You can go to image and select invert colors. Save this new file with a different name. Now, go to the gifninja website. Click on Create an Animated Gif. Now, upload both of your files to the page. You can select the spe...
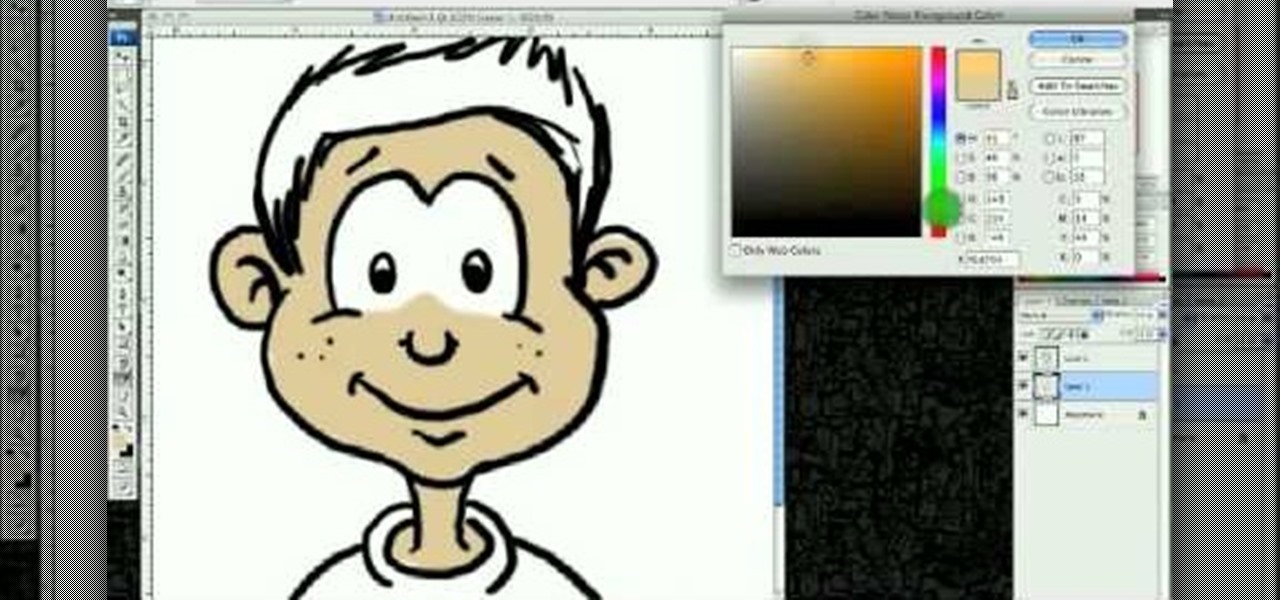
This video illustrates how to draw a cartoon boys face in Adobe Photoshop.Here are the following steps:
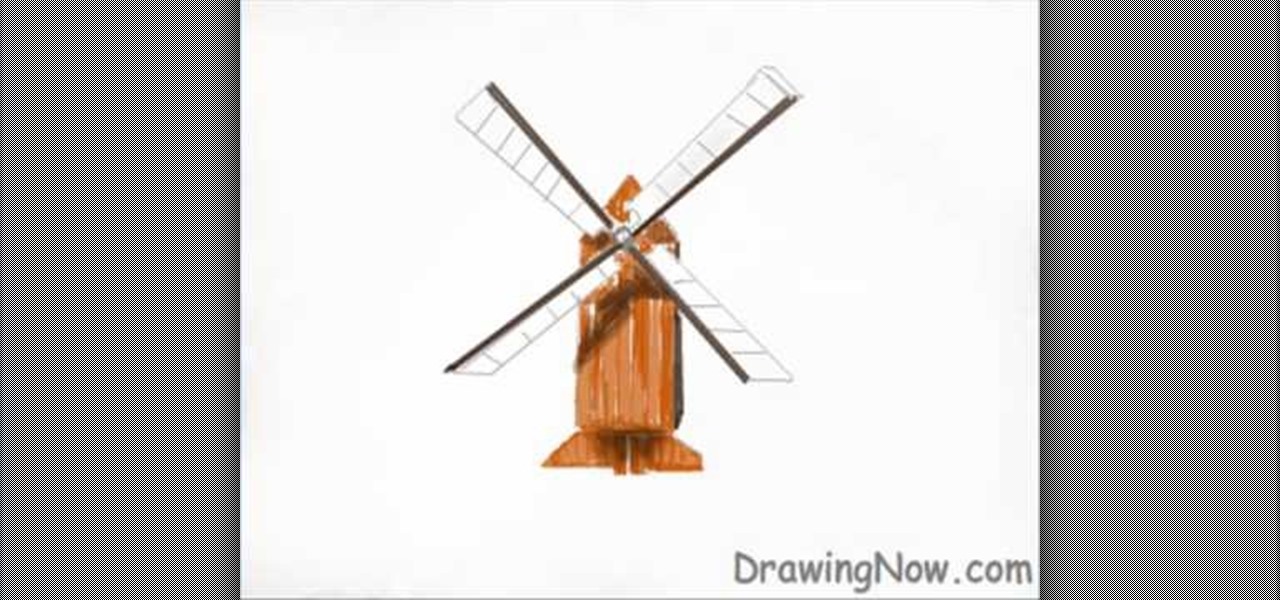
In this how-to video, you will learn how to easily draw a wind mill from scratch. First, start off with the building of the mill. Next, draw the arms of the wind mill. Include the flaps on the arms. Next, fill in the smaller details such as the center of the rotation. Next, you can fill in the color of the building. In this case, brown was used. Next, fill in the arms of the wind mill. Add appropriate shading on top of the building. You can also add shading to the arms. Next, fill in the back...
This is a video tutorial describing how to construct a mini loofah for your dollhouse. The first step is to gather your supplies. You will need a needle, scissors, thread, and tulle. The tulle and the thread should be the same color. Next your tulle should be cut to be 1.5 feet long. Then bunch up the tulle so that it is small and compact just like a loofah. Next you should thread your needle. Next sew the tulle so that it stays in the shape that you would like it to be in. Finally cut off al...
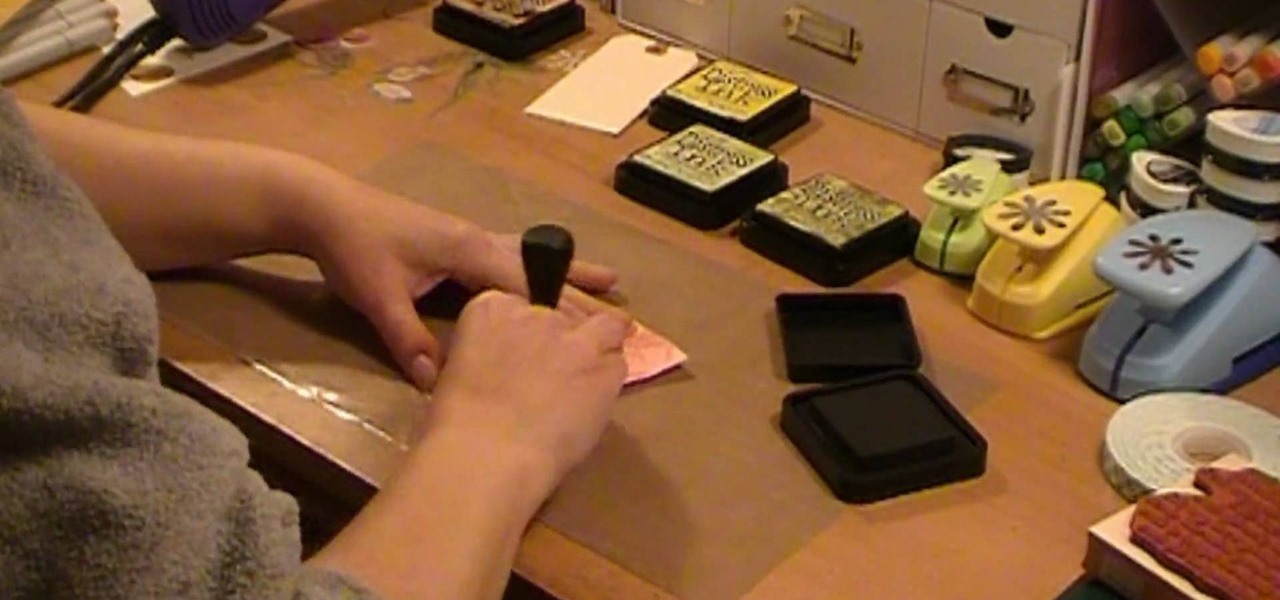
Donna50242 shows us how to make an amazing looking tag to use on different things. This video is in response to another one posted earlier. This tag is made be crinkling up an ordinary brown paper tag and then flattening it out to create the worn out wrinkle effect. Using a distressing inking tool with a foam pad, we apply the ink in a swirling motion. using different colors from the ink set (Mahogany, Mustard seeds, green etc), we can create amazing effects. And that's it, your done! Try exp...

This video illustrate us how to make ribbon woven headbands. Here are the following steps:

Christine from ExploreModeling.com shows you how to tweeze your eyebrows yourself without painful waxing or expensive treatments. First, you need a high quality tweezer with a very small point and a tweezer with a wide point. The small point tweezer is good for plucking single hairs, and the wide point tweezer can pluck a few hairs at at time. The first area you need to tweeze is the area between your eyebrows. Don't go too far into your actual eyebrow area. Then, to make your eyebrow natural...
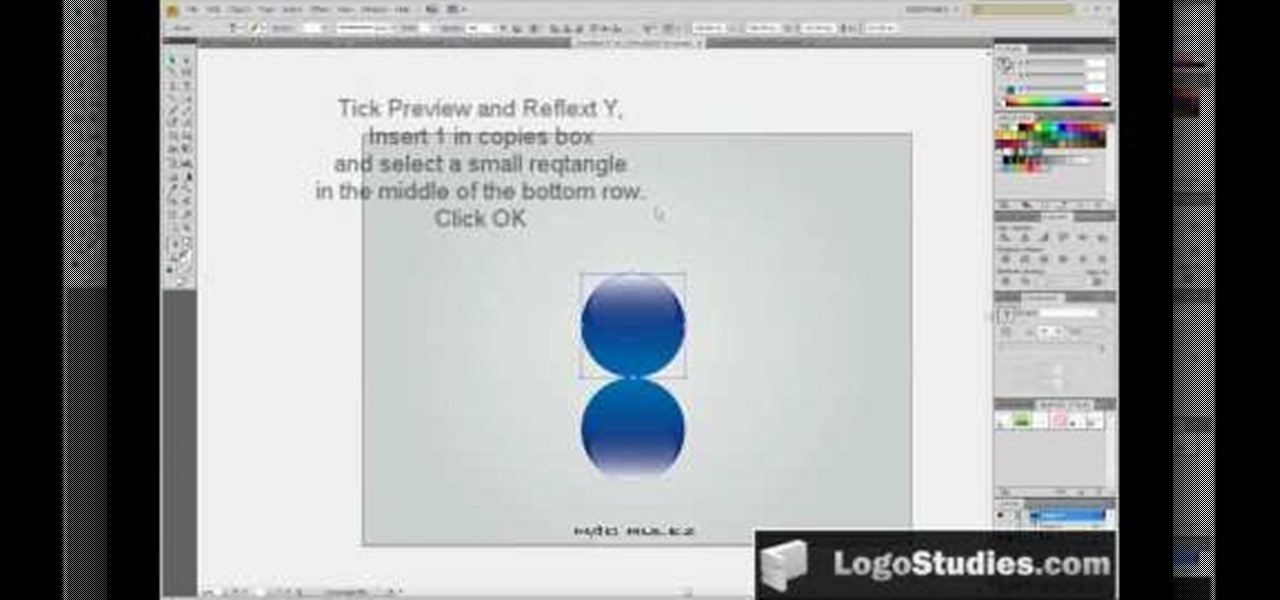
In this video tutorial, viewers learn how to create a 3D sphere and reflection in Adobe Illustrator. Begin by using the ellipse tool and create a circle. Select the black and white gradient, and drag the colors that you want into the gradient panel. Now hold the Alt key and draw a smaller circle inside. Fill it with white/transparent gradient. Select the sphere and go to Object/Group. Now go to Effect/Distort and Transform/Transform. Tick the Preview and Reflect Y, insert 1 copies box and sel...
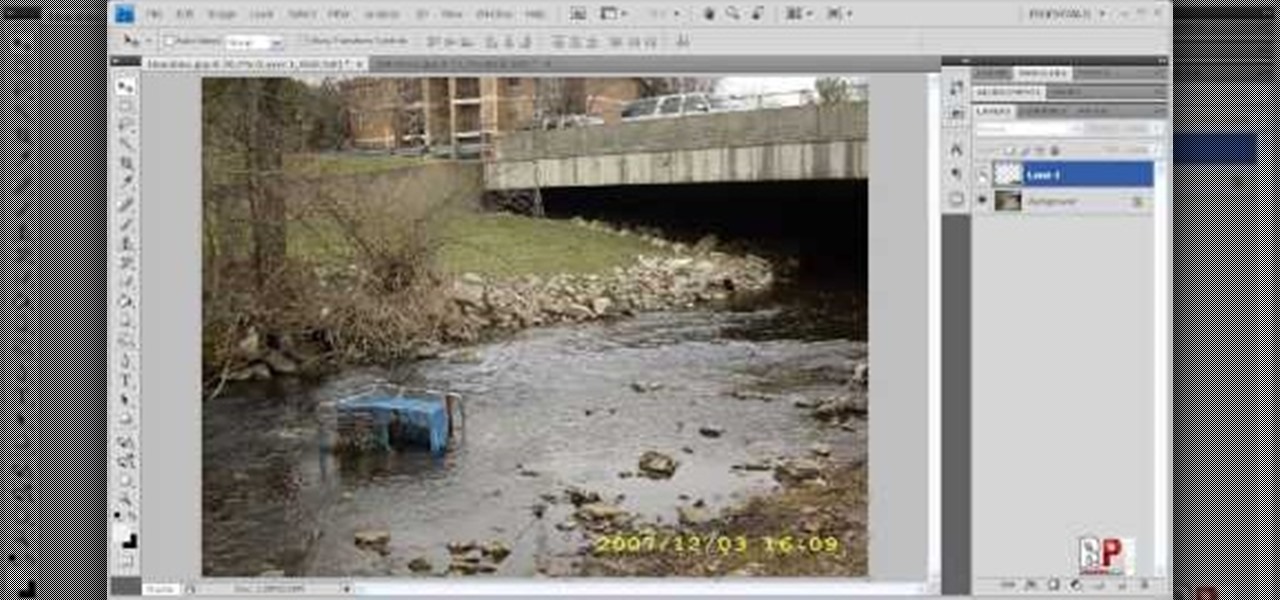
There are various ways to remove the timestamp on your photos using Photoshop. You can use the crop too and crop out the photo, but then you'll lose parts of the photo as well. You can use the patch tool, and draw a border around the date, then drag the date to another area, let go and press ctrl+D. The time will disappear and the area will be patched up with surrounding colors. Another method is to use the spot helium brush tool, and simply just brush over the text, and the spot helium brush...

In this Arts & Crafts video tutorial you will learn how to create a box to hold a mini album or small cards. Take a shiny card stock 10.5 x 6 inches. On the 6" side, score at .5" and 1" on both sides. On the longer side, score at 3, 3.5, 7.5 and 8 inches. Cut out the corners on the flap side of the card as shown in the video. Do a step cut on the other side of the card as in the video. Round the four corners with a corner rounder. You can do some stamping now if you want or you can also glue ...
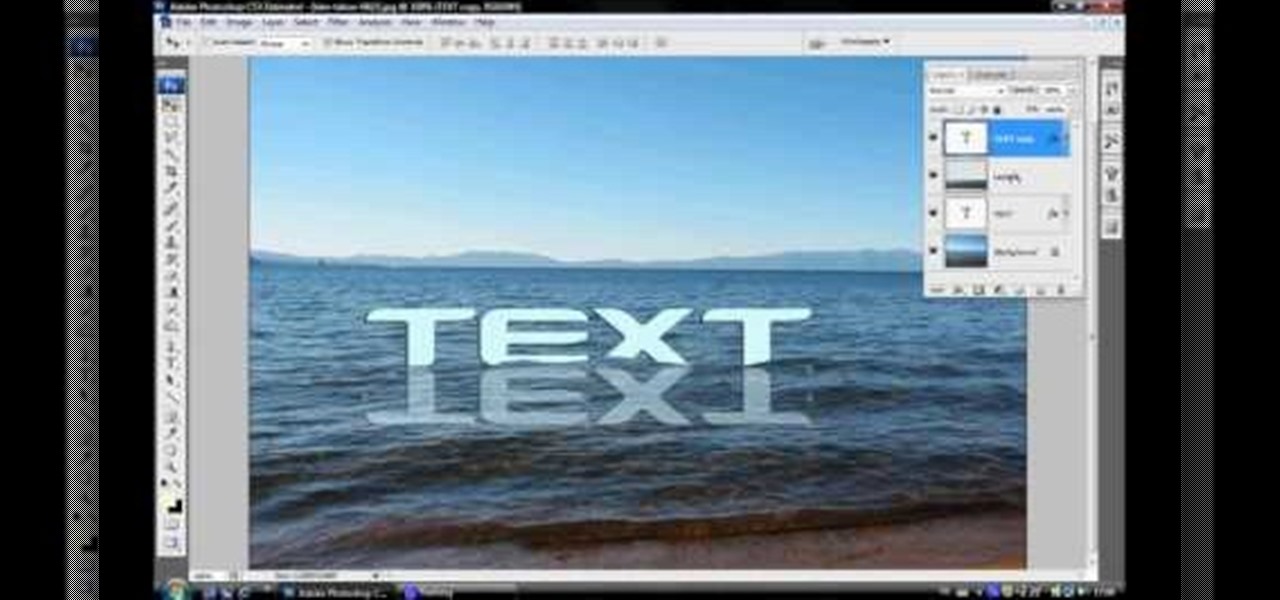
In this video tutorial, viewers learn how to make floating text on water. Begin by importing the water image into the program. Begin by selecting the polygonal lasso tool in the toolbox and select the top of the water. Once you have made the selection, right-click on it and select Layer via Copy. Then select the text tool and type in your text. Create a contour to make the 3D and give the text a light color. Then place Layer 1 over the ext layer and use the selection tool to place it behind t...

In this how to video, you will learn how to remove acne with Photoshop. First, open the image you want to edit in Photoshop. Go to the left column and select the healing brush. Next, set the brush size and find a part of the image that is clear. Hold alt and click. Next, start clicking on the areas that you want to remove. As you can see, the spots are replaced with the color that you chose earlier. Keep on doing this until the image has been completely healed. This video shows you just how e...
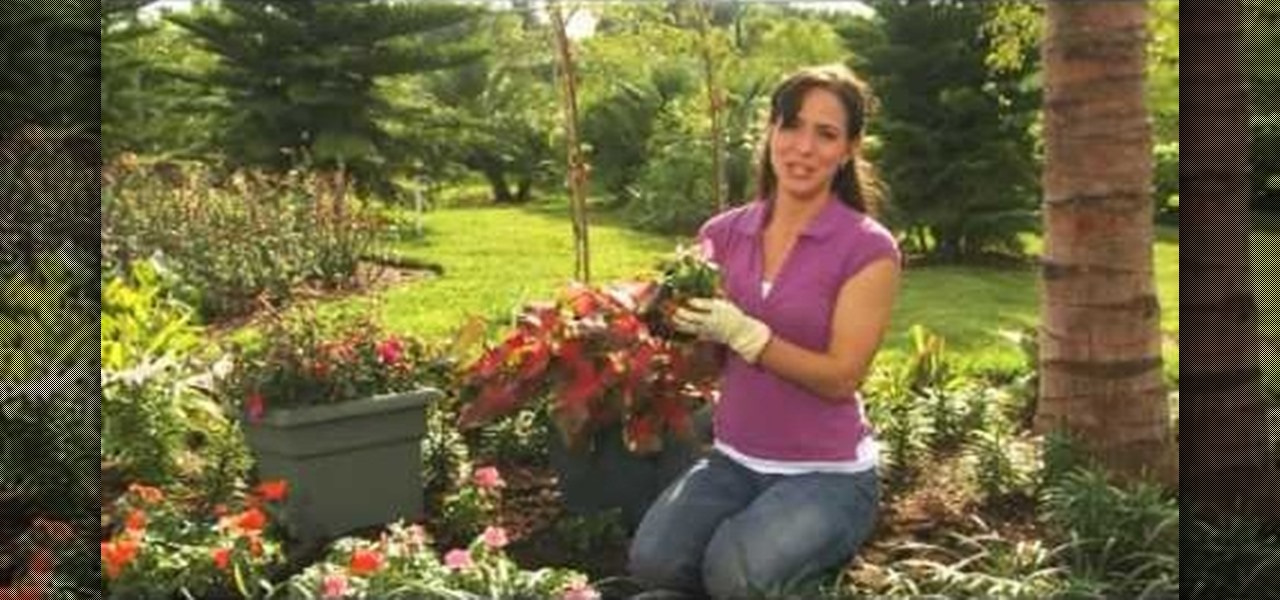
If you have a shady yard, you can still have a colorful garden. You just need to pick the right plants that do well in the shade. Caladium is a leafy plant with bright colored red, pink and green leaves. They do not tolerate cold weather and should be brought in over winter. Impatiens are popular annual flowers that grow in the shade. They look nice planted around the base of a tree or in containers. The flowers come in shades of pink, coral, white and red. Fuchsia is a beautiful flowering pl...

Following are the steps to describe how-to make small jewelry with head pins: 1. Materials needed are long head pins, beads, wire, cutting player.
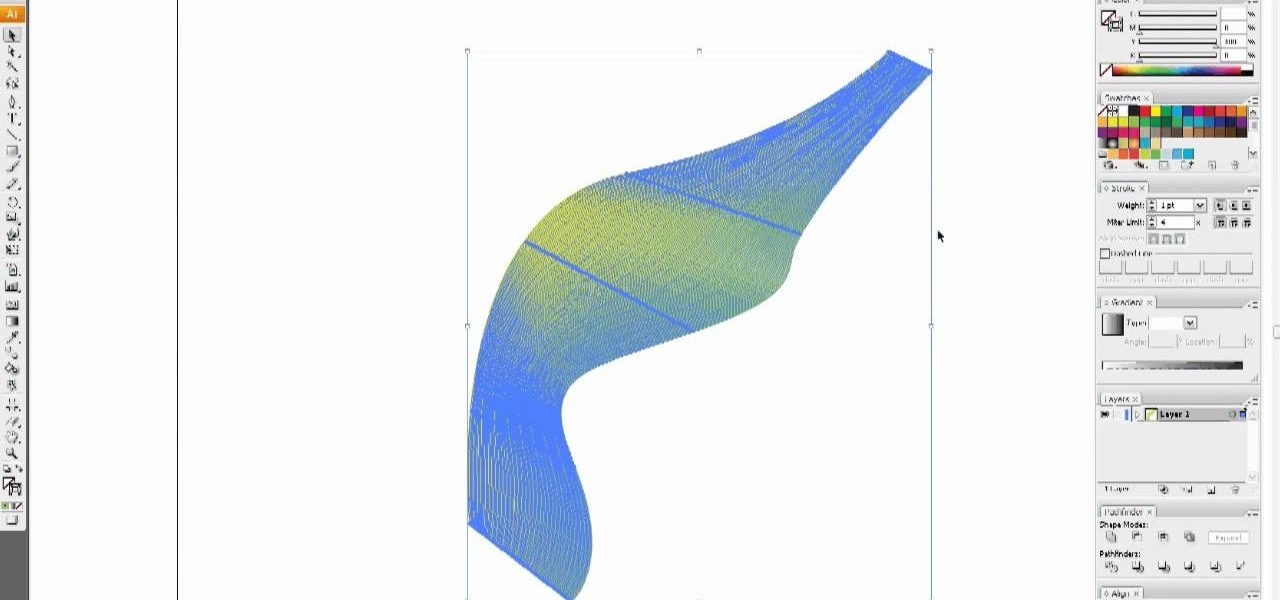
In this video tutorial, viewers learn how to use the blend tool in Adobe Illustrator. The blend tool will allow users to create objects between two strokes or filled objects. When you double-click on the blend tool, there will be 3 options to select from. Select the spacing and press OK. The three spacing options are: Smooth Color, Specify Steps and Specified Distance. Users are also able to select the amount strokes between the two objects. Now select the points of the two objects and it wil...
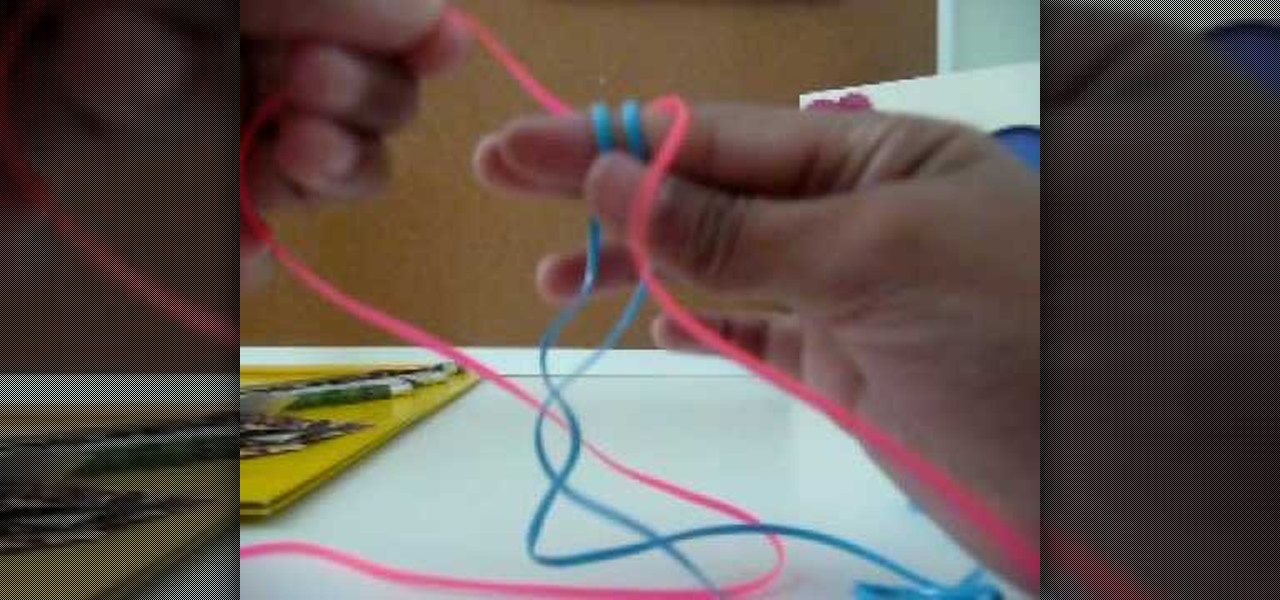
How to start a square or cube lanyard is demonstrated in this video.There are other videos to demonstrate how to stitch.