The great thing about hair is being able to do almost anything you want to it. From dying it a certain color, to adding a bunch of hair bows. Hair can be fun to play with. Another great way to style your hair is by wrapping it in a pattern or style that not only is comfortable, but also looks good as well. Find out how to dutch braid your own hair in this hairy tutorial. Oh and the French braid is woven into the hair, the Dutch braid lays ON the hair. Enjoy!
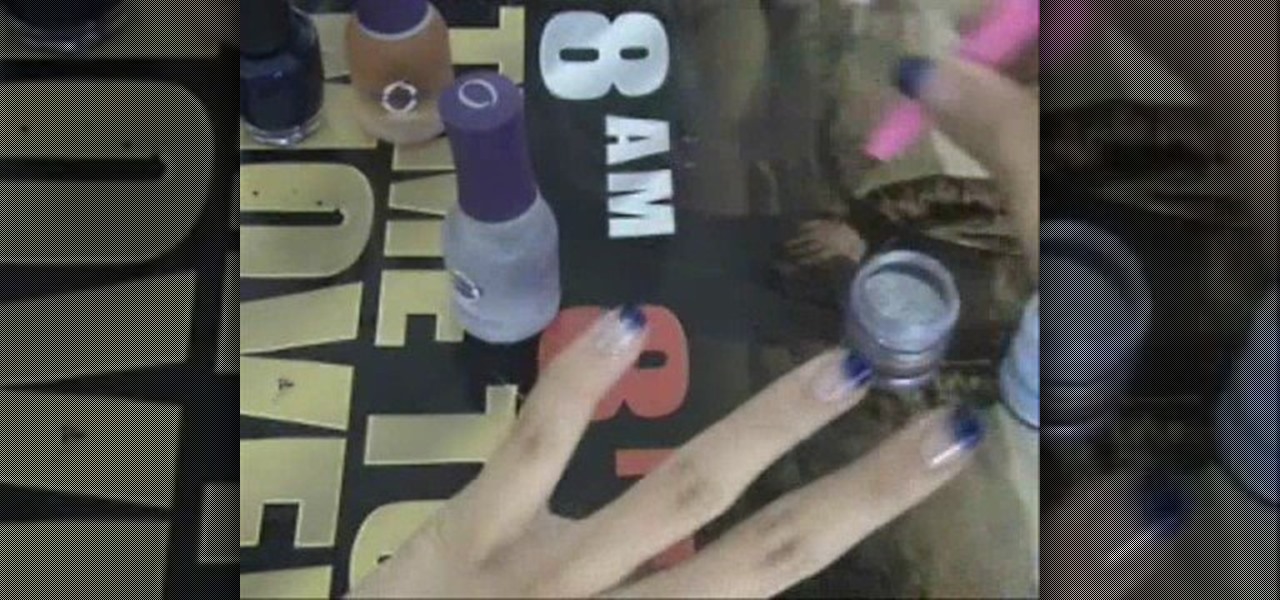
Kayden demonstrates how to do navy blue gradient French tips with silver glitter. For this you need a base coat, top coat, navy blue nail polish and some glitter.

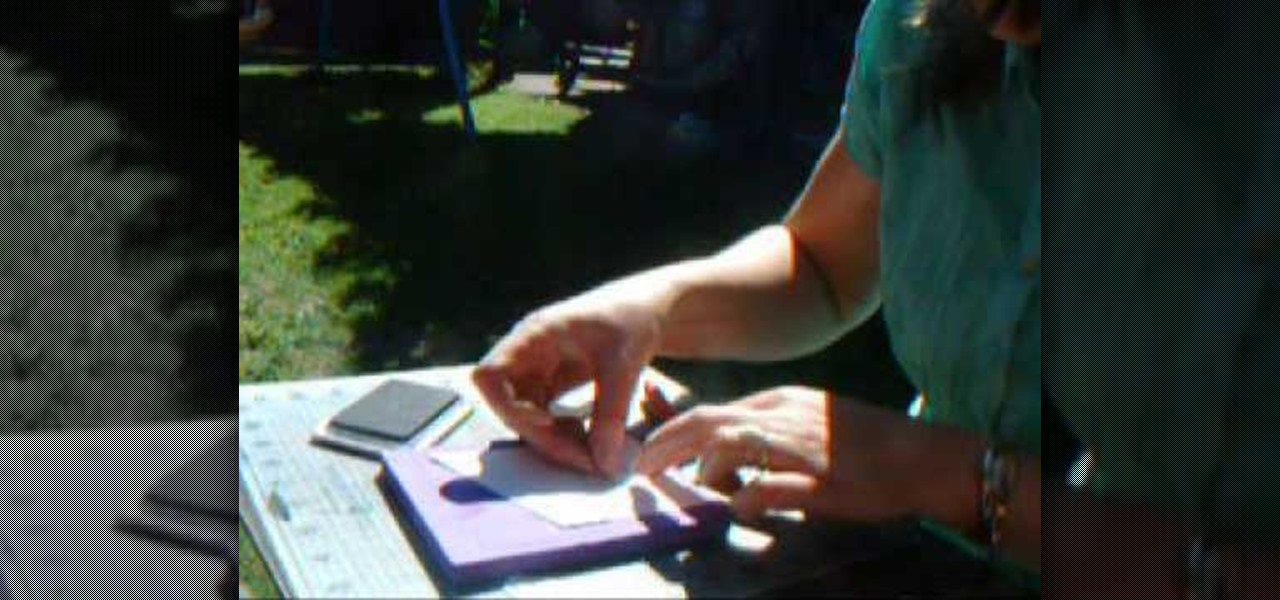
In this Family video tutorial you will learn how to make a spiral sun catcher. Take a contact paper and draw a spiral on it starting at the center and drawing out wards. Now remove the backing of the contact paper and lay it down sticky side up. With markers, color in the spiral. Then take the contact paper and lay it on top of the backing and smooth it out. Now cut along the line of the spiral with scissors. Tie a piece of ribbon to the inside end of the spiral and now you have a spiral sun ...
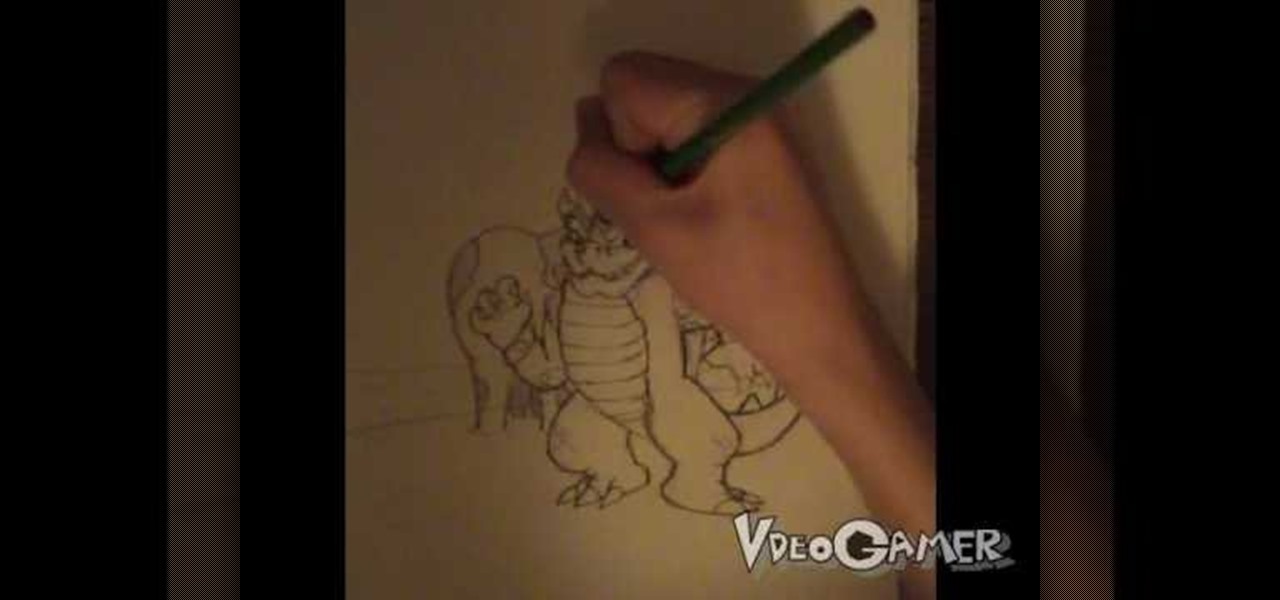
This video illustrates how to draw Bowser from Bowser's inside story. Here are the following steps: Step 1: First of all take a sheet of paper and pencil and start drawing the character.
In this video, we learn how to make objects transparent in Flash. First, open your object up and convert it to a symbol in Flash. It doesn't matter if it's a graphic or movie clip, just make sure it's a symbol. Next, click on the symbol you just created and go to "properties". Find the section called "color effect" then find the drop down menu. You will see several options, choose "Alpha". Once you do this, you will have the ability to tweak how transparent you want your object to be. Use the...
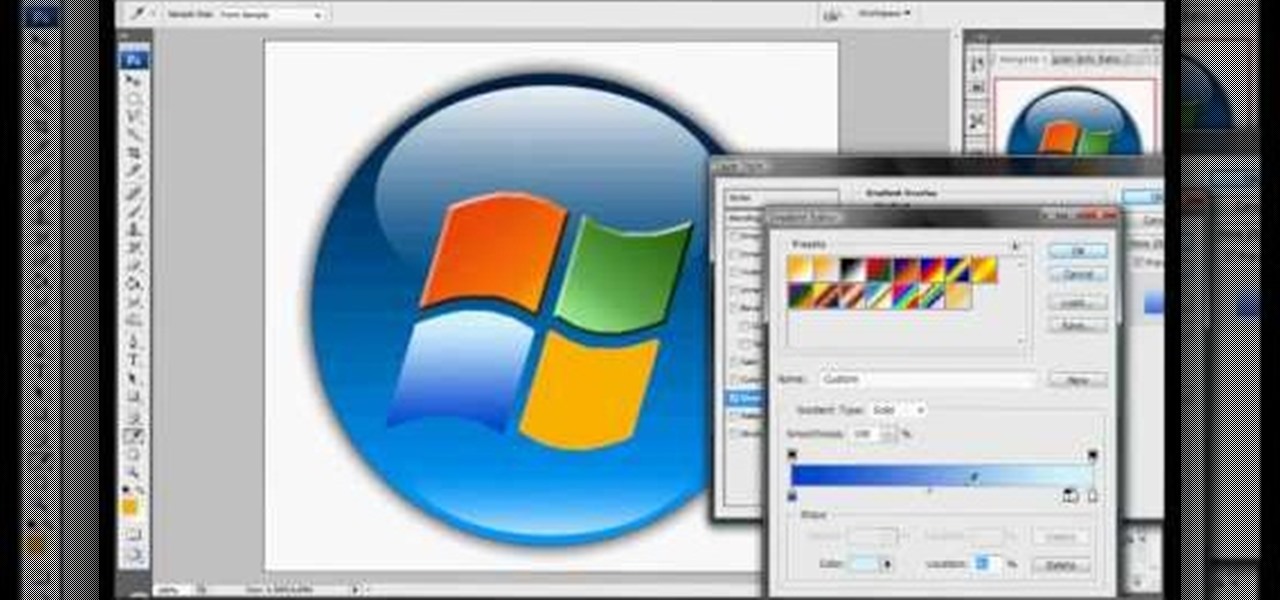
A compelling and quick moving tutorial on making the Windows Vista logo with Adobe Photoshop. The logo can be made quick without going too in depth into some of Photoshop's more advanced features. Starting with a circle a gradient shade is layered over the shape. Two circles are cut out and shaded white to give the circle a 3D feel. Then adding a drop shadow to the entire shape really gives it the logo's appearance. The windows themselves within the logo are cut to shape and copied and moved ...

Kengi shows us how to make kielbasa and cabbage, in this video.Take two kielbasa susages and cut into small pieces.Take a cabbage,cut it into halves and then slice both the halves into strips.Heat a skillet and add some oil to it.Put in the sausage pieces and some sliced onions.Cook until the sausages attain a brown colour. Once the sausages are browned add the cabbages to it.Spread the cabbage slices on top of the sausage.Cover the skillet with a heavy lid, lower the heat and let it cook.Onc...
In this how-to video, you will learn how to draw Homer from the television show, The Simpsons. You will need a piece of paper and something to draw with, such as a pen or pencil. First, draw two circles for his eyes. Next, move on to his nose and mouth. From here, you can draw the outline of his head. Add the lines for his hair. Move on to his ears and neck. You can also fill in the pupils. Next, draw Homer's collar. You can shade in the color of Homer's skin if you want. This video shows you...
In order to make an accordian- fold style greeting card, you will need a piece of card stock, glue or adhesive, scissors, markers, and stencils/stamps. Cut the cardstock in a diagonal. Fold the card into 3rds, lengthwise. Cut a 5 x 3 ¼” panel at an angle. Use Masking Magic and stamp the excess card stock. Cut out your stamp designs. Color in your designs with Sharpie brand permanent marker pens. Glue the 5 x 3 ¼” cut piece to the card, or you could use 2 sided tape. If you have addition...
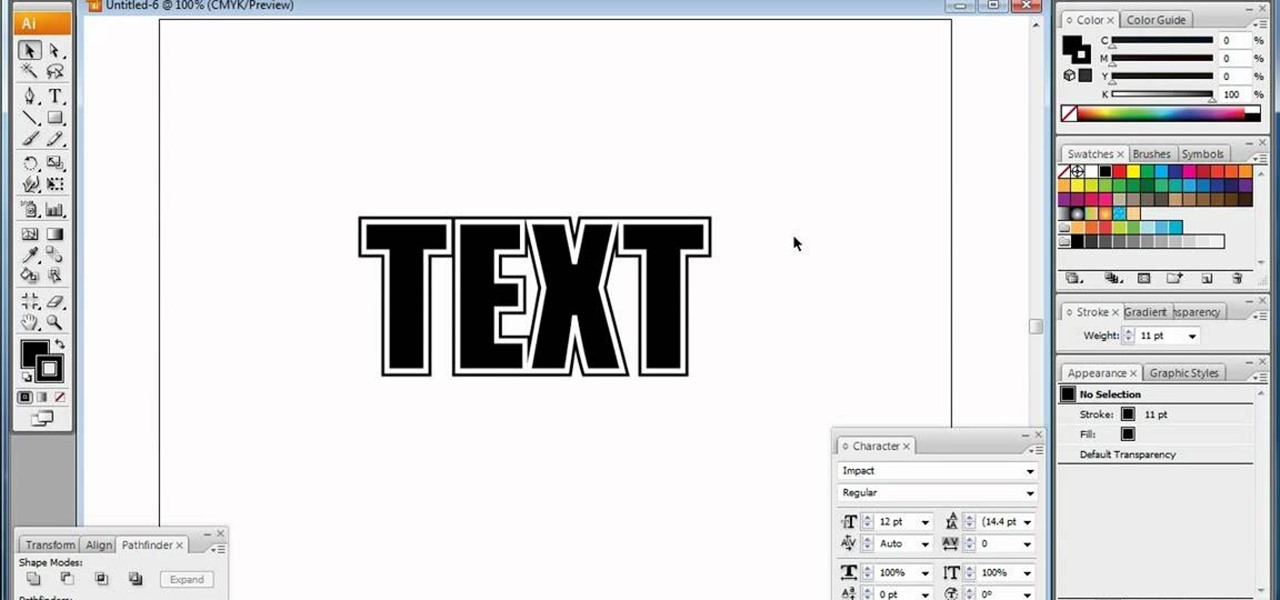
In this video, we learn how to do basic text effects in Adobe Illustrator. First, open up Adobe Illustrator and make a new document. Now, type in your desired text and change your font to one that you prefer. To make your text turn into a radiant, you will click "file" then "type" then "create outline". Now you will click on your text then click your radiant swatch. Then, go to "gradient" and adjust your colors to which you prefer. You can now put a stroke on it using the "stroke" tool and ch...
In this how to video, you will learn how to turn a photo into a line drawing in Photoshop. First, open your image in Photoshop. Create three layers of the same photo. The top two layers will be worked with. The bottom layer will remain the same. Take the top layer and change it to color dodge. Select control and I on the keyboard to invert it. Go to filter and blur to choose Gaussian blur. If you have dark lines, use a small amount of blur. You can use a lot of blur to get a unique look. Clic...
In order to make a Cuttlebug Smoosh Card, you will need the following materials: card stock (at least 3 different prints or colors), a ruler, distress tool, double sided tape or glue, distress ink, watermark stamp pad, decorative accessories, and scissors.
To do fading in flash, first drag an image onto your main window. Shrink it down so it fits on the window, then right click your image and hit copy frames, then come out to frame 15 and hit paste frames. Right click in the middle of the set of frames and hit "Create motion Tween" Go to the first frame and click on what you want to fade. Go to the color tab and then select alpha. If its not on 0, drag it down to 0. Now go to frame 15 and make sure its on 100. Now if you drag from left to right...
Using a huge jar and with water colored with die in it you can make clouds. To do this set up the apparatus as shown in the video. Now open up the top valve and blow air into the jar. Now this causes the air inside to be compressed as we are pushing more air into the confined jar. This creates a high pressure inside the ball. To understand how clouds are formed you need to know two concepts. The first concept is that as pressurized gas expands it cools. The second thing is that warm gases can...
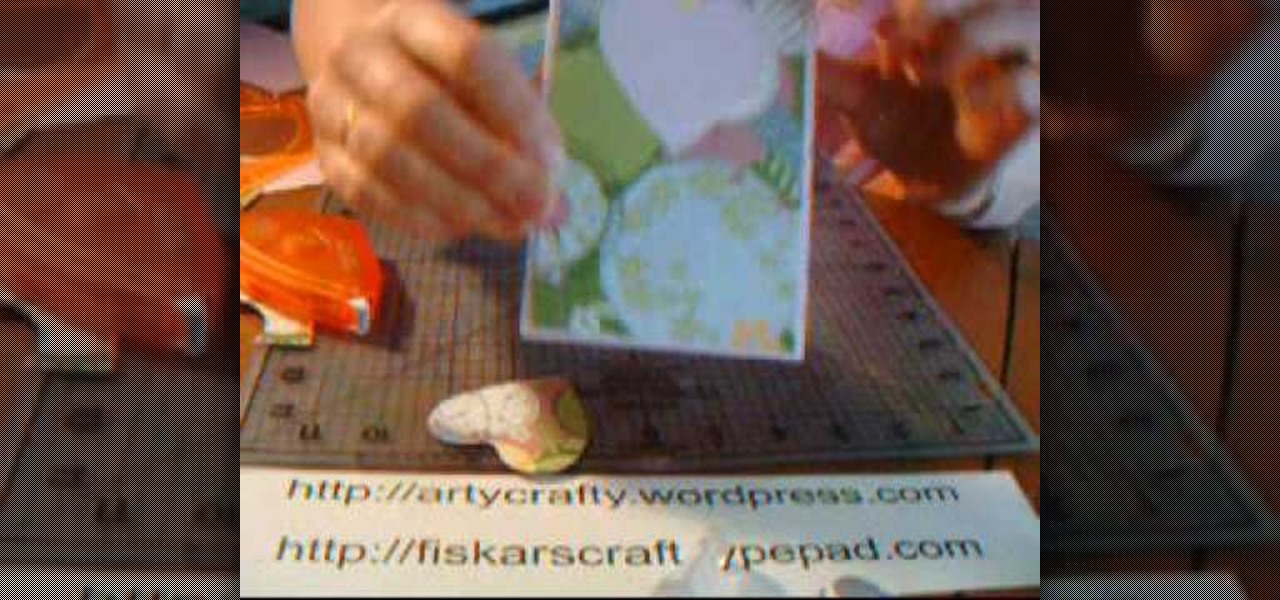
In this Arts & Crafts video tutorial you will learn how to make window cards. Supplies needed are trimmer with scoring blade, Fiskars templates, Fiskars ultra shape xpress, glitter, cardstock and embellishments. Take a 81/2 x 6 inch cardstock , score the center at 3‚Äù mark and fold it. Take a colored paper about ¬O‚Äù smaller than the card, cut out a 2.5 heart with the help of the template and glue it on the card. Then open the card and cut out a 1.5 heart from the center of the 2.5 heart. N...
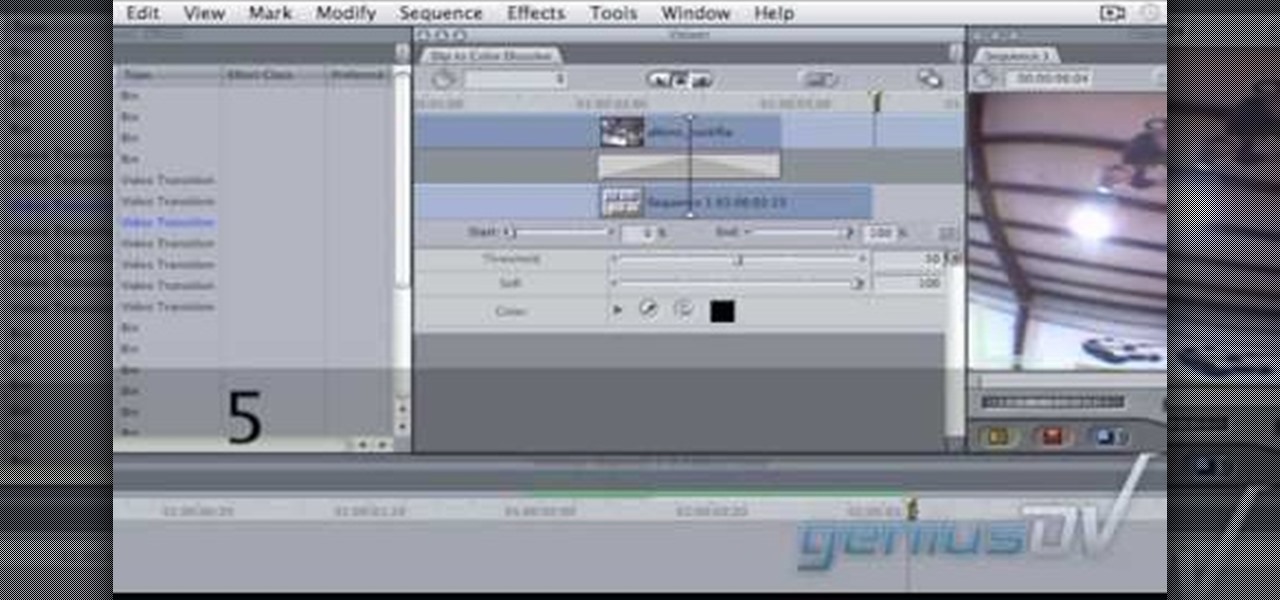
In this video tutorial, viewers learn how to create a freeze-frame effect in Adobe Final Cut Pro. Begin by placing the time line indicator to where you would like to place your freeze-frame. Press Shift and N to create the freeze-frame. The default user preference is 10 seconds. To change it, change the time and click on the insert button to splice the new freeze-frame time into the time line. Now click on the Effects tab and select the Dip to Color Dissolve under Video Transitions and Dissol...
In this video, we learn how to dress if you have an apple shape. Go for styles that show off our cleavage, like a deep v-neck top. An empire line will disguise your waist and make your bust the focal point. A coat with a belt around the wait will trim your waist in no time. Long dark top will draw attention away from your waist and light jeans will pair nicely. Use as many accessories in bright colors and you wish. These accessories will draw any attention away from your waist and make you lo...
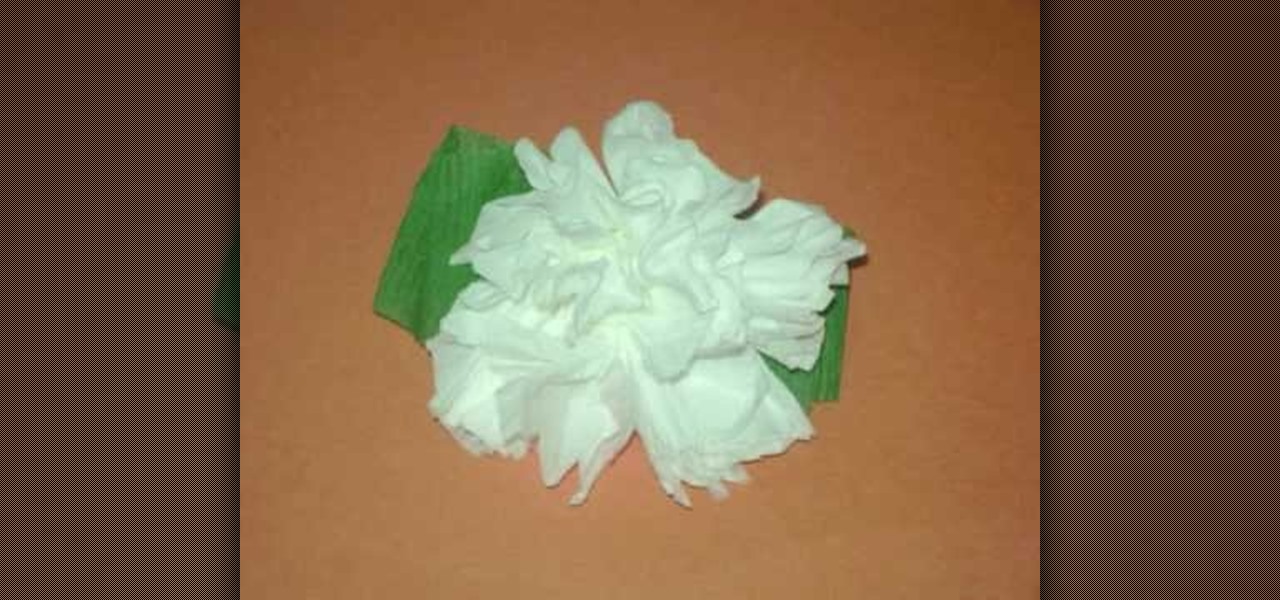
One of the most fun activities when you are a kid is making something pretty to bring home to mom. In this tutorial, learn how to make carnations out of toilet paper for a fun kid's craft. Carnations make a great craft for Valentines or Mother's Day and are easy to make with even the youngest elementary students.
Kale is a hearty and delicious vegetable that packs tons of health benefits. Kale is inexpensive to buy, can feed many and is hard to ruin because its leaves are so strong.
Shelley Lovett explains that reindeer food is, and demonstrates how it is made. Reindeer food is something you can make and then sprinkle on the snow or grass in your yard in order to help Santa's reindeer find your house. All have to do is mix some quick oats with a little red and green colored sugar to make it sparkle. Then you put in in a bag and tie with a ribbon. She has a little tag she ties onto the ribbon that explains what reindeer food is and how to use it. You can print the tag fro...
In this video, Karen shows us how to decorate cupcakes in different ways. You can use McCormick frosting in a bowl, add neon green food coloring and mix this together. Put some frosting on the cupcake and smooth it out onto the cupcake. Another great thing is to put frosting into a small plastic sandwich bag, cut the corner of the bag and you now have your own icing bag! You can use this to make any design you'd like on your cupcakes. Make the clip on the corner bigger or smaller, depending o...
Japanese kimonos are a beautiful and whimsical clothing full of tradition and grace but are not really appropriate to wear in everyday life. Luckily you can make a cute and hip kimono inspired dress with the help of this video that is perfect to wear out anytime. You will need a large piece of fabric whatever color you would like the majority of the dress to be. Use a t-shirt to sketch out an outline for the top of the dress. You will then only need to finish sewing the dress with some accent...
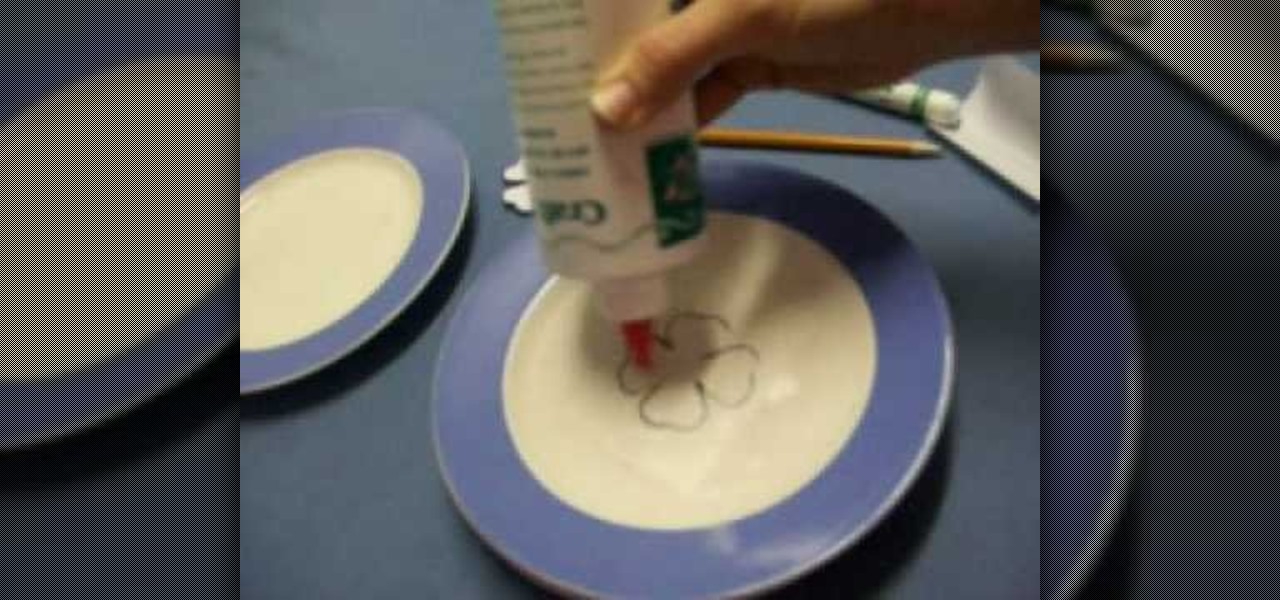
In this how-to video, you will learn how to make a four leaf clover pendant. Start off with contact paper and place it on a smooth flat surface, such as a large plate. Trace a four leaf clover shape onto the paper using a pencil or pen. Fill the entire shape in with glue. Once it dries, you can color the pendant with a green marker. Finally, you can peel off the contact paper. The four leaf clover shape will come right off with it. Viewing this video will show you the fastest and easiest way ...
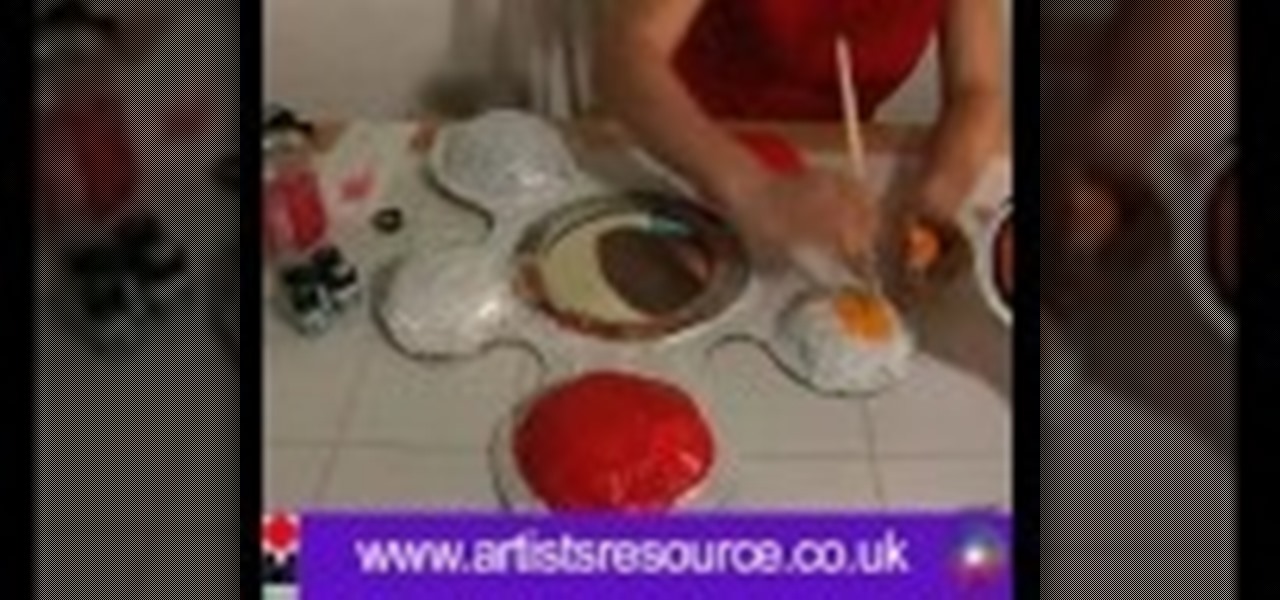
This illustrate us how to make paper mache mirror. Here are the following steps.Step 1:Take a piece of cardboard and make two circle on it with two different circumference.Step 2: Now cut through the outer circle as well as the inner circle to obtain the rim.Step 3 : Now take a sheet of cardboard and cut it in shape of a flower.Step 4: In the center of the sheet place the rim.Step 5: Now along the petals of the flower stick a pile of rounded newspaper.Step 6 : On this newspaper and cardboard ...
Love4Nails shows step by step tips for achieving this look. Begin by choosing a background color. On top of the base, apply white polish. Then apply a smile line on the top portion of the nail as you would when doing a French manicure. Then fill in the nail. If its not perfectly straight its ok because it will be covered. Next, apply glitter polish on the white area of the nail. With the white polish make three dot and use a dotting tool to extend them, creating flowers. With the original blu...
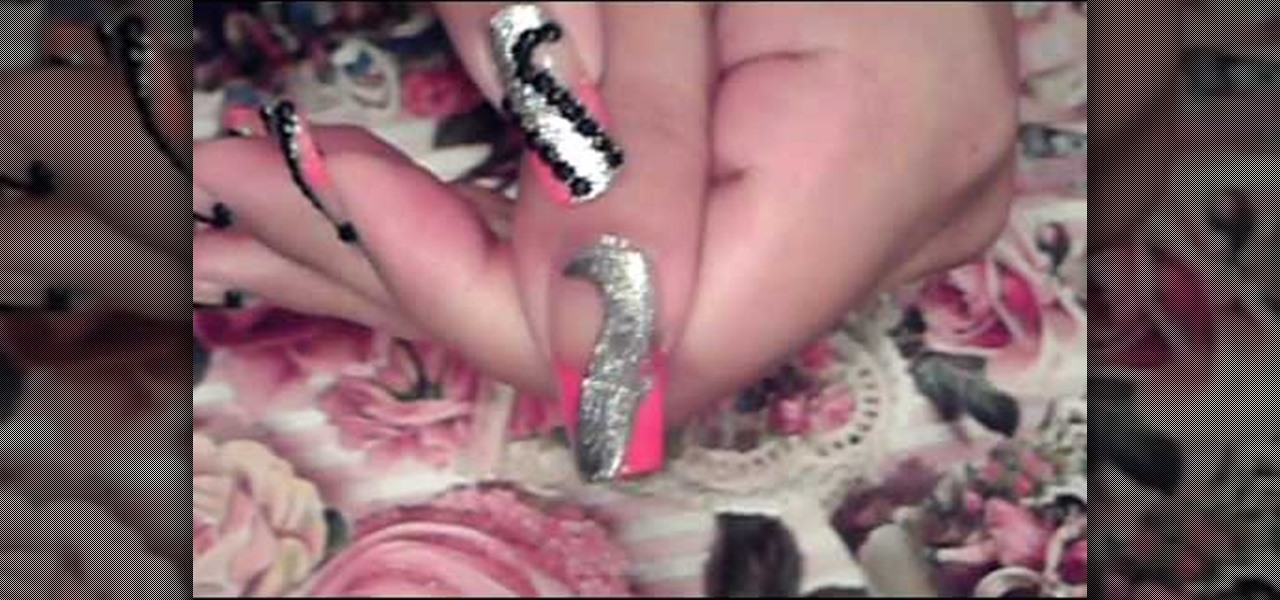
Love4Nails starts off with pink, silver, and black nail polish. First choose one of your colors to create a French tip manicure. She next takes the silver polish, starts at the bottom and creates a swirl around the nail. Swerve the silver in a way that it covers the French tip part of the nail. Then get the pink glitter and apply only on pink polished area. Place black rhinestones on the swirled area of the nail. Because you're using the pink glitter polish, if you choose not to add rhineston...
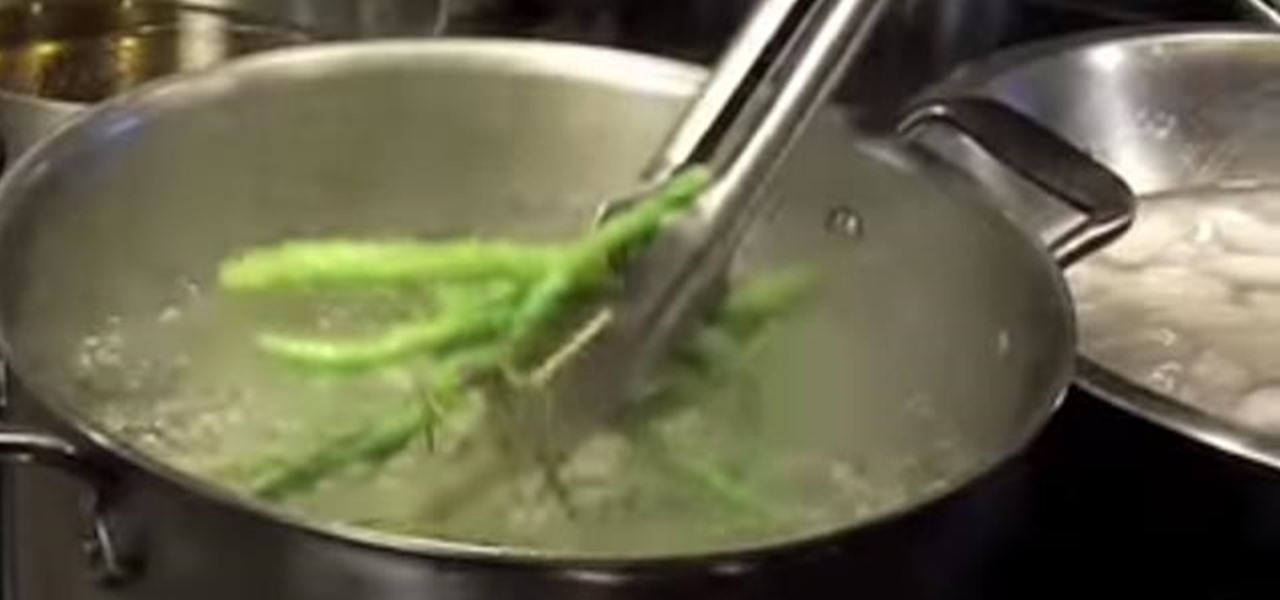
Chef Stephen Gibbs shows you a good cooking technique: blanching and shocking vegetables. Blanching is letting vegetables in hot, boiling water for a short period of time. Shocking is putting hot vegetables in ice cold water. These methods are used together in order to precook certain vegetables or even take the skin off.
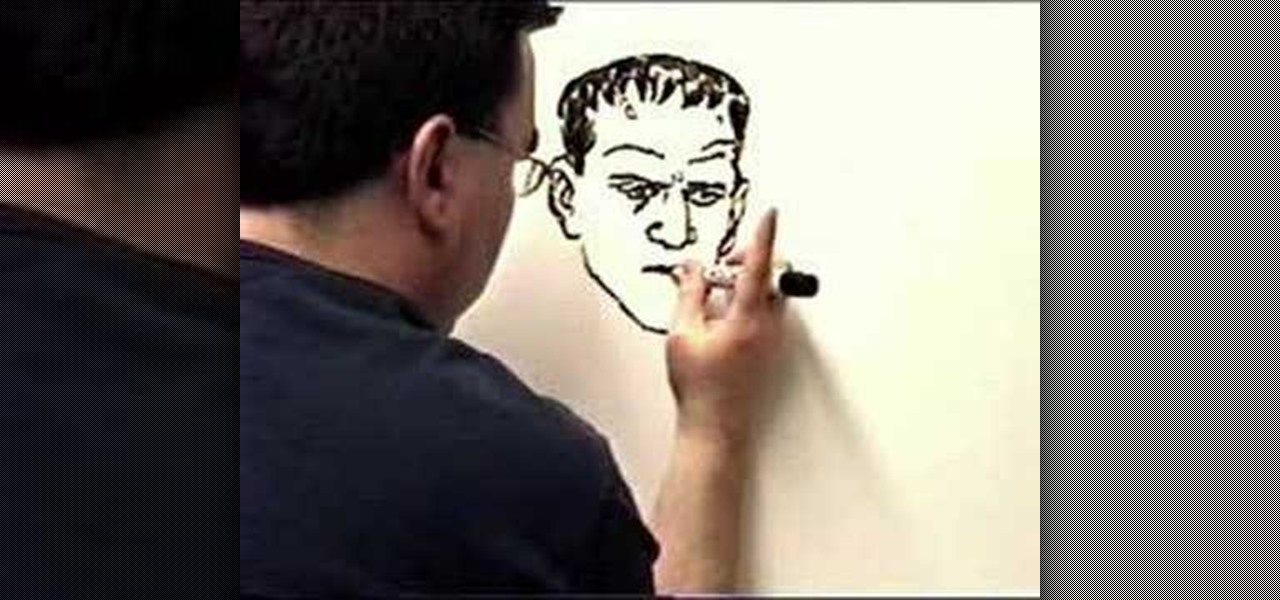
`This video illustrate how to draw Frankenstein's monster. Here are the following steps.Step 1: First of all take a sheet of paper and a pencil.Step 2: Now draw a oval circle representing the face of the monster, draw a big circle within the face showing an open mouth.Step 2: Draw small circle within the face representing the eyes.Step 3: Now draw a free hand mid part from the lower face .Now from this mid part extend two hands with waves to represent masculine look.Step 4: Draw two legs from...
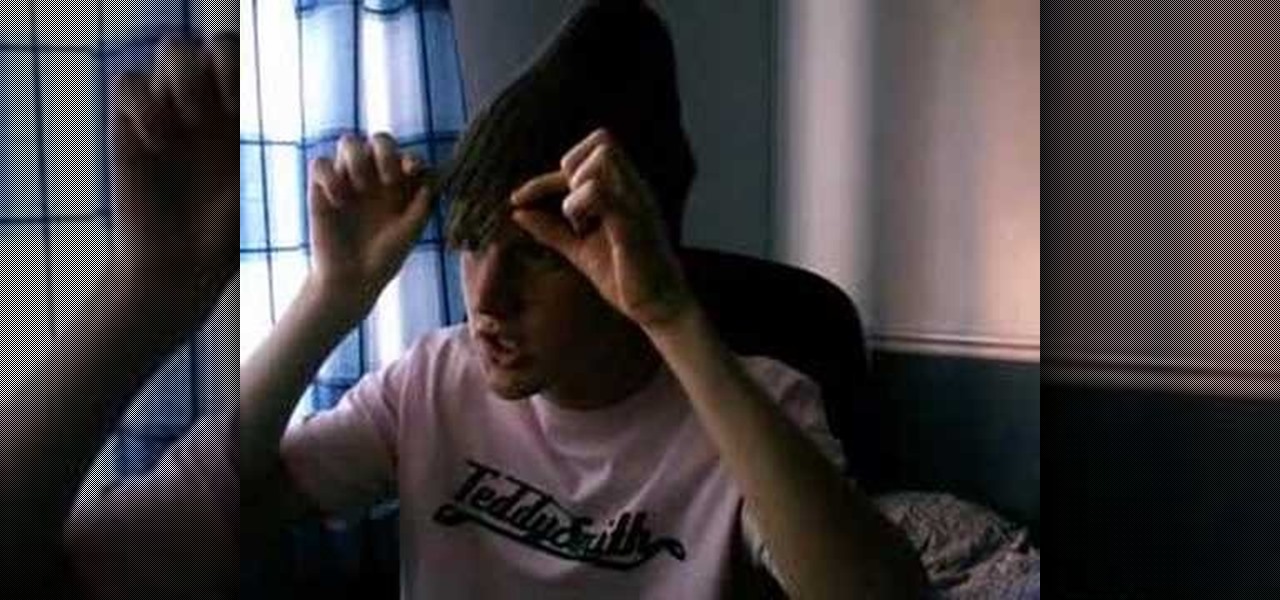
In this tutorial, Topman shows us how to wear an over sized beanie. One great way for a guy to wear an over sized beanie is to bring the beanie and drag it all the way down on the back of the head. Pull it further than you would any other beanie and it will look great. You can let your side hair and bangs come out of the front if you want to have a different look. You can use this with any color of beanie and you can also do it whether you are a guy or a girl. Make sure when you pull the bean...
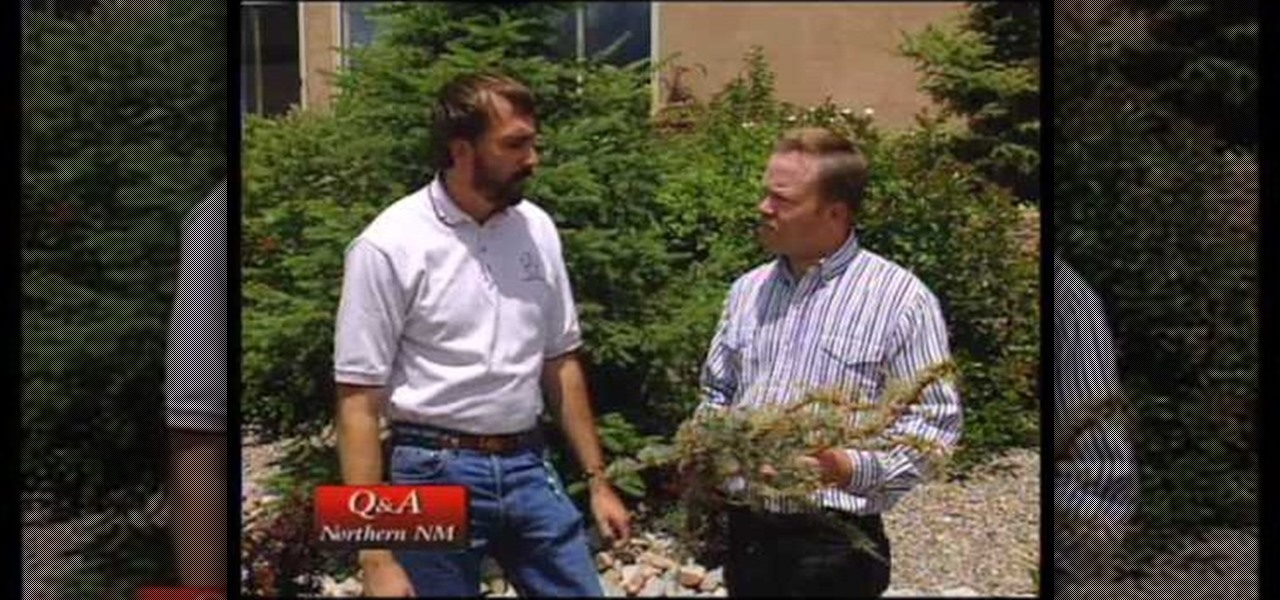
The first thing you have to understand is that the damage that comes to the spruce is mainly from the weather, moths, and caterpillars. The caterpillars and moths dry out the tree slowly, sometimes it is not noticed until the tree is on the verge of dying. One way to make sure this doesn't happen is to look under the spruce branches and the underside of the plant. You will be able to notice when it is getting withered by caterpillar accumulation. If there is a lot of caterpillars of the grayi...
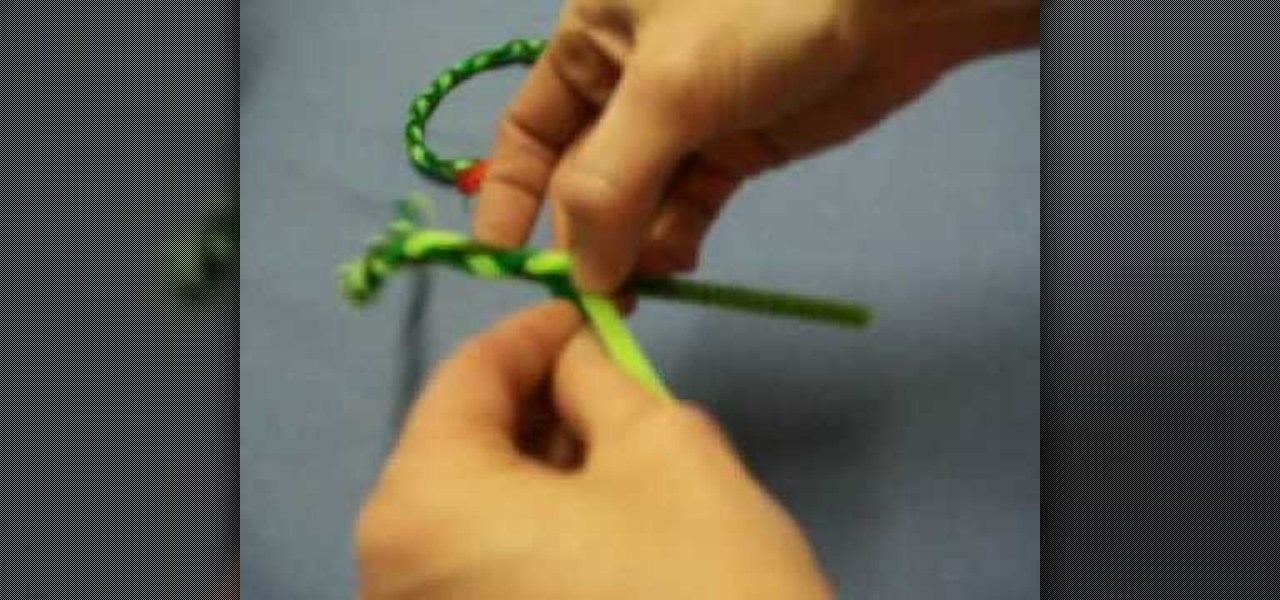
How to make mini Christmas wreaths out of pipe cleanersIn this video we are about to see how to make mini Christmas wreaths out of pipe cleaners. To start with we get colors of pipe cleaners. Now take them of equal length and twists their ends together so that they don’t come off. Start braiding from the attached ends. The art of braiding is very easy. Just take the middle over the left and the middle over the right. Repeat the process till the end of the pipe cleaners. Leave out a small port...
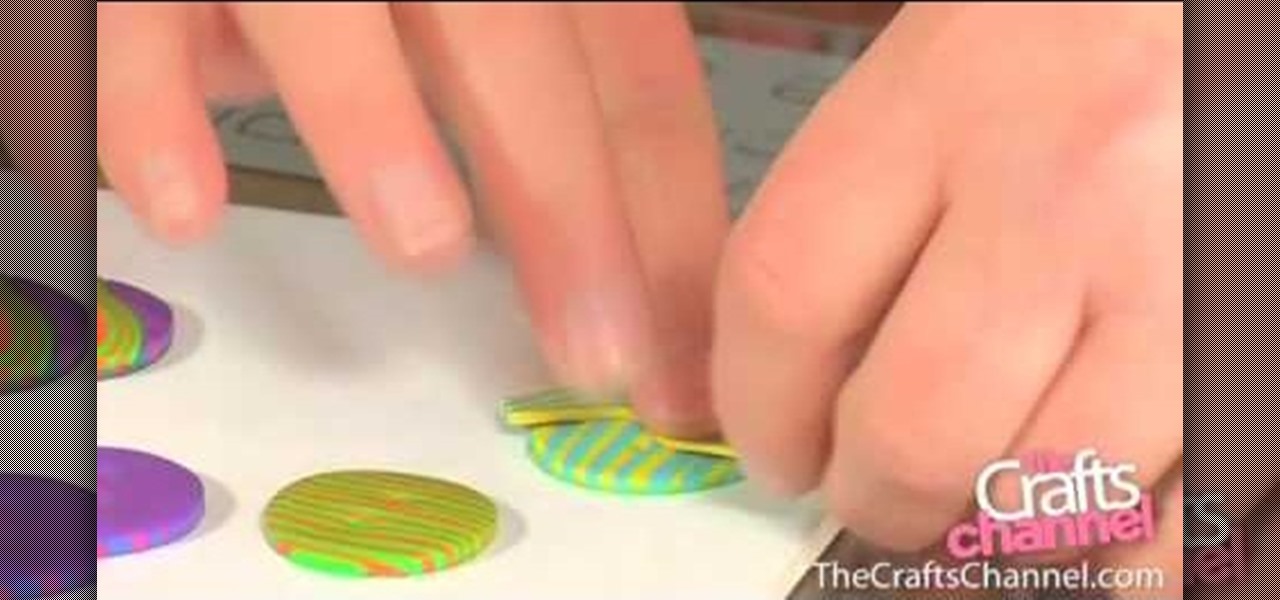
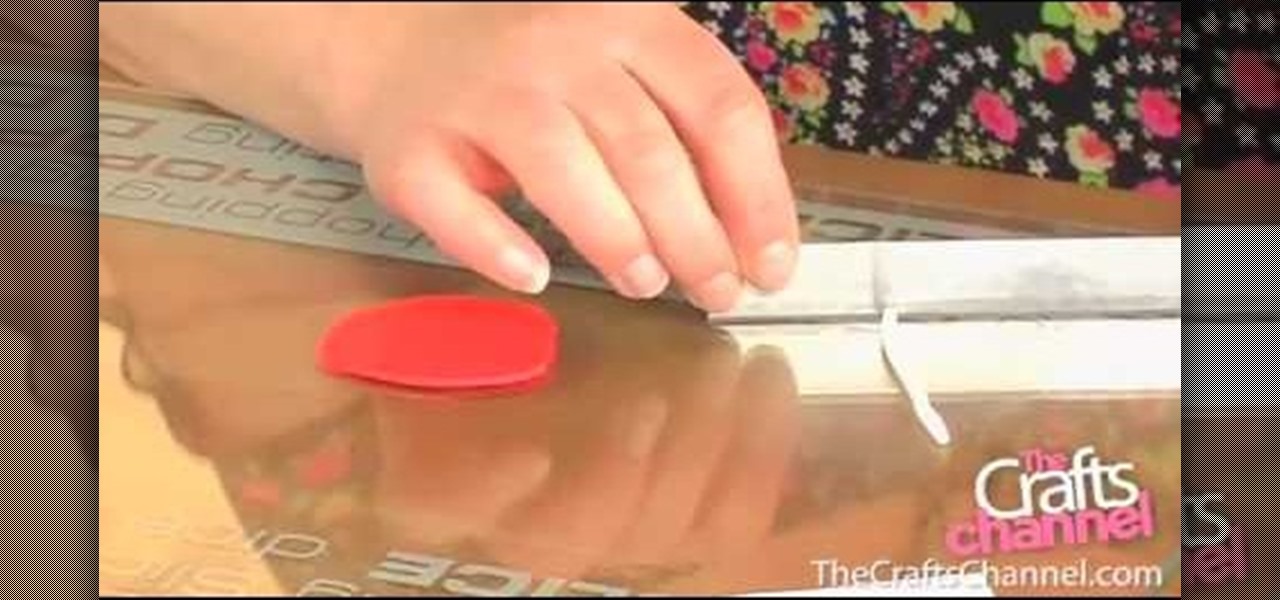
In this video Corinne Bradd explains the steps involved in the creation of stripy fimo buttons. It is rather simple and requires only a few materials such as polymer clay, rollers, cutters and needles. At the start you have to place clay pieces (varying color) in the form of a rectangle one on top of the other and fusing them together by making use of rollers. After they have been fused they are shaped into circles by making use of cutters. Holes are punched into the circle by making use of n...
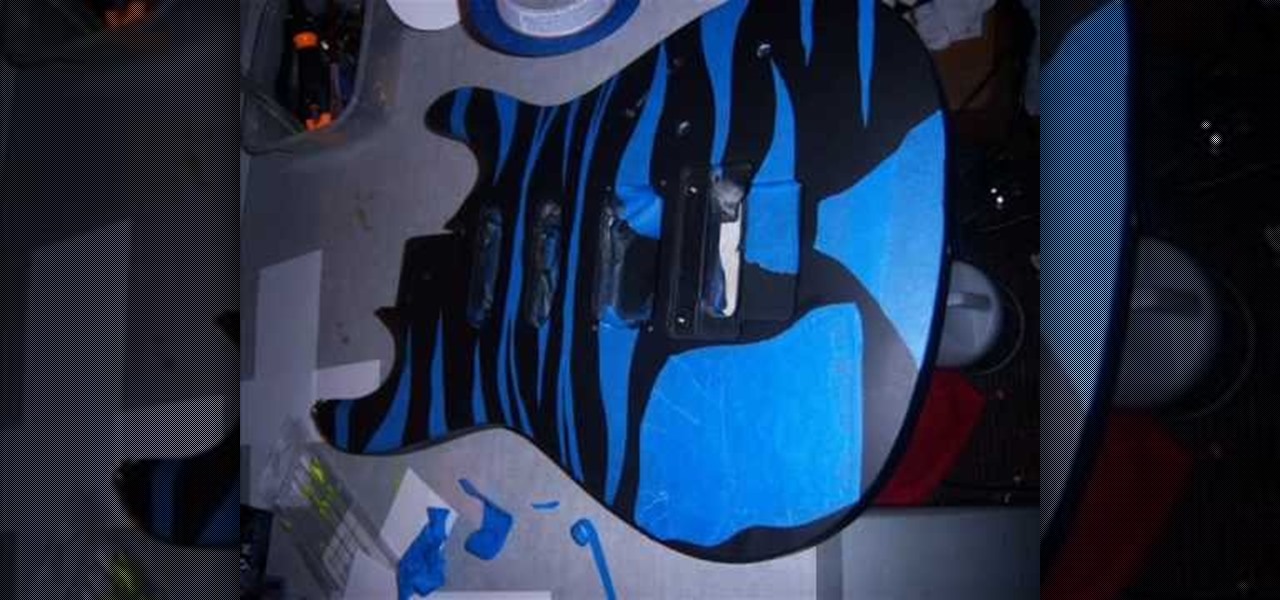
In this video Teddy Zane shows you how to paint a guitar with spray paint. It begins by painting the whole guitar with one color of flat paint, and then creating a panel where you want the picture, out of tape. Next lay your picture on top of the tape and use a scalpel or razor to cut out the design as a template carefully ensuring you do not cut the guitar, only the image and the tape. Once the entire image is cut, pull off the tape to expose the guitar beneath. Cover the rest of the guitar ...
In this how-to video, you will learn how to teach your kids the Ten Little Kites song. First, cut out different colored pieces of paper into kite shapes. Paste them onto the finger tips of two gloves. The words of the song go to the tune of Ten Little Indians. The lyrics go: One little, two little, three little kids. Four little, five little, six little kites. Seven little, eight, little, nine little kites. Ten little kites flying through the sky. Count them, Count them, Count them with me, t...
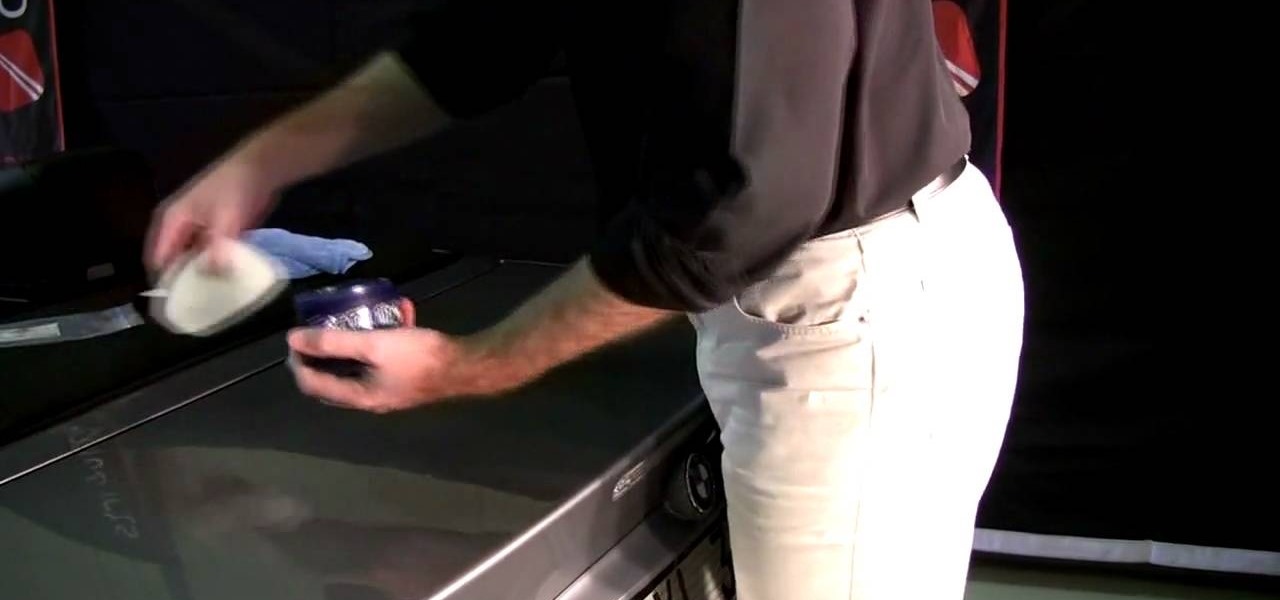
The video tells you have to protect your car using waxes and sealants. It begins by showing you how to apply a premium wax using Dodo Juice Paste Wax and a soft applicator by ensuring the wax is bonded to the paint sufficiently prior to removing an amazing finish can be created. A properly waxed car can show high shine and gloss and even improve the color of the car. The next segment of the video shows you how to apply synthetic sealants to protect the car, using Duragloss polish prep agent f...
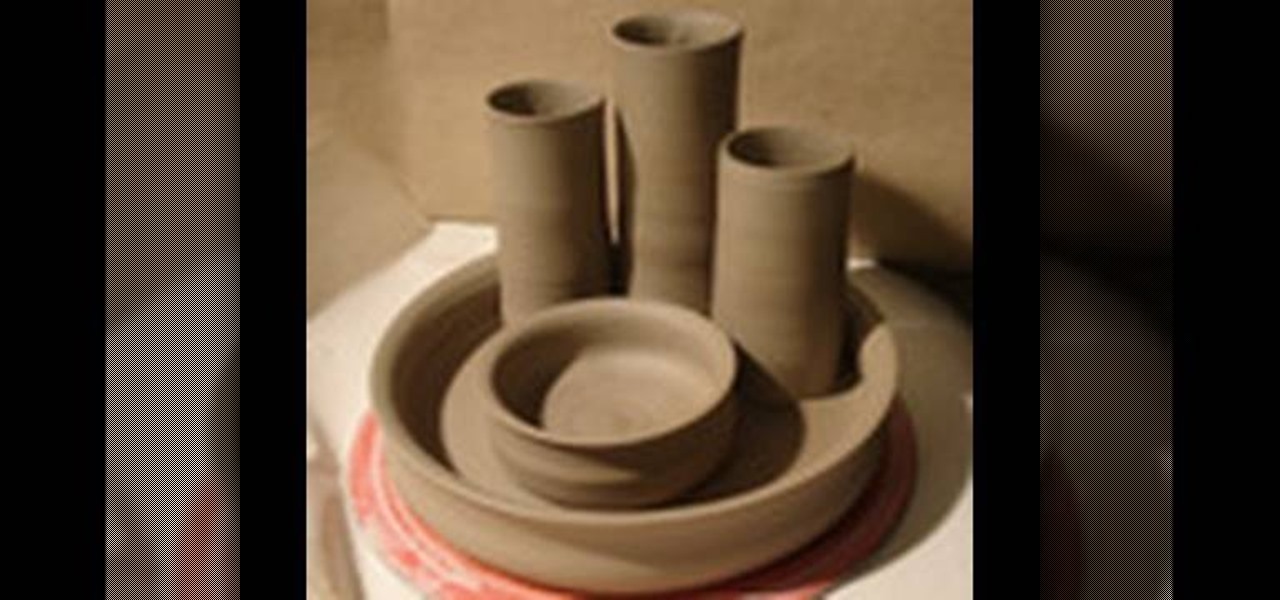
This video illustrate us how to make a desk organizer out of clay. Here are the following steps:Step 1: First of all take clay in different colors and now shape them round.Step 2: Now take one ball and press it into a flat sheet.step 3: Now take another ball and shape them in cylinders.Step 3: Now place these cylinders on the flat sheet keeping space between them.Step 4: Now take two balls and make small vessel out of these two balls .Step 5: Place these vessels between the cylinders, these v...
In this how-to video, you will learn how to quickly set up the background image on your Apple Macbook Pro. First, right click the desktop and select Change Desktop Background. A new window will pop up where you can change it. Also, you can go to system preferences and selecting desktop and screen saver. To change the image, select any of the options available. This includes solid colors to large images. You can also go to your iPhoto albums and choose any picture in there. You can also go onl...
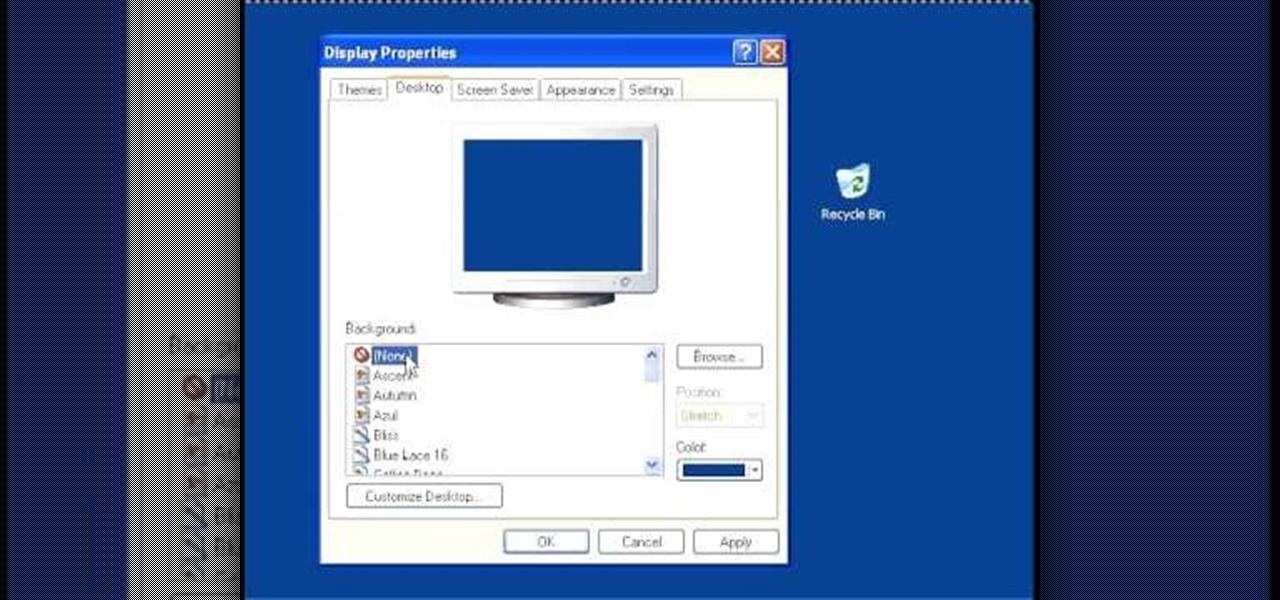
In this video, we learn how to speed up a computer and change desktop settings. First, right click anywhere on your desktop. Then, select "properties". Once you are in "properties" there are several tabs you can click on, click on "desktop" on the top. Once you click on this you can change your background, icons, home page, internet options, colors and more. By selecting "screen saver" you can choose "Windows XP" to make your computer perform quickest, also make sure your monitor has proper p...
The Crafts Channel teaches viewers how they can make spotty fimo buttons! First, take a piece of fimo and roll it out to about it's a few centimeters thick. Take another color and roll this into a thin long snake shape. Then cut this long snake into lots of tiny slices. Lift them off and put them onto the surface of your rolled out clay. Next, roll over this clay and take a baking surface, cut out the clay with a circular cutter and take away the excess clay. Now with a needle, make your hole...
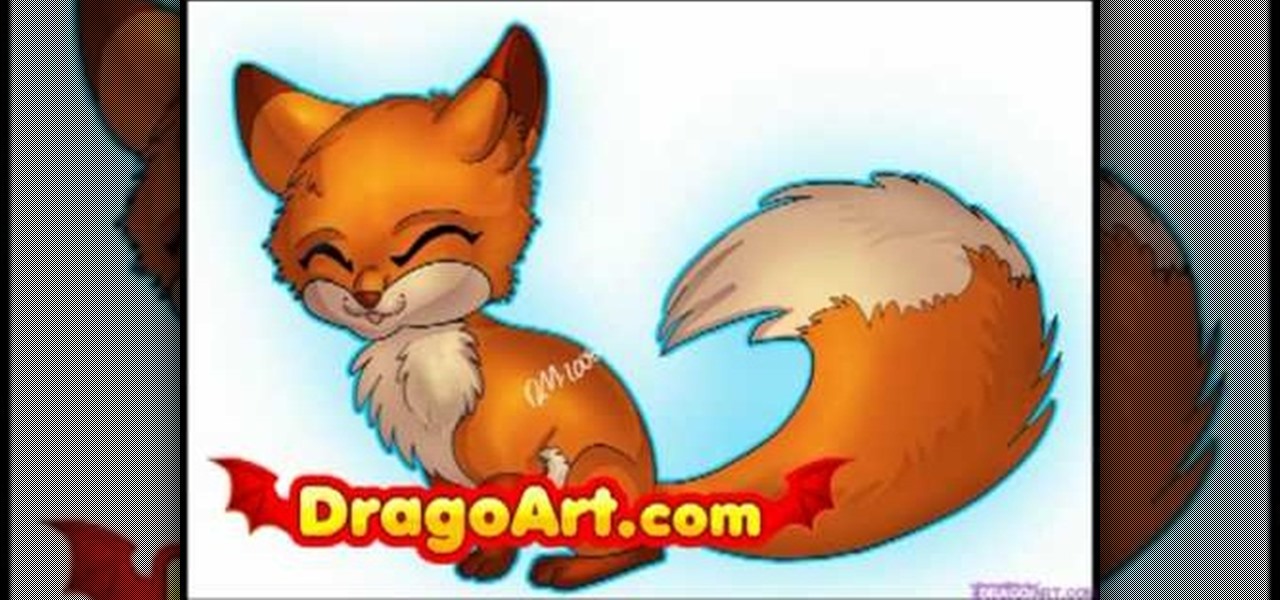
This video illustrate us how to draw an animated fox step by step. Here are the following steps:Step 1: Take a piece of paper and pencil.Step 2; Draw a small oval shape, this is the face of the fox and within this face draw two lines representing the eyes. Draw a small circle between and a bit lower then the eyes representing the mouth.Step 3: Draw the body of the fox by drawing a hands free semicircle and extend the semicircle with two very small circle on the lower side representing the leg...