Watercolor looks beautiful, but can make a huge mess. The same effect can be created with both pencils and markers. Stamps can then be colored in with vibrant detail. Watch this video crafting tutorial and learn how to color in stamps using watercolor pencils and markers.

Add more flare to your crochet projects by changing yarn color midsection. This crochet how-to video demonstrates how to change colors mid line. This crocheting technique is particularly useful because no jagged lines can be seen once you change colors midline.

This crochet how-to video demonstrates how to use two separate strings to create patterns and instant color changes without knots. The crochet technique used in this video is particularly challenging because you crochet vertical color stripes horizontally. The trick to having a successful pattern is crocheting with two different colored yarns.

This crochet how-to video demonstrates how to change color in midlines without knots. Changing colors adds variety and lots of fun to crocheting projects. Watch video to learn how easy it is to change colors midline in a crochet projects.

Crayola Colored Pencils are made with thick, soft leads, so they won't break easily under pressure. The smooth colors are perfect for color mixing and blending, as well as practicing more detailed techniques. Crayola Colored Pencils come in a variety of specialty types and sizes, so there's a colored pencil that's perfect for every young artist's needs.
In this video series, learn tips for coloring and highlighting your hair. Our expert, Liz Muller, gives you advice about various kinds of hair dye. She offers tips for all over hair color and gray coverage.

In this video series, learn tips for coloring and highlighting your hair. Our expert, Veronyka Bass, gives you advice about various kinds of hair dye. She offers tips for all over hair color and gray coverage.
An important part of video editing is color grading. This After Effects tutorial will show some quick techniques to get a cool stylized film look on you videos using color grading (or color correcting). Play around with the colors!
But perhaps my most closely guarded secret is the fact that you color your gray hairs. Now this hair coloring business can be a real giveaway when not done right, but you've done your homework and watched Expert Village's free video series on covering gray hair.
In this series of art instruction videos, our expert painter shows you how to mix primary and secondary colors as well as how to effectively use these colors in your own work of art. Start with six colors and quickly turn those six into twenty four using tips from our experienced artist. Begin with a solid grasp of the basics from Expert Village, then let your imagination do the rest. You will be creating your own masterpieces in no time!
CONTEST ENDED: WINNERS ANNOUNCED This contest has ended and winners have been announced. To see who won, check out our quick winners post. Thanks to everyone for submitting their ideas!
I have owned quite the plethora of electronics in my life. A commonality between most of these devices' screens is frozen or dead pixels. This is probably the most annoying thing about buying new hardware—your LCD, or worse, LED display has one or more pixels that continues to stay lit. Most of the time, this will appear in the form of a brightly colored pixel that never changes, or a pixel that never displays the right color. Once you notice it's there, you just can't stop staring at it. It ...
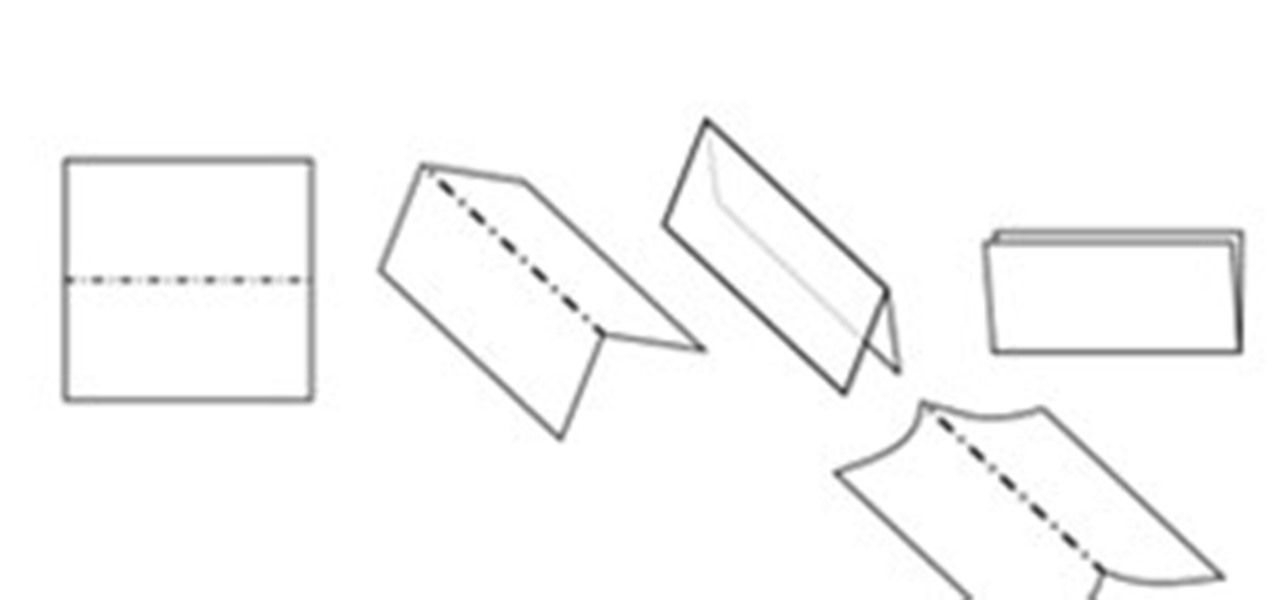
In this article you will learn how to understand written origami instructions, called diagrams. You can follow the video below or read the entire article
In this tutorial, we learn how to draw Naruto & Hinata. First, draw the outline of the head and then draw the hair and bangs on the top of the head. After this, draw in the eyebrows, eyes, nose, and mouth. After this, draw in the neck and then the rest of the body. Draw in lines to show the folds for the clothing and then draw the body of the other character around this one. Draw Hinata in the same way as you drew Naruto, just make sure to make their faces and hair different. When done, you w...
In this tutorial, we learn how to draw a vintage car. This car will take a lot of detail, so make sure you take your time with it. Start out by drawing the hood of the car, then work your way to the back of it. Once you have the basic outline of the car finished, add in the details! Don't forget the windshield, side mirrors, paint, wheels, tires, etc while drawing. To finish this up, start to shade with the pencil and then use the eraser to create a shined appearance as well. Add in colors if...
In this tutorial, we learn how to draw a graffiti alphabet. If you aren't familiar with drawing graffiti, this is a very personal type of drawing that you can do anyway you would like. Make the letters close together, but give them wide arches so they look bold. When you write out the alphabet, you will color the space between them black, and then shade the inside of them. It may be hard to see exactly what the letters are, but that is the fun with graffiti. Make it completely unique to you a...
In this tutorial, we learn how to draw fold legend Bob Dylan. To start, you will first draw the hair and the head along with the upper body, hands, and guitar. After this, you will start to add in the facial features. Draw on the eyes and add lines to make the face look more realistic. Make sure it looks like he is holding the guitar with his hand, showing one hand around it. After this, you will need to add color to the drawing on both the clothing and the skin. To finish, you will erase any...
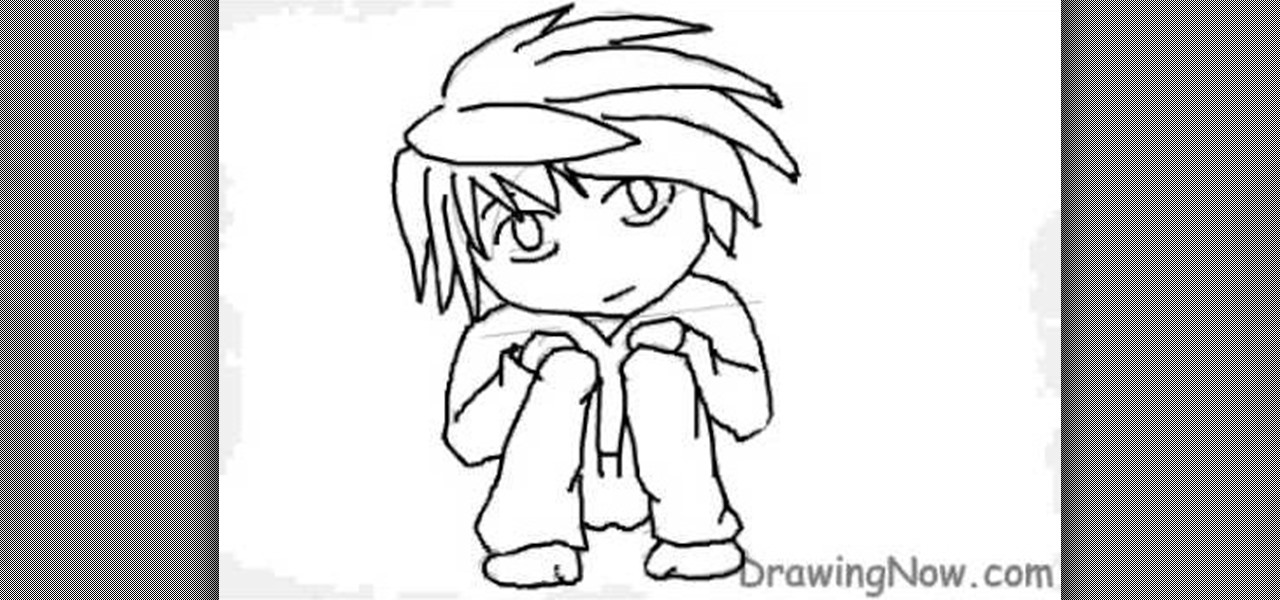
In this video, we learn how to draw a chibi L. As with any drawing, you want to start with the outline of the character to get a feel for where all the parts are going to go. After this, you will use a different drawing material to draw over this and create the final lines for the Chibi L. After this, start to draw in the details of the face and the rest of the body. Also make sure you draw in the hair, adding lines to show where the different strands are. Finish this off by coloring the skin...
In this tutorial, we learn how to draw a female face with hair. First, draw the head and then draw the shape of the chin. From here, you will draw the bangs and the hair. Draw the hair with wavy lines to make it appear curly. After this, draw on the features of the face with a darker marker. Make sure to add in small details and lines to make the face appear more realistic. Then, start to add in the details of the hair and give her a smile on the face. Finish the upper body and then add in so...
In this video, we learn how to draw stained glass style doves. This is a complex picture to draw, so start off with just one dove drawn in the middle of the paper. Add in the feathers for the wings as well. After this, outline the dove in black and then erase any background lines. From here, draw in the black eye on the head, then start to draw another dove over this one. Draw it's head touching the left wing of the first dove. After you finish this, draw the third dove over the other two. It...
In this drawing tutorial, we learn how to draw a chibi Sokka. Start off by drawing a round circle for the head of the character. After this, draw on the ears to the sides of the head. Then, draw on the hair on the back of the head followed by the facial features. After this, draw on the body, but don't draw a neck because this character doesn't really have one. Once you have the outline finished, start to use a darker marker to create the clothing and other details onto the character. Clean u...
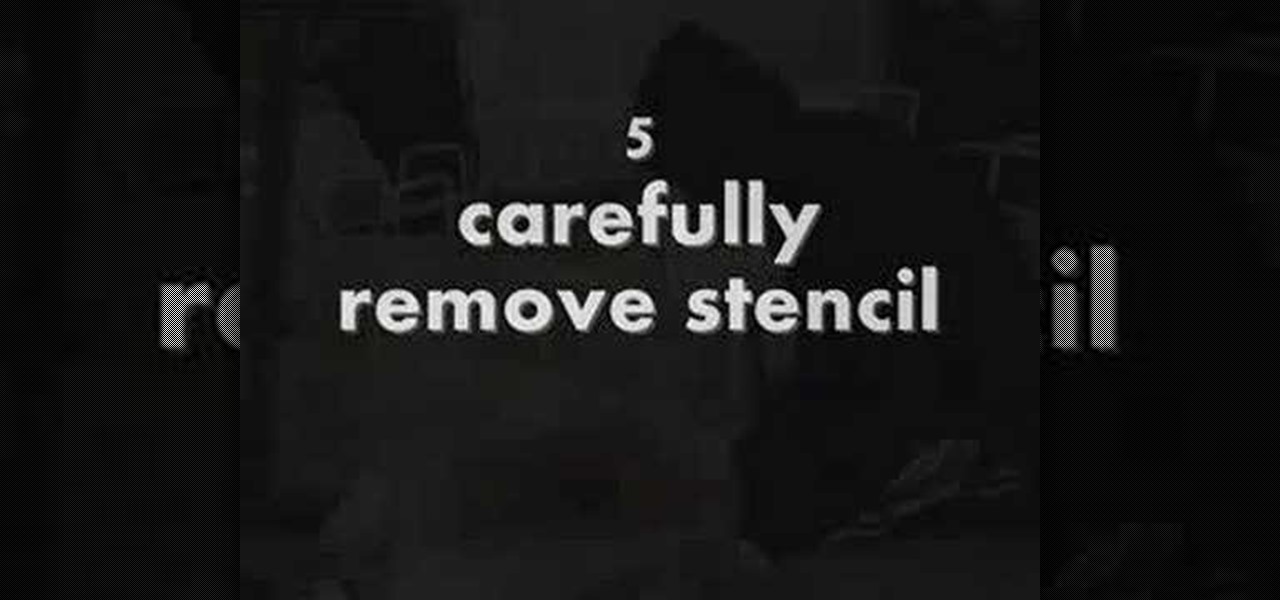
In this tutorial we learn how to stencil your own t-shirt. Start off by grabbing your plain shirt and placing paper inside of it so it doesn't bleed to the back. After this, paint your background on the shirt in your desired color. From here, place what stencil you want on the top of the shirt and then paint inside of it. When you are finished painting it, carefully remove the stencil from the shirt. After this, you will need to let the shirt dry completely so it doesn't bleed at all. You can...
In this tutorial, we learn how to draw a plan view with art markers. First, you will draw a dot in the center of the paper and then draw lines out from here. After this, use the lines on the paper to create the proportions for the buildings. After this, draw in squares and lines to help create the ground and buildings. Then, you will add in details to the building and then draw in plants and grass around the edges. After this, erase any background lines from the drawing and then color it in. ...
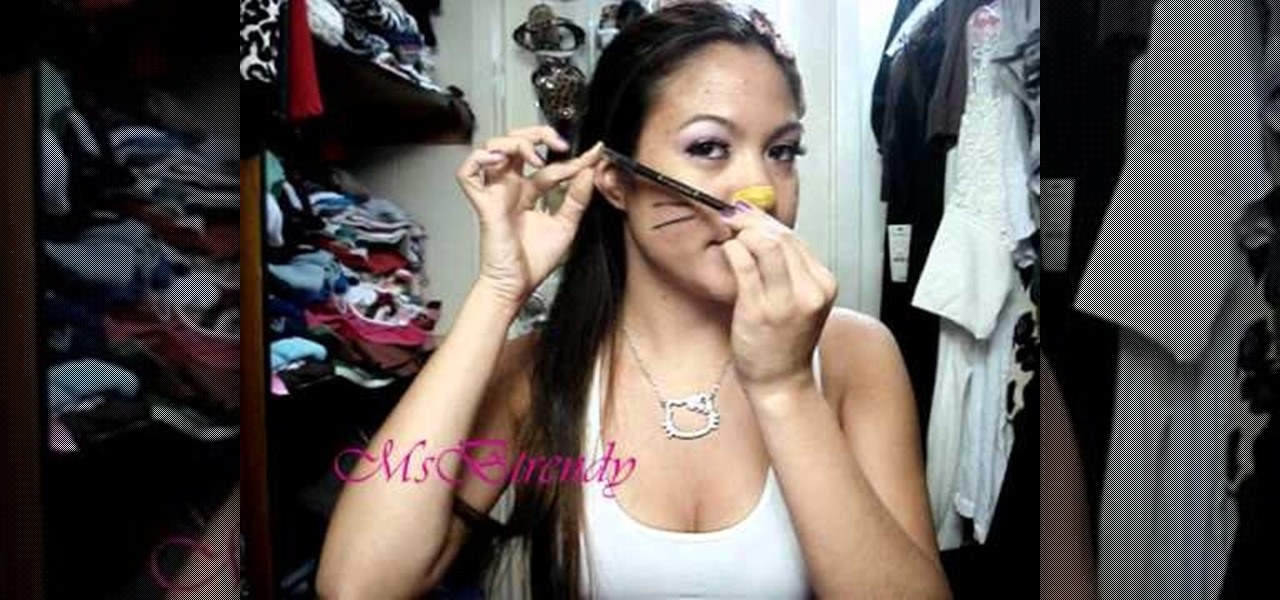
Halloween doesn't have to mean frightful garb and spooky makeup. Have yourself a pretty Halloween and send smiles to your friends' faces rather than shrieks of fear by dressing up as the iconic Hello Kitty.
In this tutorial, we learn knitting basics. To knit, you will start out by selecting your choice and colors of yarns. After this, you will need to grab two knitting needles and then make a slipknot from the yarn with your finger. Attach this to one of the needles and then start a chain one on this. From here, you will continue to wrap the thread around the needle and then squish it all together. Then, take the other needle and wrap it into the first part of the thread. Then, continue to work ...
In this tutorial, we learn how to understand fraction multiplication by drawing. Start out by drawing a square on a piece of paper, leaving space around it. Next, cut this into vertical thirds (your equation is 1/3 x 1/2). After this, shade one of the thirds in the square. Use the side of your pencil to shade in the third. Then, cut the square into horizontal halves. The square will now be in equal shapes that are also called sixths. After this, shadow one of the halves with a different color...
In this tutorial, we learn how to bend and fuse glass over a flame. First, you will need to have a Bunsen burner turned on with a high flame. After this, let the flame stay on for several seconds, then adjust the airflow for the flame so it doesn't go too high. Now, find glass and pick it up on the bottom with your hands. Stick the tip of the glass into the bottom part of the burner, where the flame is the hottest. The piece of glass will turn orange in color as it gets hotter and hotter. Onc...
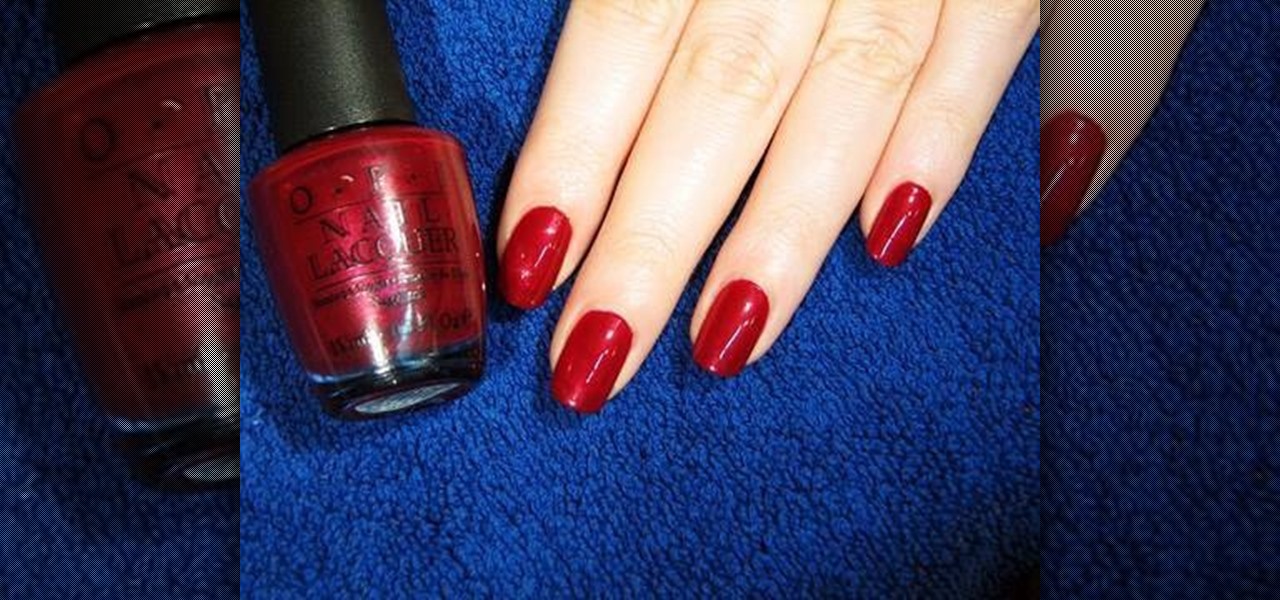
In this tutorial, we learn how to achieve a perfect at home manicure. First, remove all the nail polish from the nails and then file them down. Use a buffer to buff the top of the nail and push down the cuticles. Clean out underneath the nails and then wash your hands thoroughly with soap, then let dry. After this, use instant cuticle remover on all of your nails to remove your cuticles completely. Use a wooden pick to push these back and remove them just to make sure you have it all gone. Af...
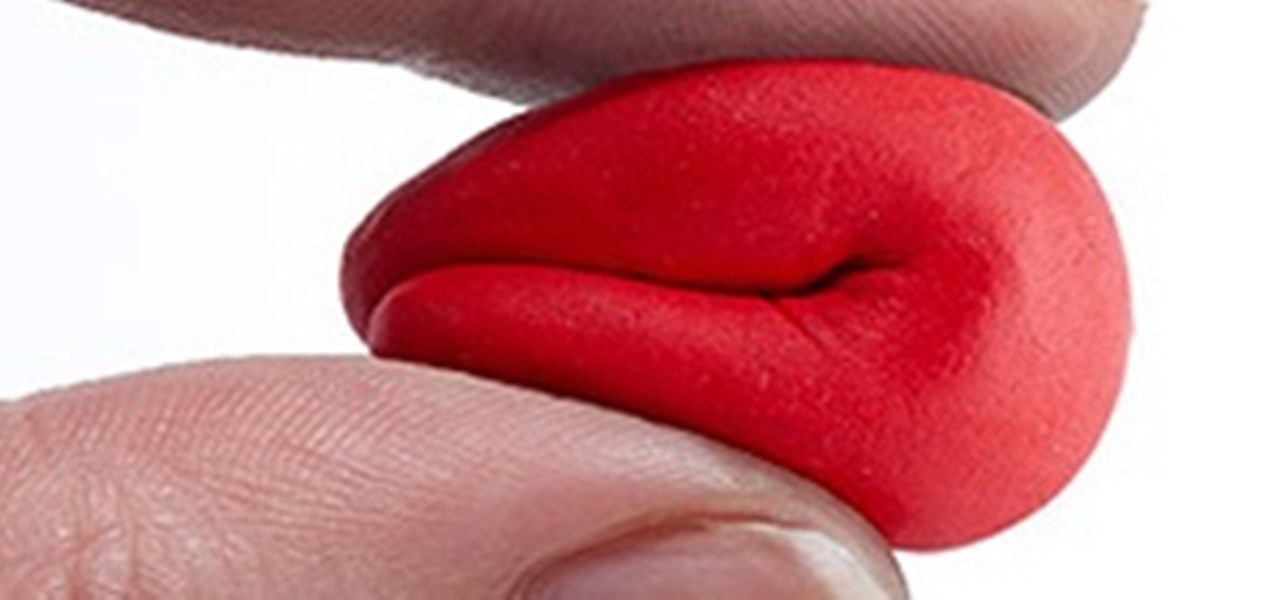
In this video, Bill Corso teaches us how to apply injury makeup. This can make it look like you are hurt, but it's really just makeup you are using to create the look! Using red and brown together can give a more realistic look of blood, blending it out through the entire cut. Using different colors on the injury can add a more realistic look to where the injury is. Work with the different features on the face to create the best look you can. Pay attention to the sweat on the body as well, be...
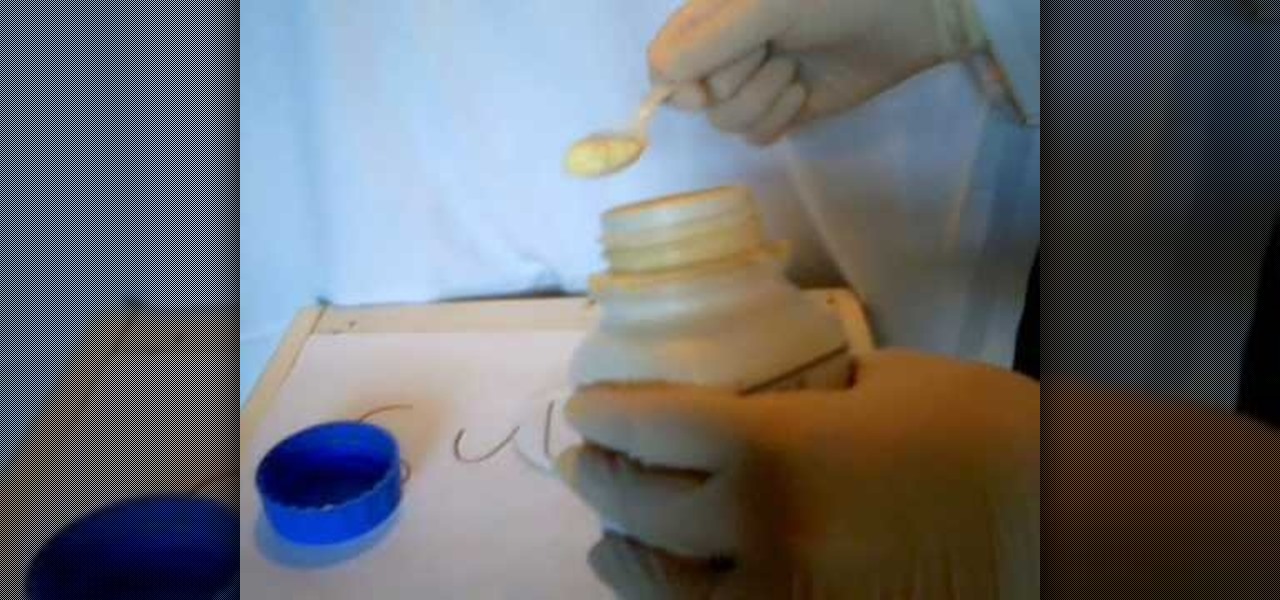
In this tutorial, we learn how to change the physical properties of yellow sulfur. First, take a heat proof water glass and add in 1 teaspoon of sulfur powder. After this, heat the glass on a low flame for a few minutes. After this, the sulfur will start to melt and turn a reddish color. Now, pour the sulfur into some cold water after it's all the way melted and watch the reaction that is occurring. Once cool, you will be able to pick up the sulfur from the water and play with it, although it...
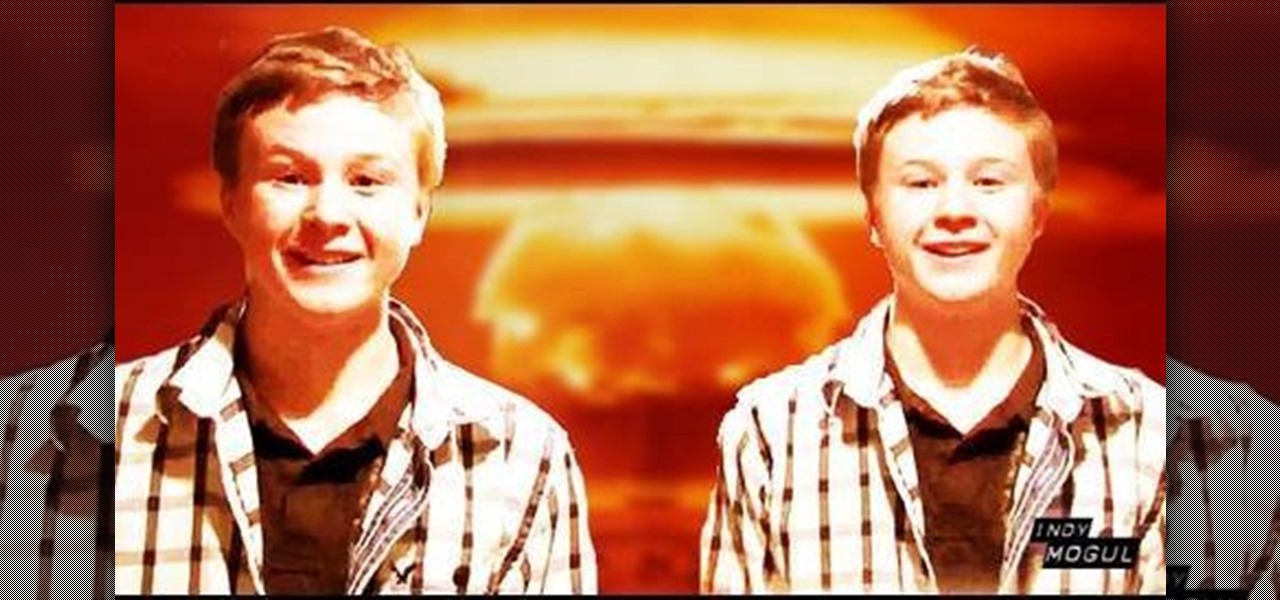
In this tutorial, we learn how to create floating objects and razorblade props. First off, take your object and some double sided tape. Then, place the tape on the object to make it look invisible. After this, tape it to the middle of the plexi-glass. Have someone else help you move this, and then when you record it on video it will look like the object is moving around in the air without anything holding it. This is a great effect that looks even better on video! To create the razorblade pro...
In this tutorial, we learn how to draw a manga girl. Start out with a pen on a piece of paper and draw the eyebrows in the upper middle part of the paper. Color the brows in, then draw in the eyes, along with their creases and the bottom of them. Next, you will draw in around the face and add in the point for the chin. Add in the details for the face, making sure to draw in the eyelashes. When finished with the features, draw bangs on the front of the face, then draw hair all around the sides...
In this tutorial, we learn how to draw a dragon in profile. Start with a pencil on a white piece of paper and draw out the outline of the profile for the dragon. After this, start to add in the details for the side of the face, this includes the horns, teeth, nostrils, and scales for the dragon. Work your way into the middle of the dragon, drawing in different details, including the eyes and the mouth. Continue to shade and add different lines to the dragon, then finish it off with a horn or ...
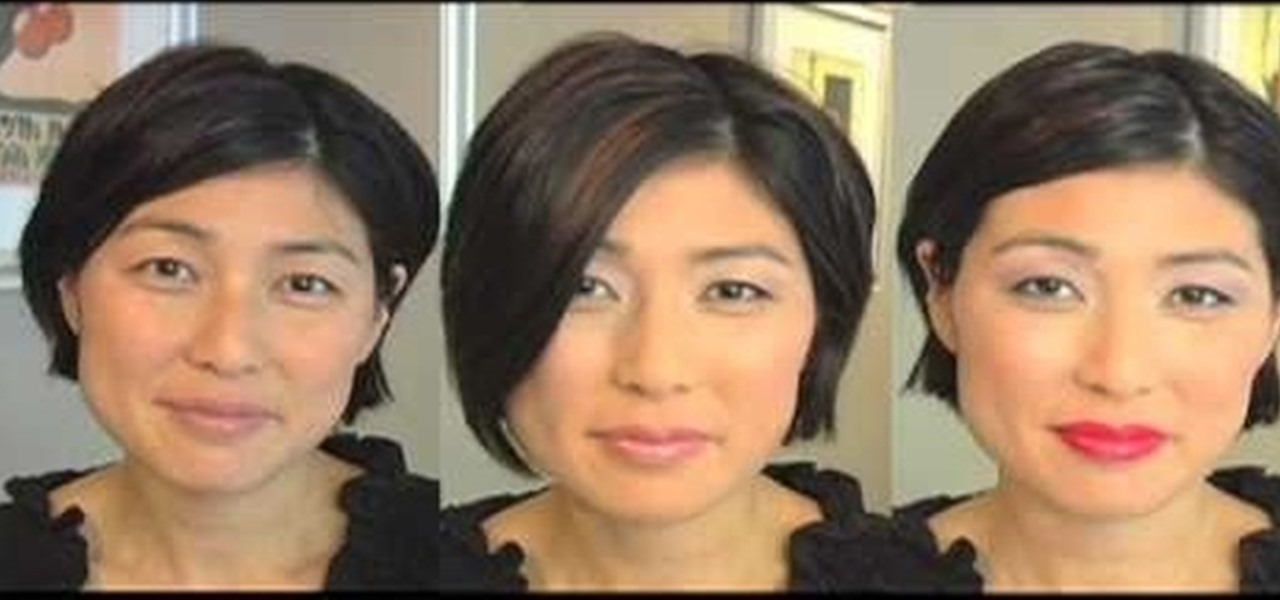
Hikaru Utada is a drop dead gorgeous Japanese pop star who isn't afraid to take chances with her makeup. Though she plays it safe with neutral eye and lip colors when she's just walking around town, for music videos she amps up the volume and goes for a sexy feminine look.
Why are you looking forward to fall? Other than sipping on warm vanilla lattes, watching the leaves change colors, and of course the start of the holiday season, we're looking forward to all the fresh, in season fruits and vegetables. Among these ripe offerings are grapes, which are extra juicy this time of year.
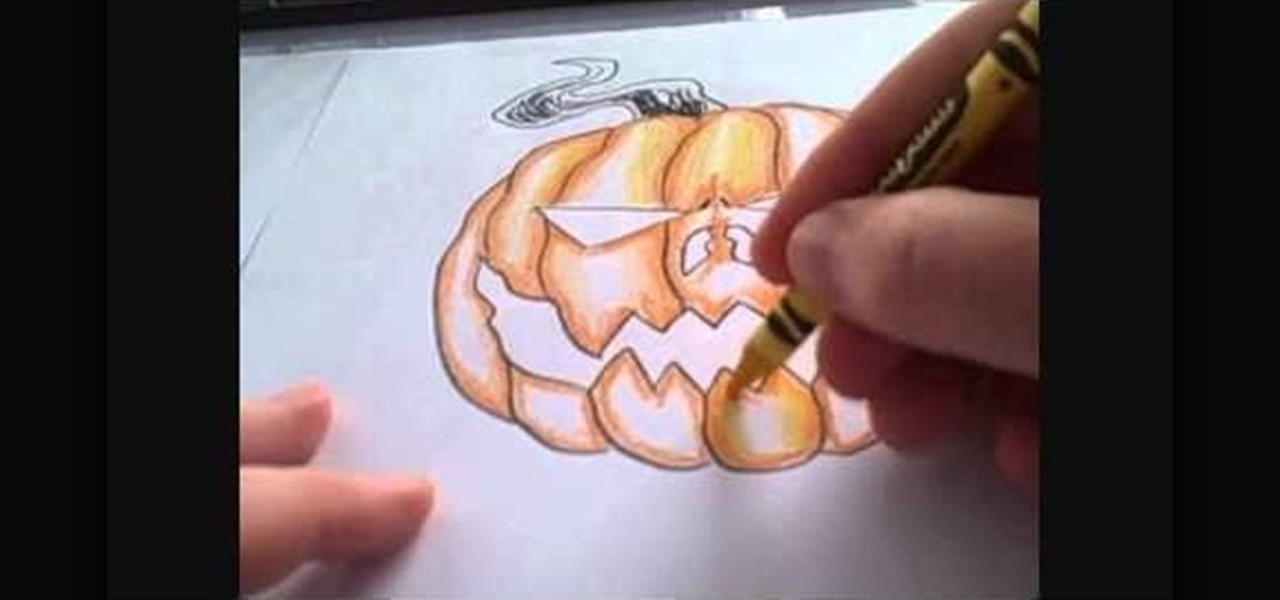
Despite their reputation, Crayola crayons can still be a useful medium for an artist to use. They come in a wide variety of highly saturated colors, which makes them ideal for when you want brightly colored projects. This tutorial demonstrates how to use Crayola crayons to draw a Halloween jack o lantern.
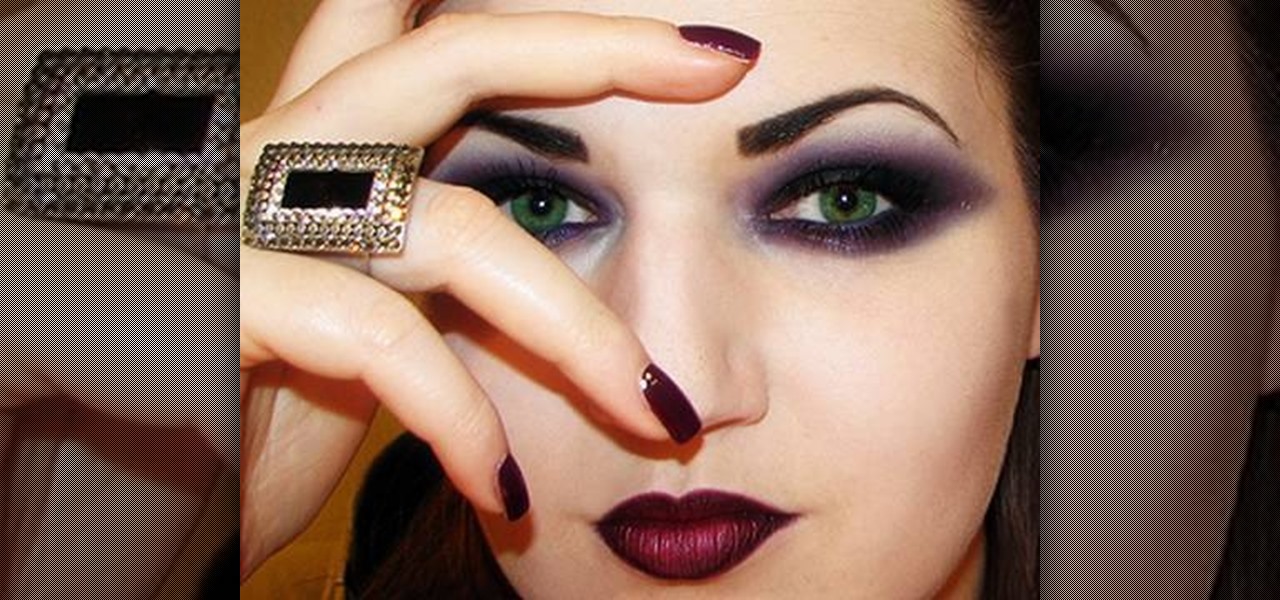
In this video, we learn how to create a dark gothic makeup look. First, apply a pale foundation and powder to the face to pale down your skin. After this, apply a black gel eyeliner all over the lid, flaring out the the side to make a winged shape. Then, apply on the bottom of the eye, smudging to make it darker and more obvious. Next, take a matte eyeshadow that is the same color as your skin, and brush it underneath your eyebrow to blend the black. After this, take a black sparkle shadow an...
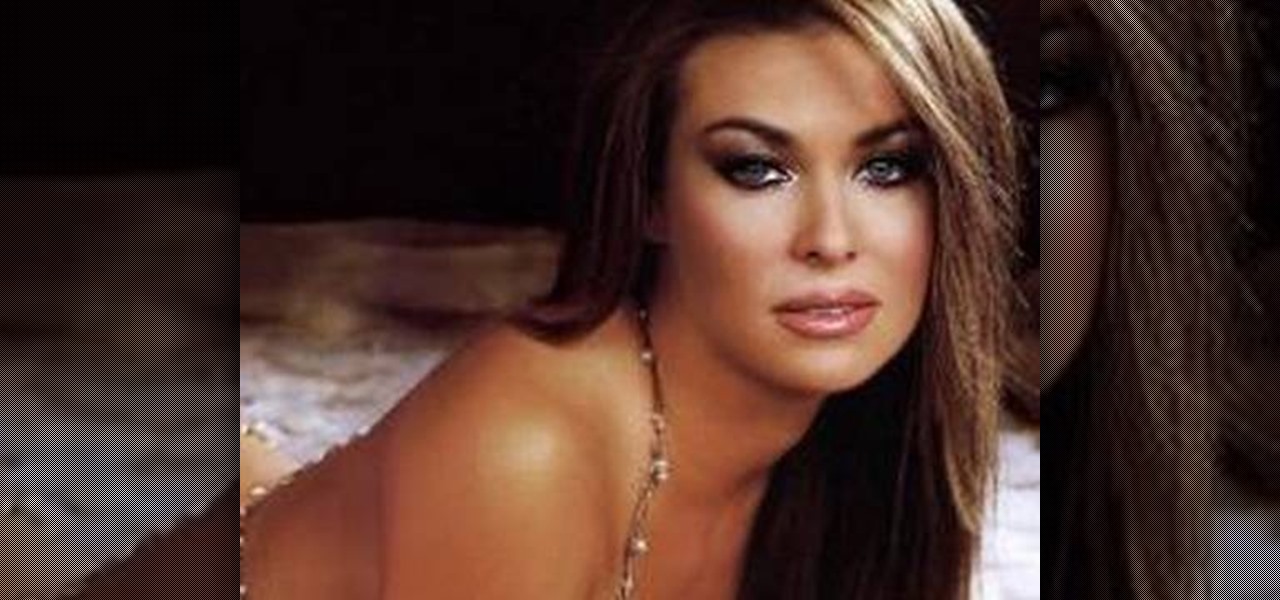
In this video, we learn how to get Carmen Electra or Playboy playmate smoky eyes. First, apply a primer to the eyelid, then apply a shimmer gray shadow to the entire eyelid with a brush. Brush the shadow so it makes a wing at the edge of the eye. Next, apply a darker shadow to the outside of the eye, building it up until you have the darkness that you prefer. Apply a matte black shadow on the outer v after this, then apply a skin tone color shadow and brush into the top of the eye to blend ou...
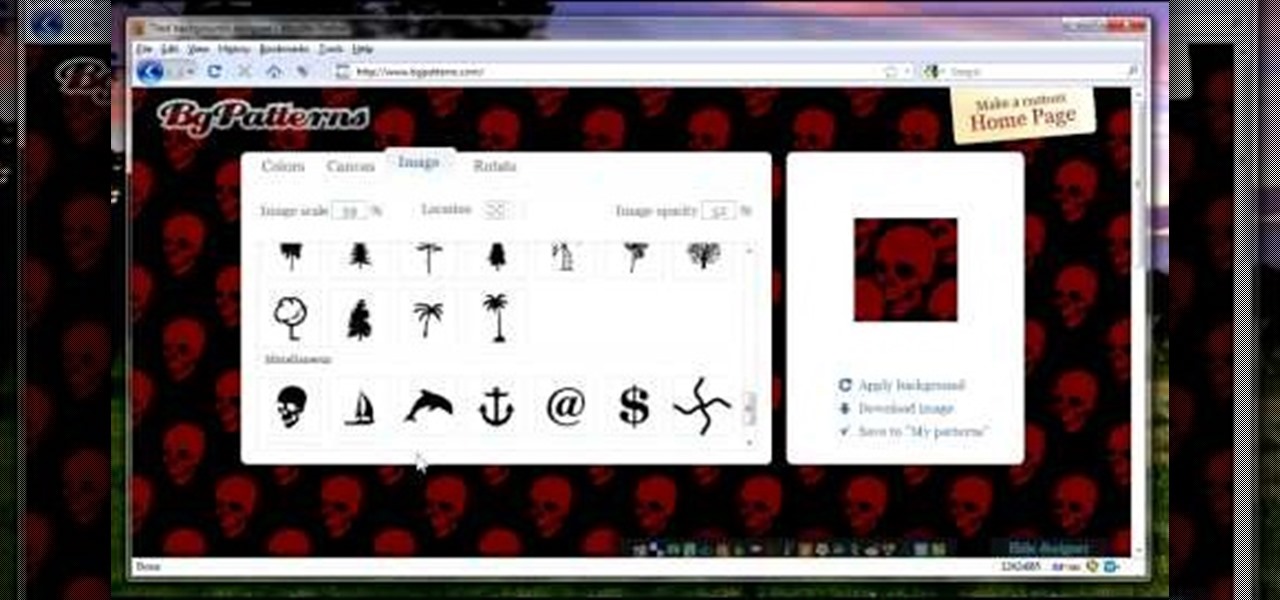
In this video, we learn how to create background patterns for web pages. First, go to the website BGPatterns. After this, the page will load and you will be able to create a custom home page. There will be a default pattern displayed on the page, but you can change this pattern and the colors as well. You can do a number of different things to make this page completely customized to how you want it to look. When you are finished, you can apply the background to your web page, save it, or down...
In this video, we learn how to get a smoky eye with black cat eyeliner. First, apply a light highlight shadow underneath the eyebrows. After this, apply a primer to the entire eyelid. Next, apply a champagne color to the lids, then apply black liquid eyeliner onto the top of the eyes. After this, take a black eyeshadow and apply it to the outer crease of the eye, then blend it in with the rest of the eye until you reach the middle. Apply liner to the bottom of the eye, then apply mascara to t...