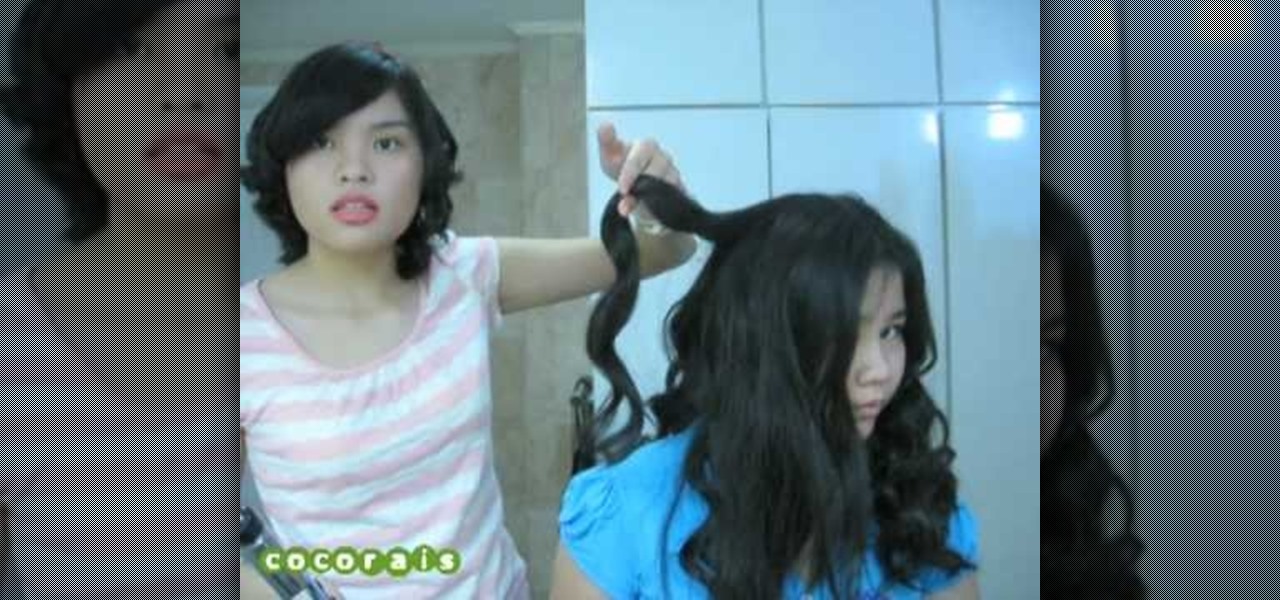
The video begins with a photo of Miley Cyrus with her curly wavy hair. The hair stylist then begins to demonstrate the process to create that same hair style on a subject. She begins by brushing the subject’s hair and then sprays some heat protecting spray onto the hair. The next step is to spray curl boosting spray onto the hair. The hair is sectioned off into small sections. Next is to use a curling iron and wrap the hair around the iron in a spiral pattern and hold for about 30 seconds. Th...
A great photographer is more than a technician, but all great portraits begin with a photographer’s mastery of equipment and technical requirements. Set yourself on the road to greatness by learning the basic components of photographic portraiture. You will need a camera, a telephoto lens, and a subject. Props are optional. Compose your subject by using the rule of thirds, where your subject is either in the left or right third, not the direct middle, for the most intresting pictures.
Depth of field is the term for how much of an area your camera keeps in focus. Moving your camera allows you to keep your subject clear, and make the background blurry. Use this video to get better control of your film making.

In this video an American English teacher shows the difference between subject and object pronouns.

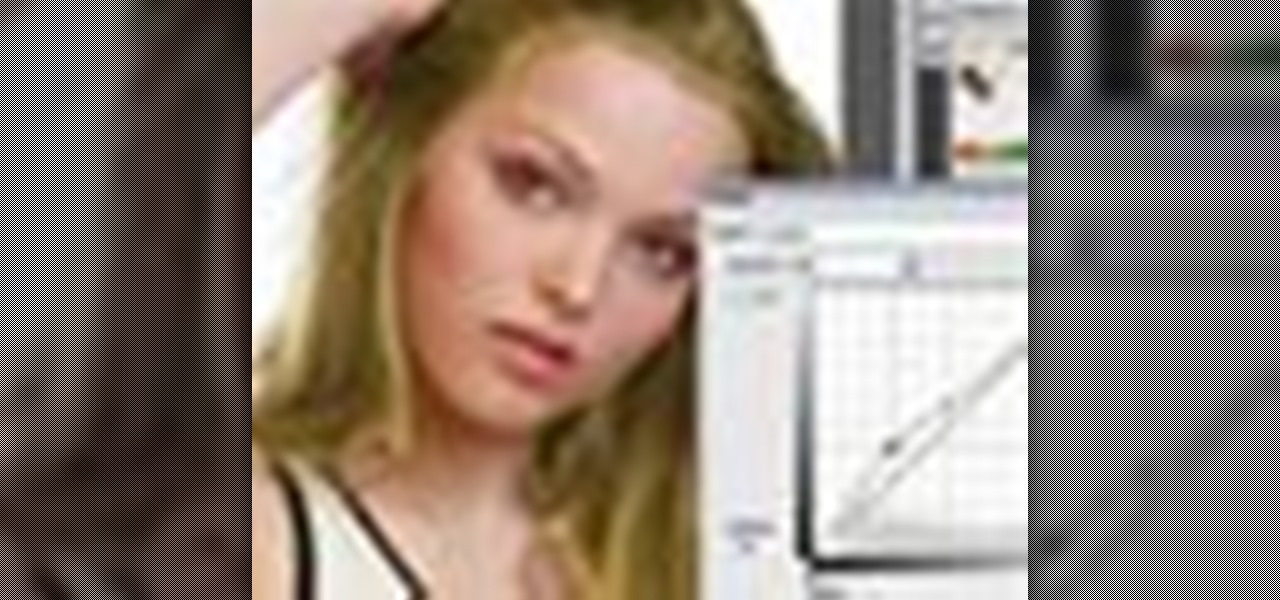
Learn how to mask a subject out of an image and transfer them to a new background using Photoshop.

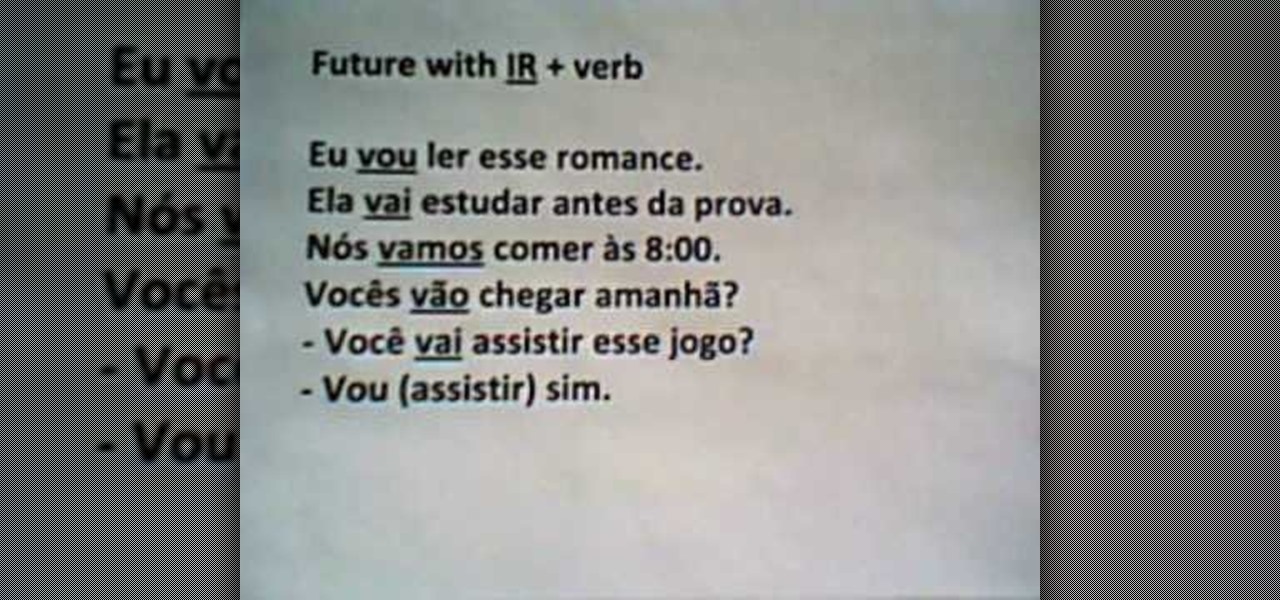
Learn the subject pronouns and present tense AR verbs in Brazilian Portuguese. Watch, listen, and repeat.

Jerry Hyman has been interested in photography since he was 13 years old, and is a former professional photographer. n the premiere episode of Woven Shadows, Jerry describes the importance of positioning the subject of a photo relative to the light source.
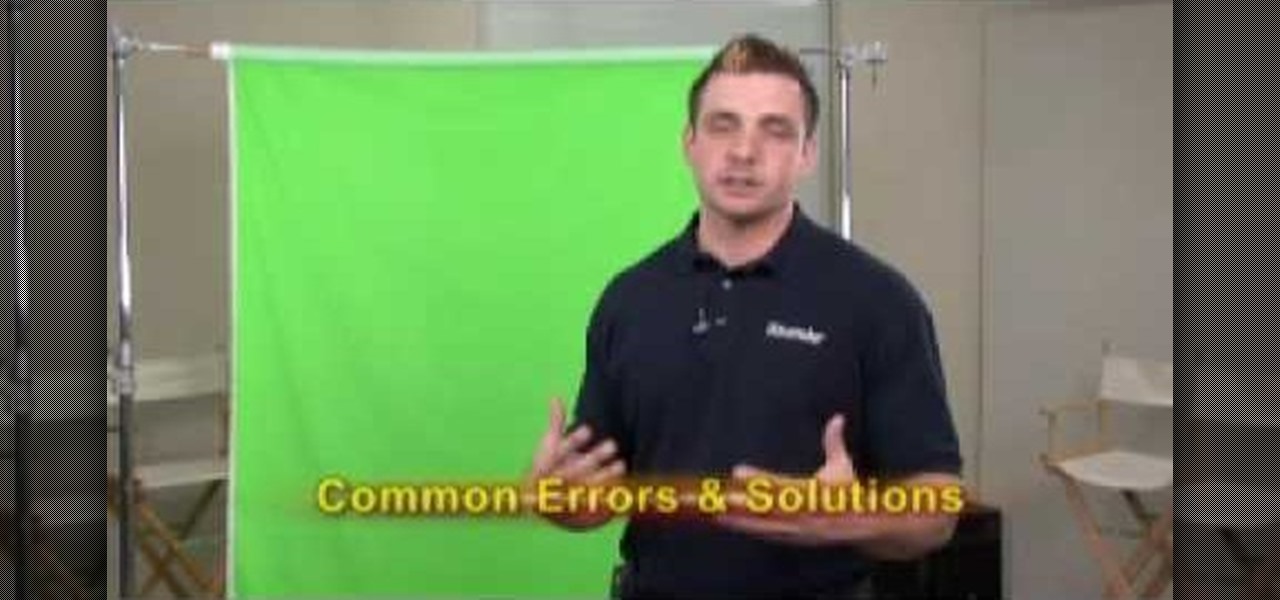
This video shows how to properly set up a green screen, to set up the screen we are taking into account this four factors:
In this Fine Art video tutorial you will learn how to focus stack for great macro photos. This video is from EPhotoZine. The idea is to take several pictures of the same subject at different distances. For this you will need focus stacking. If you focus with a wide aperture, everything in front and behind the subject will be out of focus. The idea of focus stacking is to shoot several shots and put them together in a program that automatically brings them all into one. And that is focus stack...
This video tutorial will show you how to apply four styles of lighting. This video teaches you how to apply four styles of lighting, namely Rembrandt, Beauty, Cameo and filling in from the Key Side. You will learn about high contrast lighting schemes, dealing with the amount of contrast used to highlight a person's face, as well as spotlight effects, and how these tend to draw the viewer into the scene. You will be shown how the Rembrandt Lighting setup contains three steps, namely taking a K...
Interviewing lighting basic training tutorial provides easy to follow instruction in this step by step video. Set up the interview area to allow the best camera angles. Place your lights in key, fill, and backlight positions. Use back lighting spillover to fill subject area without camera spillover. Check your setup with the subjects and make any necessary adjustments to your camera or lighting angles. Place your crew and your ready for your interview. This scenario using key, fill, and back-...
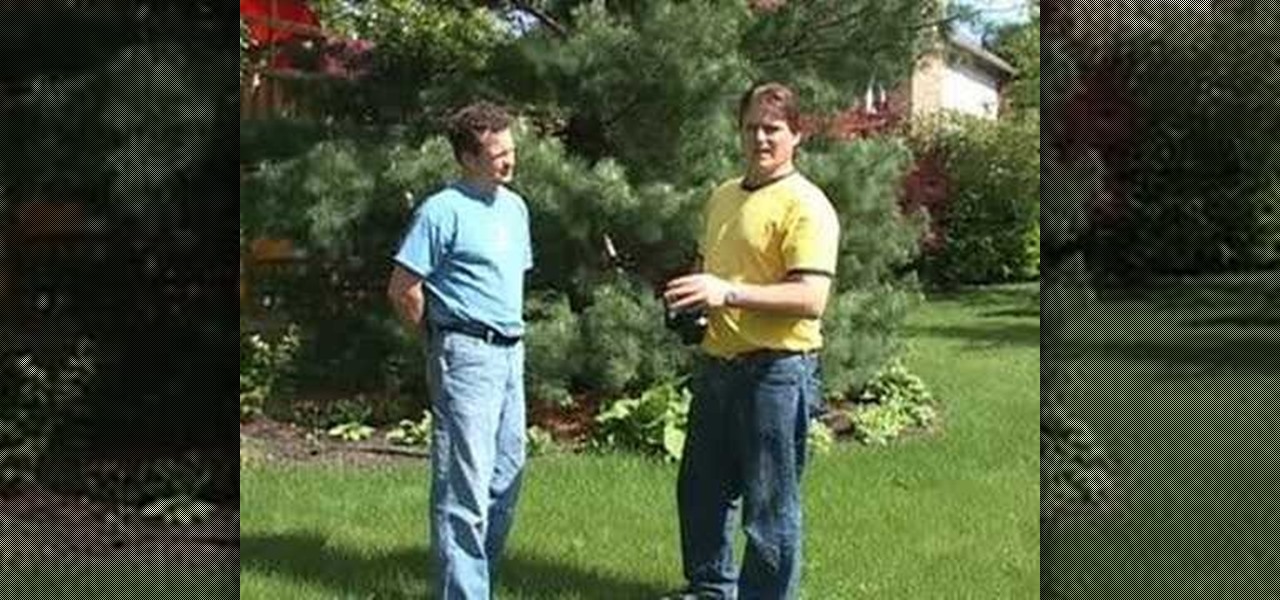
Tom Skowronski teaches us how to shoot a good video. Look before shooting so you have a more controlled movement. Hold camera steady at all times. Move the subject in front of the camera and turn the camera mans back to the sun to illuminate the subject. . Give nose room for a more professional look. Have a full frame and no dead space to have a natural looking video. Cut off at head to have a full frame. Following Tom Showronski's video-making advice can lead to a professional-looking video....
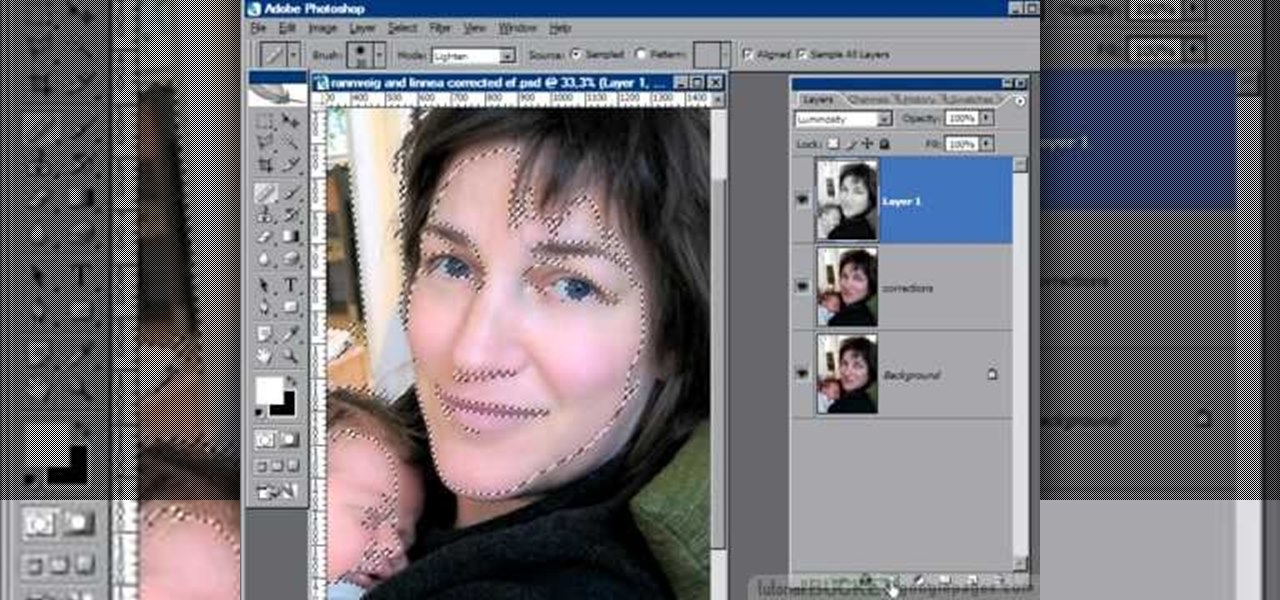
Oftentimes a subject in a photo will want to remove certain blemishes or correct his or her skin tone, and it is simple thing to do in Photoshop. This video takes us through the process of what is known as "facial scrubbing" using Photoshop software that can automatically give a person a flawless appearance like that in magazines. Retouching can be done by editing certain layers of a photo's subject. By following the steps in this video you can touch up the complexion of anyone in Photoshop.
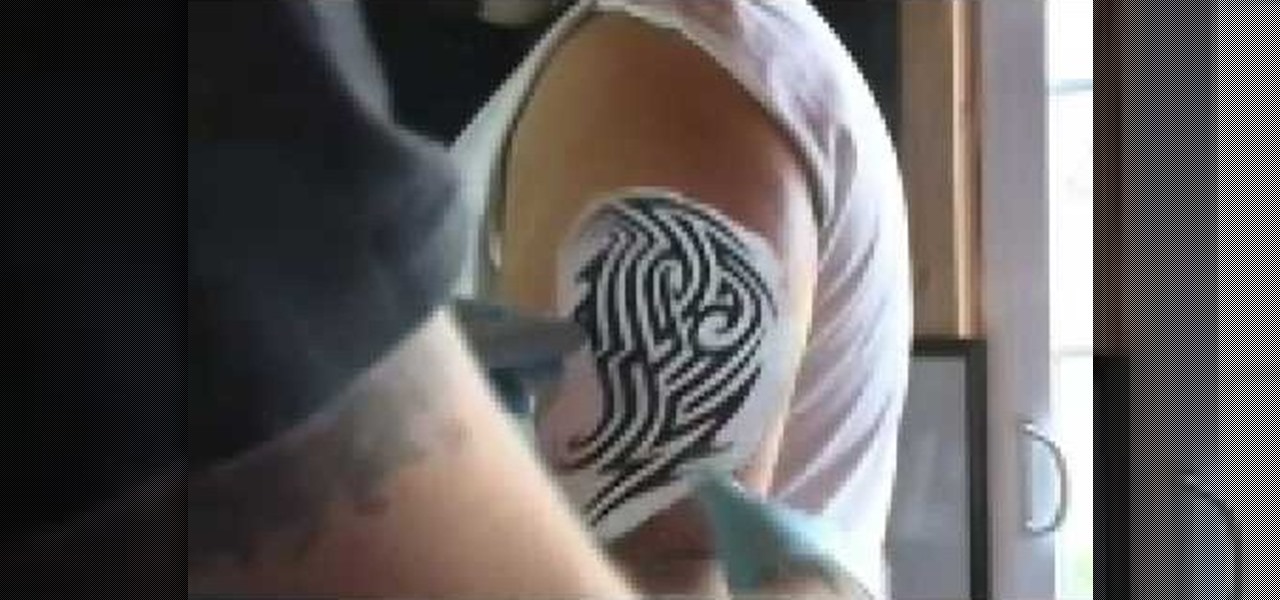
For people who would like to learn how to make a professional tattoo, this is the tutorial to watch. For making a basic arm tattoo, the subject should be seated upright in a military position. You should apply some alcohol and then some antiseptic to the area to disinfect the area and place the stencil over the area. It is suggested that the subject shave his or her arm in order to get the best effects. The tattoo stencil should be placed over the center line of the arm and align it properly,...
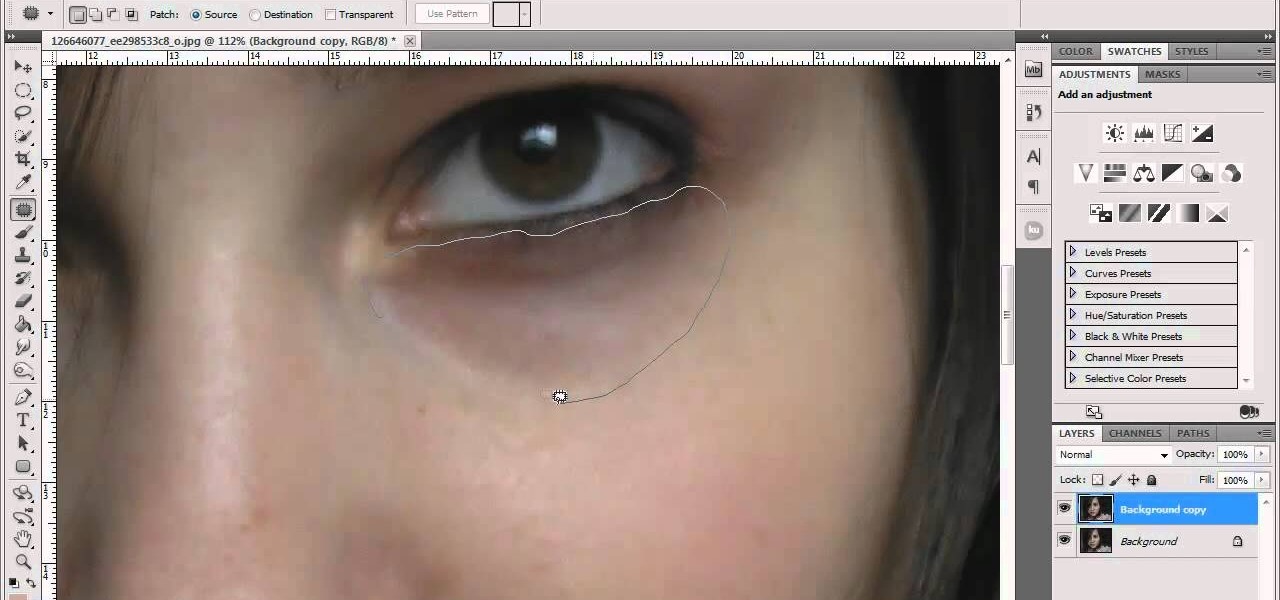
This technique is very similar to the one used for removing dark circles beneath the eyes of of people in your pictures. This shows you a simple technique where you can reduce the amount of gray in a particular area of your photo to get rid of the dark circle look.
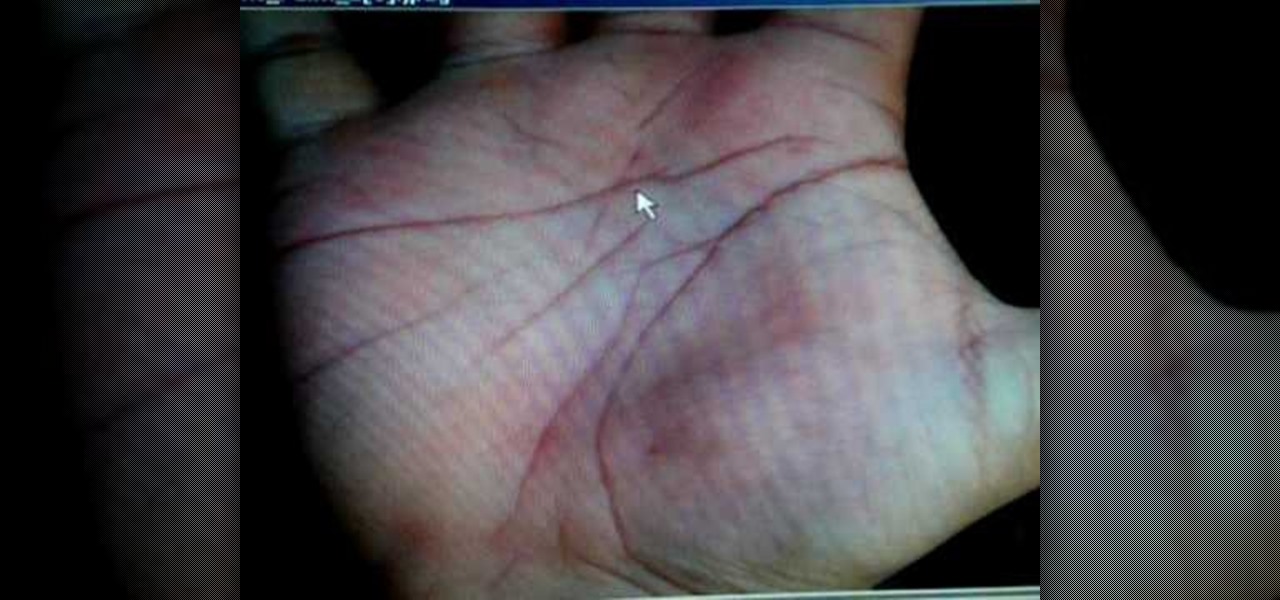
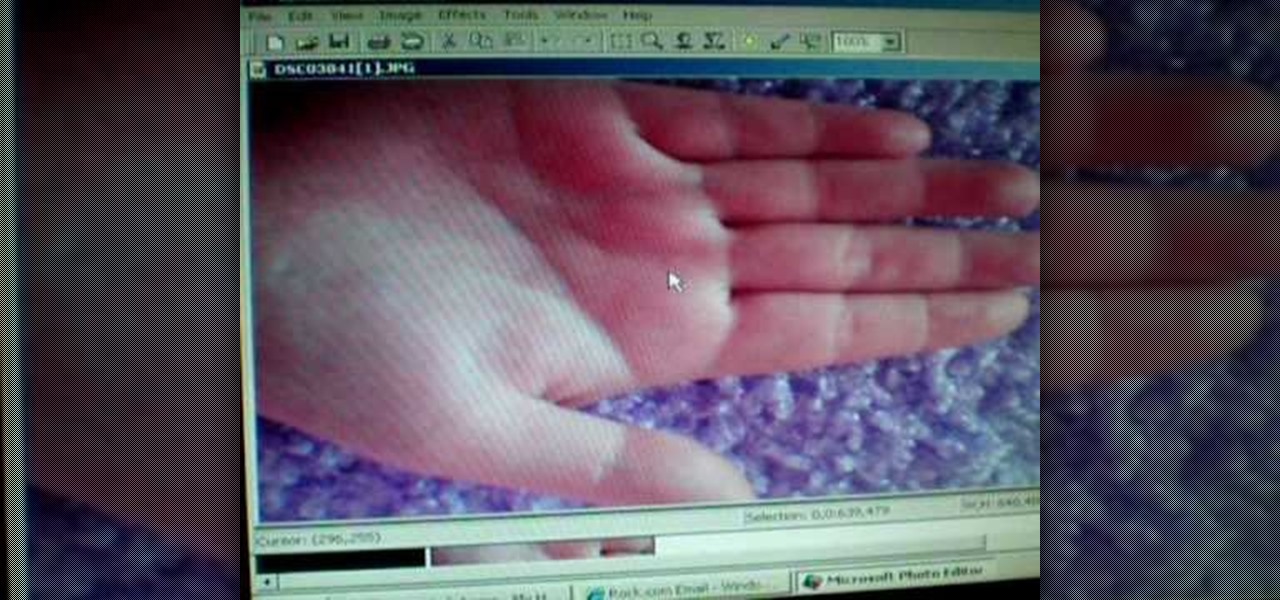
Peter John shows palmistry students how to give the subject of your palm reading career advice. Know what to look for on the head, heart, fate and life lines to be able to tell what career your subject is ideally suited for, or if they should make a career change.
New students of palmistry might get thrown in a reading when they encounter a broken line, or one that changes. Peter John demonstrates how to give a good palm reading even when the head, heart or life lines change or break on the hand. He also shows how to detect a change in your subject's future
Peter John, an accomplished expert in palmistry, demonstrates how to properly understand what it means when your palm reading subject has a long hand and long lines on the palm. He indicates what to look for to indicate intelligence and good communication skills in your subject.
Is the querent for your tarot card reading destined to become someone famous? Are they looking for a way to gain recognition? Peter John explains which Tarot cards to look out for if your subject is seeking fame and fortune.
This tutorial shows you how to use the Match Color tool in Photoshop to take a dog, or any subject extracted from a background and make it look like it's on Mars and belongs there. Even if you don't care about life on Mars, watch the tutorial anyway and learn how to use Match Color to match any subject with any background that you like or need!
Israel Hyman shows yow how to use the sun as a key light for film, video, and photography, including how its angle affects your subject’s look.
Do you know when you're going to die? Your iPhone or iPad does. That's the premise behind Death Mask, an experimental app developed by Or Fleisher and Anastasis Germanidis.
In this tutorial, we learn how to gel your flash to blend it with ambient light. First, you will need to be indoors with lights on and grab your camera. Make sure you have a separate flash on the camera, then take an amber colored film strip and place it over the flash. Next have your subject sit down and start taking pictures. Use different shades of amber and when you see the pictures it will have the background light more dim than the subject in the picture. When finished, you will have a ...
In this video, we learn how to understand verb conjugations in Brazilian Portuguese. Learning how and why verbs change tenses is very important when you learn to speak this language. Verb tenses and changes tell what state the verb is in to help you better understand it in a conversation. When saying "ar" this will be the ending of a word that reflects what tense you are using. To replace, you can also use "er" and "ir". This will also tell who the subject of the sentence is. This will change...
In this tutorial, we learn how to speak English: Imperatives or reporting verbs. Imperative sentences are sentences like "open it!", where you are asking someone to perform an action. You can also say this in a nice fashion, asking "please open it". There are many different forms of imperative sentences, which include: commands/orders, directions, instructions, requests, and warnings. All of these different types of sentences are asking someone to do something, just changing up the way they d...
In this video, we learn how to use "fill in" flash. When you are taking a shot of people outside, you will need to have a certain type of aspect on your camera. They will have shine on their face from the sun and it will be washed out with white. When you go to your camera, you need to change the flash settings so that they are compatible with being outside. Now, try taking pictures of your subjects again and you will see a huge difference. The subjects should be easier to see and there shoul...
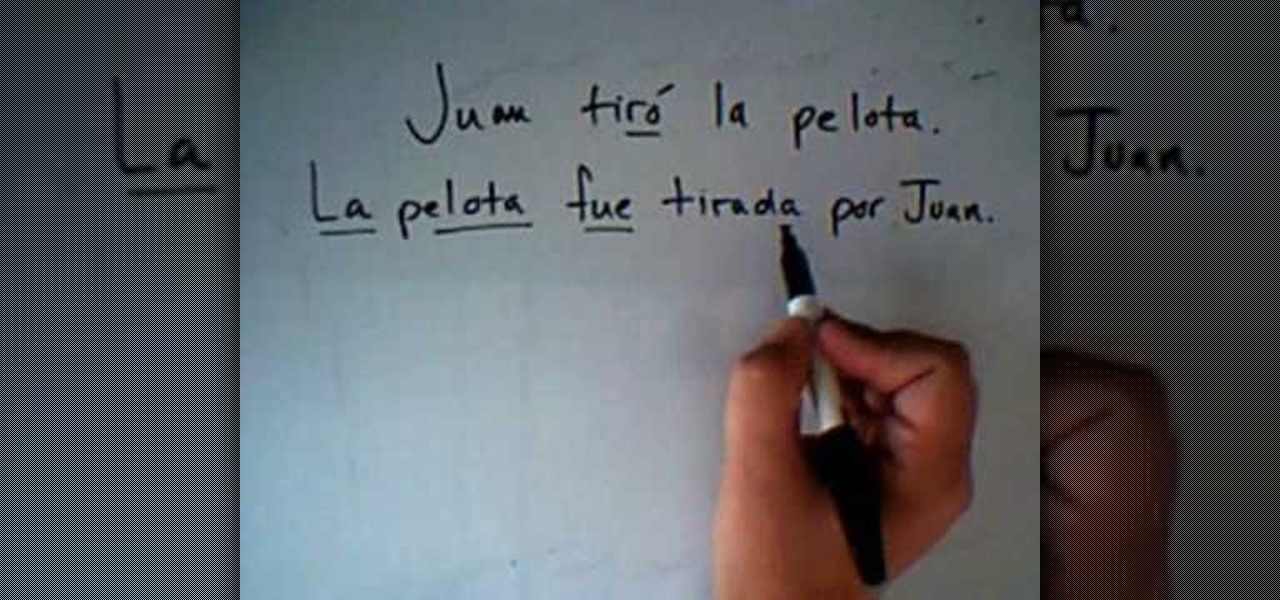
In this video, we learn how to use the passive voice in Spanish. The first way to use the passive voice in Spanish is to use "ser", the second is by using "se". First, recognize the subject, verb, and object in your sentence. Now, write your sentence using a passive voice, making the object the subject and change the tense of the verb. This is very easy to do and basically just flips the sentence around and changes out the tense of the verb. This will change the sentence into the passive voic...
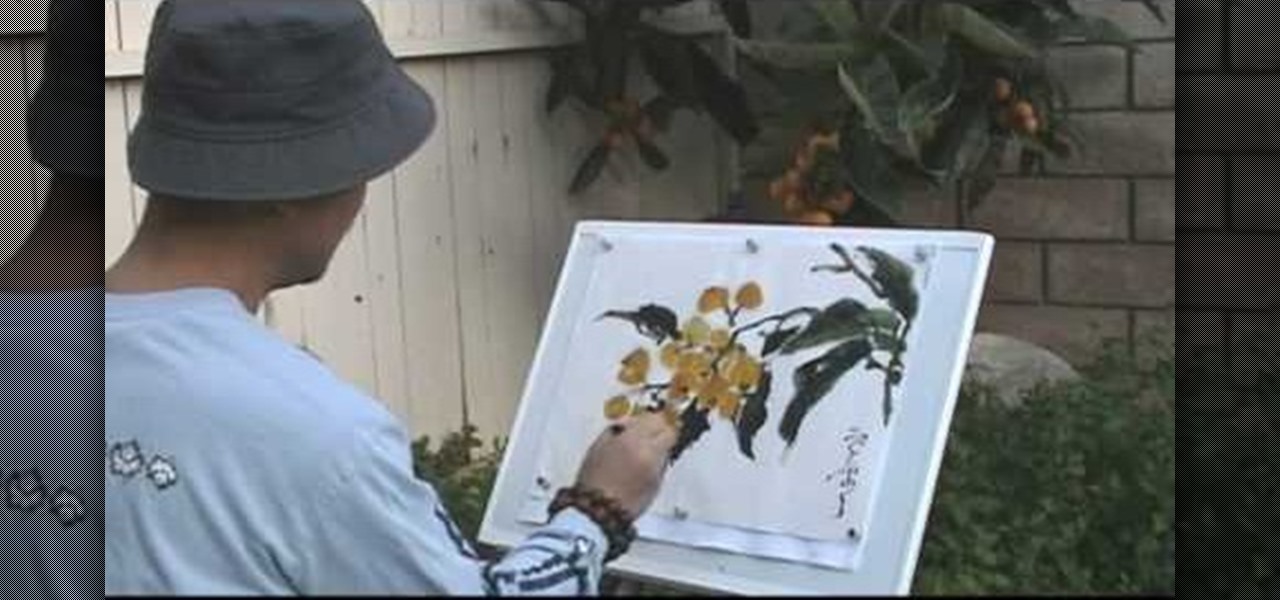
In Chinese watercolor paiting, static subjects like cherry blossoms and peach trees never go out of fashion because they represent the teeming life and beauty of nature that most Chinese watercolor artists enjoy representing.
If you have ever wondered how to create a Rorschach knot, this tutorial will show you how to do it in no time. A Rorschach knot is indicative to the blotchy silhouette of Rorschach inkblots, which are primarily used during psychological evaluations. A subject's perception of inkblots are recorded using these. This video is going to be walking you through the process of tying your Rorschach knot, as well as the ways in which it needs to be adjusted while being tied. You will also learn a bit m...
Time lapse videos can be used to distort a sense of time around your subject, which makes them very useful special effects in documentaries. By using time lapse, you can show the transition from sunrise to sunset in just a few seconds, or slow down a drop of water hitting a table. The tools in Adobe Premiere can be used to create this effect, and the following tutorial shows you how to take your raw footage and turn it into a time lapse shot.
Learn the basics of shooting videos in this video. This funny and informative video from Vimeo's excellent Video 101 series of tutorials demonstrates the importance of things like always carrying extra batteries, holding on to the subject for at least 5 seconds, using the rule of thirds to compose the shots, and planning the shots ahead of time.
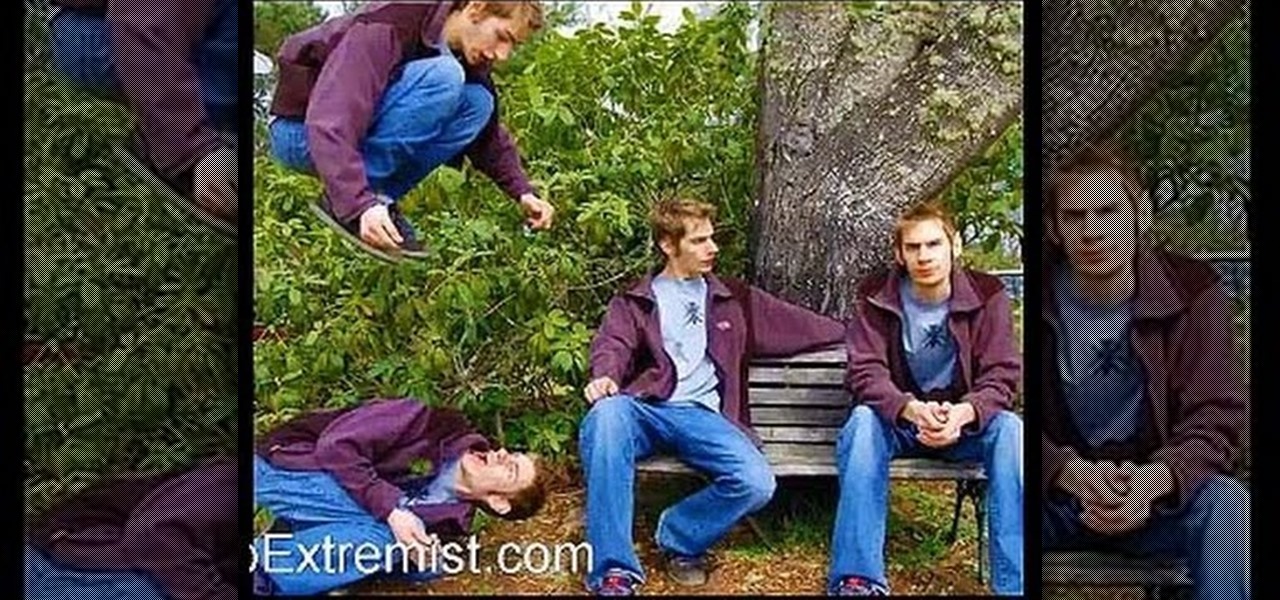
Multiplicity photography is a type of photography where you take multiple images of the same subject in different parts of the same frame, then combine them digitally to create a photo with multiple different images of the same person, animal, or object in the same setting. This is also called sequence photography when it's used in sports. This video will show you how to do it with a digital camera and Photoshop, creating amazingly cool-looking results.
Motion tracking a movie scene in After Effects is a royal pain in the butt. It takes a long time, depends largely on the suitability of the footage you are working with, and is rather confusing. This video is here to shed some light on the subject, offering many tips and tricks for basic motion tracking in After Effects. If you're having trouble getting your own scum-sucking monster to wander the desert realistically, watch this video!
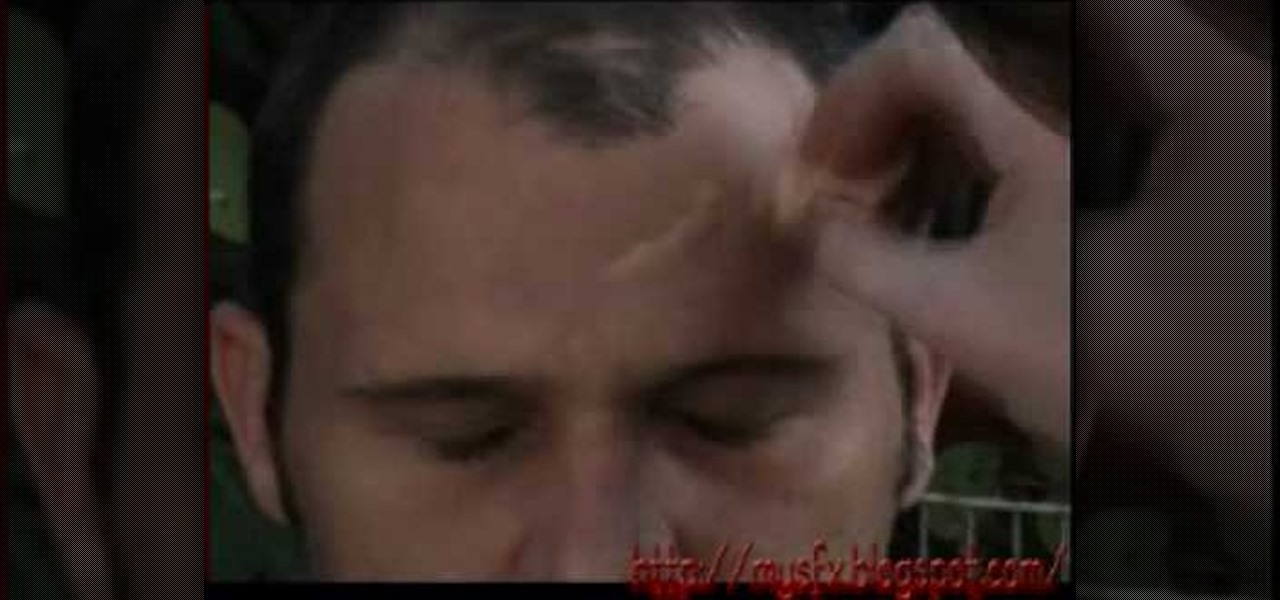
Head wounds are among the very worse types of wound, and as a results are very fun and popular subjects for representation in film. This video will teach you how to create an open gash wound on the head of your actor without taking a bottle to it. The wound looks very real, make sure you don't let your actor get near a hospital!
In this advanced level tutorial, learn how to tween with Actionscript 3.0 in Flash CS4. This video starts out slow with a simple fade-in animation and later gets more complex. Subjects covered in this tutorial include: Tween class, creating tweens, timers, timer events, tween events, using event listeners, functions, and more.
Getting into editorial art department work? They may have you switching the color of a model's clothes, eyes, and/or hair in a number of photographs... so better get schooled on the subject now! In the following video, learn how to transform a brunette to a full blown blonde with a technique that is sure to come in handy in the future.
You can add keywords as metadata to your images to enable you to search images by common characteristics or subject matter and to keep your library organized.
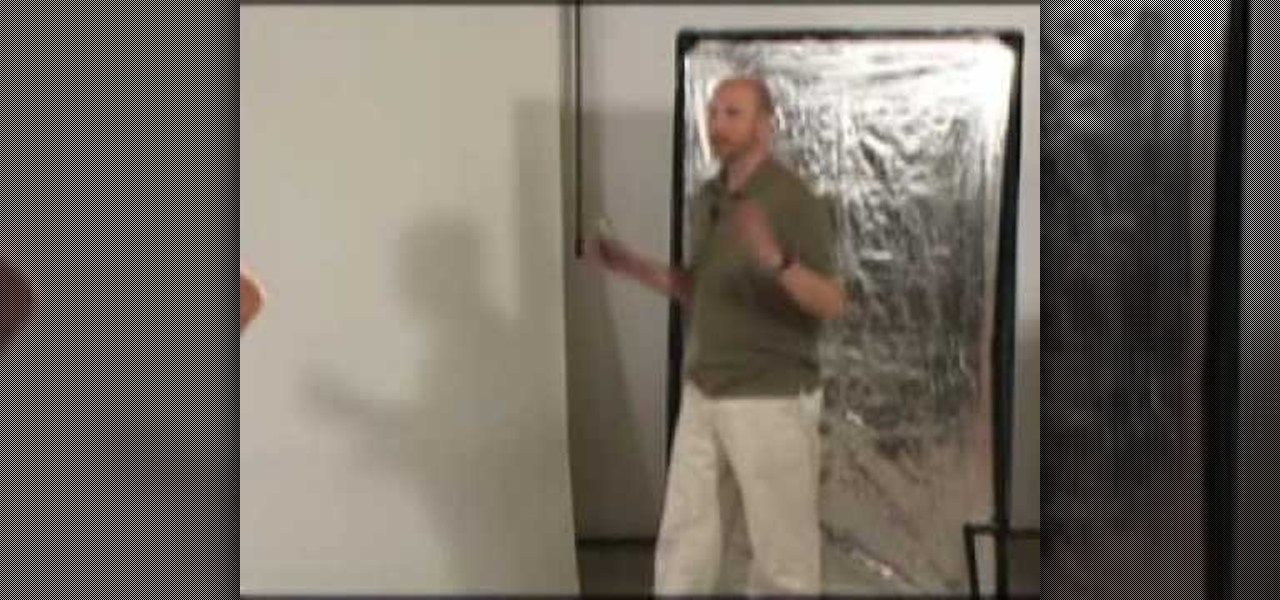
Mark Wallace explains how to set up butterfly lighting (AKA Glamour Lighting; AKA Paramount Lighting)with three light sources. This video shows a nice soft lighting underneath the nose. Used if you want to create a strong powerful look, or if your subject has strong cheekbones or jawline. This type of lighting was used in the filming of "Sin City".
Apple introduced Portrait Mode with the iPhone 7 Plus, a feature which utilized the iPhone's dual cameras to create a shallow depth of field around a subject. This effect replicates the look of DSLR cameras, making your photos look more professional. Apple, of course, carries Portrait Mode to the iPhone X and iPhone 8 Plus in iOS 11, however, with it comes a twist — Portrait Lighting.
In this tutorial, we learn how to use AV mode & High Speed Sync (flash). First, go to AV mode and change the settings to 2.8. When you do this, your shutter speed will blink at 250. To fix this, hit the lightning bolt with the "h" and change it to the high speed setting. Now, your camera will be able to use the high speed shutter with the flash as well. Now, take some shots of your subject in the sun and you should be able to see a huge difference. The background should come in crystal clear ...