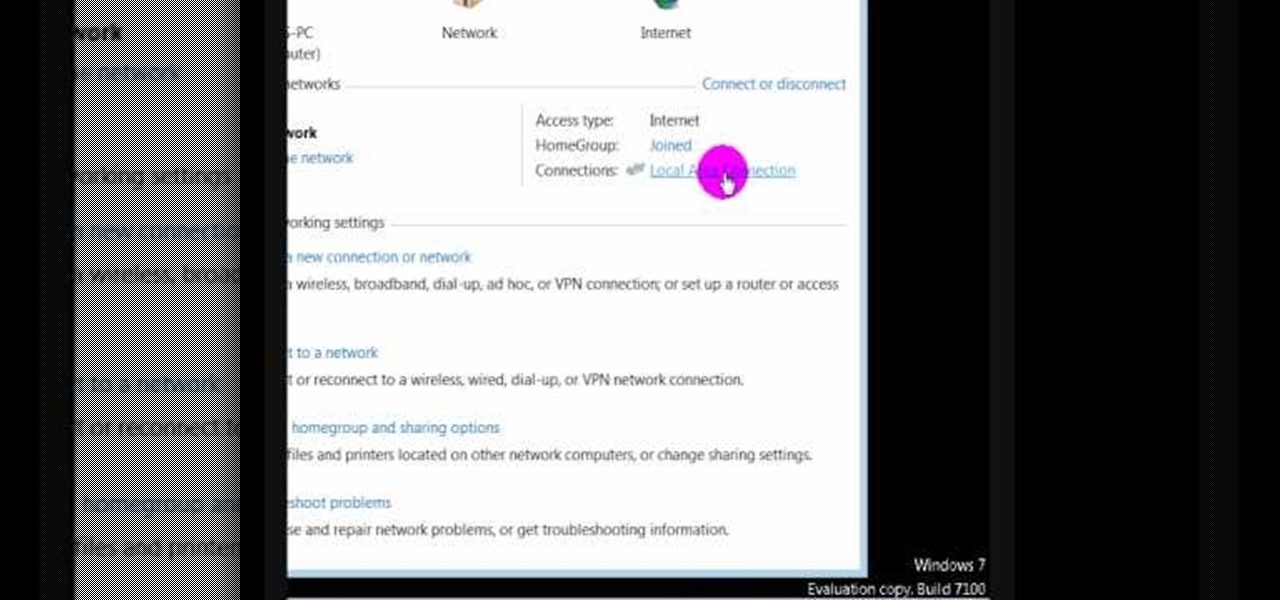
In this video we learn how to find the IP address of your computer. First, go to your desktop and click on the network in the lower right hand corner. The network and sharing center will now pop up on your computer. Click on the link that says "local area connection". Then a new window will pop up, click "details". Once the information comes up you will be able to see your IP address along with a ton of other information about your network. Another way to find your IP address is to go to the ...
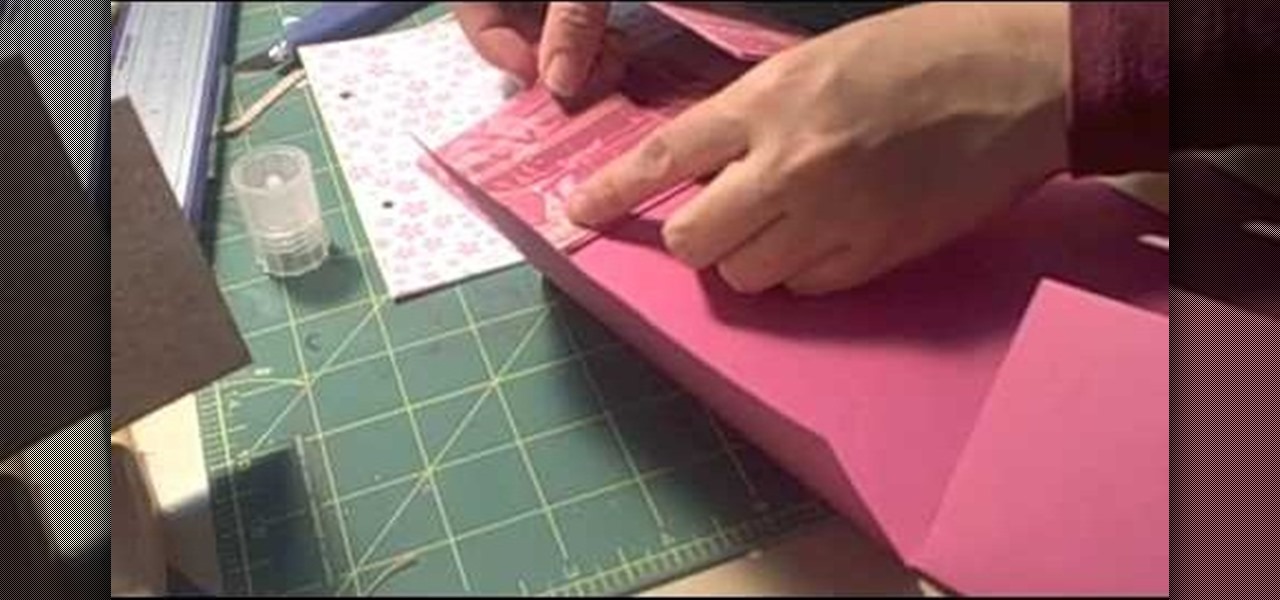
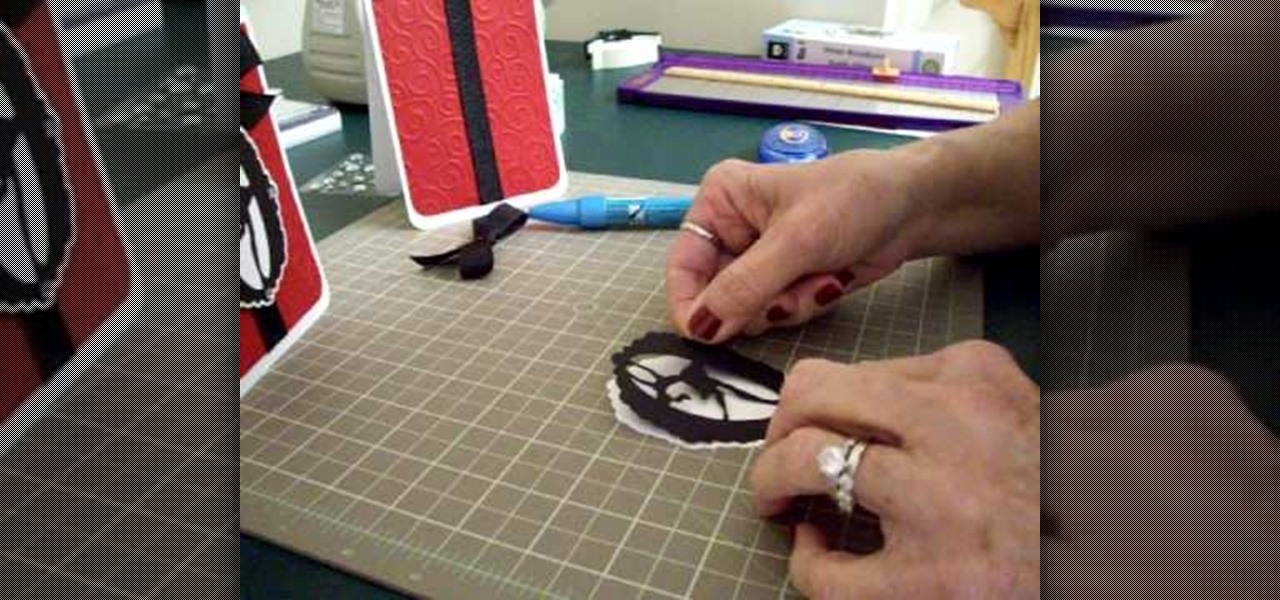
This video tutorial is in the Arts & Crafts category which will show you how to make a flip square album. Take a 12 x 12 inches square cardstock and make a score line at 3 inches on all 4 sides of the paper. Now cut along the score line at the top and bottom of the paper up to the 3 inch line. Next you fold along all the score lines inwards and you have all the flaps ready. Then mark along the edge of the center part of the sheet and punch two holes for tying the album as shown in the video. ...
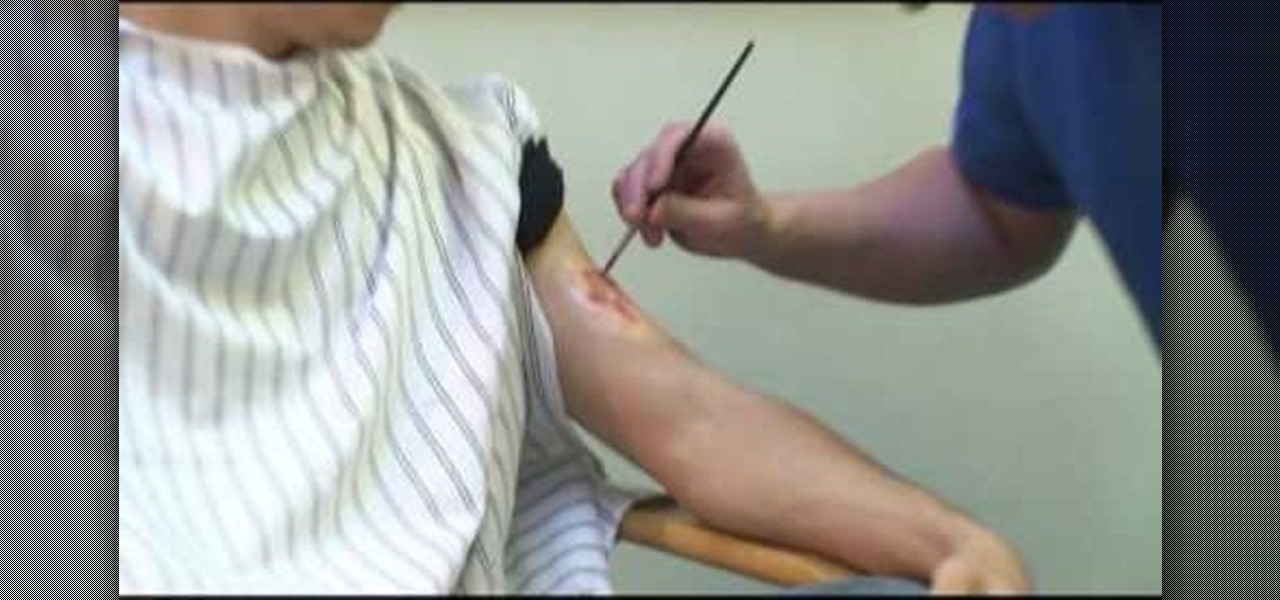
In this tutorial, we learn how to apply injury makeup with Emmy winner Brad Look. First, clean the area with water, then use glue and powder to apply the surface of the injury. After this, use more makeup to cover up the piece on the skin and blend the edges into the skin so they mix in completely. In the middle, add in some reds, purples, and blacks to create a realistic looking injury. Make sure there are textures and highlights on the would to make it look more real. Make the injury radiat...

In this tutorial, we learn how to draw Ino Yamanaka. Start off by drawing the head, drawing lines in the center to use as reference points. After this, draw the rest of the body, including the hands, torso, and neck. Now start to draw in all of the details. Draw the eyes evenly apart, then add in frown lines, a mouth, eyebrows, and any other details of the face to make it complete. Next, start to erase the reference lines and draw in the hair of the character. Draw around your basic outline t...

In this tutorial, we learn how to draw Rock Lee. First draw a circle for the head, making a chin underneath and using lines to reference where the facial features will go. After this, draw eyes that are slightly aligned to the left hand side of the face. The right eye should be larger than the left, both off center. Then, draw two dots for the nose and a "u" shape for the mouth. After this, draw a larger circle around the head and then draw in angry eyebrows above the eyes. Start to erase the...
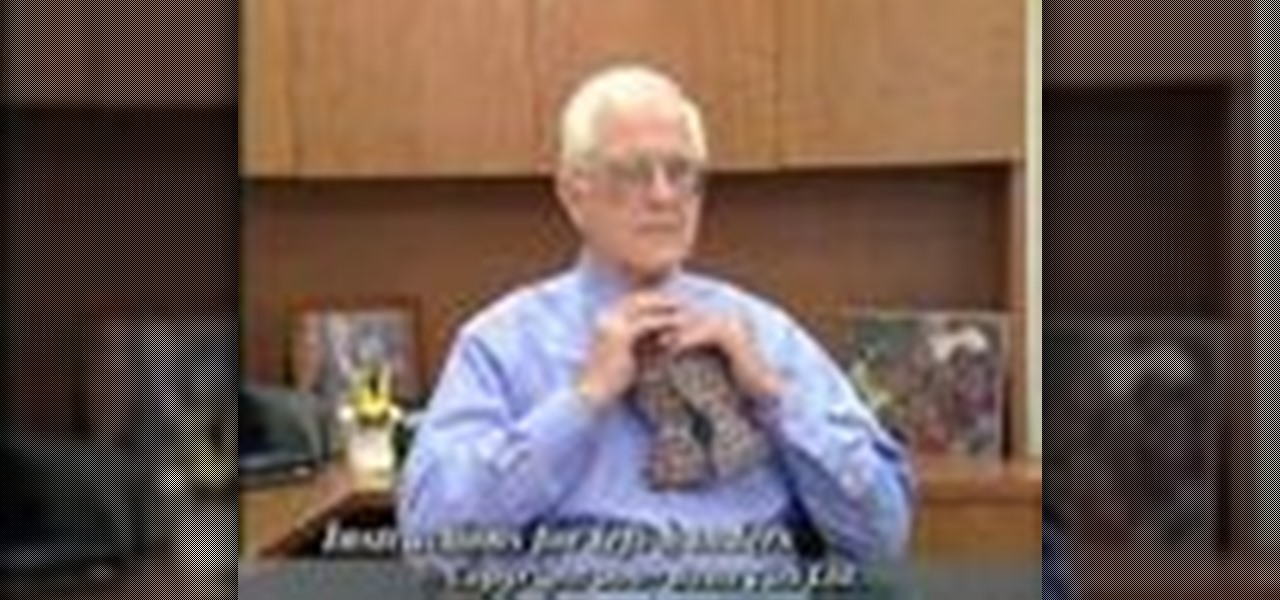
In this tutorial, we learn how to tie a bowtie left- handed. First, put the tie around your neck and adjust the two tails. The right should hang 1" lower than the left. Then, cross the longer over the shorter and push up over and through to make a simple knot. Form a bow with the back bow using your thumbs and fingers. Next, take the front tail and pull it behind the just-made bow to create the center of the full bow. Then, push the new one right through the knot in the opposite direction. Th...

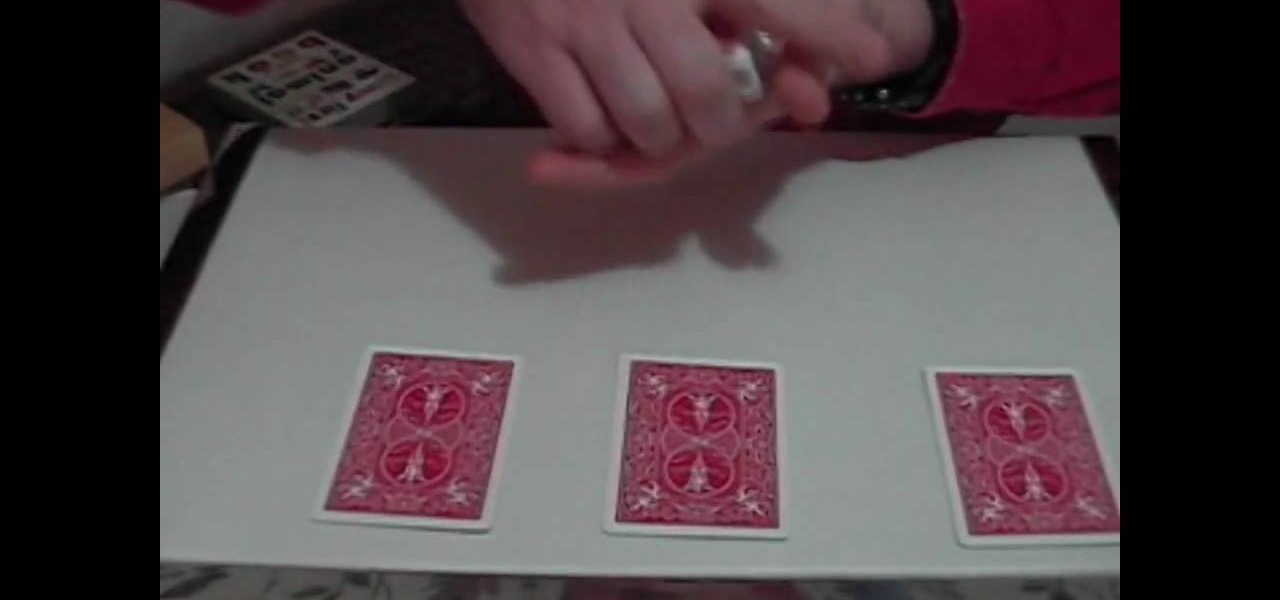
This is a video tutorial in the Magic & Parlor Tricks category where you are going to learn how to do the "Three Aces" card trick. For this trick you need a deck of cards and you shuffle it nicely. Then you flip the deck and reveal the center part of the card and say it is the ace of hearts. The actual card is the 3 of hearts. Place this card face down on the table. You repeat this process and similarly take out a clubs and diamonds card. Then you perform a magic gesture and say all three car...
In this video, we learn how to make a great meatloaf. To make this you will need: salt, cumin, garlic, milk, barbecue sauce, bread crumbs, onion, eggs, and ground beef. Start by mixing all of your dry ingredients together in a separate bowl. After this, take the ground beef and mix in the bread crumbs and eggs to the meat. Use your hands to combine everything together, then add in the dry ingredients and work everything together with your hands. Form this into a loaf shape, then place into a ...
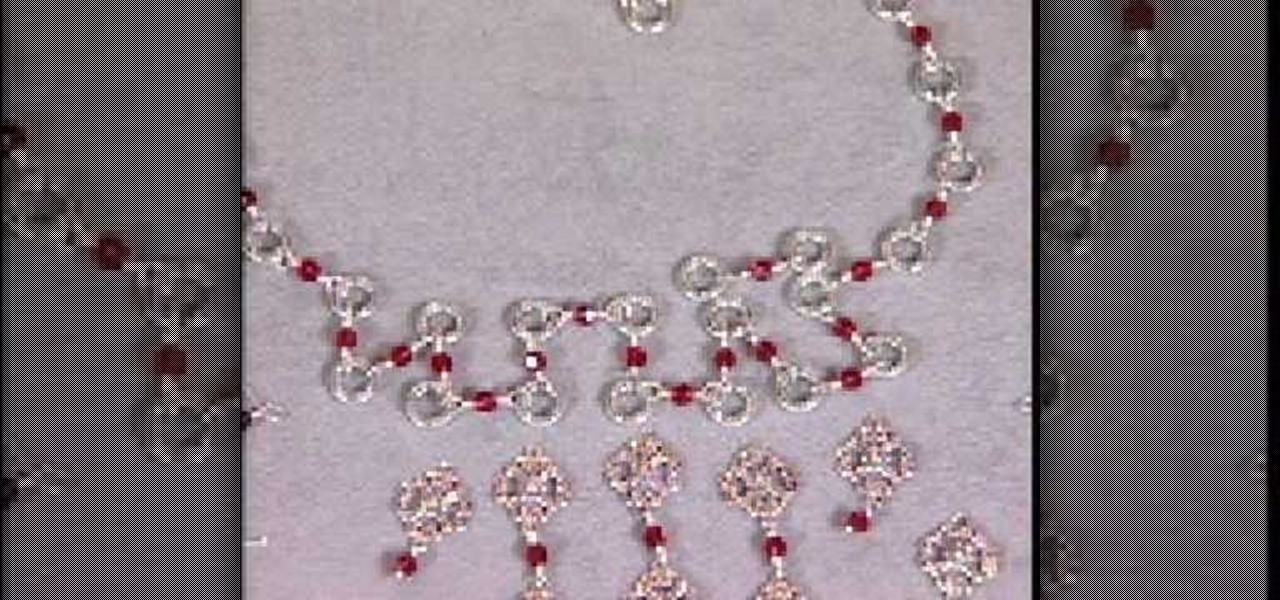
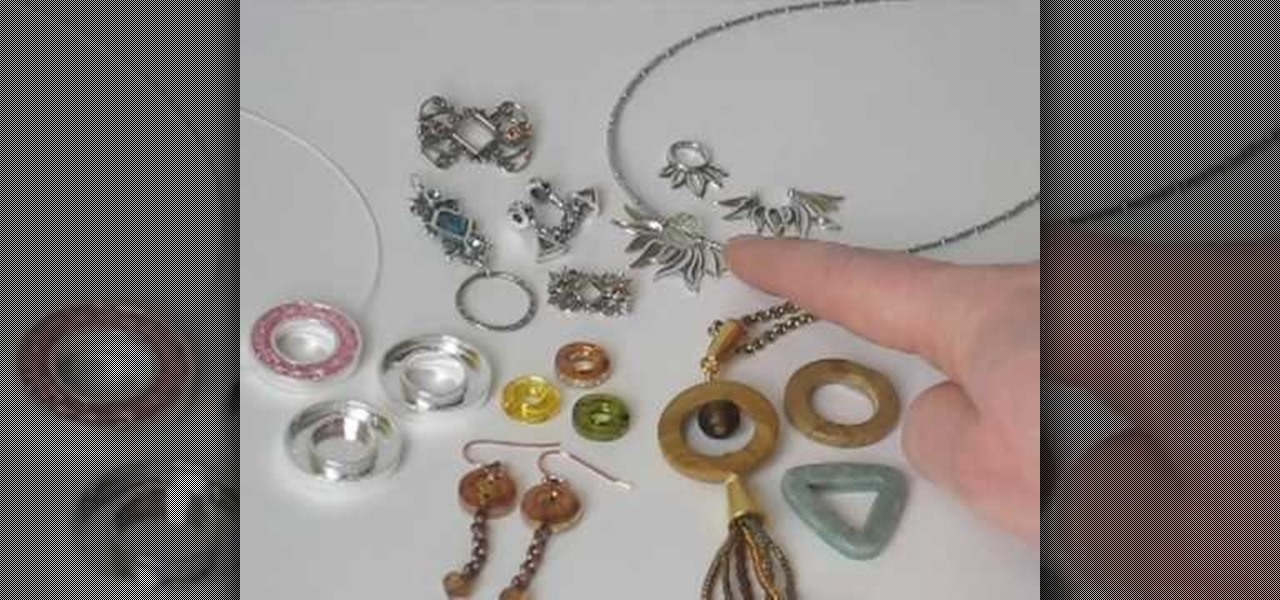
In this tutorial, we learn how to make a silver vintage-style bead necklace. First make sure you have silver wire and glass beads in the color that you prefer. Now, you will string the beads through individual wires and close them so these can be applied to the center of the necklace. This will create a long chandelier like quality on the necklace. After this, you will create the base of the necklace with the same color beads and silver. You will want to follow the pattern of creating silver ...
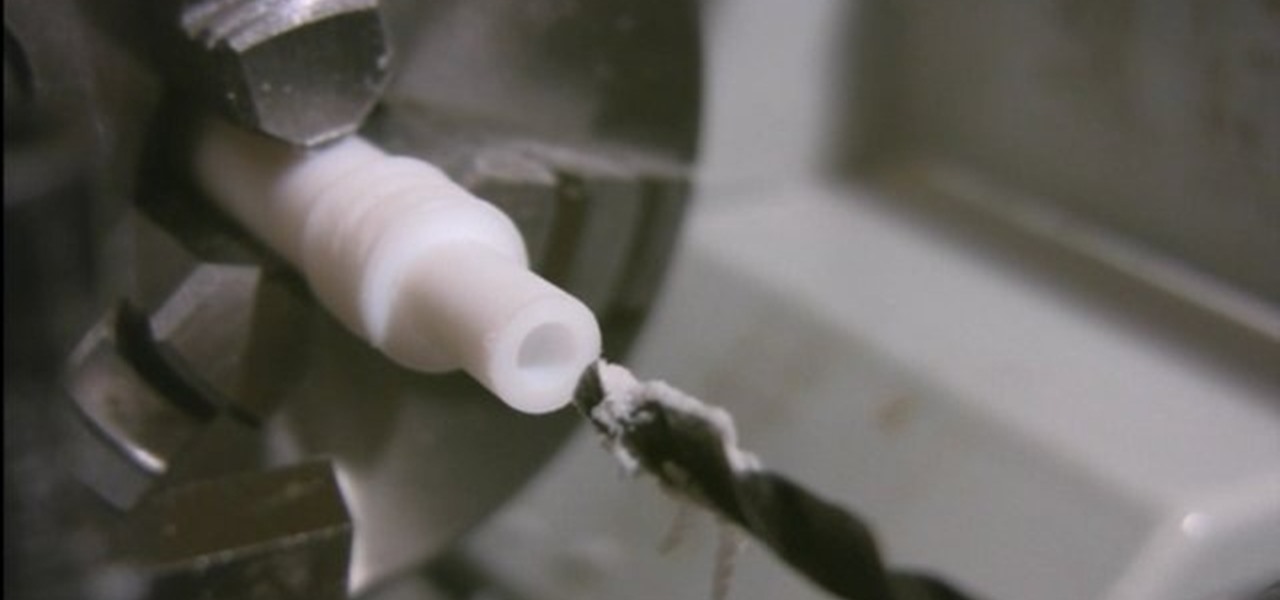
This video will show you how to create wheels for a fingerboard using a lathe. First, you should take a plastic tube and insert it into your lathe, using various drill pieces to cut down the plastic tube to the correct size. After this has been done, a drill which is attached to the lathe and adjusted to go straight through the tube can be made to create a hole through the center of the tube. You can then insert a small piece of metal into the tube in order to create the holder which will att...
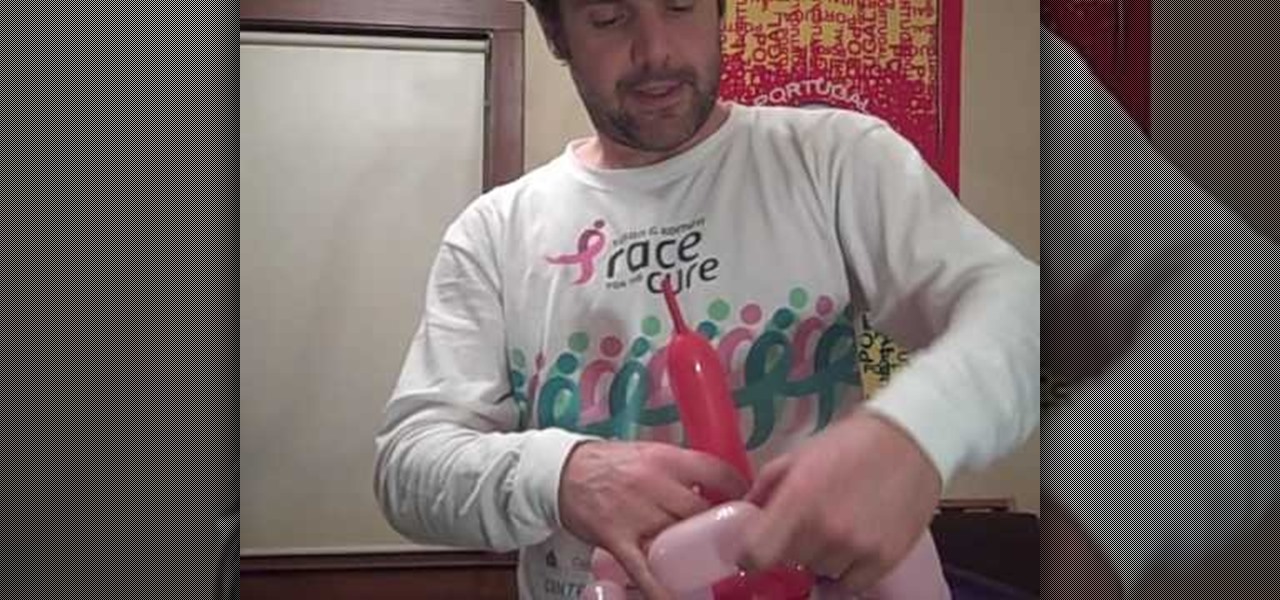
Balloons come in various shapes and sizes and if used properly, can be combined to create complex shapes that mimic real life objects. Choosing the correct color of balloons also adds to the realism in the completed object.
With all the stuff we have to do these days and our constant connectivity to the internet, it's no wonder most of us have a hard time taking a break. And no, by break we don't mean checking your Facebook and updating your satus.
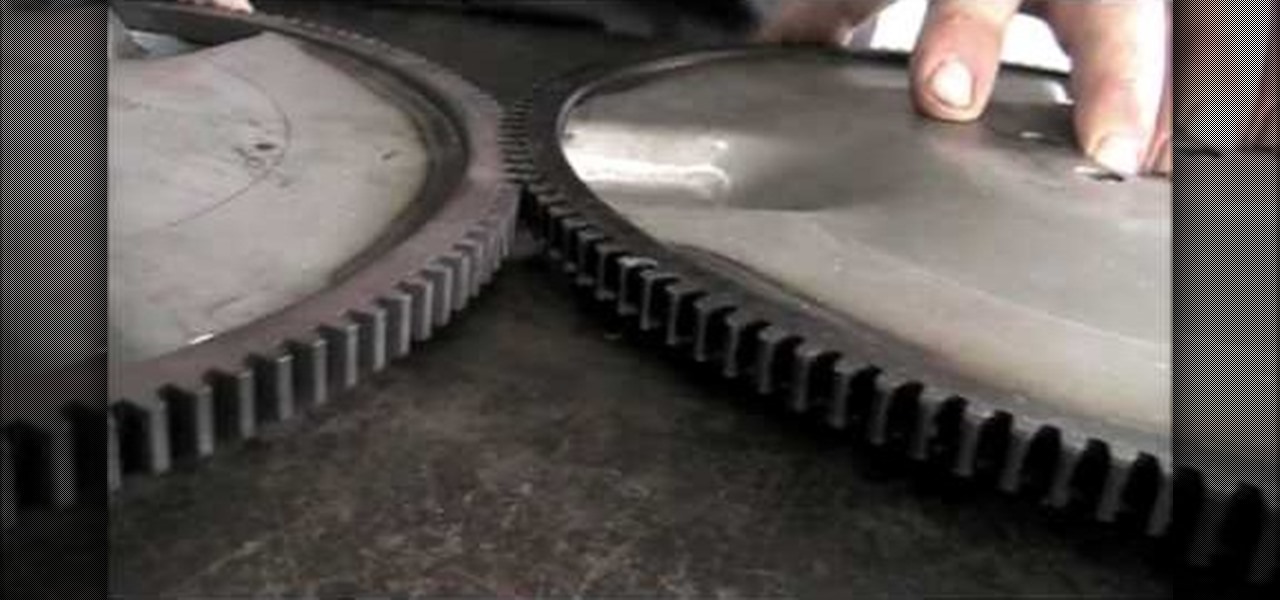
When replacing flywheels on an LLV (Long Life Vehicle), which is a postal truck used by the United States Postal Service (USPS) and made by Grumman, always look for the quality of the new flywheels ordered. Just because they're new doesn't mean they're good. The ring gear can sometimes be welded off-center to the plate, which will make the starter teeth grind the new flywheel. If you don't want to replace the fly wheel a second time, watch this video to see how to spot check them.
In order to paint a geometric, tribal, ornamental design for your nails, you will need the following: base coat nail polish, hot pink nail polish, a gold/brass/copper nail polish, a dark nail polish, and a clear top coat or a shimmer.
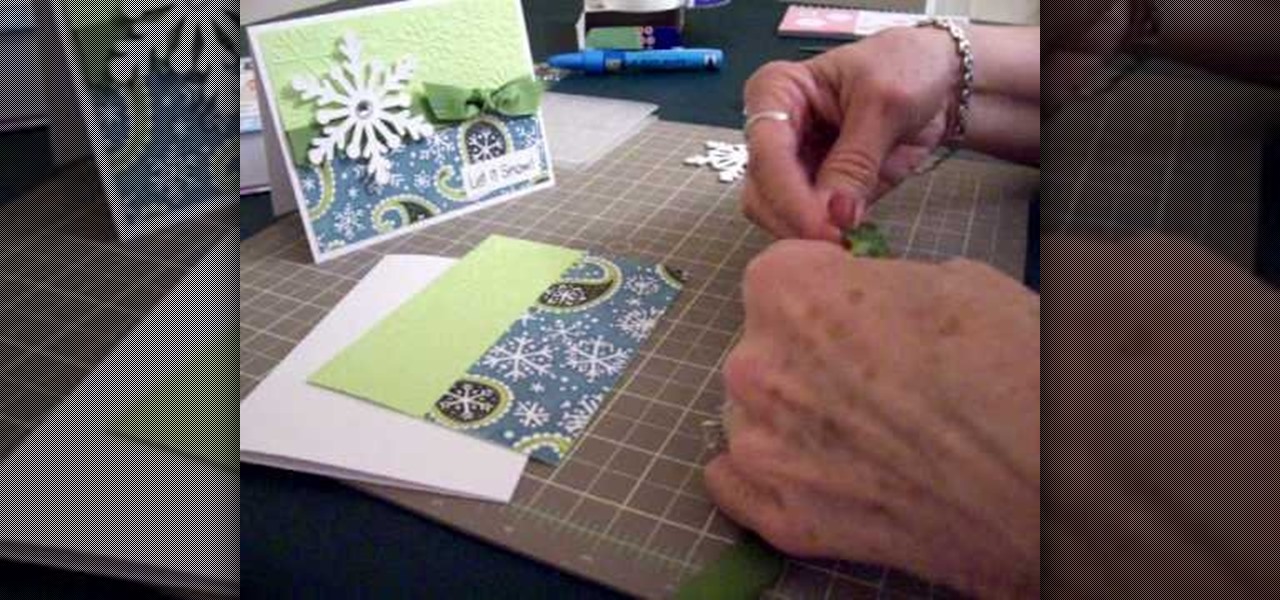
In this video, we learn how to make a snowflake card using Cricut Winter Woodland. You can find the snowflake on page 35 of the manual, then cut it at 3.5", cutting it four times to make it thick and chunky. The top of the card can be run through the Cuttlebug with a snowflake design, and the bottom can have a holiday snowflake print. The sentiment should say "let it snow" and you can place a green bow in the center next to the thick snowflake you make. You can write what you wish on the insi...
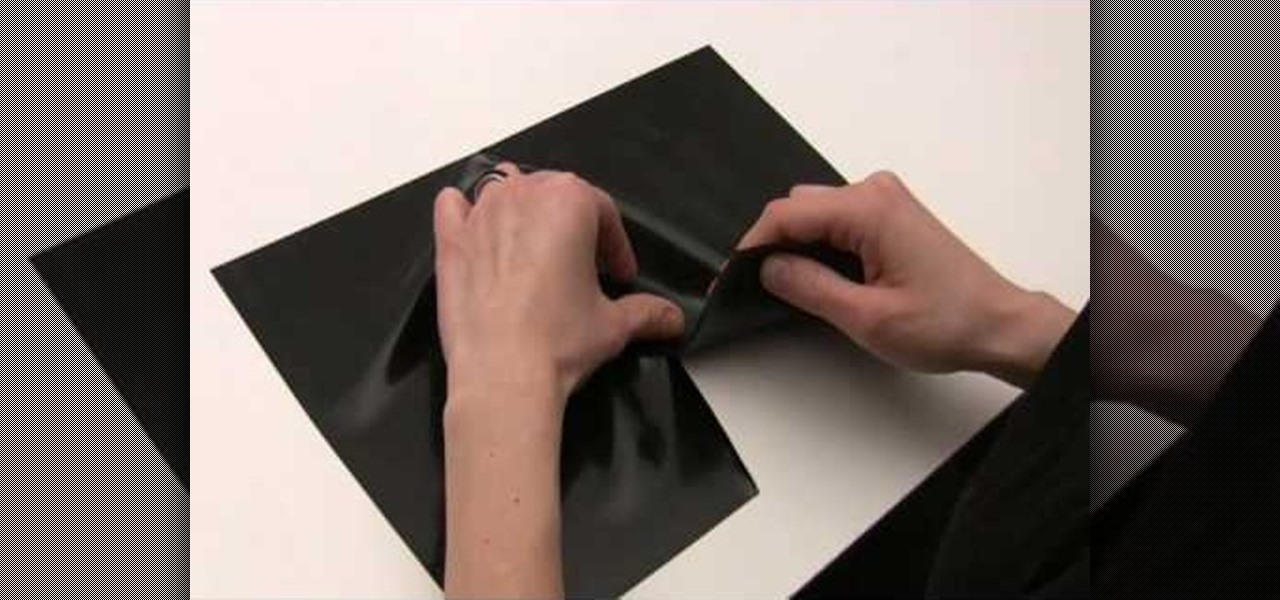
In this tutorial, we learn how to glue straight and curved latex seams. First, press each piece of latex down so it's just touching in the middle. After this, use your finger to press down on the middle, then take a roller and roll over the middle until it's perfectly straight. Now, stretch out the latex to make sure that both sides are stuck together. To glue curved latex seams, place the pieces together slowly, pushing your finger down in the center as you go to make a curved effect. Once y...
In this Spirituality video tutorial you will learn how to palm read with Peter John. If the heart line, the first line on top of the palm, is well formed and curves around towards the center of the first finger, the person is quite good and balanced. If the head line is quite long along the palm and bends towards the lower part of the palm, the person is more practical and mathematical. When you see more than one line on the mount of Apollo or the mount of Sun, the person could take more than...
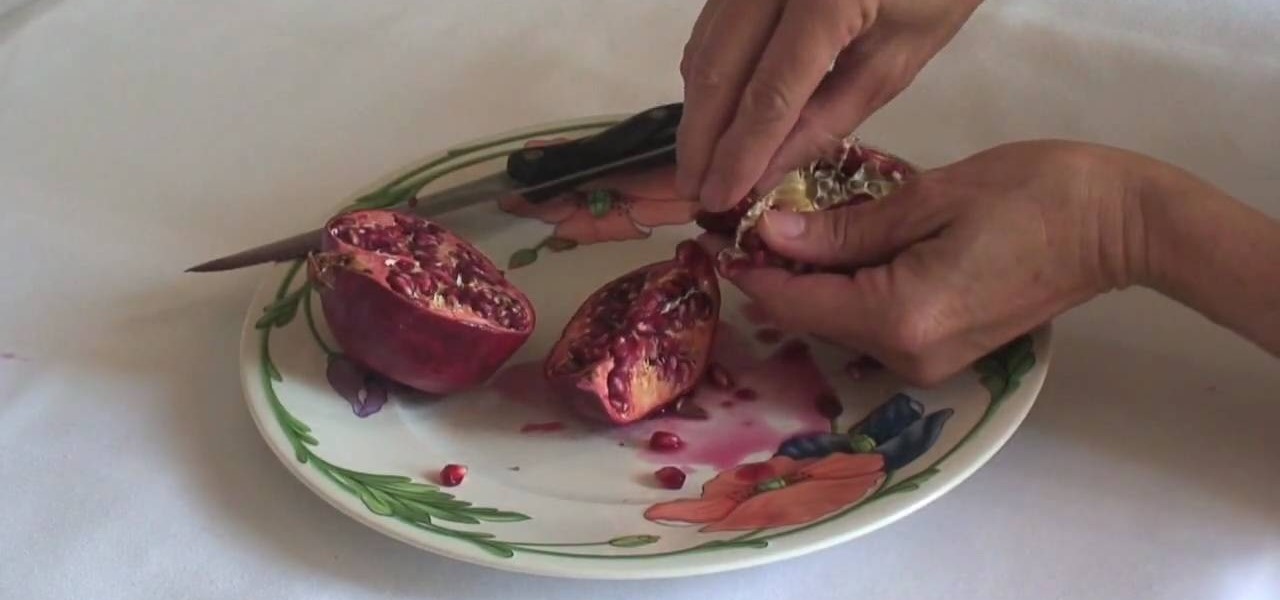
In this tutorial, we learn how to prepare a pomegranate for eating. These are very messy fruits, so make sure you place it on a surface that has a plate underneath it. Take a sharp knife and cut down the center of the pomegranate until you reach the bottom. Now, quarter the halves and push the skin back so the seeds are exposed. As you do this, you can pick the seeds off and eat them, or place into a bowl to eat later on. When finished, enjoy eating these delicious seeds with your favorite fl...
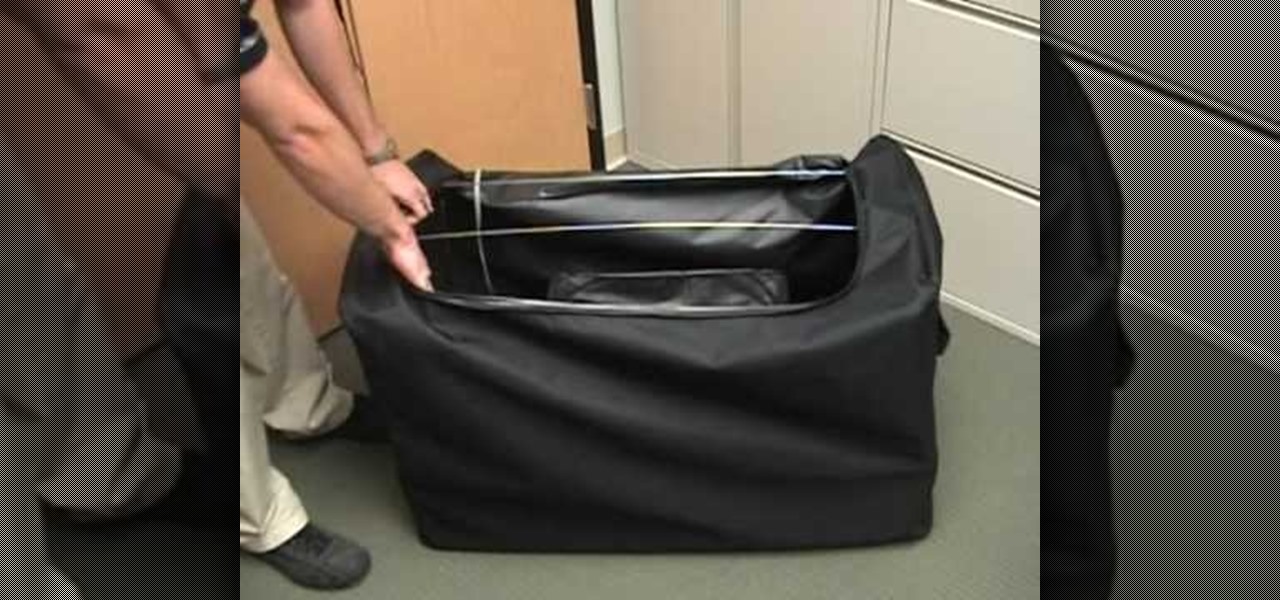
A Pack Tite Unit is used to treat items that may be infested with bed bugs. It can be used to treat suitcases and other items that can't be easily washed in hot water. Be careful not to allow any items to touch the heating unit. Place your item in the center of the rack. Place the metal safety rack on top of your item. There are also side racks available. Zip it closed. Make sure it is zipped as far as it will go. This will kill bed bugs and eggs, because it will heat items up to 140 degrees....
Make a simple, elegant card using Winter Woodland. Go to page 50 of manual. Cut tag and skater at 3 inches. Use 8 1/2 x 11 cardstock and cut vertically to 4 1/4 inch. Fold from top to bottom. Round corners of cardstock and red matte. Make red matte 4x5. Run red matte through cutter bug using swirls folder. Insert between two plates and run through. Place black grosgrain ribbon down the center. Stick to front of card. Glue skater to background. Place square crystals around skater. Create and p...
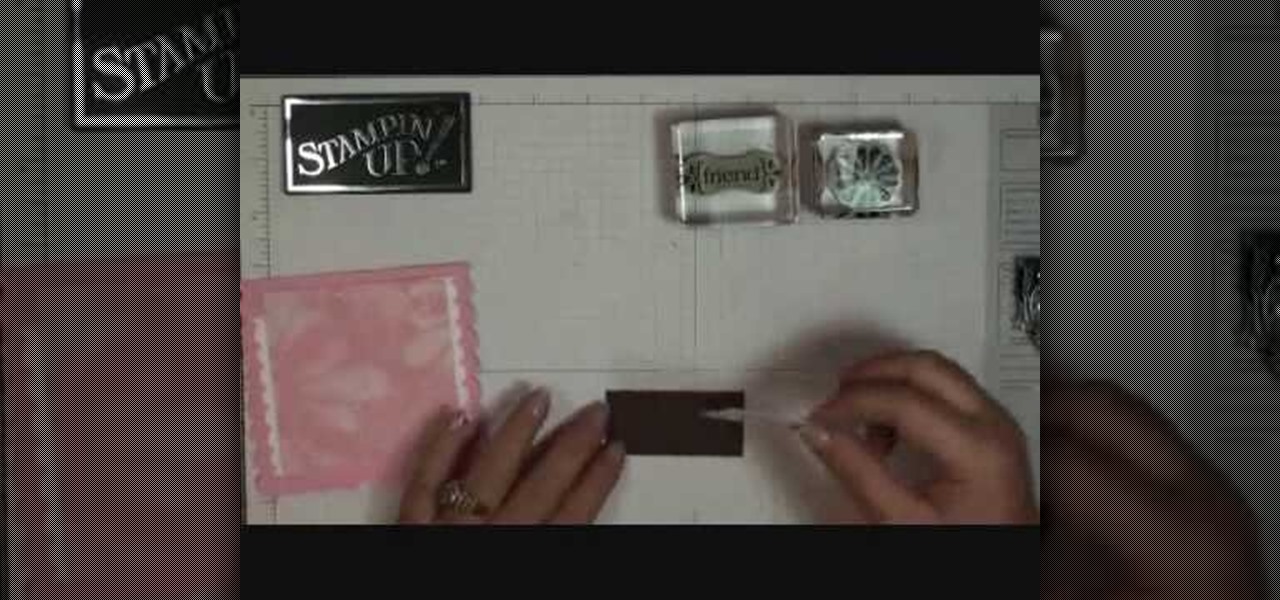
In order to make a scallop square card with Stampin' Up, you will need the following: a big shot, a large scallop square # 115950 Bigz Clear die, stamps, adhesive, design paper, mini glue dots, decorative ornaments, and card stock.
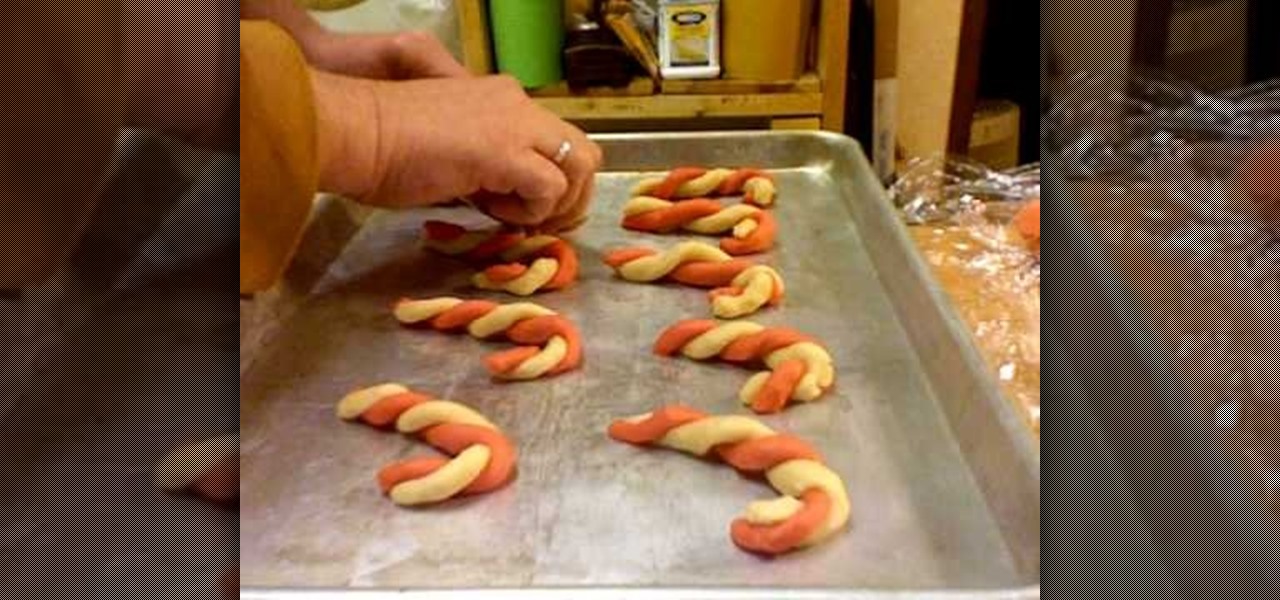
It's that time of year again! The air is a whole lot nipper, lights dance around sidewalks as you drive past shopping centers, and the scent of warm gingerbread and sweet cookies fills your nostrils when you enter your home. That's right, it's Christmas, and what better way to celebrate this festive time of year than with cookie making?
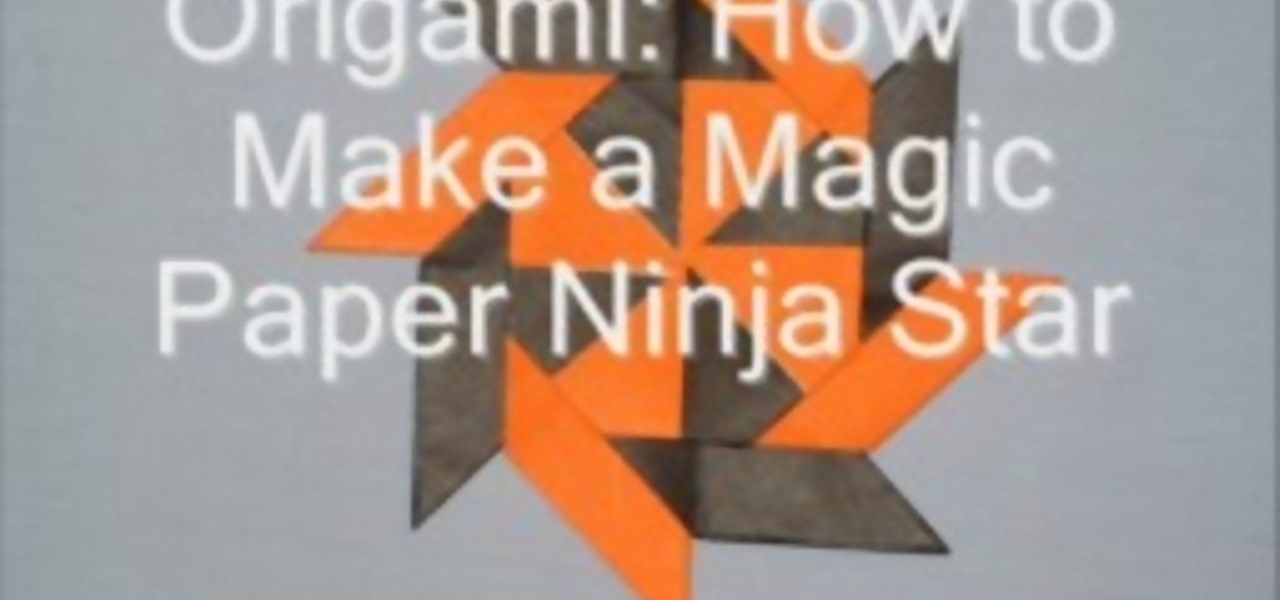
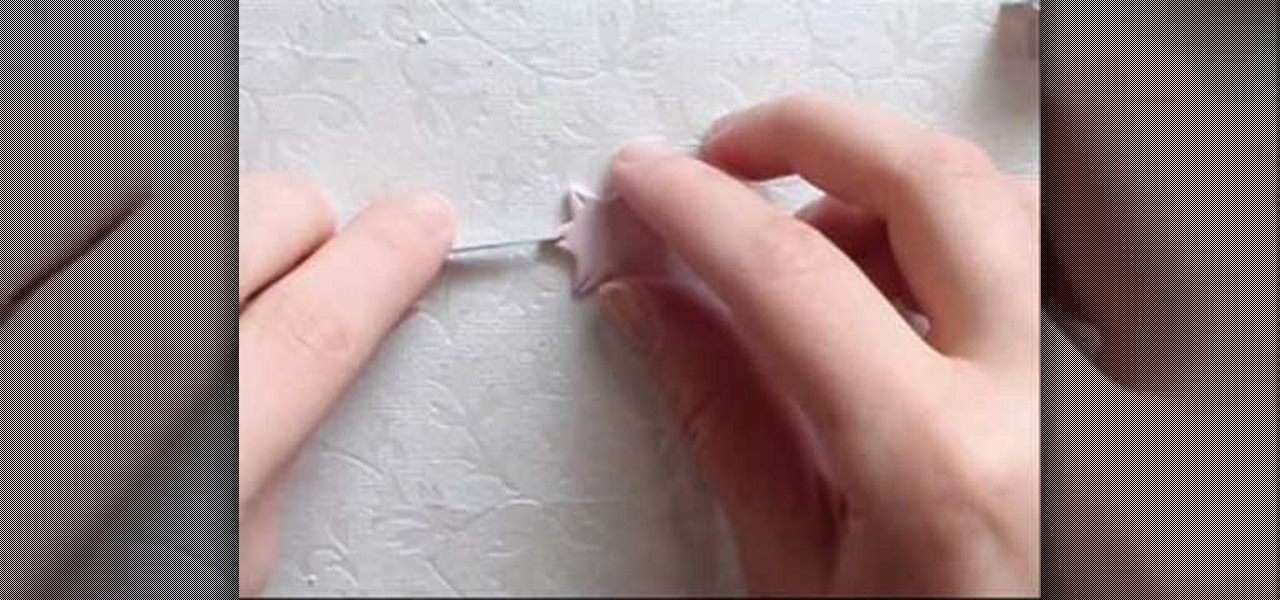
This video tutorial is in the Arts & Crafts category where you will learn how to make a magic paper ninja star. For this you will need 8 sheets of square paper, all of the same size. Fold one sheet in half, open it up and fold both corners of one edge inwards along the centerline. Now fold the whole sheet in half inwards. Then fold the lower part in a triangular pattern, make a crease and open up the sheet. Fold the lower part inwards from the center and collapse the sheet over the fold. Do t...
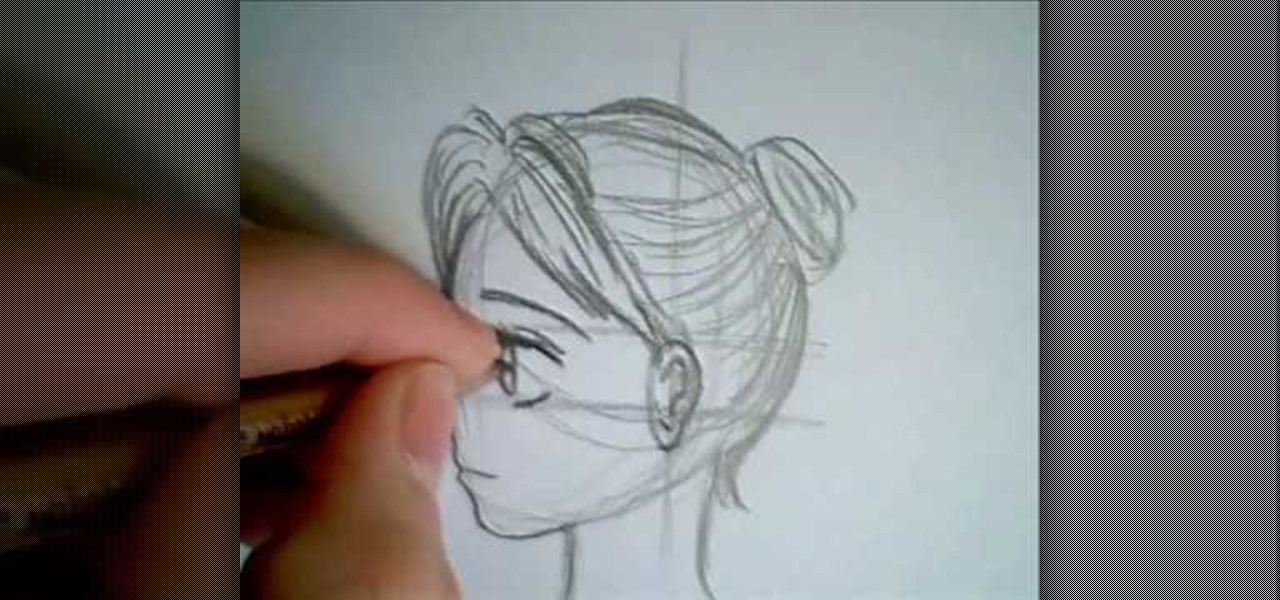
In this video, we learn how to draw a manga face sideways. start by drawing a round circle with a light pencil. After this, draw a chin that is from the side view. Next, add on the nose and make the chin look more prominent, like you are seeing the profile of the face. After this, draw on the ear to the center of the face, then start to add in further details. Make the eye and add shading by the nose to make it appear as though there's another eye. Add in eyelashes, then start to add in hair ...
In this video, we learn to heat shrink a rear window tint. First, prep your window using soapy water. Next, rinse with car with a soapy cloth and spread on the lather. After this, let it dry and cut the film around the pattern. Next, create an anchor by dampening in an 'h' shape. Next, lay the window film down with the liner side up. Anchor the film onto the window along the 'h' shape. Make sure your fingers are vertical, then heat the film until the lines react. Then, smooth on with the hand...
In this video, we learn how to make a "puppy love" box for Valentine's Day. To key to creating this box is a thin strip of paper that has teeth (pointy spikes) at the end of this. Turn this into a heart shape, then tape it around the heart to make a perfect box. It will be easier to find your center and cold it in half, then place it on the box. Glue the heart onto a black card stock to situate it, then tie a cute ribbon along the edge of the heart. This is very cute and a great idea for Vale...
In this video tutorial, viewers learn how to draw a chibi-style animation face. This task is very fast, easy and simple to do. Begin by drawing box-like face with any type of angle, depending on the character's emotion. Then add an ear. Now draw the eye. Make sure that the eyes are exaggerated and over-sized. Then draw a small nose in the center of the face and add a mouth. Add detail to the mouth such as: teeth, tongue and a chin. Finally, add the eyebrows and hair. This video will benefit t...
Clinton Kelly teaches us how to prepare an easy radish appetizer in this tutorial. First, take a radish and cut off both ends. Next, scoop out a little bit of the center of the radish going in a circular motion with a pairing knife. Now, take softened butter and place it into a plastic bag and push into the corner. Snip off the corner of the bag, then fill the middle of the radish with butter and sprinkle with kosher salt. Next, place this on a platter with a bed of kosher salt on the bottom ...
In this tutorial, we learn how to text message on the Casio G'zOne Brigade. First, press the center to unlock the phone. After this, hit the message button and then type in what you want to say. You can type on the outside of the phone or you can open it up on the inside. After this, choose who you want to send the text message to. When you are ready to text, press the send button and then your message will be transmitted to the recipient. After this, you will be able to text to anyone whethe...
This video shows viewers how to make a paper airplane. You should begin with an 8.5 x 11 piece of paper and fold one corner to the opposite side, making a triangle. This should be repeated on the other side, so that a cross is formed on your paper. Folding down opposite sides of the creases, you should have a triangular flap on your paper. Fold both sides of the flap upwards and then flip the paper over. You should then take the tip of the paper and fold backwards. Fold the paper in half so t...
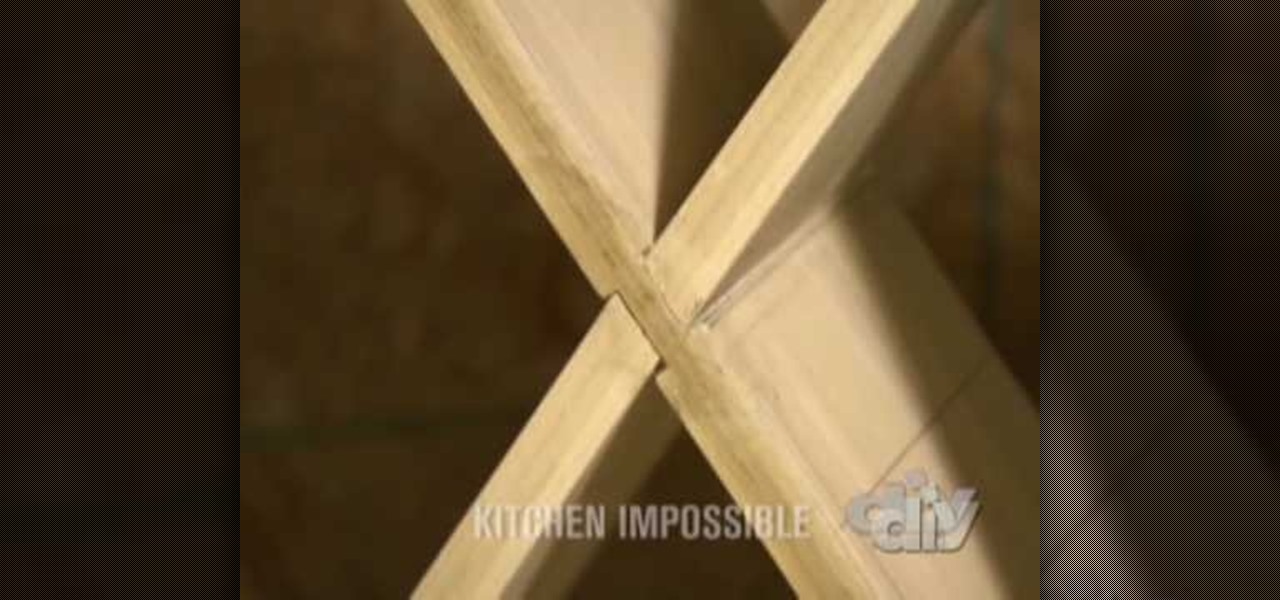
In this tutorial, we learn how to make a poplar wine rack. First, cut the top, bottom, and sides of the rack. Then, use a router to cut out the center of it. Now, assemble the rack together by using wood glue. After this, measure the length of the diagonals, then add in pieces of wood that are criss crossed throughout the box. Next, keep these in place with some wood glue and then place wine bottle on the inside of them. This will make a great wine rack for any home and you can paint it as we...
In order to make your own envelopes, you will need a piece of paper, glue, scissors, and optional decorating tools/stickers.
Bead frames are pretty simple to understand. Rather than simply stringing beads onto a pendant or necklace, you can attach them to bead frames, which come in all shapes and varieties, to make a novel design that can take advantage of negative space. It goes without saying that elaborate bead frames make the entire design more ornamental, whereas a simple round wooden bead base helps put the spotlight on the bead in the center for a subtle glamour.
Cherry blossoms aren't just special because they're Bath and Body Works' best-selling scent of all time. No, in addition to their delicate floral smell, cherry blossoms are special because they are the first flower buds to open in spring. Spring officially stars when you see the cherry blossom trees bursting into color, and what a wonderful way to celebrate the new season!
This video tutorial is in the Home & Garden category where you will learn how to install a kitchen backsplash with glass tile accents. A tile can be attached to walls with the help of mastic. It doesn't require mixing and it is stronger than mortar. Before applying mastic, sand the wall surface lightly. Don't sand away the paint. Clean the surface with damp cloth. Layout the tile pattern below the space and measure the dimensions. Do the marking on the wall of the centerline. Apply a thin lay...
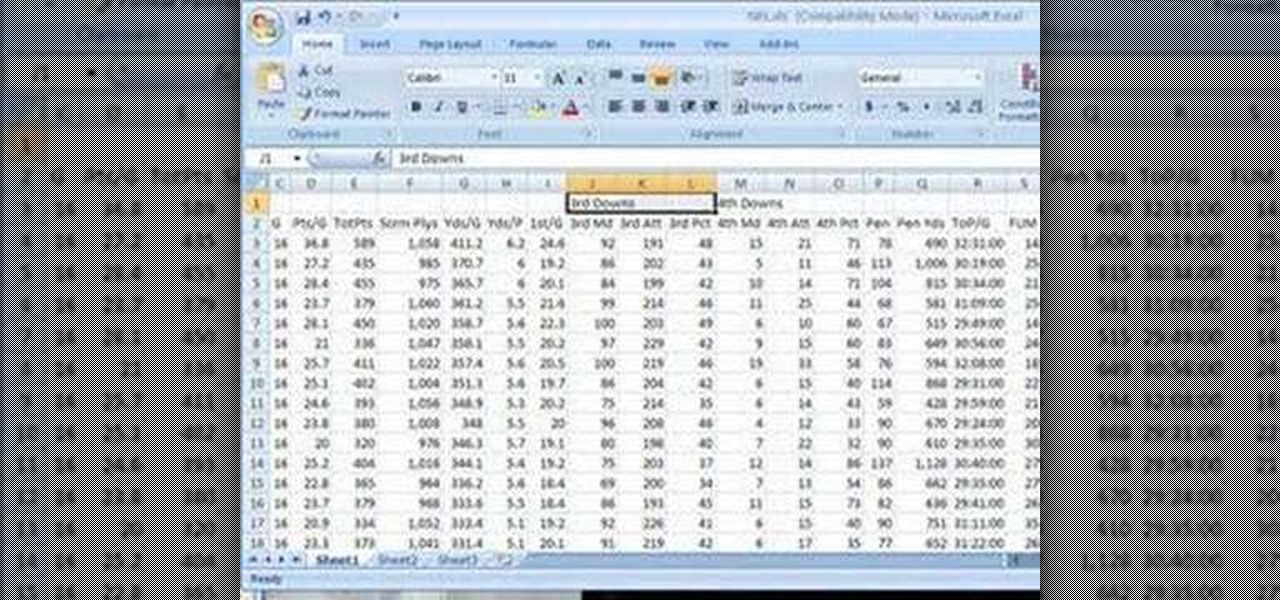
In this software video tutorial you will learn how to merge and unmerge cells in Excel. A cell in an Excel spread sheet is assigned a row and a column number. You will mostly need to merge cells when you are trying to create headers that span across two or more cells. For this select the cells that you want to merge by clicking and holding down the left mouse key on the first cell and then dragging it across the other cells that you want to merge. Then go to the 'home' tab, click on 'alignmen...
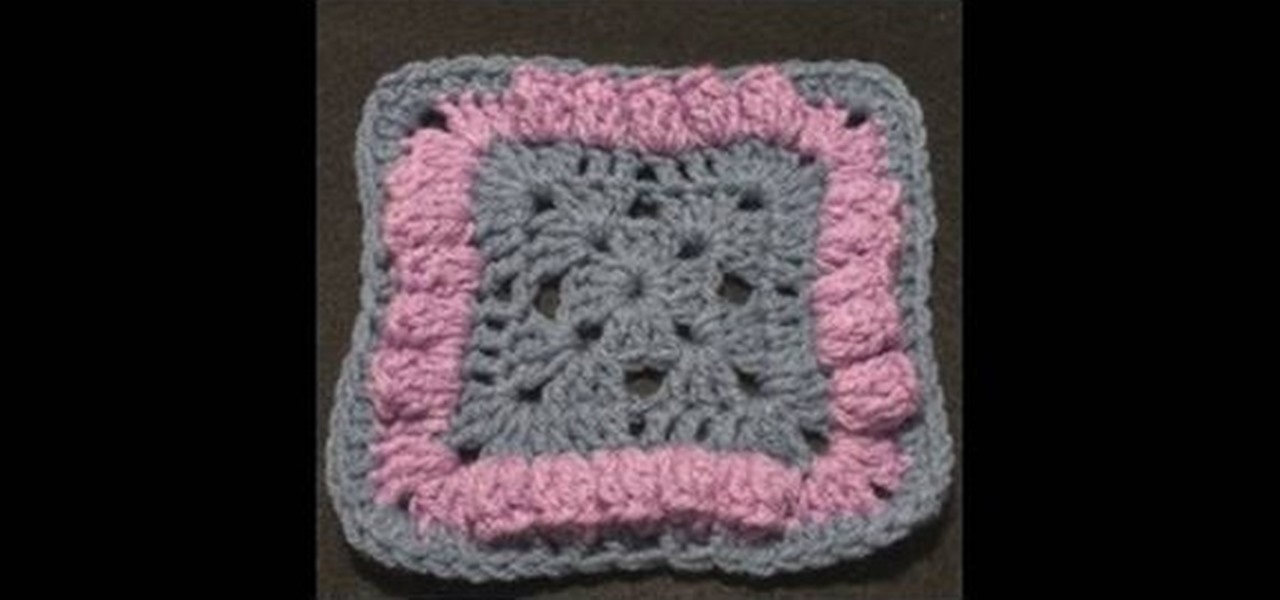
In this tutorial, we learn how to crochet a Bellevue granny square. Start by adding the slipknot to the crochet hook. Work a chain of four and join with the beginning chain. The first two rounds are going to be a traditional granny square. Chain, pull up, then work three double crochets. Continue doing this for all of them. Chain two, then work three more double crochets. Work the last three double crochets and you will have the base of the granny square complete. Continue doing this, but end...
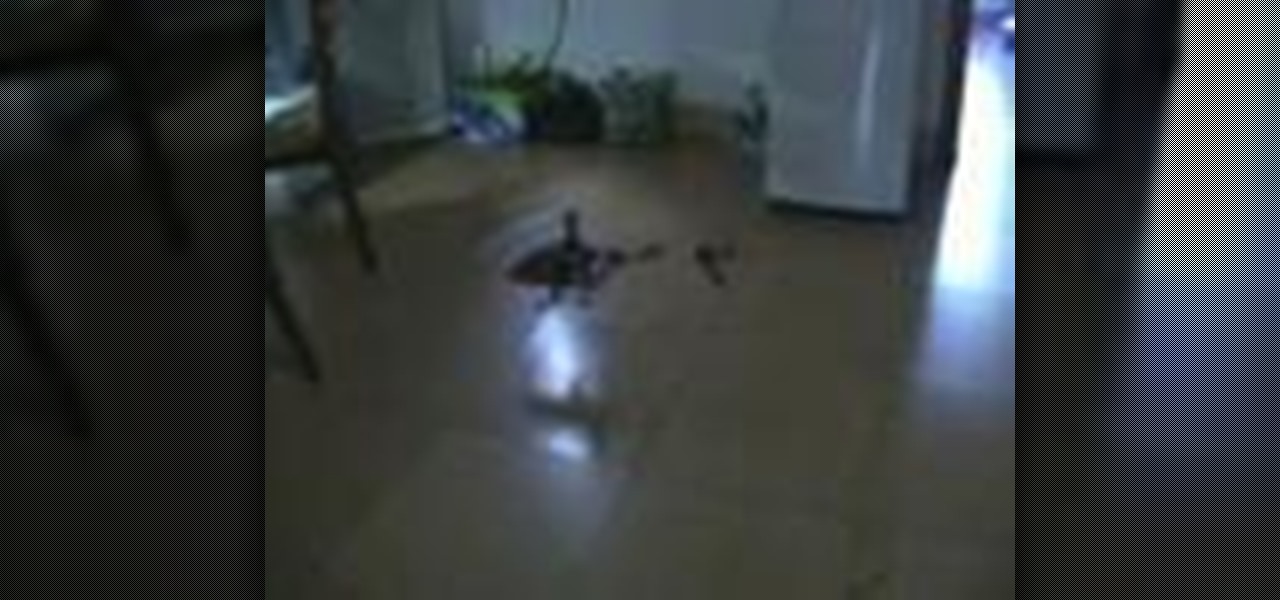
In this video, we learned how to repair a crashed 3D helicopter. If you have a crashed helicopter that isn't flying or is flying off center, repair it. You will have to have some knowledge of how to repair helicopters, and know which part is broken. Repair the parts that are broken and when you are done you will need to replace all the parts that you previously removed. After you are done with this, you will be able to turn the helicopter back on and test its flying abilities. If the helicopt...
In this tutorial, we learn how to insert pictures and format text in Fusion Essentials. Start by selecting your image and then clicking inside the text box. Select an image, then it will appear in the text box. From here, click on the picture and go to the alignment section. Choose how you want the text arranged around the image. You can justify it to the left, center, and right. You can also wrap the text around the image. Preview the page after you align it, then see if it allows the page t...
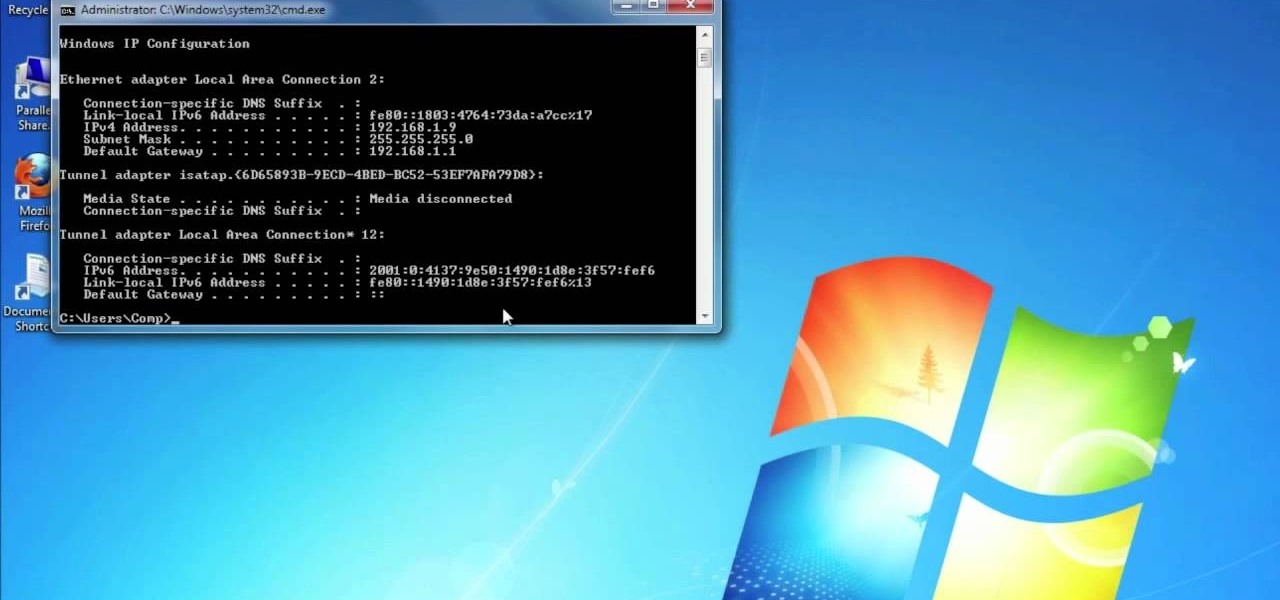
In this video tutorial, viewers learn how to find their I.P address in Windows 7 and Vista. Begin by clicking on the Start menu. Then type "cmd" into the search bar and press Enter. When the command prompt window opens, type in "ipconfig" and press the Enter button. Now search through the list and find a line that says "I.P address" or "IPv4 address". The numbers will be divided by periods. Another way is to open Control Panel and select Network and Sharing Center. Then click on your local ar...