In this video, we learn how to make beats using FL Studio. First, load in the different beats that you want and then find where the tempo is at. Take the tempo down to around 90 and then find the different editing tools you have. Use the editing tools to change the sounds that you load into the program and then change when they play according to when you load them. You can change the tempo, bass, and volume for each of the different instruments, depending on what you want to achieve. When don...

In this video, we learn how to create a melody around a vocal in FL Studio. Start to play around with the melody to the song and change the tempo to how fast you want it. Then, move around different sections to create the exact sound that you want. Finish editing all of the bars on the song until you have it to a sound that you like. Use the keys on the left hand side of the screen to help show you where you are editing the keys at. Then, use the different filters to make the song sound how y...
In this tutorial, we learn how to make an emotional anime beat in Fruity Loops. Start out by playing the different keys on the side of the screen where the keyboard is. After you have found a combination of keys that you like, start to add in different effects to this. You can also use a template that has an emotional beat already created on it. Use piano, drum, tempo, and anything else to change the sound of the beat as you would like it. Edit small parts of the beat as you continue through ...
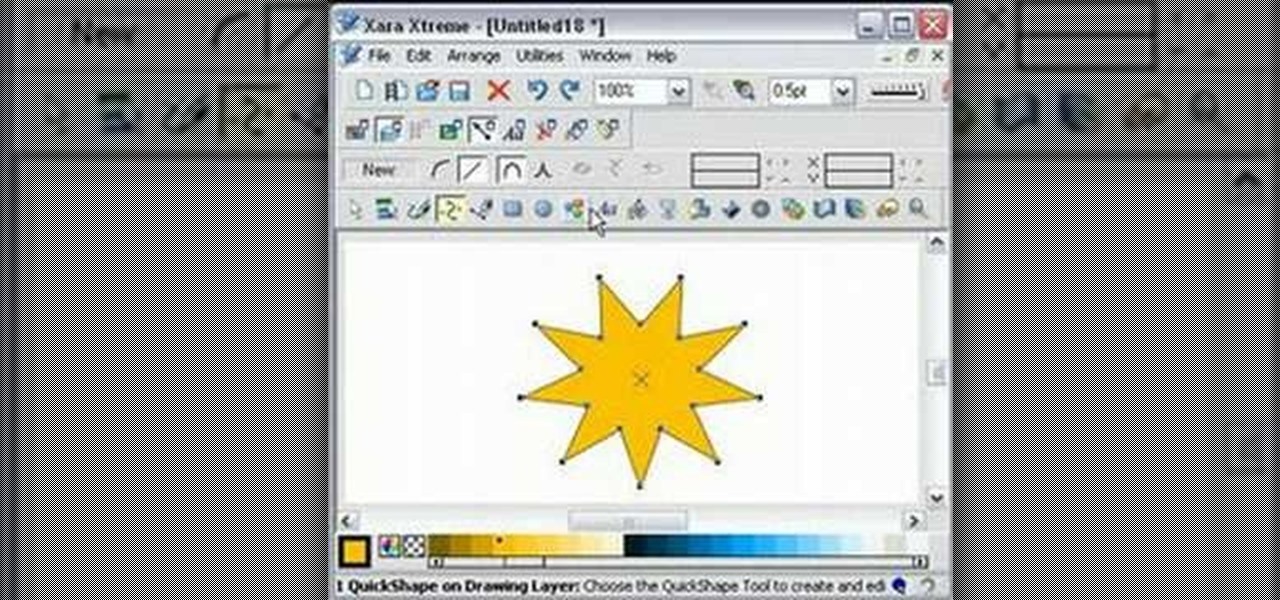
In this video, we learn how to edit quick shapes in Xara Xtreme. First, open up Xara Xtreme and select the quick shape option. From here, you will create the shape on your screen. Then, alter the number of spokes you see. You can hold down or select any nodes that you see. Pull these into the center and then it will create a thin star. Undo this and then hold down the control key while pulling in the center to create a twisting effect in the middle. All of these will look different and you ca...
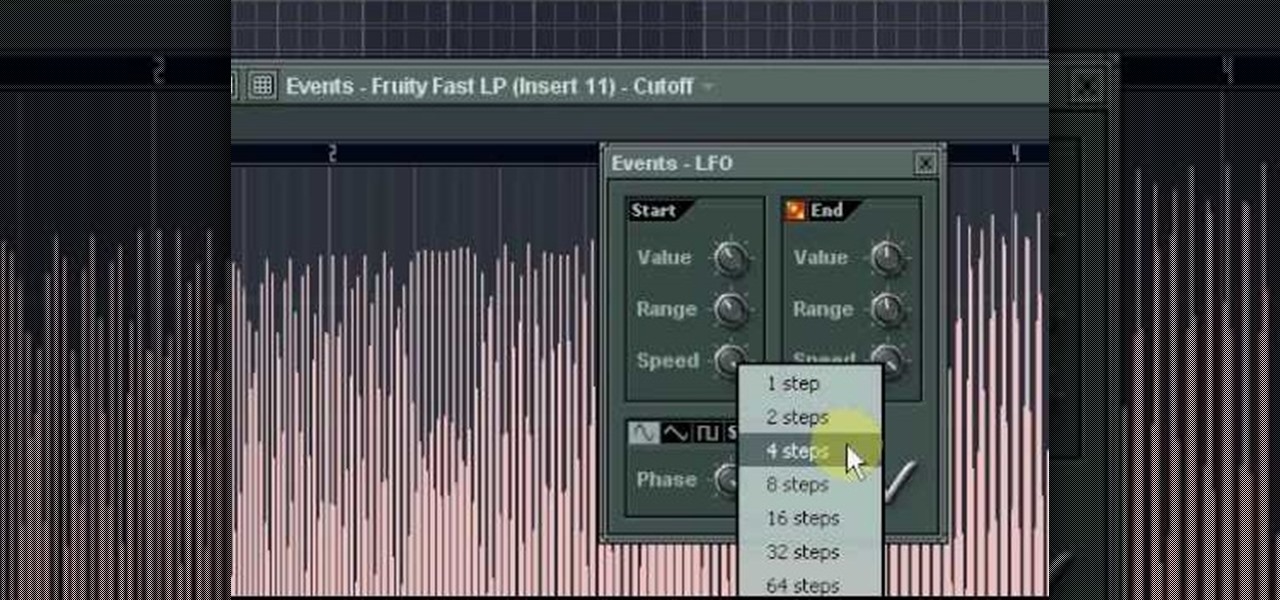
In this video, we learn how to make an effective dub bassline in FL Studio. Use a normal bass and add effects to make this. Add in different effects on the bassline, then go through the drop down menu to add in Fruity Loops fast LP. This will enable you to change the wobble on the beat as well as the cutoff. When you change this, you can control the sound by editing the knob until it's how you like it. After you edit the events, you can create the beat how you want it, then save it and use it...

In this tutorial, we learn how to clone yourself in GIMP. First, open up GIMP on your computer and then open the picture where you want to clone yourself. After this, open the other picture where you want to copy yourself and right click to copy it. Now, create a new background layer for your main picture. Use the lasso tool to cut out one of yourself inside of a picture, then transition it into the main picture. Exit out of the other image, then start to edit the colors and opacity in the fr...

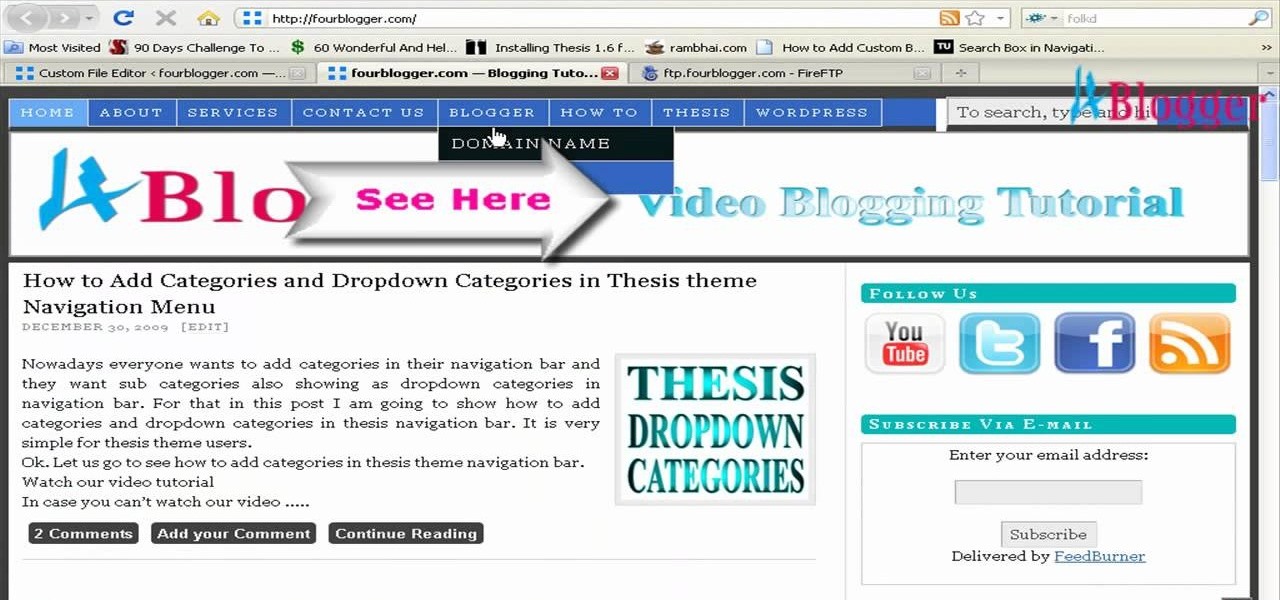
You can add banner ads in thesis header. To do this, first go to your word press admin and click on custom file editor in thesis option. Now select custom_function.php in edit selected file option and click edit selected file. You will get a warning so to do this you need to use FTP. Go to the path in FTP which is showing in the video and then click on Launch.php and now copy the code which is showing in the video and paste it in the launch.php. But you have to change your header image path i...
GIMP is a fantastic free image editing software, but if you've got the Photoshop blues and really miss the layout, this video has your answer! You'll be taken through each step in great detail showing you how to resize, and edit everything to get your GIMP user interface pretty close to Photoshop!
In this video, we learn how to use the web application, Sumo Paint. First, go to the website Sumo Paint and the website will start to load in a new window a Flash application. Once it's fully loaded, you will be able to add an image and then start to edit it. There are several different tools available on the side, whether you need to resize, crop, erase, or anything else to your picture! This is a great website for editing and makes everything simple. There is also a toolbar on the top where...
In this tutorial, we learn how to do UVmapping with 3D Studio Max. Open up your image in the software, then go to "unwrap UV". Scroll down to edit and you will be able to see the basic scale. Grab the mass and scale it down, then use your element turn on to select the different pieces. The UV mapping will now turn a different color and show you where you have edited it. Continue to do this throughout the entire program. Make sure you have all other programs closed while you are doing this, an...
Yanik Chauvin teaches us how to color correct product shots in Photoshop in this tutorial. First, remove some of the black from the image by using your crop tool. After this, if your image is too wide, duplicate your layer and use the marquee tool to edit. Remove any dust spots from your image, to make it look more clear so you have an image that is impeccable. You can do this by creating a new layer and then adding a feather to the image. Continue to go through the editing tools available un...
In this tutorial, we learn how to add a title in Pinnacle Studio. First, click drag and drop your movie into the movie screen and then click on the "edit" tab. Now go to the left hand side and click on the "text" button. Go for a standard title, or whichever you prefer and click and drag that into the video screen. It will now be in front of your video. Double click the video screen and then edit the text to say what you would like. Next, click out of this and add a transition from the right ...
In this video tutorial, viewers learn how to use the zoom tool in Adobe Photoshop. To select the zoom tool, click on the magnifying tool in the toolbar. Users are also able to press the "Z" key to select the zoom tool. Once selected, users are able to zoom into the image by left-clicking on the image. Users are then able to select the hand tool to move around the image. To zoom out, right-click on the image. This video will benefit those viewers who use Photoshop to edit images, and would lik...
In this video tutorial, viewers learn how to insert a YouTube video into Windows Movie Maker. Begin by selecting the video that you would like and copy the video's URL. Then go to Zamzar. In Step 1, paste in the video URL. In Step 2, select the video format. In Step 3, enter in your email address. In Step 4, click on Convert to convert the YouTube video. Now go to your email and open the sent link to download the video. Once downloaded, users will be able to open the video in Windows Movie Ma...
MySpace gives users the ability to hide their friends list. This video walks you step by step through being able to view this list. First, go to the desired profile. You'll see the hidden friends list. Now, click on "Edit with notepad" and code will pop up on your notepad. Because the list is on the page, editing the source code will make the list appear on the page. Next, type the command >table border=0 cellspacing=0 align="center">. Now you'll be instructed on how to delete the source code...
In this video tutorial, viewers learn how to create a carbon fiber desktop wallpaper using Adobe Photo-shop. Begin by creating a 20x20 pattern with the rectangle marquee and gradient tool. Then go to Edit, select Define Pattern and name the image. Now create a document with the dimensions of your monitor screen. Then go to Edit, select Fill and select the pattern that you have created. Then go to Filter, select Render, click on lighting effects and configure the image's lighting. This video w...
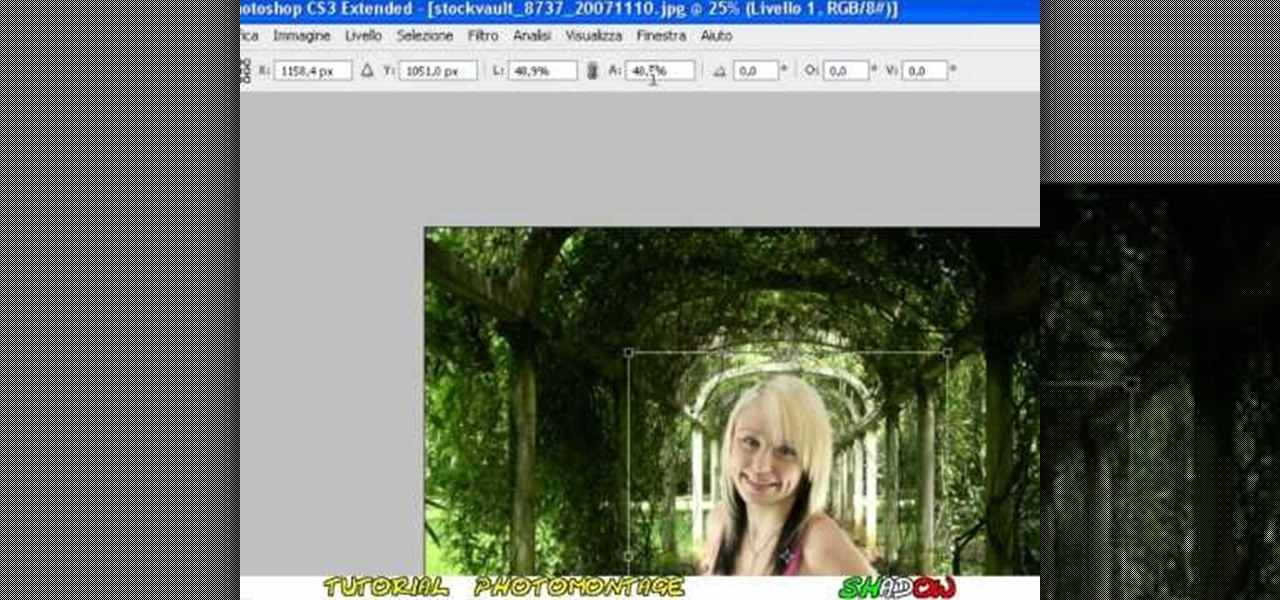
In this video tutorial, viewers learn how to create a photo-montage using Adobe Photoshop. Begin by inserting the images into the program. Then double-click on the montage image to unlock it and select the eraser tool to remove the background. Once the background is removed, select the move tool and move the montage image to the background. To modify the dimensions, go to Edit and select Free Transformation. Hold the Shift key to maintain the proportions. This video will benefit those viewers...
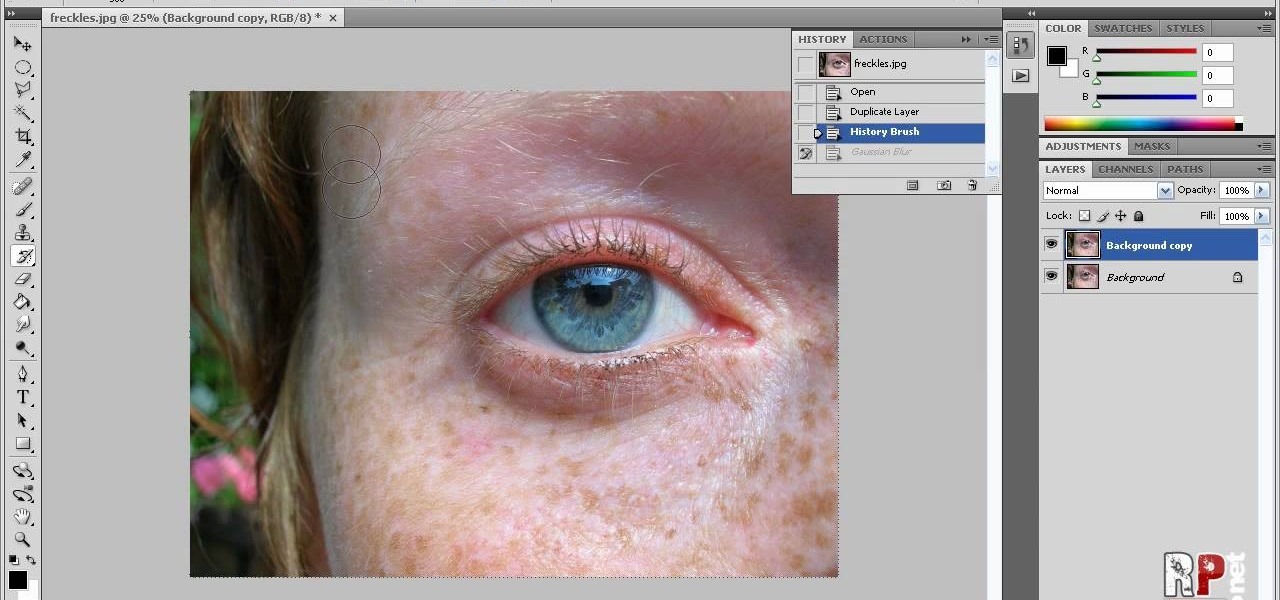
In this how-to video, you will learn how to reduce freckles in Photoshop. This is useful for editing people who have a lot of freckles. First, open the file in Photoshop and copy the background layer. Apply a Gaussian blur to the layer. Adjust it so that the freckles are no longer visible. Click okay and then open up the history palette. Click on the duplicate layer in the history window. Set the source for the history brush. Set the mode to light. Next, paint over the freckles. Now the freck...
This video is from AskNarek] and in the video he describes how to create a custom HTML Facebook Fan Page Tab. To start the process, Narek gives a web address to create the page. From your home page, you will click on Edit Page and then select the "Static FBML" application. After the application is installed you can search your apps for it. Now Narek shows us how to edit the page into anything you like. You can change the title of the Tab, include a video or picture an...
In this six minute tutorial the host and keyboard player for the band "Brazilian Girls," Didi Gutman, shows viewers how to play the keyboard in the song titled "Reason." Throughout the video, Didi Gutman shows various methods and techniques that are used for the style of keyboard that he plays. Filmed in Gutman's place of residence in Brooklyn, New York, Gutman also talks briefly about how the band got started and how he first got involved with playing the keyboard. The video also shows him r...
The video describes how to use Pinnacle Plus Studio. The narrator first describes the various tabs and features of Pinnacle Studio. He then describes how to import a video into Pinnacle Studio for editing. The video demonstrates how to add still photos, sound effects, music, and transitions to your video using the various tabs and options along with what the narrator calls the timeline. Finally, he describes how to make a movie after you have finished editing your video. He gives a good overv...
This video demonstrates how to edit a video using Pinnacle's "Studio B2" software. Once the video has been uploaded to the program, you can edit it in a number of ways using the "smartmovie" feature. For example, the program will automatically add fade transitions and special effects to your video from a list of presets which fit your movie type (e.g.: music video). You can also add music which you can chose from your own source, or some provided by the software. The software allows you to ad...
In this video Dionne from the Gadget show explains how to improve your digital photos easily using widely available free software. The first thing she instructs us to do is to download and install Google's free photo editing software Picasa. Next, once Picasa is installed you can use it's one click settings to easily remove red eyes from photographs or increase the brightness of a photo. The next thing we learn to do is to adjust the white balance of a photograph. This makes the photo appear ...
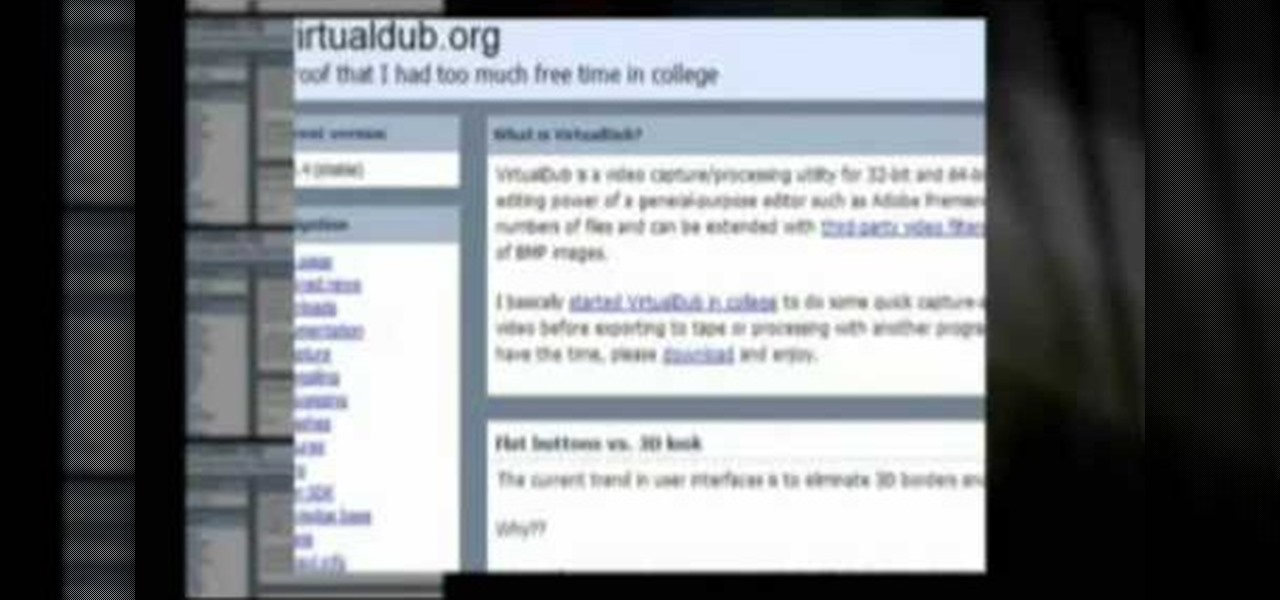
In this video tutorial solving time techs you how to apply the stabilize video effect before editing in movie maker. Download and install Virtual Dub from the link in the description and download the deshaker filter also from the link provided. Extract the filter into the virtual dub folder as shown and open the video in Virtual Dub. Compress the video using the DivX codec which can be downloaded for free from divx.com. Apply the filter by selecting the deshaker filter and change the source p...
In this video, Tom Skowron introduces the use of 24p and several important editing techniques. Using 24p can make your film projects look like genuine films. Another way to improve the appearance of your film is to adjust the shutter speed. You should set the shutter speed at twice that of the frame rate. This will decrease the level of motion blur and give the film a clean and crisp appearance. If you use 24p and adjust your shutter speed to the appropriate level, it will look like you spent...
Reason 4.0 enables you to make all kinds of edits and create effects for the audio you record and edit with the program. One of these effects is to create a "sweep" in your track. You can achieve this effect by using a noise oscillator. There are many options for noise oscillators. The one used in this example is the low bypass filter version, which produces the richest noise available. This video will show you how to add a "sweep" effect in Reason 4.0 by using a noise oscillator.
In this video by Task Tutorial we learn how to create a simple text effect in Flash. The first step is to create the text you want to use. Then use CTRL-B to break apart and distribute to layers. Now, convert your letters into movie clips using the menu options. Then add key frames and edit Alpha values in all of the letters. Alpha must be 0. Then add motion to the values and at frame 10 add a key frame. And at frame 15 add another key frame. Next use the free transform tool to move the text ...
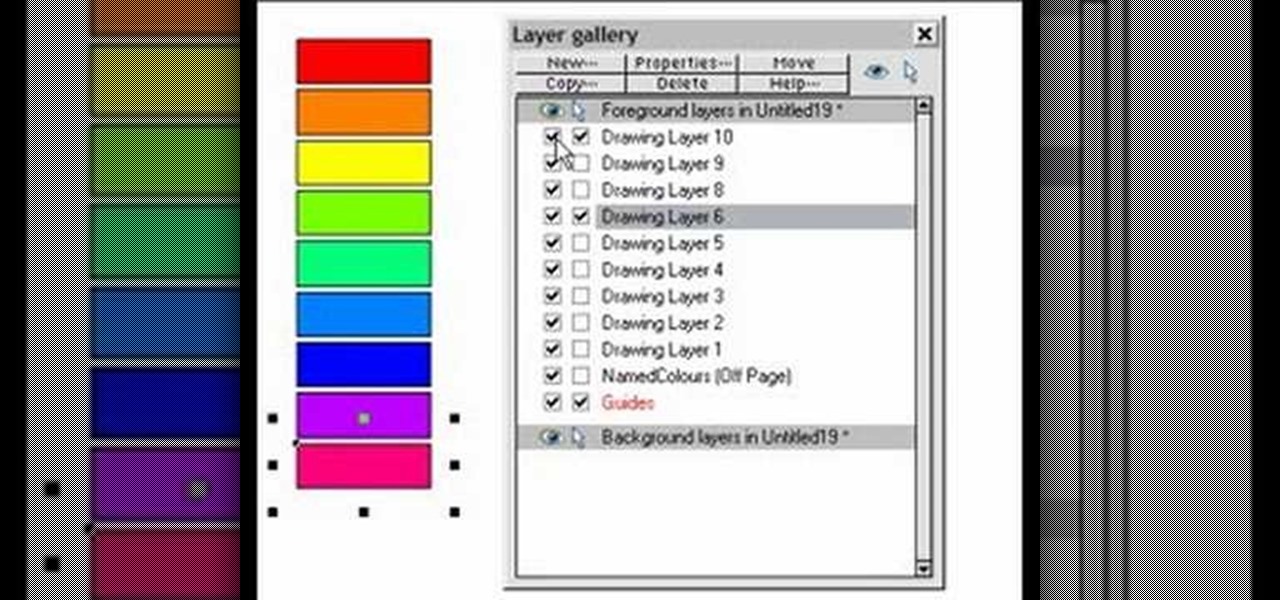
This is a very informative video on creating multiple layers and short cuts on how to edit the already made layers to match your preferences.
This video is about the use of PhotoKey. It is surely an excellent sales pitch. The video clearly depicts the benefits and advantages of PhotoKey. The easy and short ways to edit background, delete objects and also adjust light to make the photo look more real. PhotoKey is very user friendly and does magic to the project for which it is used. The video by itself makes the viewer feel that this is the best and easiest tool available to edit pictures to their own needs. It also gives informatio...
You can take high dynamic range photos with a regular point and shoot digital camera. You may need to take up to three versions of the same photograph and make a high definition composite photograph. Even a small digital camera can take three photographs at the same time using an auto bracketing feature. You can also do this by hand if you have a steady hand or a tripod. Edit the individual photographs on the computer using Adobe Photoshop or a another digital photo editing program.
After you have your audio podcast recorded or imported into Audacity, you can enhance it by editing out mistakes, shortening long silences, even chopping it into several sections to make multiple shorter episodes rather than one long show. Learn how in this tutorial. Whether you're new to computer recording, new to the Audacity DAW (digital audio workstation) or just looking to pick up a few new tricks, you're sure to benefit from this video software tutorial. For more information, including ...
Audacity is a music editing software that allows you to do a bunch of cool stuff like removing vocals from a track, edit your own track, delete clips, add clips, etc. It's great for those interested in mixing or making their own music or creating karaoke versions of their favorite songs.
While we personally like to learn a new software program by playing around with its buttons and various functions, sometimes it's a nice primer to actually read the instruction manual. And when it comes to video editing, knowing the particularities of each and every function is crucial to producing professional-quality results.
The camera connector kit from Apple is a great accessory if you want to instantly edit and interact with photos that you take on your portable digital camera. This tutorial will show you how to make use of the iPad's camera connector so that you can adjust those photos on the go.
If you want to capture HD video using your Motorola Droid 3 smartphone from Verizon, you'll want to learn all the features and functionality of the Camera app. Be sure to switch the camera to video mode so that you're able to record all those memories in full HD for editing later.
How Do You Do A Business Plan? Part 1 of 5 (Series designed to discuss the parts of a business plan, what information is involved in each part, and why a business plan is needed.)
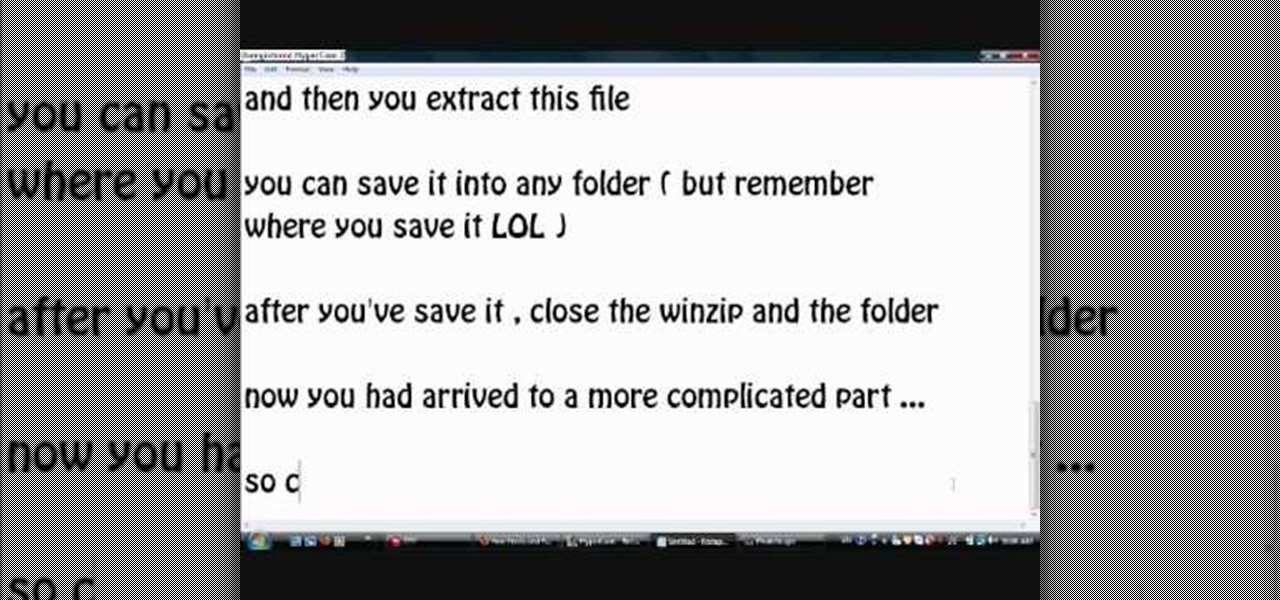
Photoscape is a piece of free, photo editing software to use instead of more costly programs such as Photoshop. The program is pretty cool but you may want to install more fonts than what it comes with. If so, check out this video and you'll find out how to get it done. You'll need a zip program like winzip or winrar and you'll of course need Photoscape which you can get here.
Now that you've imported your footage into Windows Live Movie Maker, you're ready to edit it. A good first step is to trim the beginning and end points of the individual clips that will go on to make up your movie. This clip from Vimeo's excellent Video 101 series of video tutorials will teach you how to do precisely that.
Ready to edit your footage in Windows Live Movie Maker? First, you'll need to move the individual clips from your camera to your computer. This installment in Vimeo's excellent Video 101 series of covers all of the basics—connecting your camera, copying the files over and, finally, importing them into your video editor of choice.
You can find Puppet Warp under the Edit Menu. You'll also need to use this without a background. Use a pin tool to add joints to your chosen puppets, then drag and manipulate them to get some really funny effects and distortions.