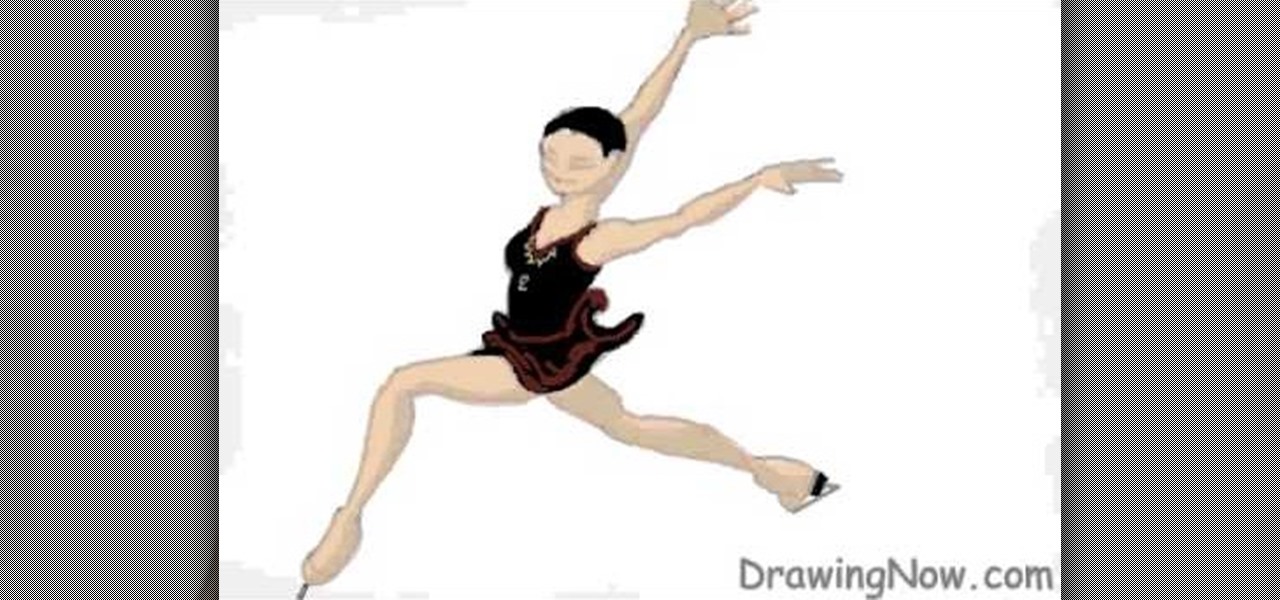
In this tutorial, we learn how to draw a cartoon female ice skater. Start off by drawing the outline of the skater's body. Draw both of her hands in the air and her legs apart like she is dancing. Then, draw in the skates and the details of the face and outfit she is wearing. After this, you will start to add color onto the outfit and the skin of the dancer. Once finished with this and adding in the details, work on the background. Make it look like the floor is ice and then add in blue for a...

In this video, we learn how to make a Rivulet scarf or reversible cable scarf. There are a couple ways to make reversible cables to look the same on the front and on the back. First, make sure you print out the scarf pattern and then learn where you want to cross to achieve a different look. First make your firs two cable crossings, doing forty stitches. Then, you can add in more stitches to make it thicker if you would like to. Continue to follow the pattern that you printed out, using both ...
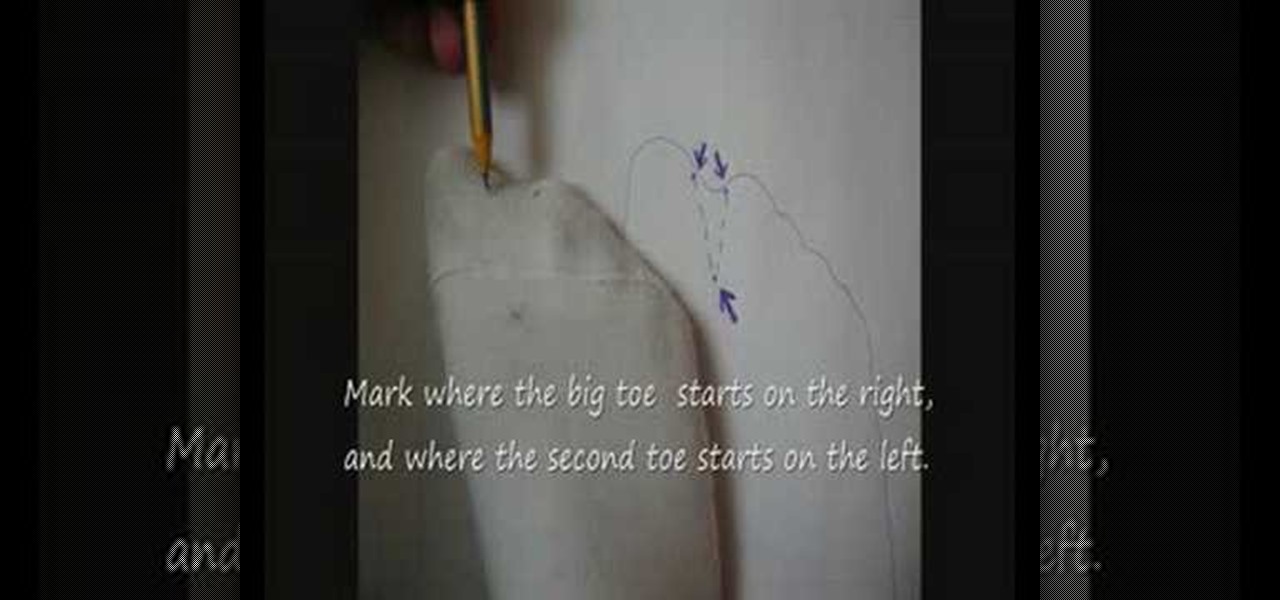
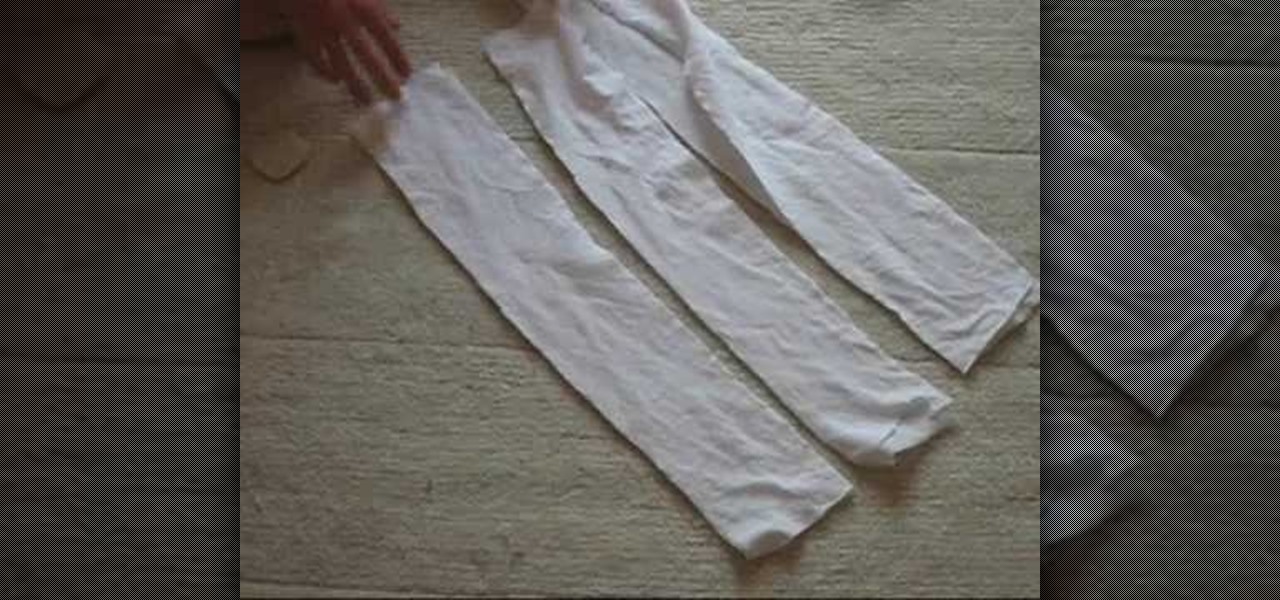
In this video, we learn how to make Tabi socks. You will need: pair of socks, thread, a needle, and scissors. First, you will turn the right sock inside out and put on your foot. Then, you will spread your big toe and second toe out as much as possible. From here, you will use a pencil to mark on the foot where you want to cut. Then, take the sock off and cut it out where you marked it. Take the needle and thread and sew along the shape that you cut out, to create separation between the toes....

In this tutorial, we learn how to troubleshoot your washing machine. First, unplug your machine before you do any handy work. Then, check for leaking around the bottom. Look around the door sill to check for wear and tear. Then, pull the machine out and check for a lose connection. If you don't see anything, you will need to call a pro. If you aren't getting water, check to make sure your water lines are connected. If your washing machine is loud, make sure you haven't overloaded it and the d...

In this tutorial, we learn how to make Splinter Cell prop goggles. You will need: goggles, a saw, pipe, a brush, black paint, duct tape, batteries, chop sticks, glue, a ruler, and a pen. First, mark three cuts on the pipe to 3 cm and 5.5 cm. Now, use the saw to cut these. Then, use sandpaper to smooth all the edges. Next, place these onto the goggles and glue them with a hot glue gun. Next, grab two batteries and wrap them in duct tape. Place these with them and then paint these all black. Af...
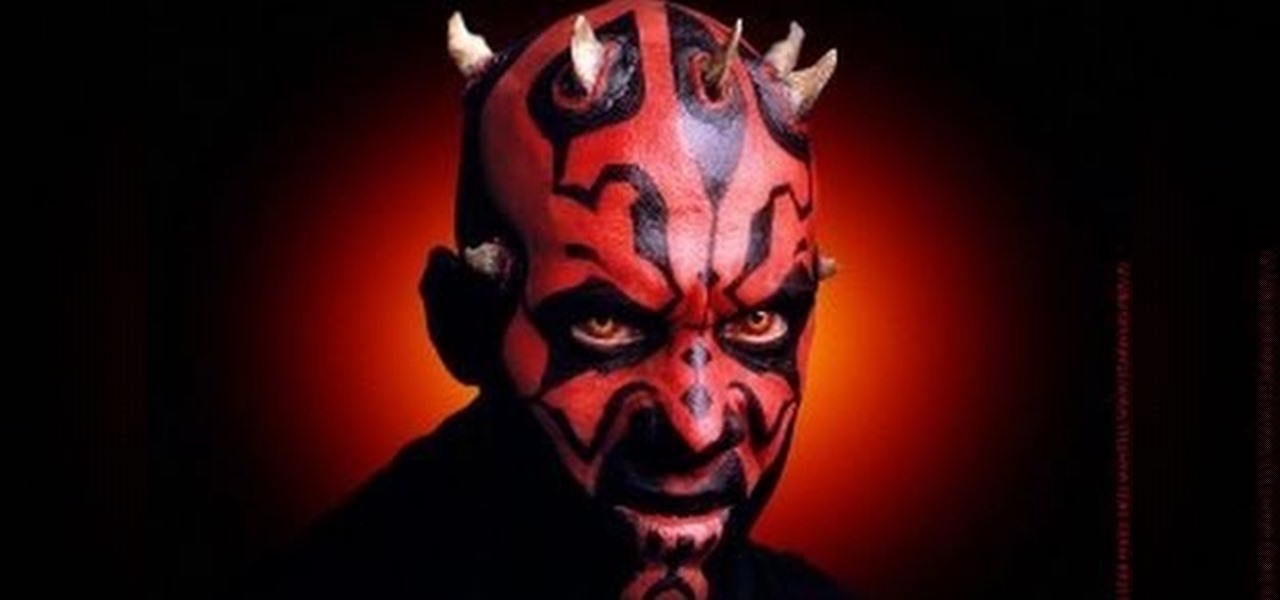
What would "Star Wars" be without its infamous red-faced villain, Darth Maul? True, we never thought he was the prettiest character in the "Star Wars" franchise (that title still goes to hottie Natalie Portman as Princess Amidala), but he had some pretty cool makeup going on.

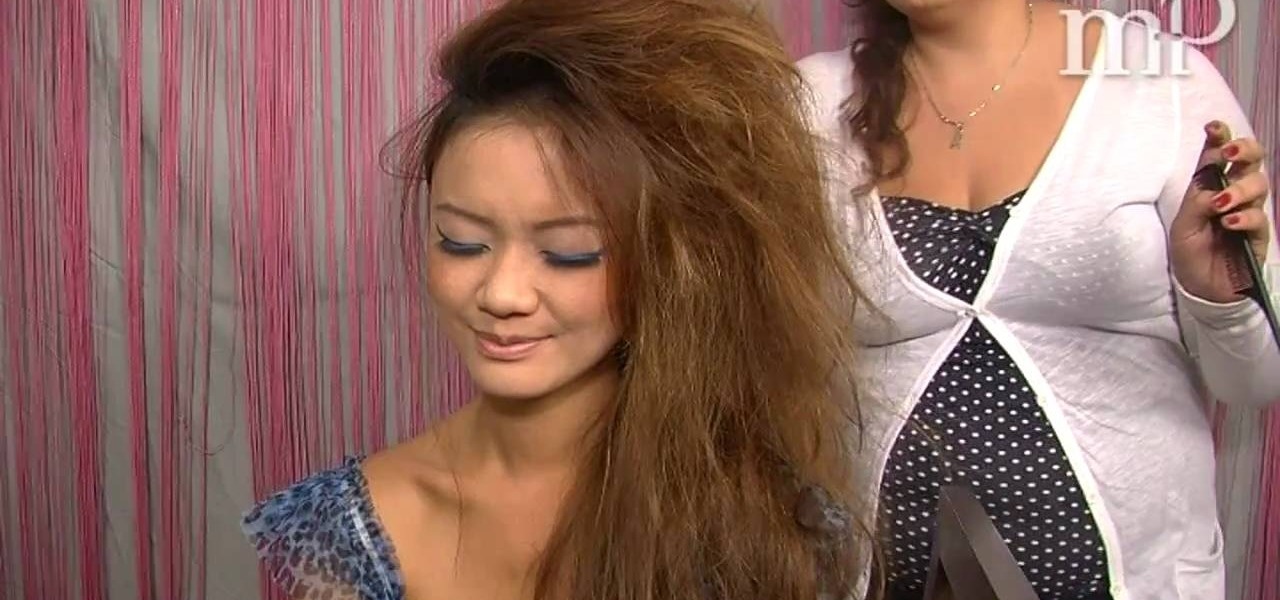
You don't need to lop all your precious long locks off to achieve Rihanna's signature hairstyles. While the lady currently has a short, choppy cut, she wears looks (like faux hawks) that can be replicated on longer hair.
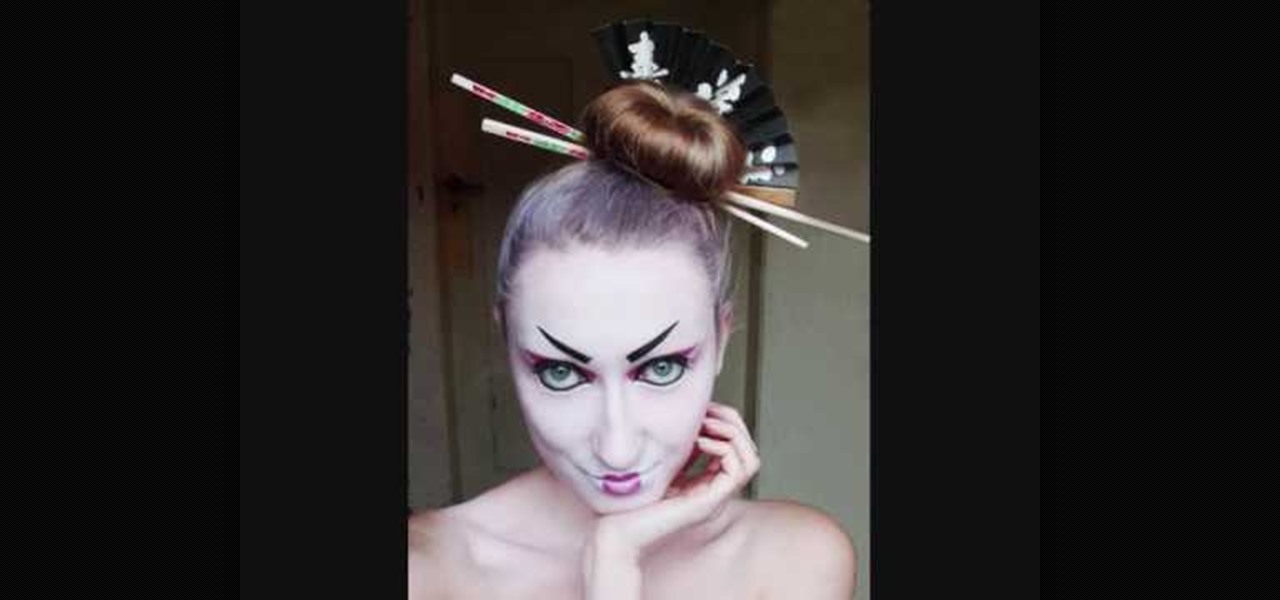
Geishas were high class courtesans who mixed business with pleasure - or, rather, whose business was pleasure. And seduction was an art to them, down to the very makeup they wore.
We always knew that Taylor Swift was a bombshell, but it wasn't until her 2010 VMAs performance that we saw just what a retro doll she could be. While Swift usually favors light and bright makeup colors that emphasize, rather than overwhelm, her natural beauty, she went all out for the awards show.
Cheryl Cole is a very pretty lady, so she could wear any makeup look - or none at all - and still look fabulous. The hostess/singer looks especially beautiful in her new music video for "Promise This," in which she rocks a hardcore rock'n'roll inspired look with smoked out black cat eyes, contoured cheeks, and a nude mouth.
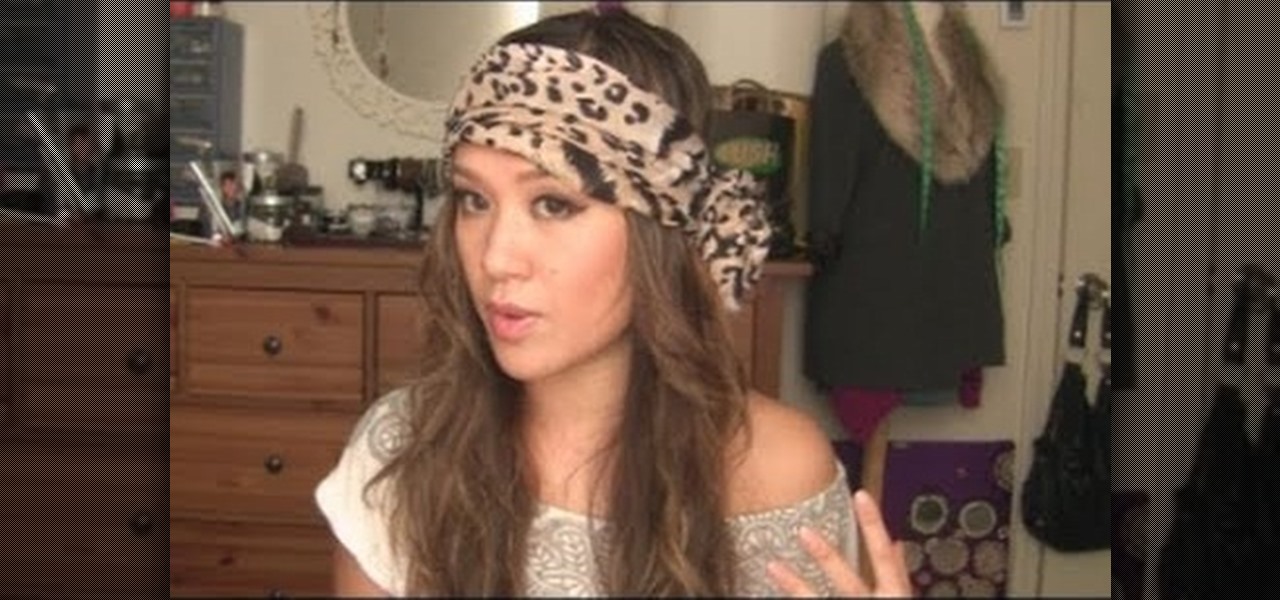
Head scarfs are second only to headbands when it comes to bohemian head wear. Just ask boho/hippie poster child Nicole Richie, who basically alternates between the two whenever she goes out.
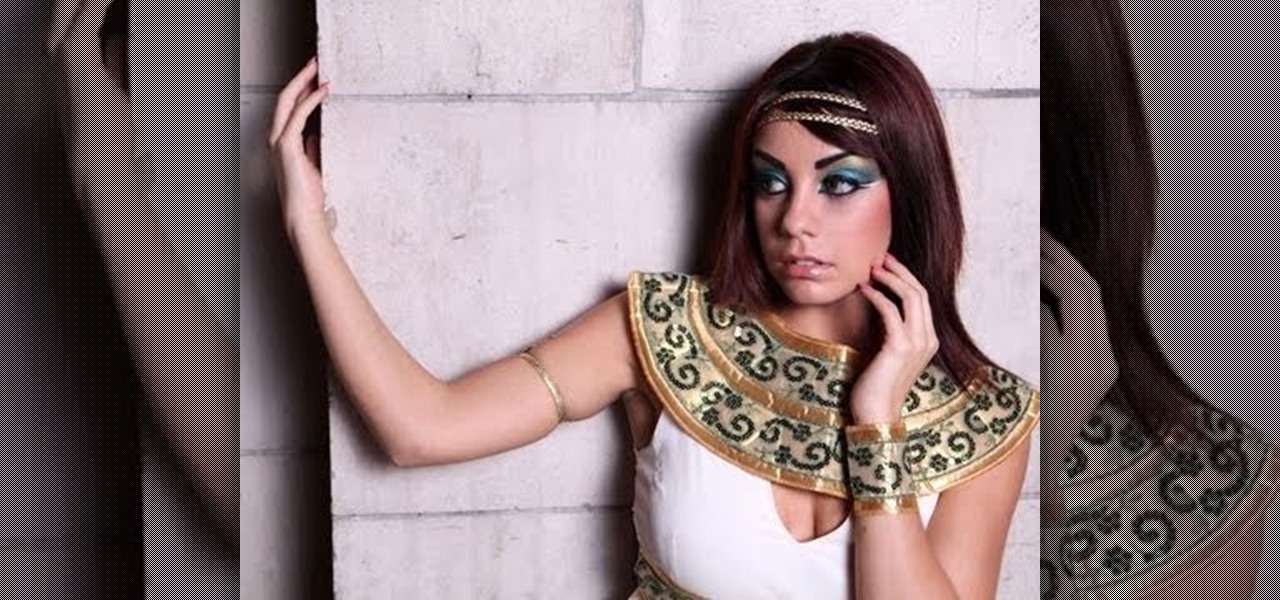
Cleopatra was not modest about makeup. After all, this was the woman who bathed in tubs filled with rose petals and milk (a good idea even today, if extravagant, since lactic acid exfoliates dead skin cells), invented perfume, and always wore makeup.
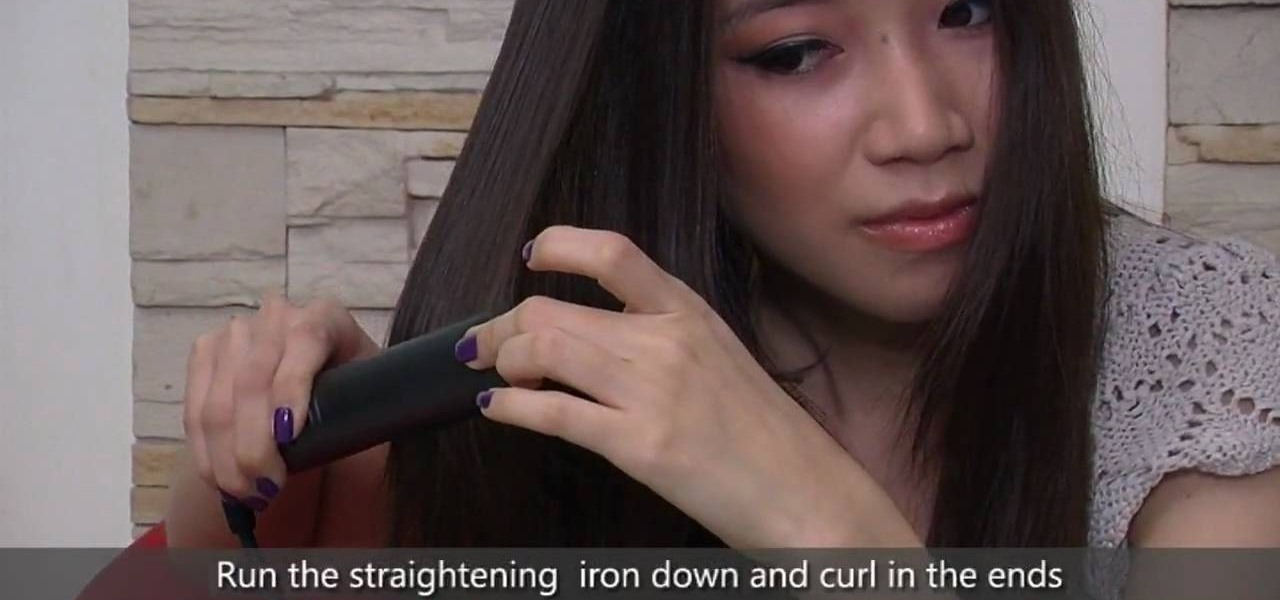
In the mornings when we wake up it seems like our hair is our own worst enemy. It just won't style right, it frizzes out, it won't hold the curls. But getting your hair ready for school or for work doesn't have to be a chore.
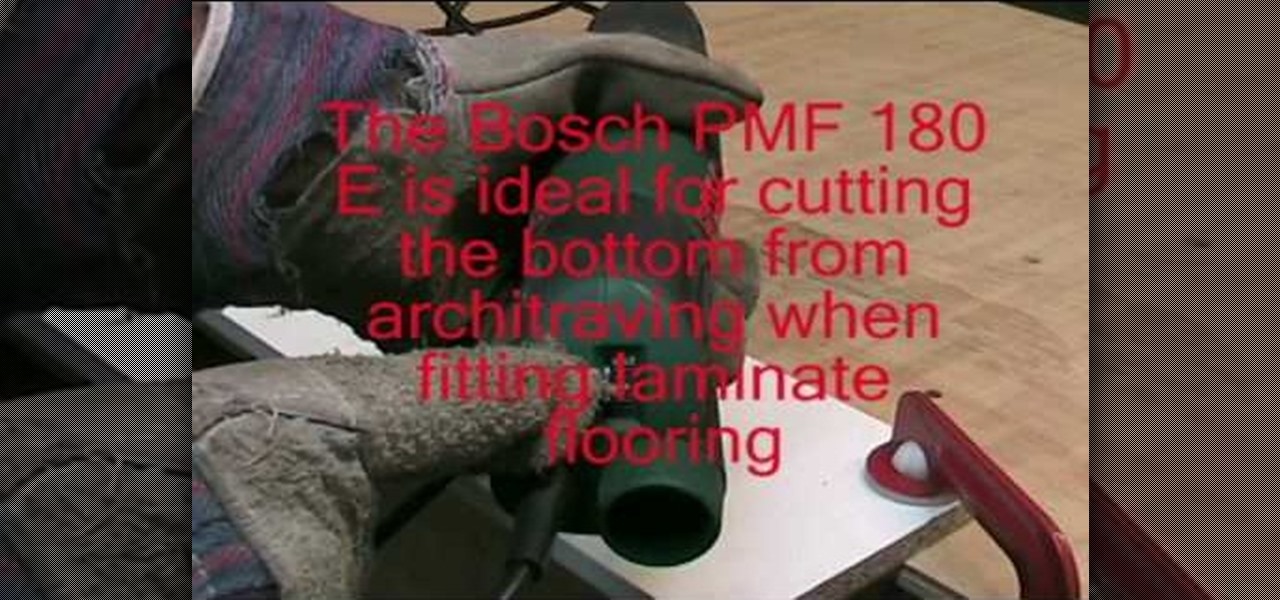
In this tutorial, we learn how to use the Bosch PMF 180E multi-purpose saw and sander. First, lock the blade into the saw and then place the screw in using a screwdriver. After this, you will be able to use the saw to cut out what you need to on your type of material. Make sure it's plugged in and you have safety gloves on while you're doing this. To change the blade, wear your gloves and unplug the machine. Remove the bolt to get the blade out and then replace it with the blade that you need...
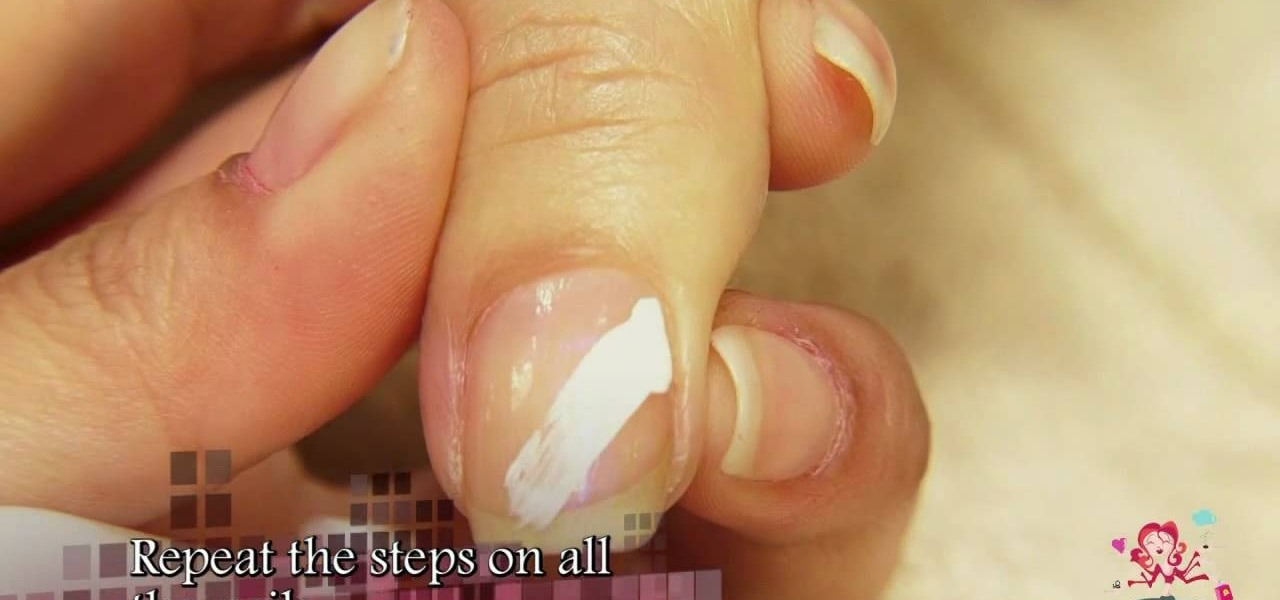
In this tutorial, we learn how to make 3D nails. You will need: nail glue, nails, glitter, nail polish, tools, and anything else to decorate. To start, paint the nail and then apply small ribbons to them at the top. You can also add in glitter if you would like. Glue the ribbons by using nail glue or super glue. For the rest of the nails, repeat the same process, making all of them look different by adding small pearls, different shapes, and glitter. Let these dry, then you can place them ont...
Zebra striped nails don't necessarily mean a big canvas of white paint striped meticulously - and painstakingly - with thin black lines. In fact, if you're going for a more avant garde nail look that's unique yet not too crazy to wear to the office, this minimalist zebra striped look may be it.
In this tutorial, we learn how to make your own summer dress. First, take a tank to and measure it out on your chest. Then, mark the shirt and cut it. Then, take another color tank top and cut off the opposite area that you just cut on the other tank. Take another piece of fabric now and measure it out to fit your body. Then, attach this to the bottom of the dress and sew all of the pieces together with a sewing machine. Try it on when you are done and then enjoy wearing your new homemade sum...
In this video we learn how to crochet a shell beanie hat. There are a total for seventeen rounds to make this beanie hat. Start out with a chain one and then single crochet in the starting loop. Continue to do this throughout the round and then join in the beginning single crochet. For the next round, you will single crochet and then create shells in the hat. Start out with round three, where you will start with a double crochet and then join the half double crochets with the beginning. When ...
In this tutorial, we learn how to make an over-sized fashion bow fashion accessory. First, take your fabric and cut it to the desired size you want the bow to be. Cut this in a square shape at first, then sew the sides of the square. Then, fold this in half and pull in the middle of the square. Cut this in the middle to make a hole. Then, turn this inside out and push out the edges. Put an additional square of fabric around the square in the middle, then shape it out to be a cute bow to wear ...
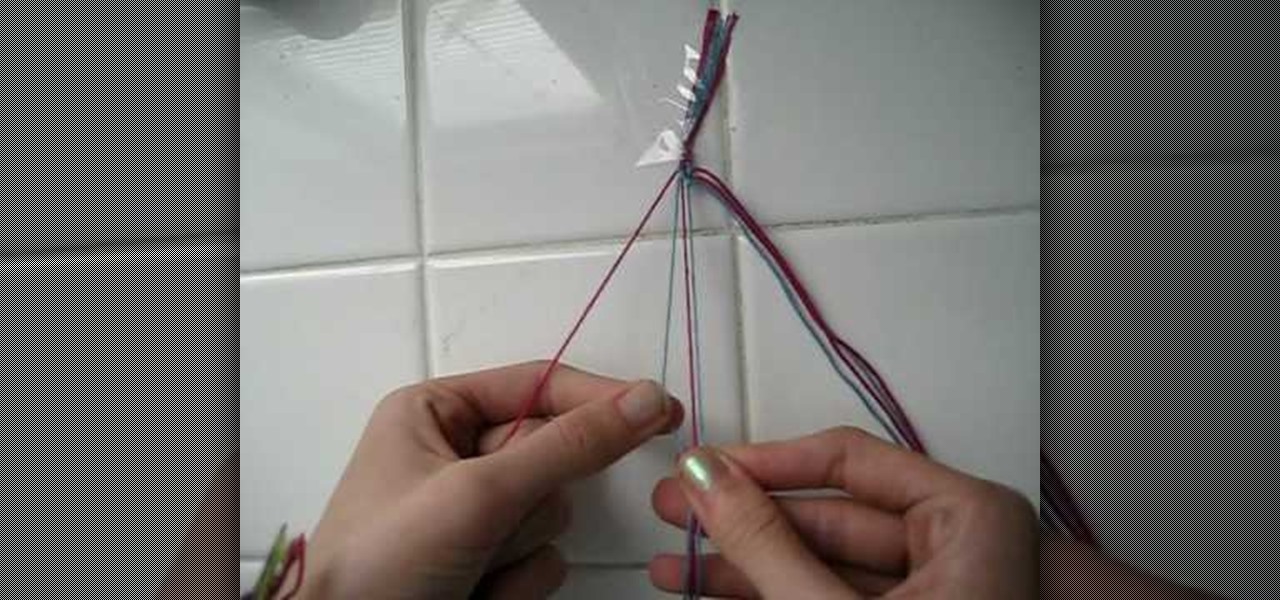
In this video we learn how to make a friendship bracelet with vertical hearts. First, tape your strings to a wall, they should be two colors with four of each. Arrange them so they are alternating colors until you reach the other side. After this, grab the first string and set it aside. Then, take the next two and tie them in a knot at the top. Tie the third string with the fourth at the top as well. Continue to do this until you reach the seventh string. Continue to tie the strings until you...
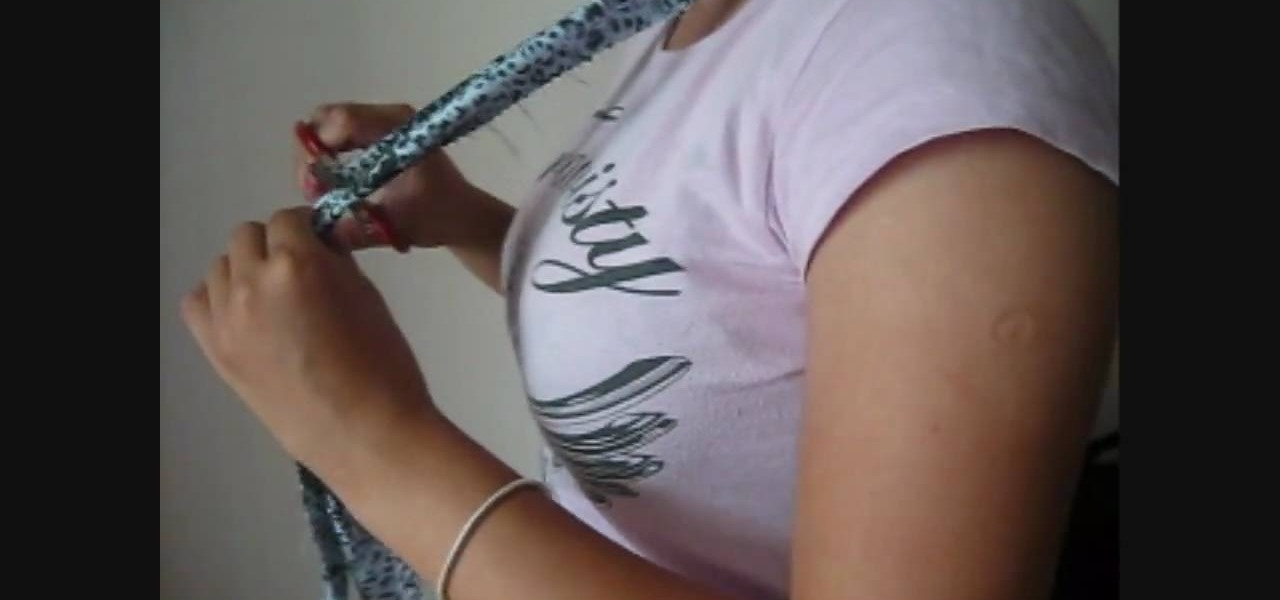
In this tutorial, we learn how to make a DIY halter style bra strap. First, you will need to cut a long piece of fabric and you will also need some bra hooks. Now, you will take the fabric and fold it in half twice so it's the correct size for a bra strap. Then, you will sew it on all of the sides to create a secure strap. From here, you will place the bra hook onto the strap at the base where you sewed the end. Now, sew this onto the strap and then attach to your bra to wear as a halter!
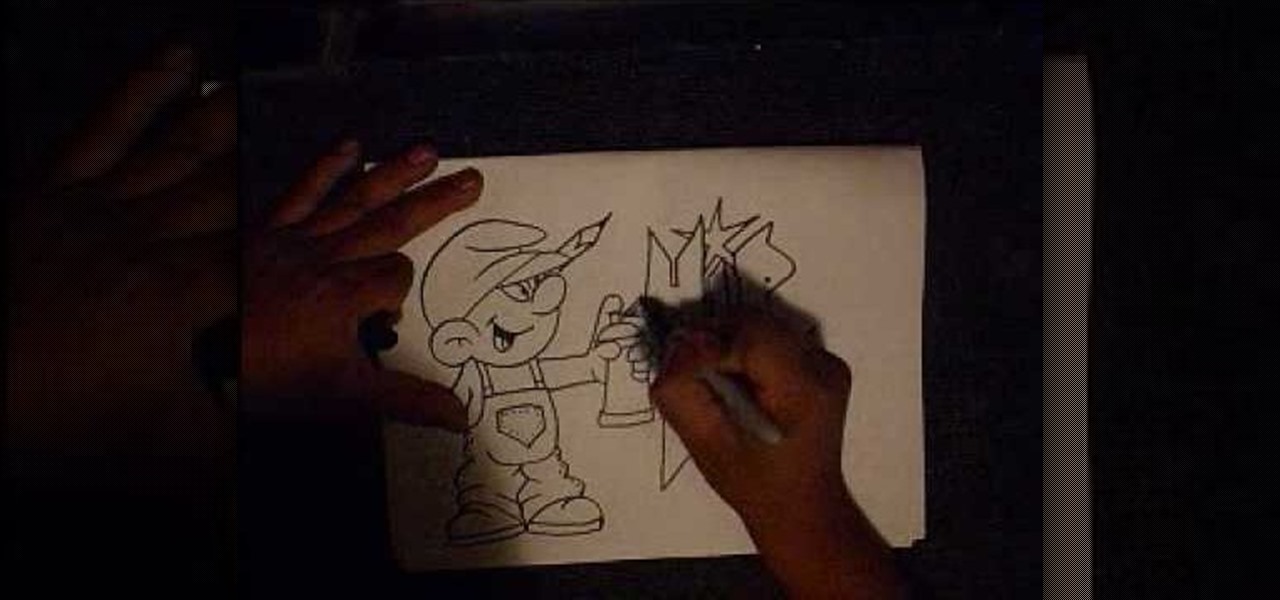
In this tutorial, we learn how to draw a graffiti Smurf character. Start off by drawing the hat for the Smurf, then draw in the ear on the side of the head. Then, draw in the face and start to add in the details. Draw in the mouth, nose, and eyes. After this, draw in the upper body and the clothing that the Smurf is wearing. Add crinkled lines on the edges to make it look like the pants are too big, then draw in the feet, arms, and hands. Draw a spray paint can in the hand of the Smurf, then ...
Feel like you're too old to still wear a costume on Halloween? We hear you. If you're past the whole "dress up as a pumpkin" phase of Halloween but still want to look festive for the occasion, why not consider a face mask?
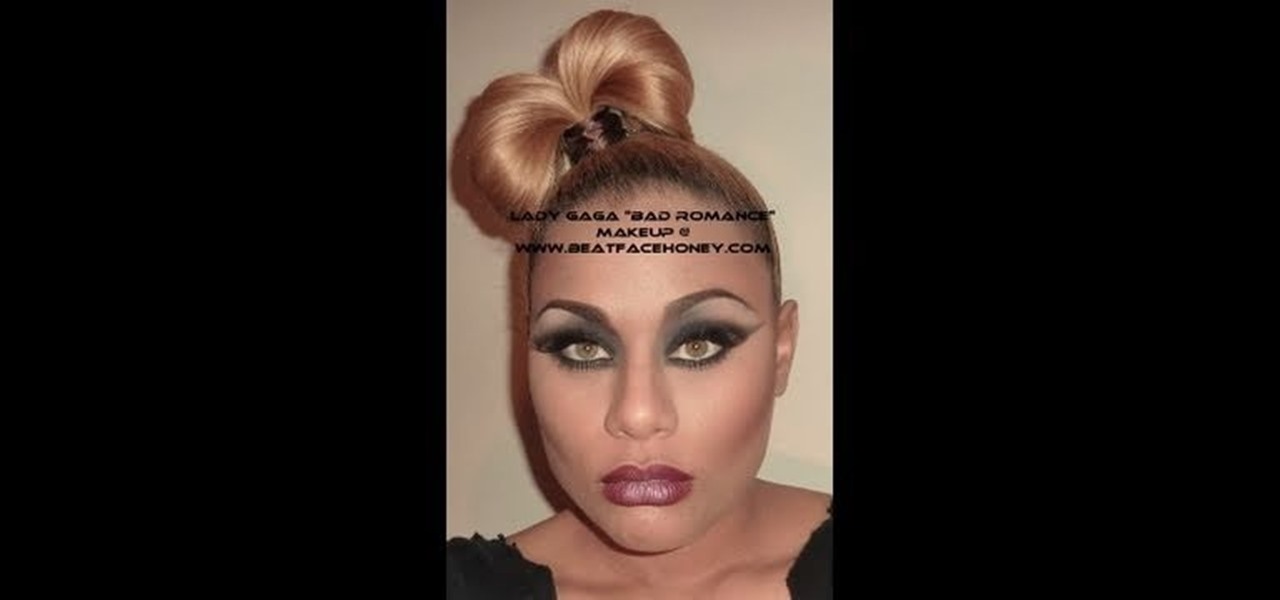
Lady Gaga is truly the queen of outrageous, outre makeup looks, so unique that the only person capable of upstaging her previous looks is herself. In her unforgettable music video for "Bad Romance" she reinvents her look many times, going from odd party hostess to insane asylum babe to monster dancer to glittery hooker to a girl seducing a guy in a bear cape.
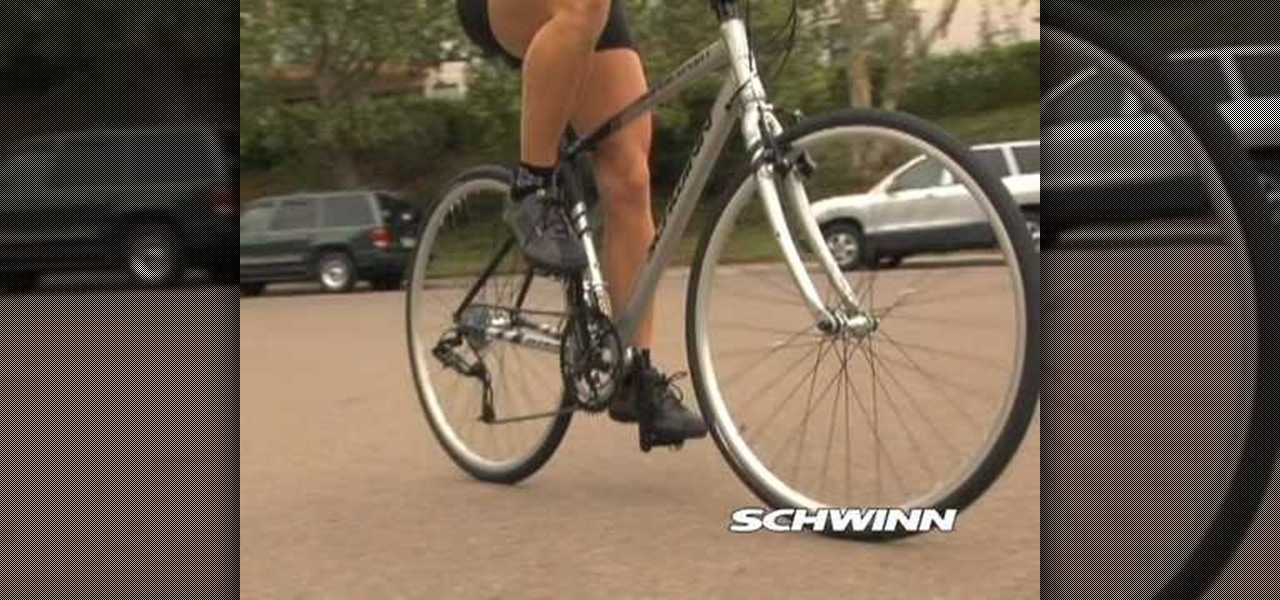
In this video, we learn how to ride with clipless pedals. These are a great option to consider. The shoes and pedals work together so when you step on the pedal your foot clips into place. The benefits include a better foot to pedal control and it's safer because it gives you instant entry and release from the petal. To wear, put the shoes on and make sure you spin one petal to the bottom of the pedal. Now, step down onto the pedal until the you hear it clip into place. After this, start to r...
In this tutorial, we learn how to make a left handed crochet wide headband. First, make a slip knot on the crochet hook and then make a chain of two. Next, wrap the yarn over and pull through once. Repeat this and then wrap the yarn over the hook, then wrap over and pull through once. Repeat this fourteen times to make the entire foundation for your headband. Once you have made this, you will need to repeat this on top of the first foundation several times until you have made several rows so ...
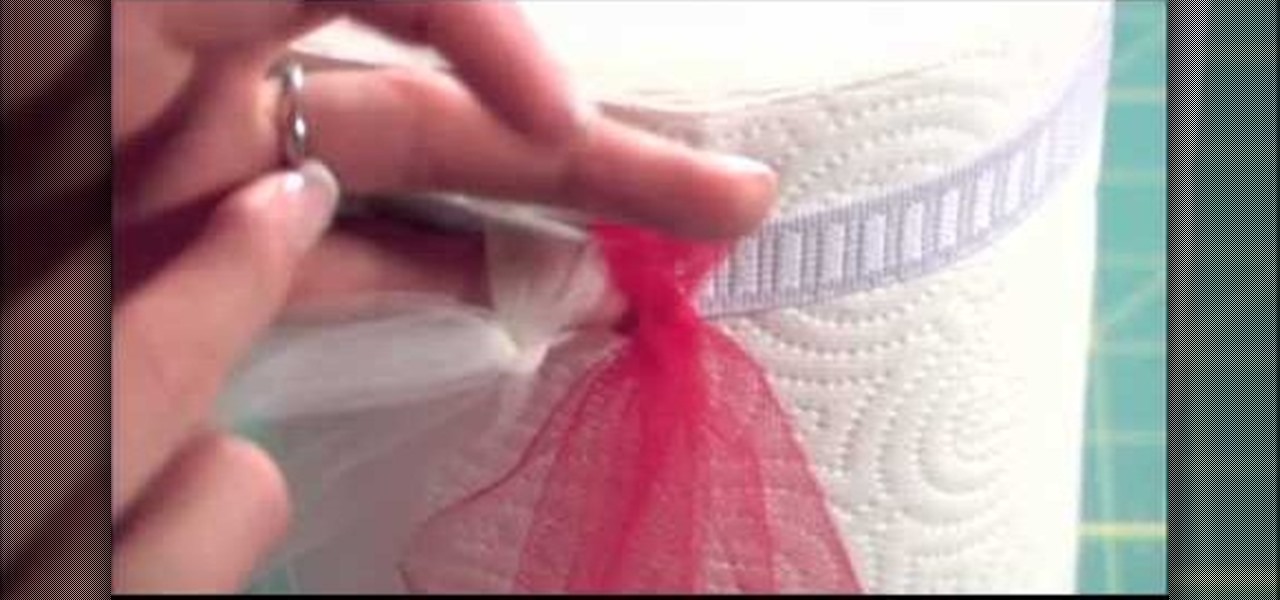
In this tutorial, we learn how to make a tutu. First, you will need to grab a rotary color and some tulle, along with an elastic band for the waist. Now, measure out the tulle for how long you want your tutu to be. Now, cut out the measurements you have made. Gather up the tulle together in different colors, and then grab the elastic. Tie the top of the fabric onto the elastic, then secure it. Once finished going all the way around the elastic, tie the waistband and then you will be ready to ...
In this tutorial, we learn how to tie dye an oval style shape. Start with a square piece of a shirt that is damp, then fold it in half. Then fold it in half again, then in half again. After this, fold the shirt accordion style, paying attention to where the main corner of the shirt is. Once finished folding, tie two knots in the bottom, then fold the fabric up until you reach the ties. Now, tie or secure this bundle tightly with rubber bands. Apply your favorite colors of die on the shirt, ge...
In this video, we learn how to destroy jeans to look like Hollister's. First, you will need to take your jeans, a nail file, and scissors. After you have these, use your files to rub onto the jeans where you want your hole to be at. Go from side to side to create a lighter look than is on the rest of the jeans. After you start grating through the jeans, there should be a small hole forming. Pull at the strings as you see them, then stick your finger inside the hole to make it the size you wan...
In this tutorial, we learn how to distress and cut up jeans to destroy them. First, you will grab an old pair of pants that you want to have a distressed look on. First, you will need to take some sand paper and rub it on the front of the jeans in the thigh area. After you do this to your liking, you will take your scissors and cut a small hole going down the legs. Use your hands to make the holes larger, then leave the frays at the end for a more distressed look. When finished, wash them off...
In this tutorial, we learn how to draw Axel. Start out by drawing the head, then add in the facial features including the eyes, nose, ears, and mouth. After this, draw in the spiky hair that goes around Axel's head. Next, draw the neck and shoulders. Continue to draw down the body until you reach the feet. Add in the details of what the character is wearing, using lines on the clothing to make it look more realistic. After this, you will need to draw in shadowing on the drawing to make it loo...
In this tutorial, we learn how to use ninhydrin to reveal latent prints on paper. This will work out because you will be spraying a special liquid onto the porous area. After this, you will turn on a black light and then be able to see the fingerprints appear in purple! Be careful with the solution, because it's flammable! This will also stain your skin, so make sure you wear gloves and don't let it contact a surface you don't want stained. To mix the solution, you will combine both of the so...
In this video, we learn how to draw Gaara. Start off by drawing the head of the character, then creating your reference lines. Next, you will draw the neck and then create circles for where the shoulders are at. Now, draw around these to create the outline for the entire body. Next, draw in the details of the upper body, using lines to show where the pecks are and then draw in the outfit that Gaara is wearing. Next, draw in the chin and the jaw bone, then the ears and all the facial features....
In this video, we learn how to easily make a tutu. First, you will need to gather all your materials, then cut the length of the ribbon or elastic you need. Then, grab your materials and cut out strips of it to place onto the elastic. After this, tie the tulle onto the elastic going from color to color as you continue. Once you reach the end of the skirt, you will have a cute tutu that is ready to wear. Making this yourself can save you a lot of money, and it can make several rather than just...
In this tutorial, we learn how to make the perfect hole for your destroyed denim. First, you will need to grab a pair of sharp scissors. Make small horizontal cuts around 1 cm apart. Once you have made as many cuts as you want, you will use tweezers to pull out the fray that is on the bottom of the cuts in the jeans. To create nicks and grindings, use a Dremmel tool on the jeans. This will help you sand down the area of the jeans you want the hole to be and create a distressed look. When fini...
In this tutorial, we learn how to make an easy hair bow. First, grab some thick ribbon in any color or material that you want to have. Use more ribbon if you want a larger one and less if you want a smaller one. Measure it out or use your eye to measure. After this, heat seal the ends so they don't fray by passing them through a lighter quickly. Now, fold the ribbon in half length wise, then place a crease there. After this, use a hot glue gun to fold down the two sides of the ribbon with a k...
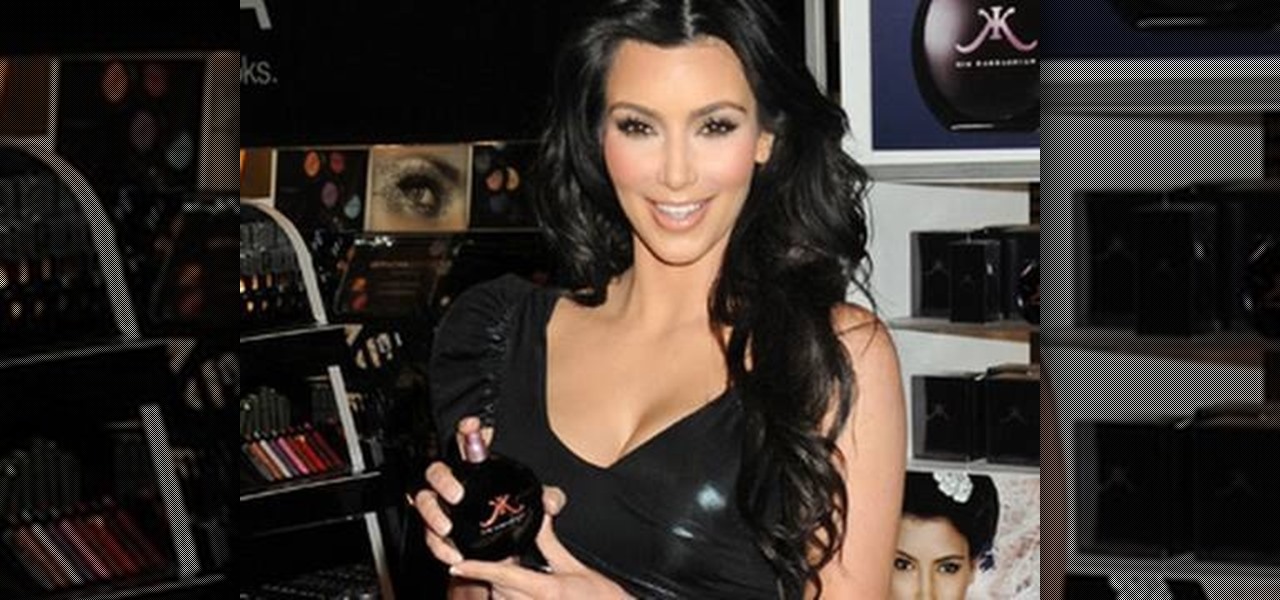
We seldom see Kim Kardashian on camera - whether it's formally at a red carpet event or just being captured by the paparazzi while shopping - without a full face of makeup and perfect ringlets in her locks.
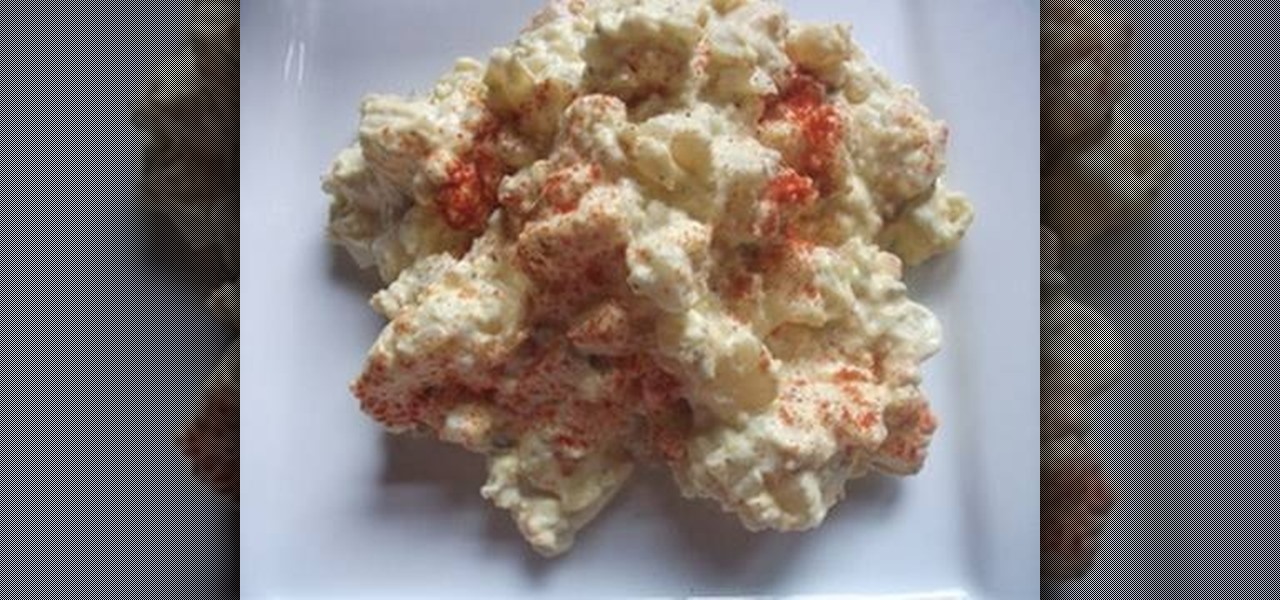
Enjoy the taste of a summertime potato salad? Then you can't pass up this masterpiece of Southern glory. This video recipe will show you the perfect way to make a delicious, soul food potato salad. This potato salad is creamy with the perfect balance of ingredients and seasoning. It's easy, simple and a real crowd-pleaser. It can easily be customized to suit your liking.
In this video, we learn how to make friendship bracelets: The Wrap. First, clip your strings to a clip board at the top. Then, separate them into three colors, two strings for each color. Then, wrap the other colors around one color until you reach the end, then push it up to the top and continue to do this. Once you reach down the top of the bracelet, switch the colors and start to wrap the other color doing the same process. Then, switch to the last color and continue to do this until you a...
With dim, minimal lighting and lots of naked bodies swarming around, night clubs don't exactly offer the chance to put you in the spotlight. That means that if you want to stand out what you wear - both on your body and on your face - has to stand out as well.