Another great photo program that you can use is PhotoMatix Pro. In this quick tutorial, learn how to take images from Lightroom, transfer them into PhotoMatix and then back to Lightroom again. This clip is hosted by a professional photographer and will walk you through the basics of this useful program.
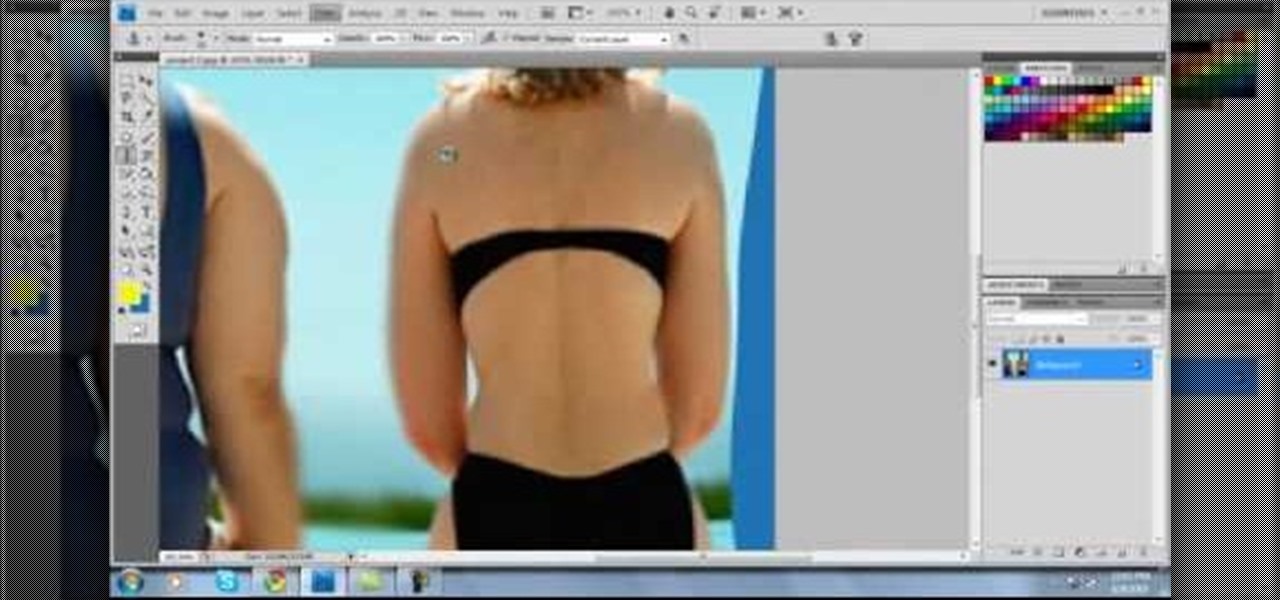
If you have a photo subject that is a tad larger than you would like, check out this tutorial. Change even the chunkiest body into a slim and svelte physique with a few clicks of your mouse in Photoshop. After watching this clip, you will certainly understand why you can never take a photo in a magazine seriously - its so easy to change someone's entire body!

Forget dogs - tripods are a man's best friend (well, if he's a photographer). Eliminating many of the factors that create crappy photos, including the instability of holding the camera up by hand, photo blurs, and general strain of weilding those hulking digital SLRs, tripods are always there to lend a helping leg. Or three.
In this tutorial, from graphic designer Ali Edwards, you will learn how to use cool, hand drawn lettering on your photos in Photoshop. You can buy packages of hand drawn letters and words from various sources (or make your own) and this clip will show you exactly how to add these brushes to your photos for scrapbooking, advertising, logos or anything else.
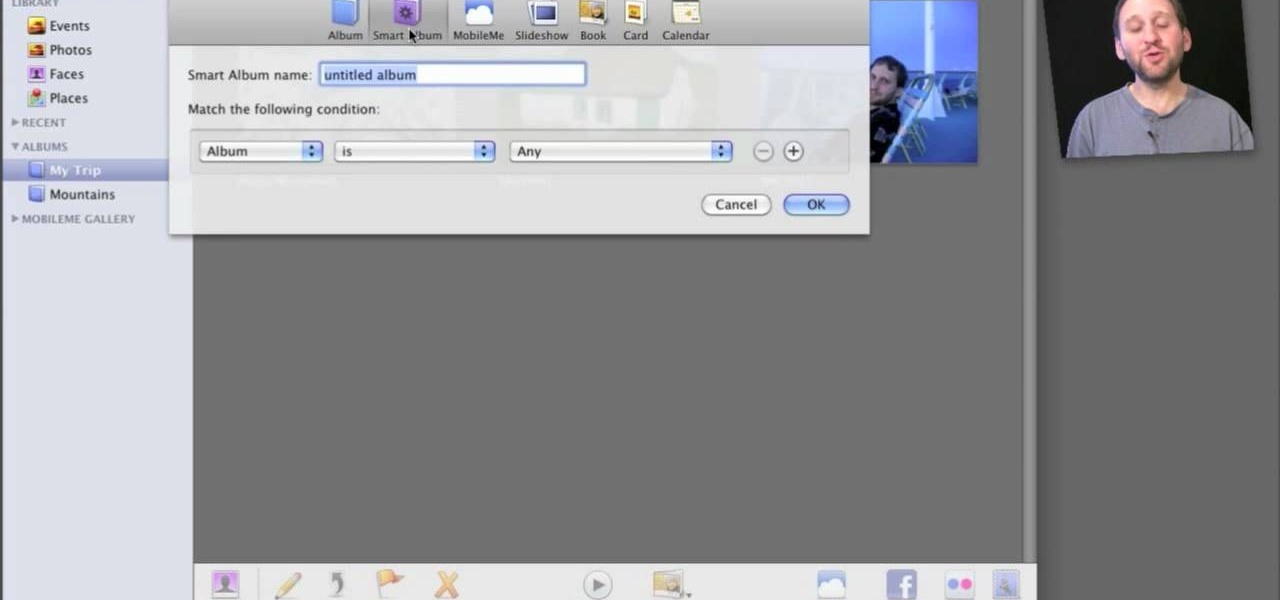
Organizing your photos in iPhoto 09 is a breeze provided you know how to take advantage of the program's various features (like, for example, keyword tagging). This free video software tutorial from the folks at MacMost will get you off and running. For specifics, and to get started organizing your own photographs, watch this iPhoto user's guide.
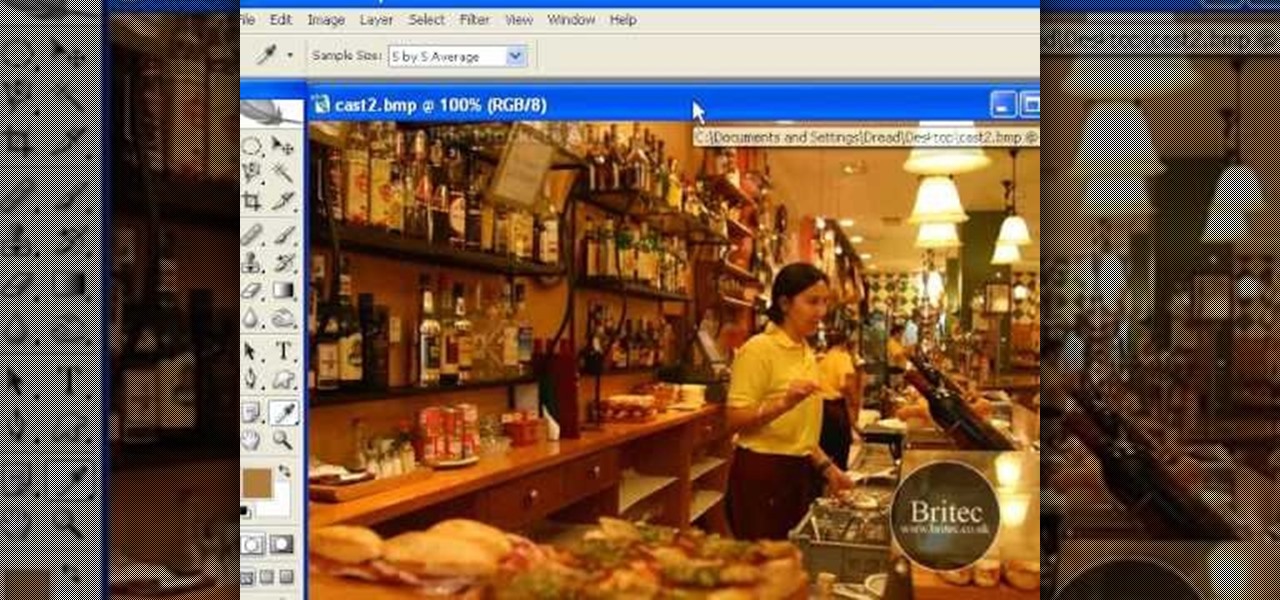
Looking for instructions on how to remove color casting when restoring photos in Photoshop? Look no further. Whether you're new to Adobe's popular image editing software or simply looking to pick up a few new tips and tricks, you're sure to benefit from this free video tutorial from the folks at Britec Computer Systems. This video offers a step-by-step guide on how to get rid of color (or colour) cast when restoring scanned photographs.

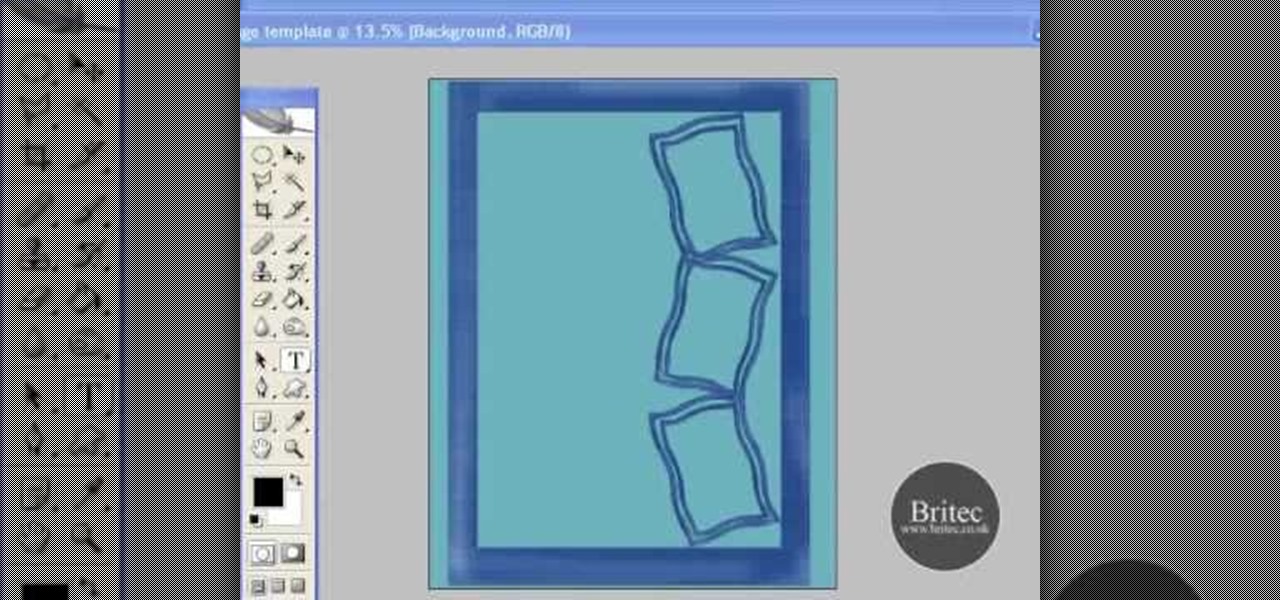
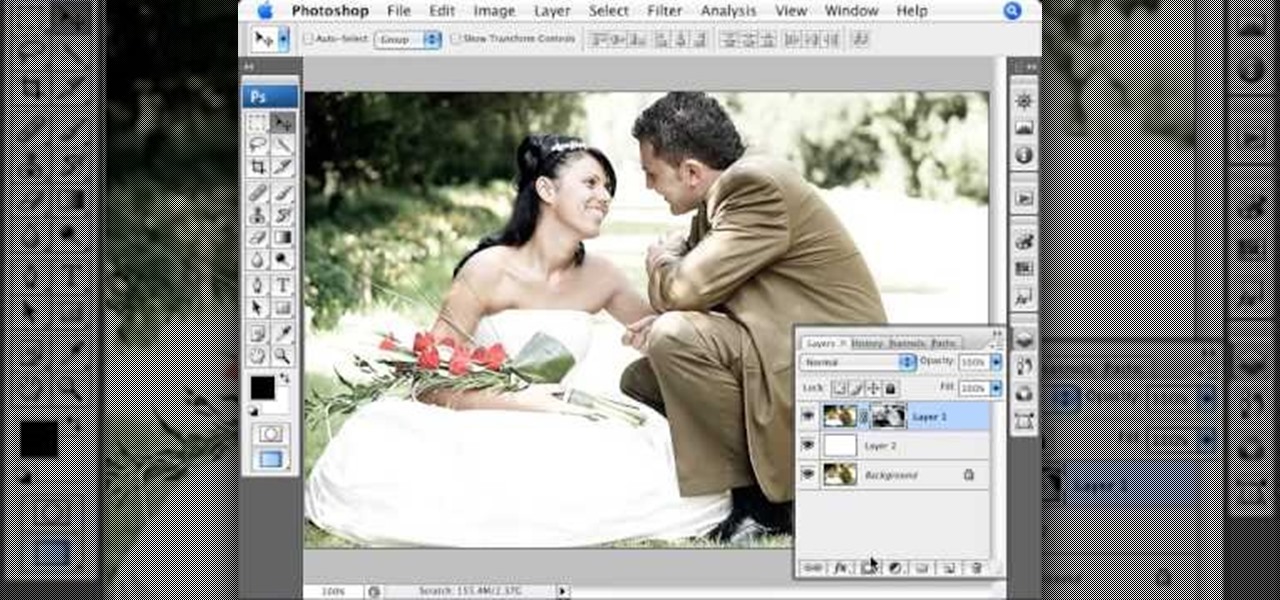
Create digital photo montages in Adobe Photoshop. Whether you're new to Adobe's popular image editing software or simply looking to pick up a few new tips and tricks, you're sure to benefit from this free video tutorial from the folks at Britec Computer Systems. This video offers a step-by-step guide on how to generate simple montages with digital photographs.
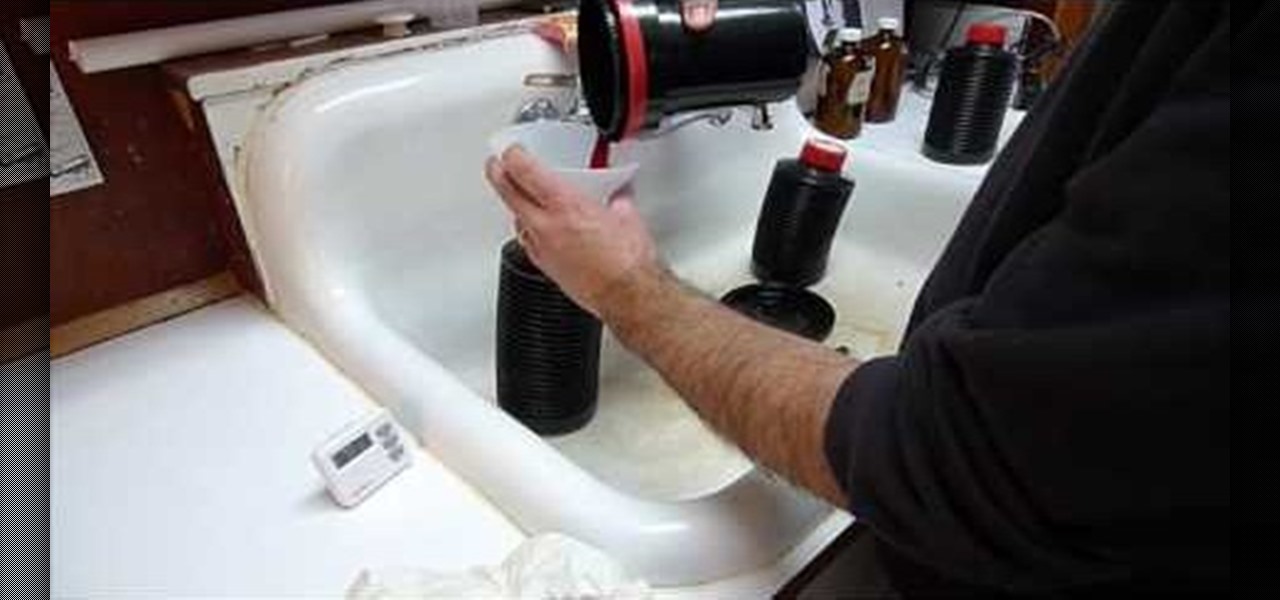
With photo labs around the world closing in the wake of the digital camera revolution, knowing how to develop your own film at home is more important than ever. This video teaches you how to develop one type of film, C41, at home using a kit. Even when there are no more photo labs left, you will still be able to make beautiful still prints from film at home after watching this video.
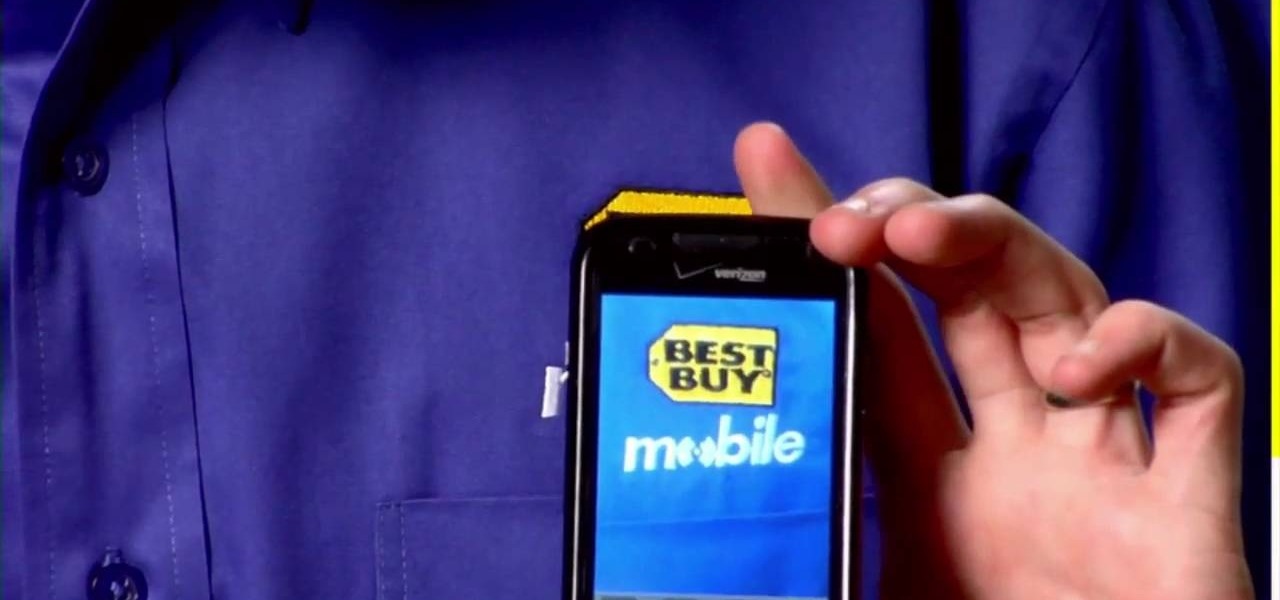
Sometimes you can't decide what to take… a picture or a video. But on any of the new Android enabled mobile devices, it's easy to toggle back and forth between photos and video on your camera. Once inside the multimedia section, the icons direct you to either picture or video options. Best Buy has answers. The Best Buy Mobile team explains how simple it is to capture photos or videos on an Android cell phone.
Want to create a time-lapse video montage from photos shot on a DSLR? This tutorial presents a general overview of the equipment, settings and post procedures (e.g., cropping & color correction) necessary to create beautiful, finished-looking time-lapse clips. Get started shooting your own time-lapse segments with this free video guide.
This Software video tutorial will show you how to use Windows Live Movie Maker to edit videos. Starting with the store board; here you can drag videos and photos or click to browse them. Click and it will open up a window with all your photos and video. On the left side is the preview window. As you scroll your cursor through the images, they will appear in this window. On top are a row of tabs. Each of the tabs is called the ribbon allowing you to select various tools. Here you can add or de...
If you frequently use Camtasia software for Windows this is a great video for you! Camtasia is a screen video software program made for both Windows and Mac This video shows step-by-step how to upload a photo and create a moving profile image. It shows how you can upload your photo, how to open the photo in Camtasia, and how you can use Camtasia to create a moving profile picture. Also discussed is how you can upload your Camtasia videos onto Youtube! Just a wonderful video for those who use ...
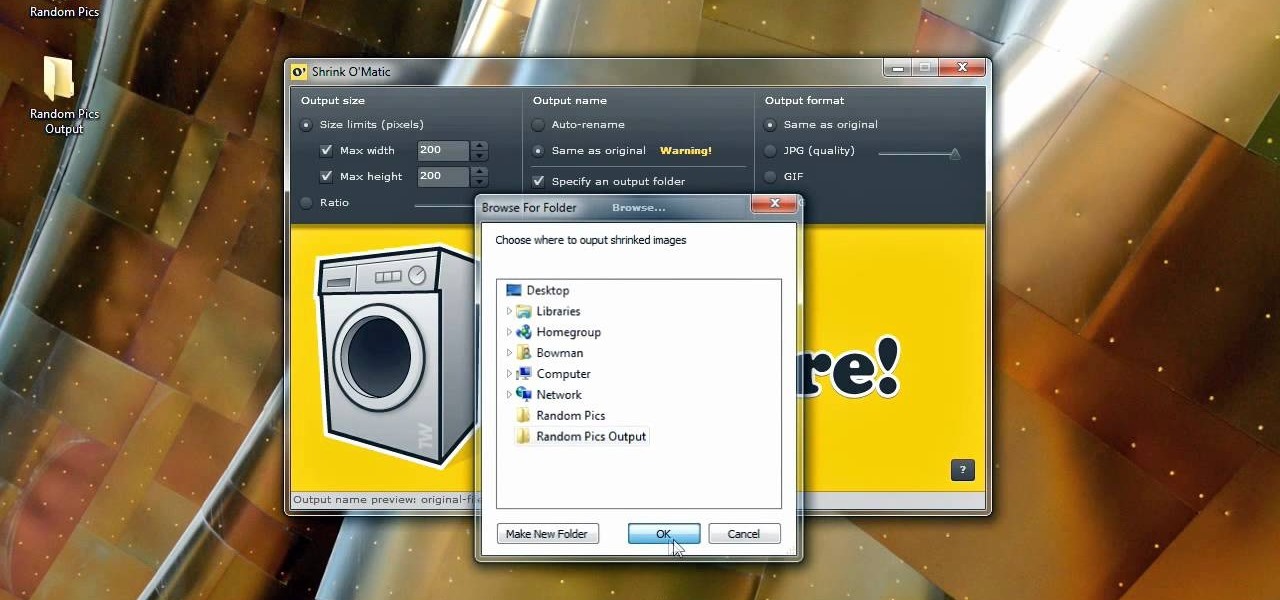
Bowman shows you how to resize your photos using Shrink O'Matic. Resize your pictures by doing the following: Open Shrink O'Matic and choose your settings, for example output size, pixels, ratio, etc. Highlight the pictures you wish to resize, and drop them into Shrink O'Matic. Open the Output Folder and you will be able to see the images in their new file size.
If you aren't familiar with Illustrator software it is very similar to the photo-editing software Photo Shop. This video is a guide on how you can make a paper scroll by using Illustrator. You can follow along with the video and make the basic shapes and then re-size the pieces to look almost exactly like an ancient paper scroll. This would be something really neat to make if you needed a background for an old-timey looking photo or if you needed to make up invitations for a church function.
For anyone interested in creating a slideshow with stationary photos, follow the steps in this video tutorial. The video shows how to take multiple images to create an animated slideshow in Flash, with fluid transitions between each image change. Using this technique can add motion to pictures and added interest. By following these steps, you can learn how to take your photos to the next level with a professional touch in a matter of minutes.
This video tutorial by VvCompHelpvV gives you two methods to achieve the Sin City effect in your photos using Photoshop. The Sin City effect is making the main subject of the photo appear colored while the rest of the photo looks black and white. In the first method the subject should be selected using a pen-tool using the settings mentioned. After that right click on the selected areas and make the feather radius 3, inverse the selection and go to image > adjustments and de-saturate and your...
In this Photoshop tutorial, learn how to convert regular photos into works of art that create a painted on effect. By using the right brush tool, a regular picture can be made to look as though it was painted onto a canvas with real brush strokes. This tutorial shows us how to use different types of brush presets loaded in Photoshop in conjunction with a new layer to create a canvas effect. The result is photo converted into a painting.
This video tutorial will show you how to create a seamless background texture using Photoshop using any square or rectangular portion of a picture. The narrator in the video demonstrates step-by-step how to achieve a seamless tiling of a photo through Photoshop and dictates the options that you will need to select. You first have to select a portion of the picture that you want to use. Then the narrator explains that you have adjust the sides of the square portion you chose--labeled A, A' , B...
Simon Plant of ProPhotoInsights.com shows how to use Photoshop to blend colors in images. He uses a photo of his son standing in front of Stonehenge to take us through each layer of the photo to alter the levels of hues, saturation, and opacity. The key to blending colors is a matter of playing with different hues and saturation levels in Photoshop to get the subject in the foreground to match the background. Follow Plant's thorough tutorial to find out how to get professional looking photos ...
In this Photoshop tutorial the instructor shows how to mask a photo to itself and produce a glowing effect. First open the image in the Photoshop tool and duplicate a layer and add another layer in between filling it with white. Now select and copy the whole layer. Add layer mask to it and alt click it. Now paste the copied layer on the masked layer. Now do the control+I to invert the masking. Now the images gets a glowing effect on which you can apply the glossy effect on it. Now merge all t...
Cell phones aren't just for calling people anymore! The LG enV3 offers a ton of photographic and video options which this video shows you how to use to their full potential. Not only can the LG enV3 record photos and video, you can edit and enhance them as well. There's even a Face Beautify option for your bad hair days, and a Funny Face setting to brighten up any frowns.
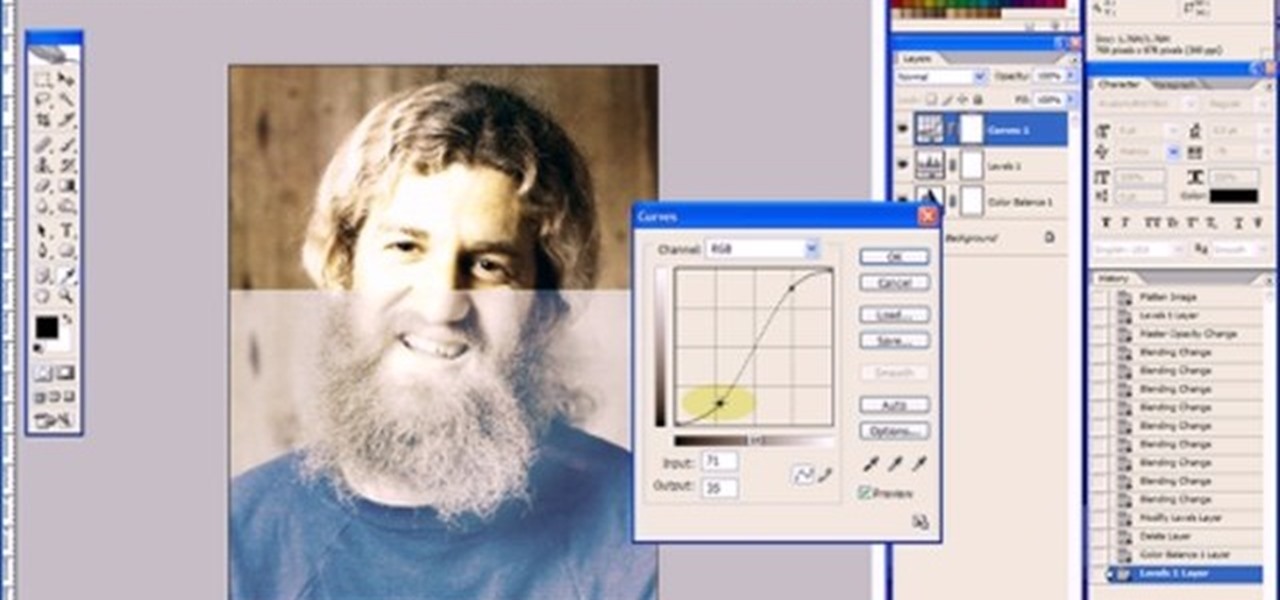
This Adobe Photoshop tutorial covers using adjustment layers in Photoshop CS2 to help out a badly desaturated photo from the early '70s. Learn to use Photoshop levels, curves and color balance tools to color correct and fix faded old photos.
This is a tutorial in Adobe Photoshop CS2 demonstrating primarily the use of the quickmask tool to make precise selections of organic shapes. Other topics covered include adjustment layers and layer masks. So watch and learn how to enhance photos using quickmasks, layer masks and adjustment layers in Photoshop CS2.
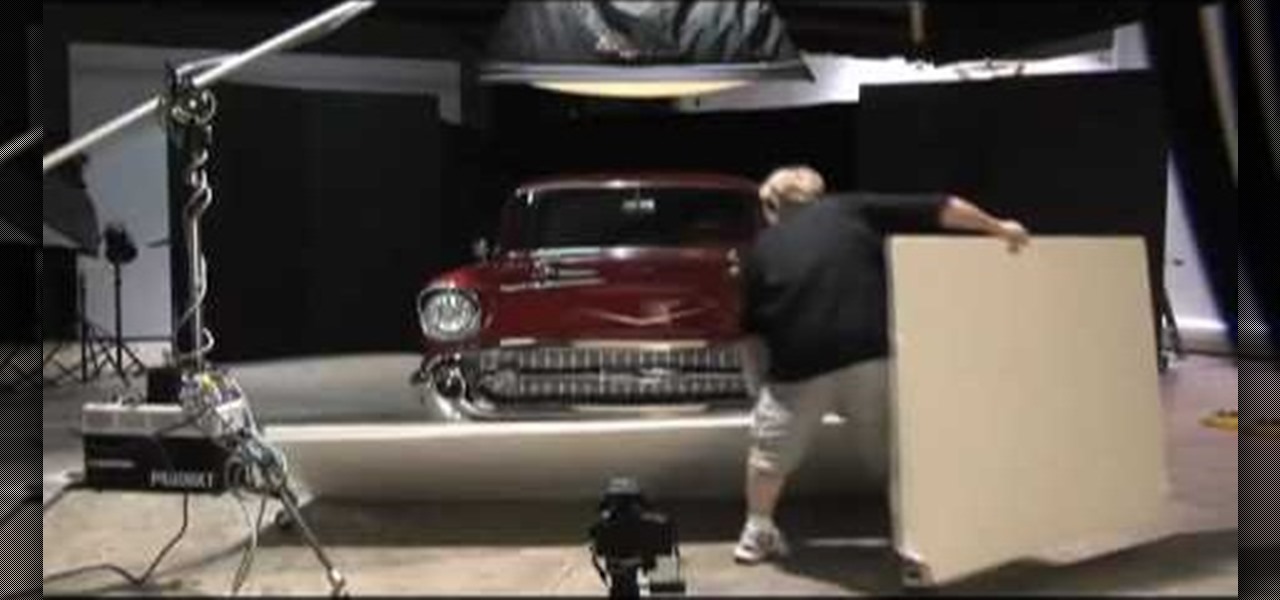
Watch this instructional photography video with Jim Talkington and learn how to light a '57 Chevy in a photo studio. This is a beautiful car, but it prevents some challenges in photographing the shiny paint and chrome surface. In this tutorial, experiment how to set up the lighting. This video is great for car aficionados. Practice these tips and improve your photography skills.
Dolin O'Shea and Make Magazine show us how to create an embroidery pattern from a photo.
This new software turns still photos into talking animations! You can record audio and animate a photo to make these photorealistic animations.
You can never see too many tutorials on retouching portraits since there are so many types of imperfections and types of people. These two examples explains how different blurs can be used, and use of other retouching tools. You should have a good knowledge of the Photoshop interface and workflow before starting.
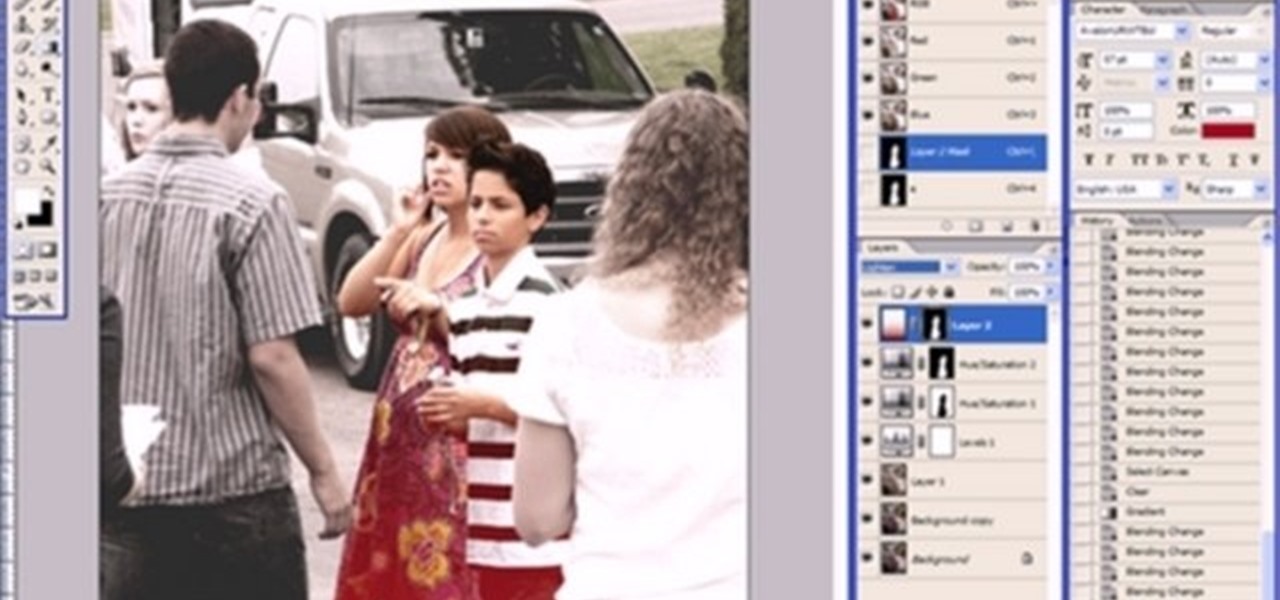
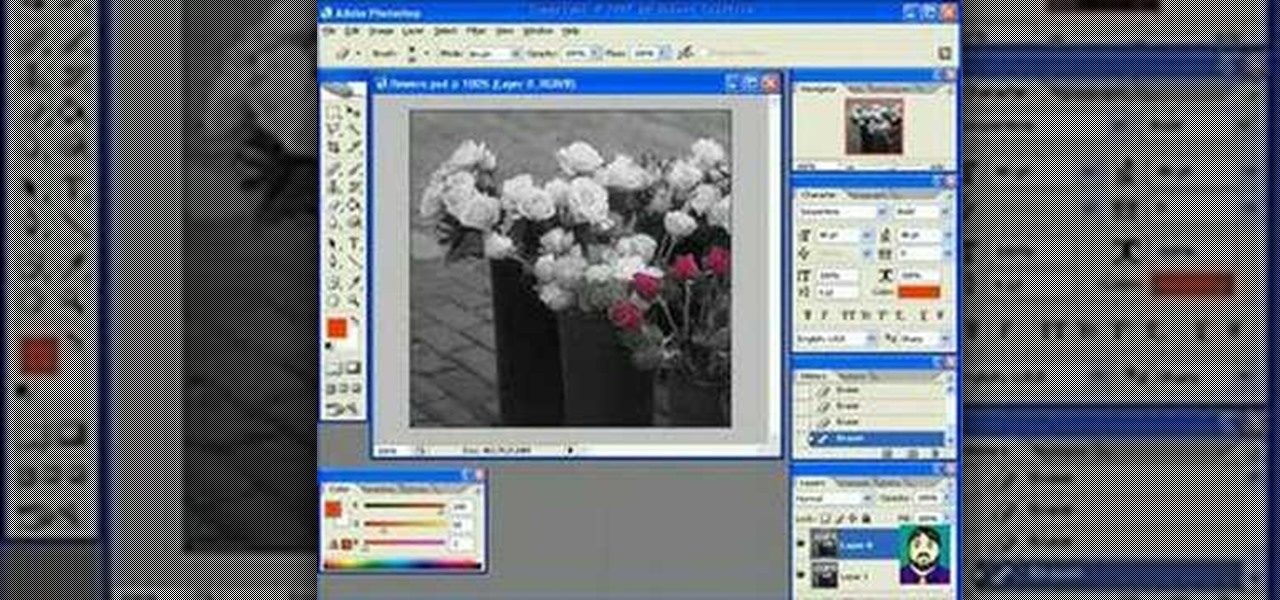
One of the neat things about Adobe Photoshop is the ability to add color to a black and white image. However, it's sometimes difficult to get just the right color. This is a neat trick to get the exact colors in a section of the photo, while leaving the rest of the photograph black and white.
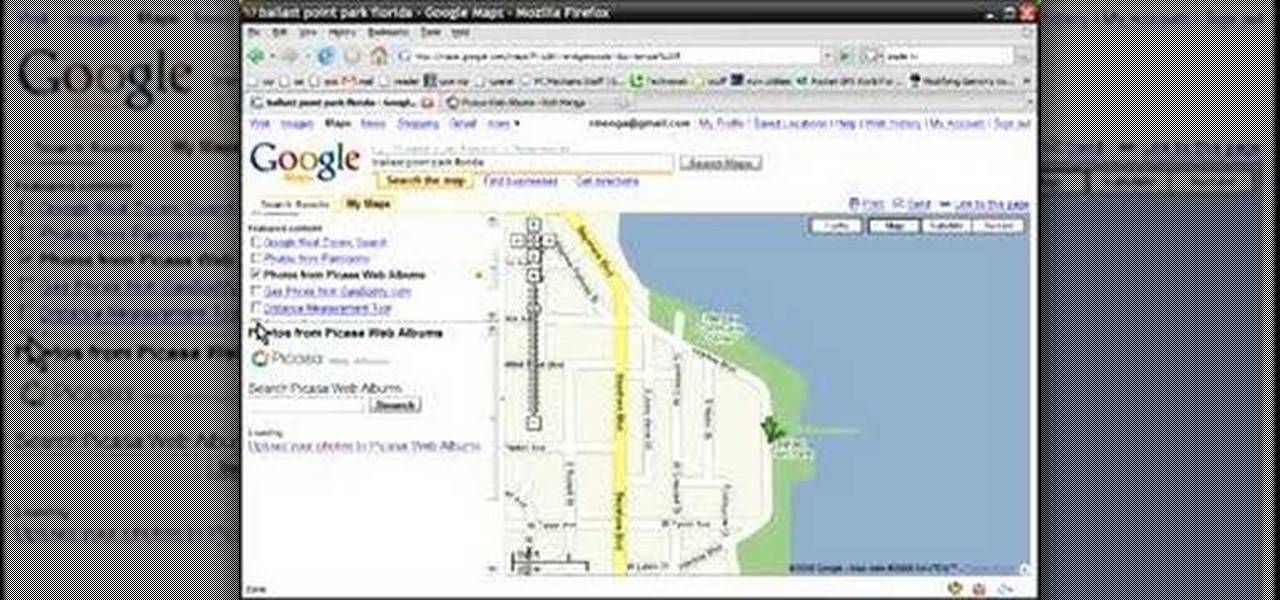
Learn how to geo-tag your Picasa photos so that your Internet albums will display the locations of your photographs via Google Maps. You'll need a Google account or a Gmail account for this to work.
In this video tutorial you will learn to use Photoshop to remove harsh sunburn from a photo image. Learn to use the Selective Color Option and mask to do the trick. You won't believe the how great the result would look til you see the video!
The type or text you usually include in your artwork in Photoshop does not need to be in solid color. In this video you will learn to fill type with a photo in Photoshop CS2. Spice up your next artwork with this cool trick!
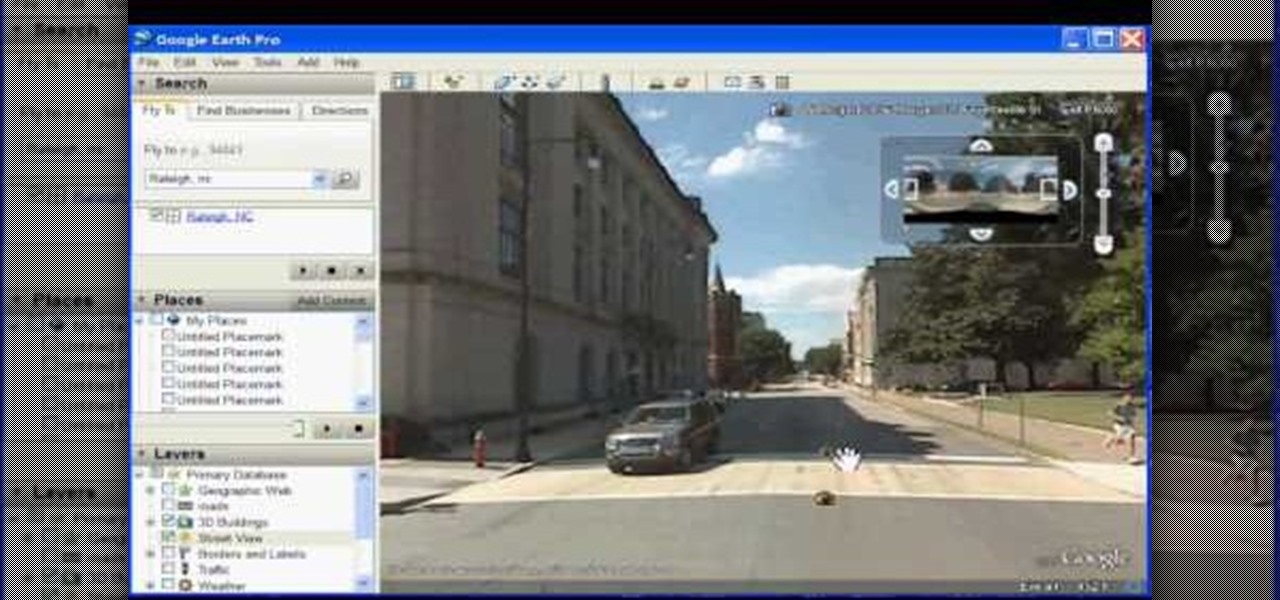
In this how to video, you will learn how to use Google Earth. First, download the program. Type in a city and state in the form. In the lower left, check street view to turn it on. Click the magnifying glass to zoom in. Some cities have 3d buildings. When you get really close, you will see cameras indicating street view images. If you get even closer, you will see spheres of the actual street view images. Click on it and the photo to get into the photo. In the upper right, you see controls to...
In this Photoshop tutorial the instructor shows how to create a Polaroid photo. First open the regular photo and make it into square shape as Polaroid images are in square shape. So use the selection tool and crop it into square shape. Now unlock the layer from background mode. Now go to the image canvas size and increase the size of canvas like up to 800 X 800 pixels. Now the layer can be moved around in the canvas. Now add another layer and fill it with white. Now select the image leaving a...
In photography, creating a double or multiple exposure photo involves combining two different images to make one single image. This technique has been used in film photography by exposing a piece of film twice to two different images. The second image becomes superimposed onto the first image, creating various effects that may mirror one another or seem ghostly.
If you want to take beautiful macro photos, without having to pay for an expensive macro lens, try the reverse lens technique and use the lens you already have. This is a creative way to get great photos without spending all of your money on equipment.
GIMP is the free alternative to Photoshop, and many of the things that you can do in Photoshop, you can also do in this open source software. Want to see how you'd look with a lip piercing, or want to touch up a photo and add one where there isn't? This tutorial shows you how to add a fake lip piercing to nearly any photo. It's not that difficult - as long as you're familiar with the basics of GIMP, you'll be able to make this work for you!
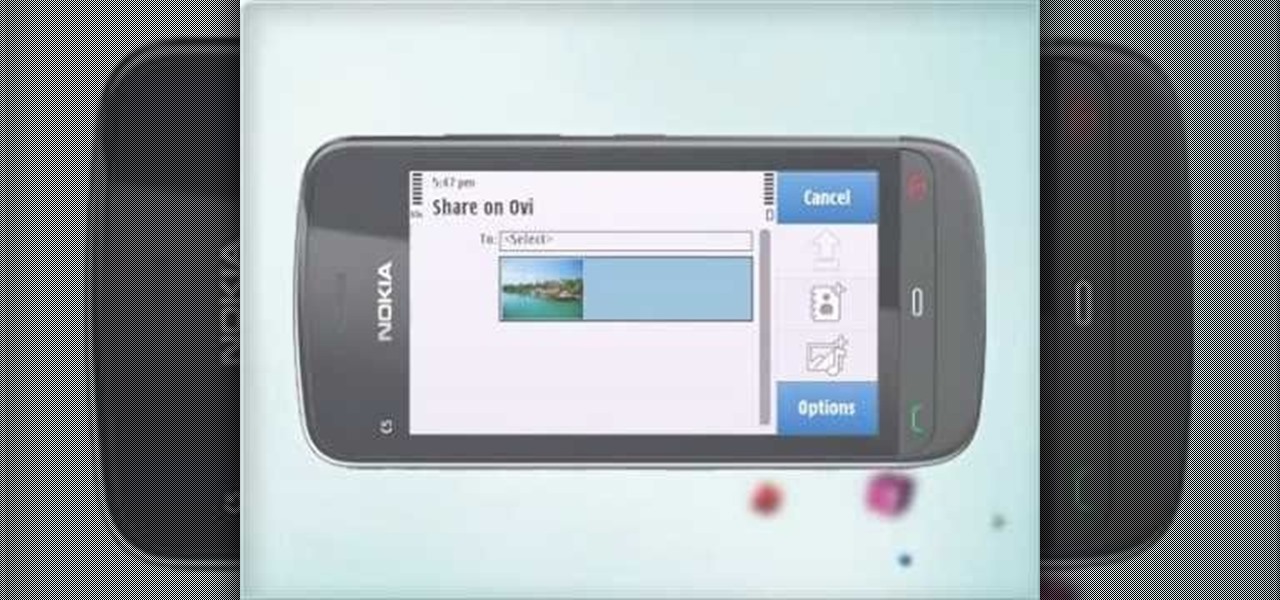
Learn how to take photos with the C5's camera. The C5 is the first offering in Nokia's new "C" series of mobile phones. It runs on Nokia's Symbian OS and features a 2.2-inch screen and 3.2-megapixel camera. Want more? Search WonderHowTo's sizable collection of C5 video tutorials.
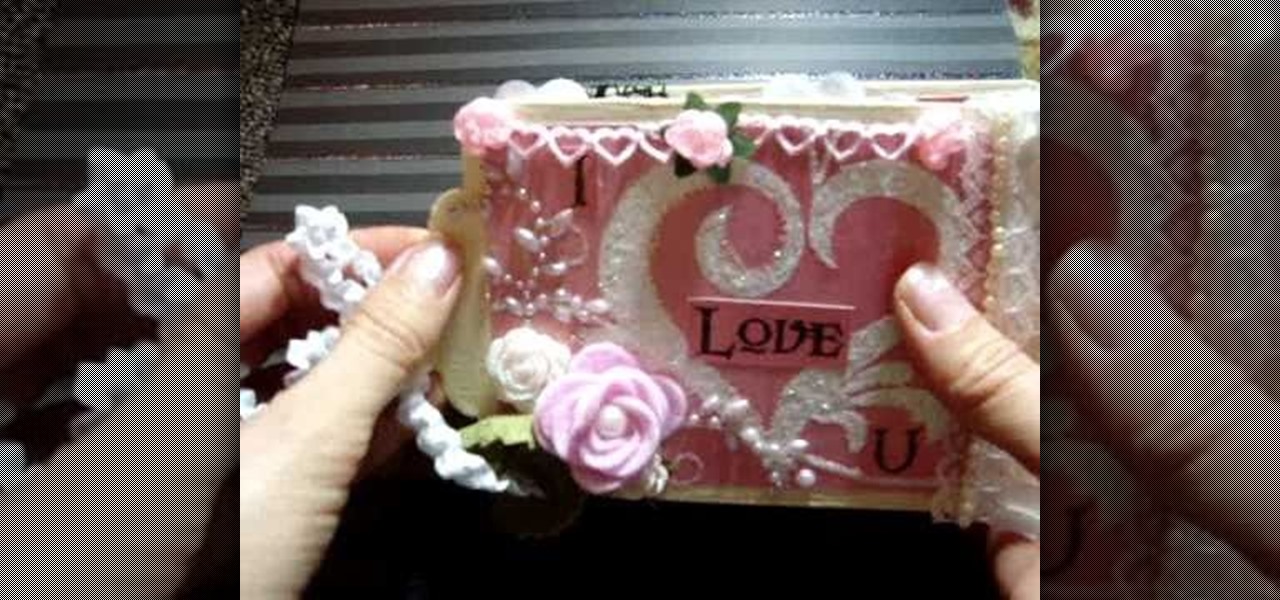
Valentine's Day is going to be here in less than a month, so make sure you keep all of your photo memories safe by placing them inside this miniature floral "I Love You" Valentine's Day mini album.
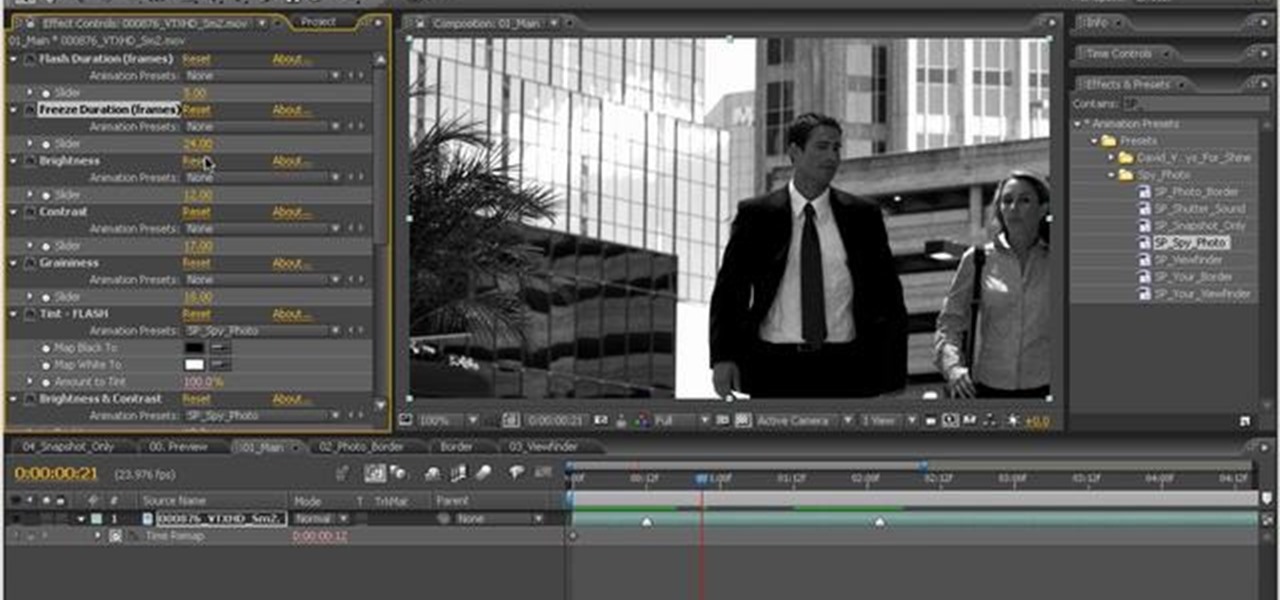
Simulate the look of snapshots in your After Effects video footage with Spy Photo, a free set of presets that dynamically automate and generate the effect. This 17-minute tutorial from Aharon Rabinowitz of All Bets Are Off demonstrates the features of this cool new addition, which includes camera sound effects and viewfinder overlays.
Watch this video tutorial to learn some very useful tricks in iMovie. In this video, you'll learn how to overlay both photos on video and also overlay video on video using iMovie. In addition, you'll learn how to turn on the greenscreen tool.