Wrinkles are one of the facial features that people most want to cleanse themselves of, be that via facelifts or simply by retouching their photos. This video demonstrates how to do the latter using Photoshop, using Hillary Clinton's face as a model. Remove your wrinkles without making yourself look like a porcelain doll!

This is a great holiday project that also encourages recycling! Take a few old cereal boxes and repurpose them into either tags (which you can use for gifts) or glittery photo corners that you can attach in your albums or scrapbooks.
By now most of us have a Facebook page. But if you've tried to steer clear of the social revolution and have finally given in, how everything works on the site may seem confusing to you.
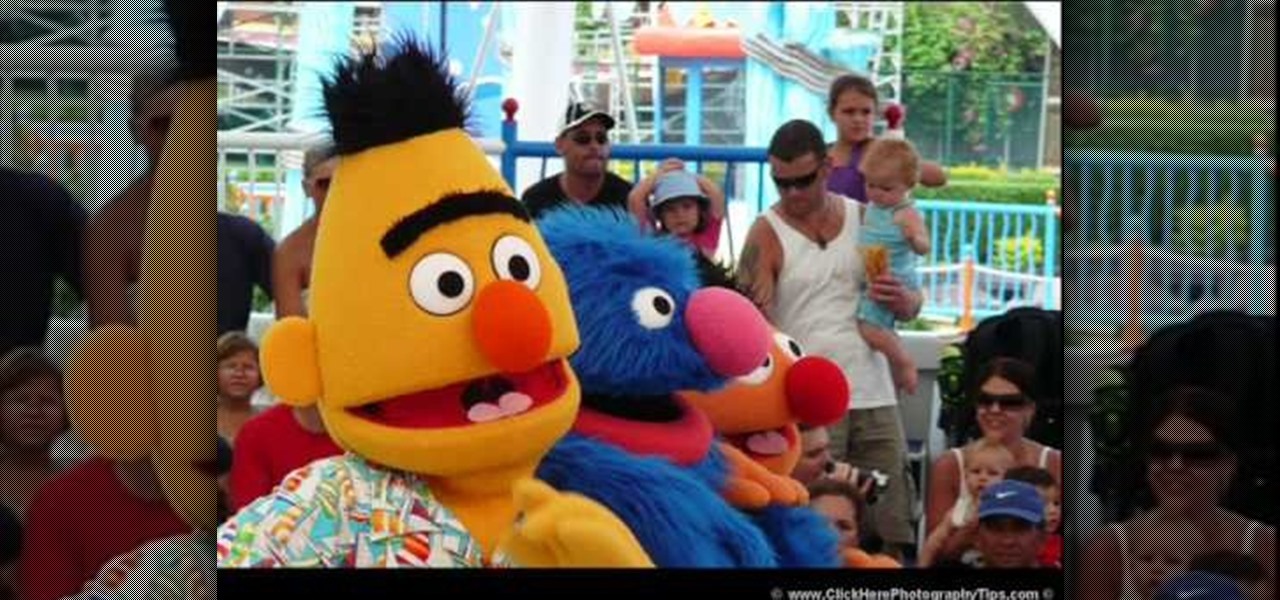
In this video from clickherephotography we learn how to take great photos by using depth of field. In a picture of a bird he used an aperture of about 5.6 which increased the shutter speed on a 300mm Canon lens. With depth of field you can blow your background out. If you used a higher aperture, a lot more of the bird would have been in focus and a bit of the background would have been in focus. By using an F-stop and this aperture, you really bring the bird or whatever object is in the foreg...

In this video, we learn how to use the camera on the iPhone 3GS. From the home screen, tap the camera icon. From here, the camera will appear on the screen with what you can take a picture of. At the bottom of the screen you will see the camera icon, thumbnail icon, and photo/video switch icon. You can tap the screen to do a focus and you can tilt the camera sideways to take a landscape portrait. To take a photo, tap the camera icon and then the photo will be saved to the thumbnail. Enjoy usi...
In this video, we learn how to use the desktop/SMS background app on the iPhone. First, you will go to your photos and then go to any photo you want. Then, press the box to use as wallpaper. From here, you will see a left "i" and a right one. Choose which one you want for your SMS or your desktop background. From here, go back to your springboard and it will be there on your screen! You don't have to re-start your phone to do this, it's just that simple. To remove it, go back to your photos a...

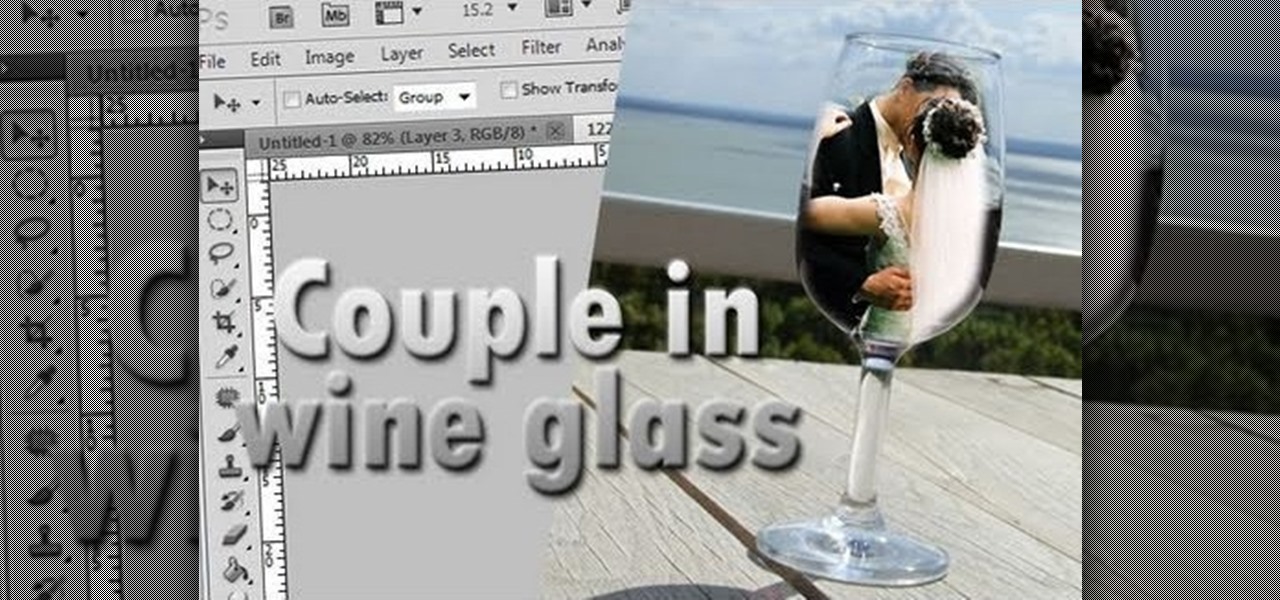
In this free video Photoshop lesson, we learn how to create a simple wine glass photo effect. Whether you're new to Adobe's popular raster graphics editor or a seasoned designer looking to better acquaint yourself with the new features and functions of the latest iteration of the application, you're sure to benefit from this free software tutorial. For more information, watch this video guide.
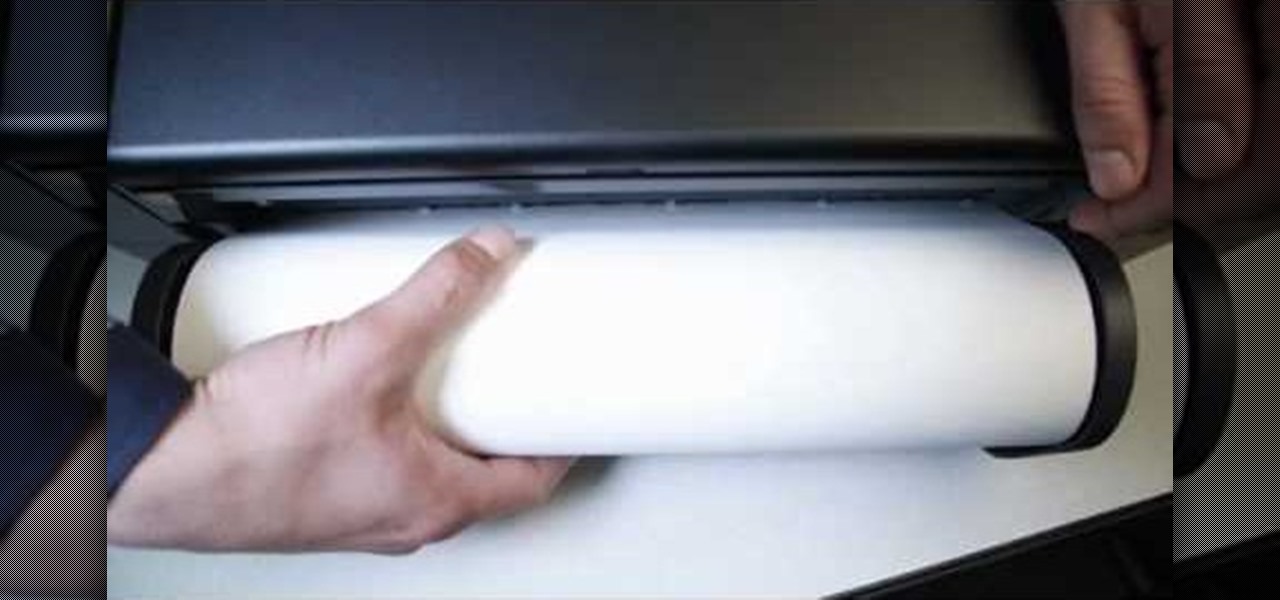
For someone used to working in reams or sheaves, a roll of printer paper can be confusing. However, replacing the paper in your printer which calls for rolls is not that hard. This tutorial shows you a very easy to follow process for loading paper into your printer. While this focuses on the Epson Stylus R2880 model, it will still work for other models.
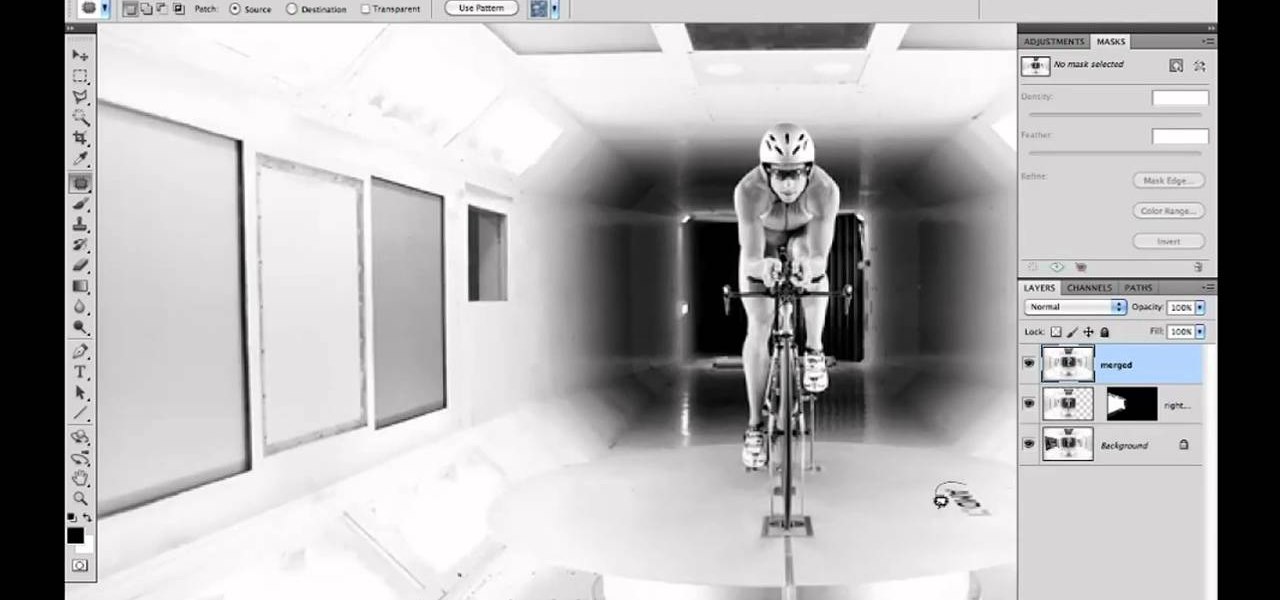
In this video tutorial, we learn how to clean up details when retouching an athletic photo in Adobe Photoshop CS5. Whether you're new to Adobe's popular raster graphics editor or a seasoned designer looking to better acquaint yourself with the new features and functions of the latest iteration of the application, you're sure to benefit from this free software tutorial. For more information, watch this video guide.
Has white balance always been a problem in your photographs? Getting the perfect color in your photos is tricky business, even on digital cameras. This video will give you the ultimate information on customizing the white balance and color temperature for your film, video footage and pictures. Ritwika teaches how to obtain accurate color balance using various custom white balance techniques.
This is a video tutorial in the Software category where you are going to learn how to optimize photos in Xara Xtreme / Xara Web Designer. This is really very easy and simple to do and takes practically no time. Open up Xara Xtreme and go to the object gallery and select a photo that you want to work on. You can now resize the image by simply stretching or shrinking it in any direction. You can also drag and position the image at any part of the canvas that you desire. You can now go to file a...
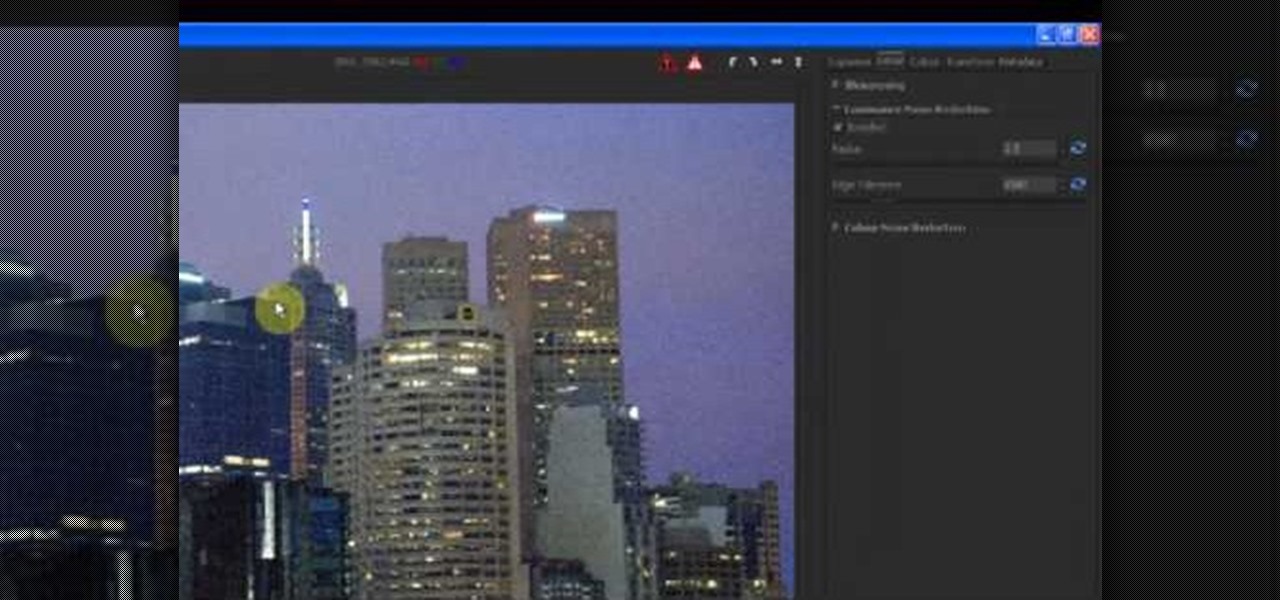
In this tutorial, we learn how to reduce noise in RAW Therapee. First, open up your photo in the software that you want to reduce the noise on. Then, open up the detailed view of the photo and click on then click on the detail button. Through here, you can sharpen the image or you can change the noise reduction for the color and luminance. Click on the drop down menu for the luminance and then enable to checked section. Then, move the edge tolerance to its maximum to see the full effect on th...
Blackberry makes it easy to get pictures from your phone and into email or onto a computer. You can either send them directly from your PDA (such as with an app for Flickr or Twitter). But if you have a lot of photos, you can get them via sync cable.
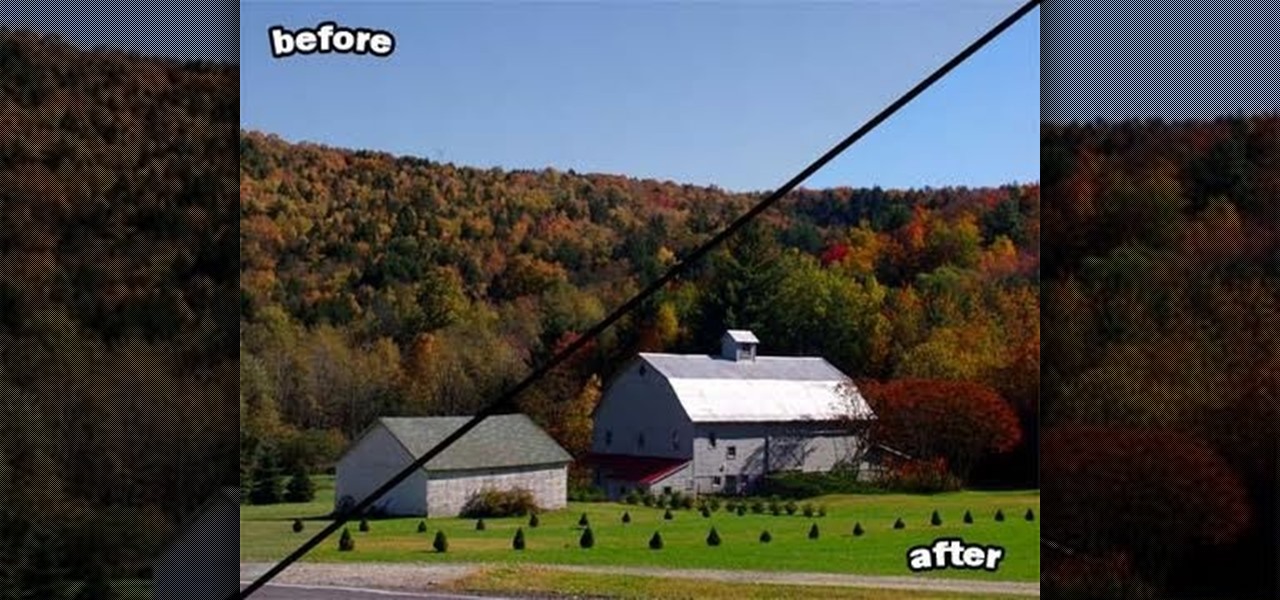
Bring out all the colors in your photo! Make them extra saturated so your image has exceptionally vivid colors. This tutorial shows you how to use the luminosity and other light effects in Adobe Photoshop to make the colors really pop for your project.
In this tutorial, we learn how to create a Lomo effect in Photoshop. This is a contrast that gives the photo a "cool" vibe and change up the effect that you see. First, load up your picture into Photoshop and then go to adjustments, then curve. From here, add a slight s-curve and then add a green channel with the same s-curve that you just created. Go to the blue channel and create the opposite s-channel from the others, then click "ok". Now, go to layer, new adjustment layer, then gradient m...
In this video, we learn how to capture your holiday in eight digital photos. This is a challenge for most people, but it can help you remember your vacation without taking hundreds of photos. First, make sure you have different lenses to capture shorter and longer distances. Find photographs of the most beautiful places, using travel guides and locals as help on where they are. Capture a beautiful sunset or a memorable church with your camera, this will help you remember your surroundings. Al...
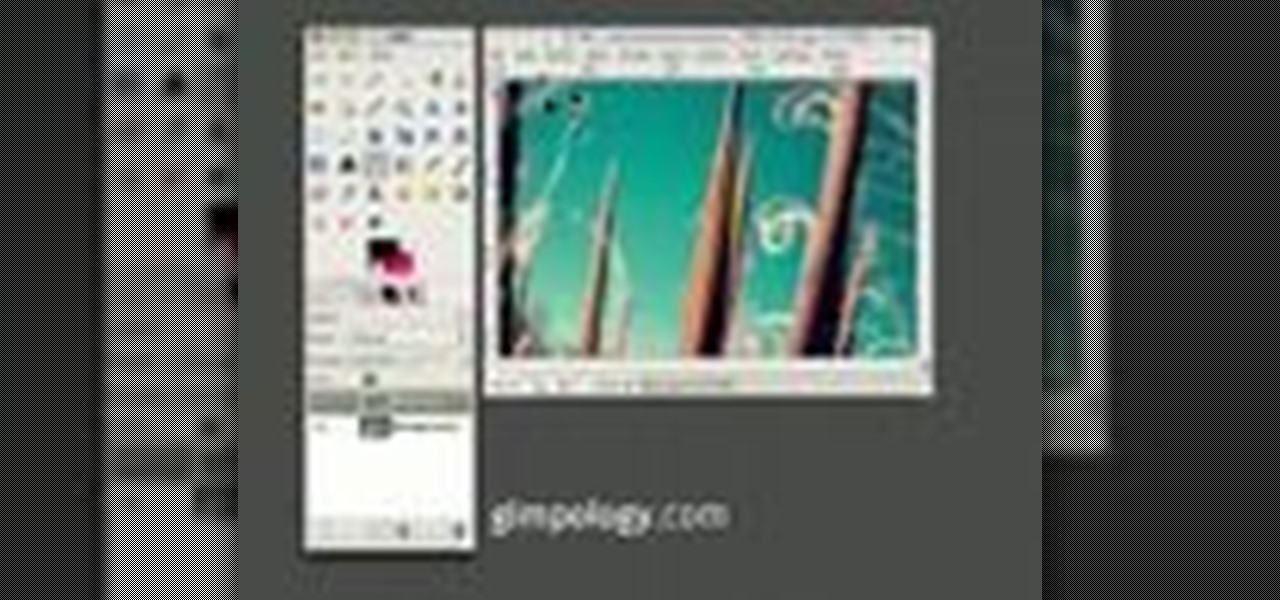
GIMP is an amazing, free image editing program that allows you to edit your photos just like in photoshop! And if you've been looking for how to create a more vintage look to your pictures take a look at this video! You'll see the different changes he makes to the color, opacity, saturation, brightness, and other settings to give it a truly vintage look and feel.
If you're creating a family scrapbook, cutting and cropping is more than just a few straight cuts. Use your creativity and these cropping techniques to help you shape and display your treasured photos in a beautiful album.
Photo books are a great way to consolidate your favorite moments into one place, and there's no need to buy those clunky photograph books anymore, especially when the whole world of photography has turned digital. That's where Lulu comes in.
Want to make your photos look professional, but don't have a digital SLR and don't want to go through tedious and neverending photo tutorials? Then you've hit the right video.
This next arts and crafts tutorial will show you how to make a homemade photo album. It's a perfect video to follow, if you're looking for an easy gift to make for your mother, friend, or relative. So check it out, pay attention, and find out how to make this great gift that is sure to last a long time. Enjoy!
Take, edit and send pictures on your Samsung Reality smartphone. This free video tutorial will see that you need everything you need to know to take, share and edit digital photos on your Reality. For thorough instructions on how to use your Reality's camera and picture editing software, watch this cell phone guide.
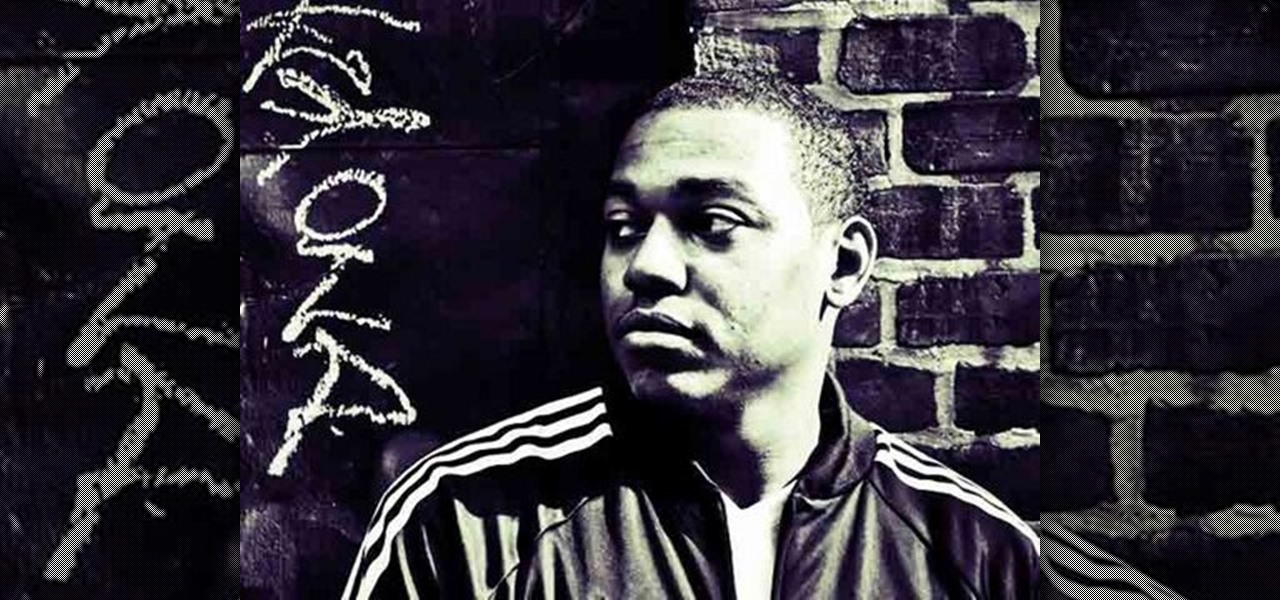
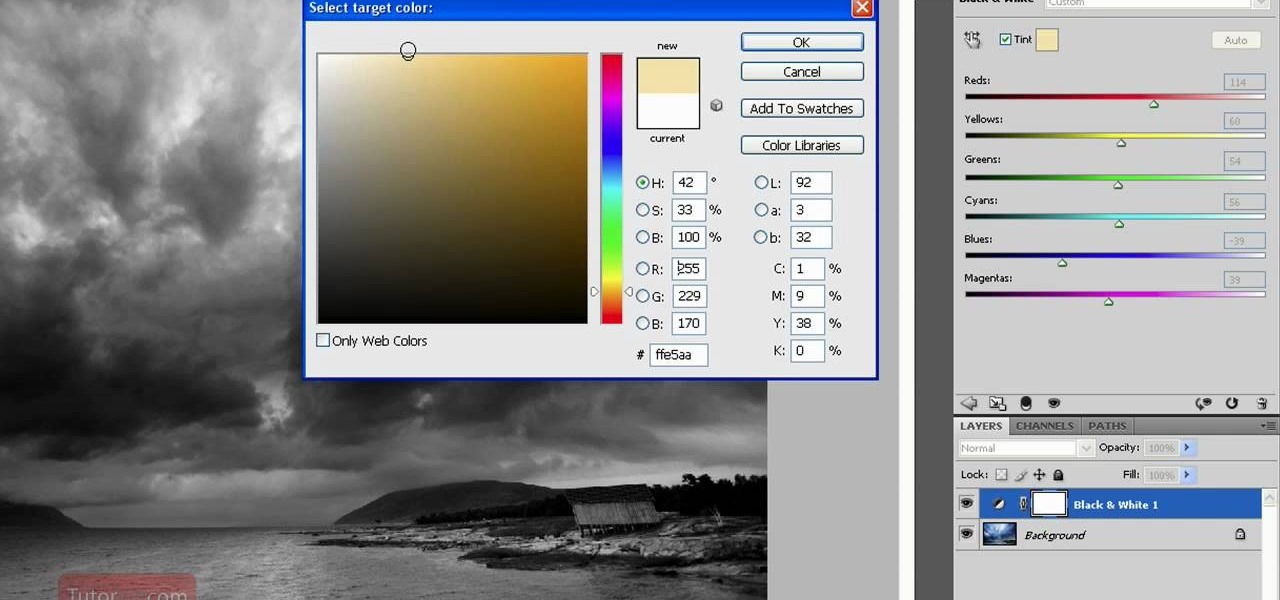
Black and white photos are great to look at and remind others of a time when technology was simple. They add a certain sense of drama and mystery to them it can be kind of relaxing to look at. In this tutorial, you'll find out how to take a normal photo and convert it into a black and white image using Photoshop CS4. Enjoy!
Just getting started with Photoshop? In this tutorial presented by Yanik's Photo School, learn how to use the patch tool in Photoshop instead of the healing brush. The patch tool retouches images using sampled pixels or pattern and comes in handy when trying to touch-up a photo.
If you've ever wanted to sketch something from scratch and realize you don't have the time to take formal classes, then Photoshop might be what you need. In this helpful tutorial, you'll find out how to take your photos, or any other photo out there, and turn it into a beautiful masterpiece. So sit back and enjoy this tutorial on how to turn a picture into a sketch using Photoshop CS4.
Creating sketches from scratch can be a difficult task, especially those who have no idea of what they are doing. Luckily for them, there's Photoshop. In this tutorial, you'll find out how to transform a photo into a sketch. It's fairly simple to do and will impress any of your friends and family. Good luck and enjoy!
This Photoshop tutorial is one that is widely used amongst professionals and everyday people. It can be used to add shadows to photos, darken the skin of family, friends, or even models, and even make the sky in a photo look more menacing. This tutorial focuses ont the burn tool and how it can strengthen an image's tone. Enjoy!
Photoshop is all about being creative. The more you know, the better you become at mixing certain tricks and techniques to make amazing pieces of digital photography. But there are so many it can take a good chunk of your time to fully understand the power that Photoshop holds. In this tutorial, find out how to easily combine photos and text using this awesome piece of software. Enjoy!
Photoshop is a great way to perfect your photos and artwork. In this tutorial, learn how to straighten a horizon, or create a straight one in a landscape image.
If the subject of your photo doesn't look as fresh as you'd like, check out this tutorial and learn how to soften skin with the surface blur tool in Photoshop. This tool is quite easy to do and in less than five minutes you could make a dramatic difference to your photos.
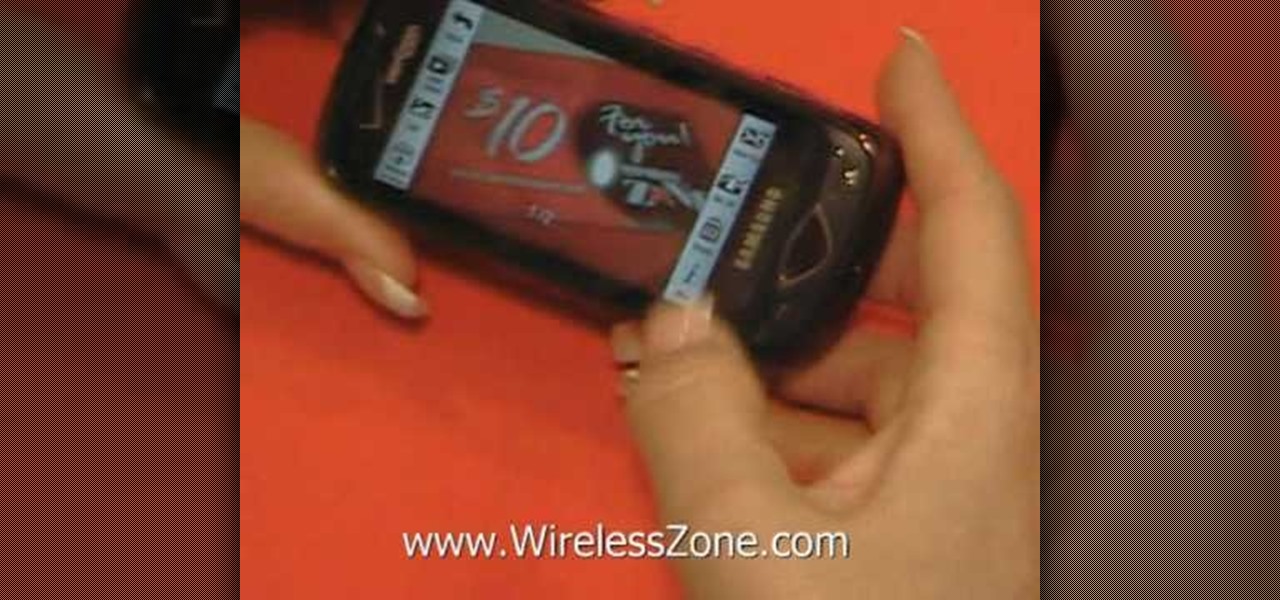
Are you a major networker with a cell phone full of digits? Are you horrible at remembering names and often times look at incoming calls with a look of confusion? There's a way to remember them from this day forward. Once you get a number, snap a picture of them and set it up as their caller ID. When calling, their photo will appear giving you a hint who it is! In this video courtesy of Best Buy Mobile, learn how to set a photo as caller ID.
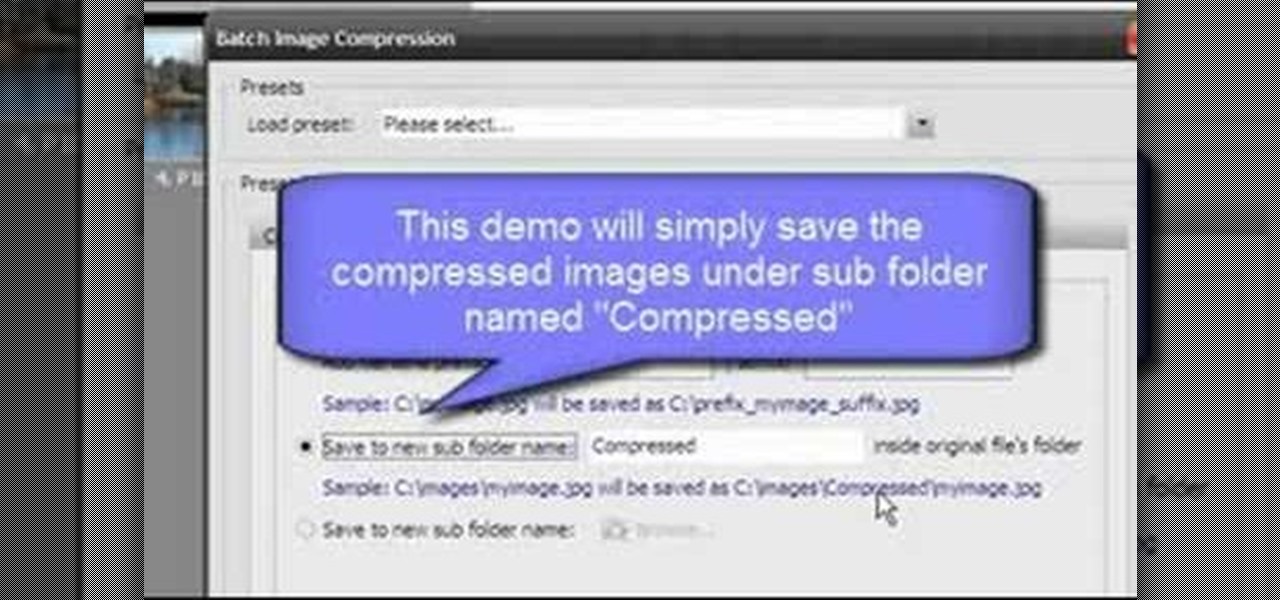
Open Image Compressor 2008 and go to the Image Tray. Pick the images you want with the image selector and click on them to add them to the Image Tray. If you want to add every photo in a certain folder, you just click on the Add All button. Once you have the photos you want, you can batch compress them. You can go to File>Batch Compress to start the process, or just click on the Batch Compress button in the toolbar. Then, pick the compression options you want, or edit the images. You can also...
Going to miss the fireworks extravaganza this Fourth of July? Doesn't mean you can't fake the experience, and that's exactly what we're going to do here—in Photoshop. You're going to learn how to take any night photograph and insert fireworks into it. It's the next best thing to watching some fireworks display firsthand.
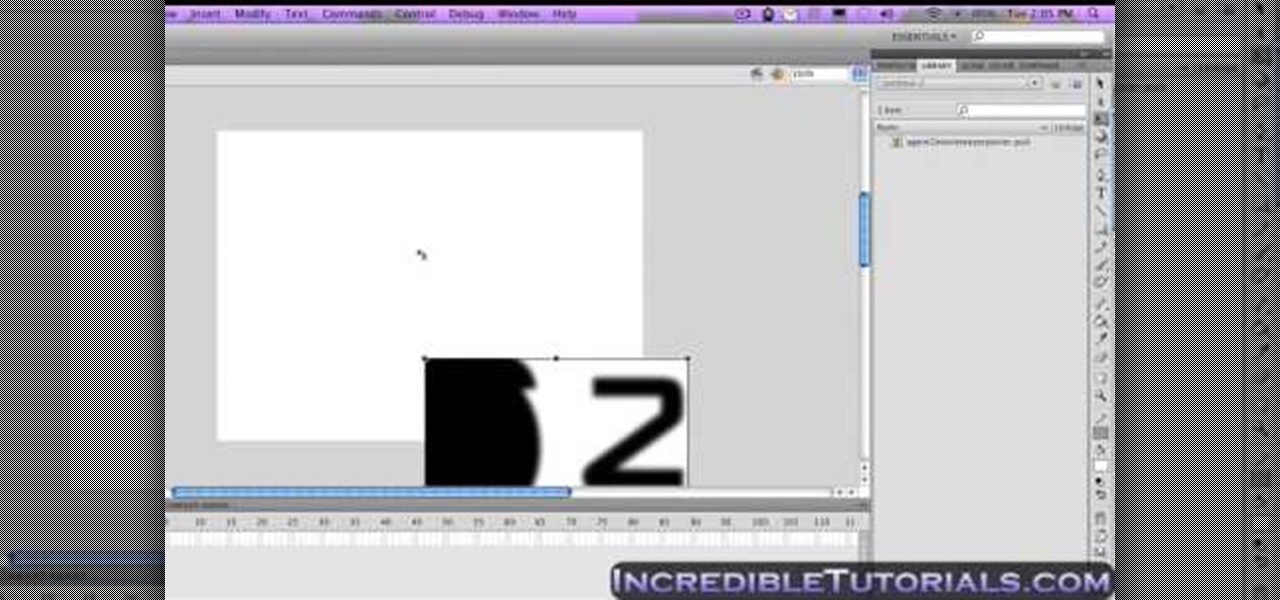
This video tutorial will help you to use the bone tool on an imported or Photoshop image while in Flash. If you want to use an image from Photoshop you must first pull the image up in the Photoshop program. Once the photo is pulled up in Photoshop you can save it by going to, file, and save us. Save your file as whatever file extension you would like to use (Photoshop, jpeg, etc). Pull up the Flash program and find file, and import. At this point you can import your Photoshop picture to your ...
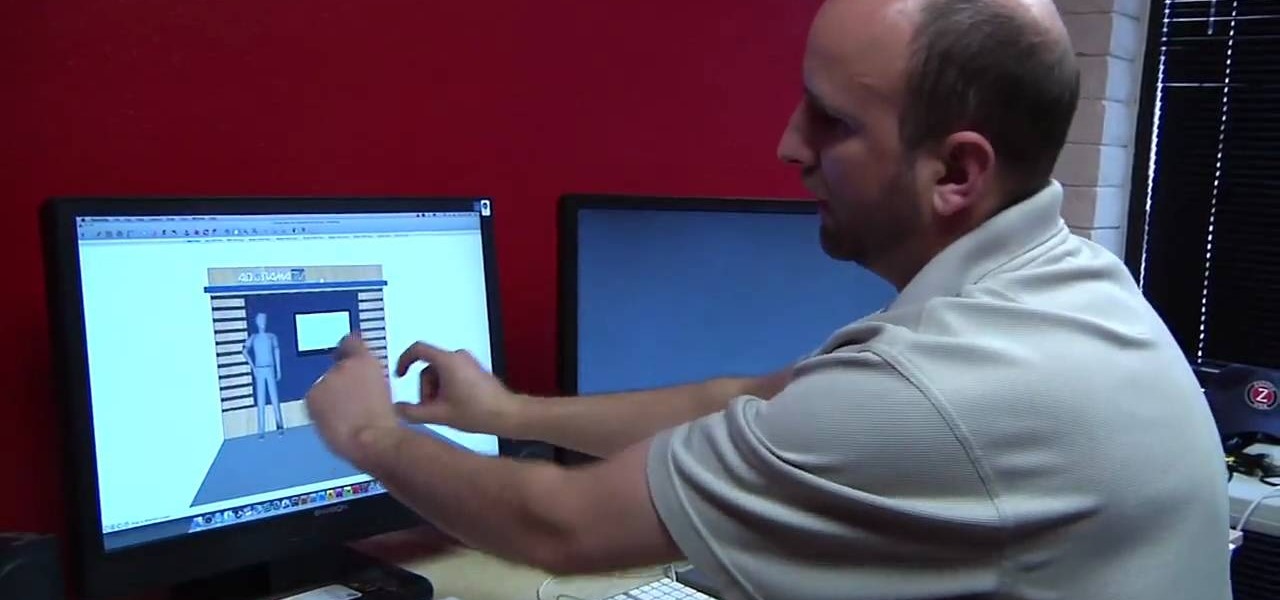
Need to build a for a set for a film, TV, stage or photo production? This free video tutorial will walk you through the entire process, from design and sketching to fabrication and assembly. For detailed instructions, and to get started building your own professional quality sets, watch this free set designer's guide.
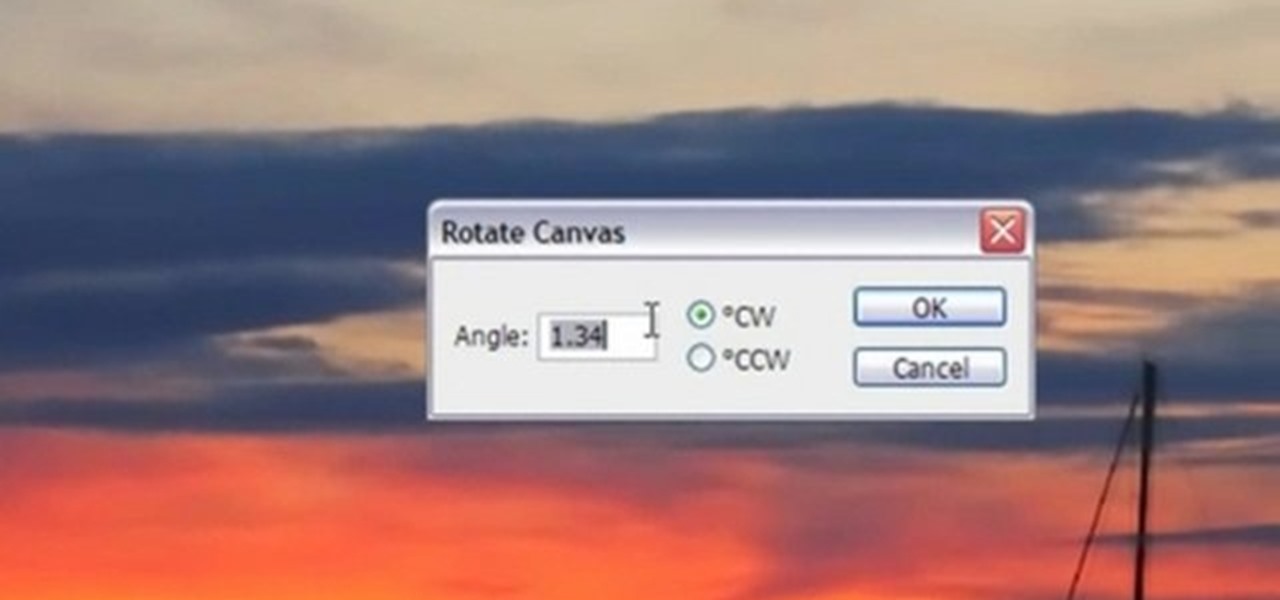
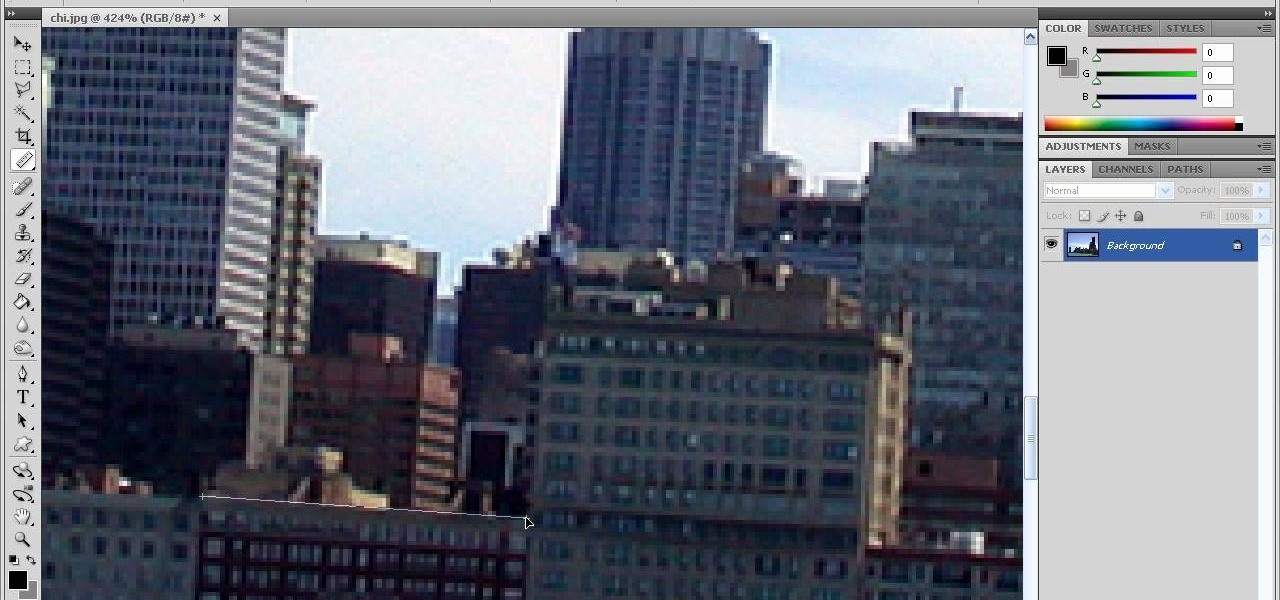
In this how-to video, you will learn how to straighten crooked photos in Photoshop. First, open the photo you want to straighten in Photoshop. Next, use the ruler tool under the eye dropper tool. Select it and zoom in to an area. Find a crooked line to straighten, such as a building rooftop or ground line of some sort. Click, hold, and drag. Next, zoom out. Go to image, image rotation, and arbitrary. Click okay and your image will be adjusted. Go to the crop tool and crop out the spaces. Hit ...
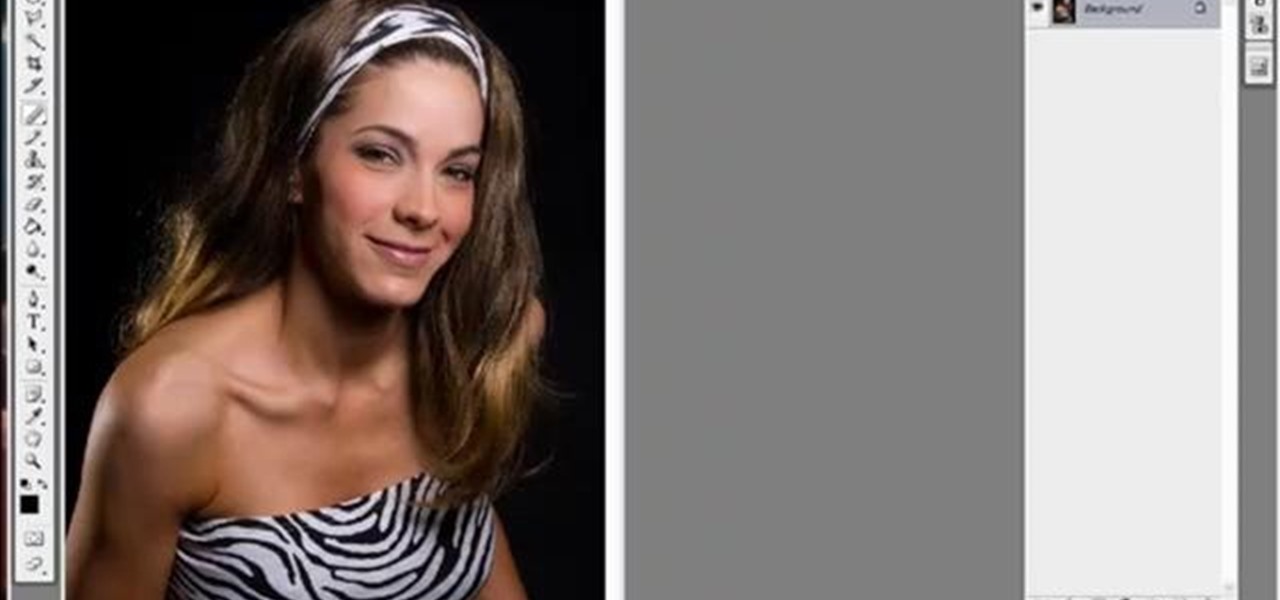
In this tutorial, learn just how easy it is to enhance your subject by changing their backdrop. By changing the background of a photo you can place your subject in new and exciting places, and enhance the color of their skin and eyes with the right color pallette.
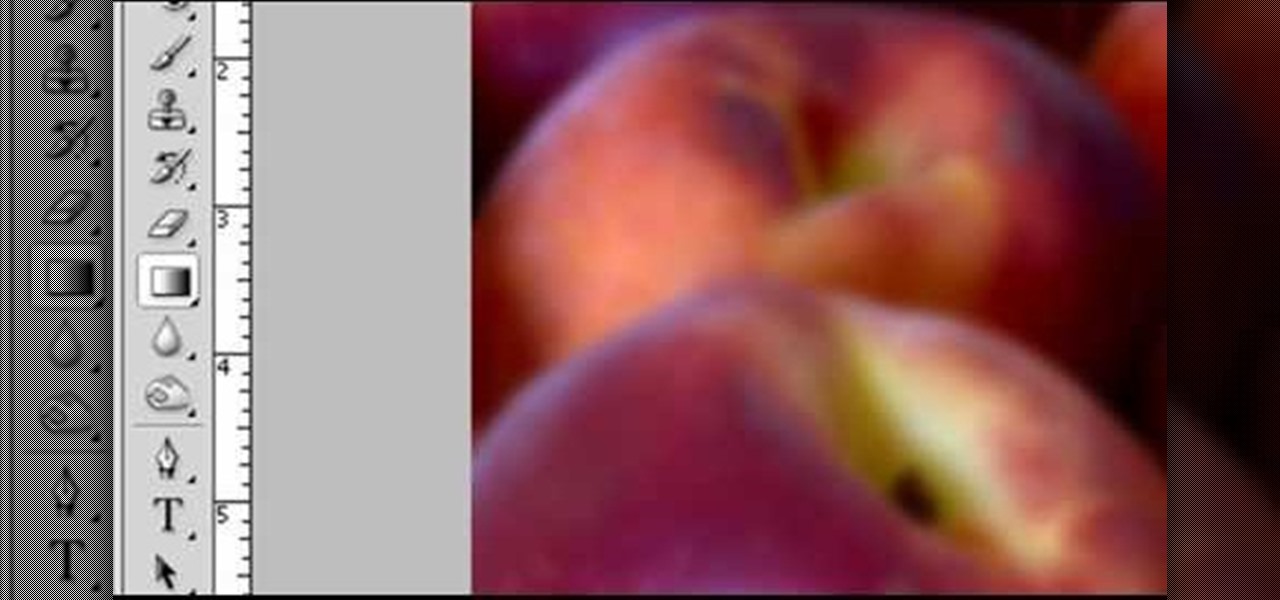
Robert with Roberts Productions demonstrates how to give your photos depth of field with Photoshop. You can create this effect by having a clear foreground and a gradually blurry background. First, duplicate the background layer. Then, go to filter and select Gaussian blur. Set it to a believable radius like 12 pixels. Create a mask by clicking on the mask icon. Then, make sure the foreground is set to black while the background is set to white. Next, go to the gradient tool and make sure tha...
In this how to video, you will learn how to turn a photo into a line drawing in Photoshop. First, open your image in Photoshop. Create three layers of the same photo. The top two layers will be worked with. The bottom layer will remain the same. Take the top layer and change it to color dodge. Select control and I on the keyboard to invert it. Go to filter and blur to choose Gaussian blur. If you have dark lines, use a small amount of blur. You can use a lot of blur to get a unique look. Clic...
Learn how to create an automator workload that will upload pictures to your Flickr account in this video tutorial. Simply Google "automator Flickr." Upload it to Flickr to allow access to your Flickr account. This means you will have to sign into Flickr and allow for the application to have access to your account. Every time you use the application, you will have to give the photo a title as well as tags. You will then save the photo as an application with whatever title you want. Anytime you...