This video shows you how to make a homopolar motor. First of all things you need to make motor are AA battery, couple of magnets and copper wire. Now take magnet and attach it to the negative end of battery, now take a copper wire and bend it to the shape shown in the video and place it over the positive end of the battery, now you will see that wire starts rotating. Now to make a stand take a small plastic lid and two pieces of rubber magnet then place magnets to both the sides of the lid an...
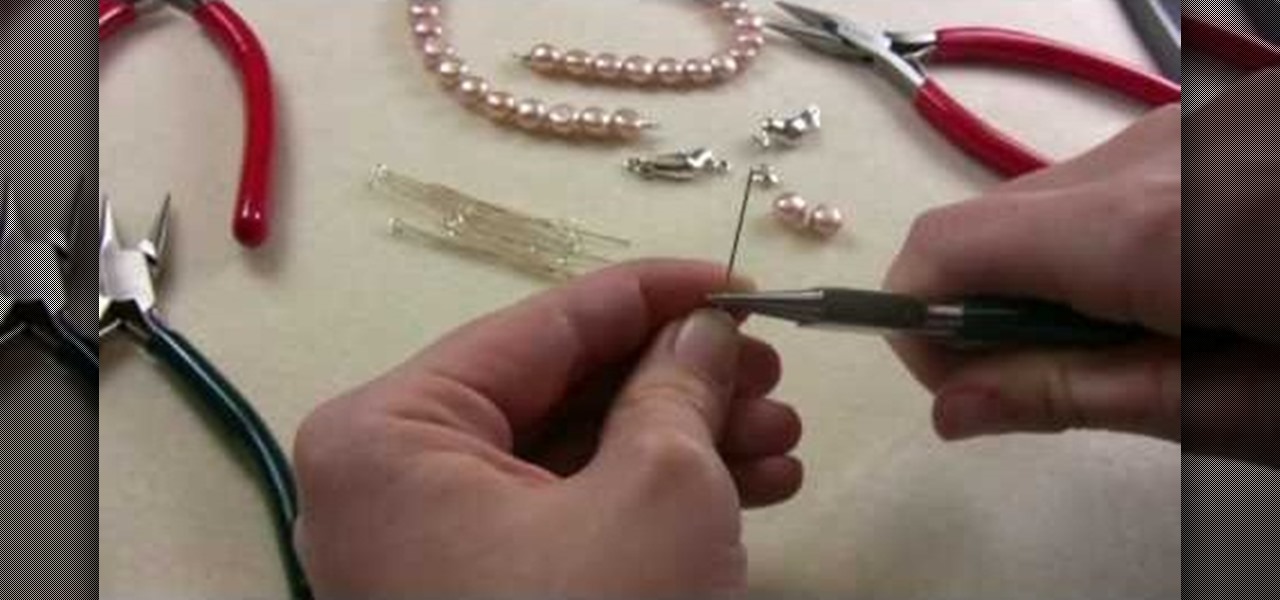
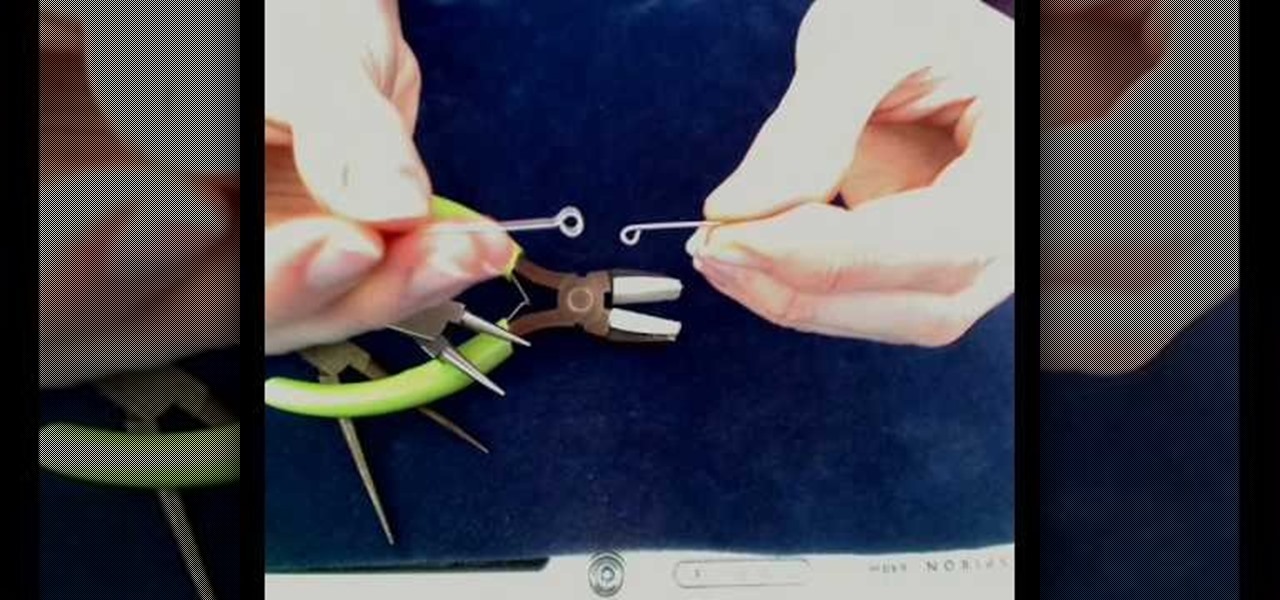
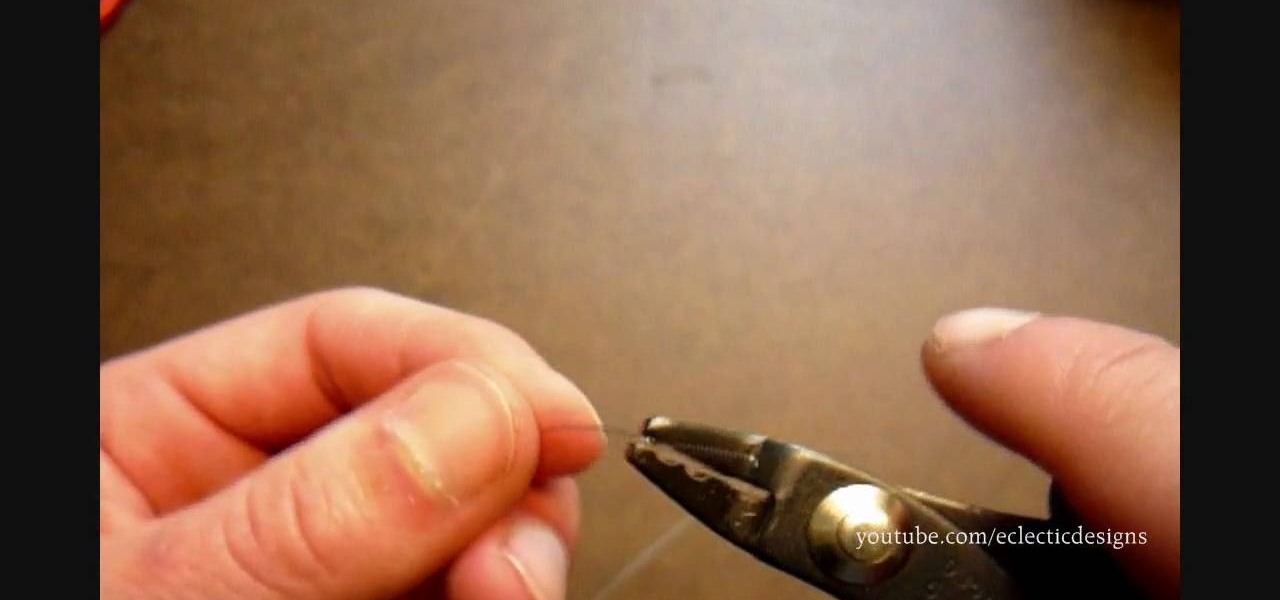
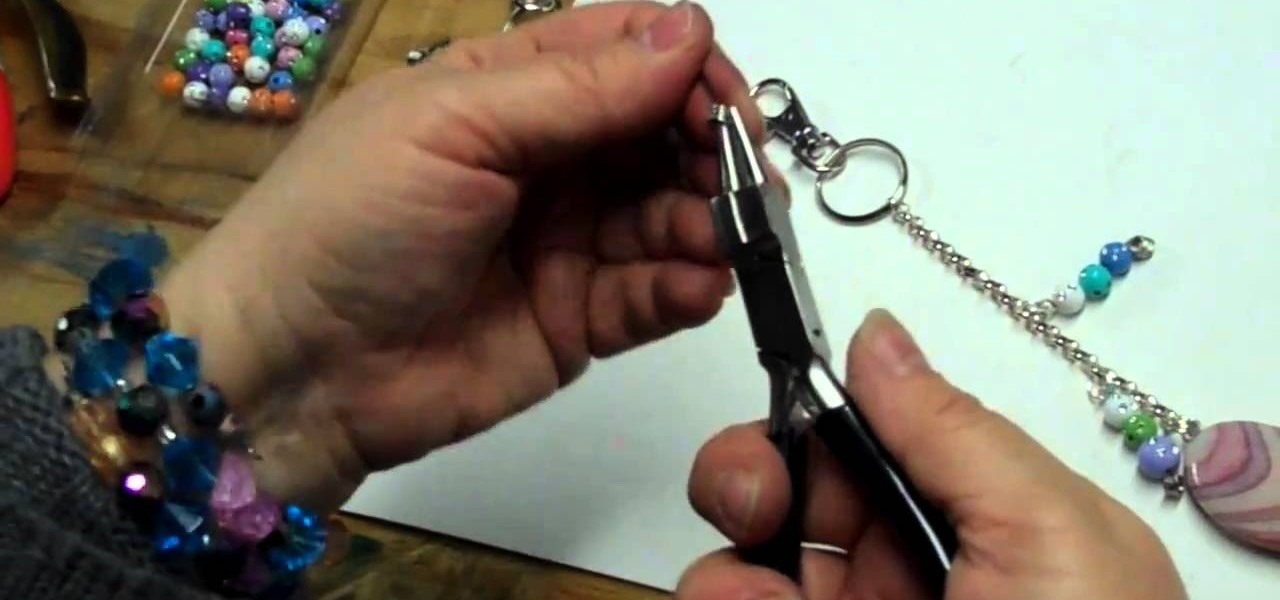
Artbeads demonstrates how to make a wrapped beading loop. First, take a head pin or an eye pin and add the beads that you would like to use. Use chain nose pliers to make a 90 degree bend about 1/8 inch above the bead. Hold the bead so the tail of the wire is facing towards you. Use round nose pliers to position the wire into a loop. Use your fingers to complete the loop. Next, attach chain link or a clasp to the loop. Use another pair of chain nose pliers to wrap the rest of the wire around ...

In this how-to video, you will learn how to make irregular bead cages. Corinne Bradd will show you how easy this is. First, if you have a flat or nugget type bead, it will be hard to make the cage easily. First, place the wire through the bead and bend it up from the loop. Hold it in place and wrap the wire around the bead. Keep wrapping until you get to the top. Next, wrap the wire around the top so that it will be completely fastened. Snip away any excess piece of wire. You can hang it from...
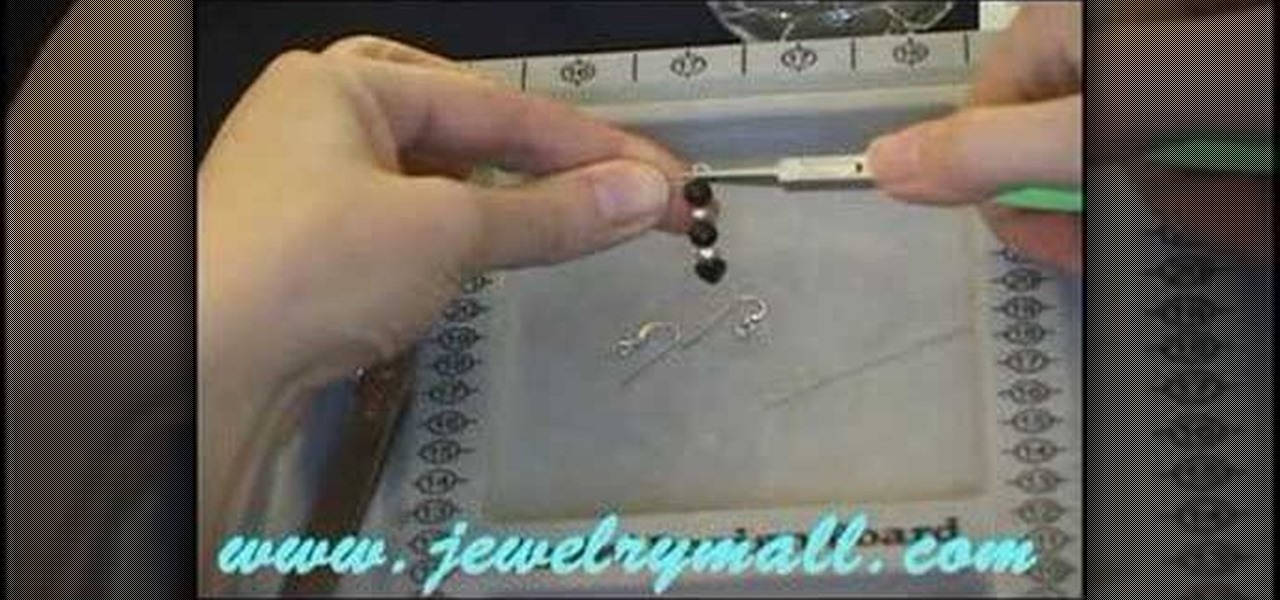
Marianna takes us through the process of creating a beautiful set of earrings! For this project you will need two sterling silver head pins, four fresh water pearls, some gemstones of your choice, two sterling silver ear wires, round nose pliers, flat nose pliers, and a cutter. Take your head pin and string your beads and gemstones on the head pin. Next using the flat nose plier, bend the end of the head pin to create a 90 degree angle. Then make a simple loop where the ear wires will be plac...
Learn how to make beautiful beaded earrings with this instructional video! The tools you will need are two head pins, ear wires, a pair of pliers, tweezers, and a nail clipper. First start off by choosing your favorite combinations of beads. Begin by stringing the beads in any order on the head pins. Next you will need to close the head pin off. The easiest way to do this is wrap it around with the pliers. You do this by easy twisting around the earring. You make sure to make a round loop whe...
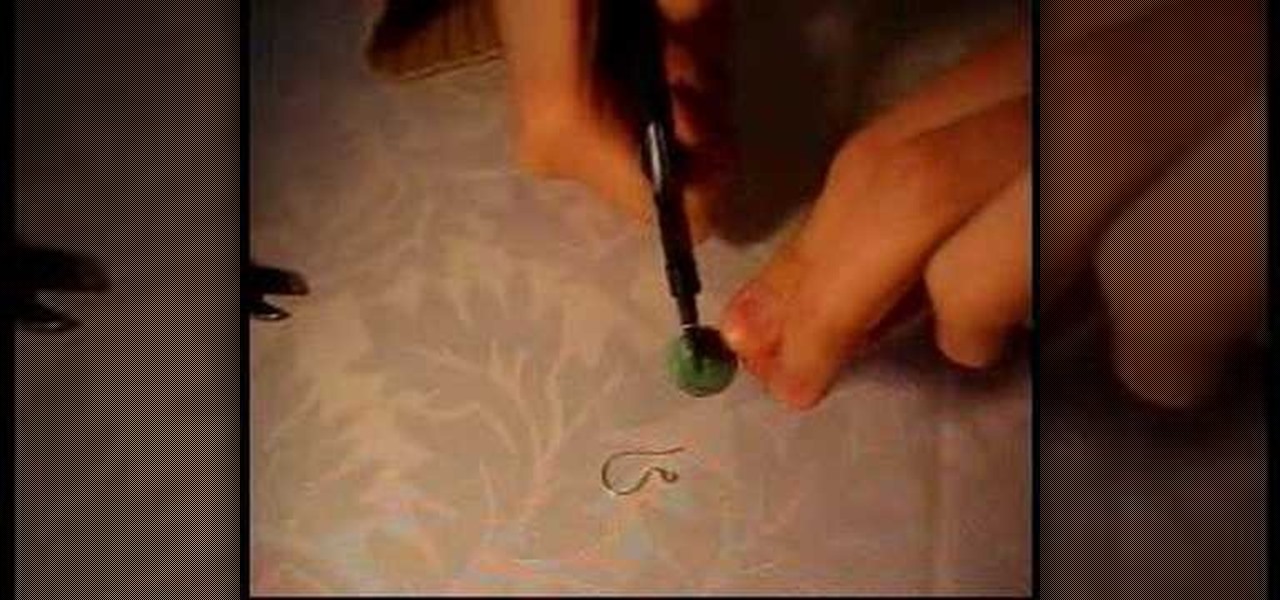
In order to make a simple hair pin you need a couple things first, a small and big bead (although you can use other items), an ear wire and a head pin. Tools that you will need are a pair of round nose pliers and a pair of cutlets. Now take the head pin and loop the beads through it. Take the nose pliers and bend it, about half way up the head pin and gently bend it with your fingers, making a 90 degree angle. Twist the pliers up and bring the head pin over the nose pliers. Then twist it cloc...

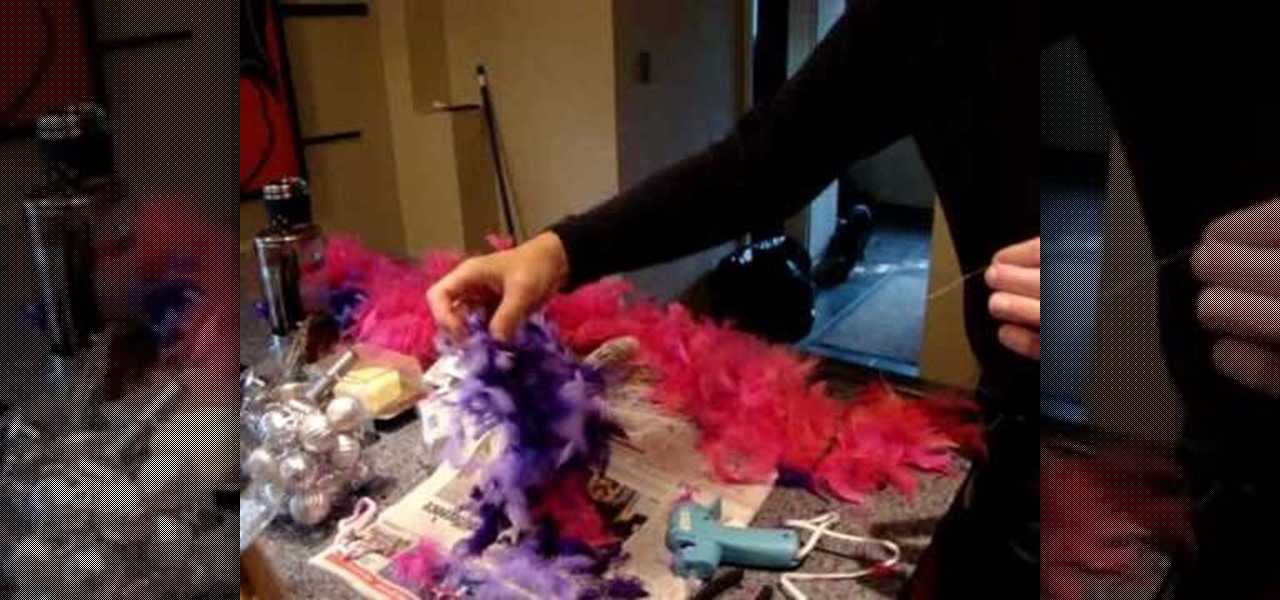
This tutorial demonstrates how to make very cheap Christmas tree decoration using feathers and Christmas silver balls. Here a violet and pint feathers are used. The best way to buy feathers is to buy feather bows in which feathers will be fixed together using some wire or string. Now an inch long section of feather is cut from two different bows of violet and pink and the ends are glued. It is left to dry for a few seconds. Some copper wire and the silver ball are taken. Connect the wire to t...
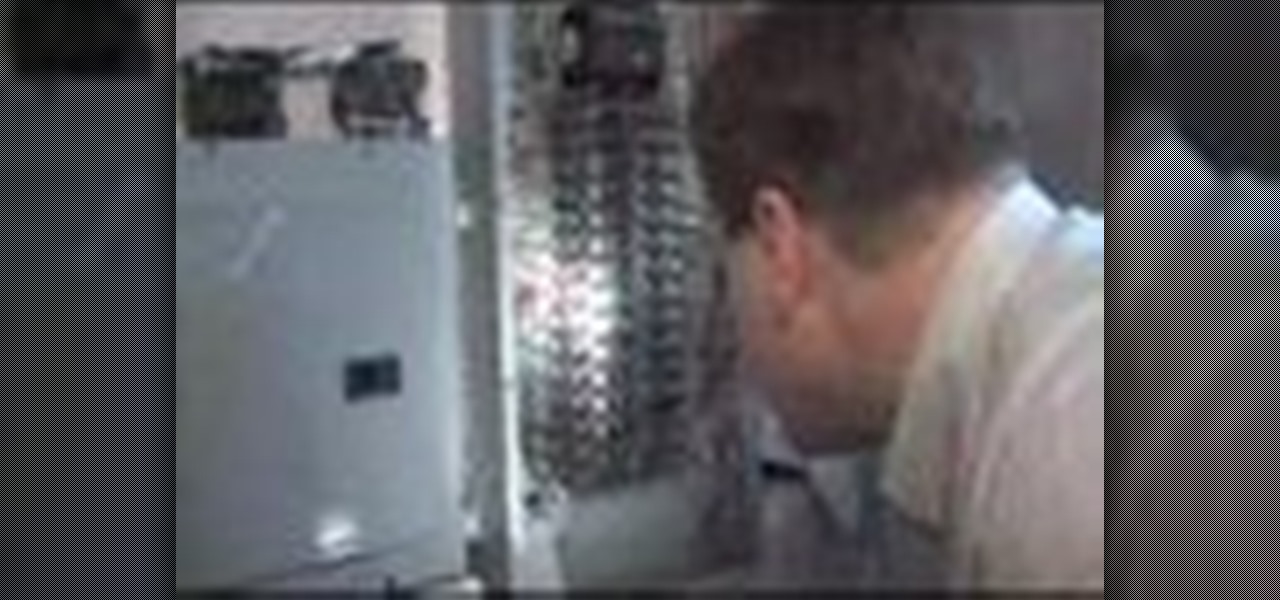
In this video tutorial, viewers learn how to properly inspect an electrical panel or circuit breaker in a house. Users should begin by taking off the cover(s) of the individual panels to see the wiring inside. Make sure the wire are connected and that there are no open or broken circuits. Users should look correlation of the circuit breaker size and the wire size to make sure the gauge of the wire can handle amp and heat that is generated. This video will benefit those viewers who want to lea...
To make a paper flower mistletoe kissing ball, cut leaf petal shapes out of green paper. Apply glue to white wire berries and attach them in between four paper petals. Wrap the ends of the petals with wire to secure the bouquet. Adjust the leaves as desired. Snip the excess wire with wire cutters. Insert the mistletoe bouquet into a Styrofoam ball. Repeat until the ball is completely covered in mistletoe bouquets. Attach a red bow to the top of the mistletoe ball. Finally, add string to hang ...
Starting out with a brief summary of what type of pliers to use when making a wire loop with tips on how to prevent markings on wire when using a certain type of plier. This video is used to teach crafters on how to make loops with wires that are useful for many jewelers Making the loop requires 2 certain types of pliers, one called needle-nose plier used to create the loop. Tips near the end on how to fine-tune the loop so it ends off perfectly as well as explanation on why a 45 degree angle...
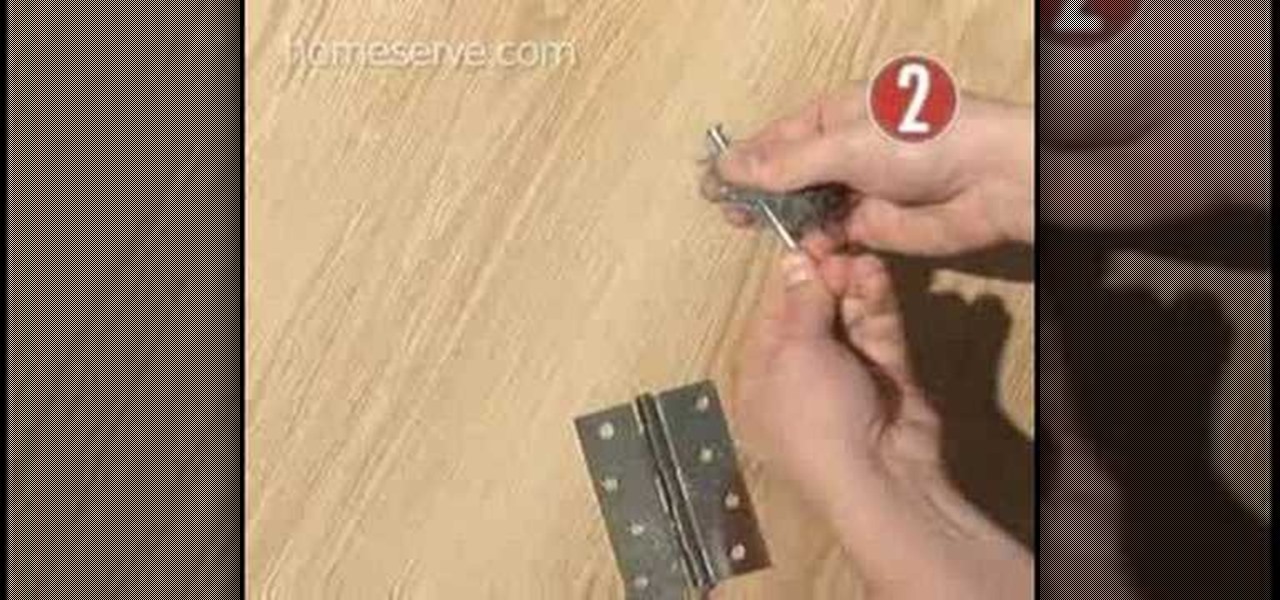
Learn how to stop squeaky hinges at home with oil and wire wool in simple steps. Spray some WD-40 lubricant to the hinge and open and close the door a few times. Use a spray tube to avoid the oil being wasted or even you can use cooking oil. If the hinges are still squeaky remove it completely and rub it wire wool, fix it back and spray the lubricant or oil. You can also rub it with soap instead of wire wool. If you still have the squeaky problem replace the hinge with a new one.
This video shows the viewer how to secure crimp beads using both crimping pliers and chain-nose pliers for the purpose of jewelry making. The video uses two millimeter crimp beads, beading wire, and both sets of pliers to demonstrate the technique. To crimp using the crimping pliers, the viewer will utilize both notches of the pliers to crimp the bead onto the wire. In order to crimp using the chain-nose pliers, one must simply flatten the bead onto the wire. Crimping is a good method to secu...
There are some very powerful tools in CINEMA 4D that you can use very quickly to create some 3D graphic elements. Once you start practicing you'll find it may be easier to create your own reference than to find the "just right" one on the web. So, if you're in need of some barbed wire, for reference or otherwise, check this tutorial out. Of course, it takes quite a bit longer to actually SHOW you how to create the barbed wire (creating the barb, wrapping it around the wire, using MOGRAPH in o...
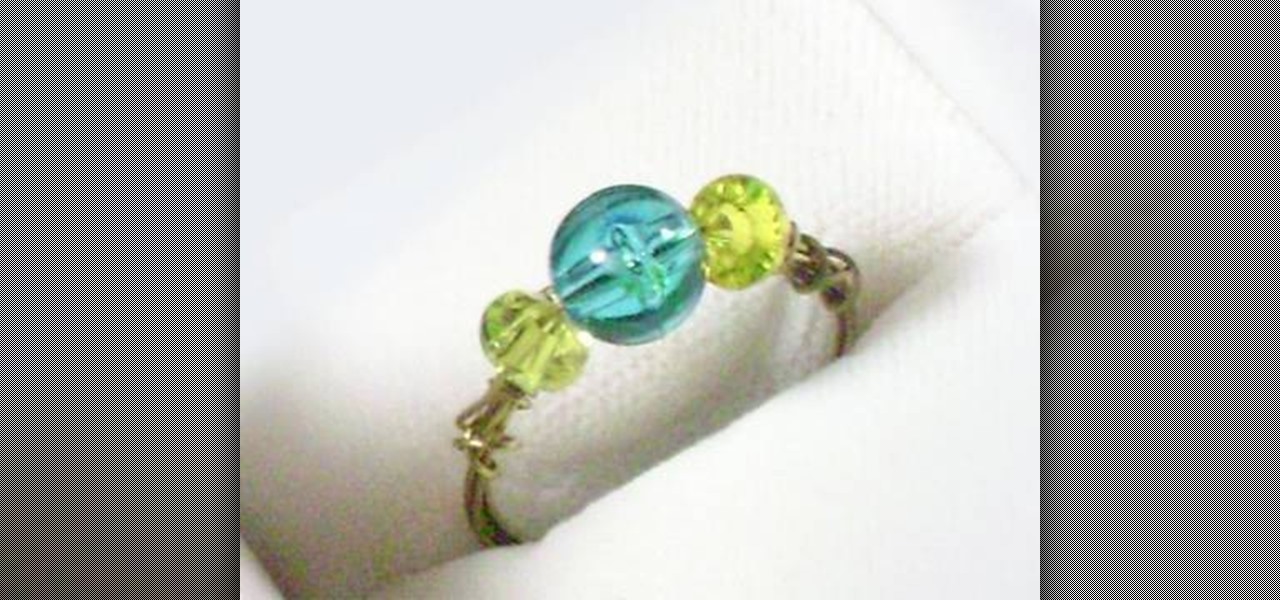
Jewelry making may be too advanced for your young ones, but these wire rings are the exception. It's the perfect project for your kids, and it's easy and fun. There's hardly any materials involved in making this wire rings, and your girls will wear them forever! At least, until they get a real wedding ring. Materials needed are:
Has you rent check bounced again for no apparent reason? It happens to everyone, but if you're roommate needs the money fast, you need to fix it fast, and wire transfers are the fastest way to give money to someone else. Executing a wire transfer is as easy as making one phone call.
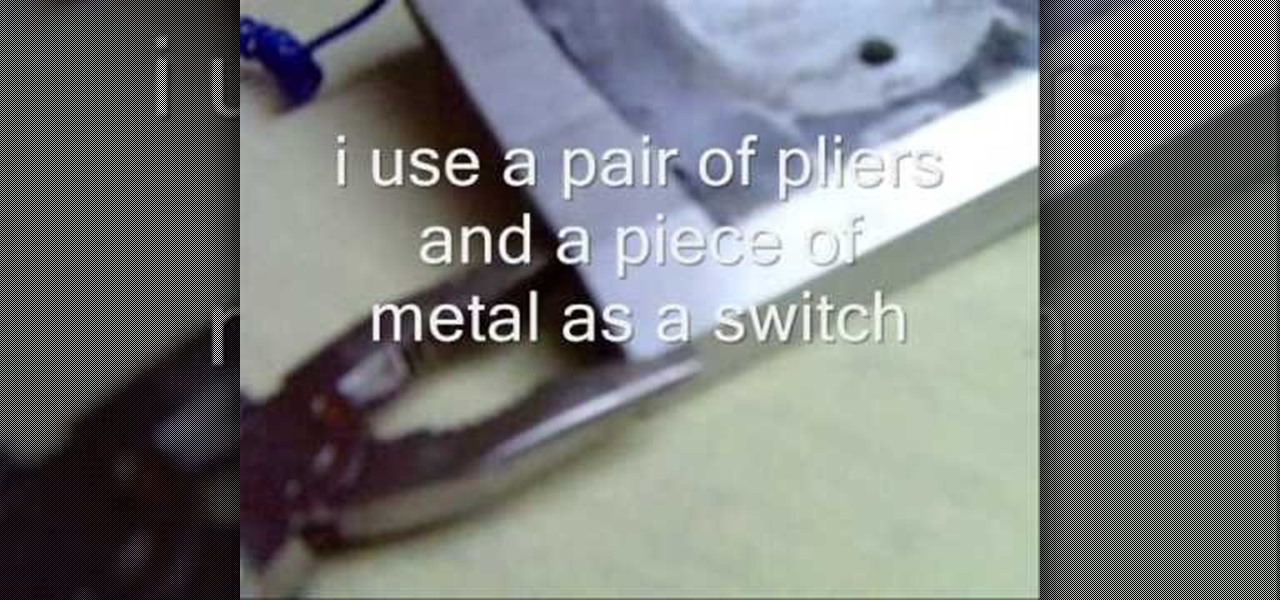
In this how to video, you will learn how to make a tight rope walking magnet. You will need a power supply with currents between 15 to 25 amps. A thick wire from a half to one centimeter is also needed for the tight rope. A small neodymium magnet will also be required. String the wire from one end to another. Place the magnet at one end. Use a pair of pliers and a piece of metal as a switch to run the current through the wire. Once that is done, the magnet should go down the wire. A magnetic ...
Leeann of Hierchiss explains how to turn a TV into an oscilloscope. Turn the TV on and make sure it works. First, unplug the power. Take the back off the television. Cut the four picture wires that attach to the circuit board. Strip the ends of the wires. Tape the remaining wires off to prevent short circuiting. Clamp the red and yellow wires and attach to a 1/4 inch jack which feeds into a tape player. Repeat the same process for the green and blue wires. Plug in the TV to make sure the conn...
Exterior lighting can add to the beauty of your home. Watch this how to video and wire exterior lighting yourself following these guidelines and safety tips. Before beginning any outdoor wiring project make sure to check with local utility companies and follow outdoor wiring codes for your area.
Tim Carter demonstrates how to wire a light fixture or ceiling light. This is a great video to learn how to wire up a light quickly and safely. As a precaution, don’t touch any bare copper wire except for the ground wire. Most new light fixtures come with insulation to keep the heat from the bulb from cooking the wires. Be sure to install this insulation. Mount the fixture to the mounting bracket. Add the decorative shade and you are ready to go. Turn the power back on and your light fixture ...
Light switch wiring can be a do-it-yourself project with this instruction from Tim Carter. You'll have no trouble wiring a light switch with his simple tips and doing light switch wiring yourself will save you lots of money.
This is 20 gauge, dark, annealed wire. The common name is stove wire or you can use something you have probably heard more of, safety wire. This video shows you how to use it to make a bolt leader in case you messed up the one that came with your trailer.
Lots of designer purse companies, especially Coach and Kate Spade, LOVE attaching beaded charms to their purses and clutches. Sparkly little bits and pieces add extra pizazz to anything they're attached to.
Optical illusions are thrilling and abundant, and this one is both cool and novel. All you need are two pieces of twisted metal wires like those show in the video. Slide them together, then untwist to created a really cool illusion.
We're totally not lying when we say that the necklace featured in this video sells for upwards of $100 at some fine retailers in Beverly Hills. Composed of a long, sparkly necklace chain and a teardrop shaped pendant attached with intricate wire wrapping, this is a necklace that looks a lot more difficult to make than it actually is.
If you're a beading novice, there's one very important thing to know before you venture into the pastime: No matter how many projects you complete, you will always have a lot more beads left over than you know what to do with.
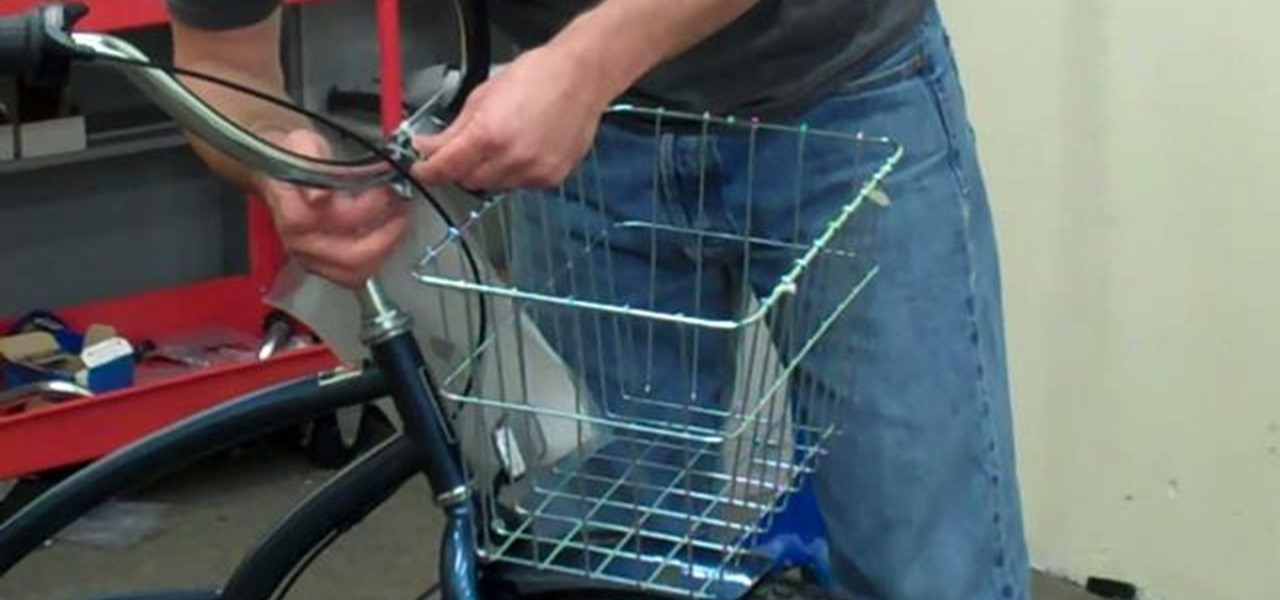
In this clip, learn how to mount a wire basket to the front of your beach bike so you can carry your towels, suit and whatever else you may need to bring with you this summer. Pete from BeachBikes.com will show you the quick and easy way to hook up a basket for all your carrying needs.
This video offers instructions on how to use a wire wrap (or wirewrap) tool, an excellent and underrated alternative to soldering. It's particularly useful when prototyping as wirewraps can be undone quickly using the short end of the tool (though this particular process isn't demonstrated in the video). See how to connect a 4-legged RGB LED to header pins, a job that is particularly obnoxious to accomplish using solder and an iron, using 30-gauge wire and the tool. For more information, and ...
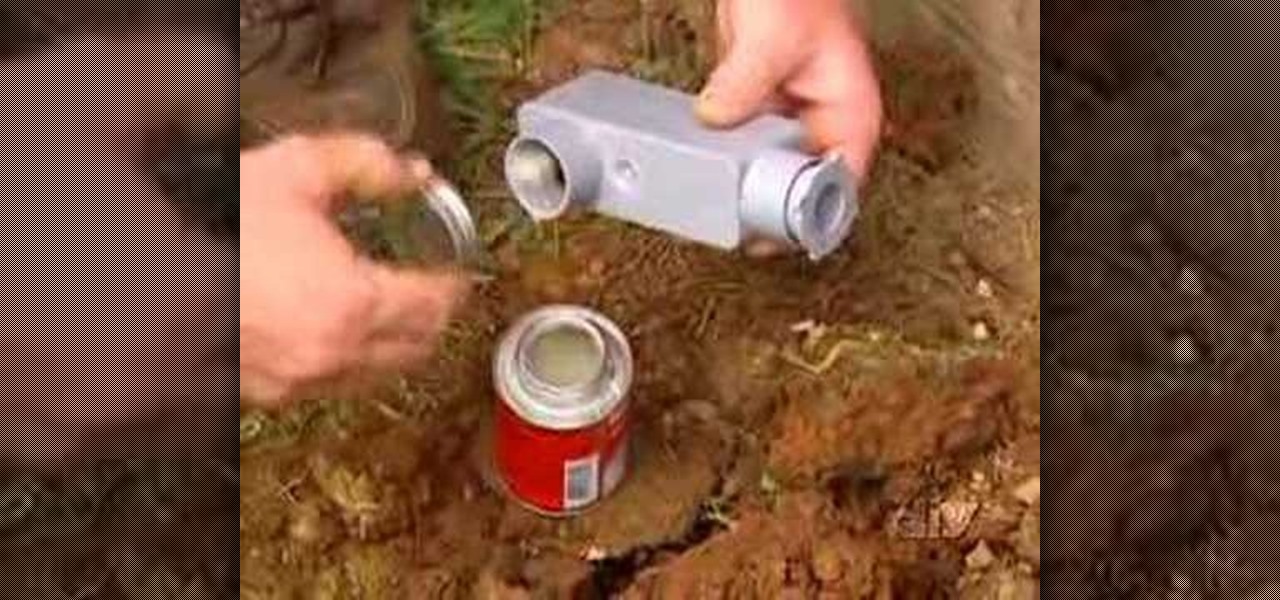
This video shows the viewer how to make an electromagnet using common items. This is done using a broken microwave, a spool, a cordless drill, a battery and a coat hanger. The microwave transformer is dismantled and the enamel insulated wire is removed. Using the cordless drill the wire is then coiled around the spool. The iron coat hanger should then be cut into small pieces and placed in the middle of the spool. It should be secured tightly. The battery was then connected to the wired coile...
Soldering properly is a skill every electronics and computer hobbyist needs. Proper soldering appears deceptively simple, but it requires practice. One has to do the steps below to solder the wires which is as follows, First Clean the area you wish to solder and scrape the wire down to the metal and then wiping it clean with alcohol or acetone. Then you want to use a rosin-core solder for electronic applications, which comes normally with coils. Tin the tip of the first Wrap one or two inches...
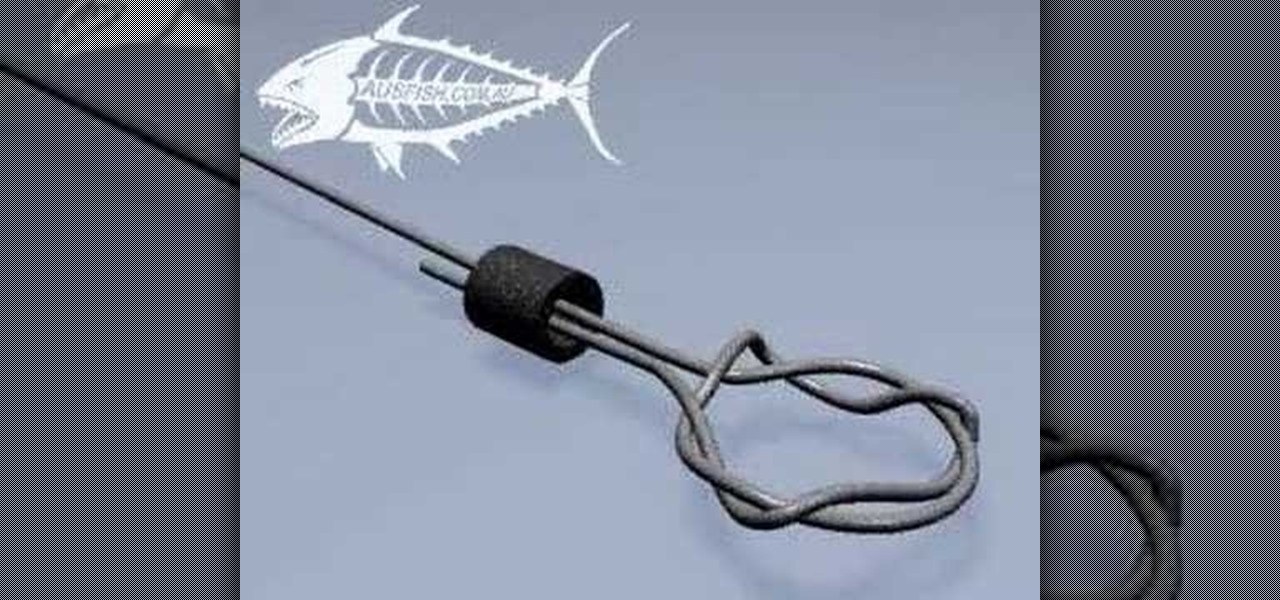
Check out this fishing tutorial video that demonstrates how to tie a Flemish Eye fishing knot for tying wire ends for terminal tackle. Just follow the simple steps as outlined in this instructional fishing video and learn how to tie a Flemish Eye fishing knot. Start reeling in the big fish!
Need to keep people out of your precious room? Tired of all of those "do not disturb" signs not working? Locks just aren't cutting it these days? Safeguard your privacy with your very own electric fence. Remember Jurassic Park, when the kid got zapped by the electric fence? Think that, but in the doorway of your room.
Using a balloon, magnet, and wire, you will see how to make a speaker. The sound quality is impressive, and volume can be increased with stronger magnets.
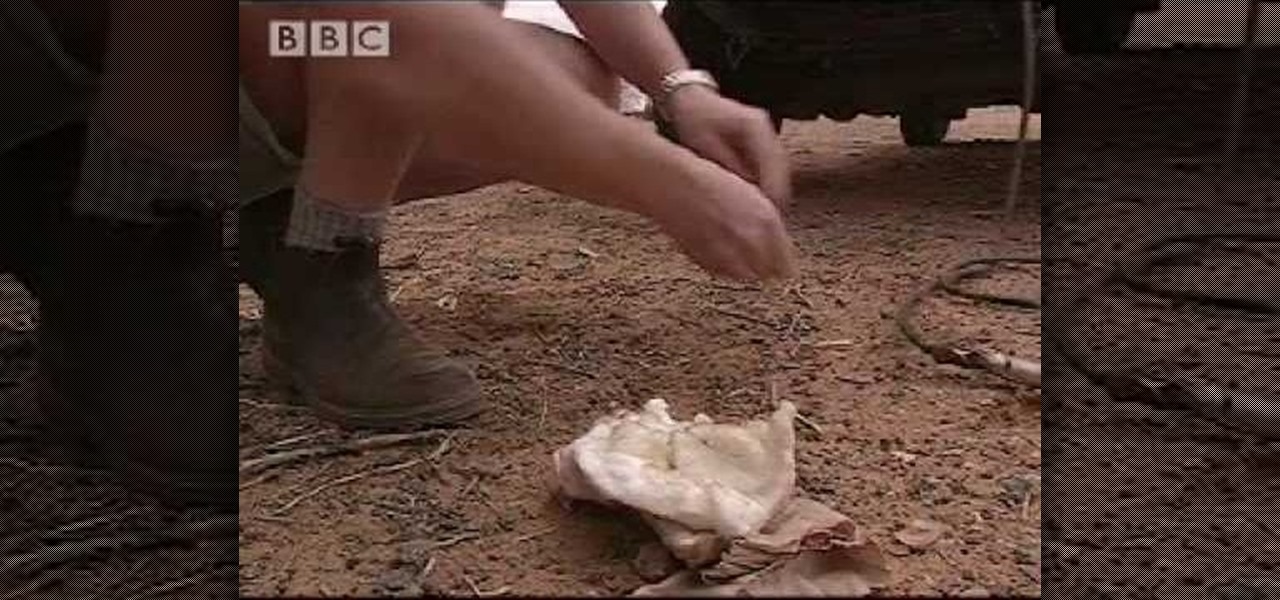
Lost in the wilderness? Did you forget your emergency personal beacon (EPERB)? Learn from the BBC how to start a signal fire using your car battery and a piece of wire wool. Let's just hope you have a car . . .
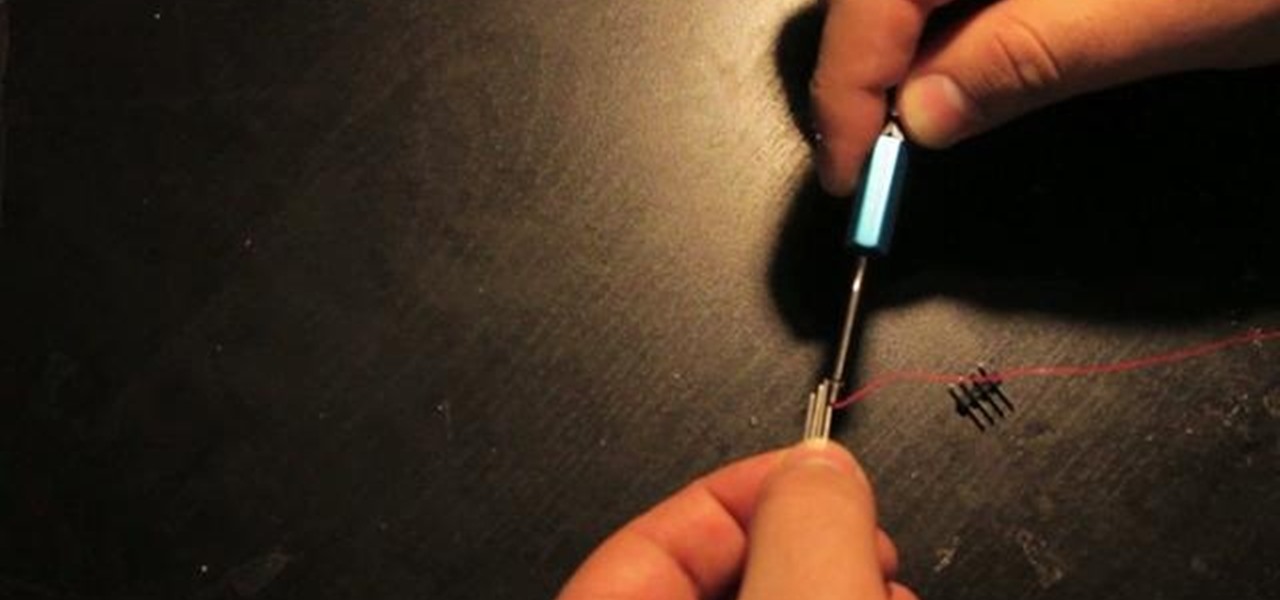
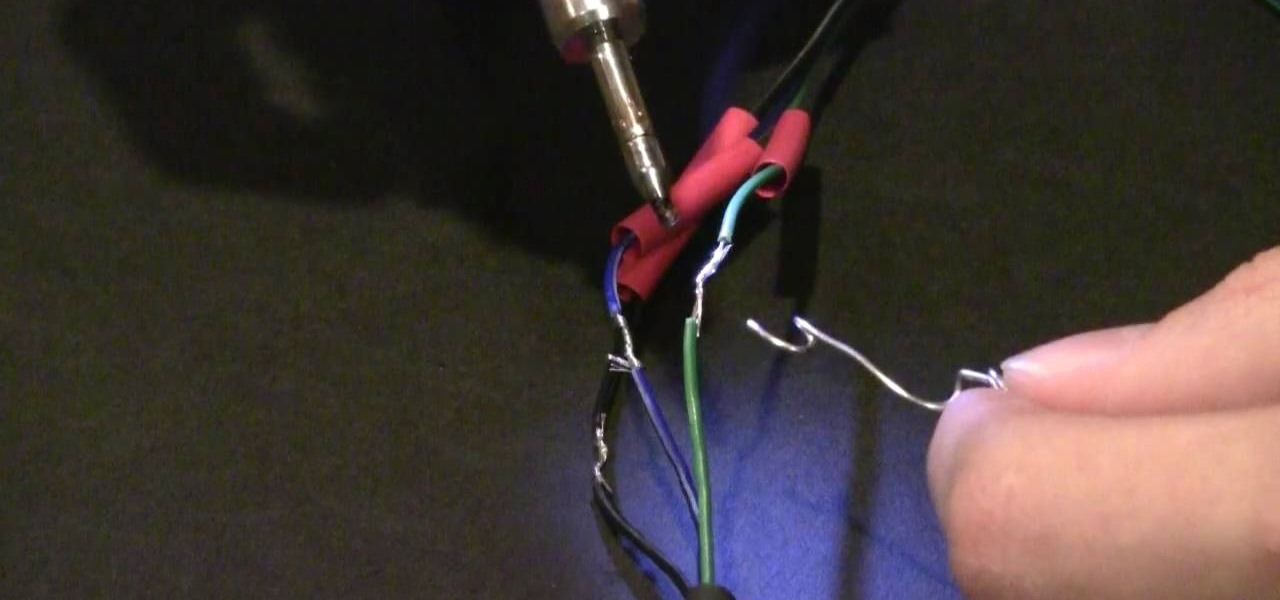
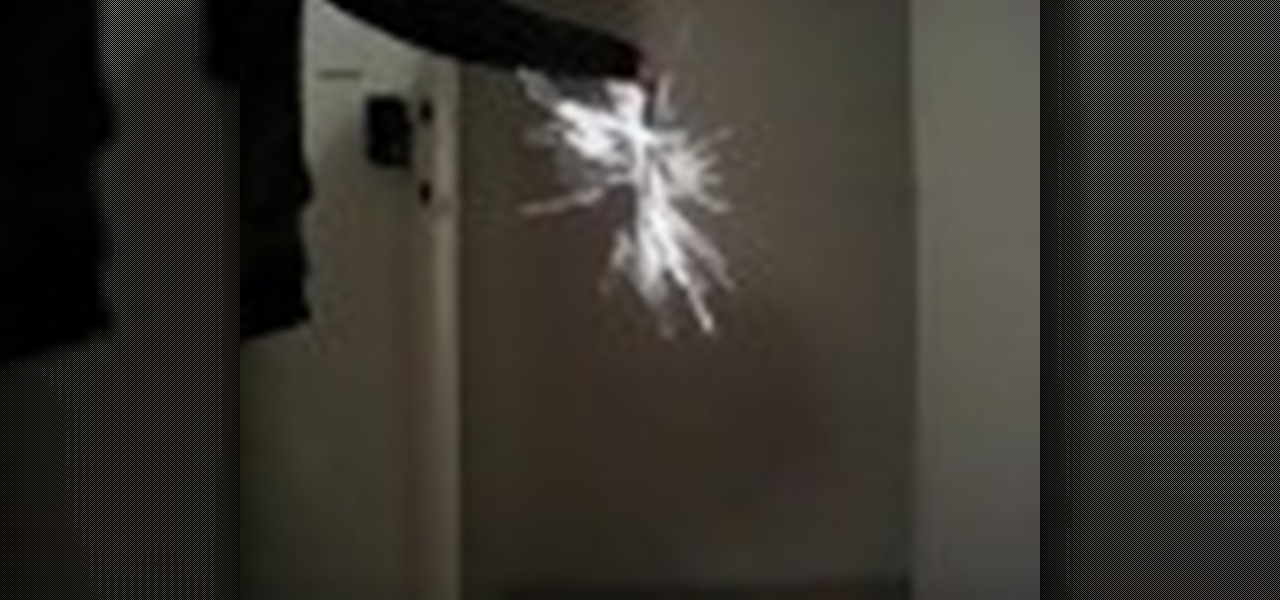
Make a lighter with one or two AA batteries and simple tiny wire!!! This is a fantastic homemade electrical lighter for any situation. You'll need two AA batteries, a push switch, a battery holder, wire, solder, soldering iron, electrical tape, crimper, and scissors for this cool electrical lighter, for your cigarettes, and such.
Want to replicate that cool effect when you can watch Christmas lights flash in time to music? It's easy! You'll need a set of speakers, an outlet adapter, excess power cord, a solid state relay and, of course, Christmas lights! Once you've gotten all your project pieces assembled, follow this tutorial so you can wire them up to your music.
Rural Geek shows us a thorough step by step for soldering wires and other electronics.
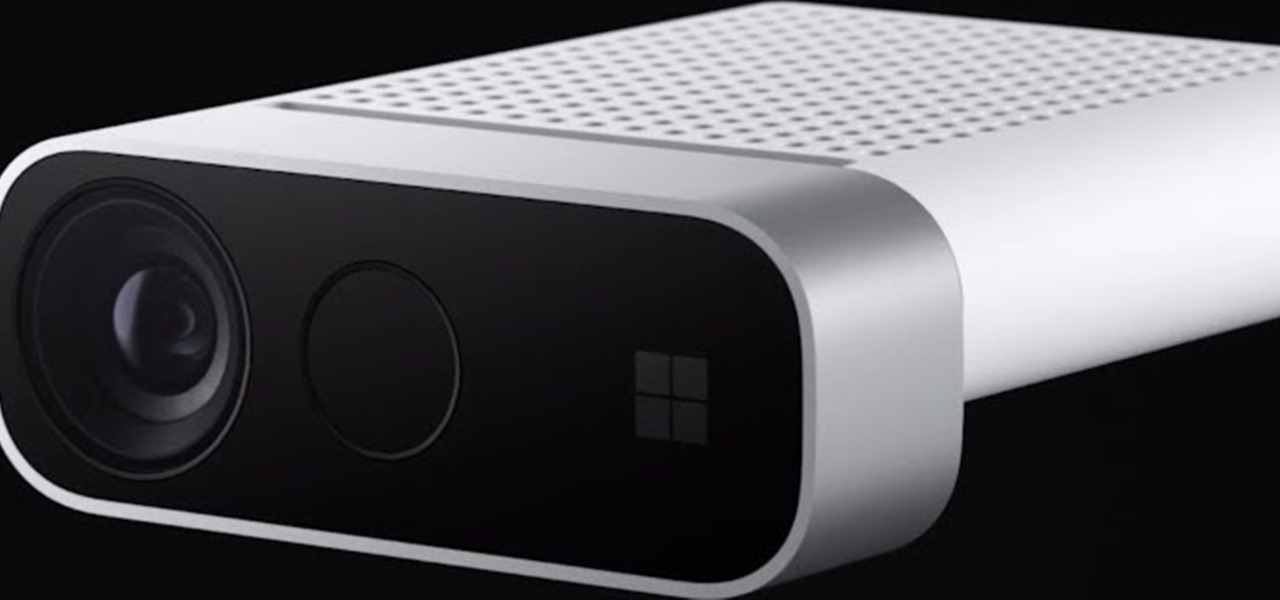
As the opening act to the grand unveiling of the long-awaited HoloLens 2 at Mobile World Congress Barcelona on Sunday, Microsoft showed off the standalone Azure Kinect time of flight sensor, which also happens to supply the improved human and environmental understanding capabilities of the next-generation augmented reality headset.
Learn how to use a set of wire strippers to take the coating off of a piece of wire so that you can make a repair to your boat, car,truck,snow mobile trailer, camper etc
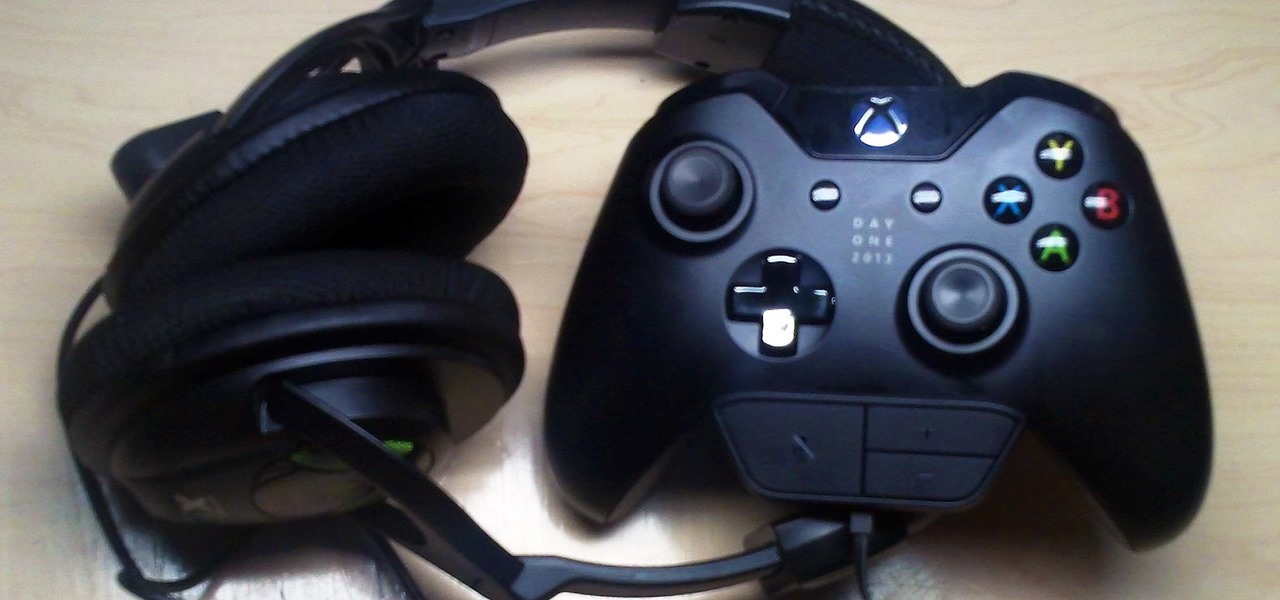
The new Xbox One has yet to implement compatibility with third-party headsets, meaning for now, you're stuck using one of the official Xbox One headsets available. However, many have run into problems with the included wired headsets, and would much rather use the expensive third-party ones they already have for the Xbox 360.
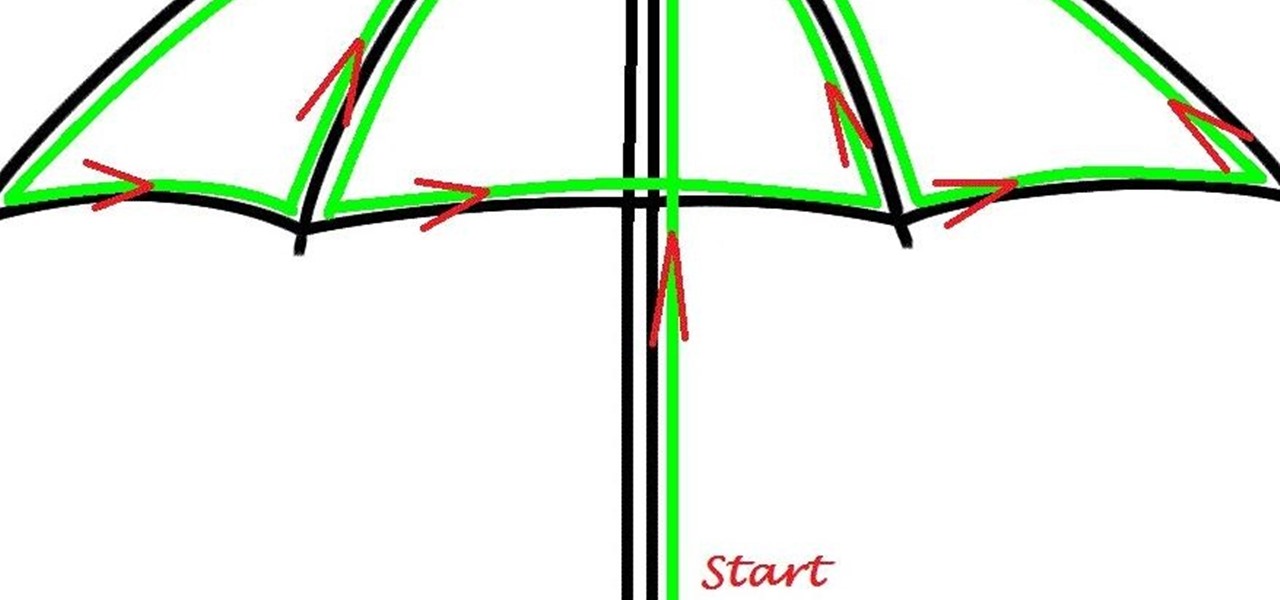
Here's a children's umbrella lined with neon green EL wire. It's definitely an easy and fun project for kids to do with their parents, and more importantly, it keeps the little mischiefs safer if they're out and about on rainy days.