To make a mini croissant out of polymer clay, you will need the following: polymer clay (tan), pastels, a paintbrush, and oil paint. Roll the clay into a ball. Next, roll it out into a log. Twist the ends. Next, shape the clay into a crescent moon shape. Use a paintbrush to dust yellow pastel onto your croissant. Start with a muddy yellow color pastels. You may need to layer the colors to get the best shade.
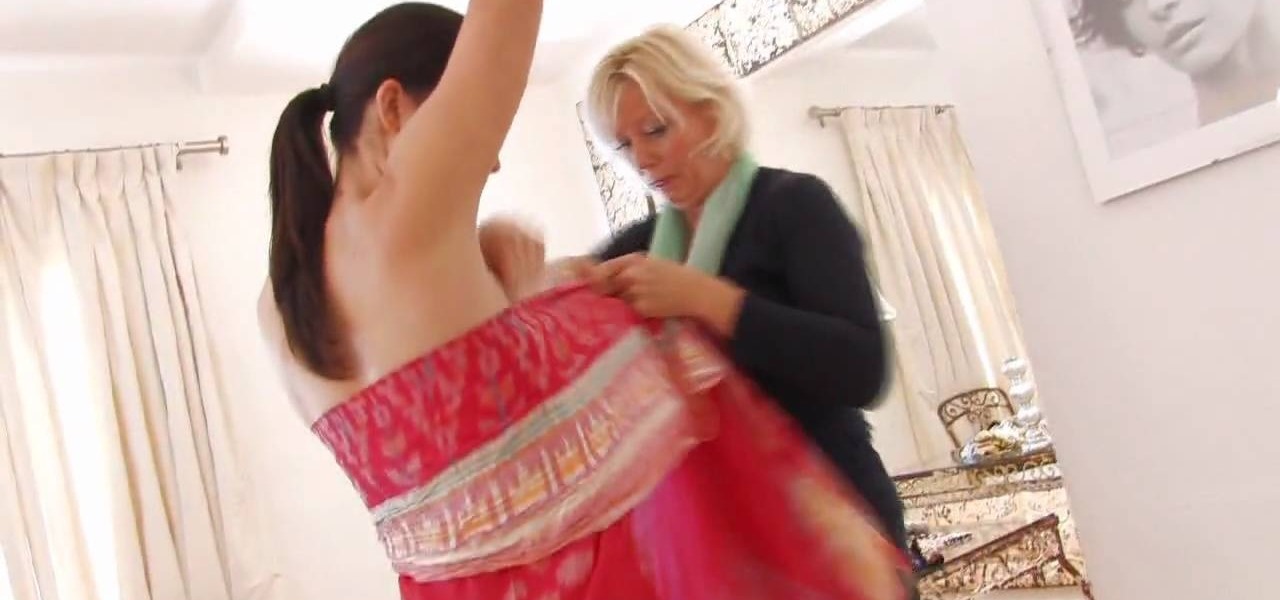
Fashion designer Cate Adair demonstrates dressing with a sarong for Modern Mom. She also discusses how to buy or extend a sarong when the one you find isn’t long enough. One important consideration for beginners is finding a sarong that can wrap around the body twice for security. One way she wraps is to simply wrap under the armpits twice and tie a flower or ornament with the corner. Another way is to put the full sarong on from the front, wrap each end backward and then over the shoulders...
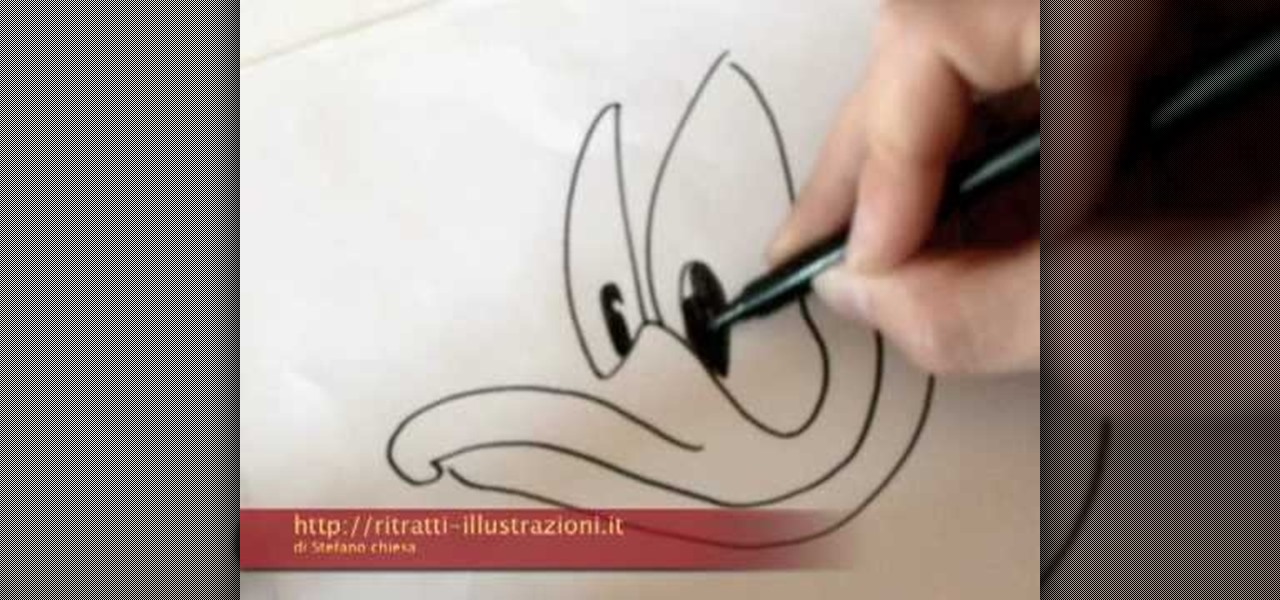
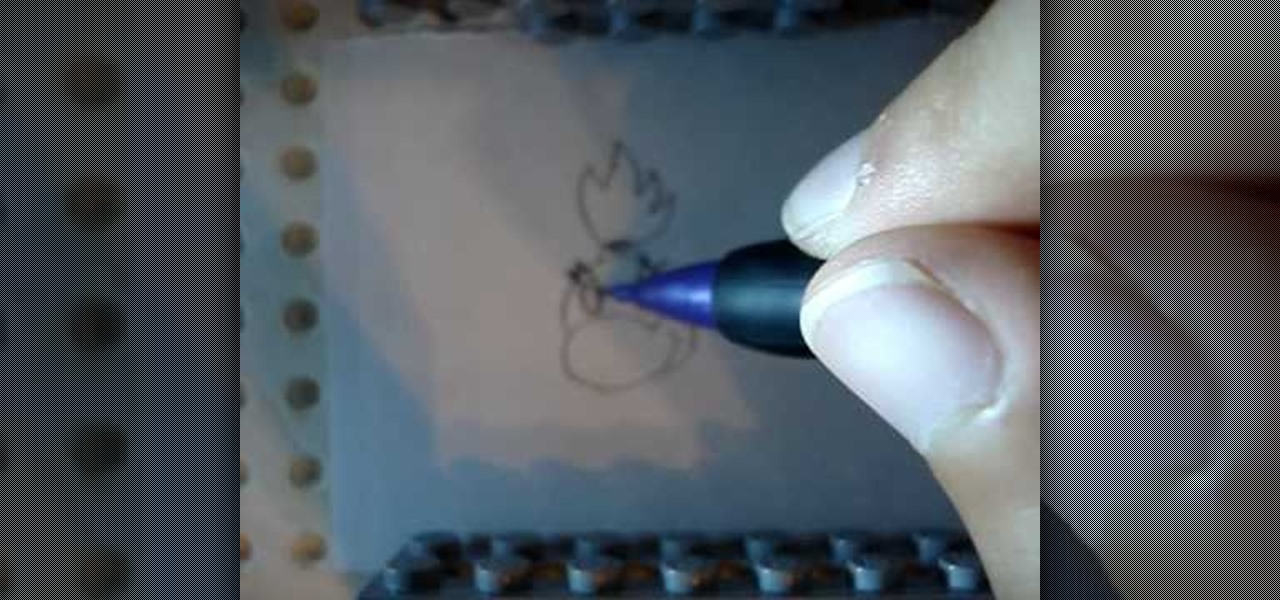
This video illustrate us how to draw Donald Duck. Here are the following steps: Step 1: First of all take sheet of paper, pencil and colors.
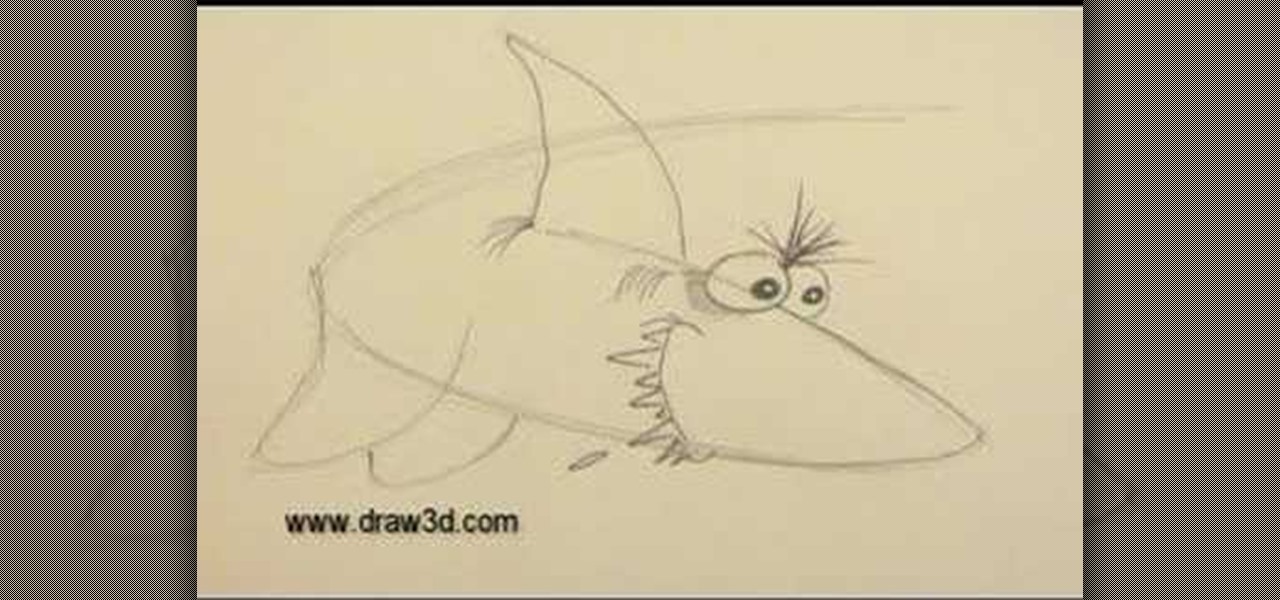
This video illustrate us how to draw 3D cartoon shark. Here are the following steps.step 1: First of all take a sheet of paper and pencil.Step 2: draw a U shape structure and again draw a U shape structure above the previous on representing the body of the shark.Step 2: Now from one end of the double U draw a V shape representing the front body of the shark, within the face draw two eyes and jaws of the shark.Step 3: Now at other end draw a tail and from the side of the body draw a triangle a...

This video demonstrates how to make a funky yarn pom pom. Take a yarn of your choice that matches your scarf. Take one end of the string and start winding it not too tightly around your fingers. Leave back enough string for the pom pom for the other end. Cut the string using a pair of scissors and set it aside taking care not to mess the ball. Cut another piece of string with appropriate length that goes around the ball of string kept aside. Place the cut string over the table and place the b...
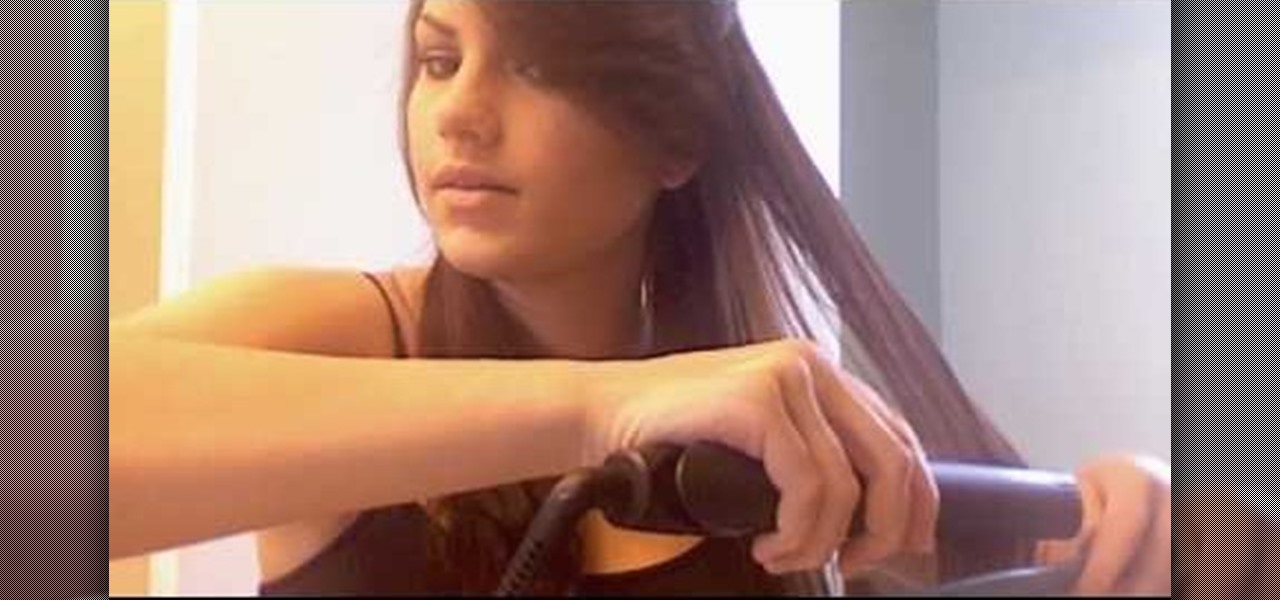
Forever Yours demonstrates how to get shiny, healthy straight hair that will last throughout the day using a hairdryer, round brush and a ceramic technology flat iron. Apply a heat protectant before beginning the process to protect the hair. Divide all hair into three equal layers, bottom, middle and top. Clip middle and top sections up high on head and begin by drying the bottom section. Dry the hair fully, divide hair into two sections and starting from one side, flat iron from root to end ...

We are taught in this video how to play "Somewhere Over the Rainbow" on the ukulele. Its explained to be a popular song and one most people associate with The Wizard of Oz. First he plays the song through. Then we're shown how. There are five different chords that are used through the entire song. First we're shown the intro, then we're taken through the verse. The verse uses the five chords given eight times. Then we're shown the chorus, which uses the five chords another eight times. The ch...
In this video tutorial, viewers learn how to make a plain paper clip into a spinner. The materials required for this spinner are a paper clip and a pair of pliers. Take the paper clip and straighten it. Now use the pliers to bend the tip of the clip at 90 degrees. Then bend it 90 degrees to left side and start bending the wire into a circular shape. The shape will look like a pretzel. Now bend the end tip of the wire 90 degrees to the opposite direction of the first bend. You should end up wi...
This video helps to draw Bowser Jr. First draw a half circle and join the ends by drawing two curves as shown in the video. Continue the left line, to draw a mouth and end it with a small arc to look like a smile. Then close the line by joining it with the right end. On the top of the half circle draw an arc and above it draw a feather shaped hair as shown. Next you have to draw eyes with eyelashes and make them look dark. Now, draw two short lines which looks like nostrils as shown in the vi...
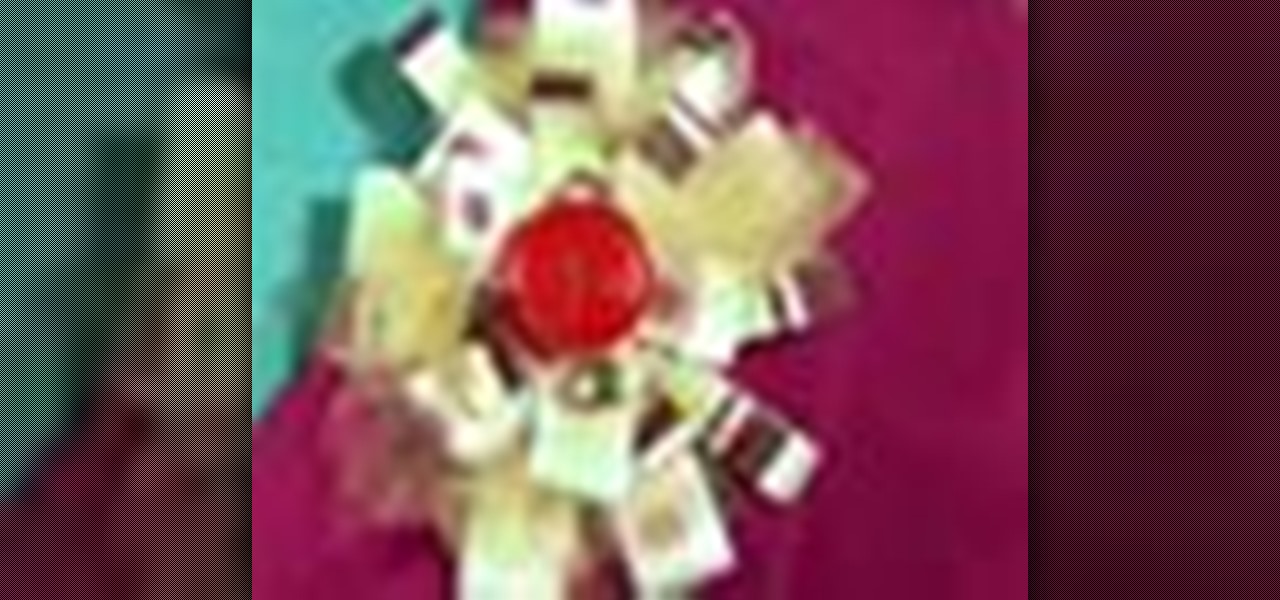
Tired of the same old flower corsages? Check out this video on how to make a one of a kind candy corsage for your next outing! These make a great gift for prom, holidays, even birthdays for that special little girl in your life.
Do you need to lock the door but don't have the keys? This may happen if you are sharing your keys with someone else, staying at a friend's house, or for a variety of other reasons. Check out this video for a sneaky way to secure that door tight without even sticking a key in the lock.
Learn how to wrap a textblock in this video tutorial. Wrapping the block allows you to protect the book's inner pages while you are working on the outside of the book. All you need to do is use some butcher paper, or any other kind of heavy duty paper you may have on hand. Lay the spine flush against one side of the paper. Open the front cover and fold the bottom sides into the book. Tape these ends together. Then, with the excess paper on the non-spine portion of the book, fold those ends in...
In this Arts & Crafts video tutorial you will learn how to do Whipstitching. The video demonstrates how to stitch the bottom of a cloth basket to the sides of the basket. A whipstitch is a very basic stitch. Start at one end of the basket; attach the bottom to the sides with a pin. Pass the needle from the inside so that the knot is hidden. All you have to do is taking the thread and whipping it around the edge. At the beginning, give it a bit of binding stitch before stitching the rest of th...
This video instructs the viewer on how to do a powerful Driven Free kick for soccer. First, you will need to come on to the ball and strike it with your in-step. Your in step is the inner part of your foot that is right next to the laces. The most important tip is that when you do strike the ball, come through the ball and not around it! Finish with a hop at the end which will create more power! You'll want to kick the ball just under the center for proper height and maximum power. Kick the b...
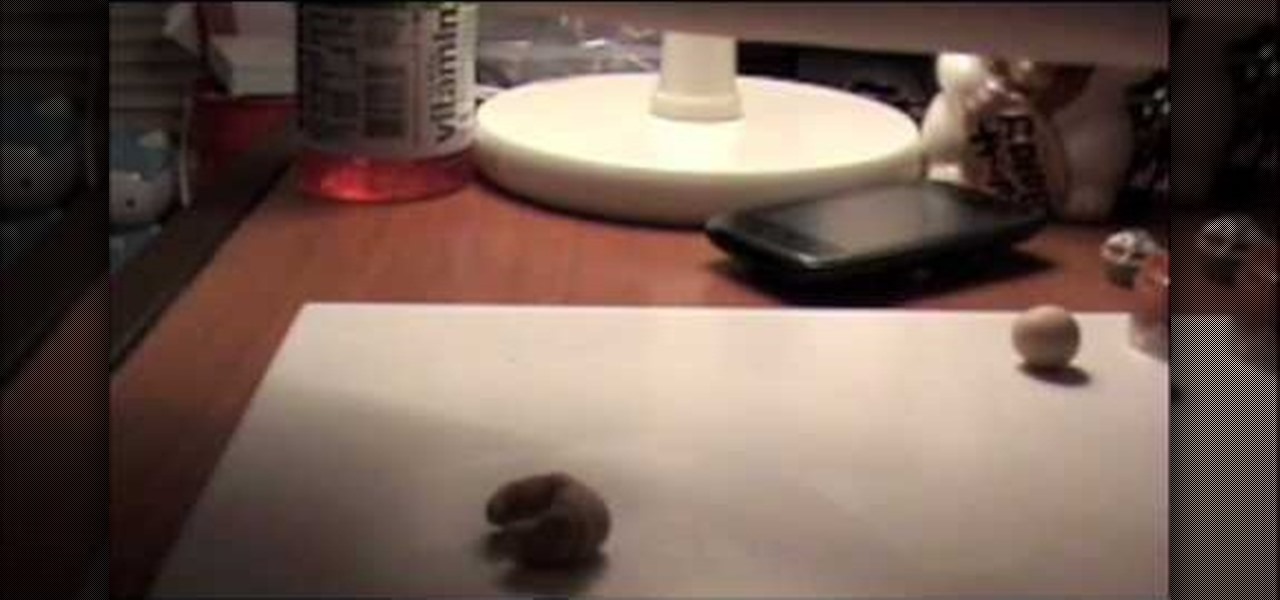
Here is another video by a woman named Angela on how to make a miniature Christmas log cake for a dollhouse. The first thing she does is roll out a sheet of brown clay with a pasta maker on a setting of 4. Then she rolls out a white sheet with smaller setting of 6. Use a razor blade and cut some straight edges. She layers the brown and white layer and rolls them together. Cutting off the ends she has now created a log cake. Use these ends for slices of the cake for dolls. She then uses a pepp...
Take one end of the Ethernet cable and plug it in the back of the XBox, the other end of the cable you have to plug on your computer. On your computer go to Start and then go to My Network Places, now select View Network Connections. Right-click the Wireless Network Connection, and go to Properties. Select Advanced tab on top of the window and make sure the two boxes are checked, press OK to continue. Now turn on your XBox and go to Test XBox Live. Wait until the test ends and then you will b...
Start with an eye pin. Place a gold bead and end cap on it. Now put on a piece called a stamp, or stamping. You want to find one that is curved like a lamp. Next put on a large crystal (8mm). In this video she uses a Swarovski crystal. Find some beads you like and place them on the pin. At the end, place on a large plastic back of an earring to secure the beads and hold the "lamp" upright. Now to make the little beaded fringe at the edge of the lamp, you take another eye pin and thread on som...
In this video tutorial, viewers learn how to make a parchment cone for cake decorating. A parchment cone is basically the same as a pastry bag. Begin by cutting out a piece of parchment paper. It doesn't matter the size of the parchment but it needs to be flat. Using a ruler and a knife, cut the paper diagonally. Take the longer end and curl it inside. Take the other end and wrap it around to form a cone. Fold the top to secure the cone. Once the cream is in the cone, roll the top and make a ...
In this video, JD, from Tying It All Together, demonstrates how to tie a knot known as a "Ringbolt Hitch". This is also known as "coxcombing". This type of knot was once a common tie used by sailors to dress-up items and parts of their ships. When tying a wheel, a "Turk's Head" knot was used to cover the part of the wheel where the two ends of the ring bolt met, which would firm up the hitch, and help to keep the tied ends from unraveling. It is a nautical tradition to use this type of knot t...
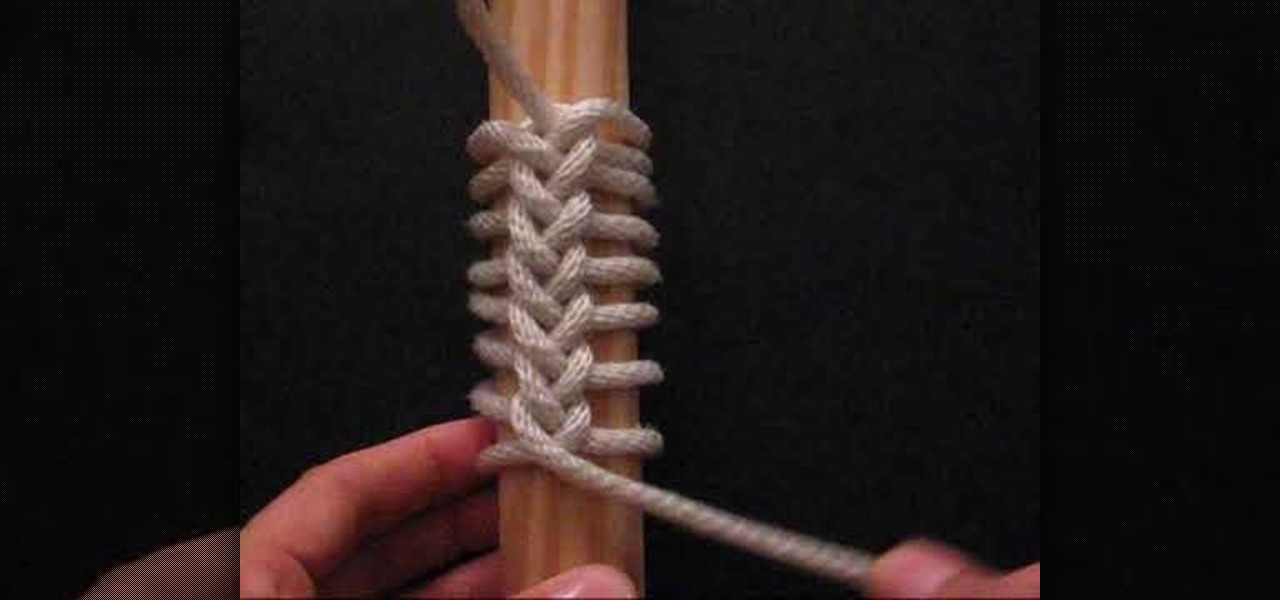
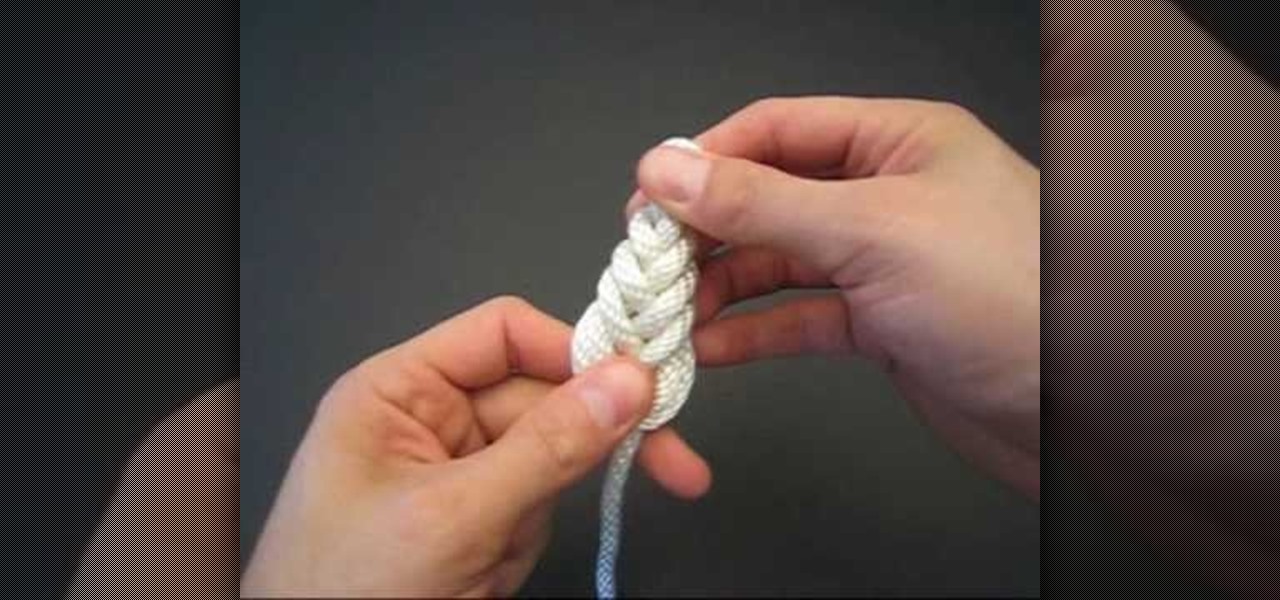
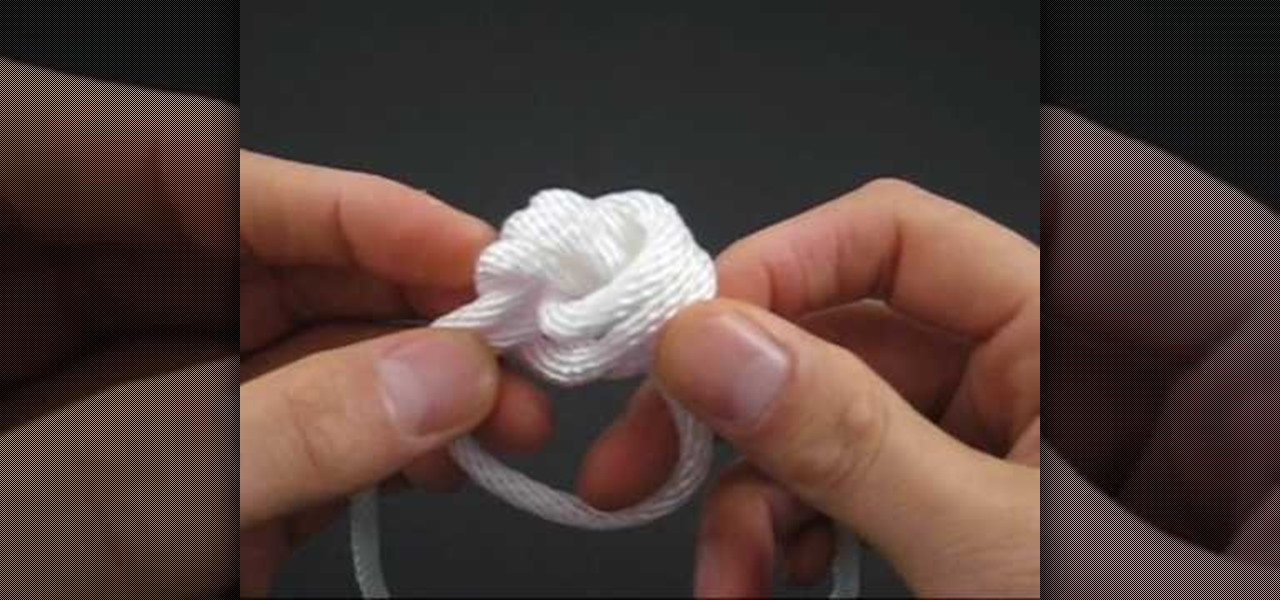
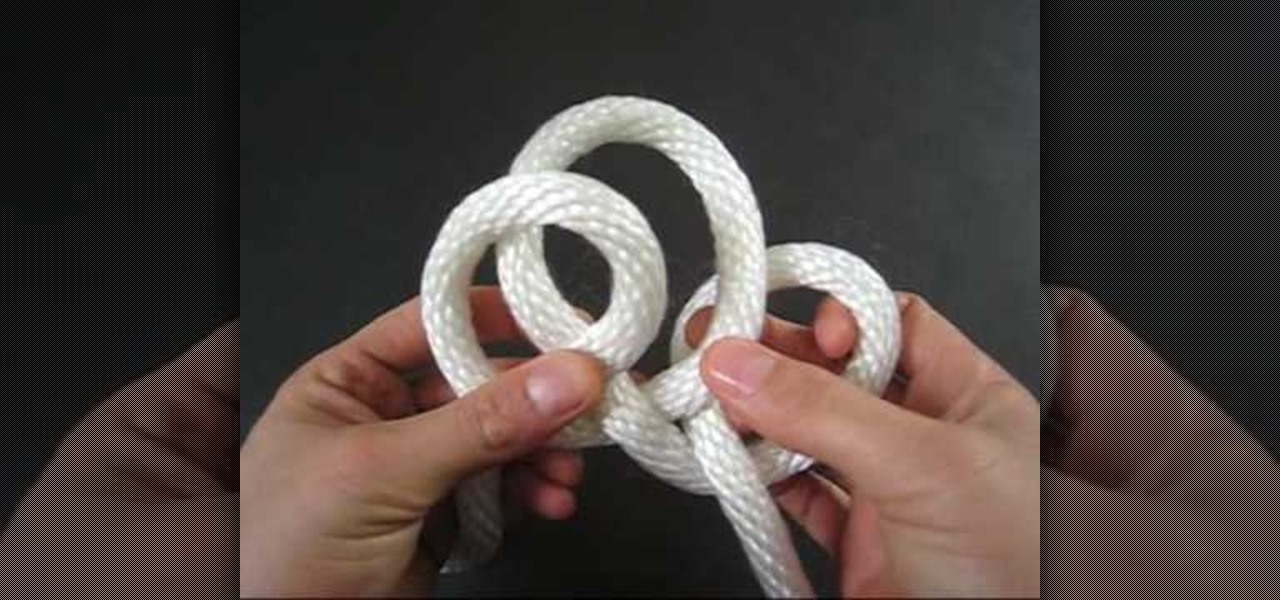
In this Tying It All Together video tutorial, you will learn how to tie a decorative pipa knot. To begin, take a piece of rope and fold so that you have two strands. Create a loop and take the left strand and loop it around the original loop. Continue doing this until you have layers of loop-like structures, gradually getting smaller and folding into one another. The effect is a woven-like structure. To actually secure the knot, fold the end strand into the last loop and then pull this end st...
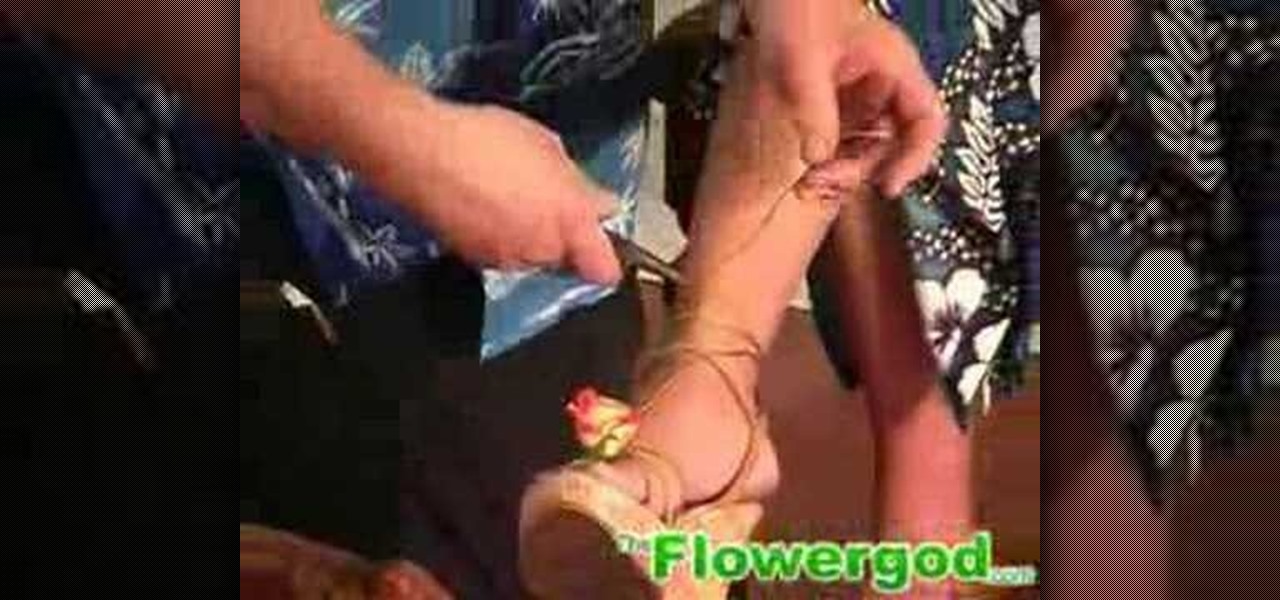
The video shows the making of a rose wire anklet for a wedding. The flower guy in the video takes a string a kind of lengthy wire and makes a small round shape in one end of it, then he inserts the other end through the upper front side of the lady's sandal so that the small circle fits exactly in the portion above the toes, then he glues a red rose and a rose leaf and fixes it in the circle with glue, then he puts the other end of the wire around her leg just above the foot, makes about two ...
This is an instructional video on how to fold an octahedron with Post-It notes. Use 3 different colors of Post-It notes. Take 2 Post-It notes in the same color, fold it horizontally and diagonally to make four squares. Fold diagonally the sticky side, you will end up with a cross or a star. Put the tight corner between the gap, alternating the color. That's it! You will end with an octahedron Watch this video and make an octahedron using Post-It notes by yourself.
In this video tutorial, viewers learn how to tie a diamond ring knot. The name refers to the similar appearance of an actual diamond ring. The Diamond Ring knot is the fusion of an Overhand Knot and a tying technique called circling. Begin by making a loop; put one end of the string through the loop and pull it to form a pretzel shape. Continue putting one end the string through the loop. Eventually it will build up and it will just need to be tightened. This video tutorial will benefit those...
To tie a quick rope shackle, take a flat thread to make this knot. Take the thread and hold it in your hand fold it from right to left and hold it at the cross hold it once again catch both the crosses and fold it once again. Insert the send fold into the first hole and the third hole. Now pull the middle of the thread to make a tight. Pull the loose ends of the thread to make it tight. Now hold the two circular holes and insert a round stick or a bamboo stick and pull the loose ends of the t...
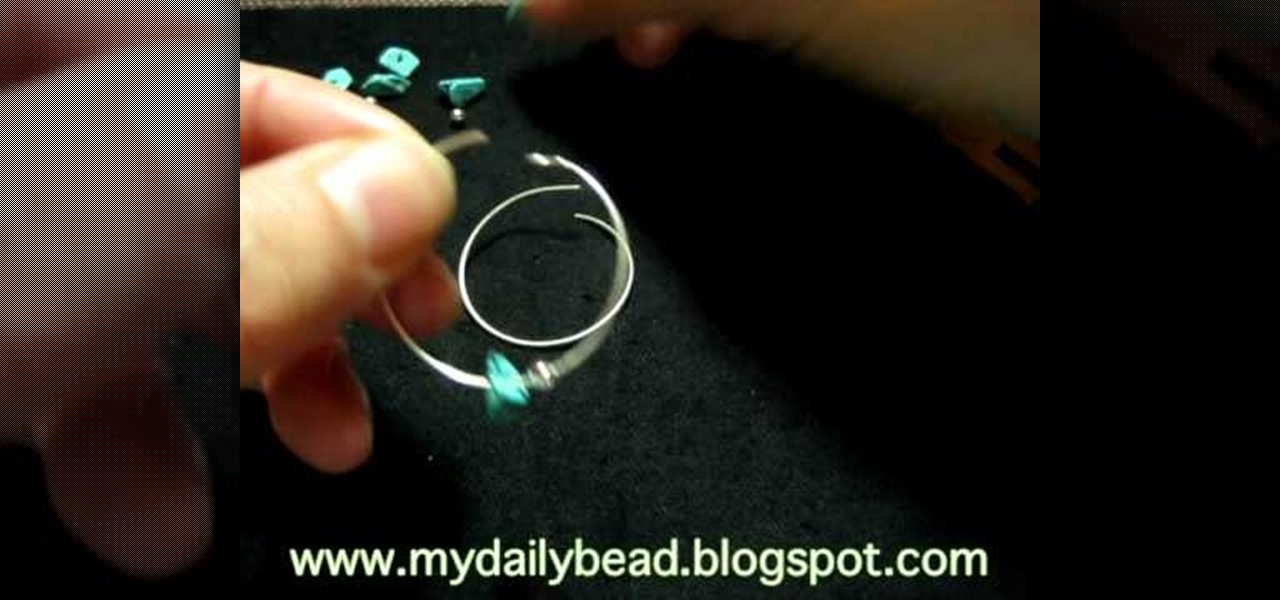
Watch this video to learn how to make simple turquoise hoop earrings. Start by taking some 20-22 gauge wire and wrap it around a soda bottle cap. Overlap the wire a little bit so that it forms a complete circle plus a little extra. Clip the wire off just a little bit past the overlap point. Do this twice so that you can make two earrings. In one end of the wire make a little loop and bend it back just a little. Put the beads that you want on the earring onto the wire loop. Put a slight bend i...
To tie the spinal sinnet, take the thread folded from left to right and hold it at the cross. Now insert the right thread in to the hole and pull the left thread to make it tight. Take the end of the thread and insert it and pull the thread which is close to the knot, you will get another hole. Now cross the hole and then insert the right side of the thread and pull down the thread close to the knot. Repeat the same till the end of the thread. Now the spinal sinnet is ready to use.
Bill Myers shows us how to record live video direct to your computer from your camcorder. You will need: long firewire cable, camcorder with firewire output, computer. Procedure: Connect one end of the firewire cable to your camcorder, then connect the other end to your computer. Start your video editing program. Turn the audio down on your speakers to avoid feedback. Turn your camcorder on then check the capture option in your screen. Record the video then hit the stop button when you're fin...
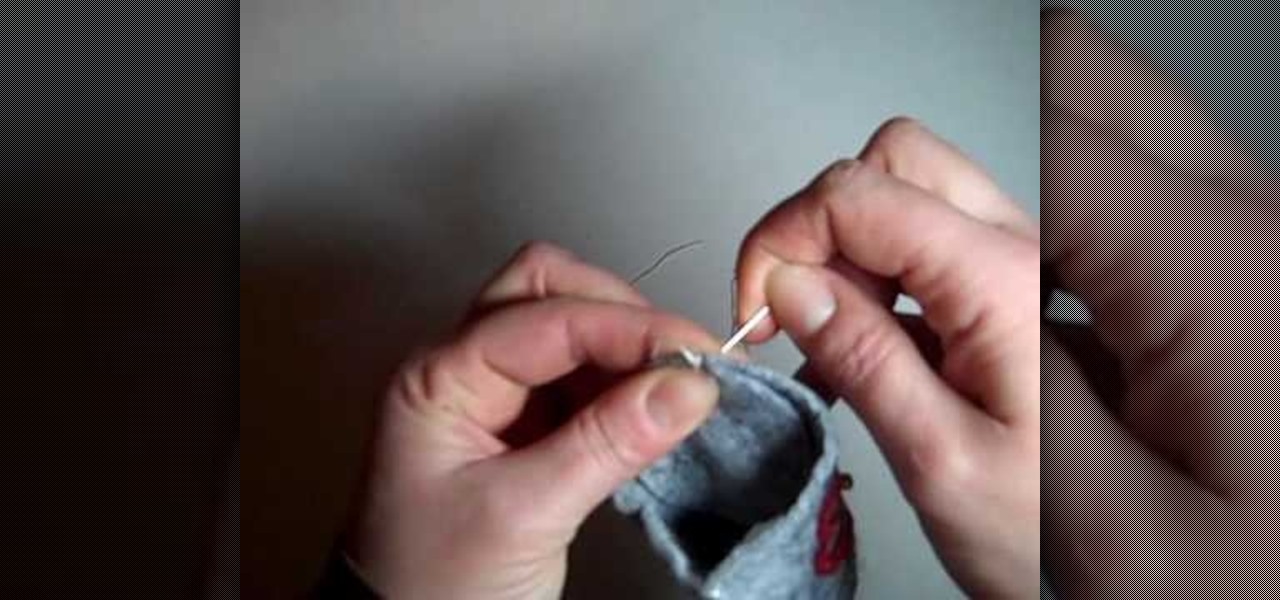
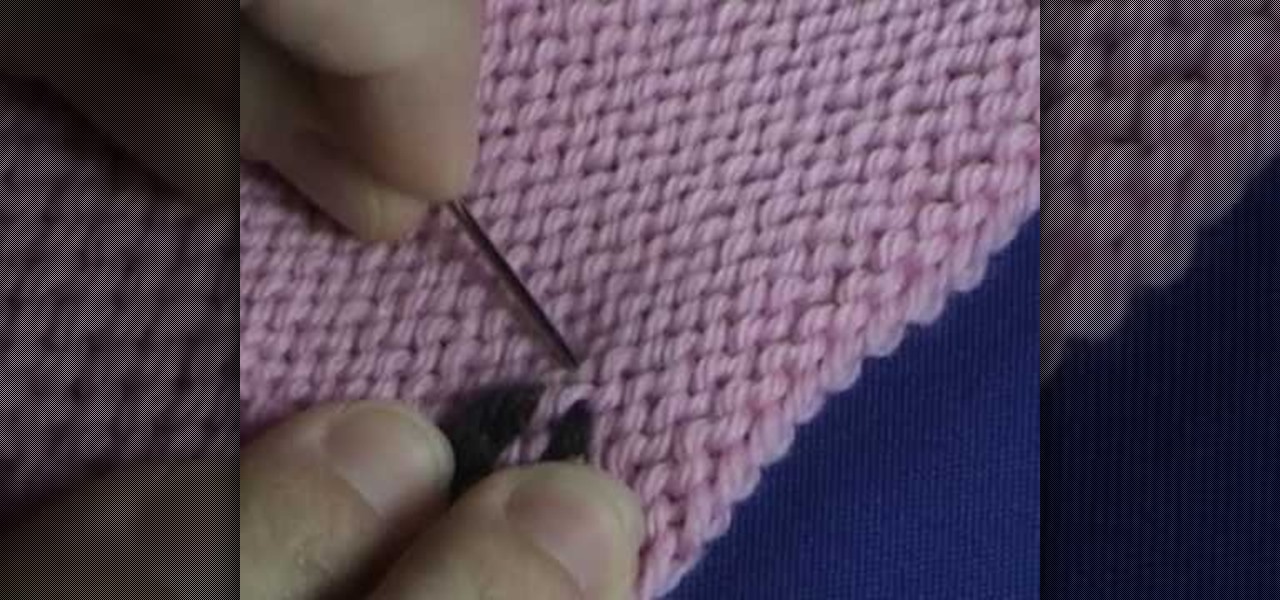
Let the Knit Witch show you how to weave the ends on your stockinette stitch project with this video tutorial. She takes a simple swatch of knitted pink fabric and shows you how to accomplish this simple but useful trick with black yarn so that it can be easily seen. Don't let your yarn unravel or ruin a project by skipping this easy to learn step! She explains it so clearly and demonstrates the technique so thoroughly that you'll be sure to have mastered it in just a few short minutes!
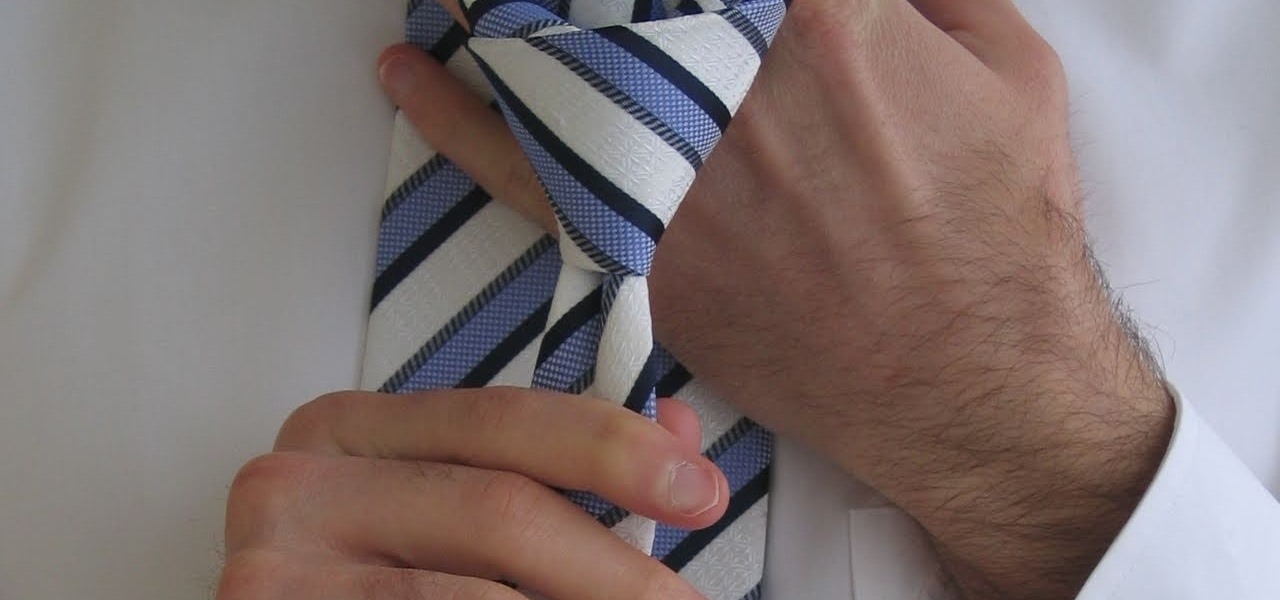
Tying a tie is a very useful skill, in this video, we are shown how to tie a Double Windsor knot, a very popular knot due to its symmetry. After placing the tie around your neck, if you are a right-handed person, make the thicker side the longer side on your right and pass this longer piece over the other one. Place the tie behind the other end and pull it through the hole and down, forming a small knot. Twisting the tie around itself backwards, pull the longer edge through on the other side ...
To solder copper pipes, start by using a sharp blade and scrape the end of the pipe you are going to solder. This will get all the burrs off of the pipe. Next, take some steel wool and clean the pipe so that it is nice and clean and shiny. The next step is to apply some flux. Use a rag to apply the flux to the end of the pipe. You want to make sure that the flux goes all the way around the pipe. After putting flux on the two pieces of pipe, put them together using the fitting. Take the blowto...
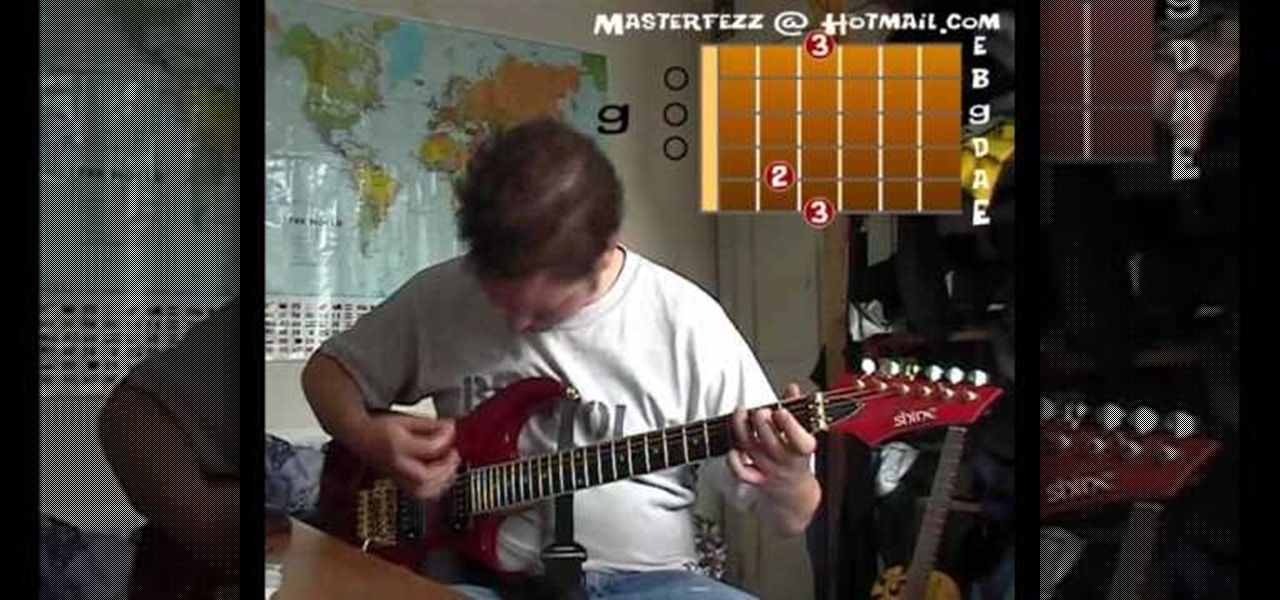
The video guide shows how to play the song “No Woman, No cry” on the guitar. Mr. Kiplan is the producer of this video.
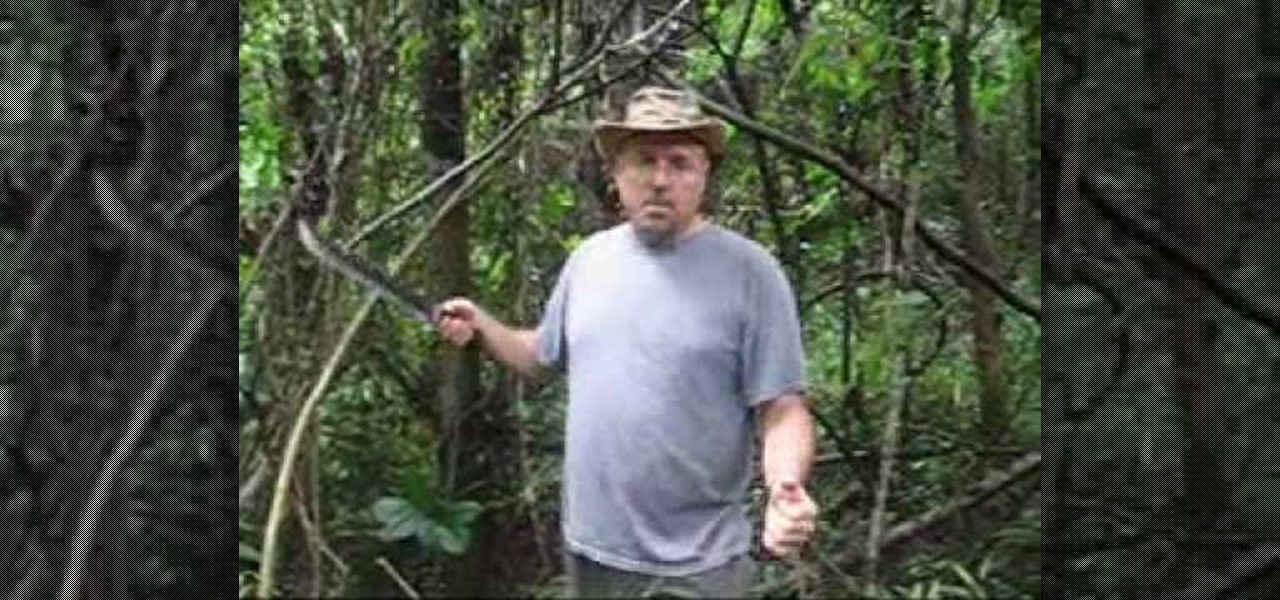
This video tutorial will show you how to use water vines to get water in the wild, if you fancy yourself the next Bear Grylls. There are different kinds of vines and not all vines are made equally. If you open them up they all contain water. Some vines produce bitter water and some are sweet.
Want to supply your head with a little extra jazz factor? Why not tie a scarf around it? You have only one head, but any number of ways to decorate it with a scarf.
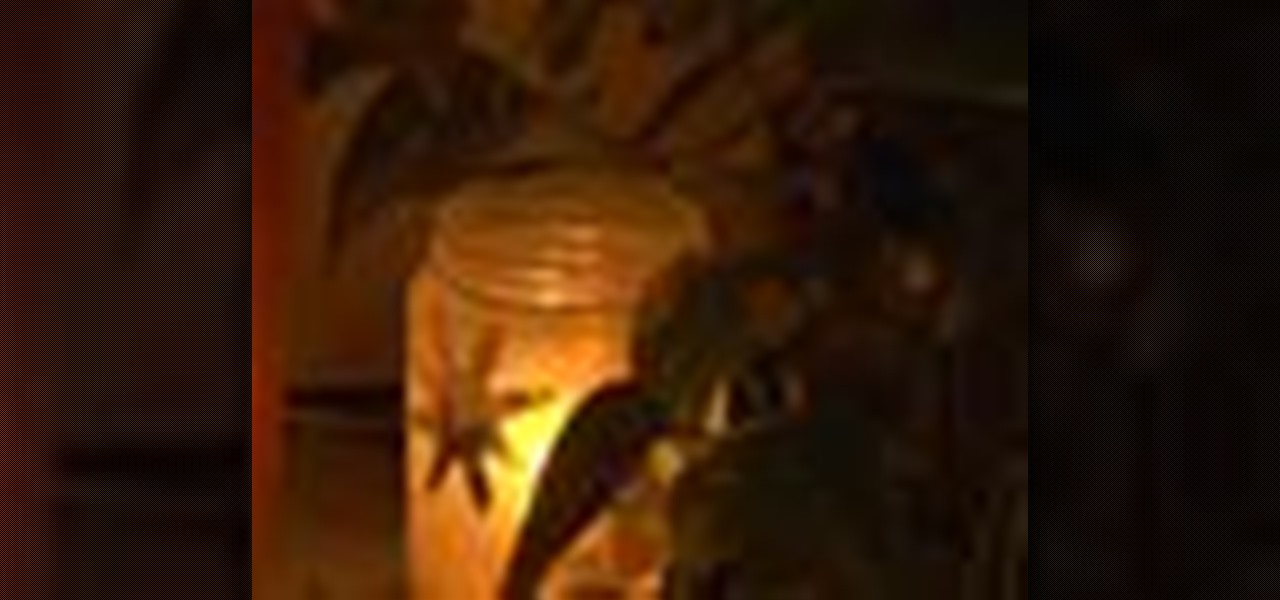
Why buy lanterns for your backyard when you can recycle empty jars into beautiful ones? This video will show you how to make lanterns out of old jars.
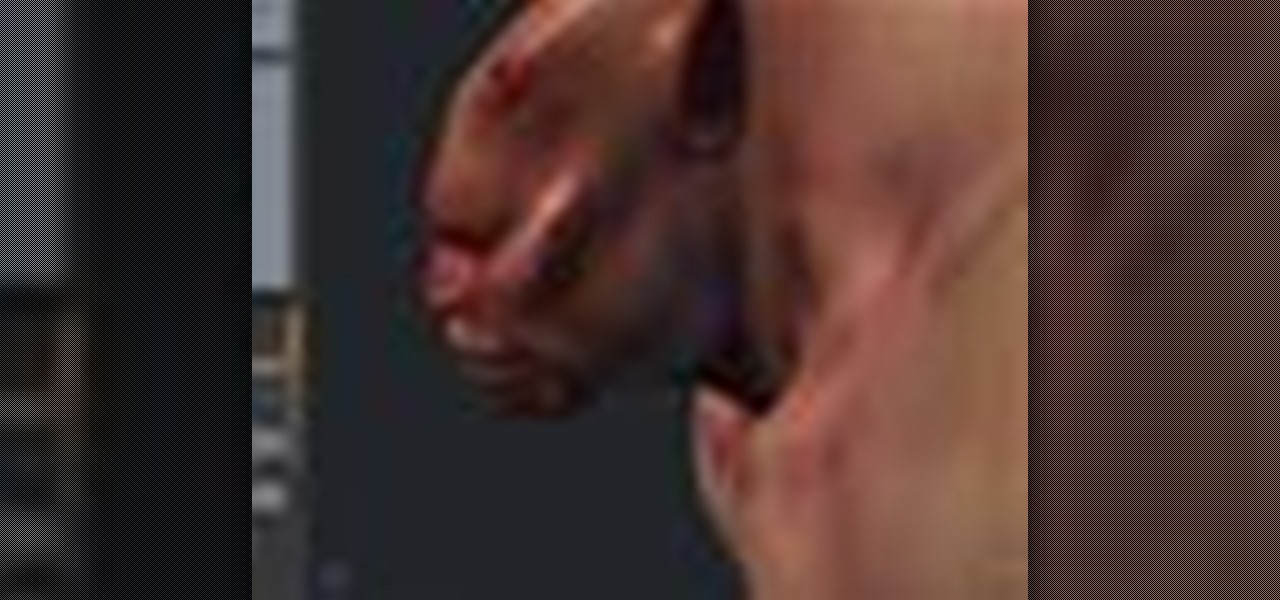
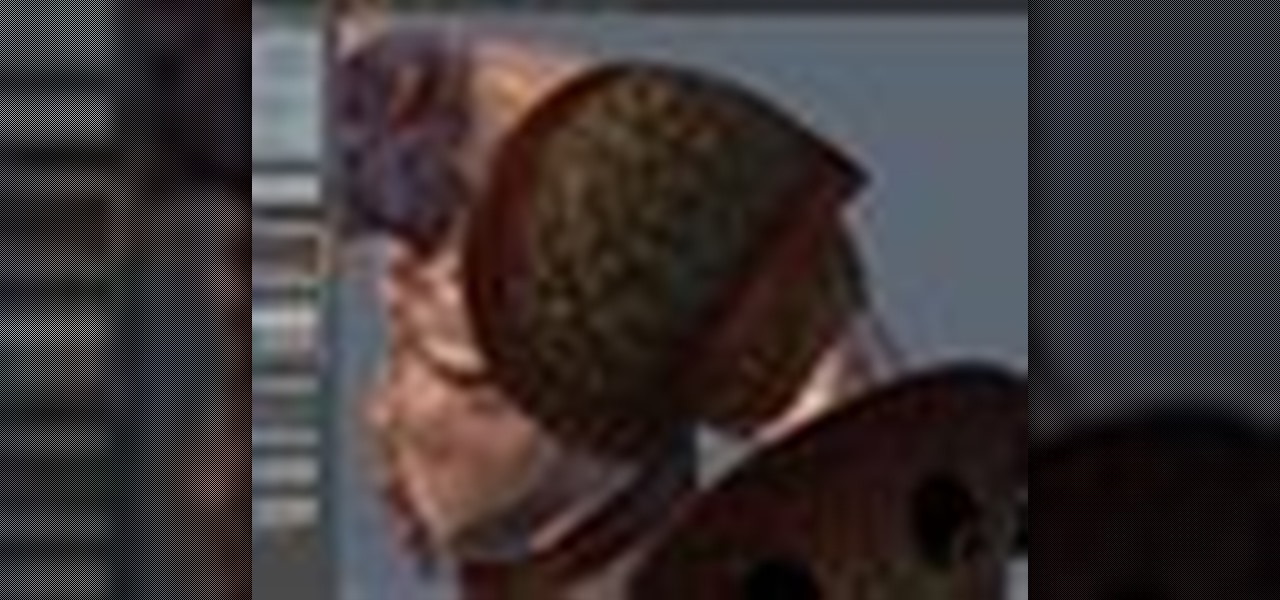
Developed by the same team of engineers responsible for LightWave 3D, modo, lowercase, delivers the next evolution of 3D modeling, painting and rendering in a single integrated and accelerated package for the Mac and PC. And now, modo is a true end-to-end solution that includes true 3D sculpting tools, animation and network rendering! More than just features, modo is a truly elegant integration of technology, raw horsepower and refined workflow. With such a wealth of inbuilt features, however...
Devolped by the same team of engineers responsible for LightWave 3D, modo, lowercase, delivers the next evolution of 3D modeling, painting and rendering in a single integrated and accelerated package for the Mac and PC. And now, modo is a true end-to-end solution that includes true 3D sculpting tools, animation and network rendering! More than just features, modo is a truly elegant integration of technology, raw horsepower and refined workflow. With such a wealth of inbuilt features, however,...
Devolped by the same team of engineers responsible for LightWave 3D, modo, lowercase, delivers the next evolution of 3D modeling, painting and rendering in a single integrated and accelerated package for the Mac and PC. And now, modo is a true end-to-end solution that includes true 3D sculpting tools, animation and network rendering! More than just features, modo is a truly elegant integration of technology, raw horsepower and refined workflow. With such a wealth of inbuilt features, however,...
Devolped by the same team of engineers responsible for LightWave 3D, modo, lowercase, delivers the next evolution of 3D modeling, painting and rendering in a single integrated and accelerated package for the Mac and PC. And now, modo is a true end-to-end solution that includes true 3D sculpting tools, animation and network rendering! More than just features, modo is a truly elegant integration of technology, raw horsepower and refined workflow. With such a wealth of inbuilt features, however,...
Devolped by the same team of engineers responsible for LightWave 3D, modo, lowercase, delivers the next evolution of 3D modeling, painting and rendering in a single integrated and accelerated package for the Mac and PC. And now, modo is a true end-to-end solution that includes true 3D sculpting tools, animation and network rendering! More than just features, modo is a truly elegant integration of technology, raw horsepower and refined workflow. With such a wealth of inbuilt features, however,...
Devolped by the same team of engineers responsible for LightWave 3D, modo, lowercase, delivers the next evolution of 3D modeling, painting and rendering in a single integrated and accelerated package for the Mac and PC. And now, modo is a true end-to-end solution that includes true 3D sculpting tools, animation and network rendering! More than just features, modo is a truly elegant integration of technology, raw horsepower and refined workflow. With such a wealth of inbuilt features, however,...