

How To: Do cable rope overhead skull crushers for your arms
Learn how to do cable rope power overhead skull crushers. Presented by Real Jock Gay Fitness Health & Life.

Learn how to do cable rope power overhead skull crushers. Presented by Real Jock Gay Fitness Health & Life.
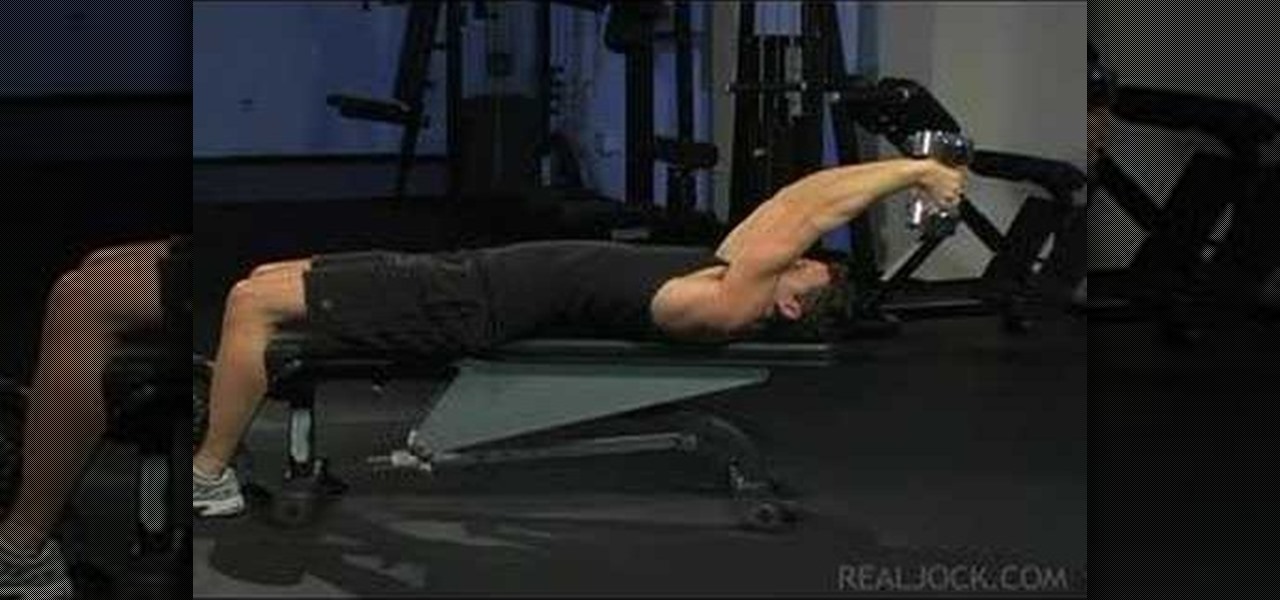
Learn how to do dumbbell skull crushers. Presented by Real Jock Gay Fitness Health & Life. Benefits
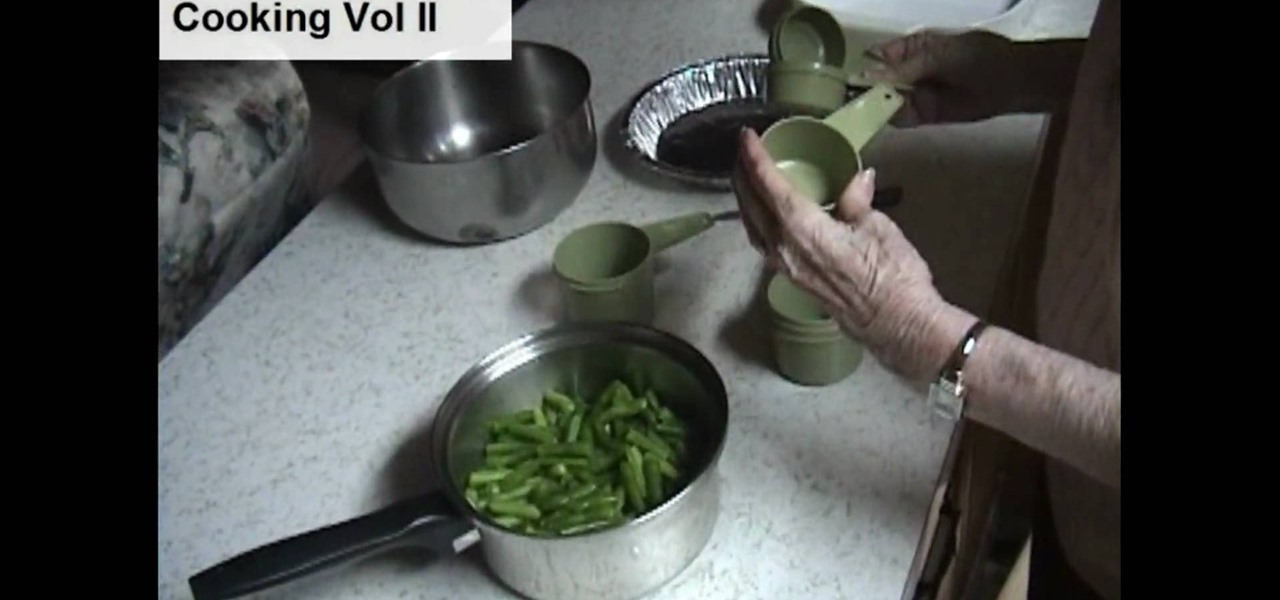
This is the country way to prepare green beans. The recipe is easy and delicious.
End constipation
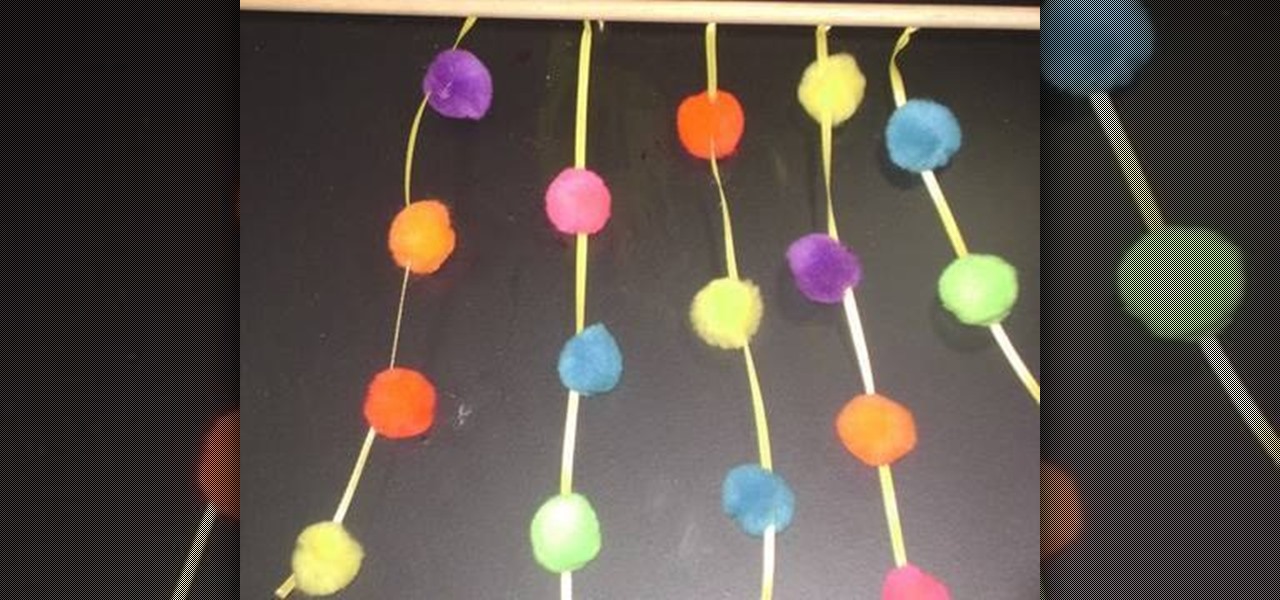
Children like to have fun things in their rooms. A pompom curtain is perfect for a little girl to have and pretend it is the entrance to her castle. A young boy might like a plain colored pompom curtain to pretend it is the entrance to the dungeon where he keeps his monsters!

This is a good dish to serve with pasta and it is easy to prepare. Ingredients you will need:

Write a fraction as a decimal

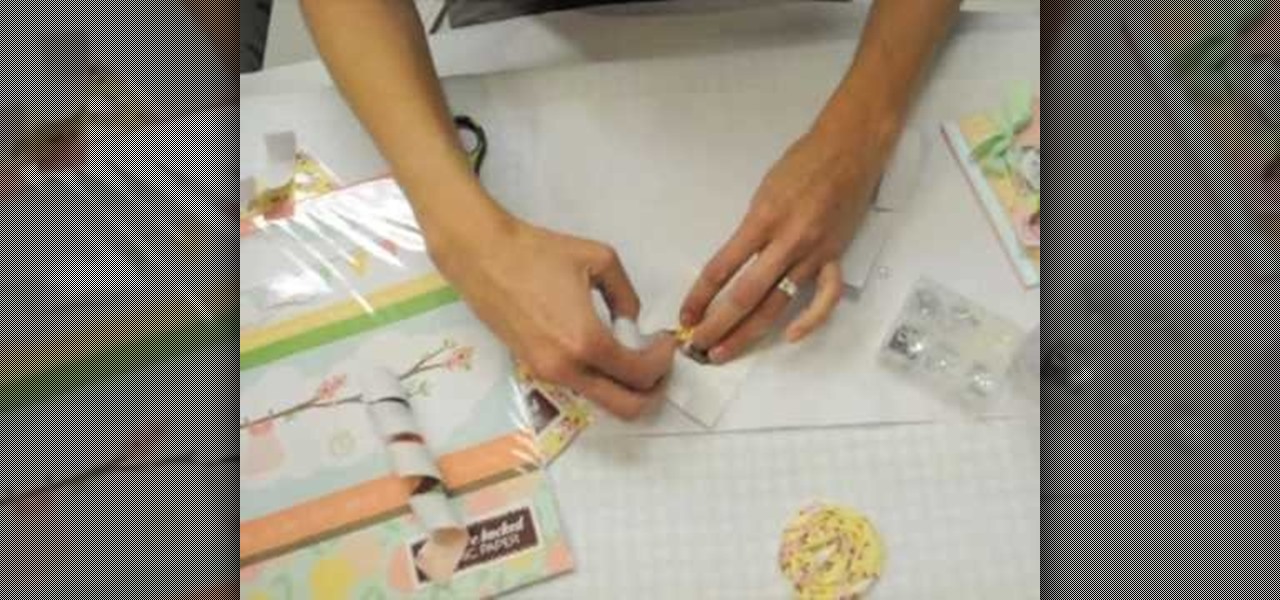
This video features an image from Squizzlefly. The card is Spring suite 2. Use a regular A2 size card. Cut 8 1/2 x 5 1/2. Score in the middle. Go down another 1/2 inch and score. Take a ruler across the top of the fold. Make a pencil mark at every 1/4 inch. Should be 21 small hash marks. Measure down 1/4 inch on both sides. Go 1/2 inch in and make a dot every 1/2 inch. Go down 1/2 inch from the fold and make a dot every 1/2 inch. Make long-short, long-short cuts with the dots along the whole ...

In order to thread your sewing machine and wind a bobbin, you will need the following, a sewing machine an empty bobbin, thread, and a pedal control for your sewing machine. Choose a good quality thread. Place the thread in the holder on top of the machine. Place the cap on the end of the thread, in order to hold it in place. Loop the thread around the first guide. String the thread through the hole in the bobbin. Place the bobbin in the slot on the top of the machine. Hold the thread in you ...
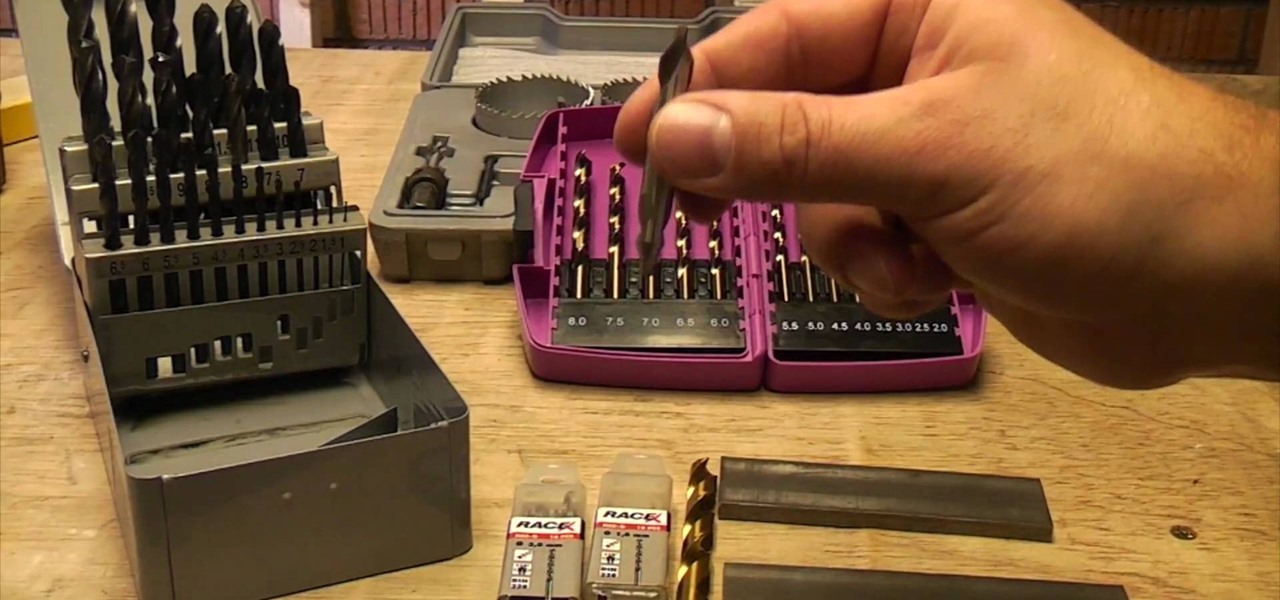
In order to find the best drill bits to drill in metal, you should look at the angle of the bit. It will need to have a center point. Bits only cut on the ends. The grooves on the sides are made to remove the excess. The point on the end determines how it will cut. Titanium bits last a long time, but cobalt bits last even longer. They will all eventually become blunt. They will require sharpening.
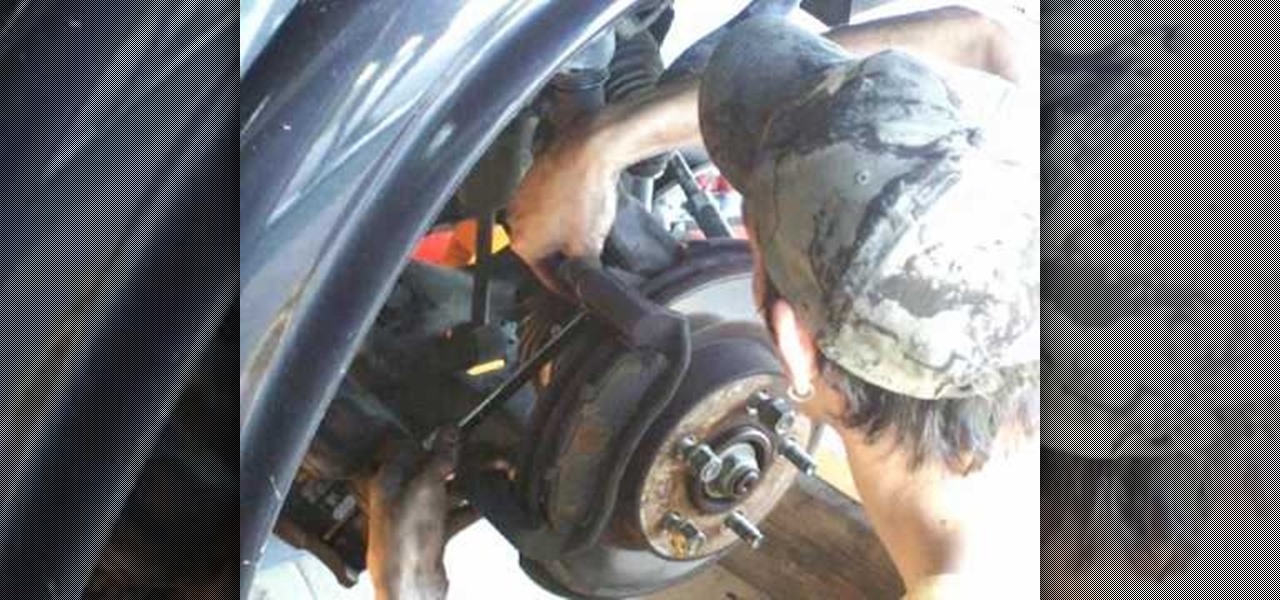
In this next tutorial, you'll find out what tools you'll need to replace the ball joints on a 1999 Ford Explorer. It's a pretty easy to follow, especially if you know anything about cars, so good luck and enjoy!

Celebrate the 4th of July by making holiday earrings. You will need:
How many stitches does your crochet art have? How can you tell? Why would you even want to know how many stitches are in your crocheted sweater or crocheted hat? Knowing how to count your stitches is a fundamental step in learning to crochet – assuming you want your finished product to be the right size and shape.
In this video, bet your friends that they can not lift an entire glass using only a plastic straw. They will most likely struggle, push the glass around a bit and try to balance it all, to no avail. Then, you come along and save the day with this trick!
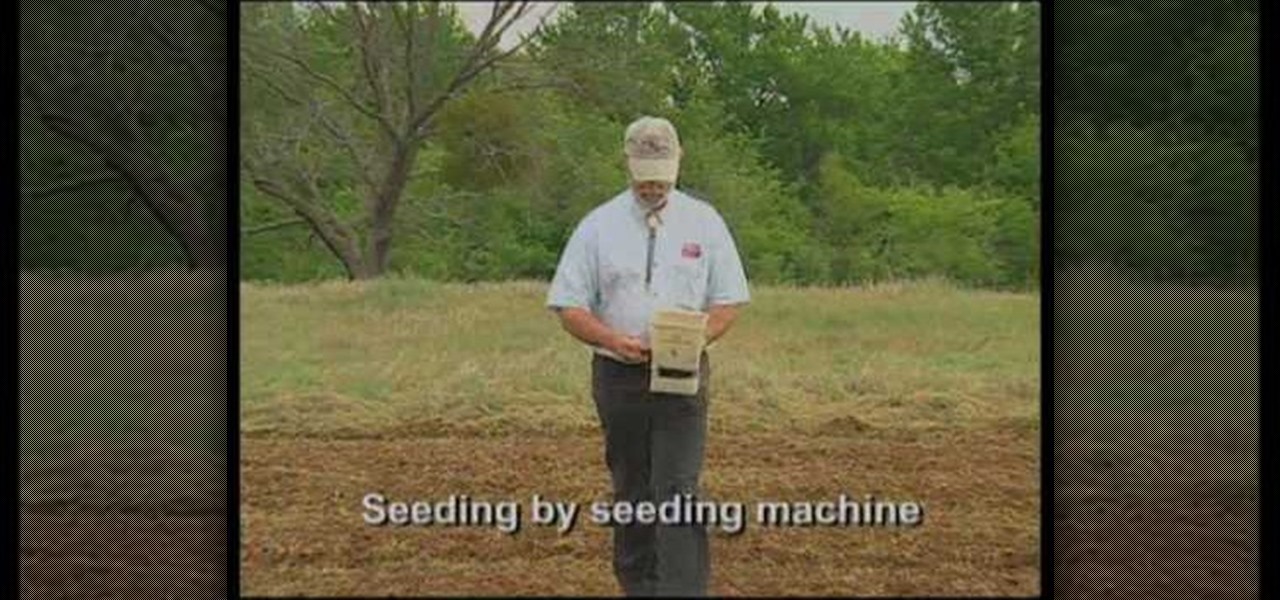
How to prepare soil for a wildflower garden

First, you will need a surfboard cable modem. You will need a wireless router with an unscrewed antenna and a power cord. Make sure you have two ethernet cord and a computer. First, take the surfboard and screw the cable into it; make sure it is completely tight. Next, take the router and one ethernet cord. Look for the spot that reads WAN; plug the ethernet cable into this spot. Take the other end of the ethernet cable and plug it into the port on the surfboard.

In this how to video, you will learn how to layer videos in Final Cut Pro. First, open Final Cut Pro. Get your original clip and then put the clip that you want in the clip and drag it in over the top in the time line. Change it to image and wire frame. Grab the corner of the image and drag it down to the size you want. You can also move it around. Next, go to sequence and render it. Once that is done, change the selection back to image. Once you play the file, both clips will be playing. If ...

Jennifer DiDonato of MadeFit TV shows how she makes ham wrapped asparagus. Asparagus is one of the super foods, full of antioxidants, low in calories and high in fiber, vitamin K and folic acid. Last but not least, it is an anti-aging vegetable.

First of all you need a long hair brush and a teeth hair brush. You may also use a band for adding glamour. Start by spreading the hair on the front of the head. Now go one inch behind and then take a lock of hair and then comb it and then start back-combing it to the front. Repeat this process taking different locks of hairs at the top and then back-combing them in sections. So you get a hair line on the top of the head which divides the hair into two parts. Now you have to comb the back por...

To make an 8 sided ninja star first you need to take a sheet of the paper you are using and fold this in half, the short way. Unfold this so you have a crease. Now, fold the corners into the center crease. Do this to the top corners. Now, flip this over and fold over the bottom of the paper to the back and crease this. Now, you will want to tear this bottom half creased part off. Fold this into a square and fold the square into halves on both sides and tear this off to create smaller squares....
In order to make Fabric Paper Rosettes, you will need the following: decorative fabric paper, scissors, glue, and jewel embellishments.
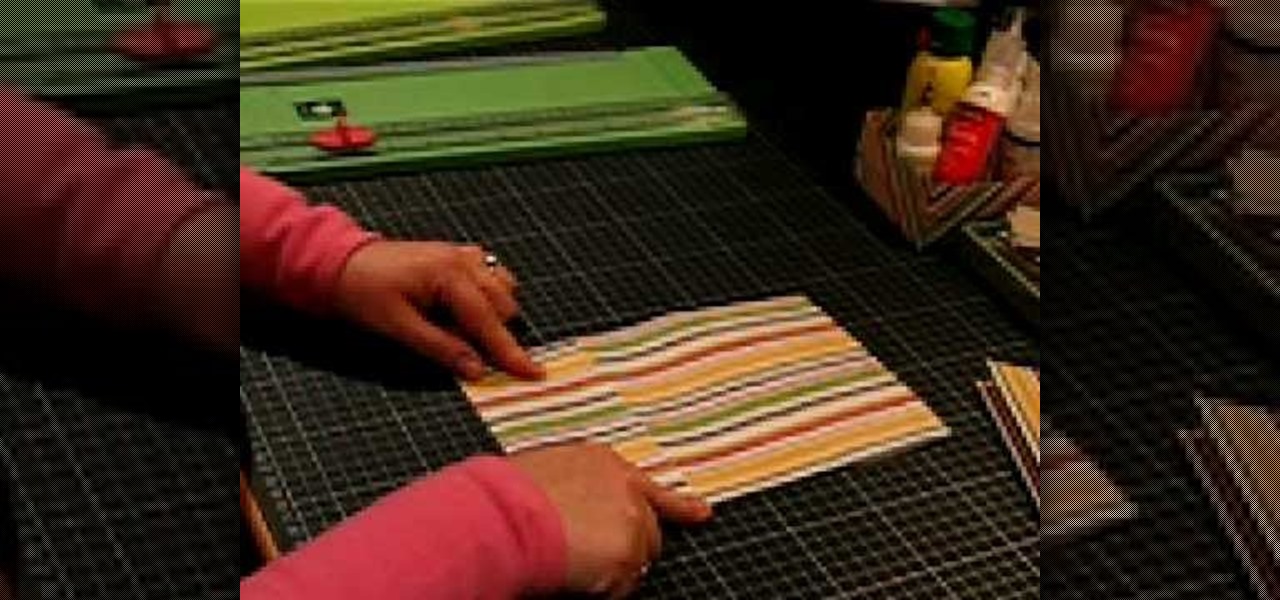
First of all you need a single sheet of paper 12 by 12 inches to make a mini book with four pages and measures 6 by 3 inches. You also need a tool for making creases and a knife to cut the paper. Start by folding the paper in half and then crease the middle line. You must always try to make the crease line as crisp and sharp as possible. Now open it out and then again fold it in the middle in the other side. After this step you have to place the paper with the length facing towards you. Now f...

This video describes the steps on how to make Origami claws. These paper claws are very sturdy and don't break easily.

Steps to Configure Your Modem/Router are: 1. Open Network connection and click properties

In this how to video, you will how to create clay coils. You will need clay about the size of your fist, water, and a knife. Pound the clay 200 times to get all the air out. Cut a slice from the clay and roll it in your hands. It should be a log shape. Now place it on a surface. Roll it back and forth until it is to the thickness you want. Water the clay coils and score the ends of it. Push the ends together and rub all the cracks out with water so that it sticks. Wet the sides of the two coi...
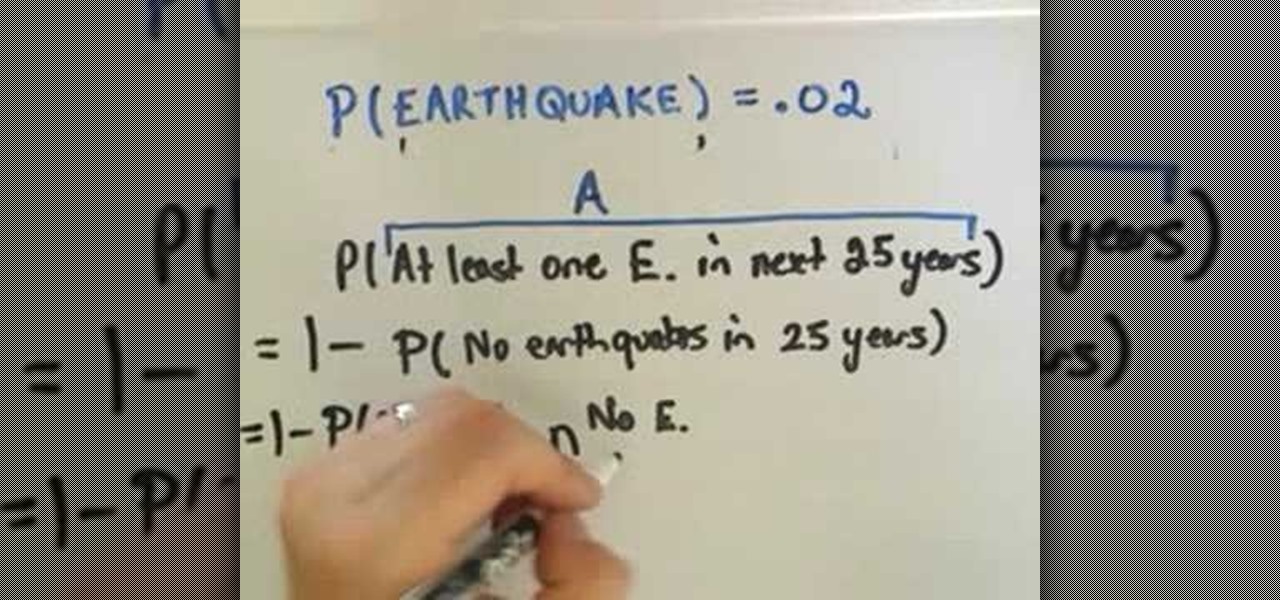
Calculating probablities can be used to help us make decision. PatrickJMT explains how to calculate probability in an "either A or not A" scenario. The probability of A plus the probability of not A is equal to one. Therefore, the probability of A is equal to one minus the probability of not A ; P(A)= 1 - P(not A). The probability of a major earthquake in San Francisco over a period of time is used as an example. The probablity of an earthquake of a magnitude of 7.5 or greater in San Francisc...

How to Sculpt a Sitting Body out of Clay
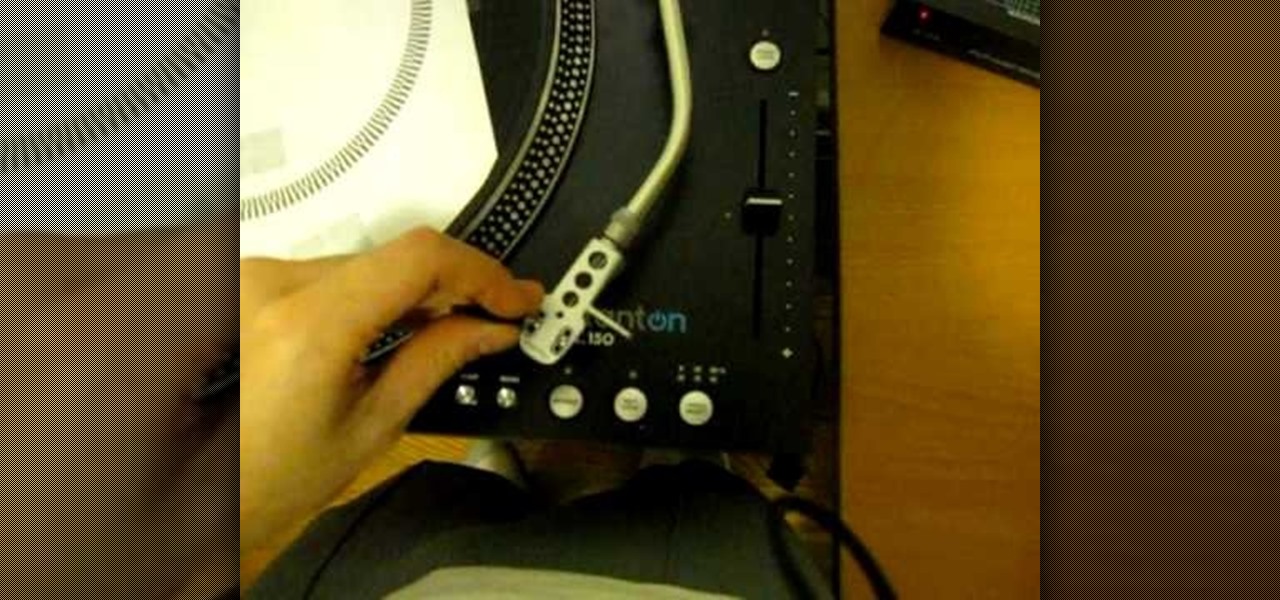
Paul demonstrates to viewers how to properly set up a turntable. Each turntable has the same basic parts, so this tutorial should work for most users. There are several components: the platter is the part that spins and it has a slip mat on top. The tone arm is to the right and it has a head shell and stylus cartridge (needle) mounted on the end. The queueing lever is at the base of the tone arm and it raises and lowers the tone arm base. There is also a VTA (Vertical Tracking Angle) adjustme...
The video demonstrates how to perform a basic card shuffle. First you have to divide the card deck into two equal decks and hold them one in each hand. Make sure that you hold the cards with three fingers, the thumb at one end and the middle and ring fingers at the other. Then you can hold the two decks little close to each other and bend the decks at the ends facing each other using the forefinger to press in the middle of the deck. Then let go off the cards in both the decks one by one in a...

Dana Plazyk shows how to make a beautiful ‘Christmas Bow’, in this video. All that is required to make this bow are the following:•A decorative Ribbon•Toothpicks•A rectangular piece of foamShe begins by making a whole twist, near one end of the ribbon. The twisted part of the ribbon is placed right behind a toothpick, fastened on a rectangular piece of foam. She then fastens the ribbon at that point with a second toothpick, to hold it in place. A small central loop is created on the free end ...
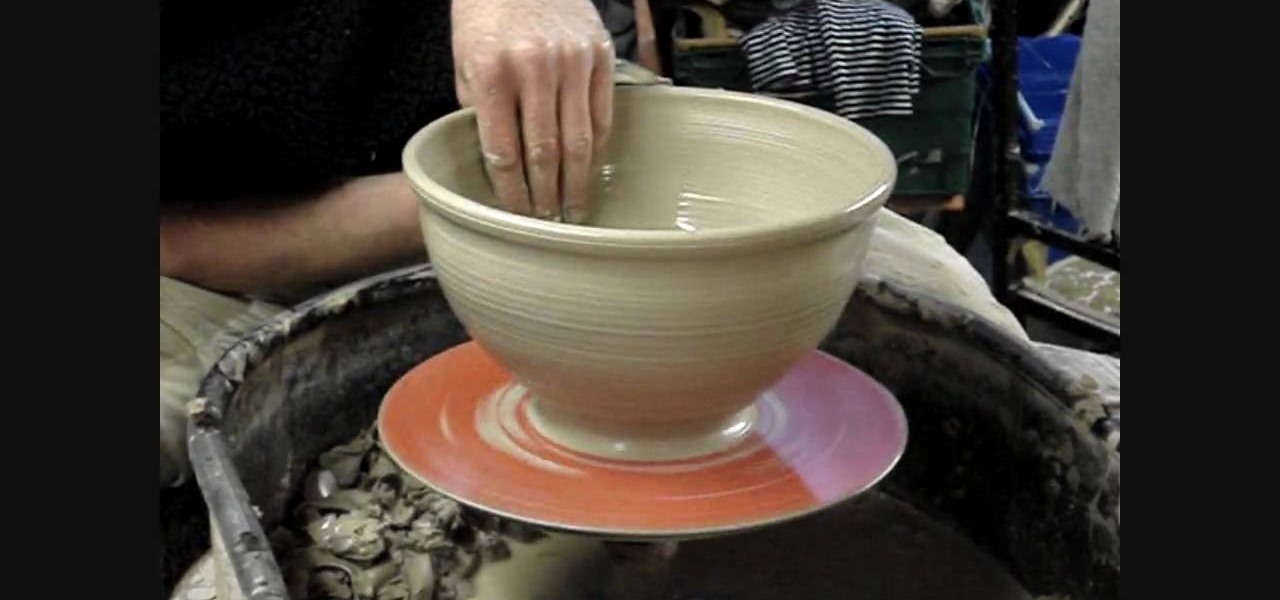
First of all you have to put some clay over the potter wheel. Now add some water and then press hard with your fingers at the bottom. Now slowly release the pressure of your hands and bring your hands upwards while slowly releasing the pressure. This shall form an inverted cone shape. Now apply pressure with your thumbs at the top to depress in the top and then wash your hands with water. Now use your thumbs to make this hole bigger. Now put a little water in this hole and then use your finge...
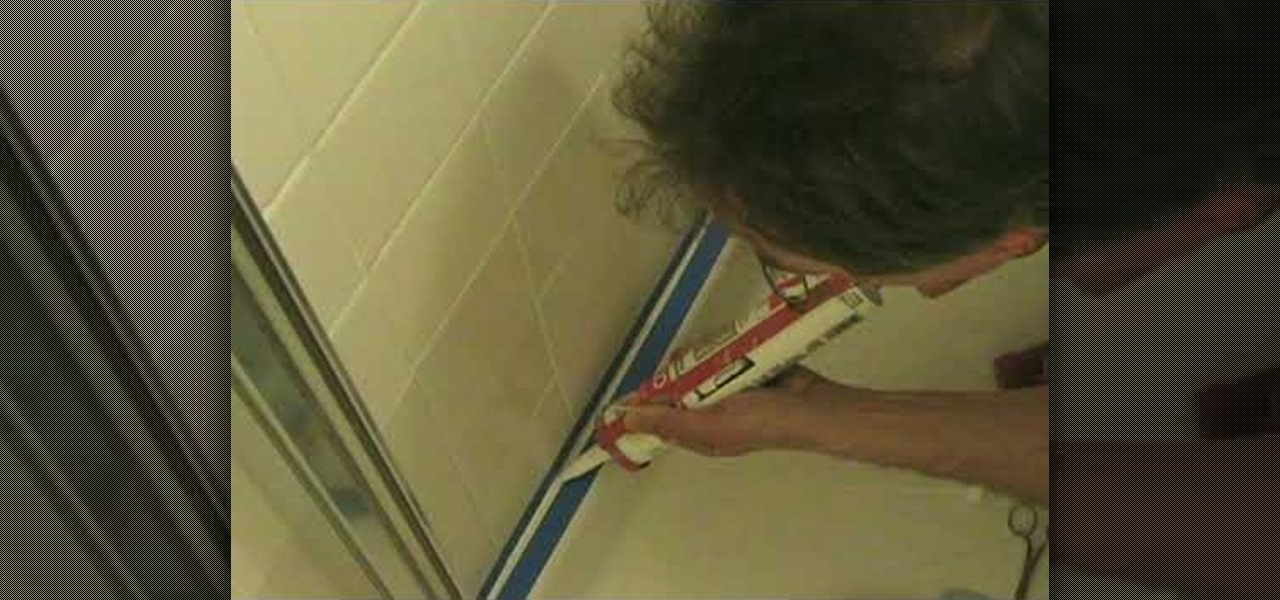
To start caulking your shower please ensure that the shower is clean, dry and all caulk joints are also clean, dry and free of any old caulk. Start by taping the 'to be caulked' areas with blue painters tape, making sure you are following the contour of the shower and pressing firmly on the tape to prevent any caulk from getting under the tape. Once the taping is completed now you can start caulking. Start by using a caulking gun from one end of the shower to another, using small amounts of c...
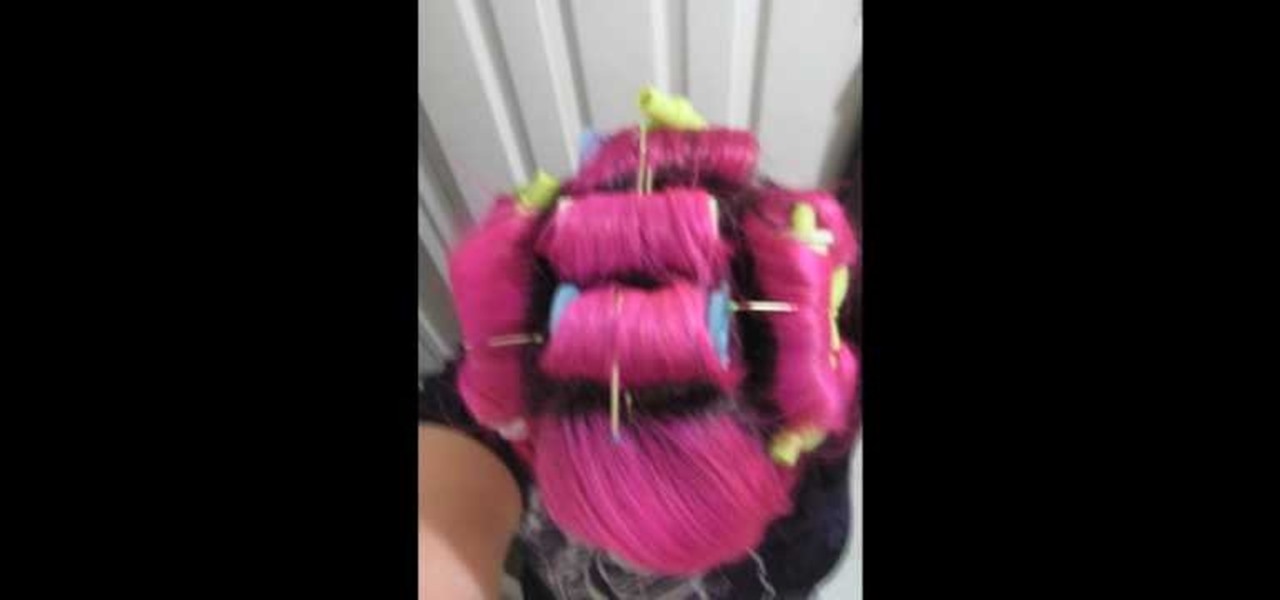
This video demonstrates how to wear your bandanna in a rockabilly style. First, you'll need to curl your hair in either rollers or hot sticks. This particular video utilizes both. Do not worry about including your bangs. Use three rollers on top, so the ends of the rollers are pointing towards your ears. The third roller will be on the top of the back of your head. Put to more rollers on each side of the top, this time the ends facing forwards and backwards. Use four hot sticks for the sides ...
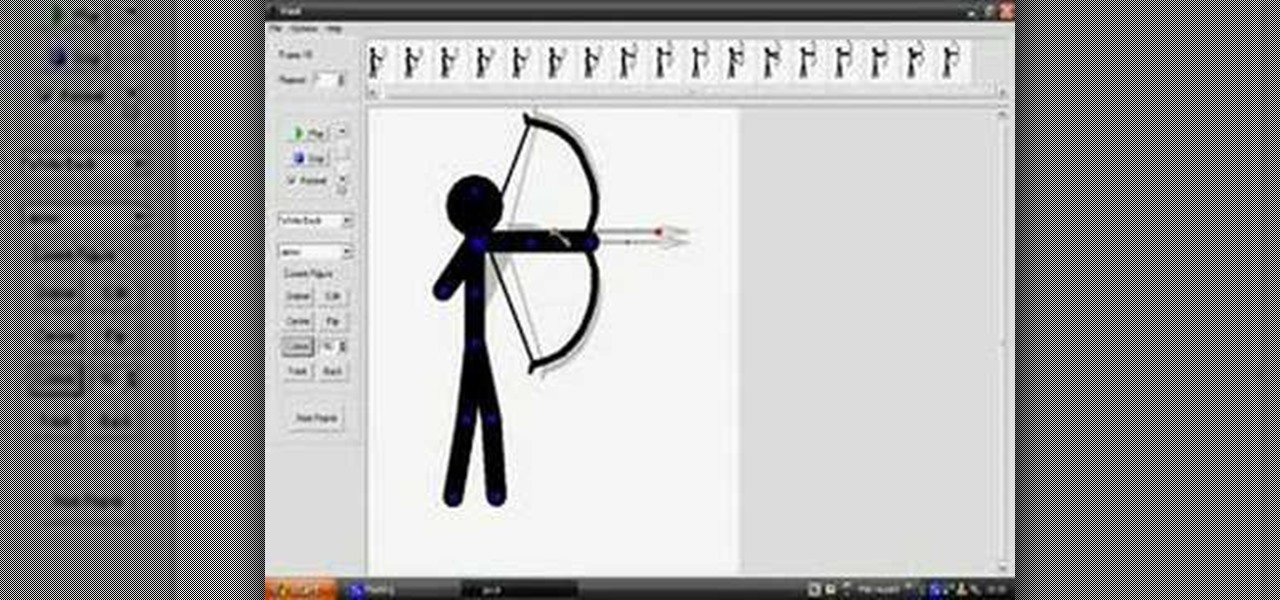
In this Software video tutorial you are going to learn how to shoot a bow in Pivot. Open Pivot and select a stick. You can adjust the size of the working space. Adjust the position of the stick in to an arrow shooting position. Then put a bow in his hand and move up the arm to a horizontal position and move the bow in a similar manner. For every new position, click on ‘new figure’ and then adjust the position. While stopping, make the gaps smaller. Now start moving up the other arm. Then move...

Joyce teaches viewers how to remove fake nails by using acetone. First, you should get acetone solution and submerge your nails into the solution for a few minutes and the nails will come off by themselves. For fake nails, you can apply nail polish remover and the nails will easy pull off. You can also just wait for your nails to grow and the fake nails will naturally fall and you can just easily pull them off. You can also get a cutter and slip this in between your fake nail and real nail an...

Charles M., an attorney and bonsai cultivator, demonstrates how to transfer a field grown Japanese Black Pine that is ready for training. A 5-gallong nursery specimen was purchased and planted in the ground with a bonsai compound soil to keep its roots close and compact during trunk thickening. The tree was allowed to grow for three years, with the main foliage under four feet, but with two “sacrifice” branches allowed to shoot out without trimming. One sacrifice branch at the top of the tree...
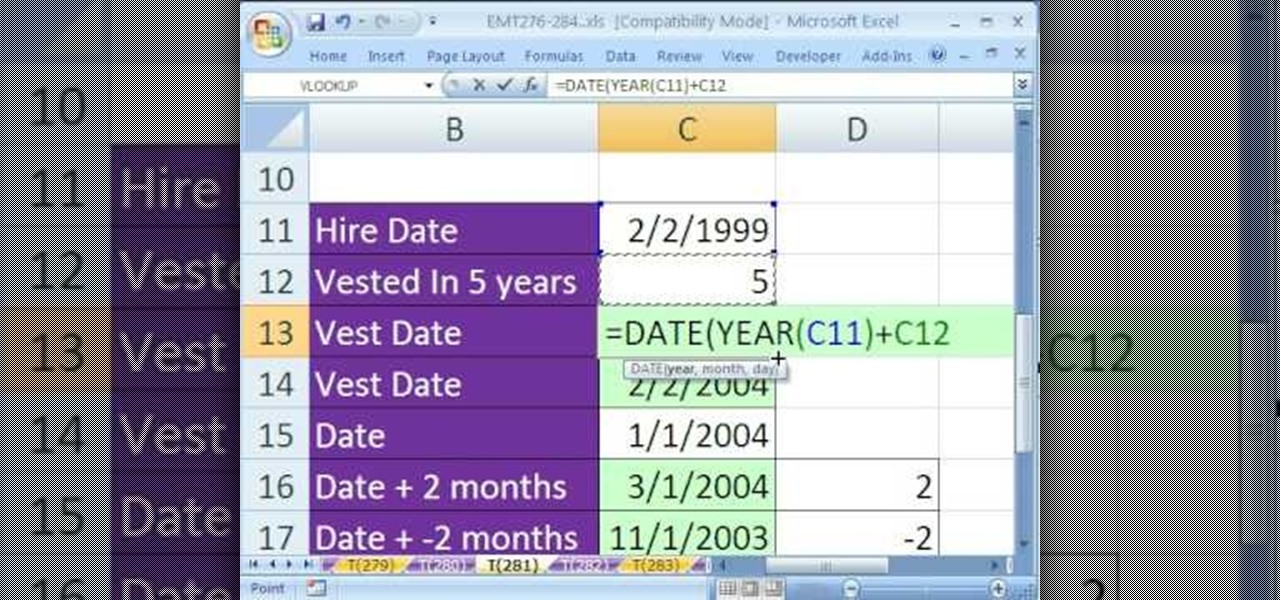
New to Excel? Looking for a tip? How about a tip so mind-blowingly useful as to qualify as a magic trick? You're in luck. In this Excel tutorial from ExcelIsFun, the 269th installment in their series of digital spreadsheet magic tricks, you'll learn how to

ultimatehandyman shows you how to Rewire a fuse from an older style consumer unit. What you need: fuse from an older style consumer unit, a tester/screwdriver, fuse wire of right thickness1. Use a tester to determine whether your fuse is in working condition or not. Once you are sure it is not working unscrew the screws partially which are found on both ends. 2. Unwind the old fuse wire from the screws and remove. Take the fuse wire that is of same rating as the one you just removed. 3. Inser...

Making your own hoop earrings can be fun and easy. In this video we learn to make gold-filled beaded hoop earrings with some wire, pliers, beads and an empty pill bottle. Take a 6 inch piece of 20 gauge wire and wrap it around the pill bottle. Then you take your round nose pliers and bend the tip of the wire in a 90 degree angle ending in a circle. You can be creative with what you put on for beads. In this video it shows a purple focal bead and 30 plain beads. So you would put 15 of your pla...
To begin you need to have a metal hollow tube made up of a strip which is around one inch wide and about two inch in length and has been bended round. Now take some clay and put it inside this hollow tube on a table. Press it with your finger. Take a glass tube with lid and use it to press the clay down to form a pot with this clay. Now remove the both the glass tube and the metal tube. Put the clay pot again back over the lid of the glass tube and press with your fingers. You have to press s...