A bunny hop is the foundation for many BMX bike tricks and it involves getting both wheels of the bike off the ground. Learn how to bunny hop from our BMX biking expert in this extreme sports video tutorial. Take action: pull up on the handle bars, pull back end up with the pedals, and practice. Patrick, the instructor in this how-to video from Live Strong, resides in Campell, CA and has been riding for several years. His sponsors include Mongoose Bikes, Fox, Monster, and Calabasas Cyclery.
Turf toe may not sound serious, but it can end an athlete's career. Turf toe involves rupturing the capsule underneath the big toe. Learn how to treat sports toe injuries in this how-to video on health and rehab.

An eye splice is the best way to create a permanent loop on the end of a multi-strand rope. Whether you need an eye splice loop to hold a hammock up in your backyard or need one for your nautical voyages, this survival training video will teach you step by step how to tie one.
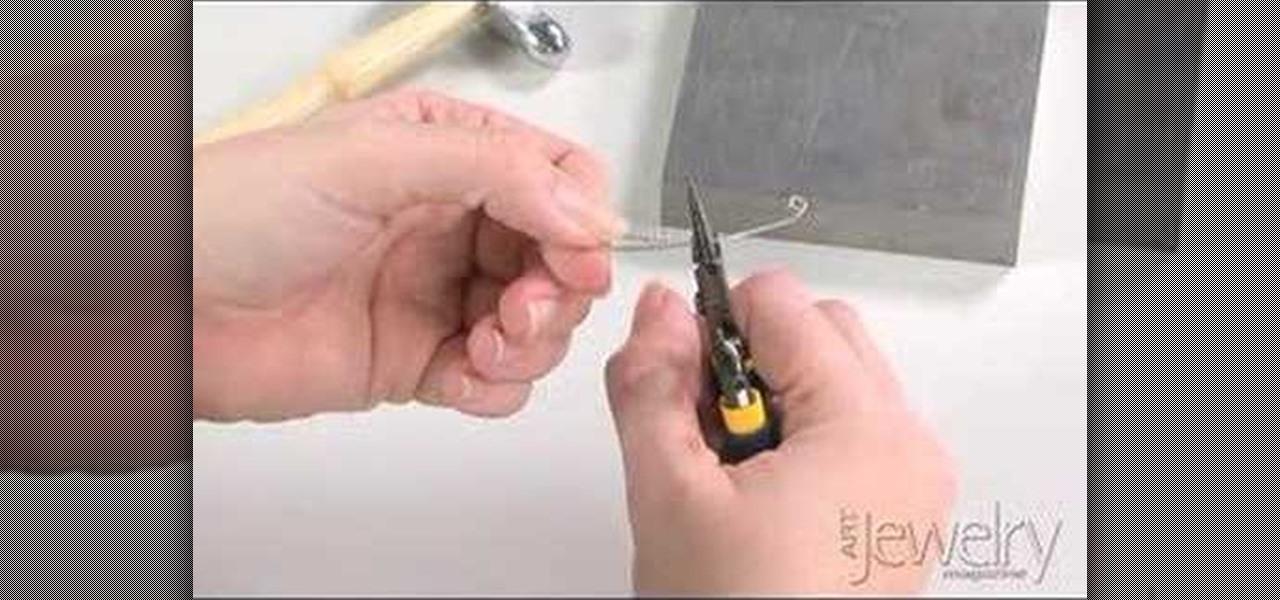
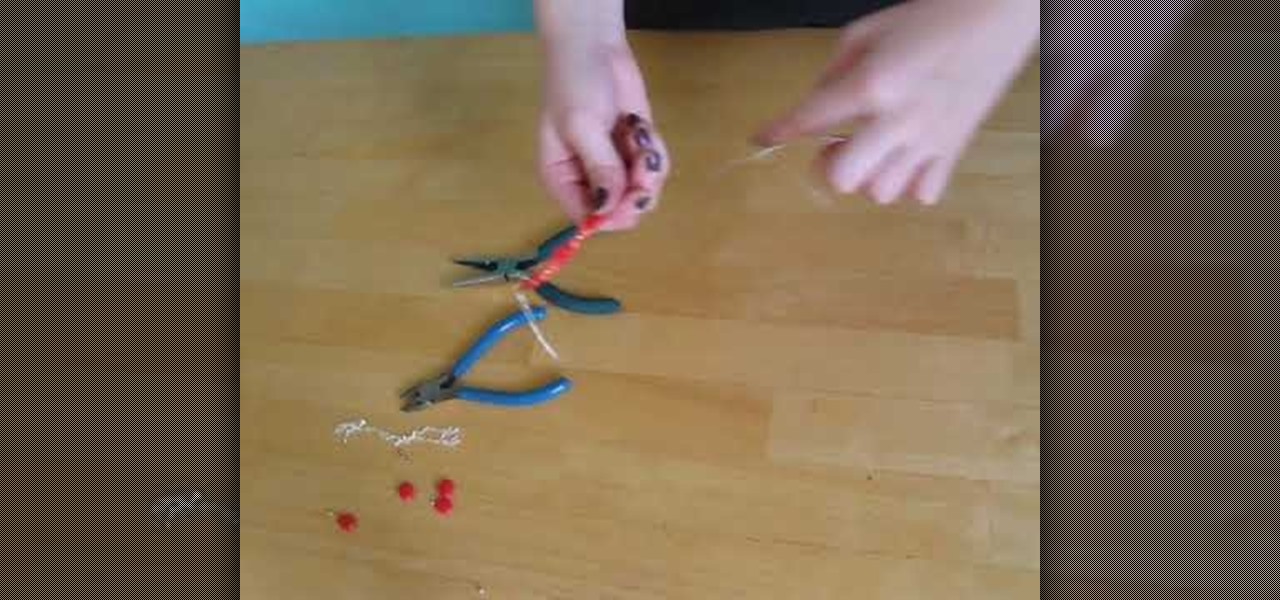
Art Jewelry Magazine associate editor Addie Kidd shows you how to make an S-hook clasp with looped ends. You will need wire, pliers, and a hammer. Learn how to make an s-hook clasp with looped ends for necklaces or bracelets by watching this video jewelry-making tutorial.
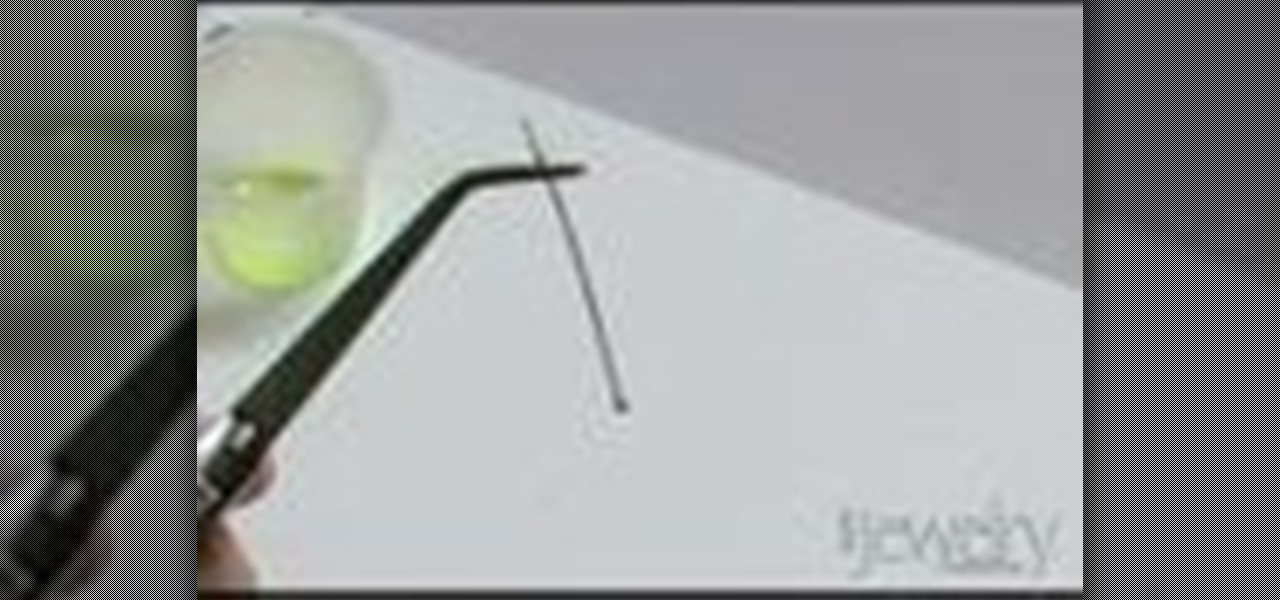
Art Jewelry Magazine associate editor Jill Erickson demonstrates how to use a torch to ball up the end of a piece of sterling silver wire. This wire can now be shaped into an earring or whatever jewelry desired. Learn how to ball up the end of sterling silver wire with a torch by watching this video jewelry-making tutorial.

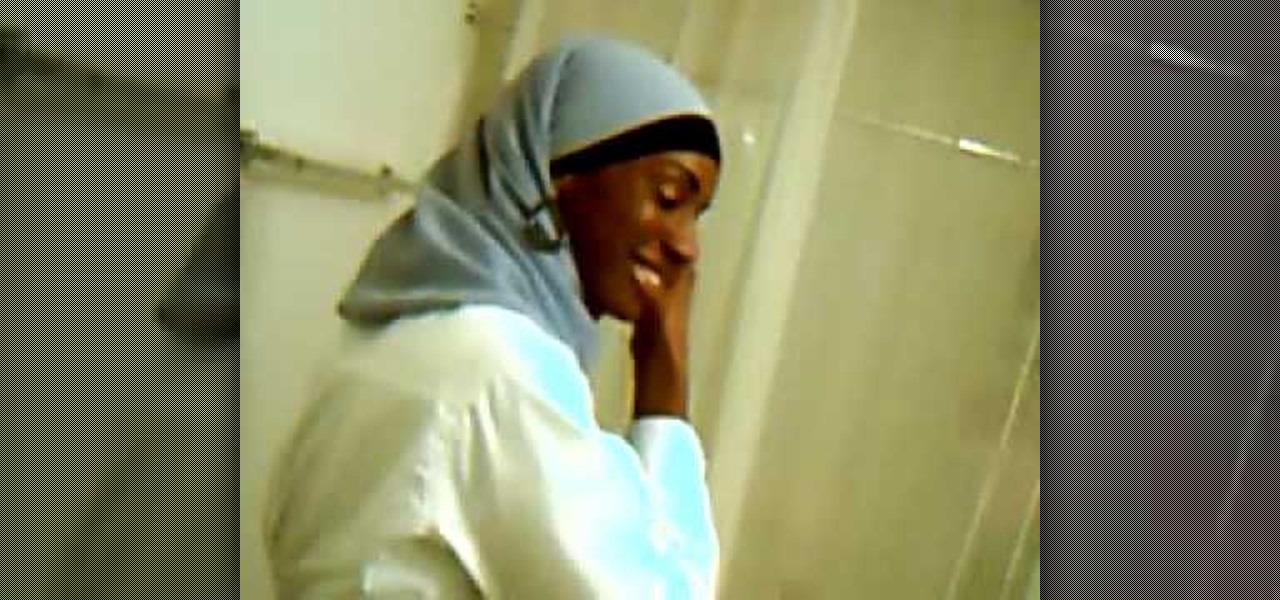
The way to wear hijab shown in this demonstration with a simple wrap around the head, securing the hijab with bobby pins at the back of the neck. The ends of the hijab are pulled forward to the chest. Then a thin scarf in a contrasting color can be wrapped around and tied at the nape of the neck as well. A portion of the hijab is pulled forward over it and pinned over the ear. Then one of the ends is pulled under the chin to the opposite ear and pinned to the head. The other end is wrapped ar...

For this hijab style, start with hair completely covered and a large rectangular pashmina scarf. Pull the scarf over the head with one side hanging longer than the other. Pull the scarf tightly over the forehead to the nape of the neck and pin it together at the nape. Take the shorter end of the scarf and tuck it back toward the nape of the neck. Then pull the long end under the chin and up around the head until it is tight. Secure the end with a pin. Earrings can be worn through the scarf as...
Several Tanzanian girls demonstrate how to tie a kanga (an African sarong). The first method is to wrap the kanga around the waist and tuck the end in at the waist to secure. The second method is to wrap the kanga into a cylinder to use it as a base for carrying a parcel on the head. Another way to wear the kanga is to wrap it around the neck like a shawl or wrapped under an armpit and tied over the shoulder for a fancier look. To wear the kanga as a scarf, fold it into quarters the long way,...
Tiara-esque headbands are fun to make, and more importantly, fun to wear! You will need, 1 basic wide headband, 1 yard of cotton fabric, 1 yard tulle, flowers from the Crafts section, scissors, beads and rhinestones for details, a glue gun. Lay the headband over the fabric, towards the edge. Mold the fabric around the headband, leaving some extra fabric at the ends. Cut the fabric. Glue the fabric from the underside of the headband, and glue from end to end. Cut all excess fabric away, and tr...
This video teaches how to hide an ending knot in your quilt in order to keep it looking neat. You wrap the thread around the needle, pull it tight, push the needle through about a half inch of the surface of the quilt, and once it comes out the other side, tug on the string gently. There should now be a knot underneath the top layer of fabric. Cut off the tail end of the thread. If the piece of thread is showing through the fabric, poke your needle inside the quilt and push it past the thread...
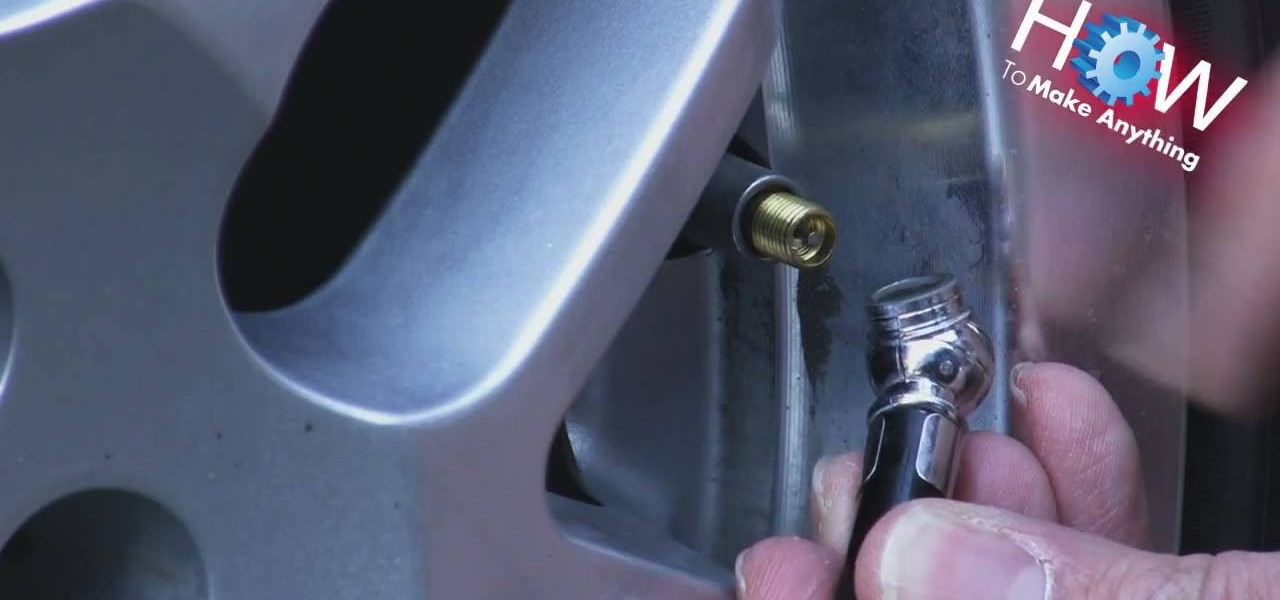
This video shows how to use a tire gauge. The first thing that you do is remove the valve cap off of the tire. Use the open end of the tire gauge. Put is onto the end of the valve. Don't use the other end of the gauge. The part of the gauge with the little round center piece in it is used to let air out of the tire. Once you have put the gauge on, push it firmly onto the valve. The air pressure in the tire will push the gauge measuring device out of the end of the tire gauge. You can look at ...
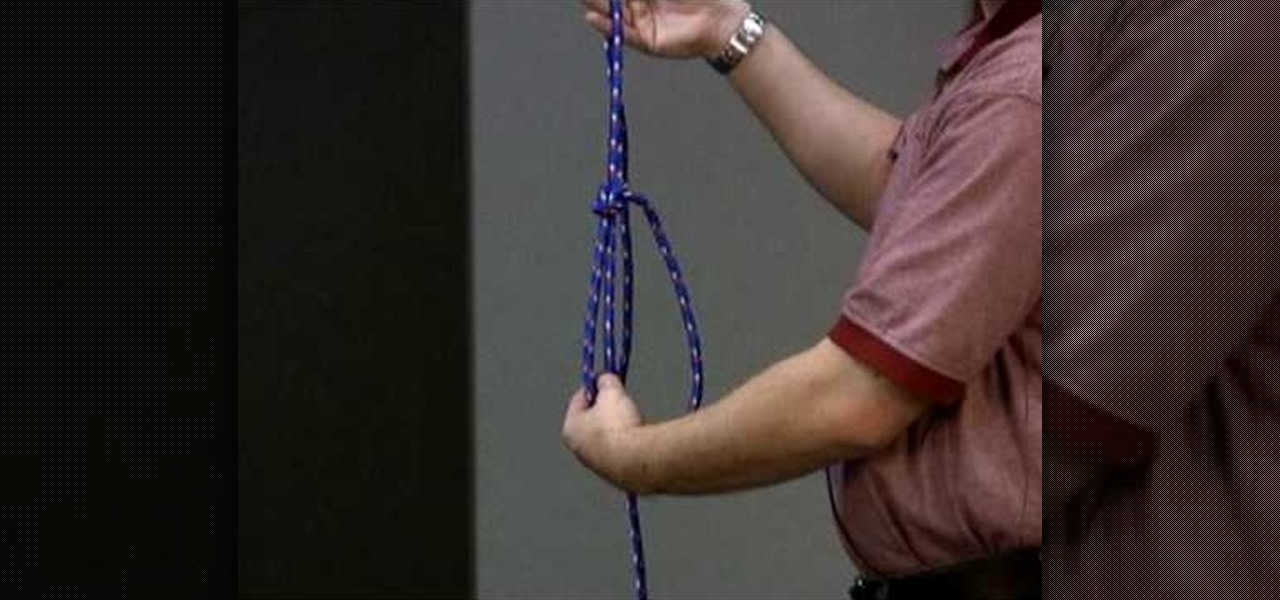
This video describes how to tie a bowline knot in a few easy steps. To start, take a loose piece of rope in your right hand and make a loop about a foot away from the end. Then, take the loose end, bring it up through the loop you just made. Immediately after, wrap the loose end around the rest of the rope, and then bring it back through the loop and pull tight. Think of the loose end as a "bunny." Bring the bunny out of the hole, around the tree, and then back through the hole. Once you pull...
The video is about tying a Zigzag braid knot design. At first, make the tag or rope into two by folding it. Take one end and make a small knot at the folded junction. Then take the second and pass it through the first made loop. Then take the other end and pass it through the loop made by second end. Continue the hitches to end the rope. Finish the knot by tightening the rope. Then rearrange the position of the hitches. This is done with care. The knot is made beautiful and prettier by making...
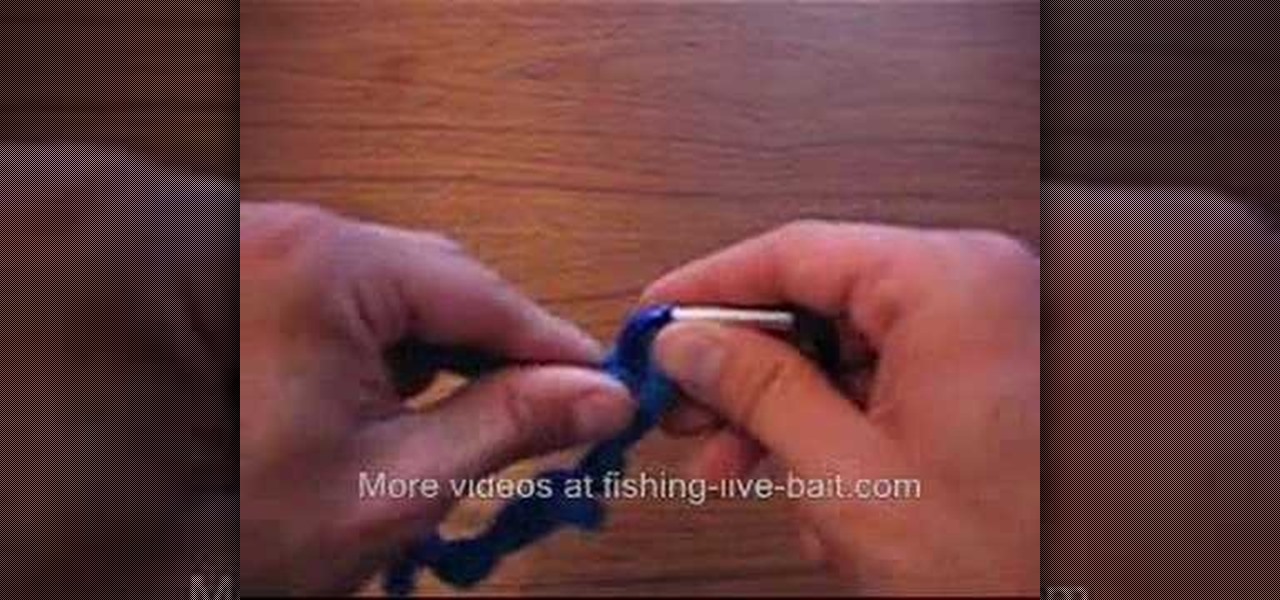
Fishing-Live-Bait shows how to tie an improved clinch knot, combining basic knowledge of how to tie a regular knot with an improved technique to make the knot even stronger. You begin by putting the line through the hook and then wrap the end of the line around the main line a total of six times. Wrapping the line that many number of times ensures the strength of the knot. The end of the line goes through the loop next to the hook. The difference between a normal clinch knot and this improved...
If this is your first novel or you want to make a better one then this video will give you good advice on how to write fiction character for a great novel. The animated animals and people in this video will give you some great advice to improve your novel.
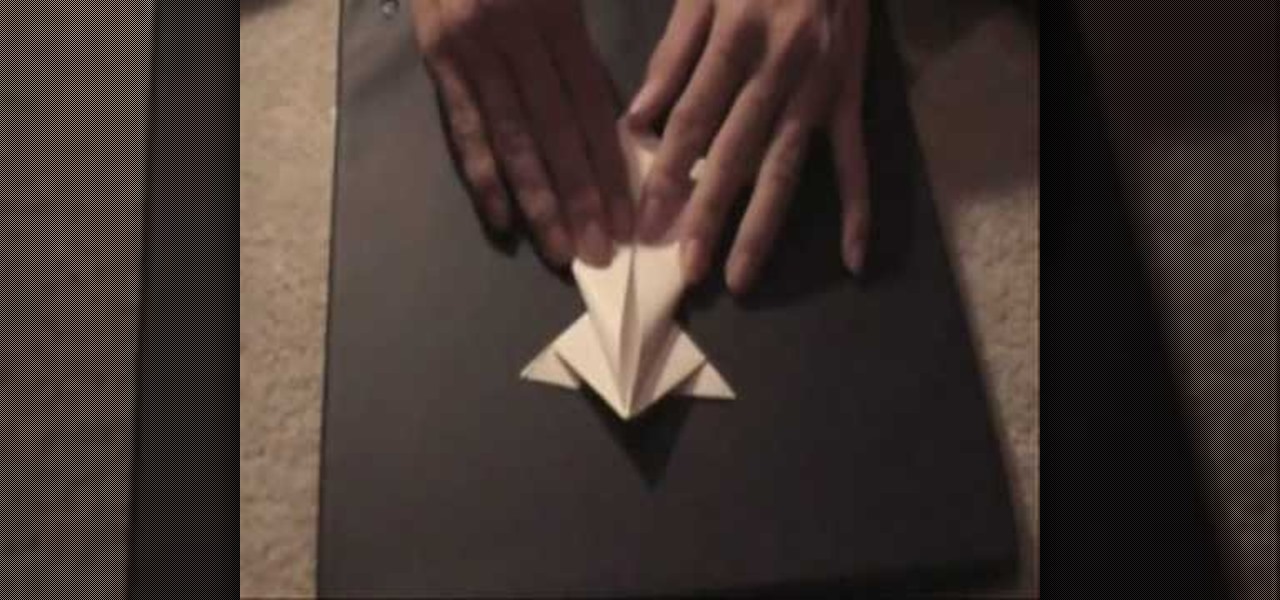
Kevin demonstrates how to make a paper frog. Take a regular sheet of construction paper. Fold the outer ends towards the center forming a triangle. Fold a crease at the base of the triangle and cut it out. Open the folds and you can observe two creases. Create two X-shaped creases by bending the opposite corners. Hold the triangles on the side of the X and squash it down such that the other two triangles meet. Repeat the process on the other side. This forms a square with a diagonal cut conta...
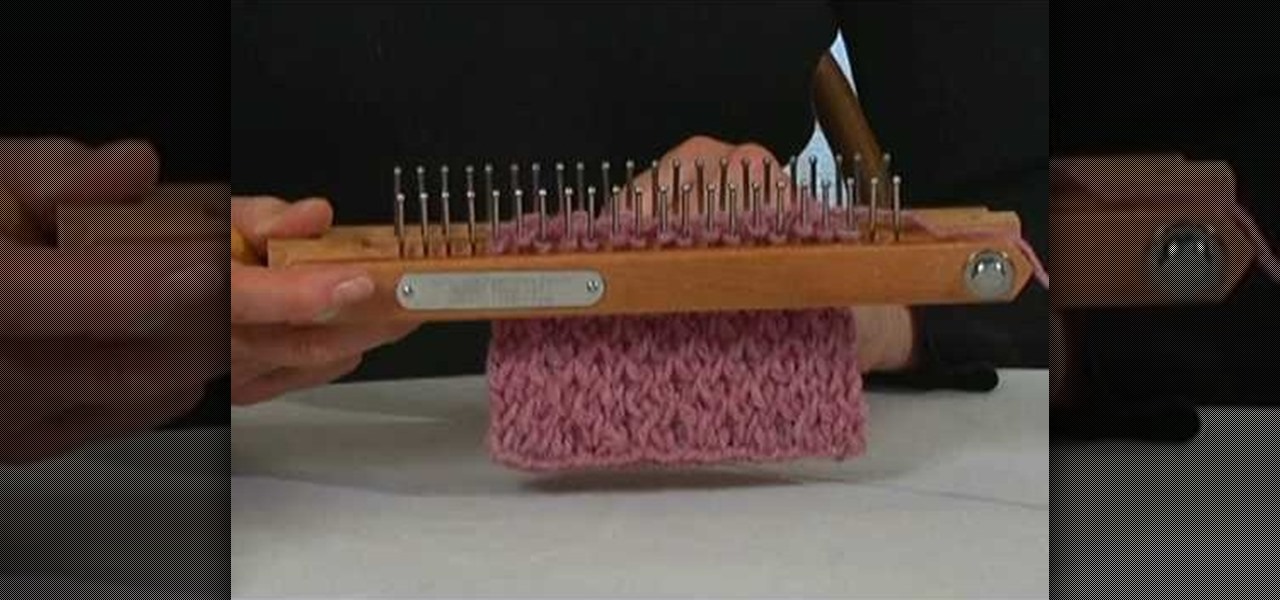
The instructor from the Knitting Board shows you how to make a criss cross stitch. This stitch has two weave patterns that you alternate to create a pretty textured look. Using a knitting board, the first stitch starts on the first pin of the back board down to the fourth pin. Then you weave back and forth across the board skipping a pin. At the end, take the yarn straight across the board and turn the board around. Return by picking up the pins that you skipped. Each pin will have two loops ...
Tie a double overhand knot 4" from the end of the shock tippet or other material to which you want to connect your class tippet. Gently tighten the double overhand knot, but only until it turns over and forms a figure-eight. This leaves two gaps through which you can pass the tippet material. Create a doubled section of your tippet 18". Putting a sharp angle on the tip of the doubled loop will help it pass through the figure-8. Pass the doubled tippet line through the top of the figure-8 knot...
This video shows how to program a password and user protected application in AppleScript.
A Norwegian shipping company says it will launch an unmanned container ship within four years, as the shipping industry begins to apply driverless technology to commercial sea transportation.
WhatsApp sneakily made some security changes to iCloud backups without your knowledge, ladies and gents. Not that strengthening security is a bad thing, but still!
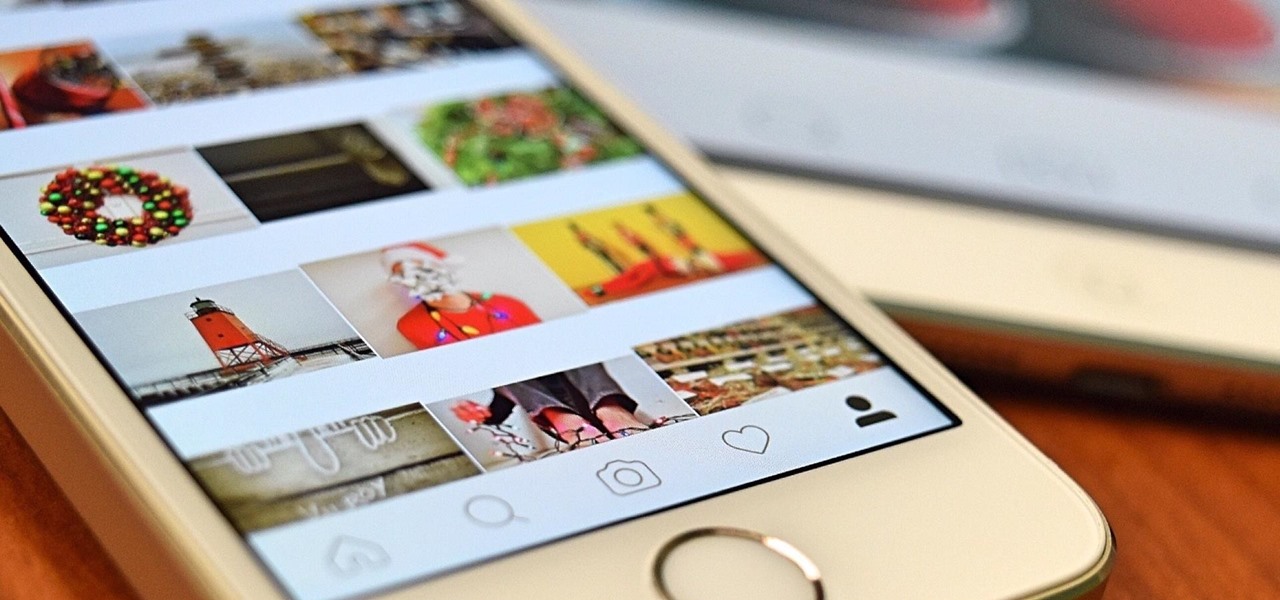
Starting today, you'll have the opportunity to save all your live Instagram videos to your phone at the end of each broadcast session. The latest update to the Instagram app now allows you to rewatch already-played broadcasts and gives you the ability to share them later on.
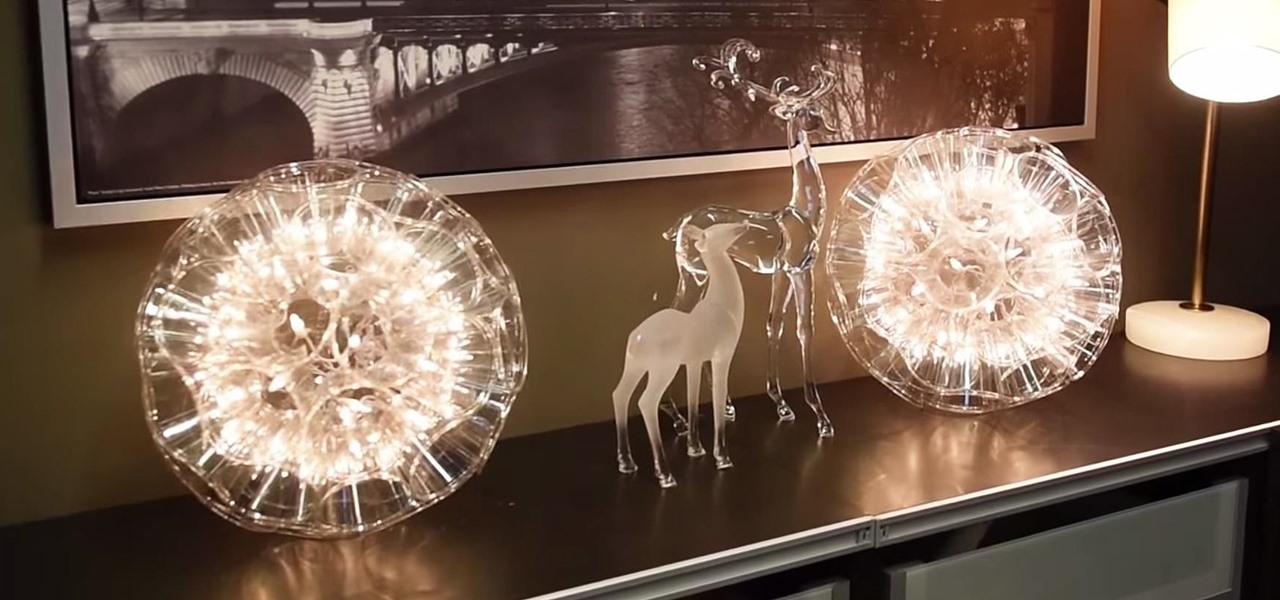
With the new year just around the corner, it's a time we all reminisce about the year that was. In the midst of families fighting over white elephant presents and the financial stress that comes with holiday gifting, you may also be dealing with the stress of hosting parties and get-togethers as well as the decorating that goes with it.
Both professional and home cooks have been rinsing raw chicken and turkey before cooking it for what seems like forever. It's one of those divisive practices—either you do it or you don't, and people tend to be rather opinionated on their stances.
It's no surprise that Costco has great deals, and that's why millions pay annual fees for the privilege to shop in their wholesale outlets. Just take their hotdog and soda combo for $1.50—it's the same price now as it was 27 years ago.
In this video, we learn how to use French wire when jewelry making. First, you want to take your wire and cut it to the length you need, using wire cutters. After this, you will place a stopper next to the pendant or bead that you are applying inside the necklace. Next, string on the clasp to the wire and then bend the end of the wire to the inside of the stopper, then cut the end of that with wire cutters. When finished, your clasp should be secure at the end of the wire and ready to hook on...
In this tutorial, we learn how to tie a decorative noose. First, form a loop and then and wrap the end around the loop thirteen times. Next, take the loose end and stick it into the coils you just made. Use a pencil and long scissors to help you do this. After you are done with this, tie a knot at the end and pull so the loop is tight. You can also clip off the loose end and pull the loop to make it larger if you prefer. When finished, use this as you wish but do not use it for violent activi...
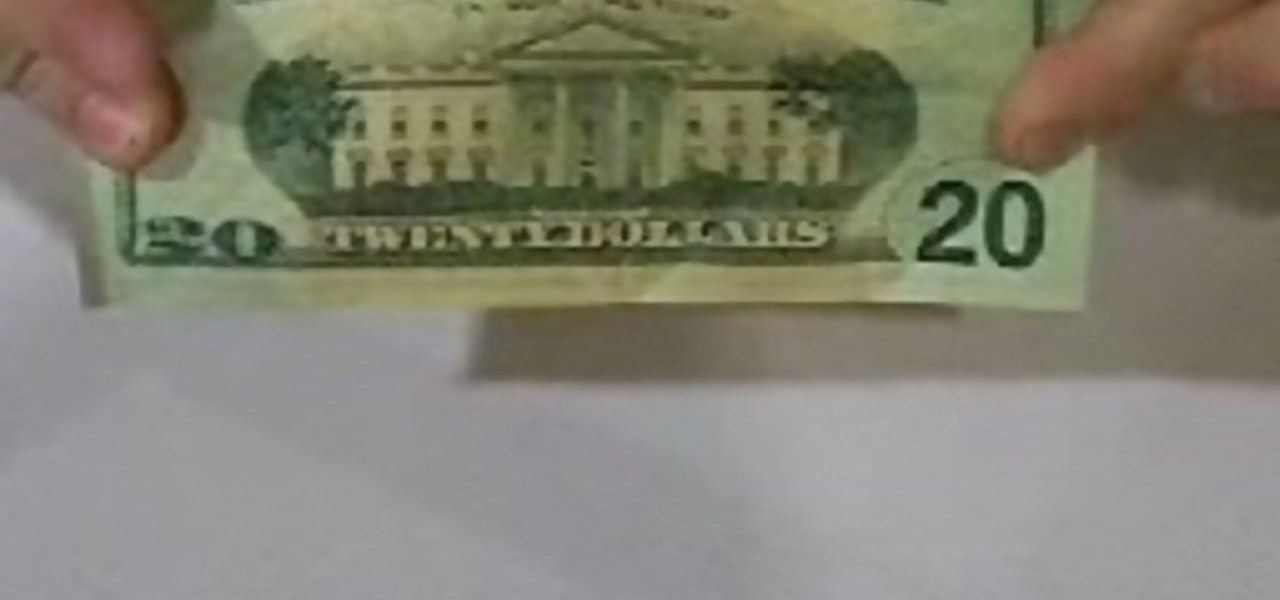
In this tutorial, we learn how to make a paper football with a $20 bill. First, take the bill and fold it in half length wise. Next, take the bill and fold one of the ends into a triangular shape. After this, fold the triangle over and keep doing this until you get to the end. When you reach the end, and tuck the flap on the end into the pocket you created. After this, you can hold the bill up with your fingers, and flick it with your other fingers. You can use any type of bill to make this, ...
Missa teaches us how to create a claspless lariat necklace in this video. First, cut your wire so it's 20 inches long and then make a loop on one of the ends, and attach a chain to it. Now put on the end bead and attach the chain to the metal wire. Now make a loop around the end where the bead is. Now take pliers and clamp the wire on the end down. You can now take wire cutter and cut an inch down on the chain and cut it off. You can now apply your favorite beads to the wire, and any pendants...
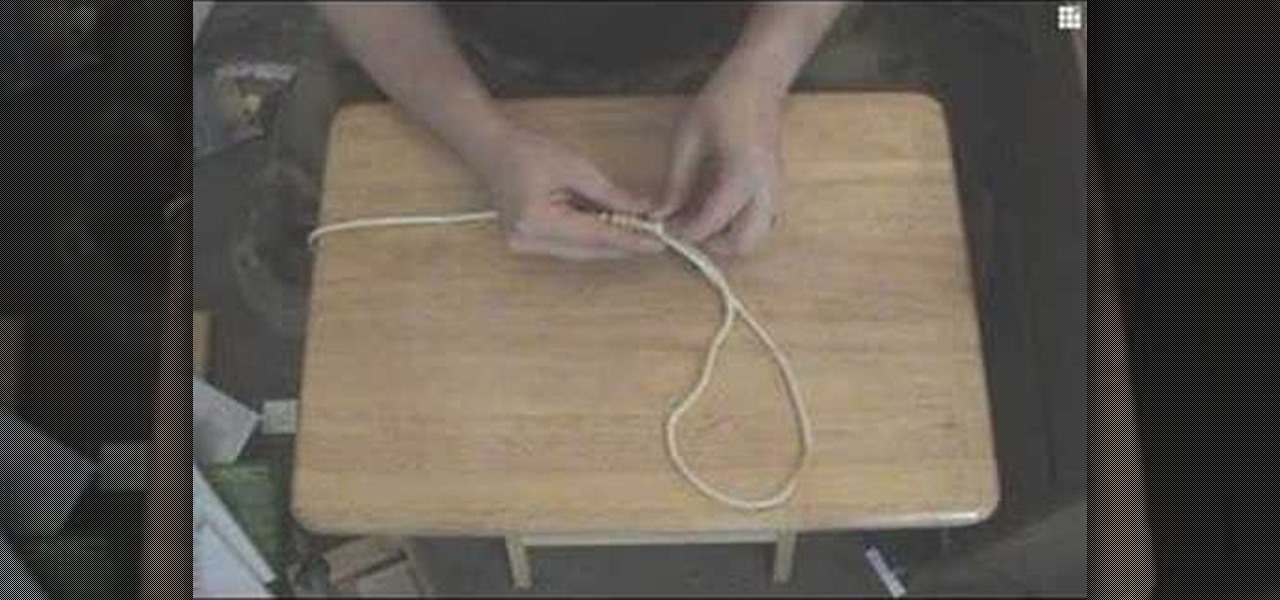
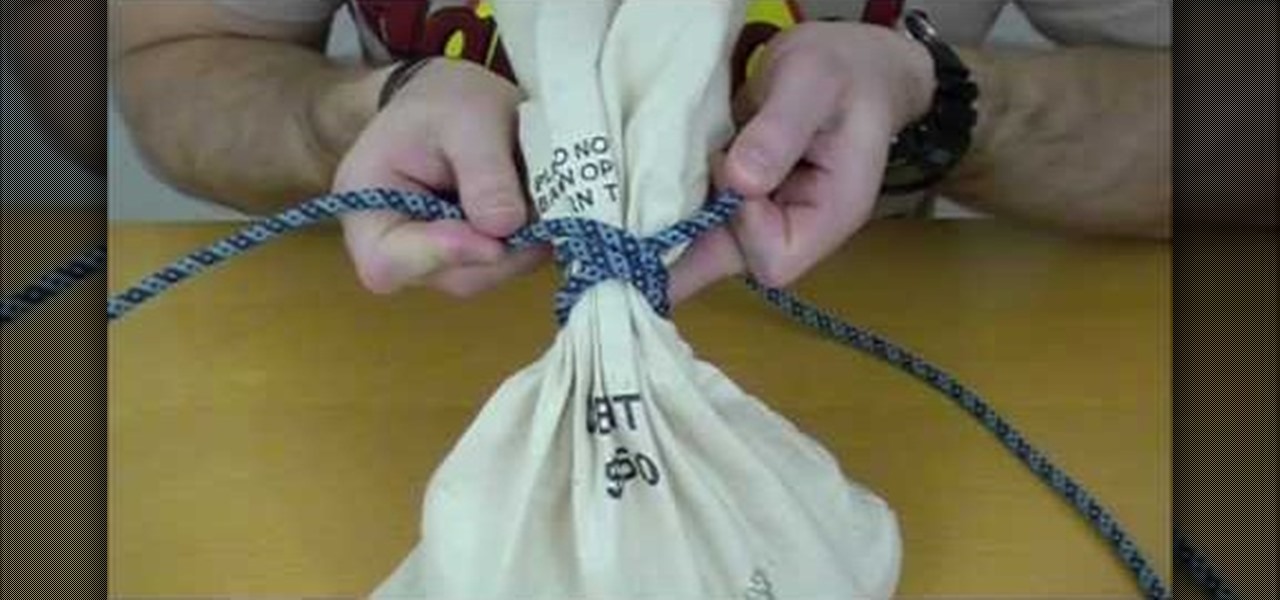
In order to tie a Miller's Knot, which is also known as the bag or sack knot, you should begin by wrapping the rope around the object you wish to bind: the Miller's knot is a binding knot. It is used to bind things. Next, wrap one of the free ends around it. You are, basically, wrapping one end around a second time.
In this tutorial, we learn how to work with memory wire to make jewelry. This is a coil material that remembers its shape and comes in a variety of different sizes. First, decide how thick you want your jewelry piece to be, then cut the excess wire with wire cutters. Next, apply a drop of superglue to one end of the coil followed by a Memory Wire end cap and let dry. Now, string your beads onto the wire. When finished, put a bead stopper onto the wire and apply glue to the very end with anoth...
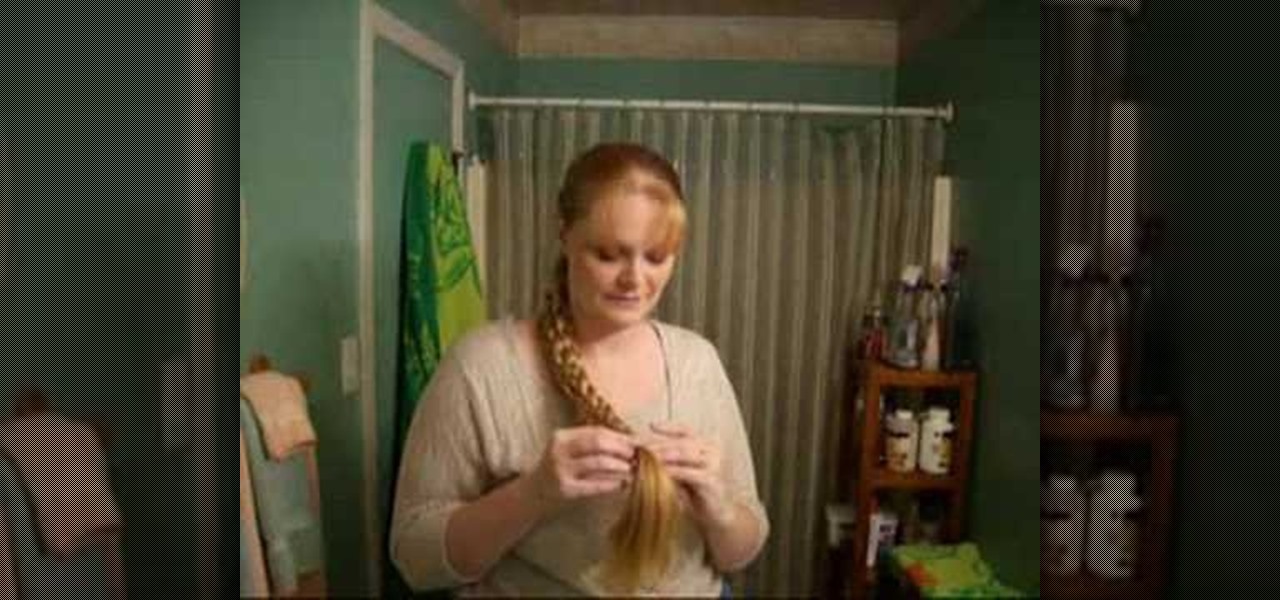
Torrin creates a Victorian up-do with long hair. The style can be done with hair that is at least just past the shoulders in length. Make a ponytail at the base of the neck. Slide the band down a bit and poke fingers through the middle of the ponytail to split the hair. Then pull the ponytail through the split from top to bottom. Separate the ponytail into three sections and make three English braids. Attach the three braids together with one rubber band, leaving several inches of hair left o...
This is a video on how to weave in ends on kniting. First take two ends at a time, tie the new color and a half not around the current working color, and tie them. The thread the end onto the yarn needle, and go througha few of the yarn stitches. Next give it a little pull to make sure nothings coming loose. Go up to the next yarn ends, and do the same thing. What you have to make sure you do is weave the yarn through light colors. Also make sure the knots are secure, and are not going to com...
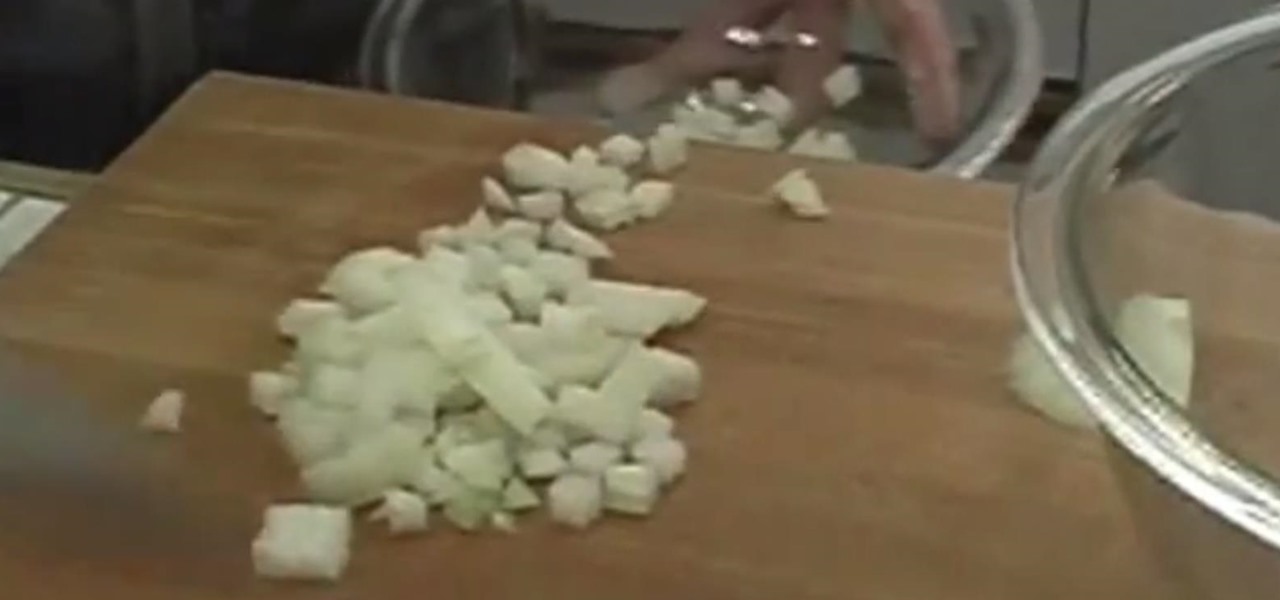
Michael Andrew, from Meals Americana, gives us some interesting tips on dicing an onion without tears.
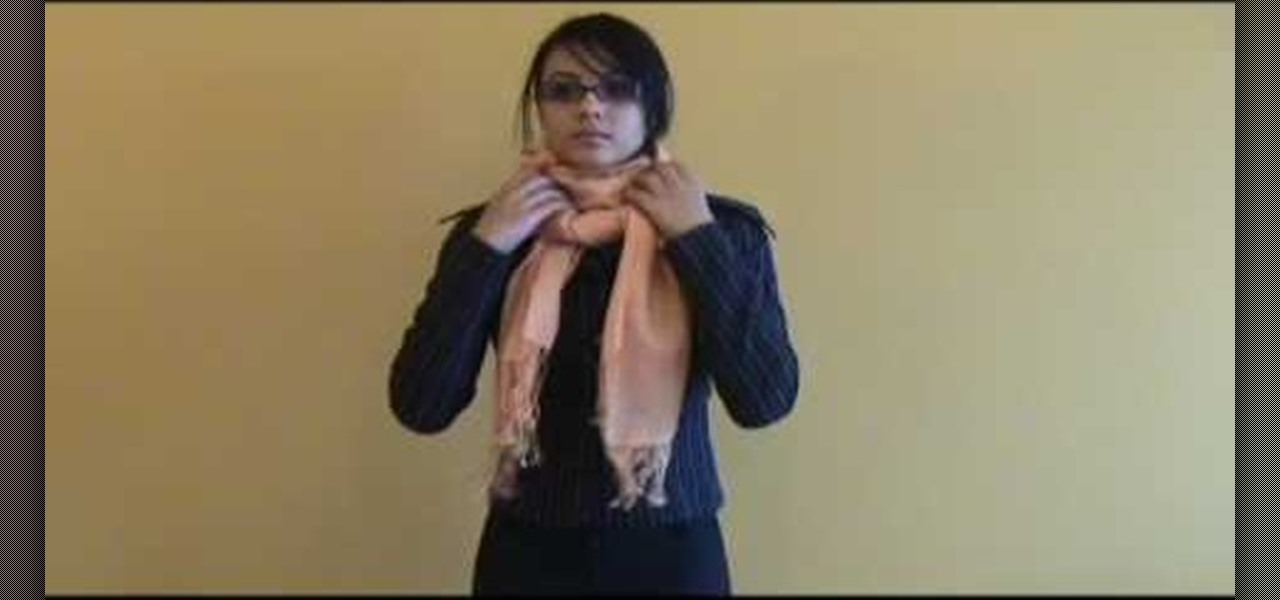
This video shows how to wear a Pashmina, also called ladies muffler, in several different style of fashion. First, with a Pashmina, half fold it, then wear it around your neck accordingly, and pass it from the closed end as tie. Then, stretch to close around the neck. Now, for the second way, open it again, wear it from the center, in a way, that it hangs from the back of the neck, give it two folds and stretch it in opposite directions, so that it is tied around the neck, then make a knot fr...
In this how-to video, you will learn how to make jewelry using cord in less than four minutes. Corrine Bradd shows you how to easily do this. First, take a satin braid and tie it in a knot. Trim the excess off with scissors and take a cord end. Place the knot inside the groove and then clamp the cord end with a pair of pliers. Turn it around and do it again for the other side. These cord ends come with a loop on top for further use. These look great on jewelry such as charms. You can use a sl...
The Pashmina master shows us three unique ways to wear our pashmina shawls. The first one involves putting your pashmina on your left shoulder and gently slide it over your chest till you reach your other arm. Then you easily raise it until you cover your other shoulder too. Don't forget to leave the other end hanging up front as it's part of the process. The second example needs the pashmina to go over your neck like a scarf. Then you take both ends and run them through the pashmina just lik...
This video describes and shows you how to tie a loop in the end of a rope with a bowline knot. A bowline knot is used in rigging by the ground rigger to create a point for the up rigger to have a point to pull up. This is how you create a bowline knot. First you must create a loop in the middle of the knot. With the free end, come up through the loop, then you go around the standing end of the rope and then you move it back through the loop. You pull the knot tight. That is how you create a b...
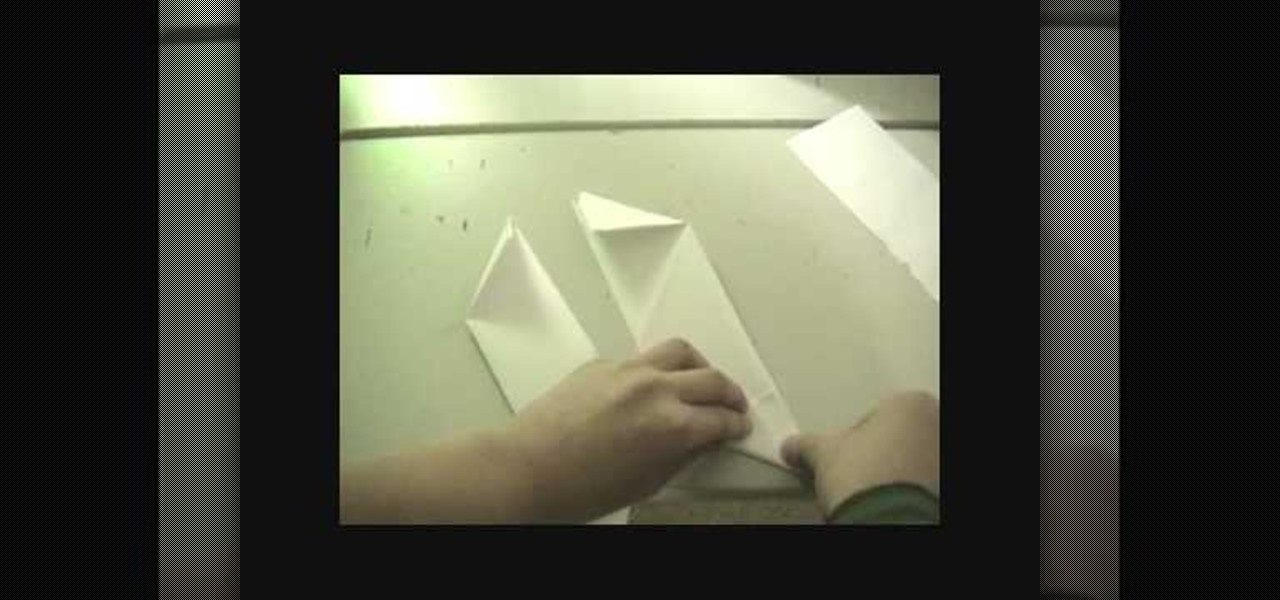
In this Weapons video tutorial you will learn how to fold a ninja star (shuriken) out of paper. Take a square piece of paper and fold it in half and tear it off to get two pieces of rectangular paper. Fold each piece of paper in half lengthwise. Then fold one end of each paper like a triangle. Fold the other end in the opposite way. Now fold both the ends to get a bigger triangles and the final shape of the paper should be like ‘Z’. Put both the pieces over each other in the form of a cross. ...
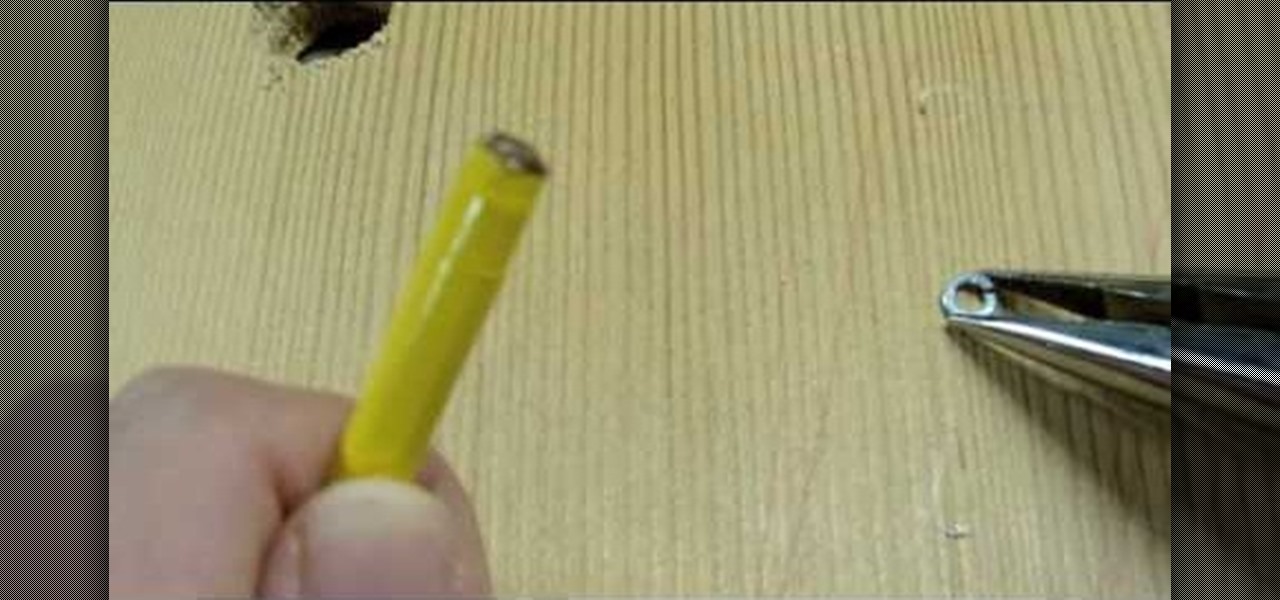
In this Hobbies & Toys video tutorial you are going to learn how to make deadly homemade bolts. Take a pencil and remove the ferrule from the end of the pencil. Make sure to pull it off completely so that you expose the flat end. Then take three pieces of electrical tape and tape them on the pencil and on to each other so that they form three wings. Now take a tack pin and with the help of nose pliers and pliers break off the rear end. Apply some hot glue to the ferrule end of the pencil and ...