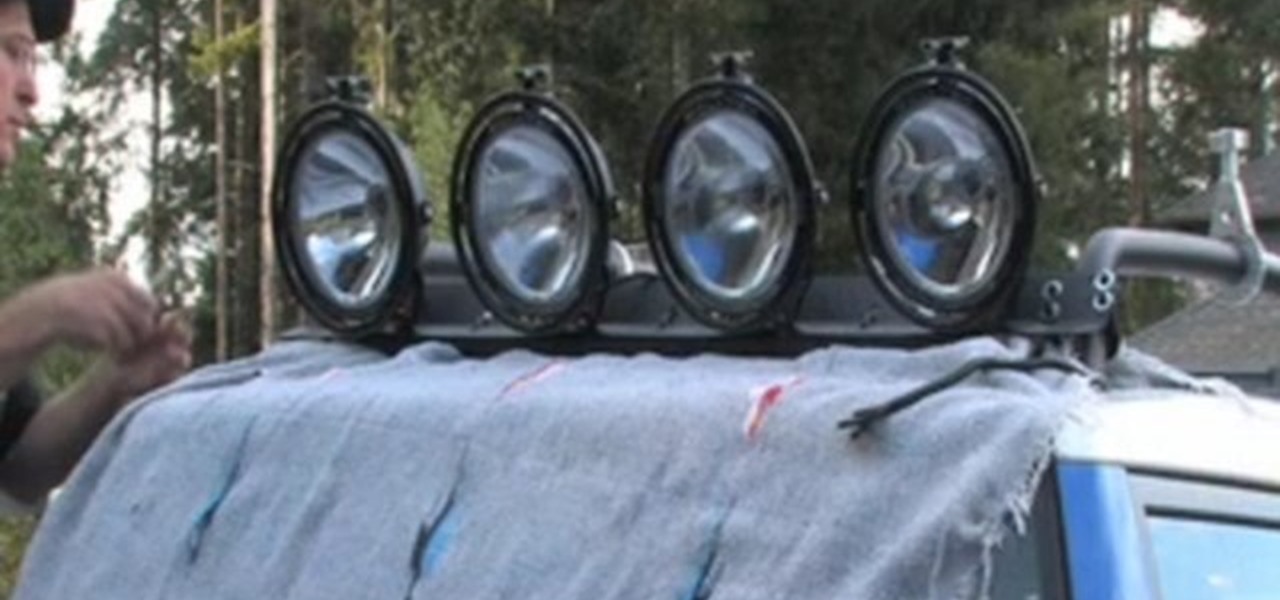
Reach the lights at the end of the tunnel, or better yet... be the lights at the end of the tunnel. Check out this video tutorial to see how to install off-road lights onto a Toyota FJ Cruiser. You will see exactly how to install Baja Designs' off-road lights onto that Cruiser in preparation of running the Baja 1000 Course. These lights only make things stronger and more clear. Forget simple automobile headlights, do you want to see that tree up that hill or not? This will take some time, mou...
Trying to take out Tempest, the last boss fight in Gears of War 3? You'll find her in Act 5, Chapter 6 of the game. Take a look at this gameplay video to find out just exactly what you'll need to do to defeat her and beat Gears of War 3! Be careful, the ending of Gears of War 3 is hinted at towards the end.
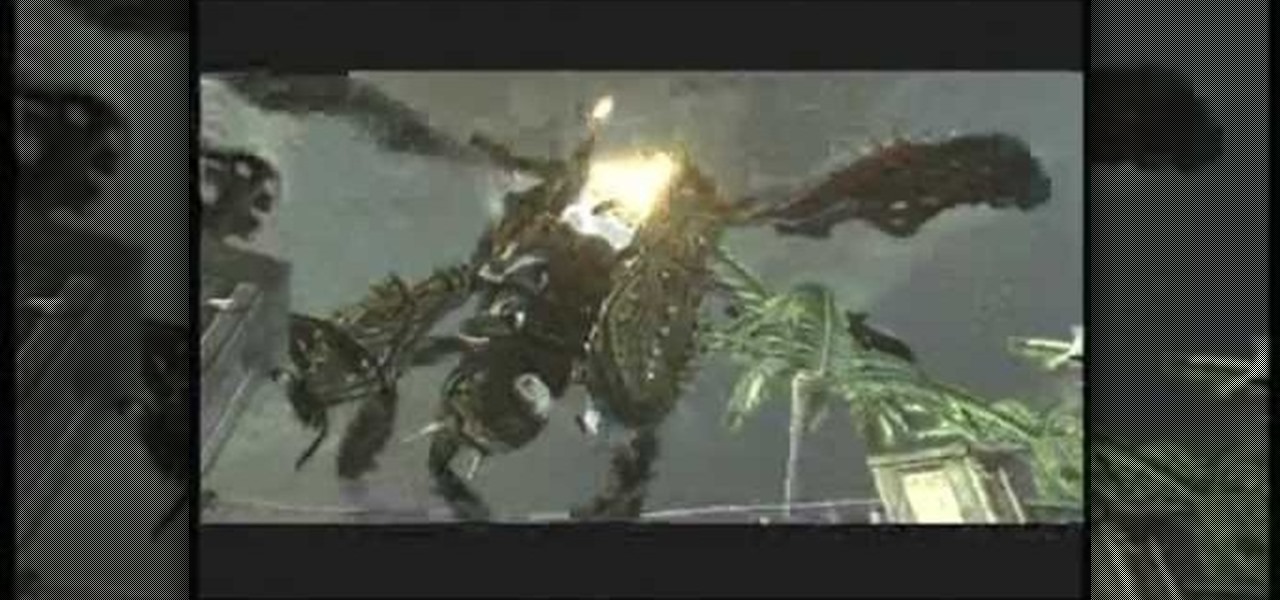
So you've survived to the end of Chapter 1, and now it's time to gear up for a pretty nasty boss fight. This video demonstrates a few good strategies you can use to bring this monster down. Make sure to stock up on armor and ammo beforhand!
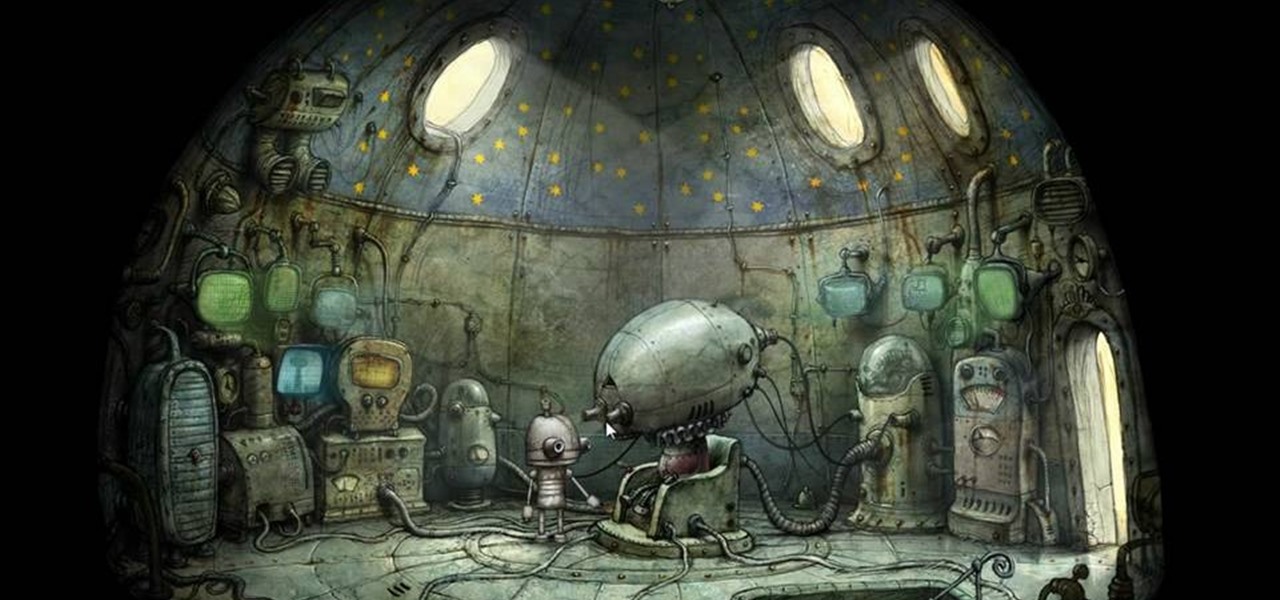
This is the last video for the Machinarium game. Solve all the puzzles at the very end of the game, including one that looks like a very old school video game. Finally, you've made it to the end of this game!

Mr. House is a character at the end of Fallout: New Vegas, about whom your character will have to make several choices. If you decide to kill or deactivate Mr. House, it will be challenging - but here is how you can.
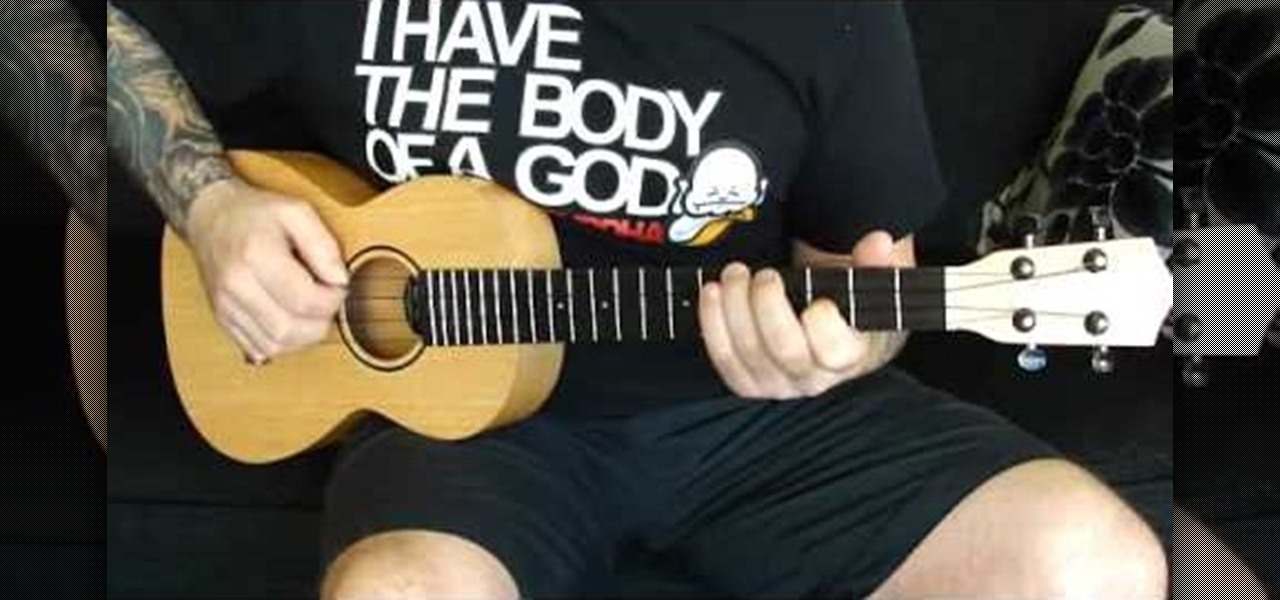
Want to play "When September Ends" by Green Day on baritone ukulele? Learn how with this video tab, which presents a complete breakdown of the song's component sections, chords and strumming & picking patterns. For all of the details, and to get started playing "When September Ends" by Green Day on your own baritone uke, watch this free video ukulele lesson.

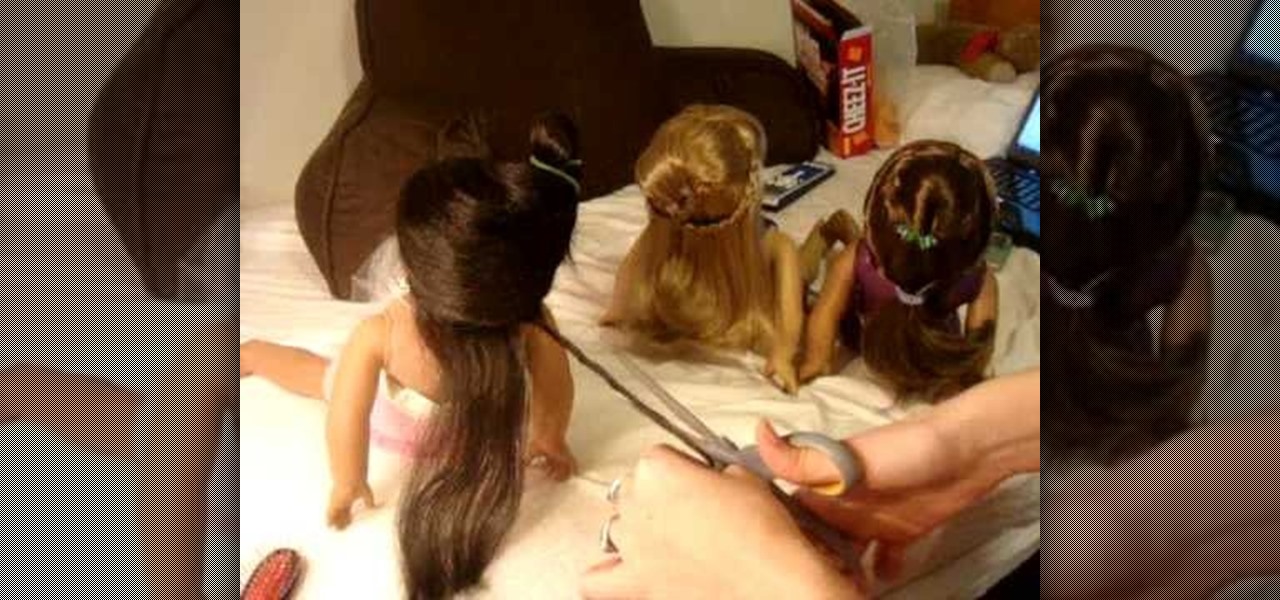
In this video, we learn how to fix your American Girl doll's frizzy hair or split ends. If the ends are frizzy or split, there is a way to fix it. First, you will need to wash the doll's hair the night before and brush it out. After this, take some scissors and start to cut small sections of the hair that have frizz on them. After this, you will cut the bottom of the section to make sure it's completely evened up. To make it easier, you can go section by section until you have it right!
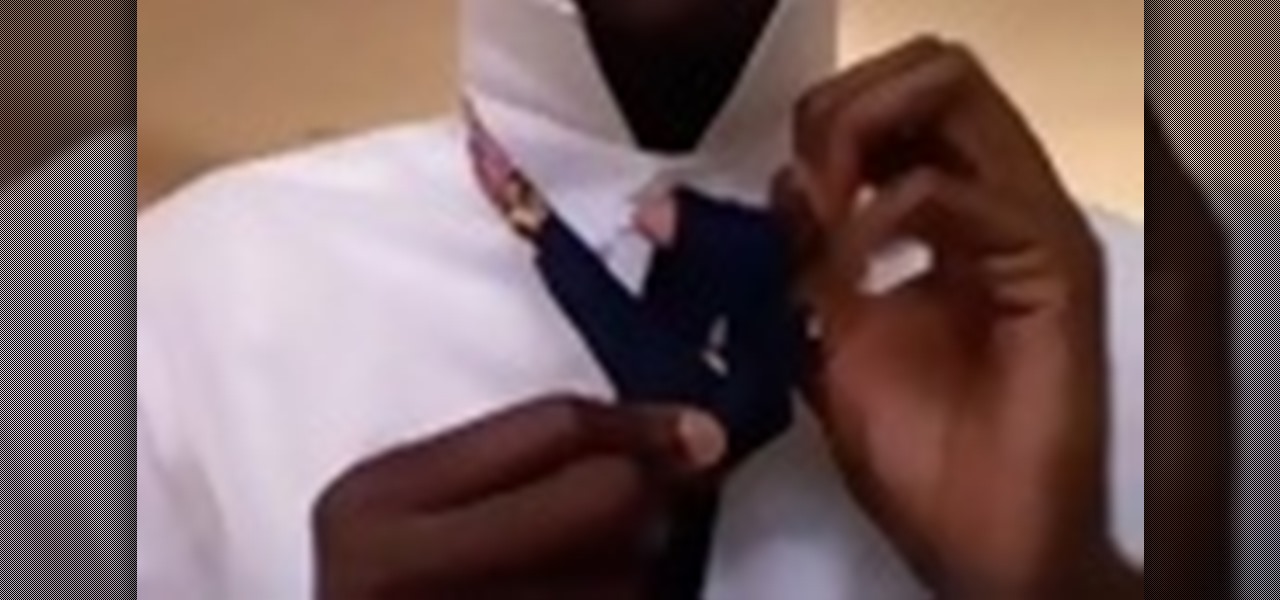
In this video we learn how to tie a skinny necktie in a Half Windsor. First, take the wide end over the thin end and then go over and under the loop. From here, take your wide end over the knot and then under and through the hole. Now, adjust your knot up to your neck where it's comfortable. Place your collar down and then you will be finished with the half Windsor knot. This is a very easy way to tie a tie that a guy can do on himself or have someone else do to him. Practice this to get good...
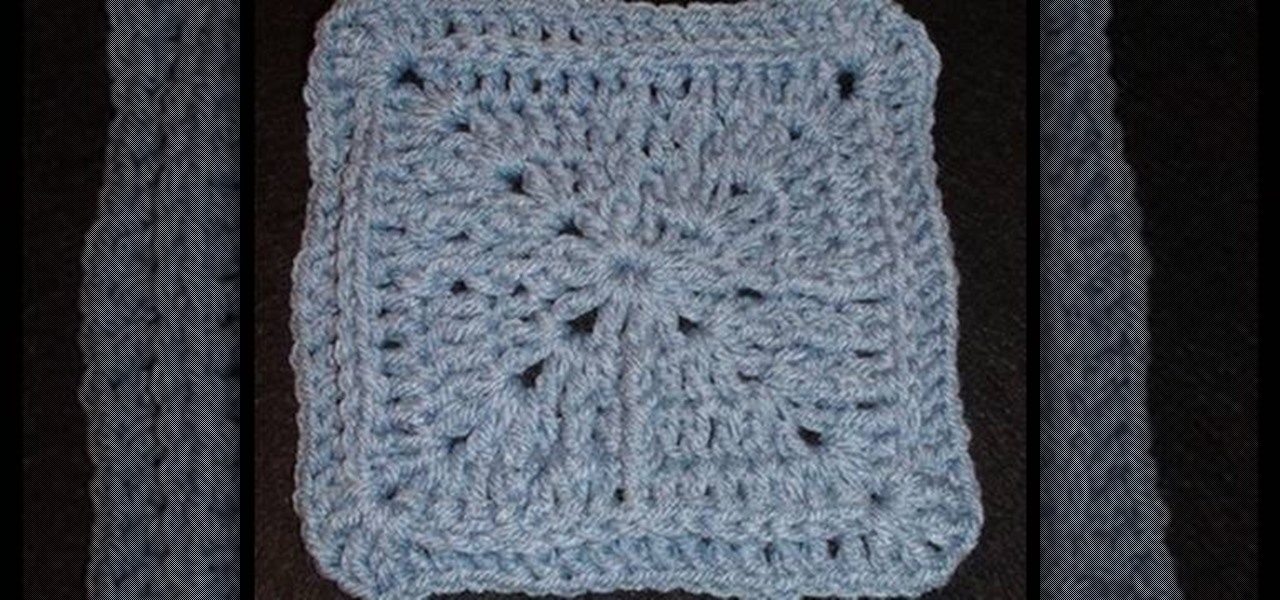
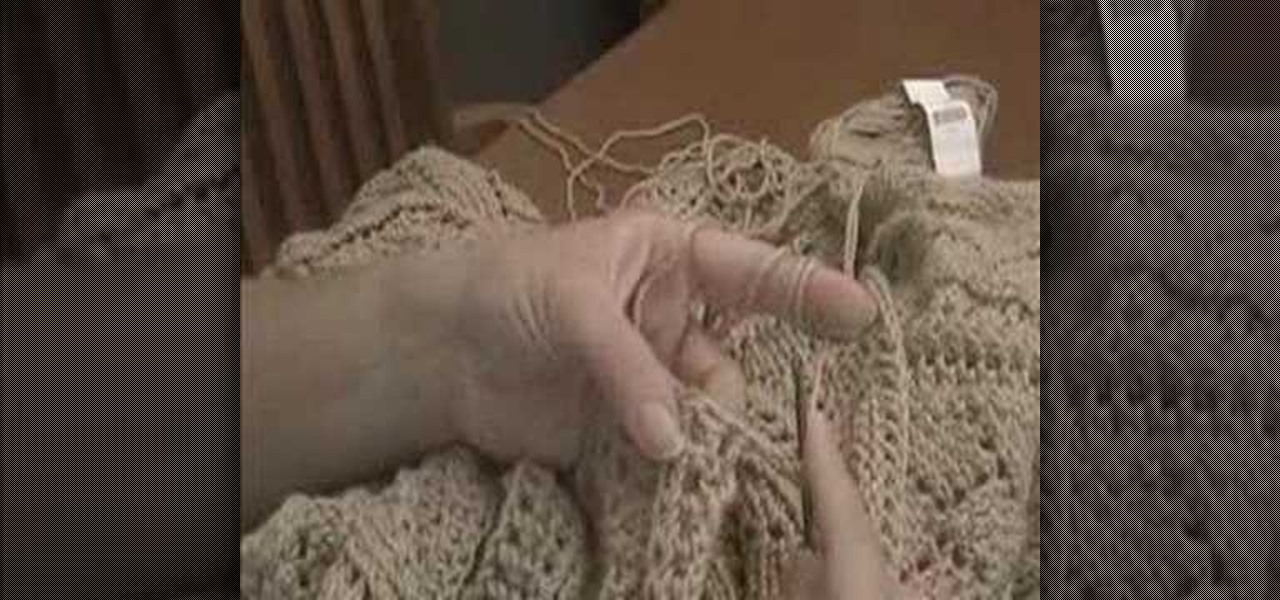
In this video, we learn how to finish a crochet never ending granny square. There is a spiral effect happening in this, because there is no place that is stopping, it's going in a continual circle. To finish one of these, you will see that the corners should be perfect. But, you will need to choose one corner to finish it off at. Go across, then choose a side to stop at. Then, chain over and double crochet in. When you come across with another color, you can weave in the end so that you can't...
In this tutorial, we learn how to jacmel crochet a granny square left-handed. In round 1, you will chain 1, then work 3 double crochets. Then, chain one four times from the original stitch and end with a single crochet. For round 2, you will chain 1 and work 2 double crochets in the same space. Next, work a double crochet in the next stitch and work over the next stitch. Work in 2 double crochets in the next chain 2 space, then chain 1 and chain 4 times ending with a single crochet. For the n...
In this video, we learn how to make friendship bracelets: The Wrap. First, clip your strings to a clip board at the top. Then, separate them into three colors, two strings for each color. Then, wrap the other colors around one color until you reach the end, then push it up to the top and continue to do this. Once you reach down the top of the bracelet, switch the colors and start to wrap the other color doing the same process. Then, switch to the last color and continue to do this until you a...
No matter how many blow outs we endure and curling irons we abuse, we always head back to our oldie but goodie ponytail when it comes to desiring comfort. Ponytails are by far the quickiest and easiest hairstyles to pull off, and there are loads of different ponytail styles to choose from.
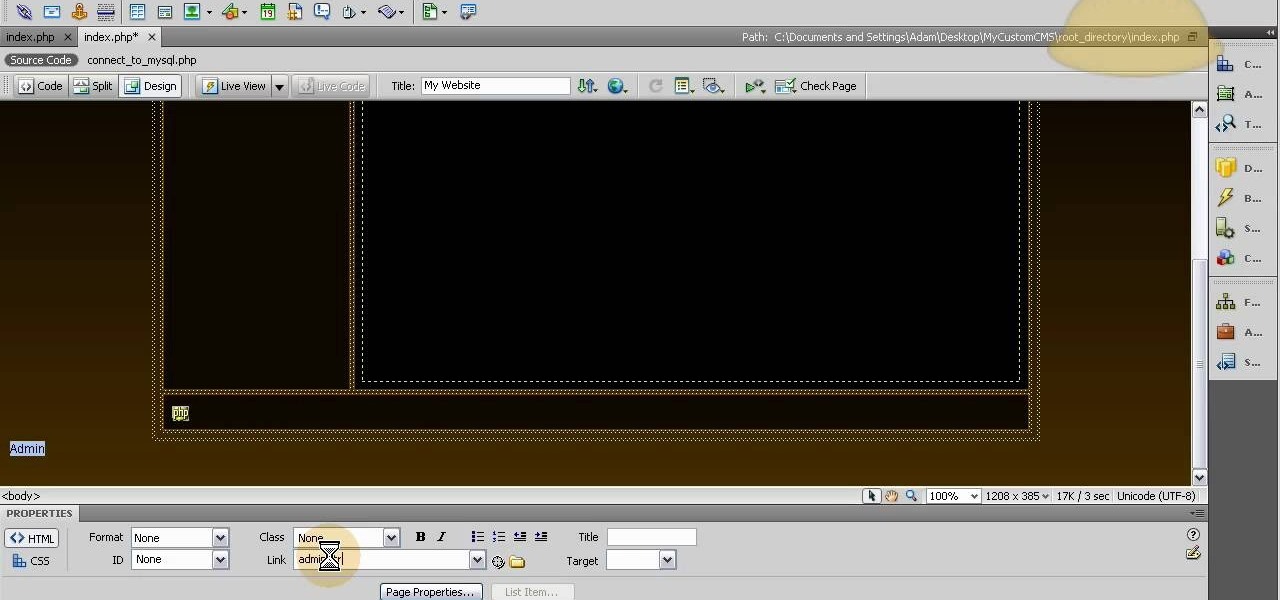
Designate a back end or administrator sector of the website, a place you can use to manage the content on the rest of the site. This tutorial shows you how to use Dreamweaver to set up this area of your website and cordon it off from the rest of your website.
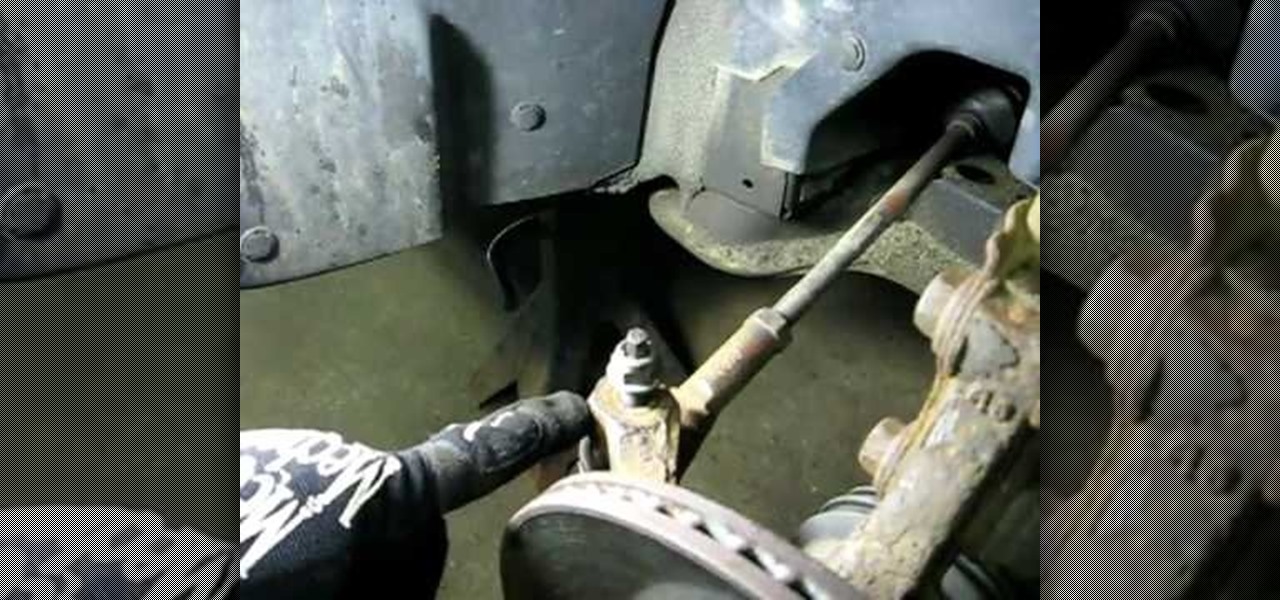
In this video, Rich Pin teaches us how to replace an outer tie rod end on a vehicle. First, get the vehicle in the air supported on jack stands, and remove the tire wheel assembly. Next, put a mark on the top of the tie rod shaft so you know where to line it up when you replace it. Next, loosen the jam nut from the rod, remove that and the nut. Remove the tie rod end after this by shocking it with a hammer. When it is removed, replace it with a new part and then attach all the bolts and nuts ...
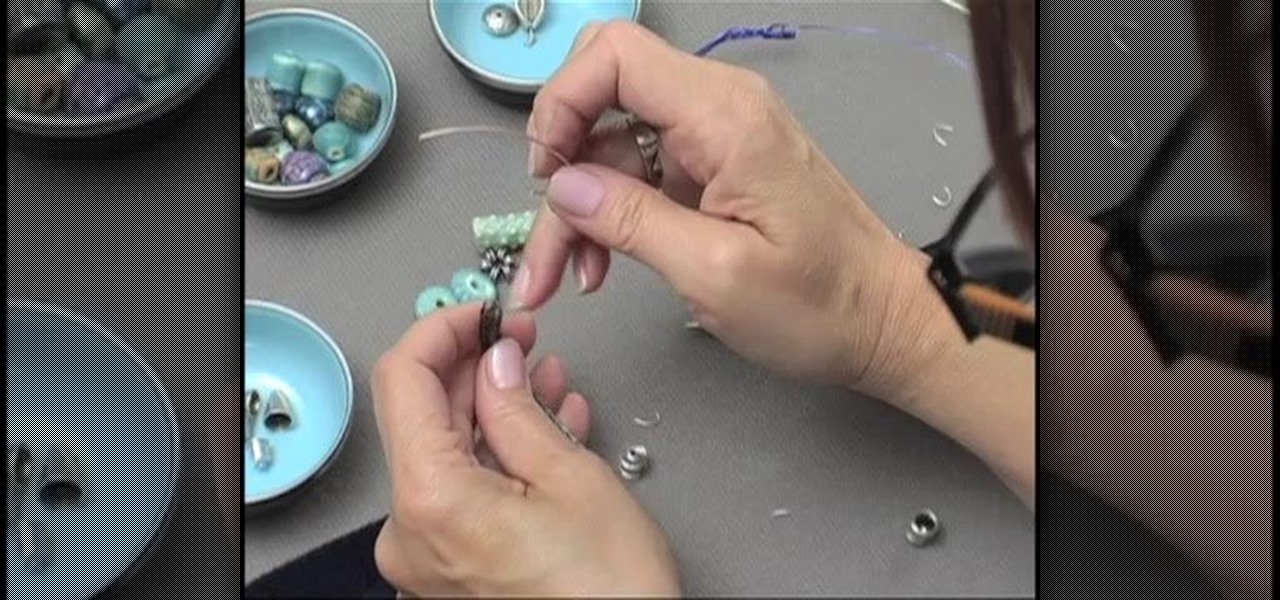
In this video, we learn how to use cones when jewelry making with Christina. First, take a half inch hard wire with a looped end and use a pair of pliers to open up the loop slightly. Next, take your strands of beads and place them onto the loop. After this, close the loop making sure it's secure and the beads won't fall off. Then, take the cone and insert the wire through the wide end and pull it through the narrow end. Using your fingers, bend the wire to a ninety degree angle, then trim of...
Where making jewelry, there are a lot of times that you will have to make a simple wire loop. This is how to do it.
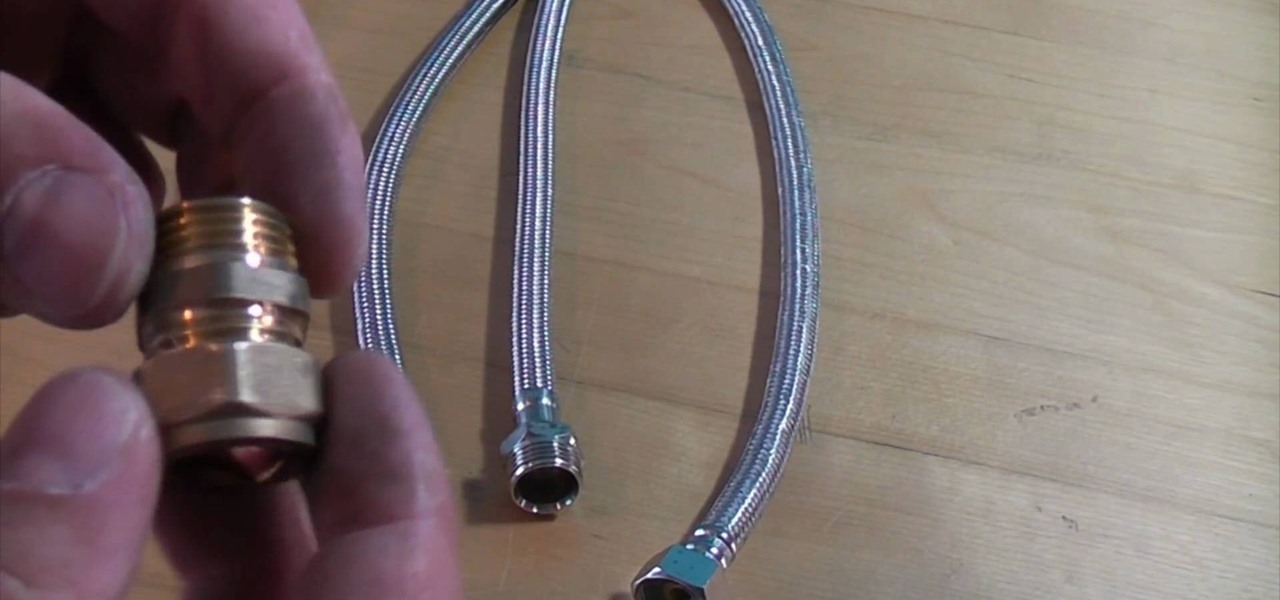
In this video, we learn how to connect flexi-tails properly. First, take your flexi-tails and grab one with a female end that will screw onto the end of a male. After this, use an isolating valve to fit the compression onto the valves and then tighten it up. Screw the flexible tail onto the end of this. Be careful buying this off Ebay, because a lot of fittings will not screw onto a compression knot. It is very simple to make this, you just have to connect the two tails and make sure they are...
In this tutorial, we learn how to tie fishing jigs. First, go through the eye of the jig with your thread, then make a fisherman's knot making seven to eight turns. Now, go through the loop with the end of the string and pull it tight. Then, cut the end off and make sure you have four to five feet of lead left. You can put a swivel on the end of it, then tie another fisherman's knot. When finished, this will go to your main line on your other rod and you will be ready to go! This is easy to m...
In this video, we learn how to make single ended dreads. First, you will need synthetic hair, a hanger, and a steamer. First, take the hair out of the package and then cut a section out of it and put the other hair aside. Next, place the hair on a clothes hanger hook, then pull on the hair with your hands. After this, pull the ends down and then take a comb and back comb the hair piece. You want it to be in a big poufy mess what you are finished with it. After this, you want to braid the hair...
In this Arts & Crafts video tutorial you are going to learn how to fold an origami ninja star. Take a normal paper. Fold it diagonally from one corner and cut off the extra portion to make a square. Fold it in half and cut into 2 rectangles. Fold each piece in half along the length. Fold both ends of each piece in opposite directions to make a triangle. Now fold the ends again to make a bigger triangle at both ends of each piece of paper. Each sheet will form a 'Z' shape. Now place one sheet ...
In this tutorial, we learn how to make a paper rose with a paper towel. First, roll one end to the other, then stick your finger inside one end and pinch the tip while twisting a few inches down. This will be your bud and your stem for the flower. Keep twisting down until you reach halfway to the end of the flower. Now, fold the loose piece on the bottom so it's parallel to the stem. Then, twist the leaf and wrap it around the bud. Then, shape the bud to the type of flower you want, then enjo...
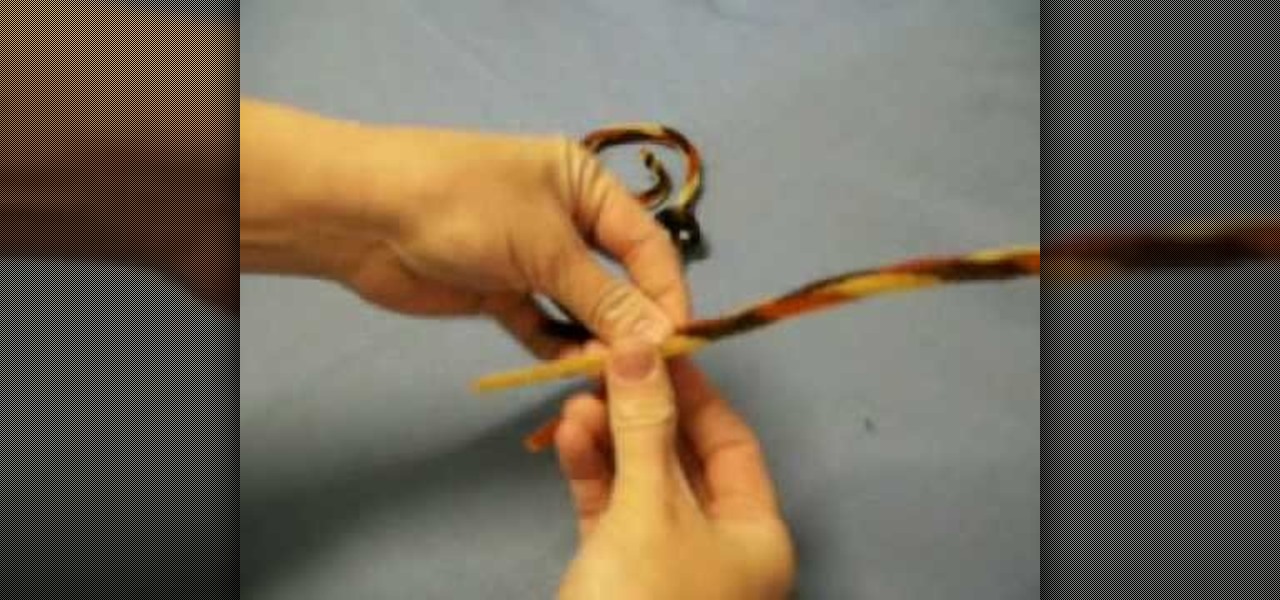
In this tutorial, we learn how to make a beaded Viking knit bracelet. First, pull a craft wire through a draw plate in the largest hole. After this, you will have a knitted weave bracelet. Now, place a hook in the loops at the end of the bracelet, and twist it down, then cut the end of the wire off and place an end cap on. After this, attach different beads and jewels to your bracelet, using wire to keep them in place. These will be one of a kind jewelry pieces that you can't buy in any store...
This video tutorial is in the Arts & Crafts category where you will learn how to tie a sheet bend knot for camping. Take two ropes, make a bite at the end of one rope. Pass the end of the other rope through this bite from underneath and come back through the loop in the second rope and pull it tight. This knot is used to tie two ropes of different sizes together. A variation to this knot is called the double sheet bend. Here you make two loops with the second rope and pass the standing end th...
In this tutorial, we learn how to make a paper football for 1 dollar. First, grab your paper and fold it in half length wise. Next, make sure the crease is nice and clean, then fold it length wise once more. Now, fold one of the corners up into a triangle shape, marking the crease exact. Fold this up again and keep doing this until you get to the end. Once you reach the end, fold the other end in twice into the pocket you see. Crease this, then stand it upright and flick it with your other fi...
In this tutorial, we learn how to craft a snake out of a pipe cleaner. First, you will take three pipe cleaners and twist their ends together, then stick a large pom pom in between the pipe cleaners. Then do a braid with the pipe cleaners until you reach the end, and then twist the end together. Then, take some googly eyes and glue them onto the pom pom. You can now twist the snake to make it look like a rattle snake and add a piece of red felt to make the tongue. This is a fast and easy proj...
In this video tutorial, viewers learn how to tie a necktie the British way. Begin by putting the tie around your neck. Cross the wider end of the tie over the narrow end. Then bring the wide end of the top up through the loop between the neck and tie. Pull it back down and slightly tighten it. Now bring the tie over and through the loop once again. Then bring with tie around the unfinished knot, under and through the loop one more time. This video will benefit those viewers who need to dress ...
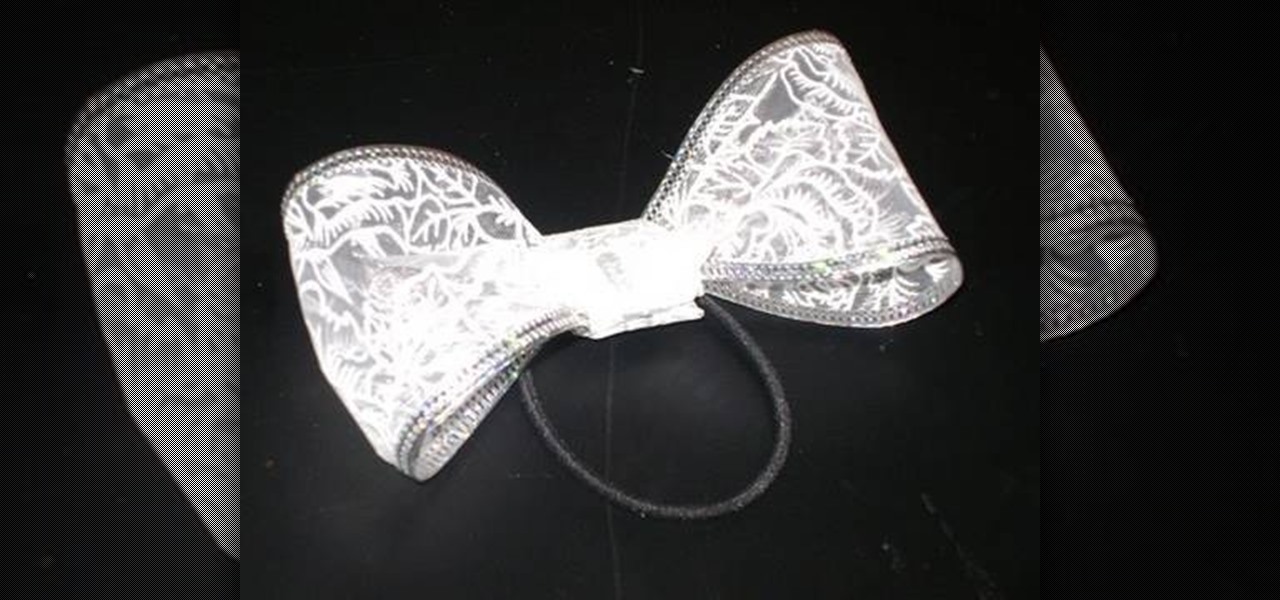
This video illustrate us how to make ribbon woven headbands. Here are the following steps:
Materials required are lace, hair band, scissors and glue. Start by cutting off a piece of lace around ten inches length using a scissors. Now apply glue at the edges of one end of the lace. And then join the other end of the lace together to form a circle. Now hold this lace at the middle and then push in the middle. Press in at the centre so that it is divided into a Bow as shown. Spread the edges a little to make it appear fine. Now cut off a piece of lace around four inches using a scisso...
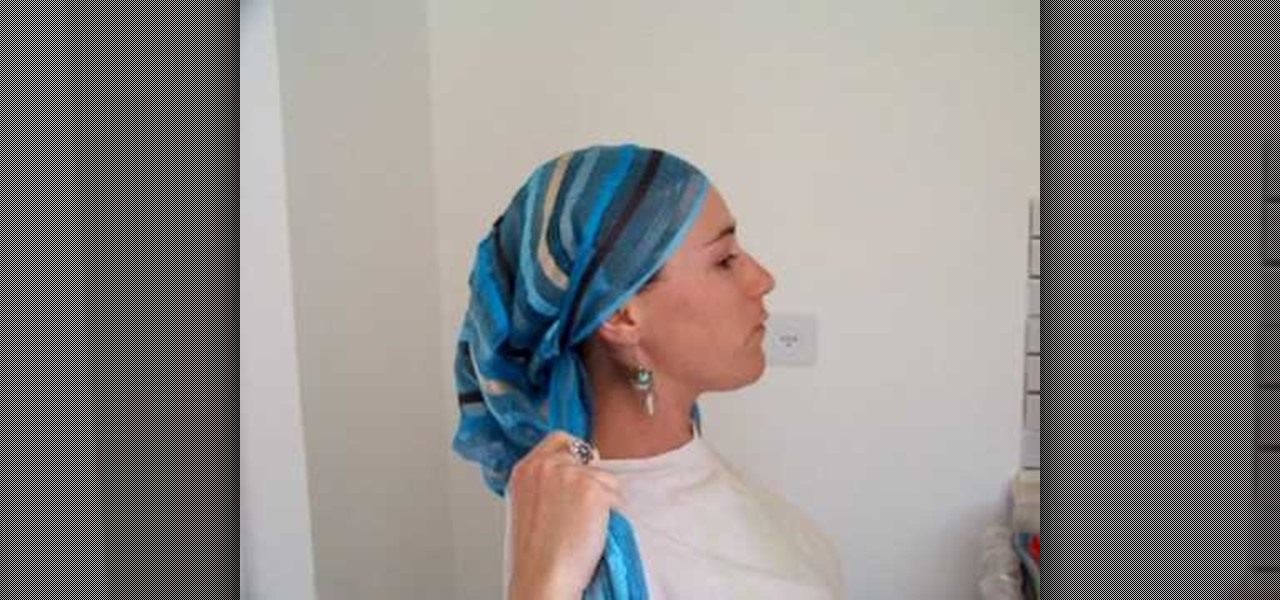
This how to video is for people looking to learn how to tie a scarf attractively. Get a long scarf for your head and place the middle of it on the top of your head. Gather each end in the hand closest to it in the middle. Turn it around by pulling it behind your head and tie the ends over each other. Next step tuck the scarf behind your ears if you like it that way. Then twist the left end around your head. Create a bun with your hair and the scarf in the back using the final side to tie it up.
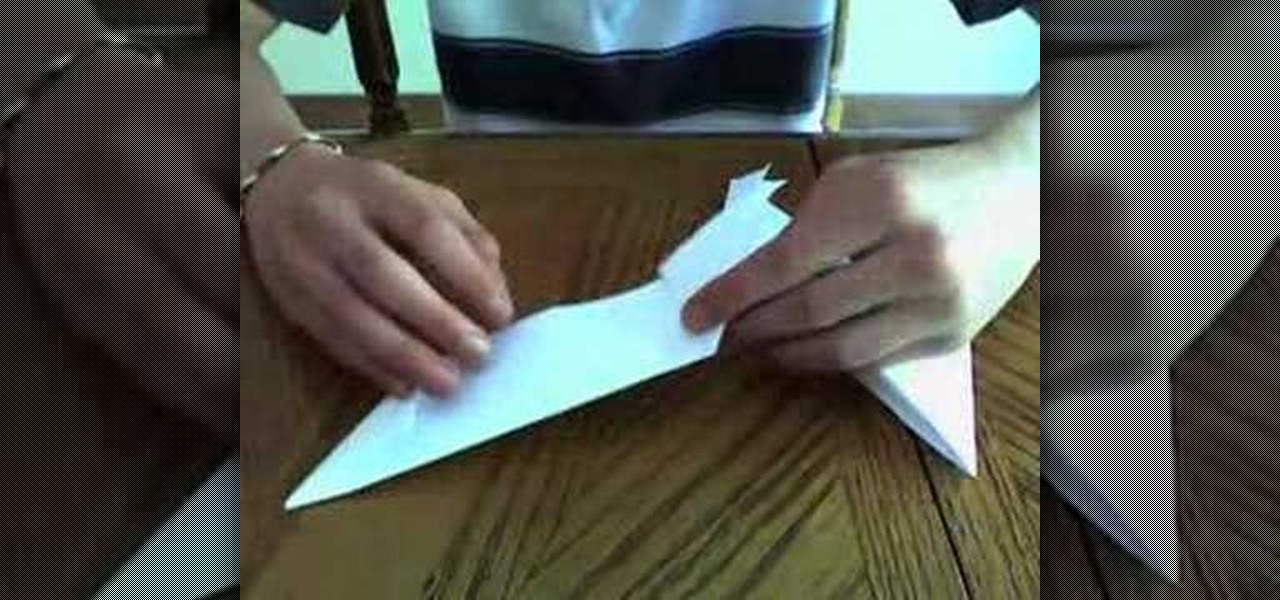
In this Weapons video tutorial you are going to learn how to make a paper shuriken (or ninja star). Take a square size paper and cut it into half. Then fold each piece in half lengthwise. Fold one end to make a triangle and fold the other end in the opposite direction to make a triangle. Now fold the ends again to make a bigger triangle. Then each sheet will form a ‘Z’ shape. Now place one sheet on top of the other forming a cross. Then fold in the protruding triangles of one over the other p...
Take a square piece of paper to begin. Fold in diagonally in half to form a triangle. You then fold both ends up so that it will form a smaller diamond shape. You then repeat what you just did, but folding two of the ends up again to meet the other side. Fold your piece of paper in half again revealing another smaller triangle. Flip the paper over and unfold the smaller pieces that you folded up to meet the ends. Pull these apart and then fold down in the middle. Bend in the 4 pointy corners ...
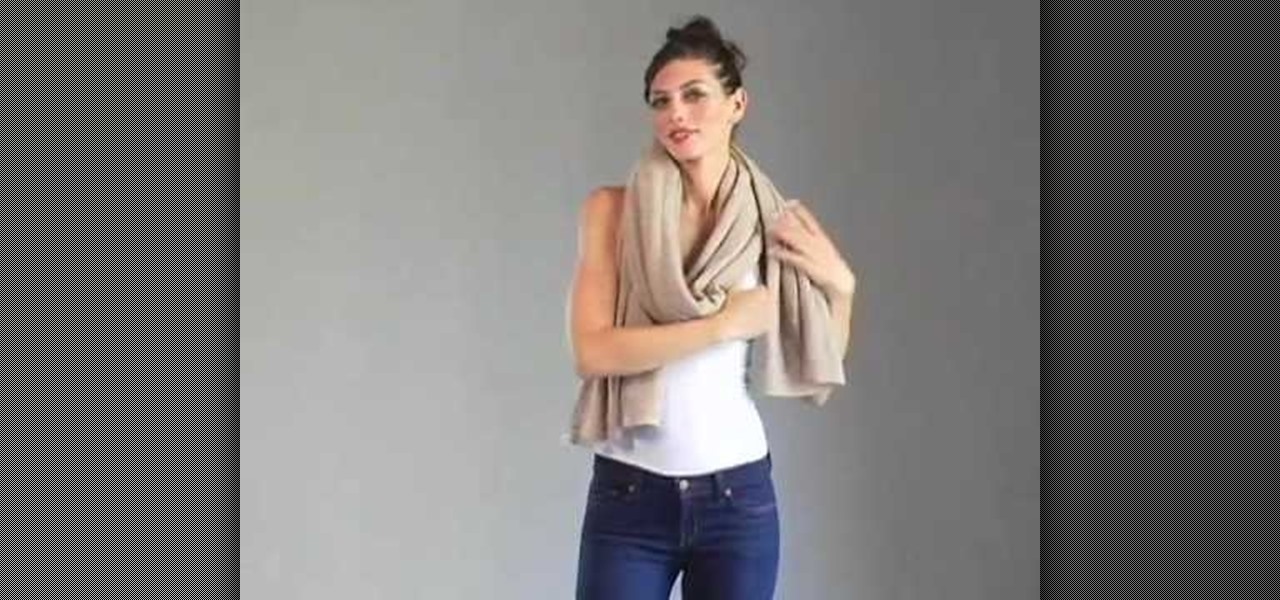
In this video, you will learn how to wear your White + Warren Cashmere Travel wrap. There are four different ways to wear this wrap. The first way involves placing the wrap around your neck. This is similar to a scarf. The second way involves wrapping the cloth around the back of your neck and having the ends go across your chest. Tie the ends behind your back. The third way involves a fancy loop and knot, similar to a fancy scarf. Lastly, you can wear the cloth behind your neck with the ends...
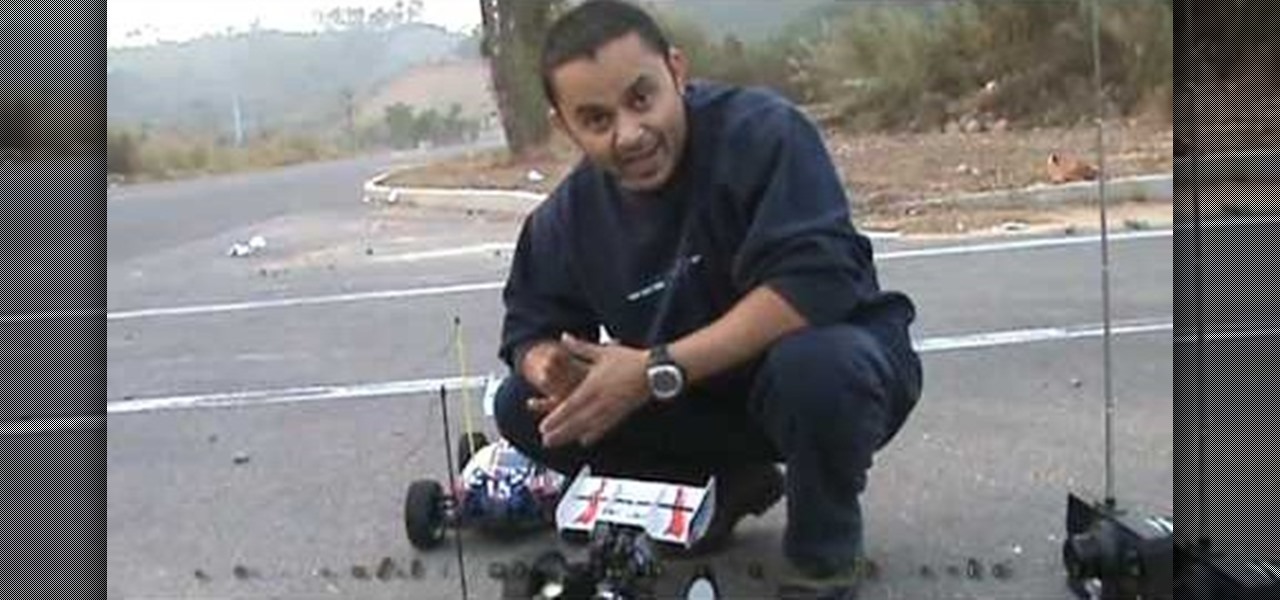
This video shows you how to tune the ACME attacker 1/8th scale nitro engine buggy. Use the high end valve and the idle speed screw as show in the film. Turn the engine and get it to the operating temperature and drive round to the see how the car performs. If the acceleration is sluggish then the low end valve should be adjusted. If the engine is having too much RPM then the idle speed should be reduced using the idle speed screw. If the engine bogs down and makes noise on full throttle and i...
This video demonstrates how to make a double- crochet edge. The video uses a large cardigan neck to create a double crochet edge on. First, back the yarn around the hook and go into the next stitch. Then pull through a loop on to the hook. Take another loop on to the hook. Next, go through the first two stitches at the end of the hook. Then take another loop onto the hook and go through the last two stitches. So, you wrap, insert through next stitch, pull on another loop, draw the hook throug...
DulceCandy87 will be showing you 11 different ways you can wear your scarf. You can start by just letting it hang from you neck so both ends are hanging in front of you. Then another way is to wrap it once with one side so that one end is hanging from the front and the other from the back. You can also wrap both ends around your neck so they hang from your back. Or you can have it go from behind your neck and under your arms and tied around your back. You can also have it around your with bot...
You can make a rocket at home using these items found around the house. Icing sugar, measuring tape, a PVC pipe, black marker, hammer, flat headed bolt around 18 millimeters wide , mortar and pestle, drill, drill bit size 5 millimeter, potassium nitrate and kitty litter.
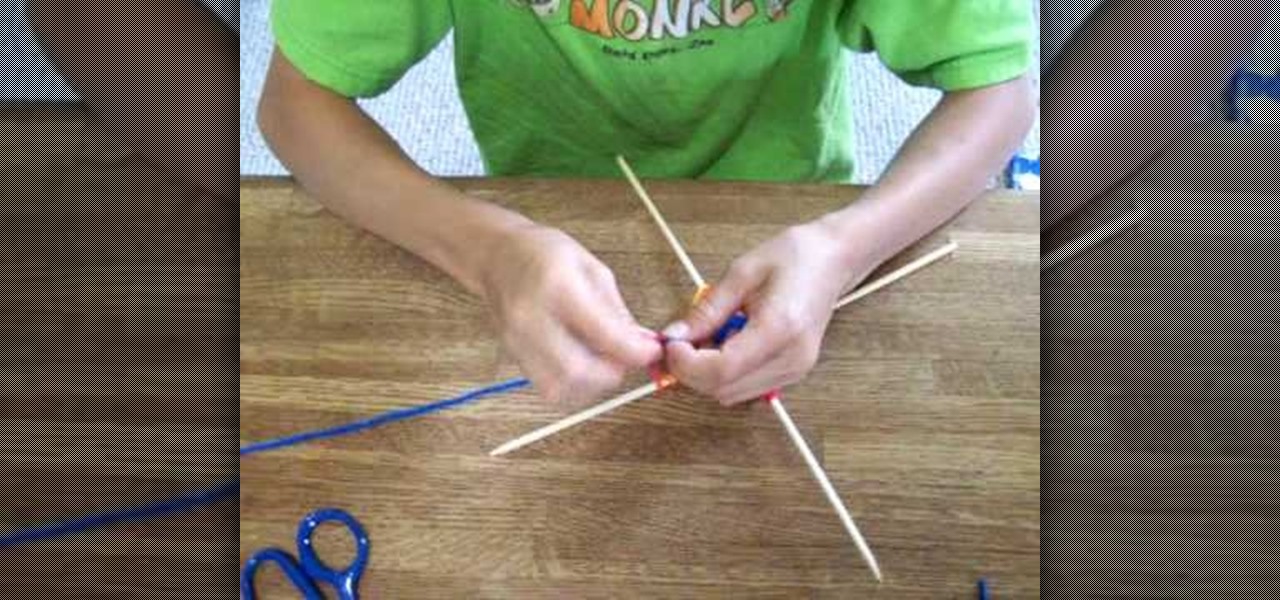
In this video and boy and a woman are showing you the steps to create a "God's Eye" or "Evil Eye". The materials that you will need are 2 sticks, yarn of your selected colors, and scissors. First, you take 2 sticks and use the yarn to knot around the middle wrapping diagonally to form a "t" shape. Then you take another piece of yarn, hold the end in the middle, and start wrapping around each stick going over one and under the next. Continue this pattern until you are done or unless you decide...
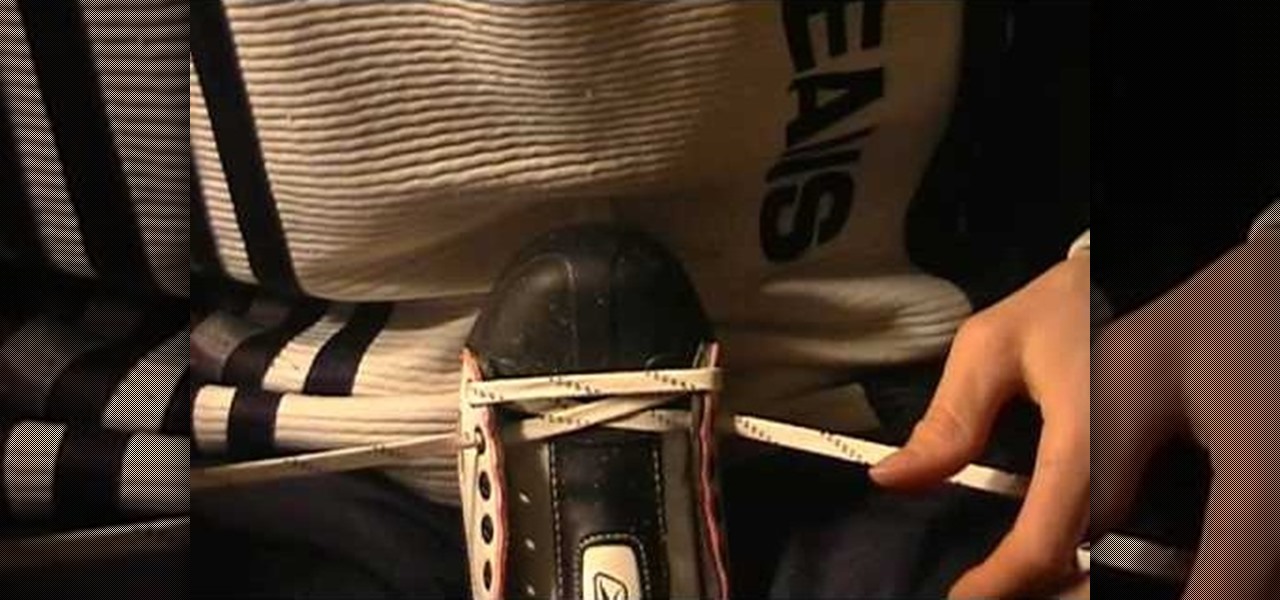
Dan Perceval, founder of the sport of Xtreme Ice Skating explains us in the video of how to properly lace ice hockey skates. It starts with the wax laces. There are different forms but he suggests heavy wax since it lasts long. These wax laces are used to grip the boots. We normally we use 120 inch if there is no wrapping around and it should be in excess if you wrap around. Now we start with lacing. You can start outwards or inwards in hole one. He prefers outward so he inserts the lace outw...
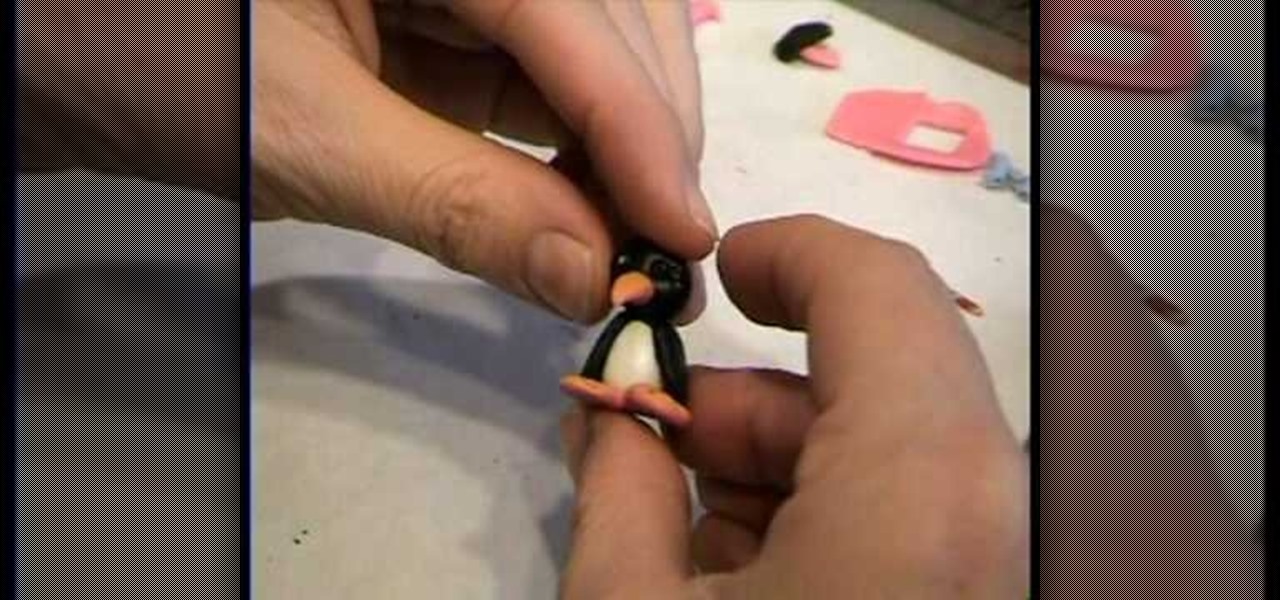
A piece of orange clay is rolled down to diameter of desired width of beak, and rolled down further at 1 end to make a point. Cone shape is cut to length of beak desired. A black ball of polymer clay is made. Base of orange beak is blended onto it. 2 clear seed beads are picked up individually with a pointed stick and pressed into head above beak. Stick is used to make 2 eye creases at right side of right eye and eyebrow over left eye. Repeat on other side. 2 flat oval pieces of orange clay a...
Brittany helps guide you throw the steps of making your very own homemade earrings with beads and the right tools. She shows you everything you need with a subtitle description to help you understand just what you are looking at. Brittany demonstrates how to make the earrings with using the heaviest bead on the bottom so they are weighted down and by sliding them up the head pin and cutting the end of the pin off with a pair of wire cutters. Next she bends the end of the pin with needle nose ...