
How To: Embroider with a free motion machine for quilting
Embroidering fabric adds appealing texture and color to quilts. Learn sewing machine methods for free motion embroidery.

Embroidering fabric adds appealing texture and color to quilts. Learn sewing machine methods for free motion embroidery.

Incorporate hand drawing with markers, ink and tools into fabric projects for stand alone illustrations or to color in embroidered designs.

It's been called the "Sin City" effect, and a myriad of other names, but really all you're doing is adding selected color to black and white photos or comic-type images. See how Bert suggests achieving this effect in his tutorial.
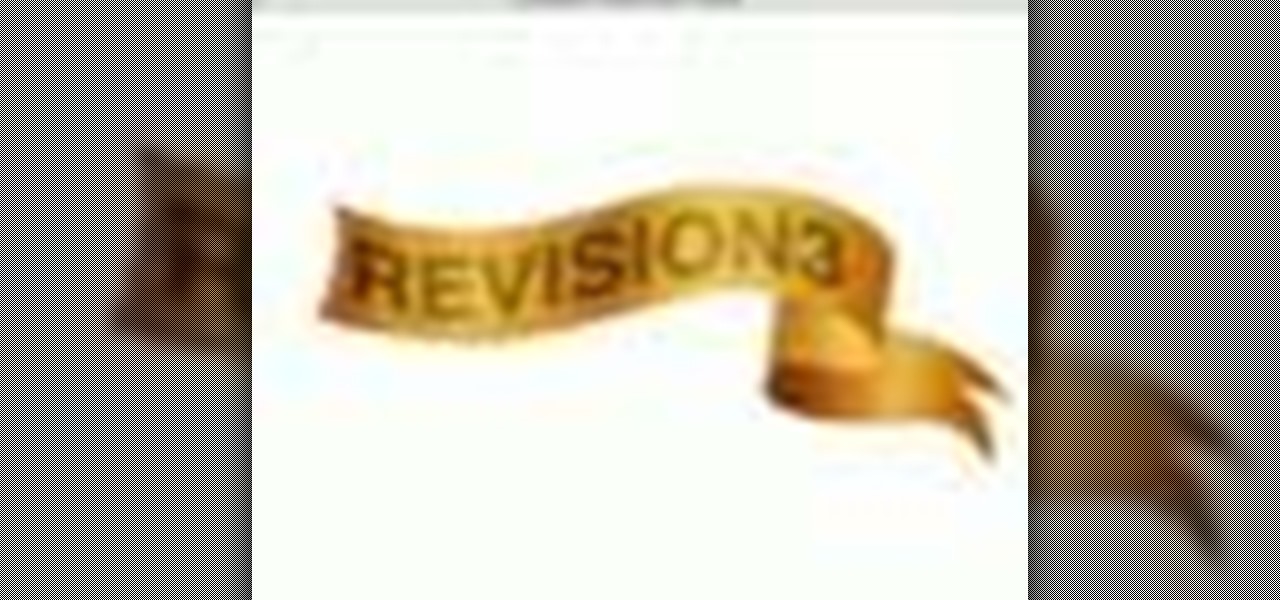
Banners are beautiful advertising and decor pieces that you can use on your website, blog, or even on printed materials (because those still do exist). Check out this Photoshop tutorial to learn how to create a lovely golden banner that flows back on itself and has believable lighting. Ripples add to the realistic nature of this banner.

How do you bring the maximum color to your veggies in the minimum amount of time? Blanching food, or parboiling, yields crisp, colorful vegetables that Oodleboxtv culinary cutie Dani Luzzatti prefers to call crudités.
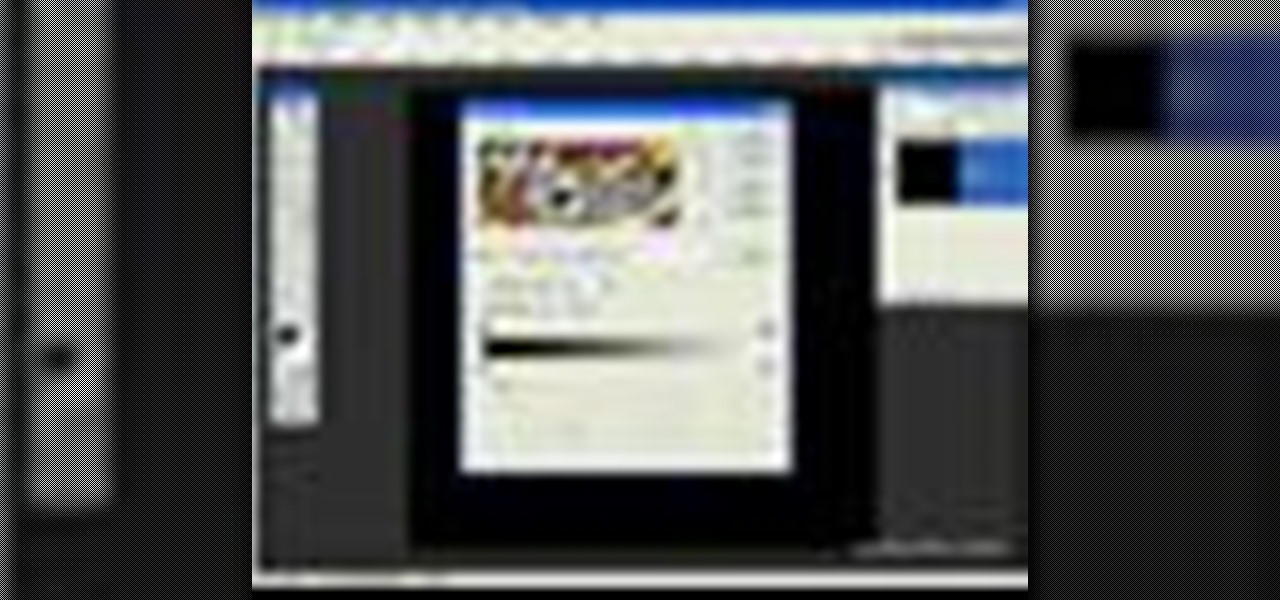
In this video tutorial you will learn to make a gradient in Adobe Photoshop CS2. This example involves the creation of a metallic reflection gradient. Feel free to experiment with different colors to achieve the effect you want!

Adobe Photoshop's Magic Eraser Tool provides you with a quick and easy way to change a pictures background or other color area with just a few clicks.
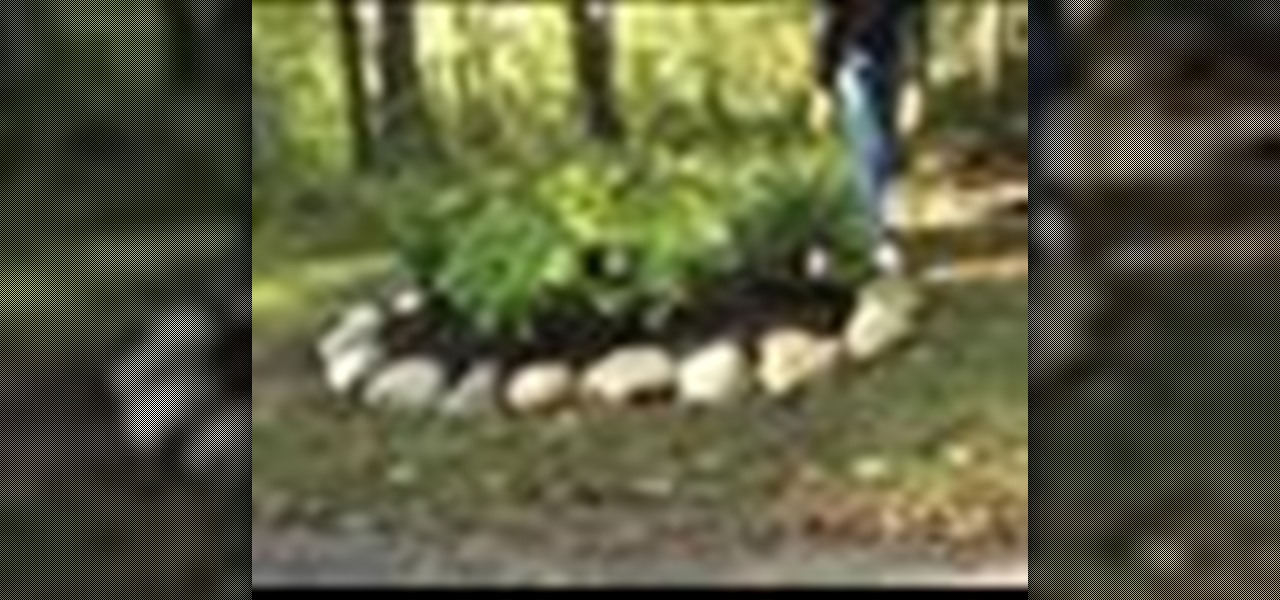
Rock gardens are a great way to add color and texture to your lawn. Learn how to build a rock garden in your yard. Common goal is to add interest to your yard. You will need rocks, top soil and plants. If you don't know what type of plants talk to your nurseyman at the garden center.
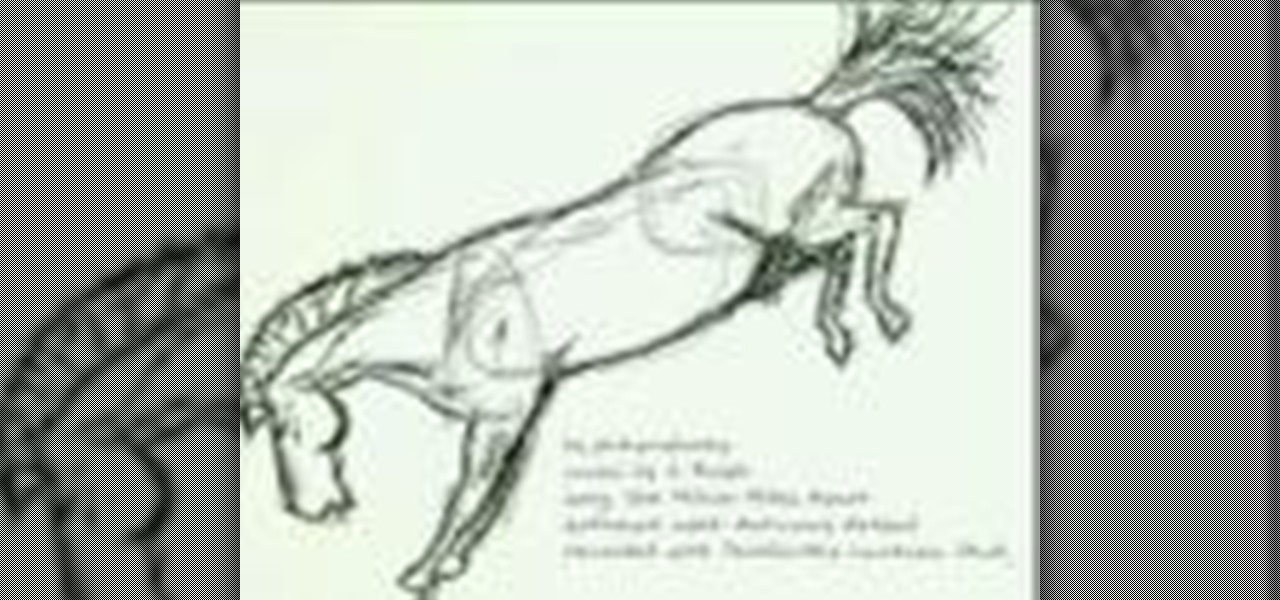
Watch this video and learn how easy it is to draw a horse. First you create a rough scratching, and then you go over it in darker color. While the video is sped up, it is pretty easy to follow along.
The Care Bears have stood the test of time, from their first appearance on greeting cards, to cutesy, plush teddy bears, to animated television series, to adventure-filled movies. The Care Bears may be long gone from television, but not from out hearts (especially Sara Griffith's of SharksBiteOfLife).

The Paper Bag Princess is one of the most beloved children's books for girls of all time, and it's heroine is a great role model for young girls everywhere. If you love the book, watch this video to learn how you can make an easy, sexy Paper Bag Princess Halloween costume.
Ever wonder why Jupiter has those colored bands across its surface? Jupiter's enormous mass is made from an array of different liquids, and those fluids do not play well together because of their different makeup. All of the hydrogen- and helium-based fluids are thought not to be miscible, which means that they aren't homogeneous in nature, resulting in strikingly beautiful bands across the planet's surface. But what about viscosity and how that correlates to the development of planets? What ...
The personal computer is a strange and powerful entity, capable of bringing great joy. Just as often, you probably want to chuck the damn thing at the wall because it doesn't work right. If you want to pull a prank on a friend that will really upset them, messing with their computer is one of the best ways to do it. This hilarious video will show you how to do three great PC pranks quickly and easily, including changing the contrast on the monitor and pretending to edit websites using Javascr...
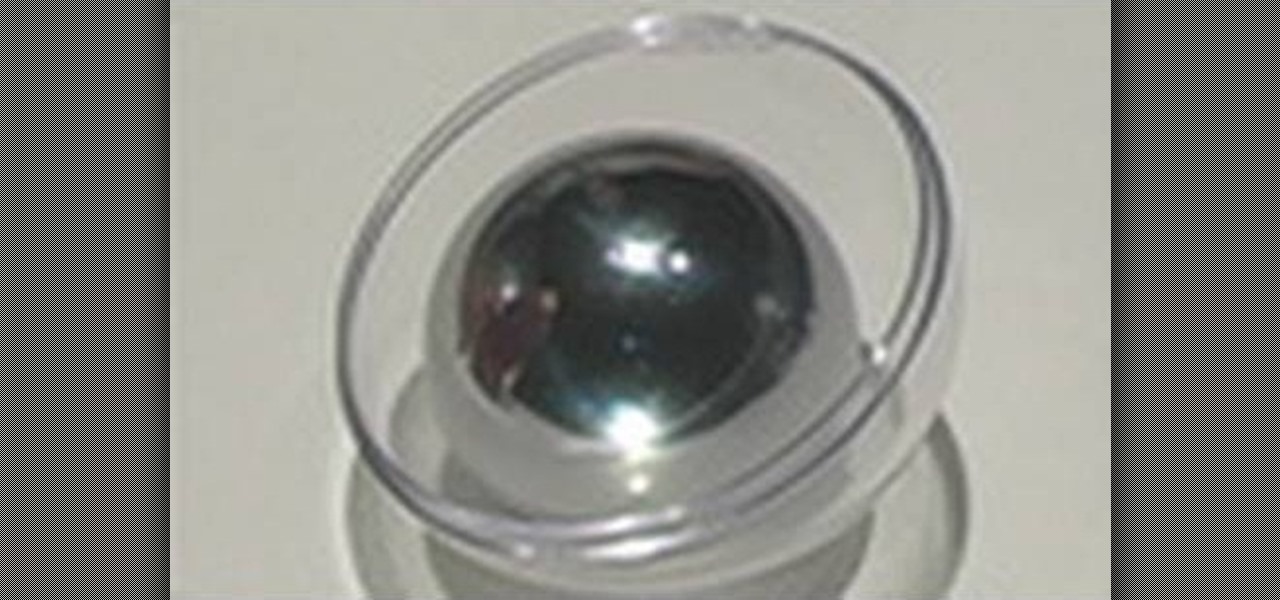
This ball isn't like any you've ever seen before. It's stubborn, it's unpredictable — it's practically immovable. Gravity cannot control this magic ball.
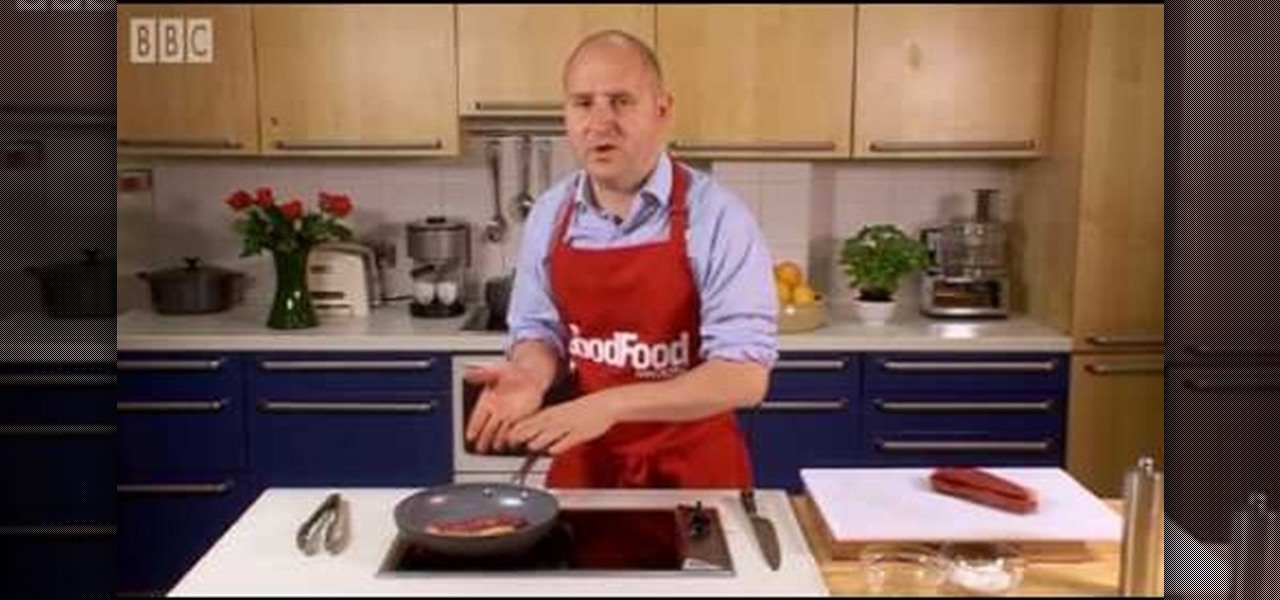
In this video, from BBCFood, Chef Barney Desmazery shows us how to pan fry a sirloin steak to medium-rare perfection. First, of course, you need some sirloin steak, about 150 grams per portion. Look for a piece of steak that has some nice marbling of fat and nice color. The pan-frying method we're using to cook this sirloin steak can be applied to any piece of meat. You'll need a dry pan. Rub a bit of oil on the steak, and then add some salt (preferably sea salt) and pepper on both sides. Nex...
In this video we learn how to make a mummy cake. We will need candy melts, eyeball mold, edible markers, a cake that has a crown on it, buttercream frosting, white fondant, sugar veil frosting, brown petal dust, a decorator brush, a cake round covered in foil, spatulas and knives. First you make the eyes. You can use the white candy melts to do this. You can use colored melts to make the irises. Put the melts in the mold and tap it to get the air out. Then put it in the fridge to harden the c...

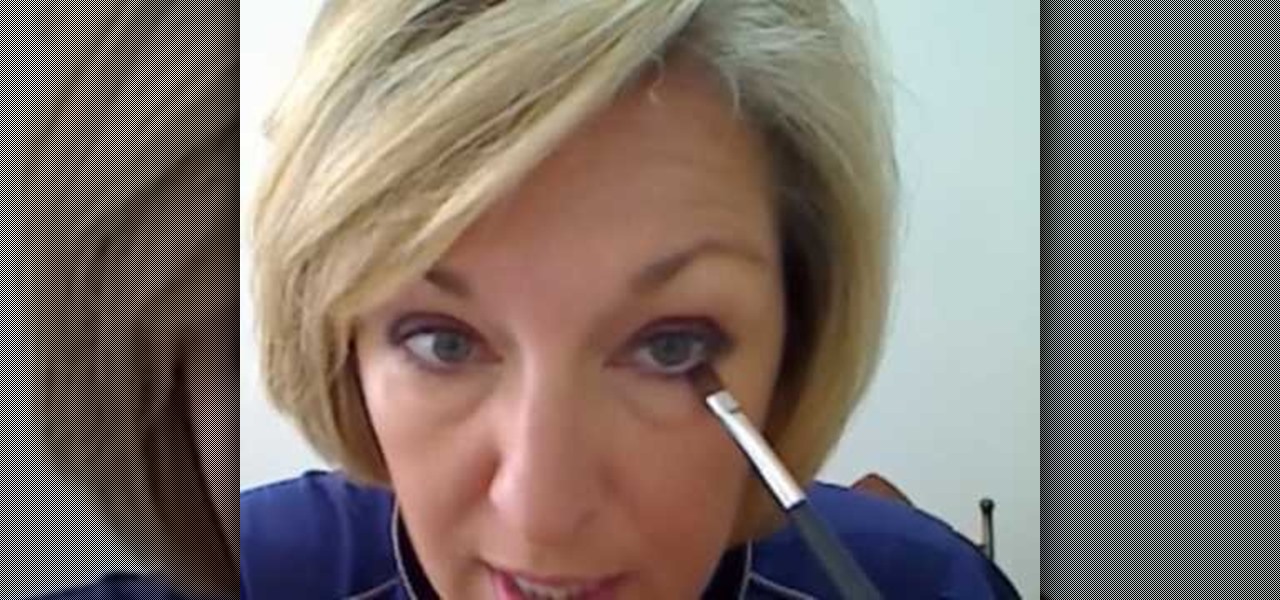
Sharon Connolly, Image Consultant, demonstrates how to create a fabulous smoky eyes look. Start by brushing a very light color over the eyelid area from the lashes to the brow, accenting the inner corner of the eye. Then apply a brown shadow from the lashes to just above the crease of the eye. Take a very light shadow and brush it above that and blend it in. With an angled brush draw underneath the lower lashes with the brown shadow.
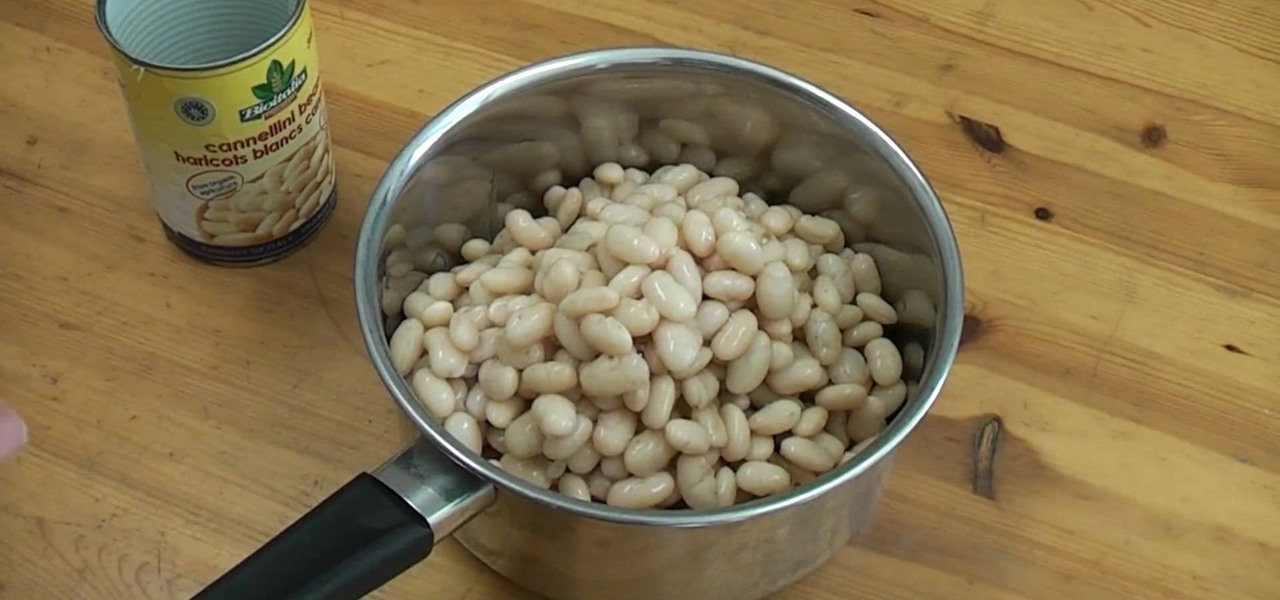
The tutor advises that the beans are high in protein and fiber but the problem is that when you buy it from the market they are high in sugar and also have artificial colors. So to make healthy beans first of all you need to take a can of 'cannellini organic beans'. You can also use any other type of beans. Now you need some water and some salt to go with it. Add these beans in a pan. You can also add some left over beans. You can now add some 'organic strained tomatoes' which is just like a ...
This video is a makeup tutorial by Image Consultant Sharon Connolly, showing us how to look younger and more polished in just five minutes a day.
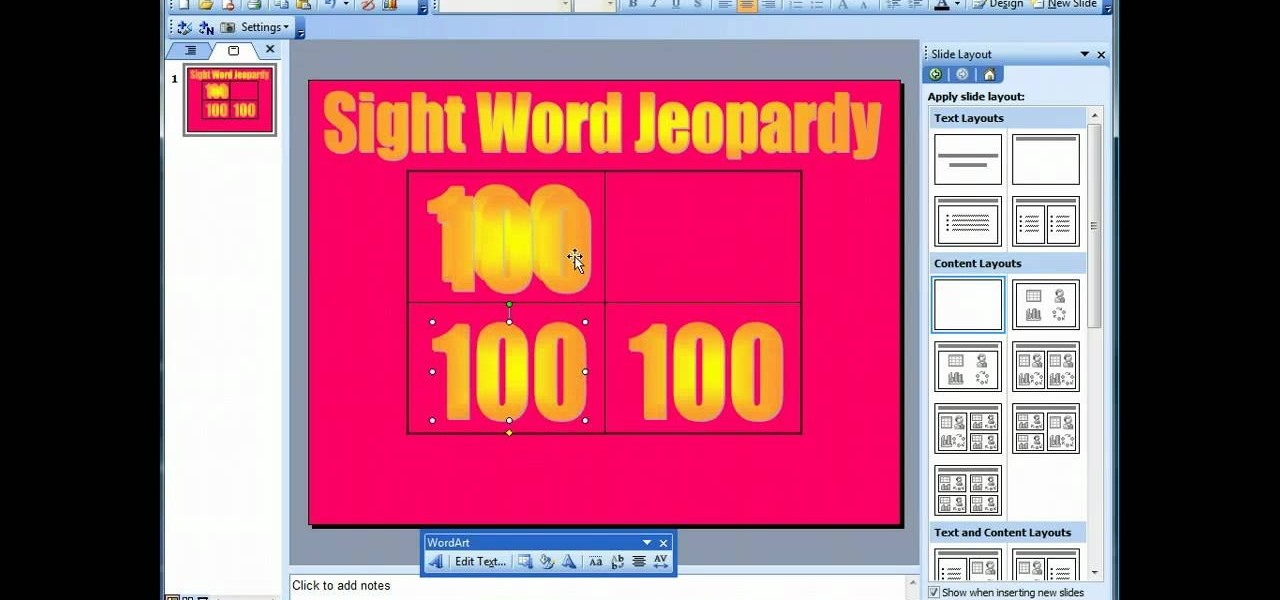
This video demonstrates how to make a basic Jeopardy game in Microsoft PowerPoint. First, choose a background color by clicking Format on the top bar menu. Select Background and choose the color you wish to have. Click Apply To All to apply it to your entire PowerPoint presentation. Then, click Insert on the top bar menu and select Table. Fill in the number of columns or rows you wish to have for your table and then click OK. In this example, create a 2x2 table. Make a title for your game by ...
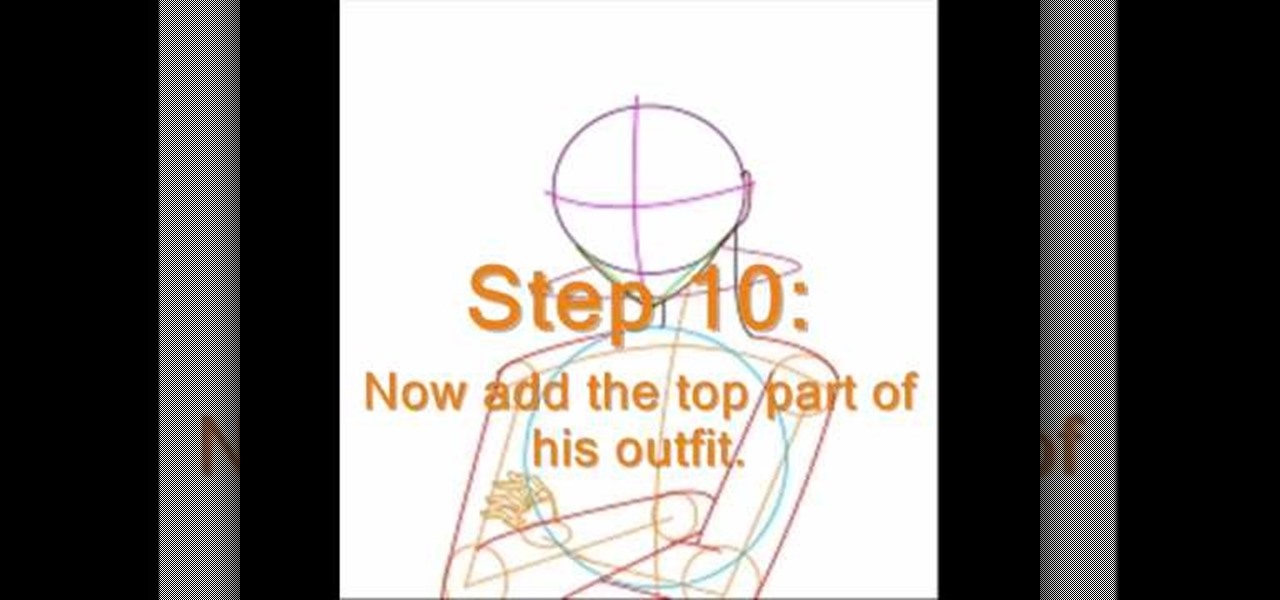
Here is a very easy method to draw a Sasuke in a step by step process by the artist Jack of Jill. First draw a circle for the head part. Then draw two lines crossing through the circle to match the eye part. At the bottom draw a small triangle similar to chin. Now draw the real cheeks. Now draw a stick figure showing its body and hands. Draw other circle touching down to the first one. Now connect the circle with his hands to make his arms. Draw neck portion, so that it touches the shoulders....
There are a lot of things out there in the design world that people have seen and liked, but didn't know how to make. LIke vector lights. Watch this Illustrator video tutorial to take a look at those cool glowing, color changing, fading, bright, neon-like, fanning spread of glowing colors. Maybe there's no specific name for them, but for now, refer to them as 3D Light Ribs. You can use these in photographs, illustrations, composites, print work, web design, and maybe even a logo or two! You w...
Learn how to create a warm, grungy background in Photoshop. - Open up a brand new document at 1280 x 720.
The V-Cube 6 puzzle is a uniquely designed and constructed skill game. V-Cube 6 is a multi-colored, multiple-layered cube, rotating smoothly on based axes. The player is required to discover a strategy to achieve uniform color sides on her or his V-Cube, but in this process, the Rubik's Cube-like puzzle may break, especially if you're in the process of speedsolving.
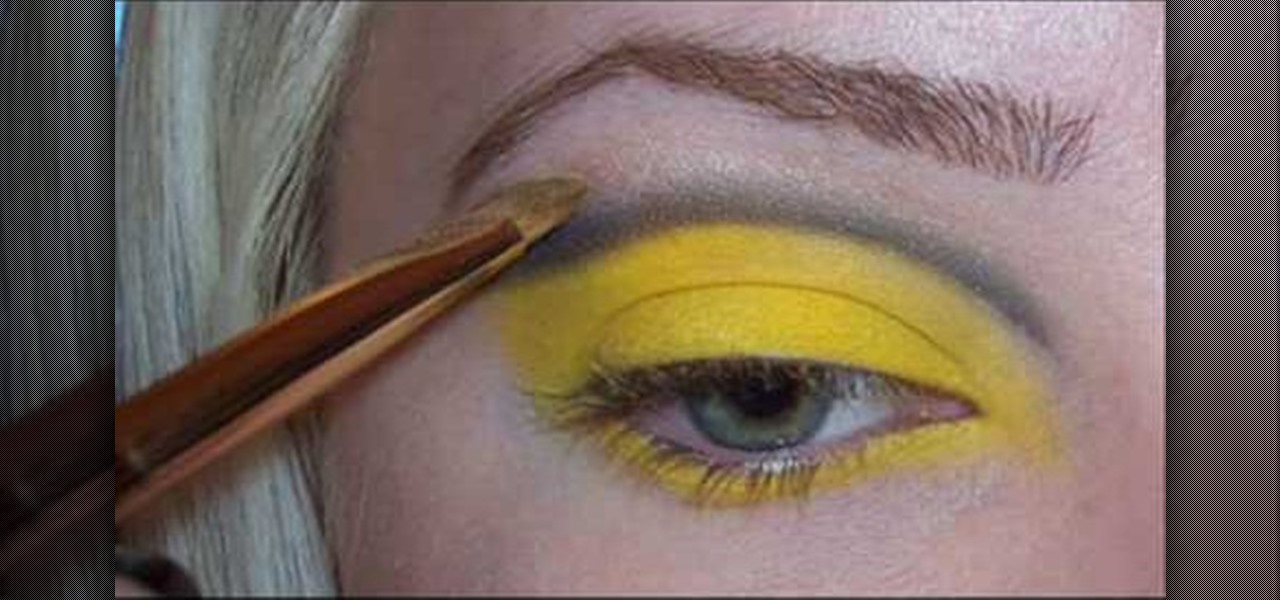
Learn how to create a yellow and black unblended eye look paired with red lips.

Store-bought fake blood isn't too expensive, but the consistency and color are always the same. Real blood varies, from bright red when oxygenated (arterial blood) to deep, dark red when deoxygenated (venous blood), and it can be either thick or thin. So to achieve the best special effect, you're better off making a batch of DIY fake blood yourself to get the look and texture you're going for. And it's very simple to do.
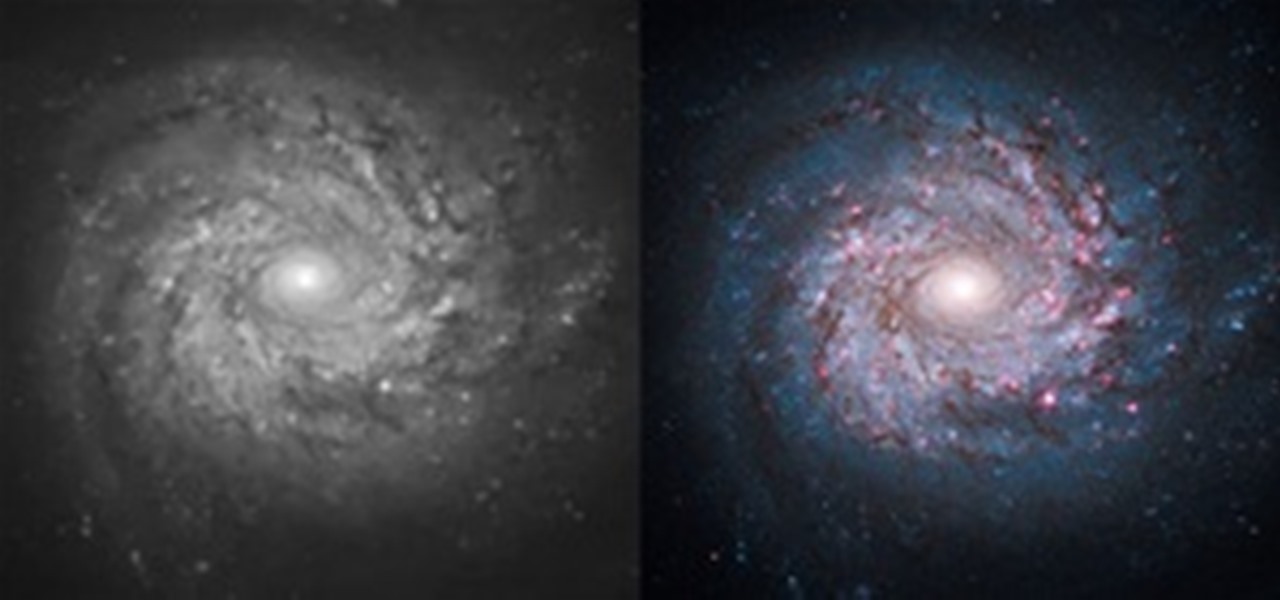
We've all seen the breathtaking, colorful photos of the Eagle, Egg and Cat's Eye Nebulae. You may not recognize them by name, but you've seen them, whether in astronomy textbooks, magazines, websites, album covers, or tee shirts. They are some of the most striking photographs ever taken from the Hubble Space Telescope (HST).
In this video, we learn how to make silly putty from scratch. You will first need to take some flour and mix it with warm water in a small plastic container. After you mix this together and it turns into a putty type of shape, you will then add in some food coloring to the container as well. Add in some borax to this and continue to mix until it's completely finished mixing together. When done, you will be able to play with this and make other colors to mix together. This is a great project f...

In this tutorial, we learn how to quickly draw Shadow the Hedgehog. First, you will need to draw the outline of Shadow, drawing in the entire body. After this, darken up the lines to make the final outline of the character. Next, draw in the details of the face and the body. Then, shadow in the sides of the character and create more details to make him look more realistic. When finished, you can choose to color him with the right colors or just keep it shaded. Add in more details if you need ...
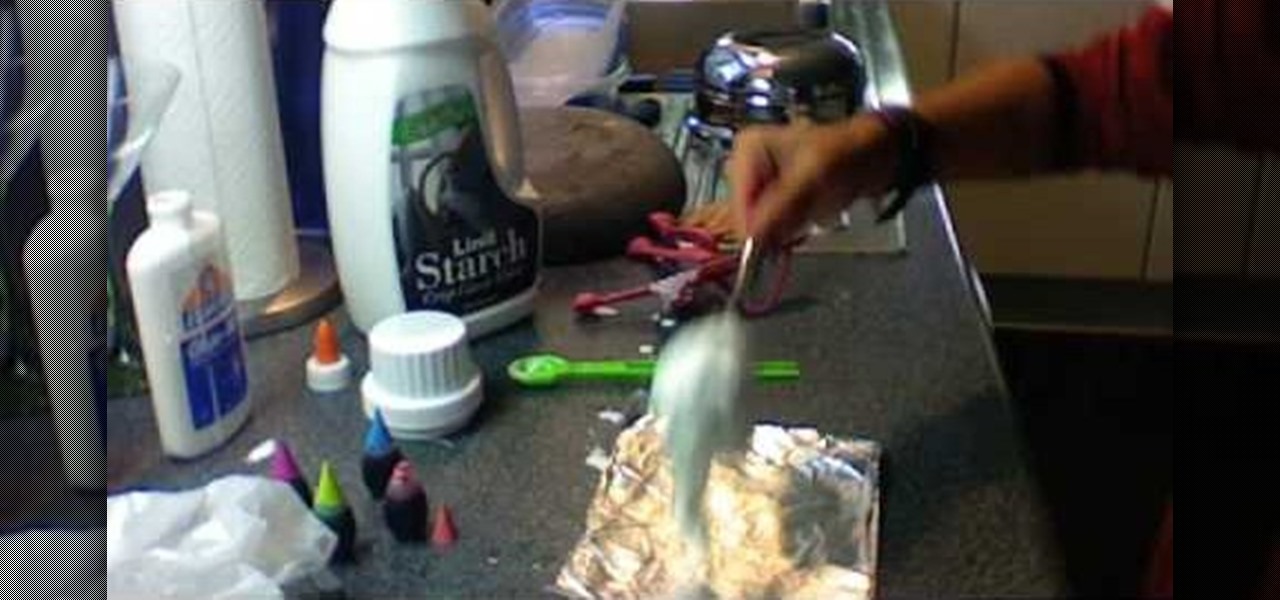
To make silly putty start by putting four tablespoons of Elmer's Glue into a glass jar. Next you will add two tablespoons of liquid starch into the glass jar with the Elmer's Glue. Use a metal fork to stir up the glue and starch mixture. Stir it until it is thoroughly mixed up. Then take the glue starch mixture out of the jar with the fork and put it onto some aluminum foil that you have laid out on the table. Take the mixture and squish it with your hands. Flatten the mixture out into a patt...
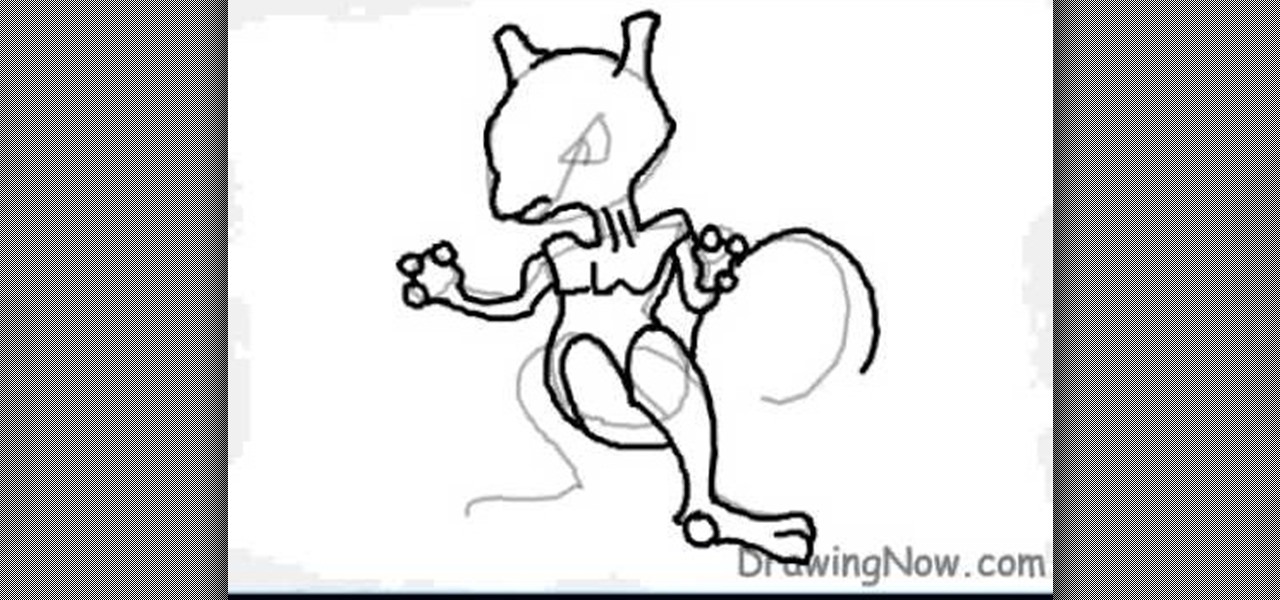
In this tutorial we learn how to draw Mewtwo. Start out by drawing the outline of the head and the rest of the body with a light pencil. Then, start to add in the details of the body and the face. Once completed, you will draw the permanent outline onto the picture over the first one and erase the first one. Next, you will color in the skin and clothing that Mewtwo is wearing. Add in shading around the character to make it look more realistic. Also make sure to use different colors on the ori...

In this tutorial, we learn how to draw Sonic the Hedgehog in Paint. First, draw a round circle for the head and then connect the spiked hair to the back of it. From here, draw in the arm and the hands as well as the body and the legs. After this, draw on the socks and the feet. Then, draw in the details of the character and the rest of the shading. From here, color in the blue and the whites on the body and then color in green on the eyes. When finished, make sure to save this and then you're...
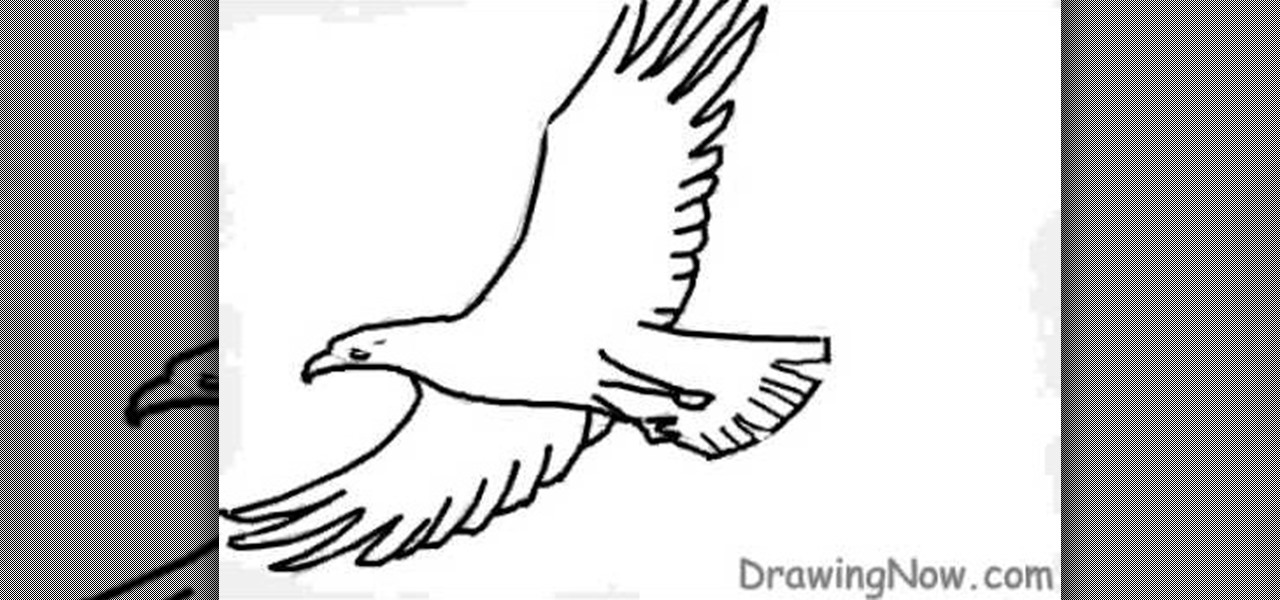
In this video, we learn how to draw a basic eagle. Start off with the outline of the eagle with a light pencil. After this, use a bold paintbrush to fill in the outline of the bird and then use marks to make the wings show the feathers better. Next, draw in the facial features and the beak, as well as the tiny feet on the bottom of the body. Next, color in the bird to be brown and then color the sky white with blue to show it's cloudy. When finished, save this and enjoy your basic eagle drawing!

In this tutorial, we learn how to draw a PSP in Ms Paint. First, draw the outline of the PSP with a light pencil marking. After this, draw in the details to the controller. Use details to make the buttons and make them look 3D. After this, you will add in shading to the buttons and around the console. Then, add color to the front of the console in any colors that you would like. After you have added in all of the details you want, you are finished! Save this and then come back to it later if ...

In this tutorial, we learn how to heat emboss a stamped image for a handmade card. First, use the stamp to grab ink and then lay it down on a piece of card stock. After this, cover it in ink and start to add heat to it. You will see the image start to change color when you do this. It will turn to a metallic sort of color when you add the heat to it. Once you have added heat to the entire thing, you will be finished with the embossed stamp effect! Do this for any type of stamp you want and ha...
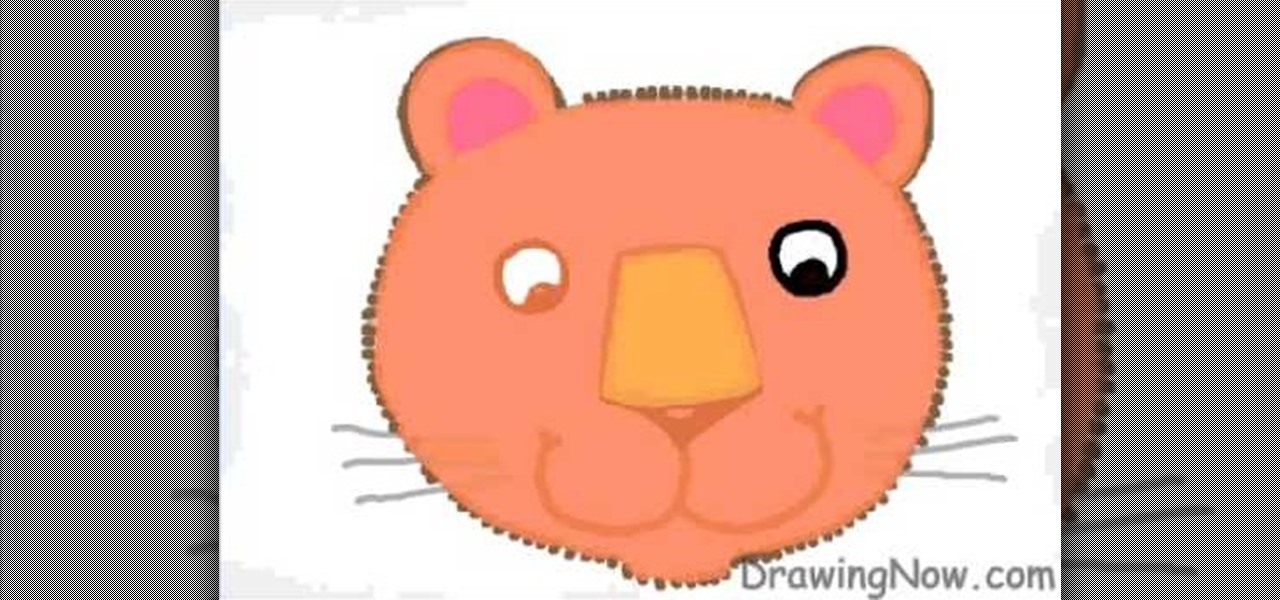
In this video, we learn how to draw a cute cartoon tiger. First, draw a circle for the head with two circles on top for the ears. After this, draw in the eyes, nose, mouth, and whiskers. Next, draw small dots around the head in brown for the fur. Then, draw over the mouth and nose with brown to match the outside color of fur. After this, color the eyes and the nose black, then add pink to the inside of the ears. From here, add in stripes to the side of the face and on the top of the head. Sav...
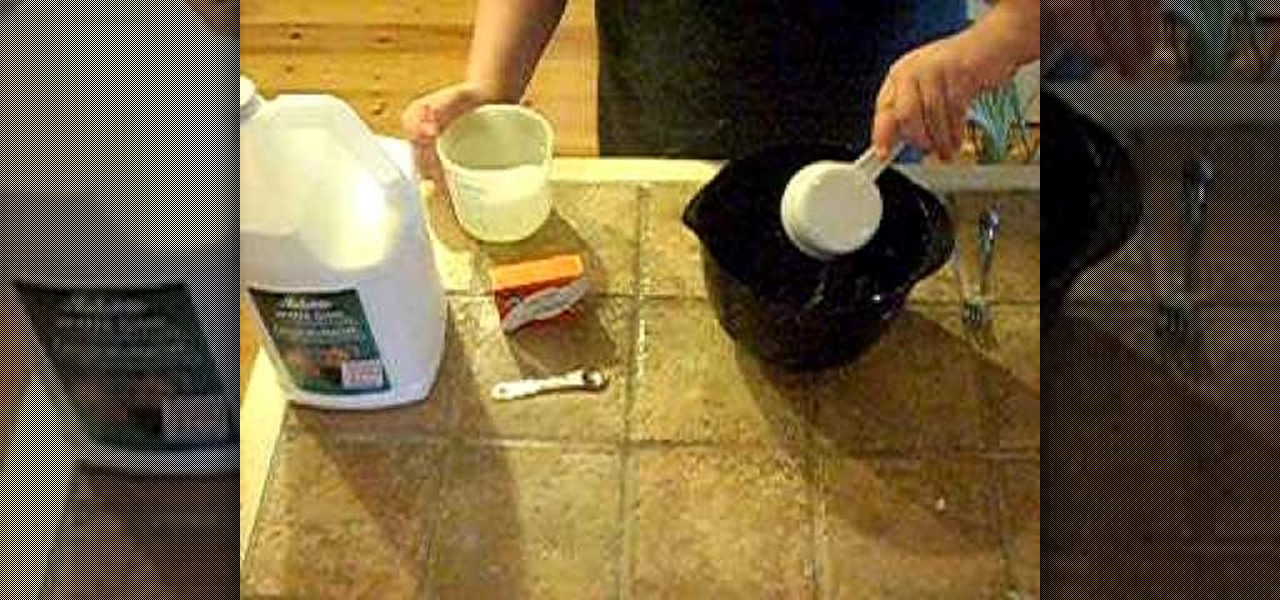
In this video, we learn how to make slime for under 5 dollars. You will need: a large pan, gallon of water, food coloring, and 1 c corn starch. Mix in warm water and continue to mix until everything is well combined. Keep adding more water to corn starch until it's the consistency that you would like. After it's hot and a slimy substance, add in some food coloring that you would like. After this, pour the slime into individual containers and allow it to cool so you can use at a later time. Wh...
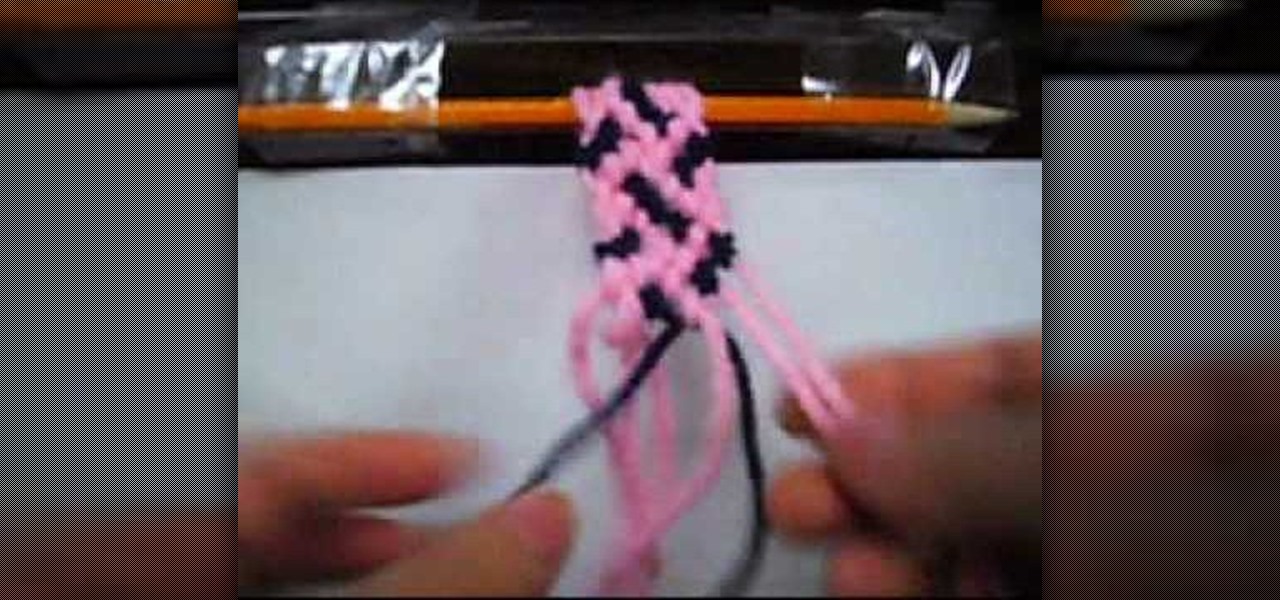
In this tutorial, we learn how to make a confused-style friendship bracelet. First, you will need to clip down your thread on the top and then start to braid the thread together. You will need to have two different colors, white and blue. Then, you will tie the right and left side together and start to braid the middle of it. Then, you will start to braid the bracelet together until you reach the bottom. When you are finished, you can tie this around your wrist and wear it whenever you would ...
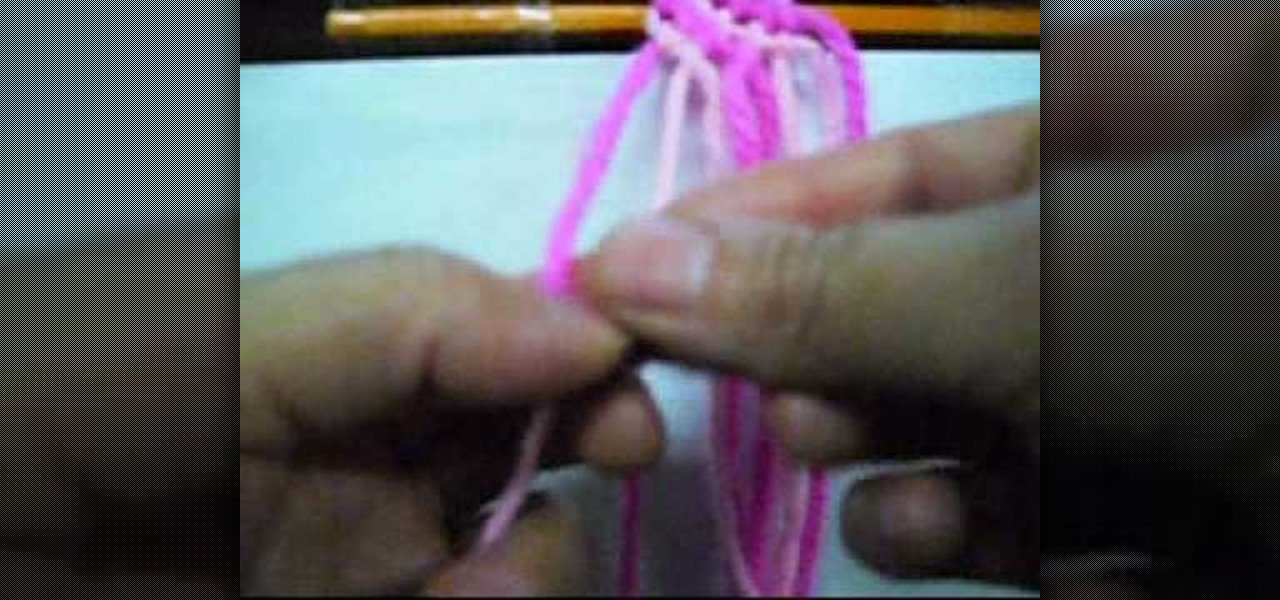
In this tutorial, we learn how to make a dual-colored line friendship bracelet. Start by creating knots in the strings going from left to right. After you have covered all of the strings on the bracelet, you can start to braid. Make sure the strings are clipped at the top to keep them in place. When you start to braid, take the two to strings on the left, and braid them in with the others going from left to right. Then you can continue to do this process until you reach the end of the strings...

Most would (unfortunately) picture Vincent Gallo when "gallo" is spoken aloud. But it's actually a Spanish word, which translates to rooster, and even cock, which just happens to bring up connotations of the swollen controversy over Gallo's film "The Brown Bunny".